Are you getting ready to launch a new WordPress website? Instead of letting visitors see your work-in-progress, why not build excitement with a professional coming soon page?
At WPBeginner, we’ve helped thousands of users launch their websites successfully, and we’ve learned that a well-designed coming soon page isn’t just a placeholder. It’s a powerful marketing tool.
You can hide your unfinished site professionally, build anticipation for your launch, start collecting email subscribers before you go live, and create buzz around your brand.
The best part? Creating a beautiful coming soon page is much easier than you might think. In this step-by-step guide, we’ll show you exactly how to create an engaging coming soon page that works hard for your business, even before you launch. 🚀
What Can a Coming Soon Page Really Do?
Let’s be honest. Most people just put up a basic ‘Coming Soon’ message and wait. But smart business owners? They use this time to start building their success.

Here at WPBeginner, we use SeedProd for our custom pages because we’ve seen how powerful a good pre-launch strategy can be.
Take Mustard Seed eCommerce (a SeedProd client!), for example. They’re able to set up high-converting coming soon pages in under 30 minutes and start collecting leads for their clients immediately, instead of waiting weeks or months for the full site launch.
The secret is thinking beyond just hiding your unfinished site with an under-construction page. You can:
- Run a contest to build excitement.
- Offer special “early bird” deals to collect emails.
- Create a VIP list for your most interested visitors. We’ve seen businesses build lists of 1,000+ subscribers before they even launch!
With that in mind, let’s see how you can create a coming soon page for your WordPress website. You can use the quick links below to skip to a specific section:
Step 1: Set Up a Domain and Hosting Account
Before creating a coming soon page, you’ll need a domain name and a WordPress hosting provider.
Normally, a domain costs around $16 per year, and hosting plans start at $7.88 per month (usually paid annually). This can be a big expense, especially for new businesses that are just starting.
Luckily, our friends at Bluehost have agreed to offer a free domain name and a generous discount on hosting for WPBeginner readers.
Basically, you can launch a viral waitlist landing page or even an entire website for just $2.75 per month.
After signing up for a hosting account, Bluehost will automatically install WordPress for you.
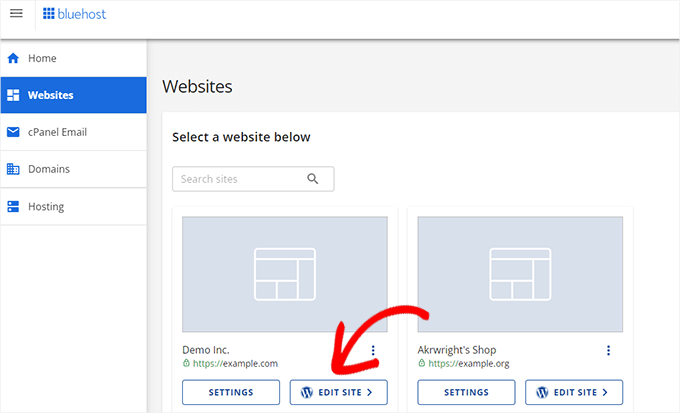
You can then simply log into your WordPress account dashboard. After that, navigate to the ‘Websites’ tab and click ‘Edit Site’ on the site you want to build a WordPress coming soon page in.
If you don’t want to use Bluehost, then you can also install WordPress on other hosting companies like Hostinger, SiteGround, or WP Engine following a fairly similar process.
For more detailed instructions, see our step-by-step guide on how to install WordPress.
Step 2: Customize Your Coming Soon Page
The easiest way to create a coming soon page is to use SeedProd. It is the best landing page builder on the market and has a drag-and-drop editor that allows you to create professionally designed pages quickly.
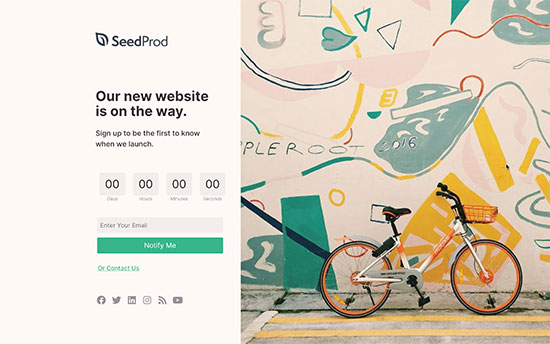
SeedProd has over 320 ready-made page templates and 90 blocks that you can simply drag onto your designs. This allows you to create all kinds of page designs without having to write a single line of code.
Note: There is also a free version of SeedProd that allows you to create custom page designs no matter what your budget. However, in this guide, we’ll be using the Pro version as it lets you connect your page with an email marketing service.
This means you can start collecting leads and building a mailing list even before launching your website.
For more information, see our complete SeedProd review.
First, you need to install and activate the SeedProd plugin. For more details, see our step-by-step guide on how to install a WordPress plugin.
Upon activation, go to SeedProd » Settings and enter your license key.
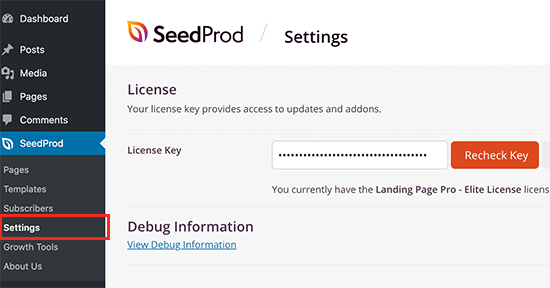
You can find the license key under your account on the SeedProd website. After entering this information, click on the ‘Verify Key’ button.
Next, go to SeedProd » Landing Pages. In the ‘Coming Soon Mode’ section, click on ‘Set up a Coming Soon Page.’

You can now choose a coming soon page template.
SeedProd offers many different theme template kits. To preview a design, hover your mouse over it and then click on the magnifying glass.
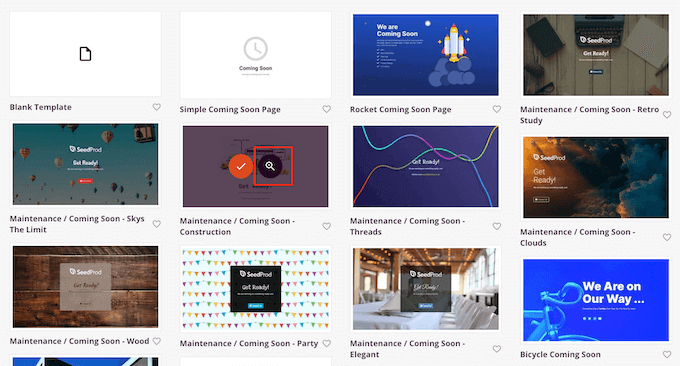
When you find a design you like, simply click on ‘Choose This Template.’
We’re using the ‘Launch Coming Soon’ template in all our images, but you can use any design you like.
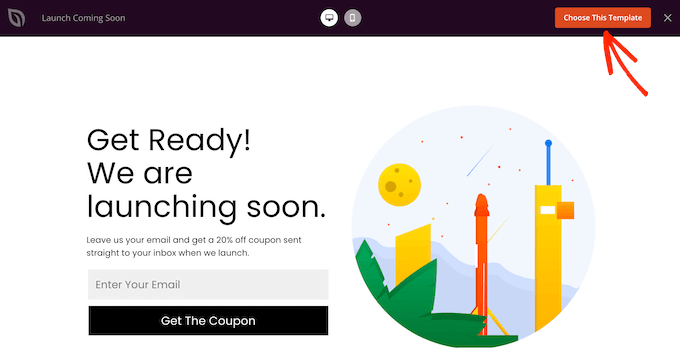
After selecting a template, you’ll be taken to the drag-and-drop page builder, where you can start customizing the coming soon template.
On the right side of the screen is a live preview of your page.
To customize any part of the template, simply click to select that block in the layout. The left-hand menu will then show all the different settings you can use to customize that block.
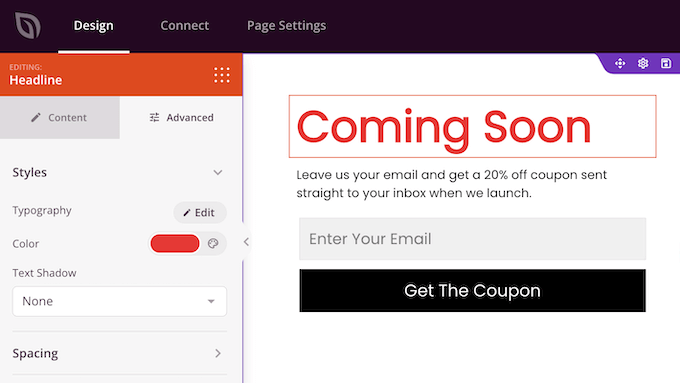
You can also add new blocks to your coming soon page. As an example, let’s add a countdown timer so visitors know how long they have to wait until your site goes live.
In the left-hand menu, find the ‘Countdown’ block and drop it onto your page preview.
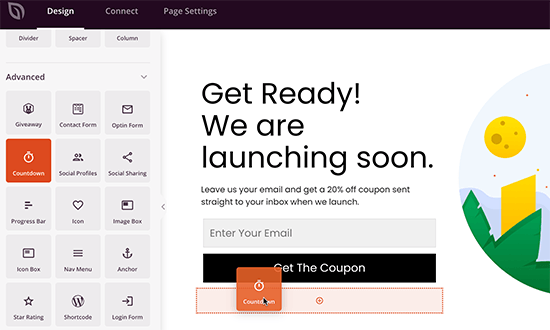
After that, click to select the Countdown block in your layout.
In the left-hand menu, set the date and time when you plan to publish your blog, online store, or website.
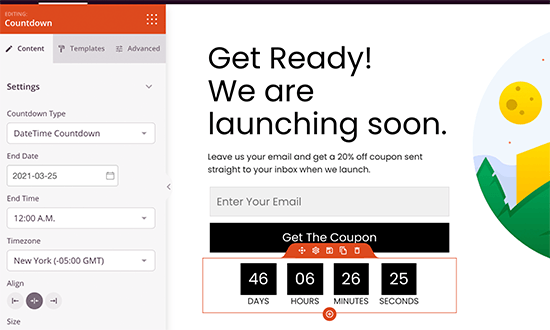
The countdown block will now show the day, hours, minutes, and seconds until your WordPress blog or website goes live. In this way, you can build anticipation and excitement around your site’s official launch date.
You can now add more blocks to your WordPress site coming soon page following the same process described above. You can read these guides if you need help building your page:
- How to Choose a Perfect Color Scheme for Your WordPress Site
- How to Add Dynamic Content in WordPress (Beginner’s Guide)
- How to Show a Number Count Animation in WordPress
- How to Create a Squeeze Page in WordPress That Converts
- Key Design Elements for an Effective WordPress Website
Step 3: Connect Your Email Marketing Service
A coming soon page is a great way to collect leads and grow your email list, ready for when your website launches.
The good news is that SeedProd integrates with all the top email service providers, including ActiveCampaign, ConvertKit, and Drip.
To connect the page to your provider, click on the ‘Connect’ tab.
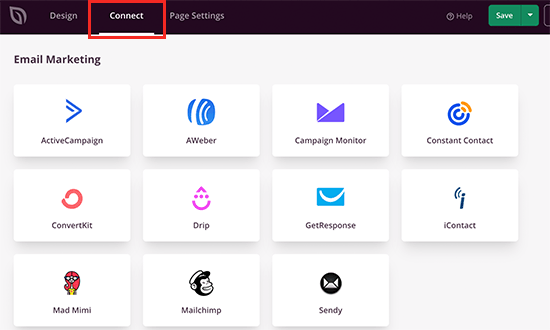
You can then hover your mouse over the email marketing service that you use on your website, such as Brevo (formerly Sendinblue) or Mailchimp.
When the ‘Connect’ button appears, give it a click.
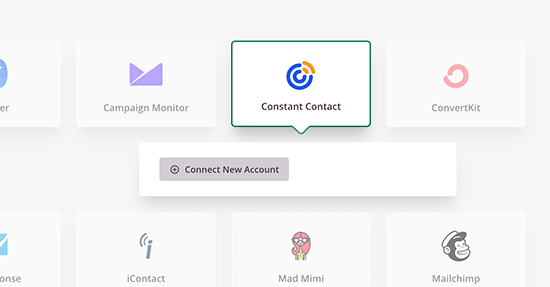
The steps will vary depending on your service provider, but we’ll use Constant Contact as an example. Give ‘Constant Contact’ a click, and then select ‘Connect New Account.’
Next, you’ll need to enter the API Key from your Constant Contact account.
After that, give the connection a name. This is just for your reference so you can use anything that helps you identify this connection in WordPress.
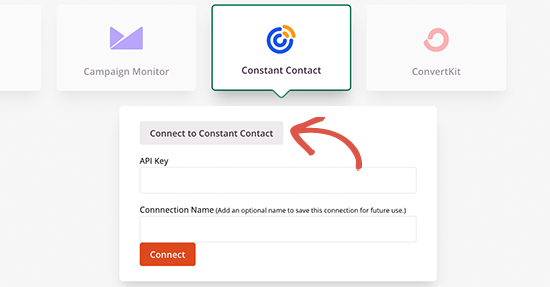
Once you’ve done that, click on the ‘Connect’ button.
This will open a popup where you can log into your Constant Contact account. If you’re happy to give SeedProd access to your Constant Contact data, then click on ‘Allow.’
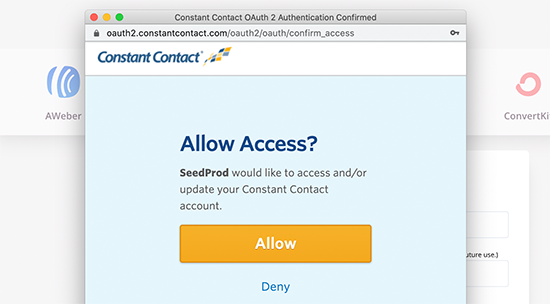
SeedProd will now fetch all of the information from your Constant Contact account.
Simply choose the email list that you want to use with your coming soon page, and then click on ‘Save Integration Details.’
Step 4: Configure Your Coming Soon Page Settings
SeedProd has some advanced settings that can help you collect leads, build customer loyalty, create brand awareness, and more.
To take a look at these advanced settings, simply click on ‘Page Settings’ on the page builder.
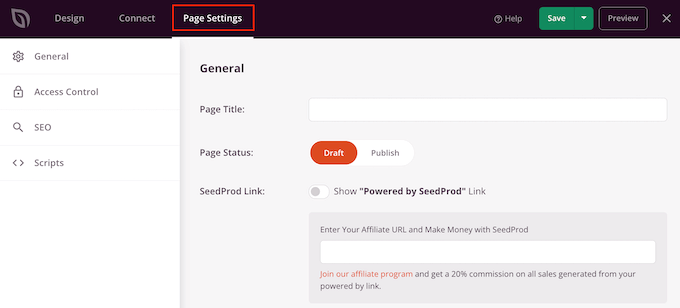
Restrict and Grant Access Based on User Role
By default, SeedProd will show your coming soon page to all non-logged-in users.
Sometimes, you may want to change who can access your site while it’s in coming soon mode. For example, if you’re designing a client’s website, they may want to see it while it’s being built.
WordPress comes with a built-in user roles and permissions system, which controls the actions users can take on your site and the information they can access.
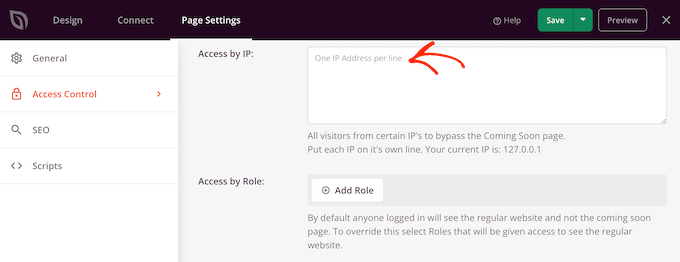
You can use this system to grant and deny access to your website while it’s in coming soon mode by selecting ‘Access Control.’
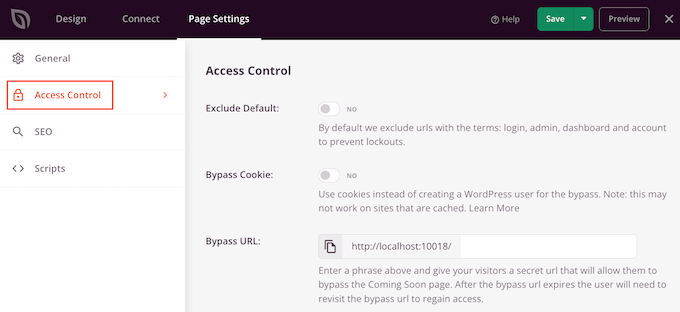
To give access to specific user roles, click on ‘Add Role.’
This opens a dropdown where you can grant access based on the user’s assigned role, such as subscriber or author.
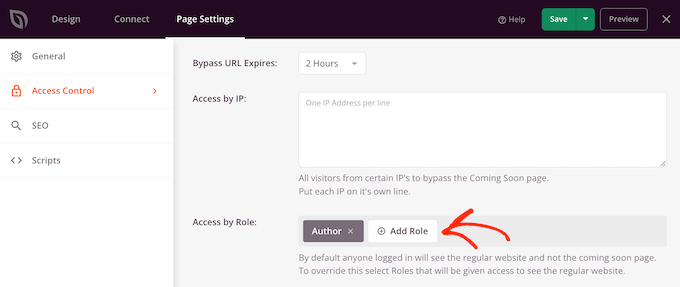
You can also grant access based on IP address, which is useful if a person always accesses your site from the same location. For example, you might whitelist the client’s office or your home IP address.
To do this, simply type the address into the ‘Access by IP’ box.
Improve Your Coming Soon Page’s SEO
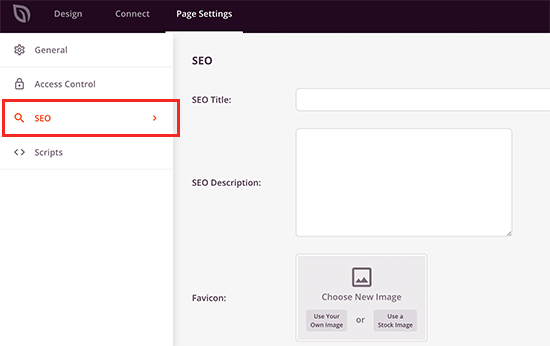
While you’re in the ‘Page Settings,’ you may also want to switch to the ‘SEO’ tab and provide an SEO title, description, favicon, and a featured image that SeedProd will use when your coming soon page is shared online.
This can improve your WordPress SEO and start to build brand awareness, even before launching your full website.
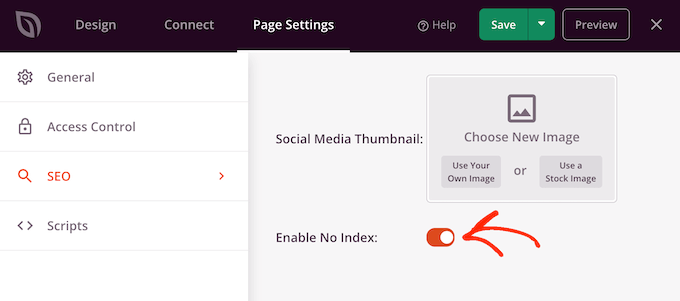
Another option is to tell search engines not to index the page. This can be useful if you’re working on a secret project or any other content that you don’t want to show in the search results.
To do this, simply click to activate the ‘Enable No Index’ switch.
If you’ve installed popular SEO plugins like All in One SEO, then SeedProd works seamlessly with them as well.
Track Your Website Visitors
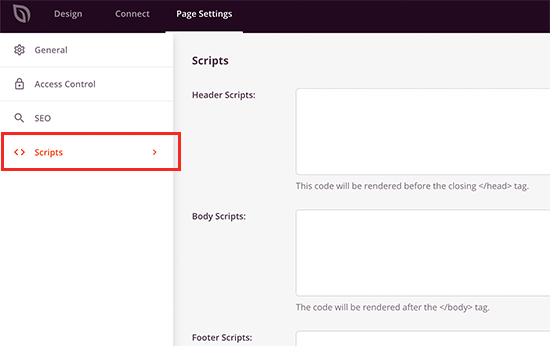
Lastly, you can switch to the ‘Scripts’ tab and add any third-party scripts you want to use.
For example, you may want to add Google Analytics code, Meta pixel, or some other tracking code to your coming soon page. This allows you to track visitors and gather information, even before launching your website.
When you’re finished, don’t forget to click on the ‘Save’ button at the top to save your advanced page settings.
Step 5: Publish Your Coming Soon Page
When you’ve finished working on your coming soon page, the next step is publishing it.
First, you need to click on the Save button and then select ‘Save as Template.’
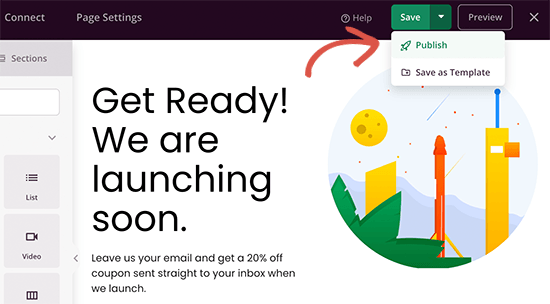
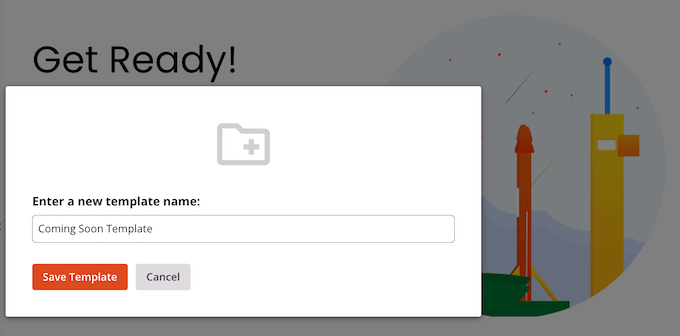
When asked, go ahead and type in a name for the template. This is just for your reference so you can use anything you want.
After that, click on ‘Save Template.’
In the next popup, click on ‘Return to Page Editor.’ You can then click on the ‘X’ button in the upper-right corner to close the SeedProd page editor.
At this point, you may see a popup asking whether you want to publish your coming soon design and put your site into coming soon mode. If you’re happy to go ahead, then click on ‘Yes, Activate.’
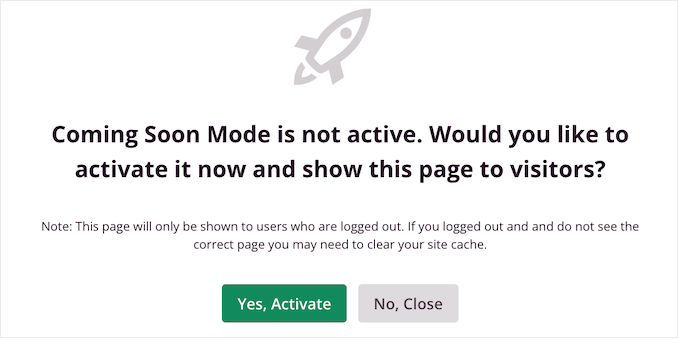
If you don’t want to enable coming soon mode just yet, then click on the ‘No, Close’ button.
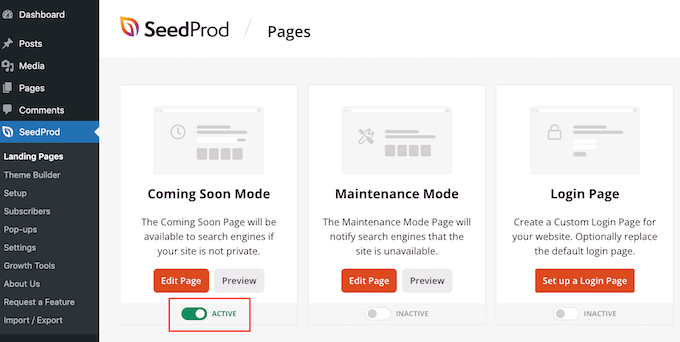
When you’re ready to show the coming soon page to visitors, simply go to SeedProd » Pages. Here, click on the switch in the ‘Coming Soon Mode’ section so that it shows ‘Active.’
While your website is in coming soon mode, you can still log into your WordPress dashboard and work on your site.
However, logged-out users and visitors will only be able to see the coming soon page.
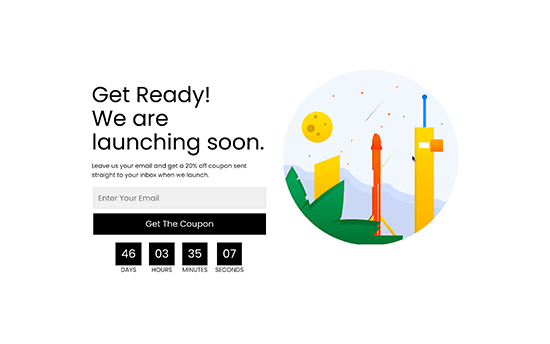
Once the page is published, make sure to double-check it to see if everything looks good. Preview your website on mobile, desktop, and tablet to ensure that the page is responsive on all devices.
How to Switch Off SeedProd’s Coming Soon Page
When you’re ready to launch your site, SeedProd makes it super easy to turn off the coming soon mode.
Simply go to SeedProd » Landing Pages and click on the ‘Active’ toggle so that it shows ‘Inactive’ instead.
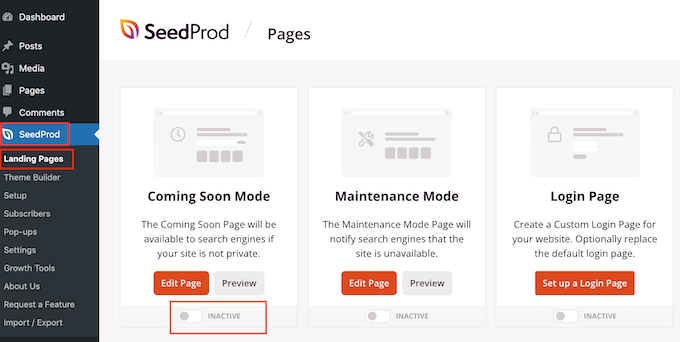
Now, if you visit your website, you’ll be able to see all of your posts and pages.
Maintenance Mode vs Coming Soon: Which Page Should You Use?
If your site is undergoing maintenance, then you should typically show a maintenance mode page instead of a coming soon design.
A coming soon page is more for websites that are in the process of being developed or launched. Meanwhile, a maintenance mode page is for websites that are undergoing updates or repairs.
You can learn more about their differences in our article about coming soon and maintenance mode: what’s the difference.
The good news is that SeedProd also allows you to create beautiful maintenance pages. Simply go to SeedProd » Landing Pages and click on ‘Set up a Maintenance Mode Page.’
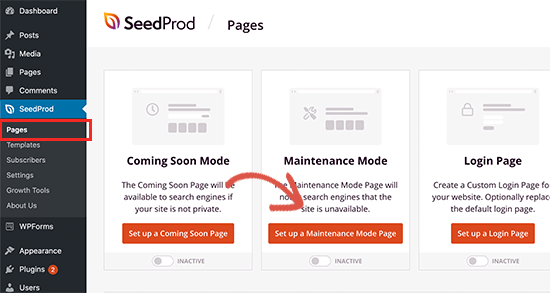
You can now design your page, following the same process described above. You can also control exactly who sees this page, and easily turn off maintenance mode once you’ve finished working on the site.
To learn more, see our guide on how to put your WordPress site in maintenance mode.
We hope this article helped you learn how to create beautiful WordPress coming soon pages. You may also want to see our ultimate guide on how to edit a WordPress website and our expert picks of the best WordPress plugins for theme builders.
If you liked this article, then please subscribe to our YouTube Channel for WordPress video tutorials. You can also find us on Twitter and Facebook.


Yves Archambault
Hello,
Interesting, this would work while I construct the site with DIVI?
WPBeginner Support
As Divi is a page builder, it would normally be recommended to use either SeedProd or Divi and not both on one site.
Admin
Jiří Vaněk
When I finally learned the exact differences between a coming soon page and a maintenance page, I decided to use a coming soon page for a website we’re currently building. I’m not a skilled designer, but since I have SeedProd, I followed this guide and used the plugin, and I have to say the pages created with its help are really beautiful. Now we can work on the website while also having a very tasteful notification showing when the site will approximately go live. Simply put, it’s great.
Fauwaz Marjan
Is there a way for the logo to be aligned left of the page in the coming soon page? Because every time I save the changes, it automatically keeps the logo aligned to the center.
WPBeginner Support
Please reach out to SeedProd’s support and they should be able to take a look and assist you.
Admin
Jerome Brooks
Hello,
My page is presently set on the Coming Soon Mode Active. How do I make my page active for the world to see? Thank you.
Jerome Brooks
WPBeginner Support
That would normally be due to a plugin, you could either check through your plugins settings or disable your plugins that you are not actively using for finding where that is set.
Admin