If you run a business like a restaurant or a small boutique, then you may not need to make an entire online store.
In some cases, you might just want to give customers an easy way to order food or a limited number of physical goods.
There are really endless situations where a simple order form might be the better choice.
So, we researched the best order form options to help you make one yourself.
That way, you can easily collect customer orders without needing an over-complicated eCommerce solution.
In this post, we’ll show you two simple ways to do this using a few of our favorite tools: WPForms and WP Simple Pay. Let’s dive right in!
Why Create an Online Order Form in WordPress?
Does creating a complex online store sound overwhelming? If so, you’ll be happy to know that it’s not really necessary for many small businesses.
Some businesses set up online stores to take orders, accept payments, and manage inventory. But you might not need a complex eCommerce website with a shopping cart.
For instance, if you own a restaurant, there is no need to create an entire online store. The same might also be true if you only sell a few items.
In many cases, a simple online order form can get the job done.
Your form can be customized to let customers pay online, during pickup, or upon delivery.
When users fill out your online form, they can input all the necessary details, like product specifications, quantities, delivery information, and payment options.
This ensures that you receive accurate information, which simplifies the ordering process, boosts customer engagement, and can even help increase your revenue.
Having said that, let’s see how to easily create an online order form in WordPress. We will go over two methods in this tutorial. You can use the links below to jump to the method of your choice.
☝ Important Note: Both WPForms and WP Simple Pay offer support for multiple products and subscription settings.
But in our experience, WP Simple Pay is better for subscriptions. Meanwhile, WPForms’s advanced settings give you more control over your order form, so it could be a better choice if you want to offer multiple custom products on your form.
Method 1: Create an Order Form With WPForms (Multiple Products & Advanced Settings)
If you want to create an advanced order form that includes item images, lets users select multiple items at once, and sorts products into groups, then we recommend WPForms.
The plugin lets you easily create any kind of online form and add it to your website (no coding skills required). Plus, it easily integrates with CRMs and email marketing platforms, making it an ideal choice for growing businesses.
We have used WPForms many times to build forms for the WPBeginner website, and it’s never failed us. To learn more, see our WPForms review.
Before we dive into the tutorial, it’s important to note that WPForms also has a powerful AI form builder that can help you create advanced WordPress forms faster than ever.
We won’t be using it now since we’d like to show you how easy it is to work with the plugin’s pre-made order form template. But just keep in mind that it can be really useful if you know you’ll need to create multiple forms in the future.
Now, to get started, you’ll need to install and activate WPForms. For detailed instructions, see our step-by-step guide on how to install a WordPress plugin.
☝ Note: WPForms has a free plan. However, you can upgrade to the pro plan to get more form templates and unlock advanced features like smart conditional logic, file uploads, form notifications, spam protection, and more.
After you activate the plugin, visit the WPForms » Settings page from the WordPress dashboard to enter your license key. You can find this information in your account on the WPForms website.
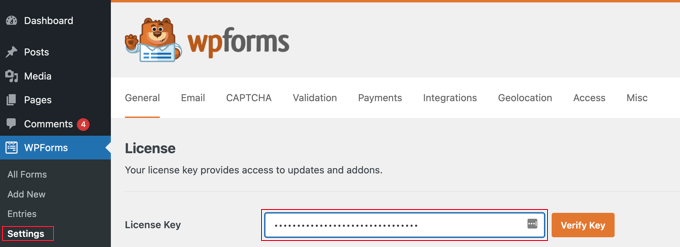
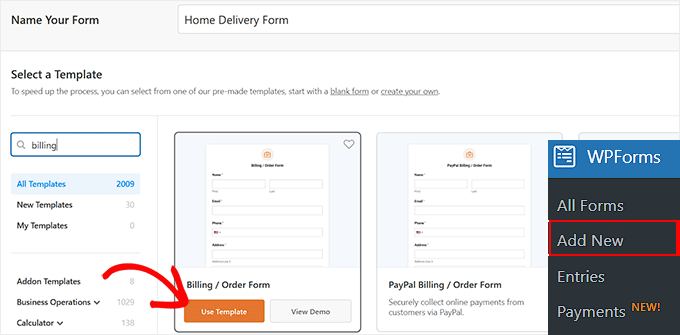
Next, head over to the WPForms » Add New page from the WordPress dashboard.
This will take you to the ‘Select a Template’ page, where you can start by adding a name for your form. Then, you’ll need to choose a form template. We recommend using the ‘Billing / Order Form’ template.
To pick this template, simply move your cursor over it and click the ‘Use Template’ button.
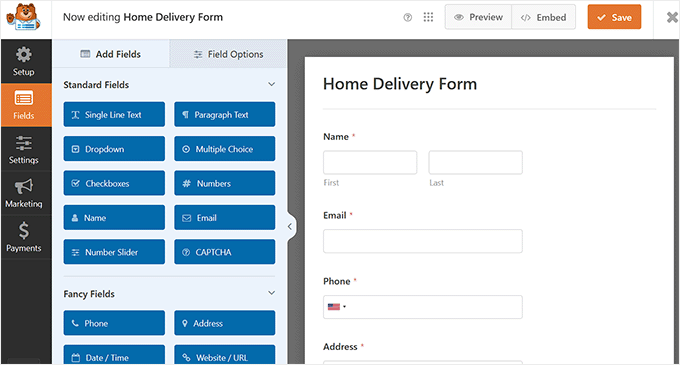
You will now be taken to the WPForms drag-and-drop editor. Here, you will notice a form preview on the right with form fields in the left column of the screen.
You can now edit your online order form however you want by dragging and dropping fields from the sidebar.
The default template already includes fields for most of the information you’re likely to need, like name, address, and phone number. However, you’ll need to list your actual products.
To do this, click on the ‘Available Items’ field to edit it. This will open its settings in the left column, where you can type in the name and price of each item that customers can order from you.
The price won’t automatically display on the form, so you may want to add this to the item name.
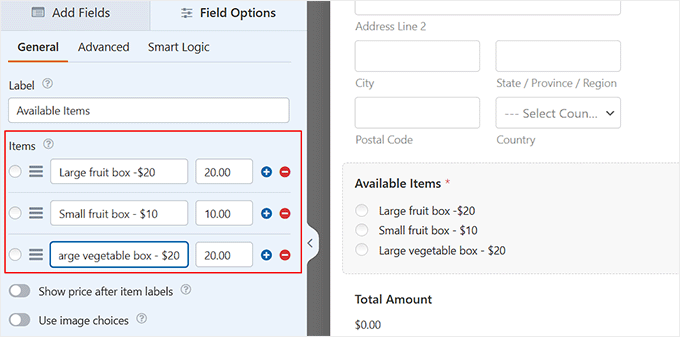
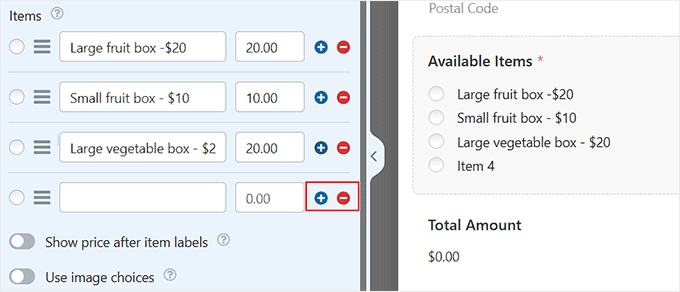
To add more options, simply click the (+) icon wherever you want to add the extra items. You can also remove an item by clicking the (-) icon.
Note: You can add as many items as you want. However, customers can only select one option from this field.
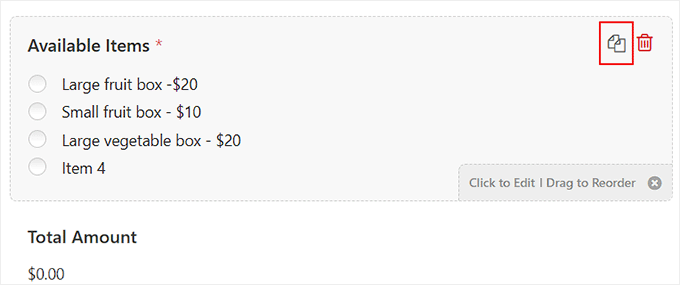
If you have several categories of options, then you may want to copy the field to create groups.
You can copy the ‘Available Items’ field by clicking the ‘Copy’ icon that appears when you run your cursor over it or when it’s selected.
Make sure you change the ‘Label’ of the fields to something appropriate for each group as well.
You will also need to use a different type of field if you want customers to be able to select two or more options within a single field.
For this, switch to the ‘Add Fields’ tab and scroll down to the ‘Payment Fields’ section. Then, choose and add the ‘Checkbox Items’ field to the form.
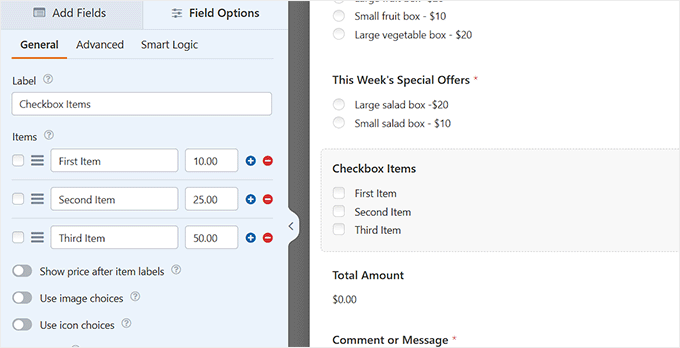
You can now edit that field as before, entering names and prices for your items. Customers can check as many items as they want to order.
If you want to show images of your products, that’s easy, too. Simply toggle the ‘Use image choices’ switch.
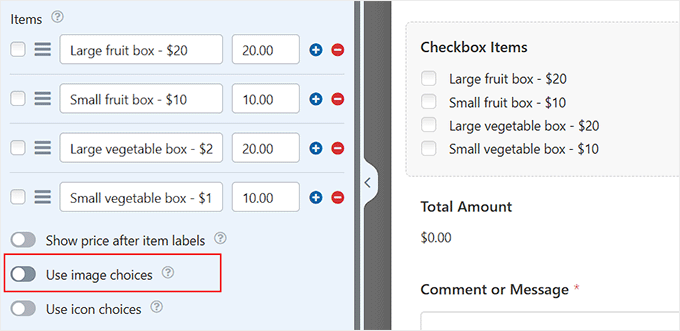
Once you do that, the ‘Upload Image’ button will appear under each item.
You can then add images either from your computer or from your WordPress Media Library according to your liking.
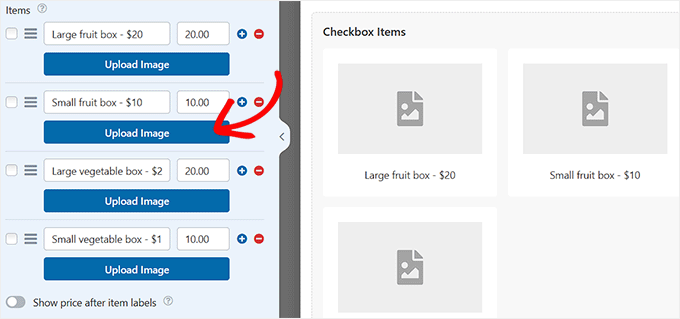
Keep in mind that WPForms won’t resize or compress your images, so it’s important to upload them at the right size. They should all be the same size and no more than 250×250 pixels.
Ideally, you should also optimize your images for the web.
You can now customize the rest of the form fields in a similar way. Once you do that, just click the ‘Save’ button at the top to store your settings.
Configuring the Notifications Your Order Form Will Send Out
If you are creating an order form, it’s a good idea to set up notifications for it. This way, you will immediately get an email alert once someone places an order on your website.
To do this, switch to the ‘Settings’ section from the left column and click the ‘Notifications’ tab. By default, completed order forms will be emailed to the admin address for your WordPress site.
However, you may want to change this or have the order forms copied to more than one address.
You can simply type the email address or addresses in the ‘Send To Email Address’ box. If you are entering more than one email address, then separate them with a comma.
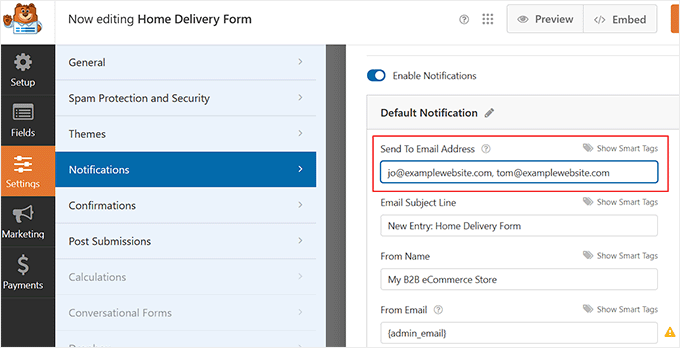
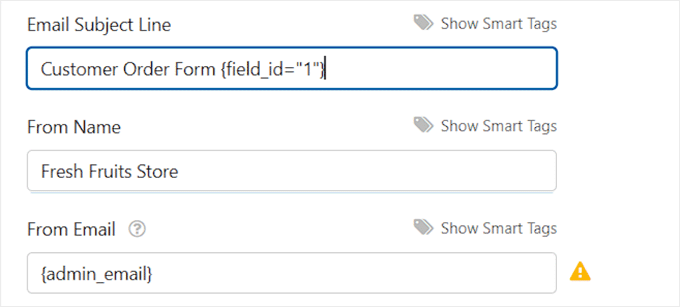
You might also want to change the subject line so that it’s not the same for every order. This could make it easier to keep track of orders in a crowded email inbox.
Here, we have changed the subject line of the emails to read “Customer order from” and then the customer’s name. We used ‘Show Smart Tags’ to insert the name field in the subject line.
You can change any other details you want according to your preferences.
We strongly recommend setting up an email notification for your customers. This will remind them of what they’ve ordered and let them know that you’ve received their order.
To set up a new email notification, click the ‘Add New Notification’ button.
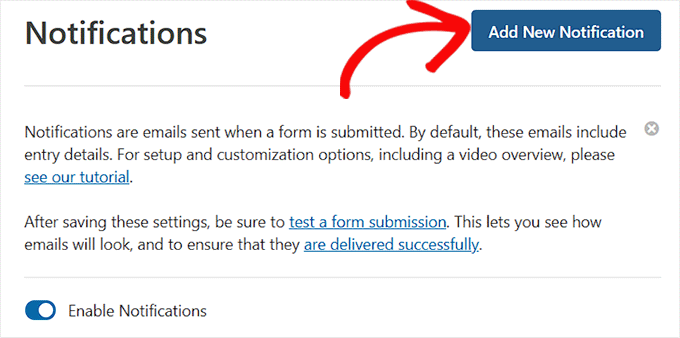
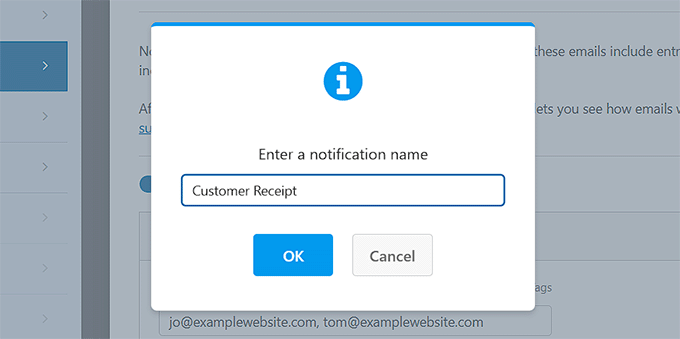
You will be prompted to type in a name for the new notification.
You can call it whatever you want, as customers won’t see this name. We suggest something like ‘Customer Receipt’ or ‘Customer Email Confirmation’.
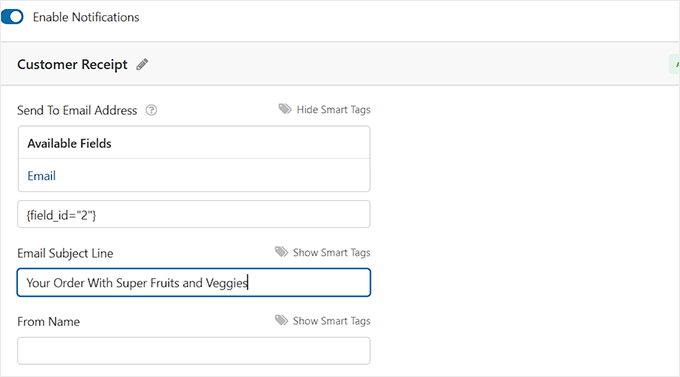
You will want the ‘Send To Email Address’ to be your customer’s email account. This means you have to delete {admin_email} from this box.
Then, select the ‘Email’ field.
You’ll also want to enter other details for the email. We suggest using a subject line such as “Your order with” and your company’s name.
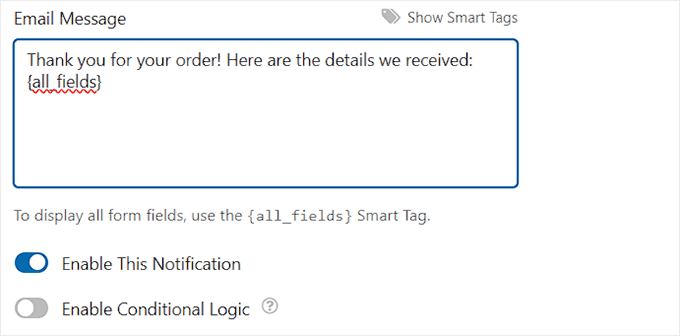
In the ‘Email Message’ field, you’ll probably want to add a message to your customer.
The {all_fields} tag will give all the information the customer entered on the form. For detailed instructions, see our tutorial on how to send a confirmation email after WordPress form submissions.
Setting the Confirmation Message for Your Customers
Along with sending your customers an email receipt, you can also show them an on-screen confirmation so they know that their order has been sent.
You can do this under the Settings » Confirmation tab.
The default confirmation reads, “Thanks for contacting us! We will be in touch with you shortly.”
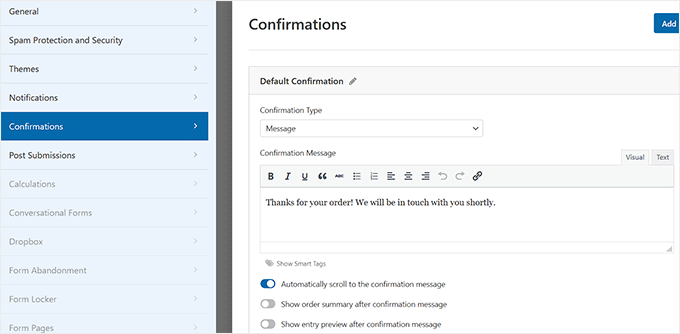
You can change this to anything you want and use the visual editor to format your text.
Alternatively, you can redirect customers to a “Thank you” page on your website or even to another website altogether.
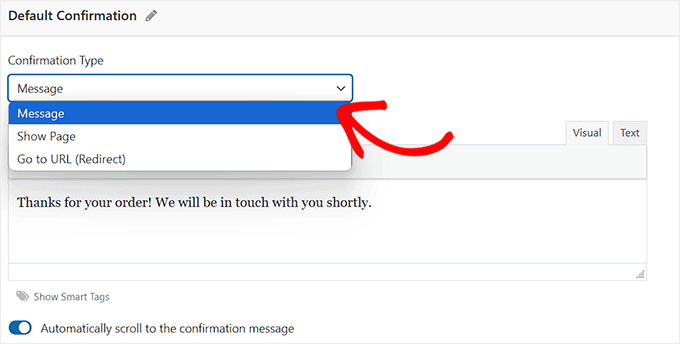
Once you’ve set up the confirmation message, click ‘Save’ at the top of the screen.
Integrating Payment with Your Order Form (Optional)
If you want to take payment through your order form, then you will need to integrate it with a payment processor.
WPForms integrates very easily with multiple popular payment processors, including PayPal, Stripe, Square, and Authorize.net. Customers can pay either through their PayPal account or by entering their credit card details.
☝ Note: The free version of WPForms allows you to accept payments via Stripe. However, you have to pay 3% plus Stripe fees on payments made through your forms. To remove the additional fees and access more payment gateways, you can upgrade to WPForms Pro.
We are going to use PayPal in this tutorial, but the process for Stripe is similar.
First, you’ll need to exit the form builder. You can do this by clicking the ‘X’ at the top right. If you have unsaved changes, you’ll be prompted to save your form.
Next, go to the WPForms » Addons page in your WordPress dashboard. Scroll down to the ‘PayPal Standard Addon’ and click the ‘Install Addon’ button beneath it.
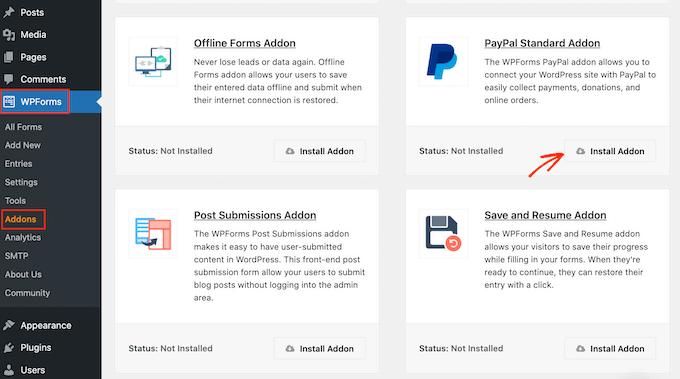
The addon will then be installed and activated automatically.
Now go back to your form, which you can find under WPForms » All Forms. Once the form builder is launched, switch to the ‘Payments’ tab and click the ‘PayPal Standard’ option.
Next, toggle the ‘Enable PayPal Standard payments’ switch.
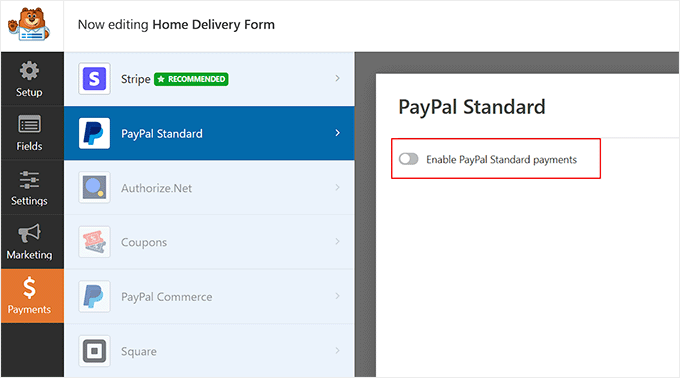
Then, fill in the details of the form. You can start by adding the email address associated with your PayPal account.
Leave the ‘Mode’ dropdown set to ‘Production’ and leave the ‘Payment Type’ set to ‘Products and Services’.
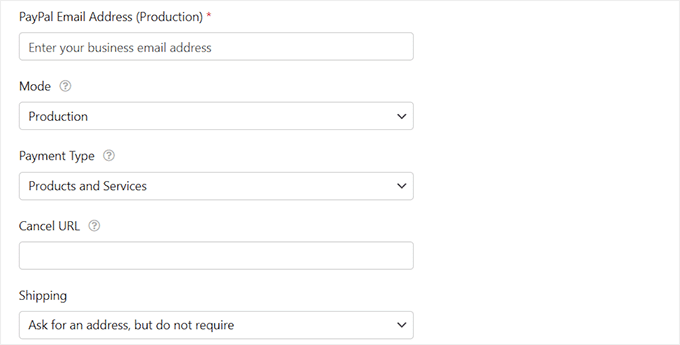
If you’re collecting the delivery address through the order form, then you can change ‘Shipping’ to ‘Don’t ask for an address.’
You don’t need to enter a ‘Cancel URL,’ but you may want to create a page on your website for customers to be sent to if they don’t complete the checkout process.
Click the ‘Save’ button once you’ve finished.
Now, when the user submits the form, they’ll be automatically directed to PayPal to pay. You don’t need to add any extra fields to your form or do anything else.
For more information, you can see our tutorial on how to add a PayPal payment form in WordPress.
Adding the Order Form to Your Website
The final step is to add your order form to your website.
Simply choose the page you want to add your form to, or create a new page under Pages » Add New.
Next, click on the ‘Add Block’ (+) button to add a new block (wherever you want your form) and find the WPForms block. It’s located under the ‘Widgets’ section of blocks, or you can simply type ‘WPForms’ into the search bar to find it.
You’ll see a WPForms block. Click the ‘Select a Form’ dropdown and choose your form.
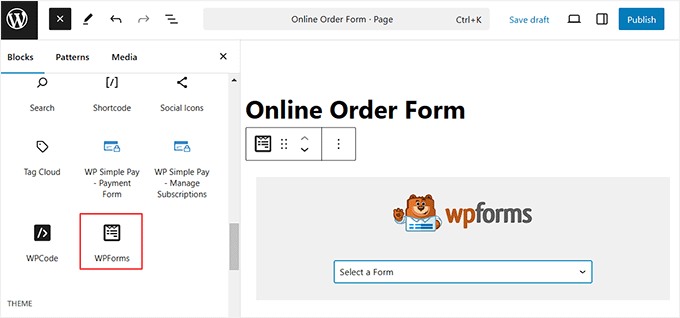
You’ll then see a preview of the form itself in the WordPress editor.
When you are ready, save and publish (or update) your page. You can view it live on your site to see your form in action. Before sharing it with customers, we recommend testing the form to ensure it works as you expected.
For more details, see our guide on how to embed forms in WordPress.
It’s also a good idea to check that you receive the email notification when the form is submitted. If not, check out our post on how to fix the WordPress not sending email issue.
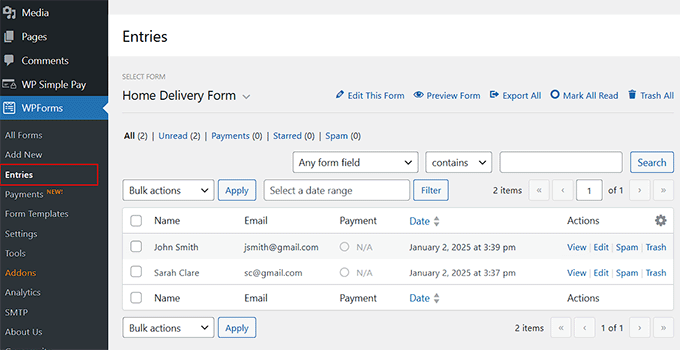
Even if you do miss an email or accidentally delete it, WPForms saves form data in the WordPress database. You can find all your orders by going to WPForms » Entries in your WordPress dashboard.
Click on the name of your form to see a list of entries. Click ‘View’ next to any of these to see the details.
Method 2: Create an Order Form With WP Simple Pay (Subscriptions & Simple Settings)
If you are looking to create a simple order form connected with Stripe that supports recurring payments or subscriptions, then we recommend WP Simple Pay.
It is also a great choice if you have a limited number of products and want to set up purchase restrictions without overcomplicating things. This makes it especially suitable for businesses offering a small range of products or services.
It can integrate with numerous payment options, has an intuitive form builder, and gives you premade templates. We’ve tested this tool out thoroughly for a variety of scenarios, and we really liked it. To learn more, see our WP Simple Pay review.
First, you need to install and activate the WP Simple Pay plugin. For details, see our tutorial on how to install a WordPress plugin.
☝ Note: WP Simple pay offers a free plan. However, to unlock most of the payment options and subscription features, you will need to opt for the pro version.
After you activate the plugin, a setup wizard will open up on your screen. Go ahead and click the ‘Let’s Get Started’ button.
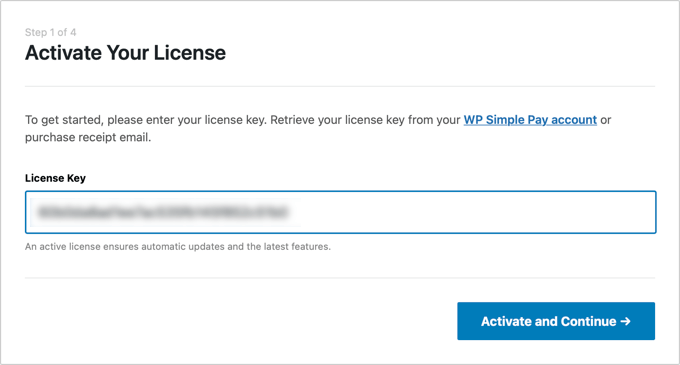
Next, you will have to add your plugin’s license key.
You can find this information in your account on the WP Simple Pay website.
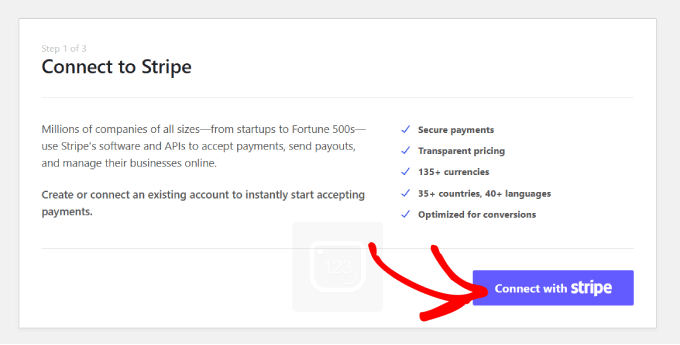
After that, you will be asked to connect your plugin with Stripe so you can easily accept online payments.
Keep in mind that since WP Simple Pay is a Stripe plugin, it won’t work on your website until you connect it with a new or existing Stripe account.
To start the process, click the ‘Connect with Stripe’ button.
For step-by-step instructions, see our tutorial on how to accept Stripe payments in WordPress.
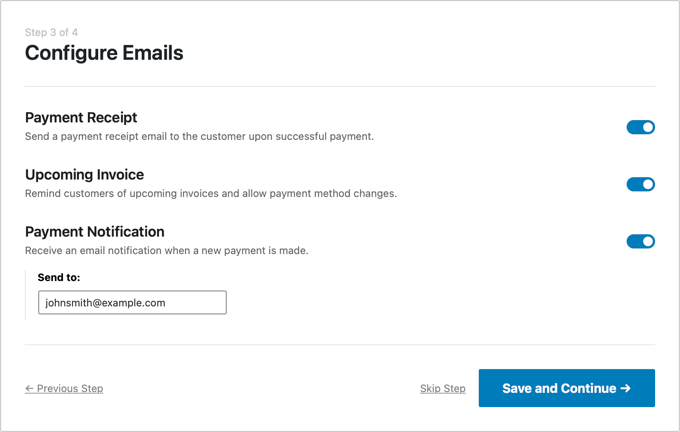
Once you successfully connect Stripe and WP Simple Pay, the setup wizard will ask you to configure your emails.
Here, you can enable options to receive email notifications for payment receipts, upcoming invoices, and payment notifications. You will also need to enter an email address where these messages must be sent.
Then, click the ‘Save and Continue’ button and finish the rest of the setup wizard steps according to your liking.
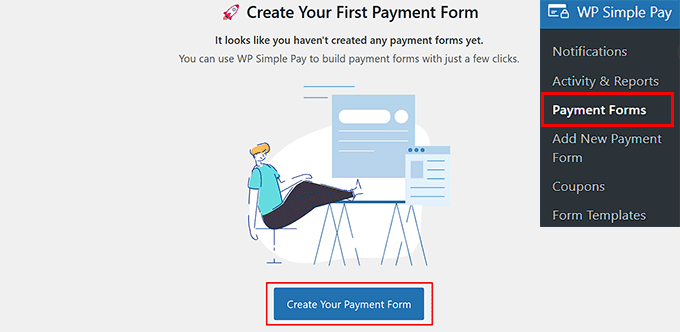
Now, go to the WP Simple Pay » Payment Forms page in the WordPress dashboard.
Here, simply click the ‘Create Your Payment Form’ button.
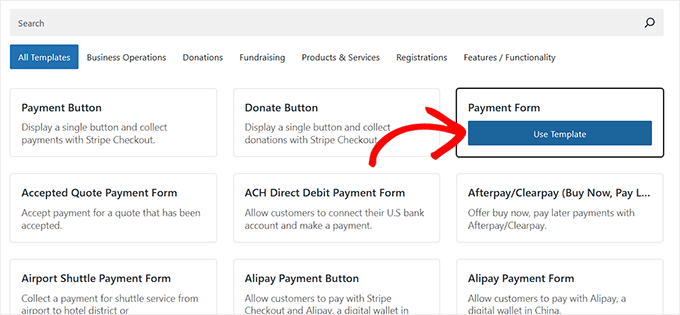
This will direct you to the ‘Select a template’ screen, where you will notice a list of premade templates offered by the plugin.
You may want to switch to the ‘Products and Services’ tab to find an order form template that fits your needs. There, you will find form templates for things like cleaning services, laundry services, martial arts lessons, walking tours, pool cleaning, and more.
If you don’t find a pre-made template that meets your specific needs, we recommend using the ‘Payment Form’ option. Just click the ‘Use Template’ button below it.
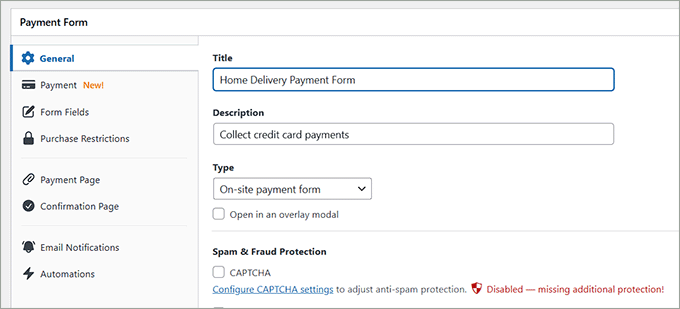
You will now be taken to the ‘Add New Payment Form’ page, where you can start by adding a title and description for your form.
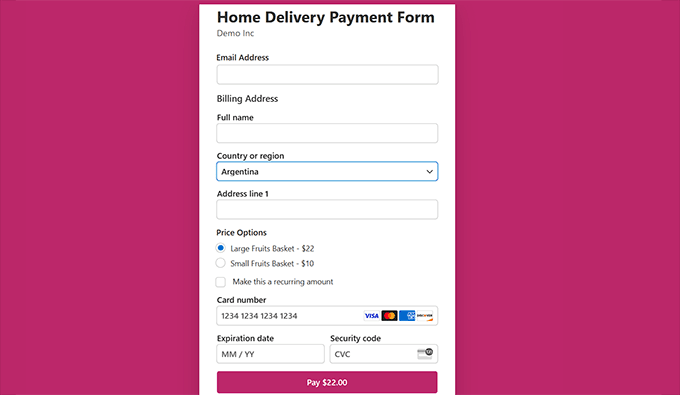
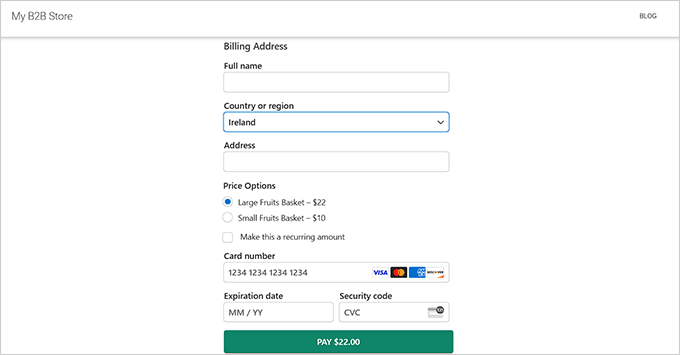
For example, if you are creating an order form to deliver fruit baskets to a user’s address, then you could call the payment form something like ‘Home Delivery Payment Form.’
After that, select your form type as ‘On-site payment form.’ You can also enable CAPTCHA to protect your form from spam entries.
Then, switch to the ‘Payment’ tab from the left column and choose your preferred tax collection rates from the dropdown menu under the ‘Tax Collection’ option.
Next, add the price for the product that you plan to sell with the form.
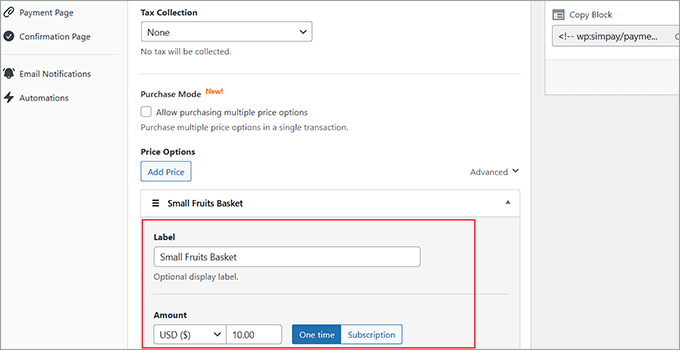
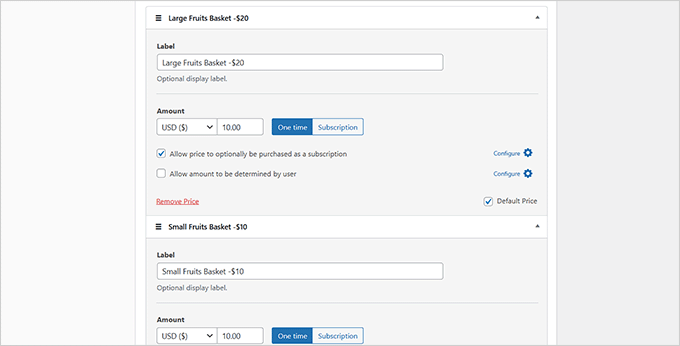
If you want to sell multiple items with your order form, then just click the ‘Add Price’ button to add another section. You can now add a label for each product according to your liking.
We also recommend typing the product’s price in the label section because WP Simple Pay doesn’t show the amount by default.
💡 Tip: WP Simple Pay also allows users to select multiple products in the order form. To add this functionality, just check the ‘Purchase Mode’ box.
Next, add your product’s pricing and choose the currency in the ‘Amount’ section.
If you also want to create an order form where users can choose to subscribe to your products, then you can check the ‘Allow price to optionally be purchased as a subscription’ option.
This will add a recurring subscription checkbox to your payment form. When users select that option, you will receive payments from them every month and will need to deliver the product to them monthly as well.
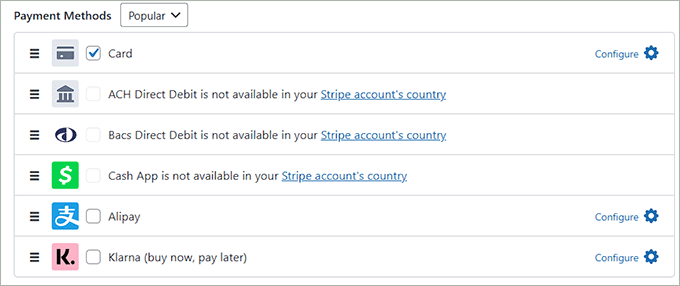
After that, scroll down to the ‘Payment Methods’ section and select the ‘All’ option from the dropdown menu.
Now, you can add Card, ACH Direct Debit, Klarna, Cash App, GrabPay, iDEAL, and many other options as payment methods by checking the boxes next to them.
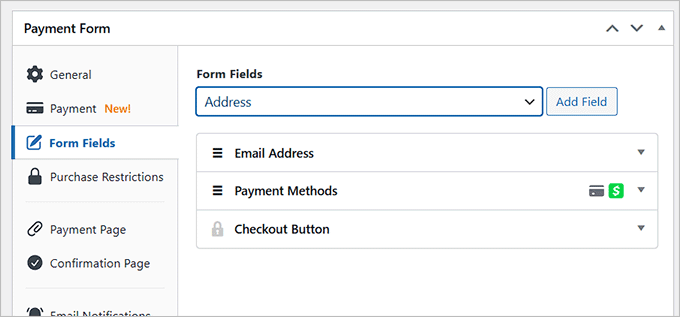
After you’ve selected your payment method options, switch to the ‘Form Fields’ tab. You can now add a form field from the dropdown menu and configure its settings by expanding the tab.
You can also rearrange the existing fields by dragging and dropping them.
For instance, you can add and customize an address field on your form if you plan to deliver physical products. That way, customers will need to give their home address when they make a purchase.
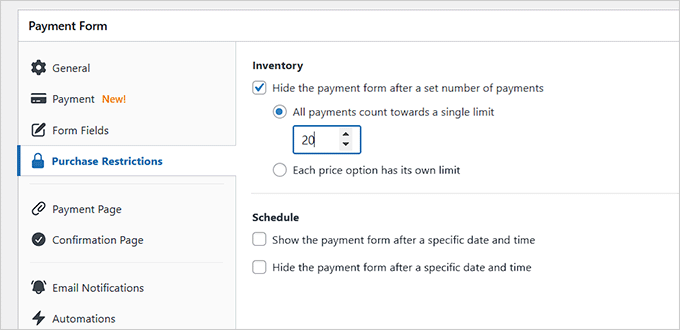
Then, switch to the ‘Purchase Restrictions’ tab. Here, you can check the ‘Hide the payment form after a set number of payments’ box and add a value.
This feature is super handy if you have a specific number of products you want to sell and want to prevent overselling. For example, if you are selling fruit baskets and only have 20 available, you can set that as the limit. Once you hit 20 orders, the form will automatically disappear from your site.
You can also schedule your form to appear or disappear after a specific date. This is especially useful if you are creating an order form for seasonal products.
For instance, if you sell cookies and plan to offer Christmas cookies just for the season, then you can set a schedule for the payment form so it only appears during that time when there’s demand.
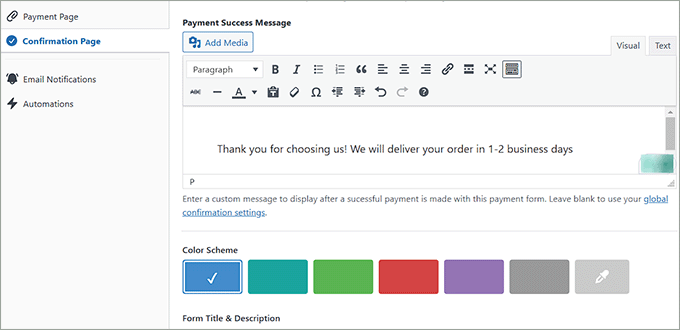
Next, head to the ‘Confirmation Page’ section from the left column.
Here, you can type a success message that users will see on their screen once they complete their order. You can also customize this message by choosing a color scheme and adding a header image.
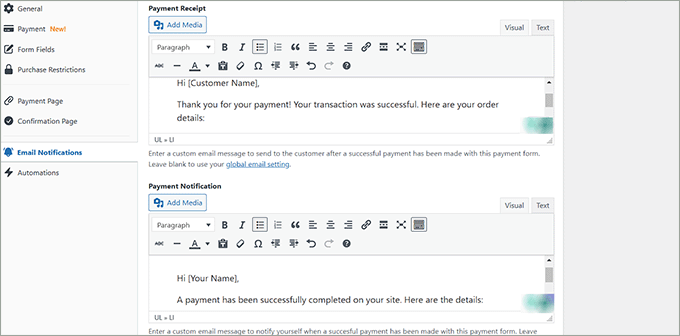
After that, switch to the ‘Email Notifications’ tab to add the message users will receive with their payment receipt.
You can also add a custom email message to notify yourself when a successful payment has been made with this payment form.
Adding the Order Form to Your Website
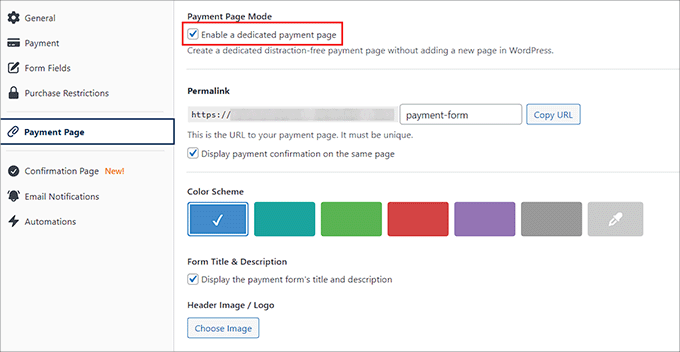
Finally, move to the ‘Payment Page’ tab and check the ‘Enable a dedicated payment page’ box.
The plugin will now generate a custom page for your payment form. That way, you don’t have to create a new page manually.
To customize the payment form page, you can add a permalink, color scheme, image, and footer text.
Then, click the ‘Publish’ button to store your settings.
You can now visit the WordPress site to view the online order form in action.
However, if you have an existing page where you want to add the form, then click the ‘Publish’ button after adding the custom email messages.
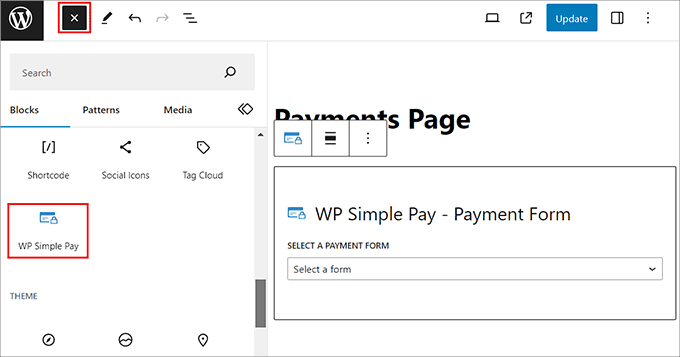
Next, locate the page or post where you want to add the payment form and open it in the WordPress content editor. Then, click the ‘Add Block’ (+) button in the top left corner to open the block menu.
From here, find and add the WP Simple Pay block to the page, and select the payment form you created from the dropdown menu within the block.
After that, click the ‘Update’ or ‘Publish’ button to save your changes.
Finally, simply visit your WordPress site to view the order form.
Bonus: Tracking Your Online Orders
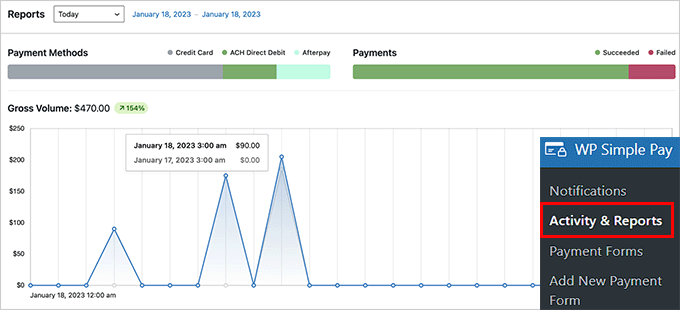
When users start placing orders using your order form, you can head to the WP Simple Pay » Activity & Reports page from your WordPress dashboard.
Here, you will get an overview of your site’s latest payment activity. You can see a quick snapshot of today’s transactions and check out the 10 most recent ones.
Plus, the plugin lets you generate reports for any date range. Once you have chosen a start and end date, you will see detailed insights, including a breakdown of payment methods, payment statuses, and successful payments.
This will help you better manage your order form.
💡 Does adding an online order form to your site sound too complicated? Does your website need a refresh? If you answered yes to both of those questions, then you may want to check out WPBeginner’s WordPress Website Design Services.
Our team of experts can redesign your core pages, set up your order forms, and much more – all for an affordable price! Plus, you’ll get a dedicated project manager to bring your new ideas to life. Book a free consultation today!
Video Tutorial
If you’d like to follow along with video instructions, then just watch our YouTube tutorial below.
Bonus: Add a Restaurant Reservation System in WordPress
If you have a restaurant website, you may also want to add a reservation system to it.
Offering a convenient online reservation option can improve the customer experience. It will minimize the need for phone reservations and reduce lengthy hold times.
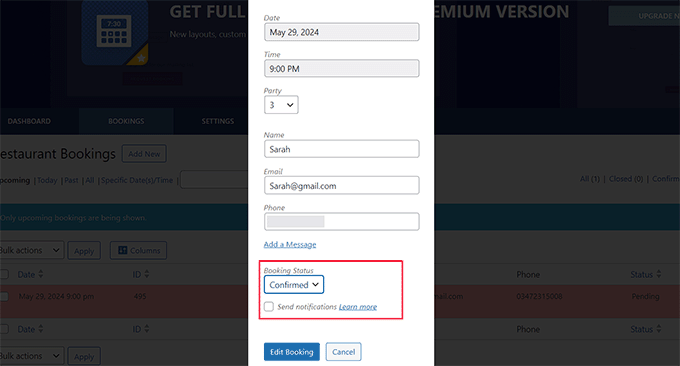
For instructions on how to do this, see our tutorial on how to add a restaurant reservation system in WordPress.
That’s it! We hope this article helped you learn how to create an online order form in WordPress. You might also like our ultimate WordPress eCommerce setup guide and our top picks for the best WordPress coupon code plugins.
If you liked this article, then please subscribe to our YouTube Channel for WordPress video tutorials. You can also find us on Twitter and Facebook.


Mrteesurez
When it is not necessary or not need to create a whole online store as user can simply order with an order form. As the owner, how do I show variety of products to order to users or this type of business is for selling only one product type ? I want to know please.
WPBeginner Support
It would depend on the specific products you are looking to sell for how to show variety.
Admin
Mrteesurez
Ok, for example I am into gadgets selling phones, laptops and earpods, is it useful and applicable to these products. I will like to show varieties of products when ordering
Jeremy Roberts
The simplest method would be to add images for your multiple choice using the form plugin. Our guide below shows an example:
https://www.wpbeginner.com/wp-tutorials/how-to-add-image-choices-in-wordpress-forms-boost-engagement/
Mrteesurez
Thanks for sharing the guide, I have checked and read the guide. I also discovered that I can use the lite version of WPForms for me. I appreciate the support.