Creating WooCommerce product galleries is a fantastic way to display your products beyond the typical shop pages, helping you engage more potential customers and increase conversion rates by showcasing your products in your blog posts and other web pages.
In our experience running multiple online stores, product galleries let you feature products visually where they can make the most impact. We find they improve user experience and drive sales by strategically placing product images where visitors are most likely to notice them.
In this article, we will show you how to easily create a WooCommerce product image gallery. With our step-by-step instructions, you’ll be able to beautifully display your products and optimize your site for greater engagement and sales.

Why Should You Create WooCommerce Product Galleries?
WooCommerce is the most popular WordPress eCommerce plugin on the market. It allows you to sell products by creating an online store.
Most WordPress themes for WooCommerce come with default templates for shop and shop category pages. These pages simply list your products using the theme’s style.
What if you wanted to create a product gallery and display it inside a blog post or another page on your site? By displaying your products in your popular blog posts and pages, you can increase your sales and conversions.
Let’s take a look at how to easily create WooCommerce product image galleries. We’ll share two different methods, and you can use the quick links below to jump to the option that suits you:
Method 1: Creating WooCommerce Product Galleries with SeedProd (Recommended)
The best way to make a WooCommerce product image gallery is by using SeedProd. It’s the best drag and drop WordPress page builder on the market.
SeedProd lets you easily create custom WordPress themes and landing pages, with no coding required. Plus, it comes with built-in WooCommerce blocks and integration that make it easy to add product image galleries to any page or post in WordPress.
To get started, you need to install and activate the SeedProd plugin. If you need help, you can follow this guide on how to install a WordPress plugin.
Note: There is a free version of SeedProd that you can try out, but you need SeedProd’s Elite plan to access WooCommerce blocks.
Once the plugin is activated, go to SeedProd » Settings from your WordPress dashboard and enter your license key.
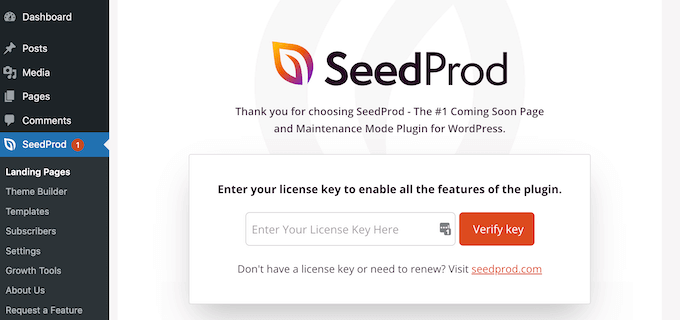
You can find your license key in your account on the SeedProd website. After entering your license key, click the ‘Verify key’ button to continue.
Choosing a WooCommerce Template Kit
Next, you need to choose a WooCommerce template kit to use for your online store. This will replace your existing WordPress theme with a new, custom design.
Simply go to SeedProd » Theme Builder and then click the ‘Theme Template Kits’ button.
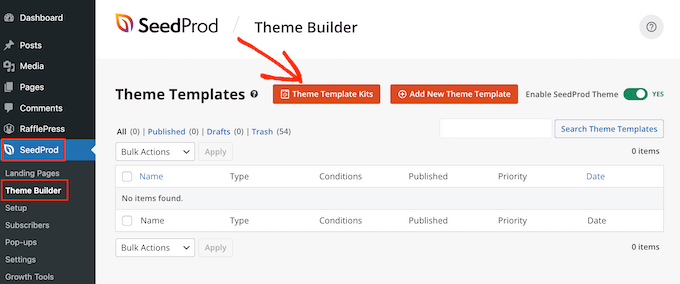
This will take you to SeedProd’s website kit library.
From here, you can click on the ‘WooCommerce’ tab to see all of the template kits created specifically for online stores.
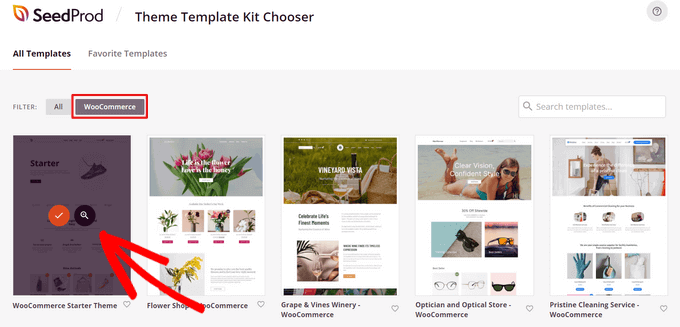
You can hover over any template kit and click on the magnifying glass to preview the design. When you find a template kit you like, simply click the checkmark to use it.
For this tutorial, we’ll be using the WooCommerce Starter Theme, but you can use any template kit you want.
Once you’ve selected a template kit, SeedProd will import it, and you’ll be able to see a list of all the template parts on the theme dashboard.
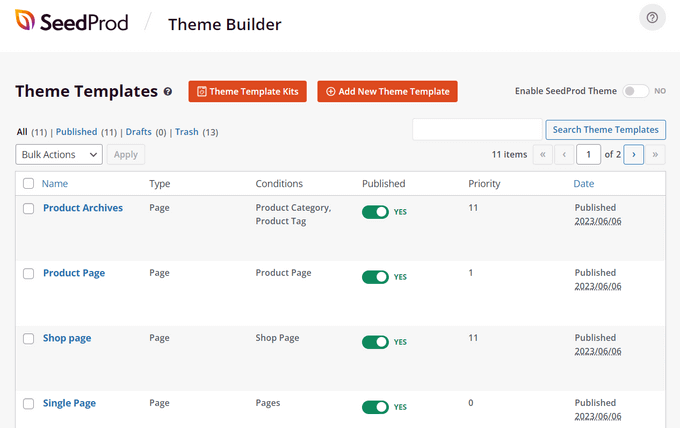
You can customize each part of the template, including product pages, shop page, checkout page, and more, with SeedProd’s easy drag-and-drop builder. This is how we’ll add a WooCommerce product image gallery.
First, find the template part you want to customize. For this tutorial, we’ll choose the ‘Single Post’ part. This is the template that determines how all of your individual blog posts look.
Simply hover over it and click on the ‘Edit Design’ link.

This will open up SeedProd’s visual page builder.
From here, you can drag and drop ready-made blocks onto your page, click on any element to customize it, and see a preview of how your design looks in real time.
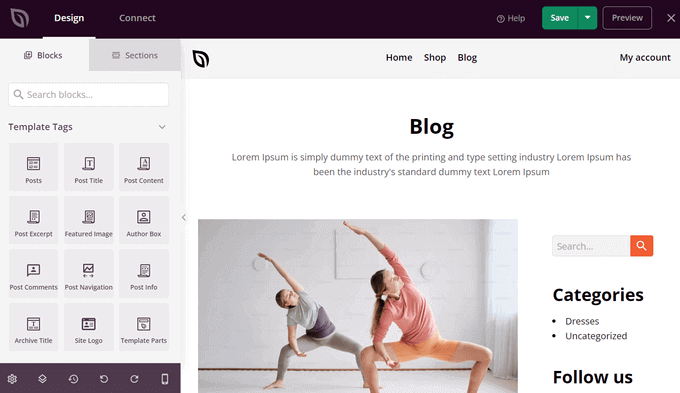
Go ahead and make any customizations you want and we’ll add the product image gallery in the next step.
Adding WooCommerce Product Image Gallery Slider in WordPress
Now that you have a custom WooCommerce theme design, you’re ready to add a beautiful product image gallery.
To do that, click on the ‘Product Gallery Images’ WooCommerce template tag block in the left-hand panel and drag it anywhere onto your page preview area.
This will pull your product information and images directly from WooCommerce.
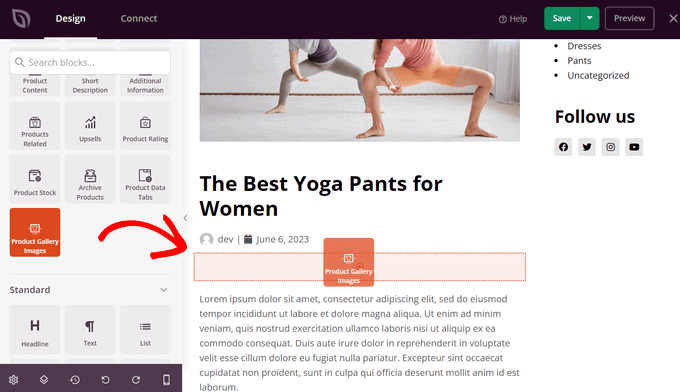
Next, you can click on the block to customize the settings for your product image gallery.
First, you’ll see the image zoom option. This allows visitors to hover over an image to get a zoomed-in view of a product.
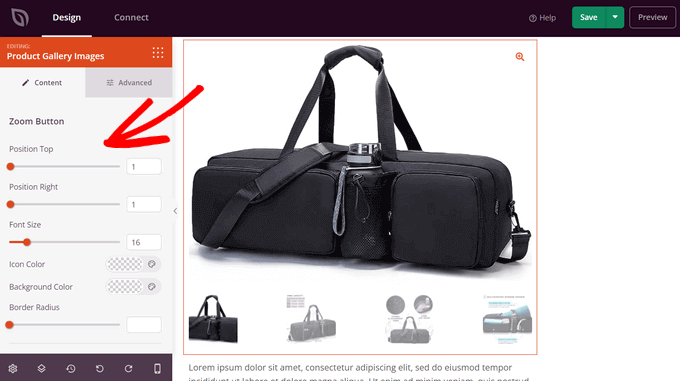
You can drag the horizontal sliders to control the zoom button position. You can also change the font size, icon color, border radius, and background color.
If you scroll down, you can also customize the image and thumbnail borders. You can set the border radius, style, color, and width.
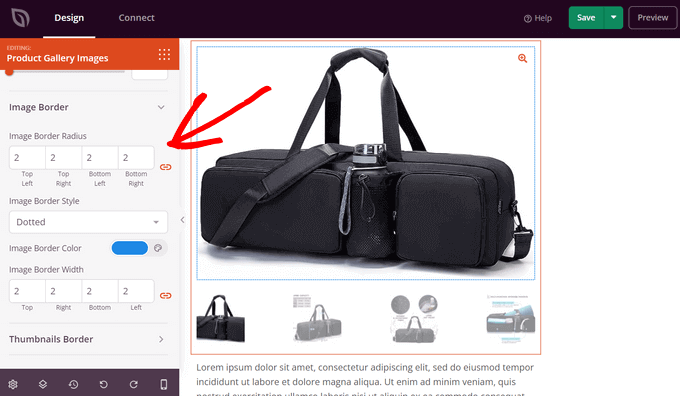
There’s also an ‘Advanced’ tab that you can click on to see more customization options.
These include spacing, CSS ID and class, device visibility, animation effects, and more.
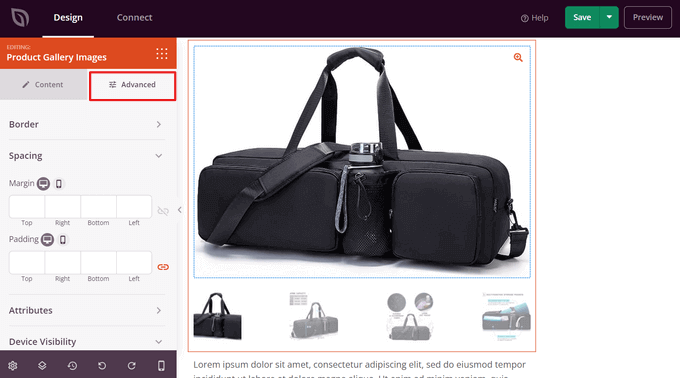
When you’re finished customizing your product image gallery, don’t forget to hit the ‘Save’ button.
Publishing Your WooCommerce Product Image Gallery
Finally, you need to make your product image gallery live on your website. To do that, exit the visual builder and go back to the ‘Theme Builder’ dashboard.
Then, simply toggle the ‘Enable SeedProd Theme’ switch to the ‘Yes’ position.

That’s it!
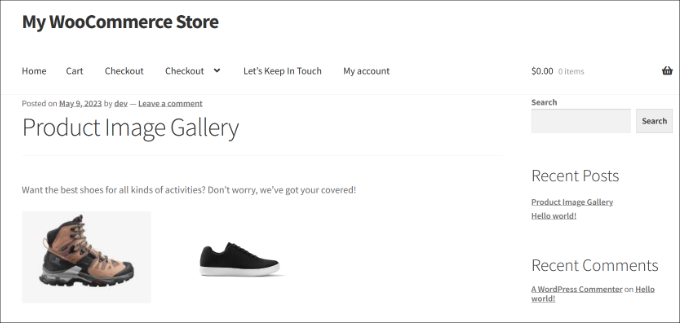
You can visit your website and see your WooCommerce product image gallery live in action.
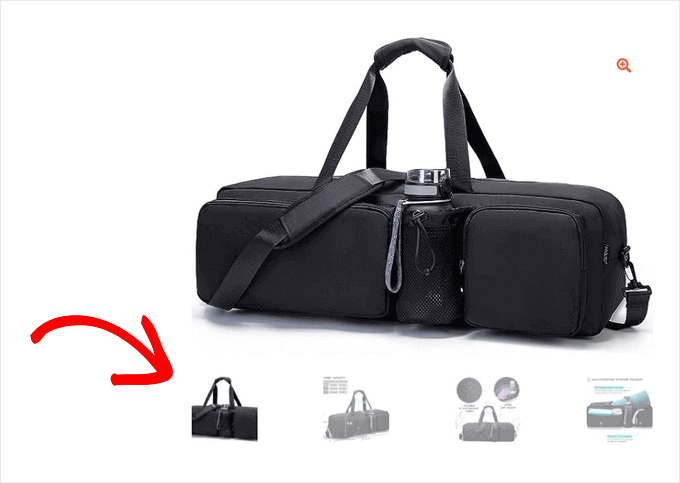
Now, your visitors can click through the product images in your gallery like a slideshow and zoom in on product details.
Method 2: Creating WooCommerce Product Galleries with Envira Gallery
Envira Gallery is the best WordPress photo gallery plugin and makes it easy to show products anywhere on your site. It is a quick way to create a WooCommerce product gallery in WordPress.
The first thing you need to do is to install and activate the Envira Gallery plugin. For more details, see our step-by-step guide on how to install a WordPress plugin.
Upon activation, you need to go to the Envira Gallery » Settings page to enter your license key. You can find this information under your account on the Envira Gallery website.
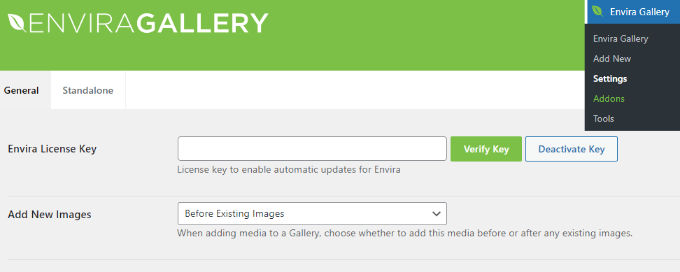
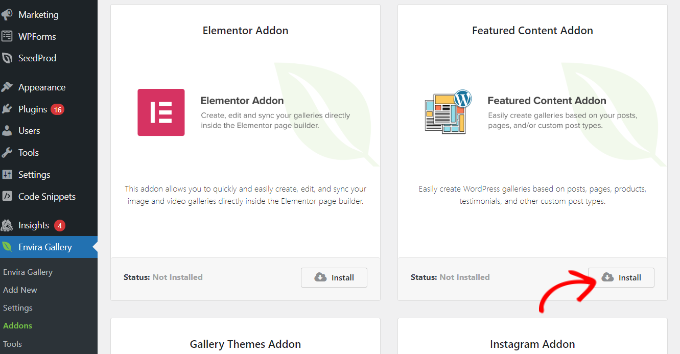
Once the license key is verified, you can go to Envira Gallery » Addons to install and activate the ‘Featured Content’ addon.
This addon will allow you to display your WooCommerce products in the Envira galleries. Go ahead and click the ‘Install’ button under the Featured Content Addon.
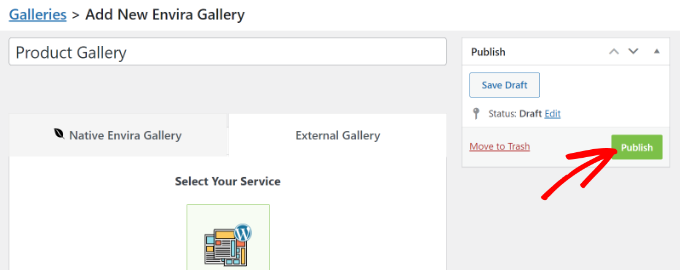
Next, you need to go to the Envira Gallery » Add New page to create your new product gallery.
From here, you can start by adding a title for the new gallery.
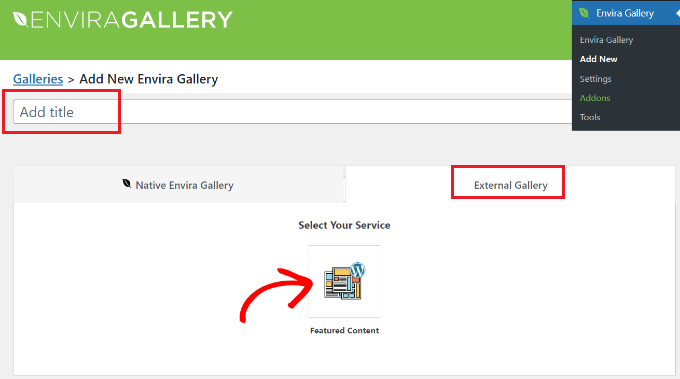
After the title, you need to switch to the ‘External Gallery’ tab and click the ‘Featured Content’ option.
Next, scroll down to the ‘Images’ tab. In the ‘Select Your Post Type(s)’ field, you need to select the ‘Product’ option, which is the custom post type for WooCommerce products.
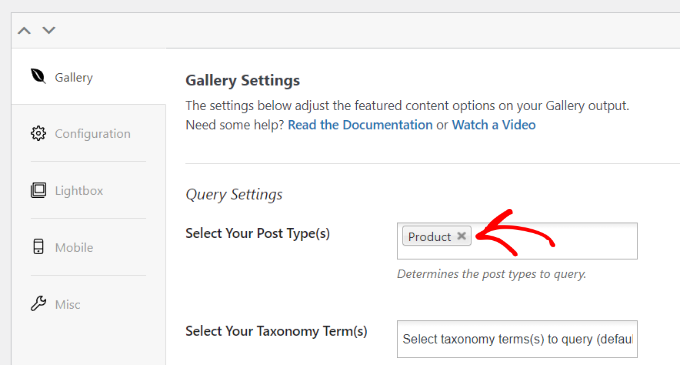
If you have hundreds of products, then you may want to create multiple galleries.
You can narrow down the gallery listings by selecting taxonomy terms for specific product tags or categories.
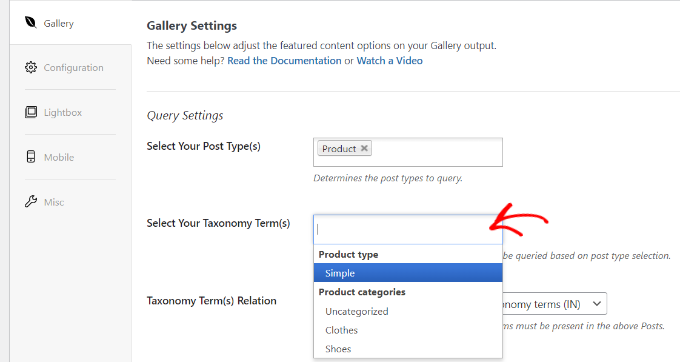
Simply repeat this process with different product tags and categories each time you create a new product gallery. The post type will always be ‘Product’ in all your WooCommerce product galleries.
You can also choose a taxonomy term relation to select and display specific products in your galleries.
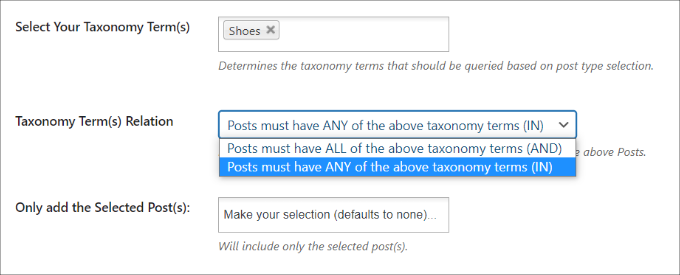
For more details, you should check out our guide on how to create an image gallery in WordPress.
Once you are done, you can publish your product gallery which will make it available to be added anywhere on your WordPress site.
Adding WooCommerce Product Gallery in WordPress
Next, you can add a new post or page or edit an existing one to display your WooCommerce product gallery.
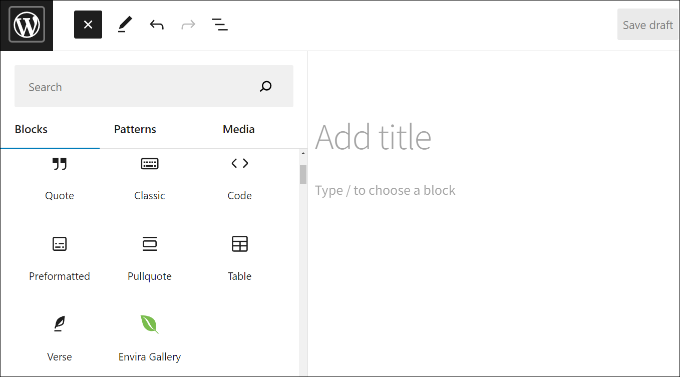
Once you’re in the content editor, simply click the ‘+’ button and add the Envira Gallery block.
After that, you can select your product image gallery in the Envira Gallery block.
Simply click the dropdown menu and choose the gallery you created earlier.
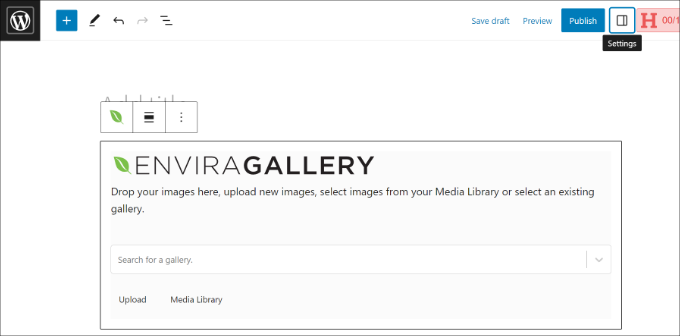
You’ll now see a preview of your gallery in the block editor. If it doesn’t load, then don’t worry. You can simply preview your blog post or page to see if it’s working properly.
Next, you can save and publish your post. After that, visit your website to see the product gallery in action.
We hope this article helped you learn how to create a WooCommerce product image gallery. You may also want to see our guide on how to upsell products in WooCommerce and our expert pick of the best WooCommerce plugins for your store.
If you liked this article, then please subscribe to our YouTube Channel for WordPress video tutorials. You can also find us on Twitter and Facebook.


Jiří Vaněk
I’m really excited about this article! You’ve described very well how to easily create image galleries in WooCommerce, which is perfect for someone like me who is still learning about running an online store. Fortunately, I’m not alone in this journey :). Using Optin Monster for a CTA at the end of the article is a brilliant idea, especially since we use Optin Monster (as well as Seed Prod for landing pages) not only on WooCommerce but also on our blog and company website. It has expanded my knowledge about e-commerce on the Woo platform once again.