Web directories allow you to make money from content that’s submitted by the people who visit your website. Since you don’t have to research or create the listings yourself, this is an easy way to make money online.
In our experience, there are many tools that you can use to create a web directory. We’ve tested most of these plugins, and they make it super easy to add a directory to your site. Based on what we learned from testing, you can use a dedicated plugin like Business Directory or a forms plugin like Formidable Forms.
In this article, we will show you how you can create a web directory in WordPress, and even how to accept payments for posting premium web listings.

Why Create a Web Directory in WordPress?
A web directory is like a catalog that lists businesses or individuals.
Each listing has useful information, such as the company’s location, business email address, and the services they offer.
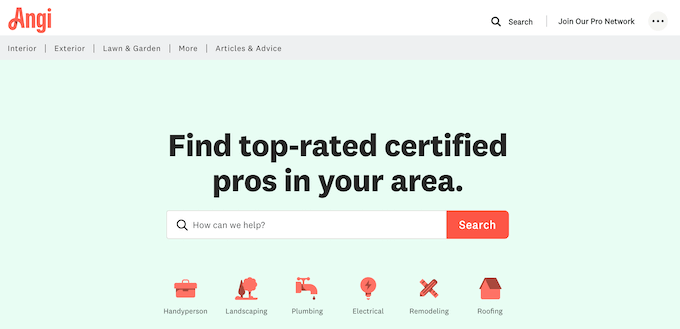
Yellow Pages, Angi, and Yelp are all examples of popular web directories that help people find a place or service.
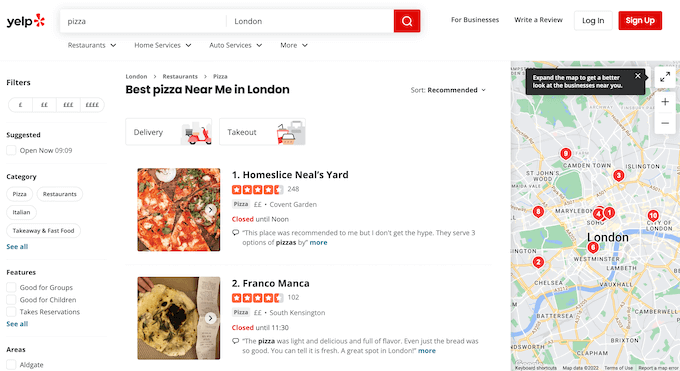
To help visitors find what they’re looking for, these popular directories often divide their content using topics, categories and tags, interests, and other characteristics, as you can see in the following image.
Web directories are a popular online business idea and a great way to make money online from user-generated content.
Often, tutorials show how to create a directory using a web directory theme. However, this means you need to use the same theme forever.
Instead, we recommend installing a web directory plugin that you can use with any WordPress theme you want.
With that in mind, let’s take a look at how to create a web directory in WordPress. Simply use the quick links below to jump straight to the method you want to use:
Method 1: Create a Directory Using Business Directory Plugin (Recommended)
The easiest way to create a directory is by using the Business Directory plugin. This plugin has everything you need to create a directory, organize your listings, and accept credit card payments in WordPress.
There’s also a free version of Business Directory available, but the premium plugin has more features including support for Stripe, PayPal, and Authorize.net. With that in mind, we’ll be using the premium plugin in this guide.
First, you’ll need to install and activate the plugin. If you need help, then please see our guide on how to install a WordPress plugin.
Set up Your Directory Pages
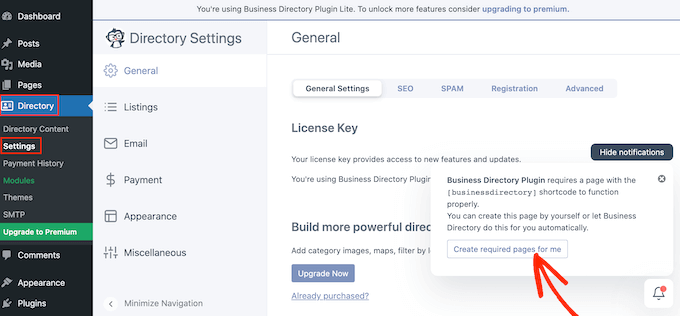
After activating the plugin, you can go to Directory » Settings from the WordPress dashboard. You will now see a popup asking your permission to create a new page.
The Business Directory plugin needs this page to work properly, so go ahead and click on ‘Create required pages for me.’
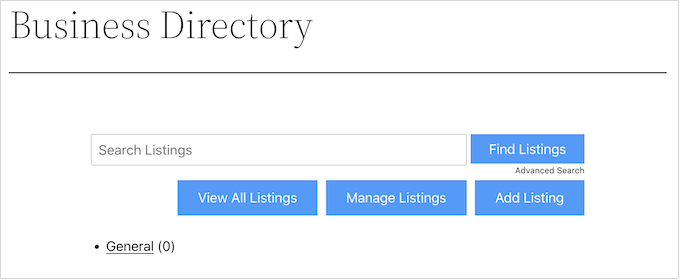
The plugin will now create a new page called ‘Business Directory.’
By default, this page has all the controls visitors need to look through your different listings and submit their own listings.
To start, it’s a good idea to check the plugin’s settings by going to Directory » Settings.
Here, you’ll find different sections:
- Listings
- Payment
- Appearance.
We recommend selecting each tab and then reviewing the settings to see if you need to make any changes.
For example, in Listings, you can change how many listings the plugin shows on each page.
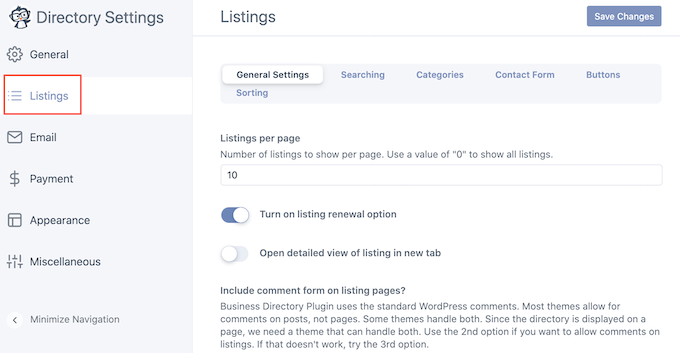
When you’re finished, don’t forget to click ‘Save Changes’ to store your settings.
Customize the Directory Listing Form
Business Directory has a standard form that it shows to visitors, but you may want to customize this form by adding your own custom logo, branding, or content.
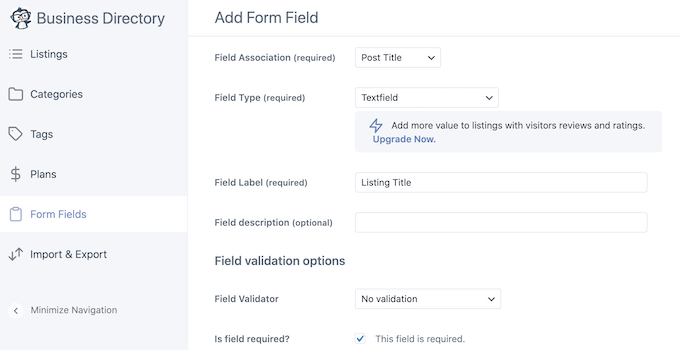
To customize the form, go to Directory » Directory Content and then select ‘Form Fields.’
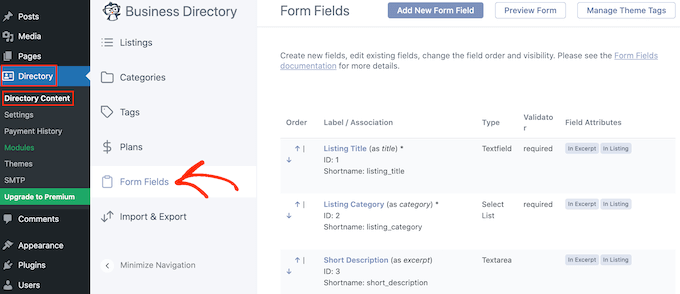
This screen shows all the fields that make up the standard form.
To change where a field appears in the form, simply click on the little up and down arrows in the ‘Order’ column.
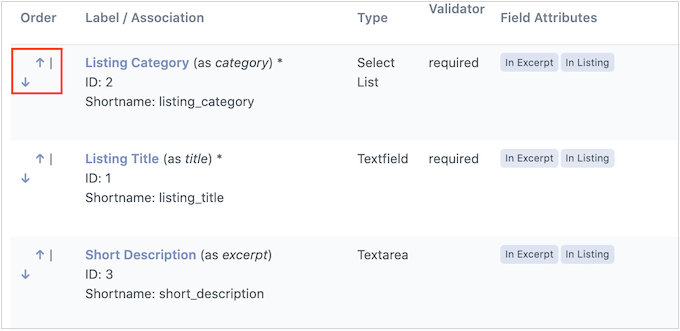
To remove a field, click on its ‘Delete’ link.
Finally, if you want to make some changes to a particular field, then click on its ‘Edit’ link.
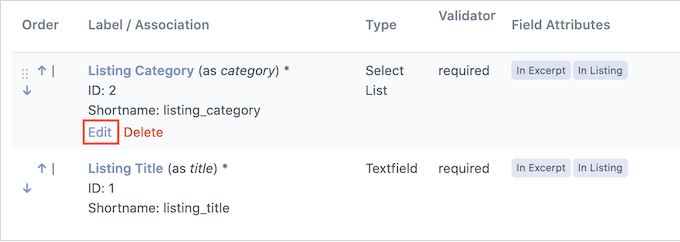
This opens a page where you can change the field label, mark the field as mandatory, add an optional description, and more.
When you’re finished, don’t forget to click on the ‘Update Field’ button to save your changes.
Create Some Business Categories
Next, it’s a good idea to create some categories that people can use when submitting their listings. These categories will also help visitors browse your directory and find what they’re looking for, similar to how WordPress categories and tags work.
By default, the plugin has a single ‘General’ category, but you can add more by clicking on the ‘Categories’ tab. Then, go ahead and select ‘Add New Category.’
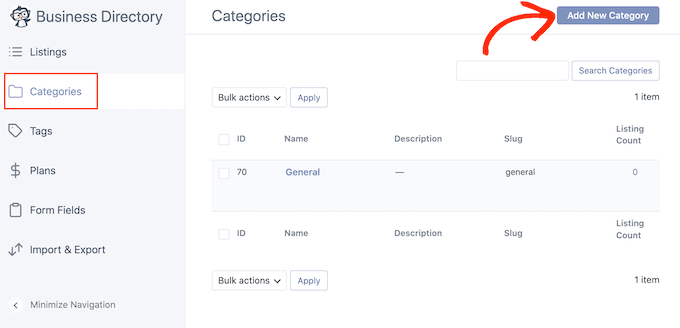
In the popup that appears, type in a name for the category.
You can also organize the categories into child-parent relationships, similar to child pages in WordPress. To turn a category into a subcategory, just open the ‘Parent Category’ dropdown and choose a parent.
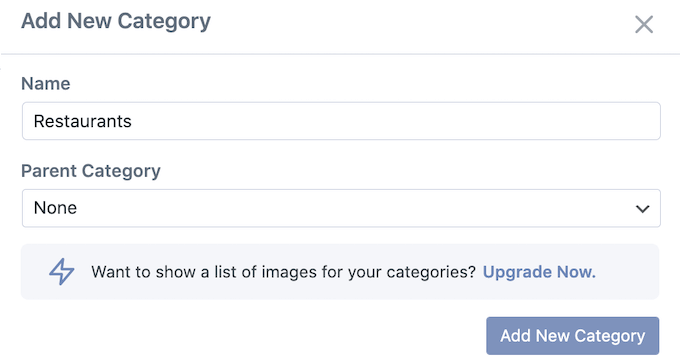
To create the category, go ahead and click on ‘Add New Category.’
You can add more categories to your business directory by repeating the same process described above.
Start Accepting Directory Listings
Now, visitors can create a new listing by heading to your Business Directory page and clicking the ‘Add Listing’ button.
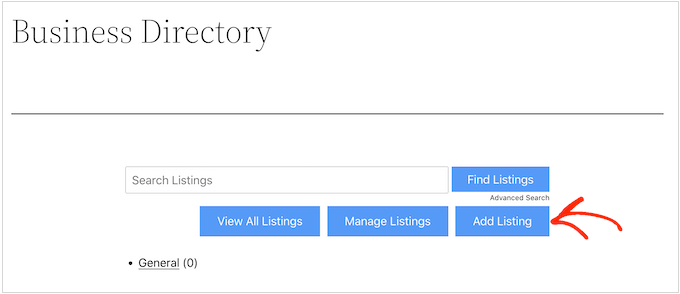
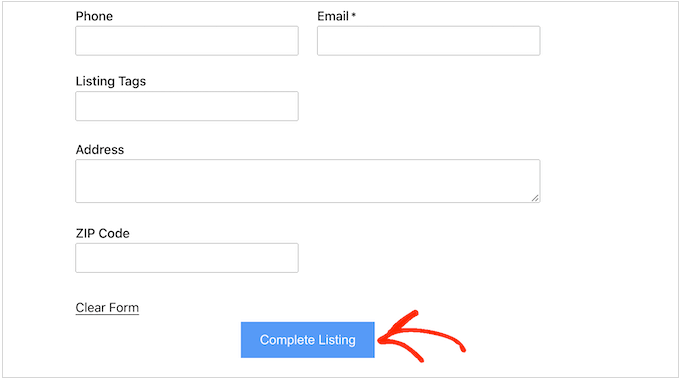
This takes them to a screen where they can type in all the information for the listing.
Then, they simply need to click on the ‘Complete Listing’ button at the bottom of the page to submit their listing.
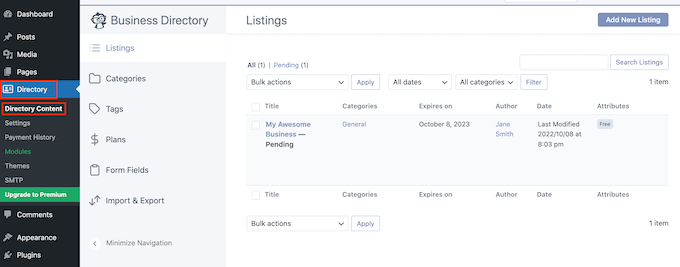
Every time a visitor submits a listing in this way, you’ll need to approve it manually. To do this, head over to Directory » Directory Content in your WordPress dashboard.
You will now see a list of pending listings.
To take a closer look at a listing, simply click on its ‘Preview’ link.
This will open the listing in a new tab.
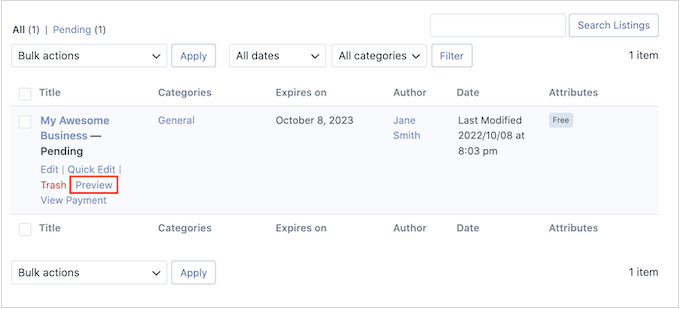
To make any changes to the listing, click on ‘Edit.’
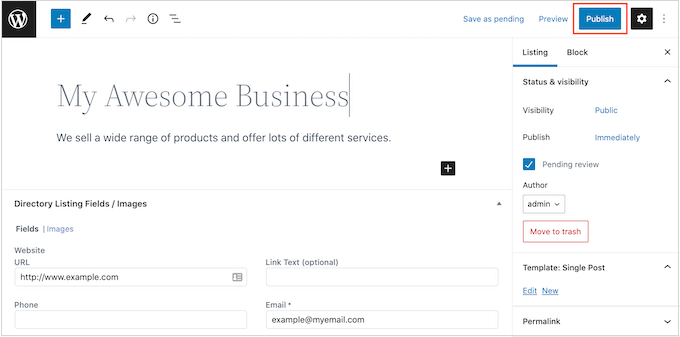
You can now make any changes you want. When you’re happy with how the listing looks, click on ‘Publish.’
As a WordPress admin, you can also create listings in the dashboard. For example, you might want to create listings for your affiliate marketing partners so they don’t have to do all the hard work themselves.
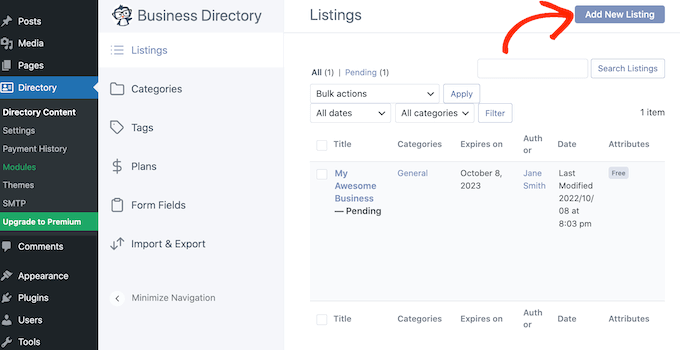
To create a listing, go to Directory » Directory Content and then click on ‘Add New Listing.’
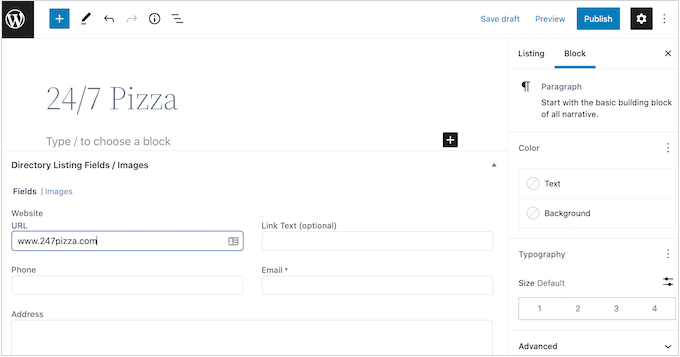
This opens a screen where you can type in all the information.
When you’ve finished, click on ‘Publish’ to make the listing live.
Accepting Payments for Directory Listings
There are lots of ways to make money online with WordPress, including accepting payments for publishing a listing.
By default, Business Directory only supports the Authorize.net payment gateway, but you can accept payments using PayPal, Stripe, and Payfast by upgrading to the premium plugin.
To set up Authorize.net, go to Directory » Settings and then click on the ‘Payment’ tab.
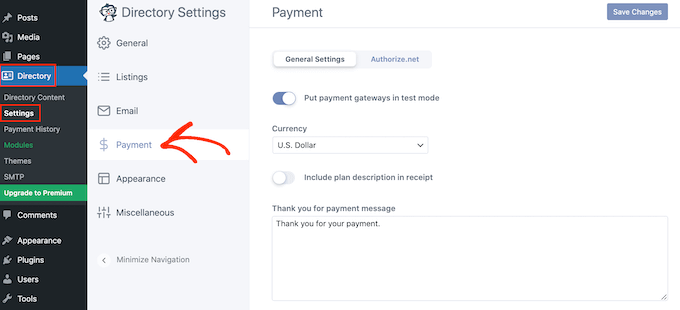
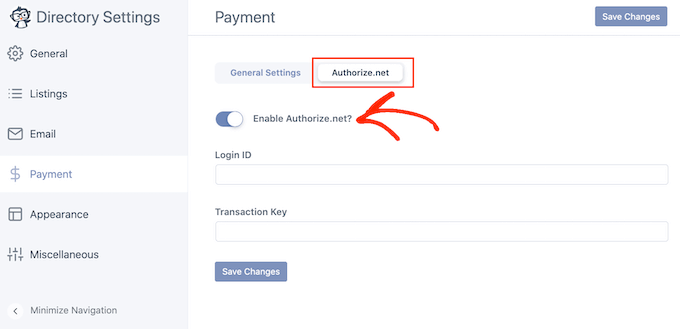
You can then go ahead and select ‘Authorize.net.’ Here, click on the ‘Enable Authorize.net’ switch so that it turns blue.
This adds some new settings where you can type in the login ID and transaction key for your Authorize.net account.
Once you’ve done that, click on the ‘General Settings’ tab.
If you’re not ready to start accepting payments yet, then make sure to enable ‘Put payment gateways in test mode.’
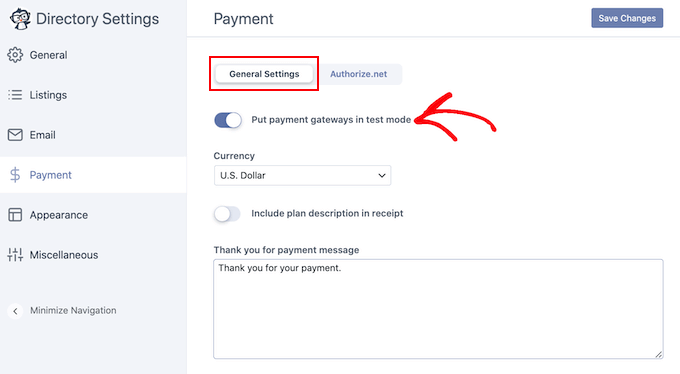
By default, the plugin accepts payments in dollars, but you can select a different currency using the ‘Currency’ dropdown.
You can also type in a different thank you message, which will be shown to users when they send you a payment.
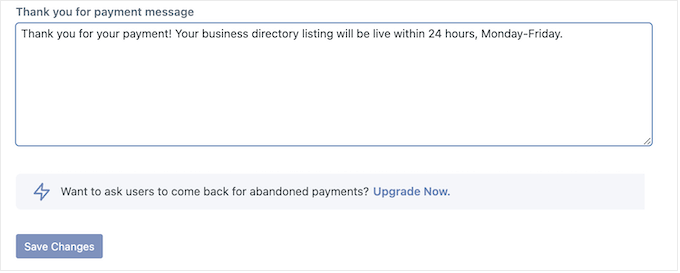
When you’ve finished configuring the payment settings, don’t forget to click on ‘Save Changes’ to store your settings.
Create Payment Plans
Before you can accept payments, you’ll need to create at least one payment plan. To start, go to Directory » Directory Content and then click on ‘Plans’ in the left-hand menu.
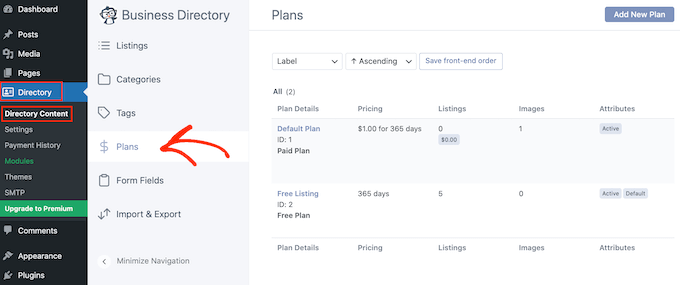
The plugin comes with a free plan and a default plan, which is $1.00 for 365 days.
To change either of the plans, simply click on its ‘Edit’ link.
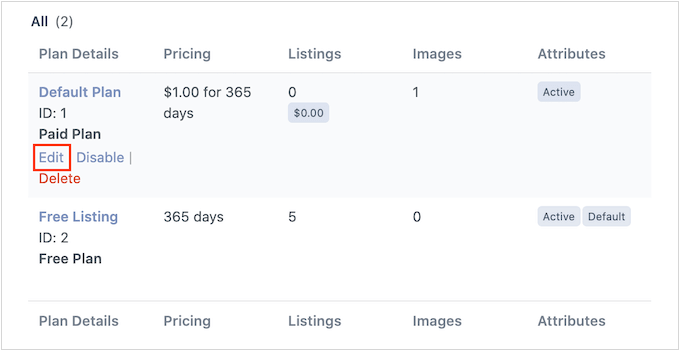
This takes you to a screen where you can make all kinds of changes to the plan.
This includes changing the price or even creating different prices for specific categories.
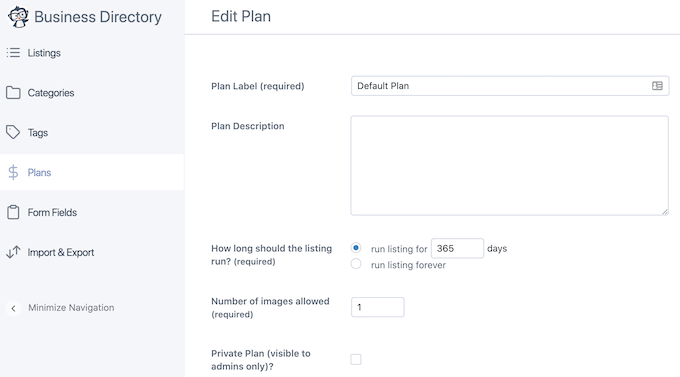
When you’re happy with the changes you’ve made, don’t forget to click on the ‘Save Changes’ button to make your plan live.
Simply repeat these steps to create additional payment plans.
Method 2: Creating a WordPress Directory with Formidable Forms
You can also create a business directory using Formidable Forms.
Formidable Forms is the most advanced WordPress form builder plugin in the market and helps you to create lots of different forms including surveys, payment forms, booking forms, and more.
Formidable Forms also comes with a powerful ‘Visual Views’ feature that you can use to display user-submitted data on your website. Using this feature, you can easily create directories, real estate listings, job boards, event calendars, and more.
With that in mind, let’s create a business directory using the Formidable Forms plugin.
Create a Form to Collect Data for Your Directory
The first thing you need to do is install and activate the Formidable Forms plugin. For detailed instructions, see our guide on how to install a WordPress plugin.
You’ll also need to install Formidable Forms Lite. This free plugin provides the core foundation for the premium plugin’s more advanced features.
Once you’ve done that, go to the Formidable Forms » Global Settings page and select ‘Click to enter a license key manually.’
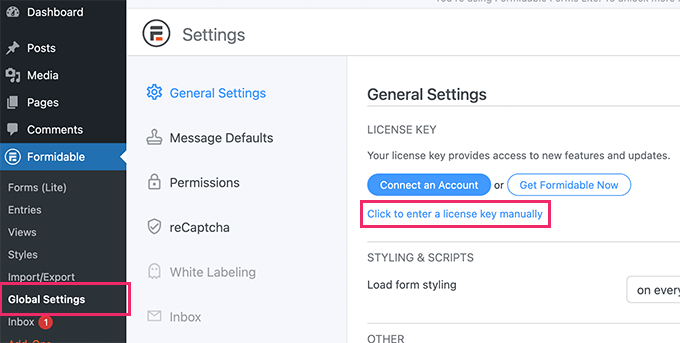
You can find the license key under your account on the Formidable Forms website.
After entering this information, go ahead and click the ‘Save License’ button.
Add a Payment Gateway
Many website owners charge visitors to submit a listing. If you want to create a premium web directory and accept credit card payments, then you’ll need to install an addon and set up a payment gateway.
Formidable Forms can collect payments with Stripe, PayPal, or Authorize.net.
In this guide, we will show you how to accept payments using PayPal, but the steps will be similar to other payment gateways.
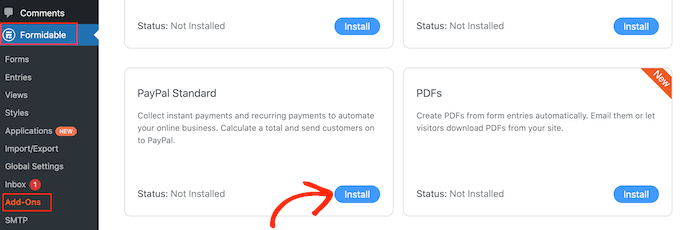
In your WordPress dashboard, go to Formidable » Add-Ons. In the ‘PayPal Standard’ section, click on ‘Install.’
Later in this guide, you’ll use ‘Visual Views’ to display all the information that visitors enter into your form.
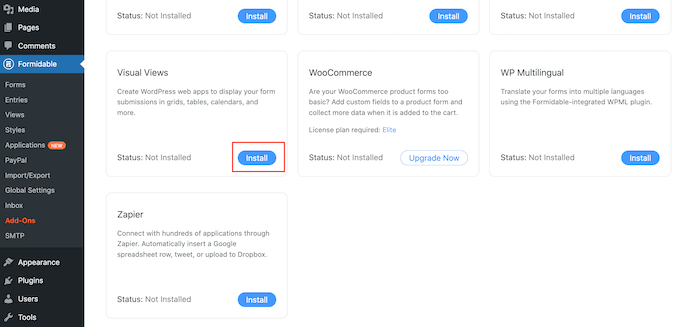
With that in mind, find the ‘Visual Views’ addon and click on its ‘Install’ button, as you’ll need this addon later.
Once you’ve done that, head over to Formidable » Global Settings.
Then, select ‘PayPal’ in the left-hand menu.
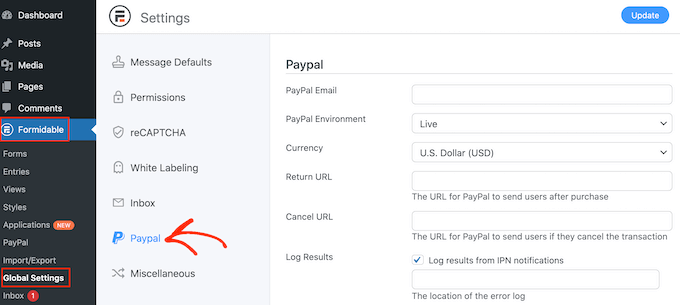
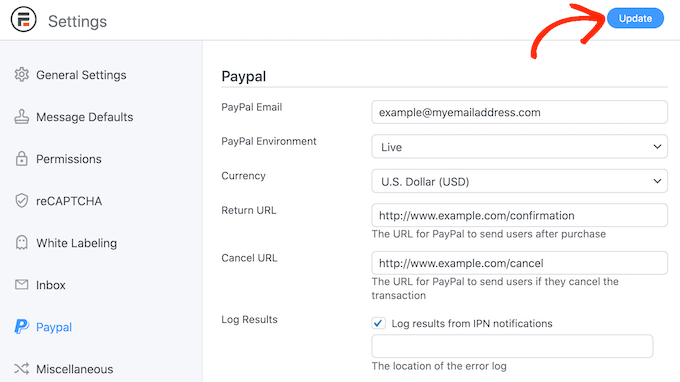
On this screen, type in the email address that’s linked to your PayPal account. You can also change the currency and the URLs that will load after a visitor completes their payment or cancels their order.
After entering this information, click on the ‘Update’ button to save your changes.
Create a Form
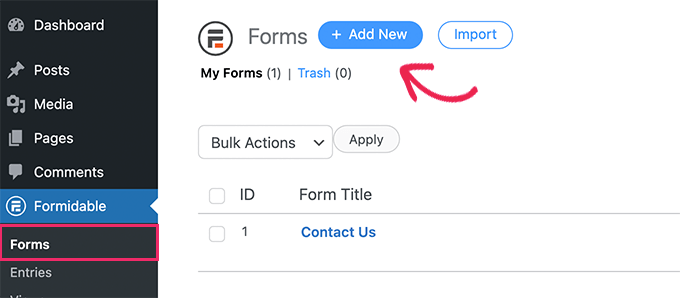
Now you’re ready to create a form by heading over to the Formidable » Forms page.
Here, click on ‘Add New.’
This will bring up a list of all the form templates you can use.
As an example, we’ll create a real estate directory by clicking on the ‘Real Estate’ category.
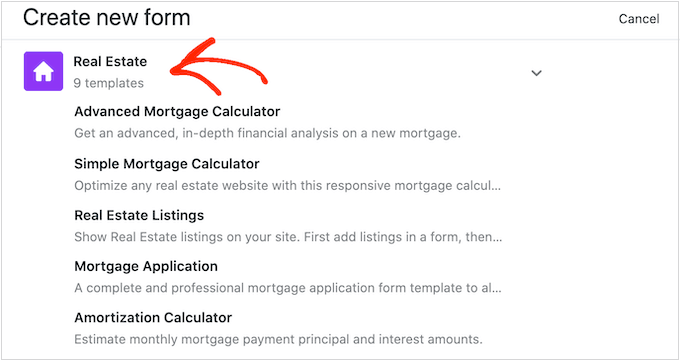
You can now see all the different templates within this category, including multiple mortgage calculator templates.
To preview a template, just hover your mouse over it and then click the little icon that looks like an eye.
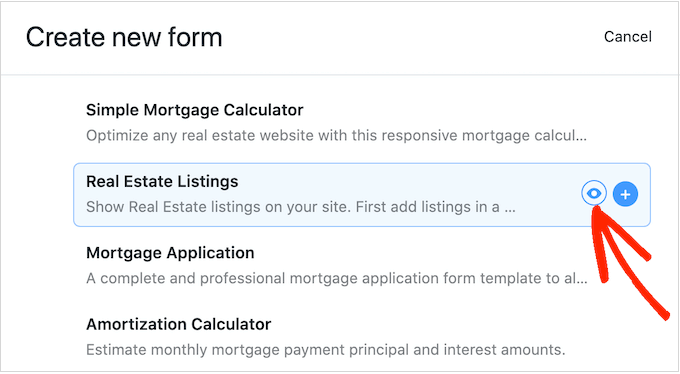
To use a template, hover over it and then click on the ‘+’ icon. We’re using the ‘Real Estate Listings’ template in all our images.
Once you’ve done that, type a title into the ‘Form Name’ field and enter an optional description. This information is just for your reference, so you can use anything you want.
Then, click on the ‘Create’ button.
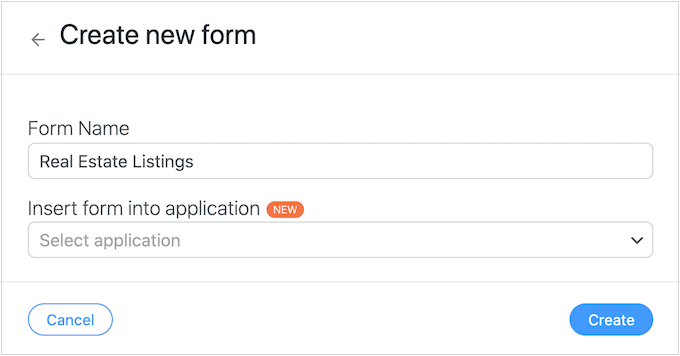
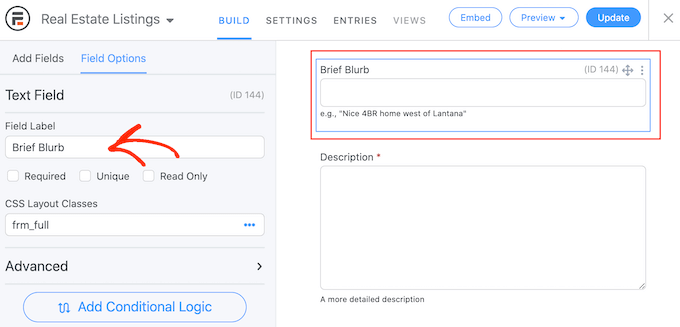
This will open the template in the Formidable Forms editor.
From here, you can simply point and click to customize any field in the form. For example, you might click on the ‘Brief Blurb’ field and then type some new text into ‘Field Label.’
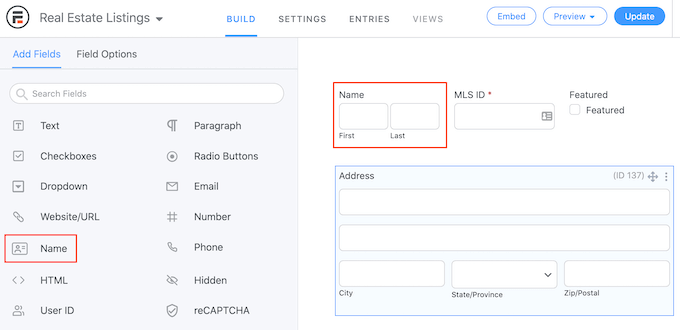
You can also add more fields by selecting ‘Add Fields’ in the left-hand menu.
Then, drag any of the fields onto the form layout. For example, you may want to add a field where the visitor can type in their name.
To continue customizing the template, simply repeat these steps.
When you’re happy with how the form is set up, click the ‘Update’ button at the top right corner of the screen.
Add a Payment Action (Optional)
If you want to collect payments, then you’ll need to add an action to your form. To do this, click the ‘Settings’ tab and select ‘Actions & Notifications.’
After that, click on ‘PayPal’ to add the action to your form.
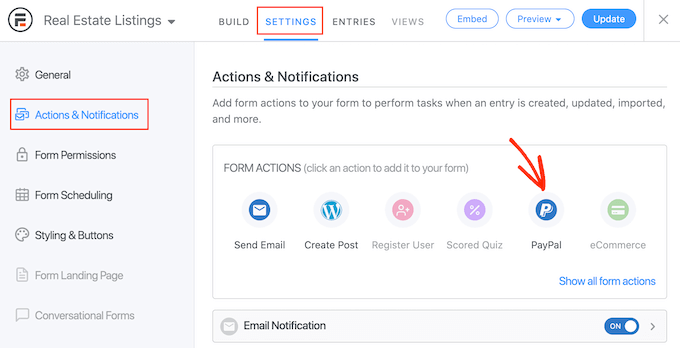
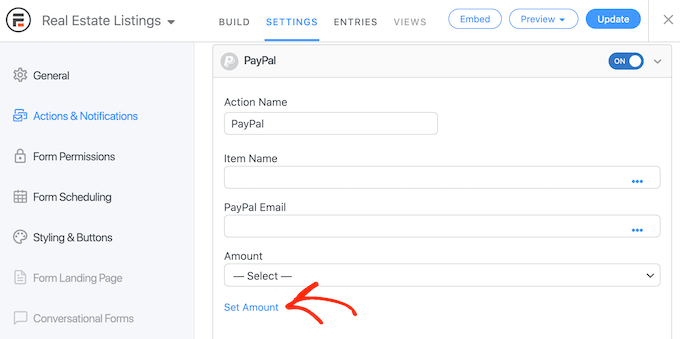
Next, scroll to the ‘PayPal’ section.
To charge visitors a flat fee for creating a new listing, click on ‘Set Amount.’
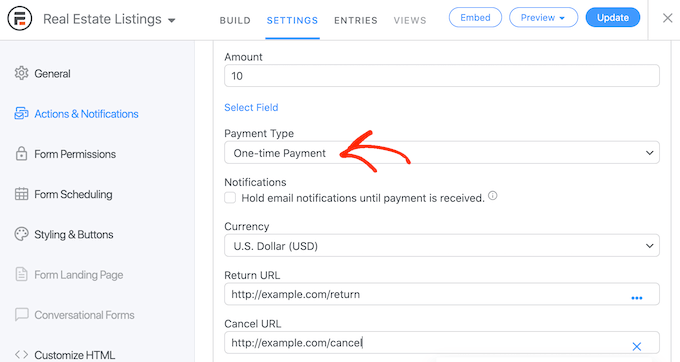
You can now type in how much you want to charge.
You can also choose whether to make this a one-off payment, a donation, or a recurring payment using the ‘Payment Type’ dropdown.
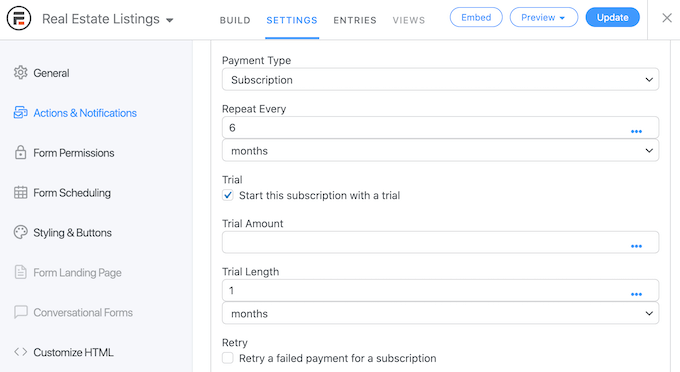
If you select ‘Subscription’, then you can use the controls to specify how often the person will be charged.
In this way, you can earn money from your listings over the long term. You can also offer customers a free trial subscription.
Once you’ve finished configuring PayPal, don’t forget to click on ‘Update’ to save your changes. Now, visitors will need to make a payment before they can submit the form.
2. Publish Your Form in WordPress
When you’re happy with how the form looks, it’s time to add it to a post or page.
As an example, we’re going to add the form to a new page by heading over to Pages » Add New in the WordPress dashboard. You can now give the page a name, upload a featured image, and add any other content that you want to show on the page.
After that, click on the ‘+’ icon and type in ‘Formidable Forms.’
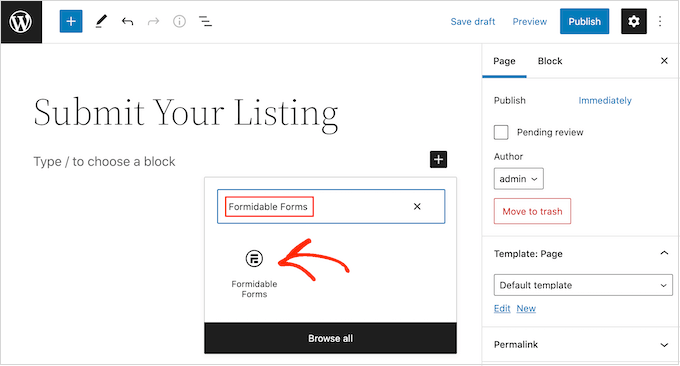
When the right block appears, give it a click to add it to the page.
Next, simply open the ‘Select a form’ dropdown and choose the real estate listing form.
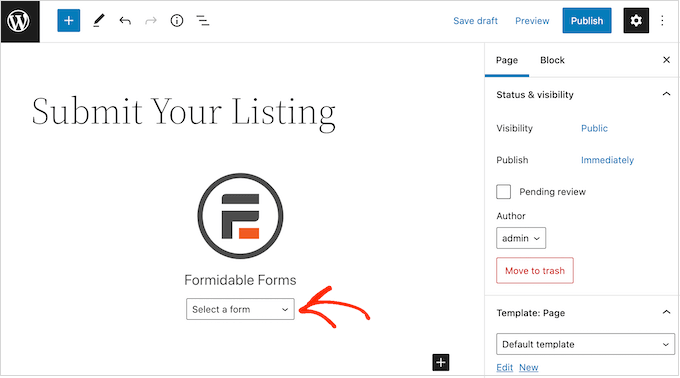
Formidable Forms will then add the form to the post, and show a preview in the block editor.
When you’re ready to make the form live, go ahead and publish the page.
After that, it’s a good idea to add this page to your WordPress navigation menu so people can find it easily. You may also want to send a message to your email list so your audience knows they can now submit listings to your website.
3. Build Your Web Directory with Formidable Views
Next, you’ll want to create a web directory so the user-submitted content appears on your WordPress website.
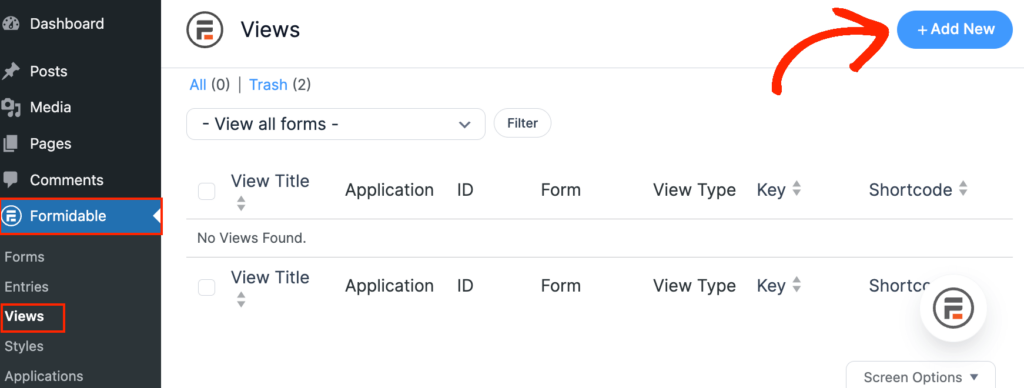
You can do this using the Visual Views feature, so head over to Formidable » Views and then click on ‘Add New.’
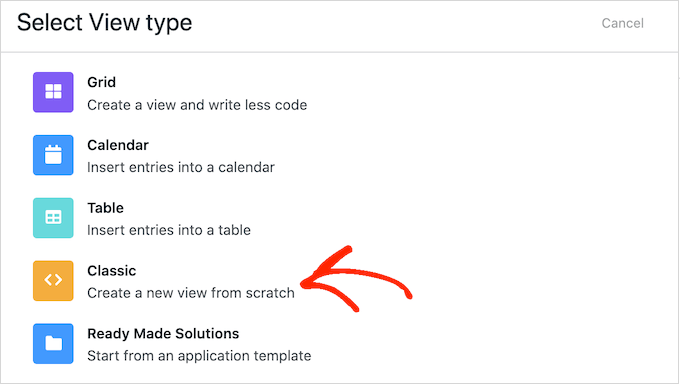
A popup will now show the different layouts that you can use for your directory.
Go ahead and click on ‘Classic,’ as this allows you to create a new layout from scratch.
On the next screen, open the ‘Use Entries from Form’ dropdown and choose the real estate form we created earlier.
Formidable Forms will give your view a name based on the form you’re using as the data source. However, you can change this if you want.
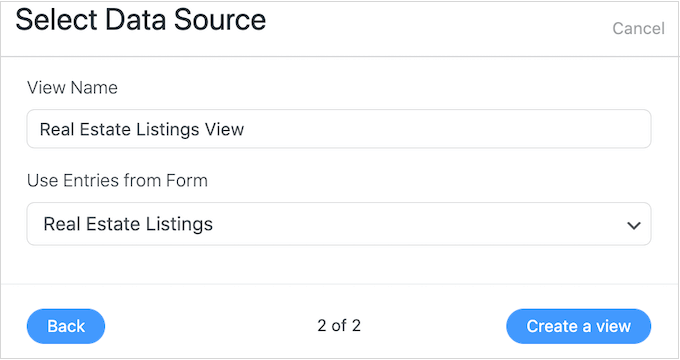
When you’re happy with the information you’ve entered, click on ‘Create a view.’
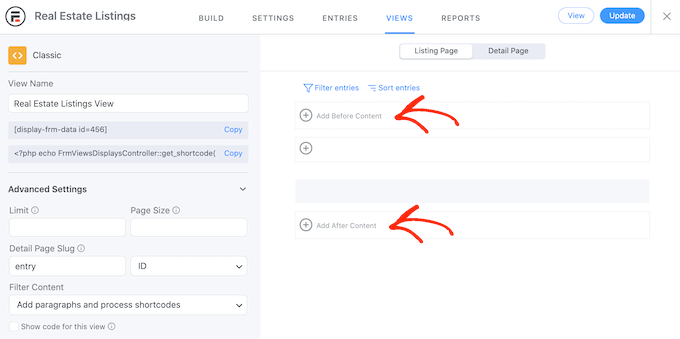
You can now type in any information you want to show above and below the listing. For example, you may want to add your contact information at the bottom of the page.
To do this, simply click on ‘Add Before Content’ or ‘Add After Content.’
This will open a popup where you can type in any text that you want to show above or below the listing’s content.
To the right, there are also some parameters you can use. Formidable Forms will replace these parameters with real values on your website. For example, it will replace [siteurl] with your site’s URL.
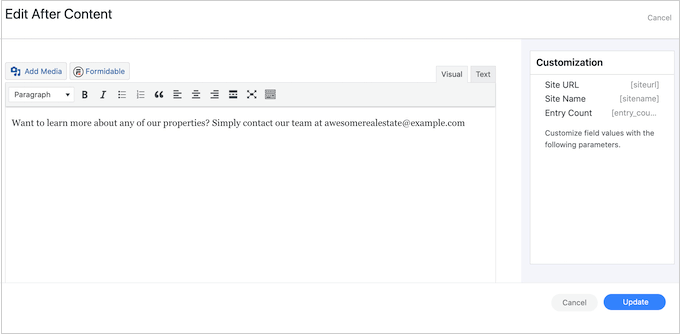
When you’re happy with the information you’ve entered, click on ‘Update’ to save your changes and return to the main view editor screen.
Once you’ve done that, you’re ready to create the layout for the different listings on the directory page. To get started, click on the middle ‘+’ icon.
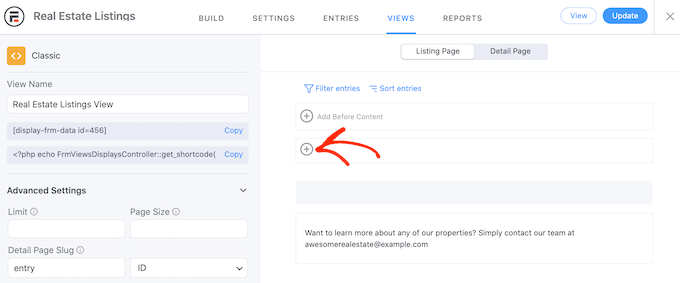
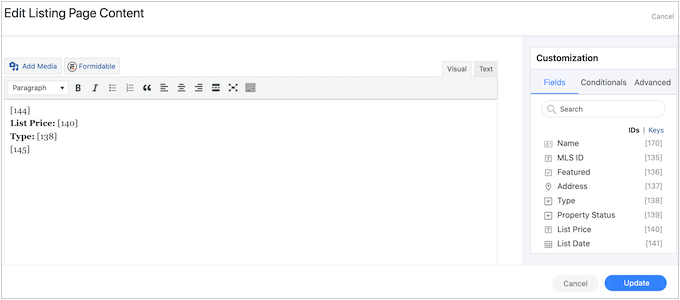
You can now type text into the main text editor and select different parameters in the left-hand menu.
In the following image, we’re creating a simple layout that shows each property’s brief blurb, followed by the listing’s price and type.
Finally, we’ll show the full description.
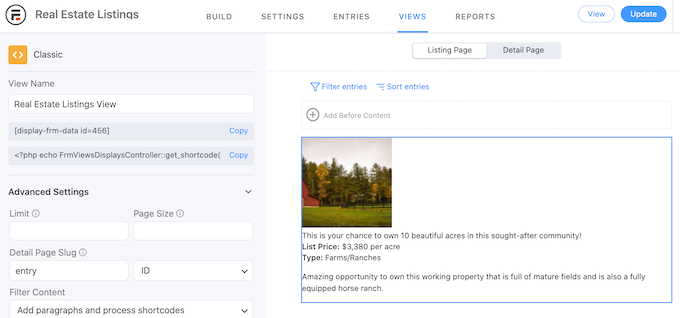
In the following image, you can see an example of how this simple layout will look on your WordPress website.
To expand on this very simple layout, just keep adding more parameters and plain text following the same process described above.

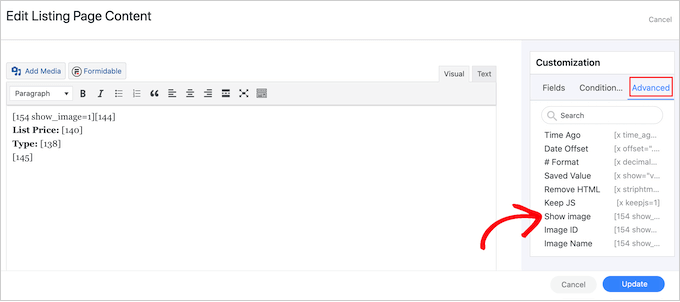
You’ll likely want to show a photo of each property. To do this, click on the ‘Advanced’ tab of the ‘Customization’ box.
Then, click ‘Show Image,’ which displays any images visitors submit.
While you’re working on your layout, you can preview how it will look to visitors by clicking on the ‘Update’ button.
This takes you back to the main editor, which shows a preview of the layout you’re creating.
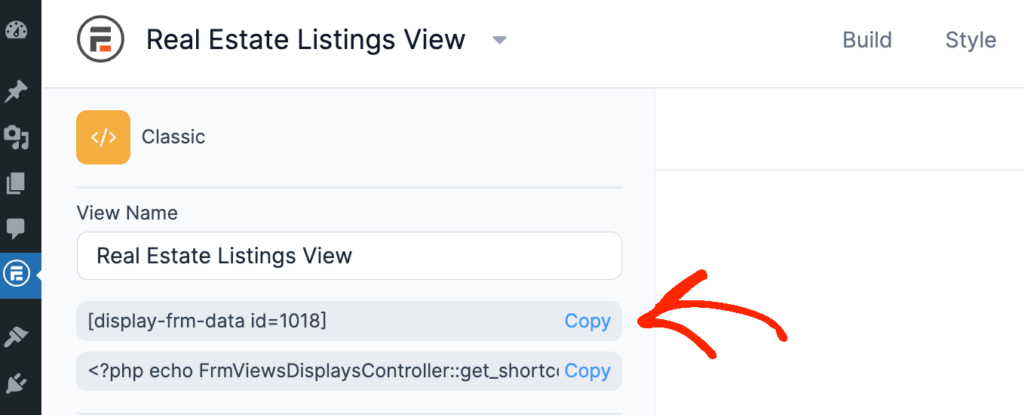
When you’re happy with how the directory looks, you can add it to any page or post using the shortcode in the left-hand menu under ‘View Name.’
Simply find this code and then click on its ‘Copy’ button.
For more details on how to place the shortcode, you can see our guide on how to add a shortcode in WordPress.
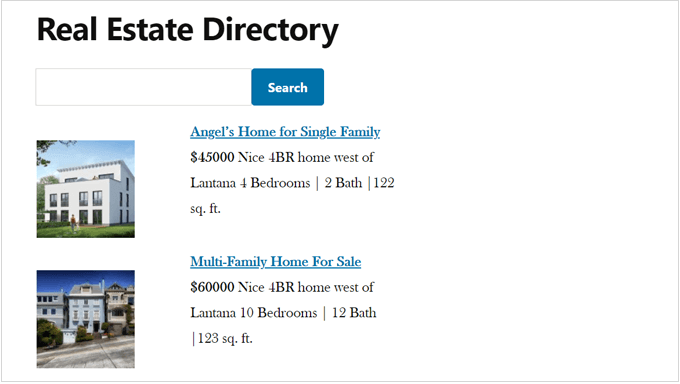
Once you’ve done that, simply visit the page or post to see the finished web directory.
Bonus: Add a Review Feed to Your Business Directory
For some business directories, it may make sense to show customer reviews next to the listings. For example, if you’ve created a directory of local restaurants or hotels then you can improve the visitor experience by showing Yelp reviews for those venues.

Smash Balloon’s Reviews Feed Pro is the best customer review plugin for WordPress.
This single plugin allows you to show reviews from Yelp, Facebook, Google, WordPress.org, Trustpilot, and TripAdvisor, so you don’t need to install multiple plugins.
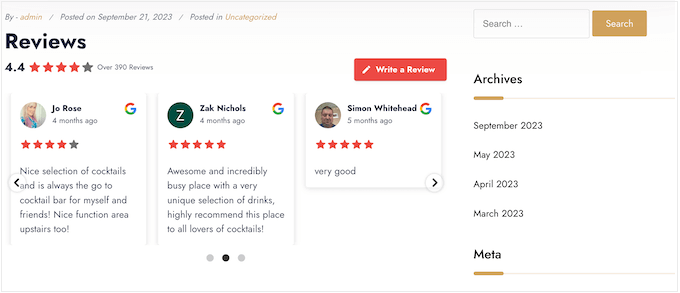
Reviews Feed Pro also automatically copies your website’s design.
This means the reviews will perfectly suit your WordPress theme and look like a natural part of your business directory rather than content embedded from another platform.
Even better, Smash Balloon will fetch new content automatically, so your business directory will always show the latest reviews.
For step-by-step instructions, please see our guide on how to show your Google, Facebook, and Yelp reviews in WordPress.
We hope this article helped you create a web directory using WordPress. You may also want to see our expert pick of the best online order form plugins for WordPress and how to embed Google Forms in WordPress.
If you liked this article, then please subscribe to our YouTube Channel for WordPress video tutorials. You can also find us on Twitter and Facebook.


Daphane Simmons
Thank you WPBeginner. The business directory review and step-by-step outline was very good. I’m new to WordPress and now think I will pursue creating a website with WordPress.
WPBeginner Support
Glad we could help make you more comfortable starting a site
Admin
Mrteesurez
Please, what is the difference between formidable form and the formidable views, is it a part of it or a different plugin entirely ?
WPBeginner Support
The views are a part of Formidable Forms
Admin
Mrteesurez
Thanks for the clarification, I initially thought it’s another plugin entirely or an add-on to Formidable form.
jeff
If I install directory theme , do I still need to install plug in?
WPBeginner Support
It would depend on the theme, some have the functionality added while others only offer the styling. If you do use a theme with directory functions it would also make it difficult to move your content to a new theme
Admin
crassus David
How do create real estate site using wordpress?
Please help.
WPBeginner Support
To create a real estate site you would want to take a look at our article here: https://www.wpbeginner.com/wp-tutorials/how-to-create-an-idx-real-estate-website-using-wordpress/
Admin
Brandon
Can you tie directory results to user submitted form?
Emmanuel
hi am trying to combine an inventory and a directory functionality on a website and I would love if the users can search for specific products that are available in stores near them. pls how do I achieve this? thanks
Rizwan
I tried submit listing as a visitor, it required me to register with site, it gives email and activation link and after that new user is created with limited dashboard (actually only profile) what i want is that anyone can submit his business details in created listings and what i have to do is to approve or disapprove (like we do with comments)
Aurora
This is exactly what I’m looking for. Great post as usual!
desy
It will be great if you give demo link
Ravinder Singh
Hello i am WordPress user want to create a WordPress web directory.
Please can anyone help me in detail.
Archanian
Great article, I loved it. I was thinking about creating a directory website and wanted to use WordPress but I wasn’t sure if WordPress would be a good choice. Your article here answered several questions I have been seeking answers for.
I was a little unsure about using WordPress for this purpose but was seriously thinking about it since I am quite familiar with it.
You info here has helped me to decide to go for it and see what I can do with it.
Thanks for the write-up, it was just what I was looking for.
Tushar Bhambare
please give demo link
Nouman Younas
It will be great if you give demo link
RickyO
There are other plugins that offer much more (such as photos, events, scheduling, attendance sales, and multiple layouts for viewing the listings by biz type, dates [current day, past and future]), and easy to install and maintain.
The GF solution just seems like too much detail work.
Siddharth Saudagar
Can you please provide names of such plugins?
Andrea Pernici
The problem with Wordpress directories is that you can’t manage any level of permission by category for example.
Do you know a way to set the proper user levels to a Wordpress Directory plugin or theme?
Janet Barclay
I love Gravity Forms, but had a bad experience with the Directory add-on, which is a third party plugin and not supported by Gravity Forms. The support is next to zero, but I got by until one day my directory just disappeared.