If you are a photographer, artist, or designer, then it’s a good idea to create a portfolio website showing off your work. On top of that, making your portfolio filterable will allow visitors to sort and view your photos based on tags.
This helps you showcase different styles of your work, and users can easily discover items that interest them.
WordPress doesn’t allow you to do this out of the box, so we decided to look for an easy solution. And this article, we will show you how to easily create a filterable portfolio in WordPress.

Why Create a Filterable Portfolio in WordPress?
Most photographers and designers create beautiful portfolios showing their best photographs. However, sometimes, people looking to hire you may want to see if you have done something similar before.
For example, someone looking for a fashion photographer might want to see your previous work in fashion.
Adding filters to your portfolio allows you to show your work under different tags. It also helps your users to easily sort items in your portfolio.
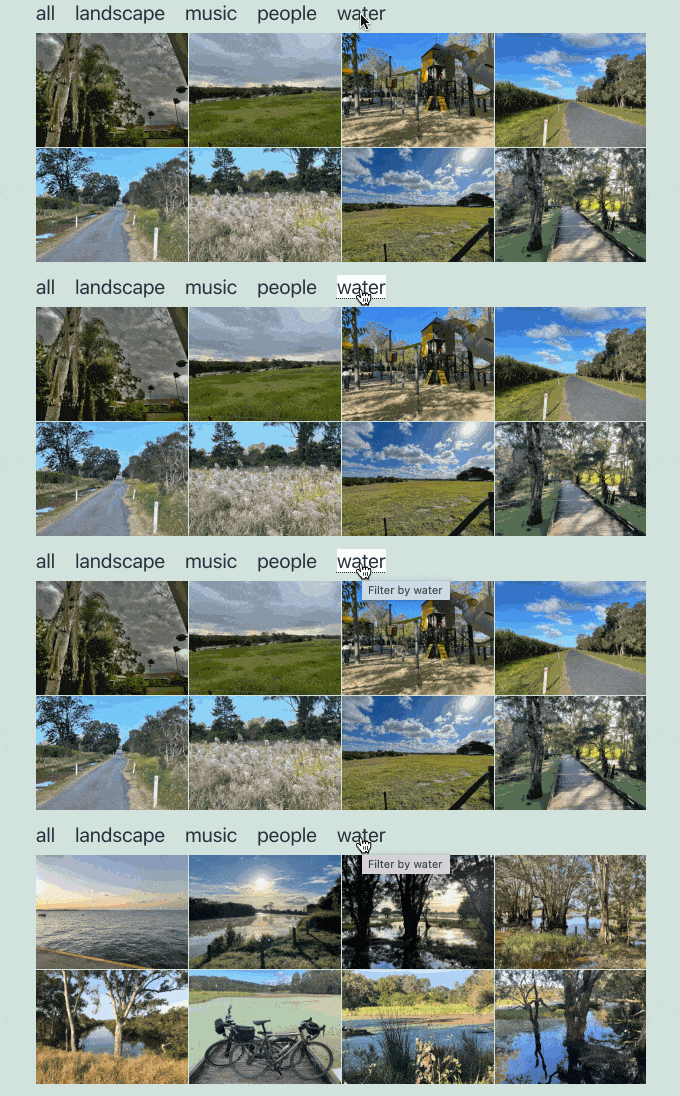
Having said that, let’s take a look at how to easily create a filterable portfolio on your WordPress website without writing any code.
Creating a Filterable Portfolio in WordPress
First, you will need to install and activate the Envira Gallery plugin. For more details, see our step-by-step guide on how to install a WordPress plugin.
Envira Gallery is a premium WordPress plugin, and you will need at least the Plus plan to access the Tags addon.
For more details, you can see our complete Envira Gallery review.
Upon activation, you need to visit the Envira Gallery » Settings page to enter your license key. You can get this information from your account on the Envira Gallery website.
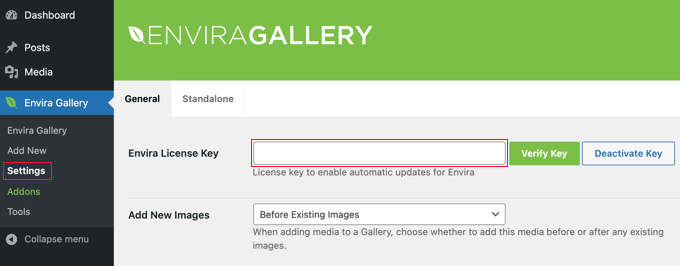
Once you have entered the key, you should click the ‘Verify Key’ button. You will see a message that the site is now receiving updates.
Next, you need to install the tags addon. To do that, head over to the Envira Gallery » Addons page and find the Tags Addon.
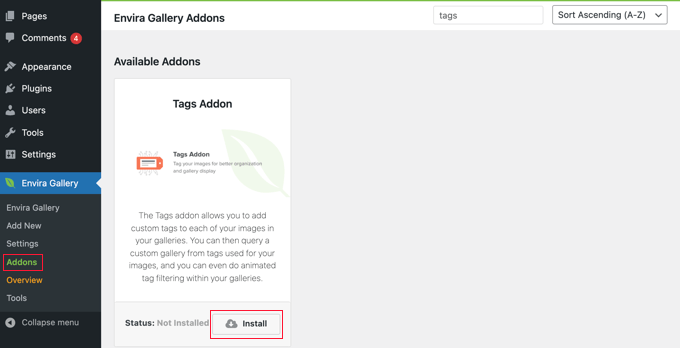
Once you find it, you need to click on the ‘Install’ button.
Envira Gallery will fetch and install the addon for you, and then you will need to click on the ‘Activate’ button to start using it.
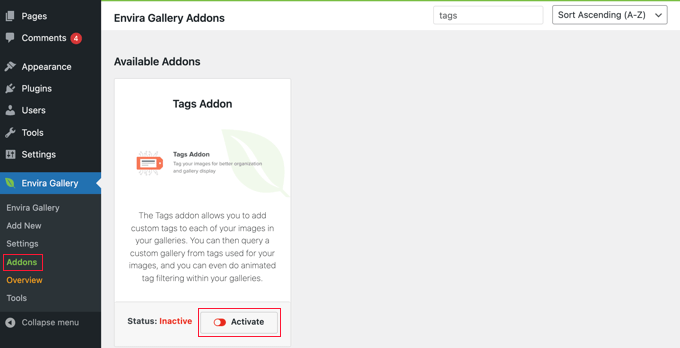
Now, you are ready to create your filterable portfolio.
Head over to the Envira Gallery » Add New page to create your first gallery and give it a name.
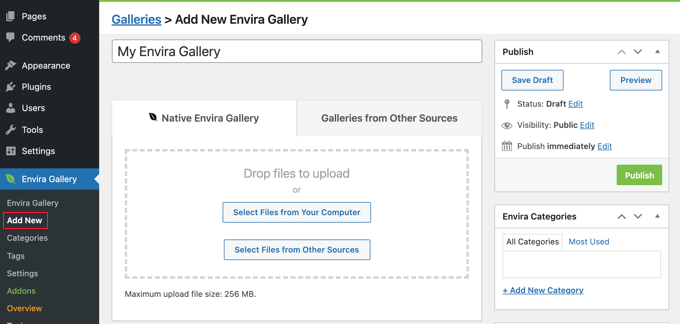
If you want to upload your photos to the gallery, then you should click the ‘Select Files from Your Computer’ button.
If the photos are already in the WordPress media library, then you should click the ‘Select Files from Other Sources’ button.
Envira will now upload and insert those files into your gallery. Once it’s done, you can scroll down to see your images.
For more details, see our guide on how to add image galleries in WordPress.
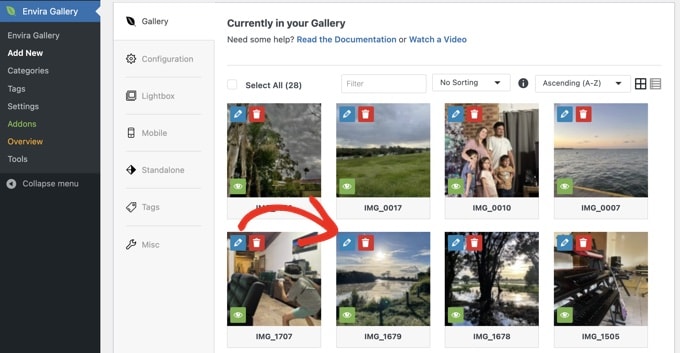
Now, you need to click on the pencil icon to edit an image.
This will bring up a popup where you can add the tags and other metadata to your photos.
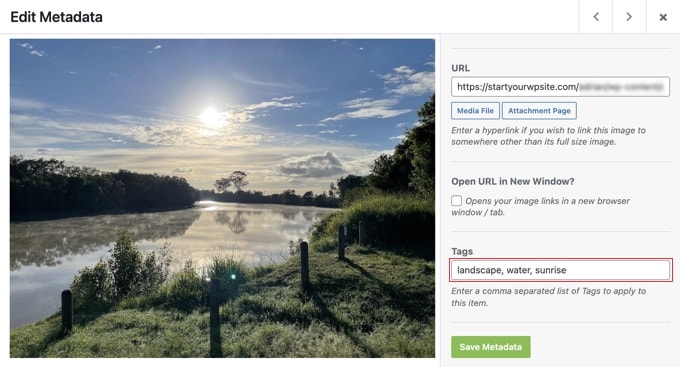
Enter the tags you want to assign to this photo. You can add multiple tags separated by a comma. Once done, click on the ‘Save Metadata’ button to store your tags.
Now, you need to repeat the process to add tags to all images in your gallery.
After adding tags to your photos, click on the ‘Tags’ tab on the left of your gallery page. This is where you can enable or disable tag filtering for your gallery.
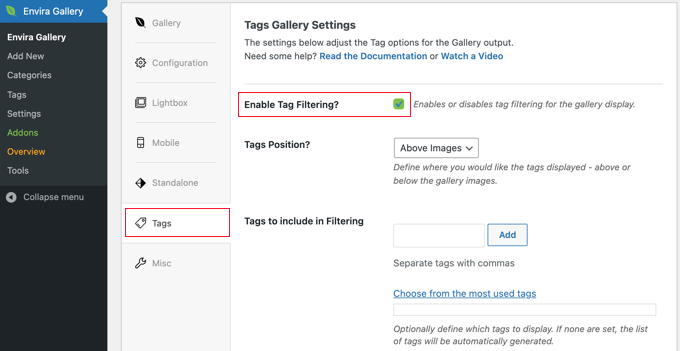
You need to check the ‘Enable Tag Filtering?’ box to enable tag filtering, and you will be able to see settings for this option.
You can show tags above or below the gallery, show all tags or select tags to show, and configure other display settings.
Once you are done, simply click on the ‘Publish’ button to make your gallery live. Your portfolio gallery is now ready to be added to your site.
Adding the Filterable Portfolio to Your WordPress Website
You can now create the post or page where you want to display your filterable portfolio. If you are using the block editor, then simply add an Envira Gallery block to the article.
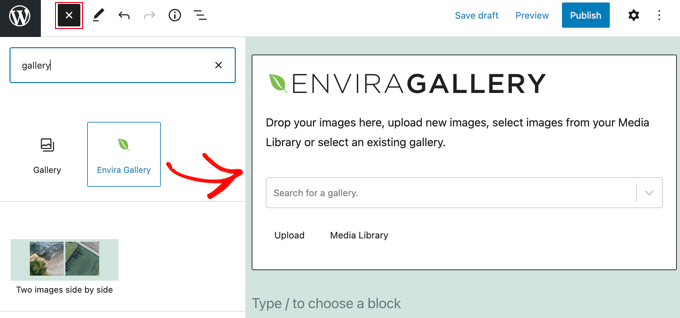
After that, you should click on the ‘Search for a gallery’ dropdown menu and select the gallery you published earlier.
If you are using the classic editor, then you should click the ‘Add Gallery’ button that you will find under the post or page title.
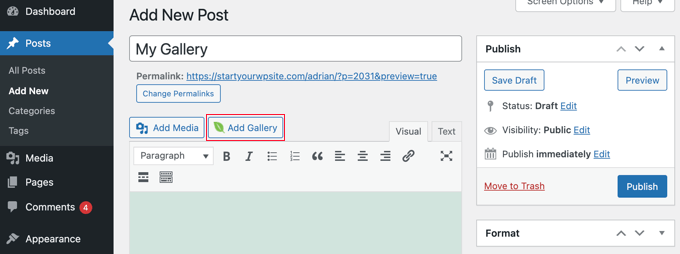
This will bring up a popup where you can select the gallery you just created and insert it into your WordPress post and page.
You can now update your post or page to save your changes and preview your website to see your filterable portfolio in action.
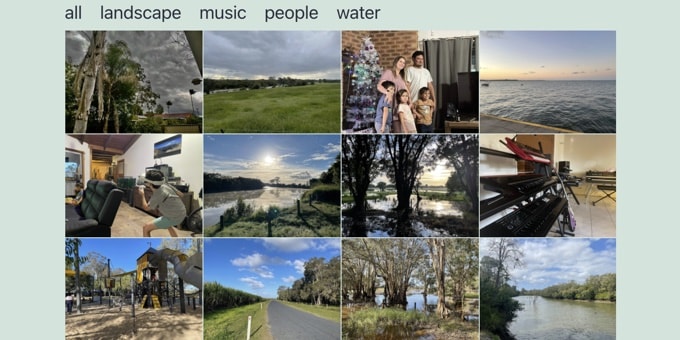
If you would like to learn more things that you can do with Envira Gallery, then just check out these tutorials:
- How to Create an Image Gallery in WordPress (Step by Step)
- How to Add a Gallery in WordPress with a Lightbox Effect
- How to Automatically Add Watermark to Images in WordPress
Video Tutorial
We hope this article helped you add a filterable portfolio in WordPress. You may also want to learn how to create a WooCommerce product image gallery or see our expert pick of the best WordPress photo gallery plugins.
If you liked this article, then please subscribe to our YouTube Channel for WordPress video tutorials. You can also find us on Twitter and Facebook.


Dennis Muthomi
Filterable galleries are a must-have for creatives.
A helpful tip I’ve learned is to create a standardized tagging system before setting up your Envira Gallery tags. I do this with all my photographer clients. I stick to consistent tags like “wedding,” “portrait,” and “commercial” across their work. It’s super helpful for two reasons:
– Makes portfolio maintenance way easier
– Creates a better filtering experience for visitors
BTW, the Tags Addon you mentioned has been perfect for implementing this system!
Haim
All the photo galleries I found so far that support Tags allow filtering one tag at a time. I’d like to implement gallery where I can filter based on multiple tags to get the photos having ALL the tags. For that the Tag selection should be in a checkbox form to allow checking more than one. Can anyone point me to such solution for WP? Thanks.
divp
nice one keep sharing
Lewis
Really awesome article, I loved this theme and soon I will be hiring a web developer to build me a theme like this. Thanks!