Protecting your hard work is essential, especially when it comes to your WordPress website. So, it makes sense if you’re looking for a way to back up your WordPress site to Dropbox.
Based on our experience, it’s best practice to regularly back up your site and store it in a separate location, like Dropbox. This way, you can easily restore your content, plugins, databases, and important settings if there is a security breach or something goes wrong.
Lots of our partner brands currently rely on Duplicator for backups, and they’ve all had really positive experiences with it. So, we can confidently recommend it for all your backup needs.
In this article, we will show you how to back up a WordPress site to Dropbox, step-by-step, using Duplicator.

Why Back Up a WordPress Site to Dropbox?
Whether you are running a small WordPress website, an eCommerce store, or any other type of website, then creating regular backups is essential.
A backup is a copy of your website that includes important files, folders, databases, site content, themes, plugins, and other information.
With backups, you’ll have a copy of your website ready in case of a fatal error or security vulnerability. Then, you can restore your website to its previous state in just a few clicks.
Storing your WordPress backups on your computer’s hard disk or website server can be risky. If your hard disk fails or the website server gets compromised, you’ll lose all your backups.
That’s why storing backups in multiple locations is a good practice, including cloud storage services like Dropbox.
Dropbox is a popular file-hosting service that lets you store and back up files to the cloud. The best part is that you can access, save, and share these files from anywhere.
In this article, we will show you how to back up WordPress to Dropbox. Here is a quick overview of all the steps we will cover in this guide:
Let’s get started.
Connecting Your WordPress Site to Dropbox
The easiest way to create WordPress backups and save them in Dropbox is by using the Duplicator plugin. It’s a beginner-friendly WordPress backup plugin that helps you to back up, migrate, and clone your website.
Several of our partner brands trust Duplicator for handling their backups. They’ve consistently reported that it’s been a reliable and efficient solution for safeguarding data.
We’ve also researched and tested this tool in depth. To learn more, you can refer to our complete Duplicator review.
One of the reasons we love the Duplicator plugin is because it easily integrates with different cloud services like Dropbox, Google Drive, Amazon S3, OneDrive, FTP, and SFTP – SSH.
Note: We will use the Duplicator Pro plugin for this tutorial because it includes cloud storage integrations. There’s also a free version of Duplicator you can use to create site backups, but it doesn’t allow you to automatically store those backups in Dropbox.
First, you’ll need to install and activate the Duplicator Pro plugin. If you need help, then please see our guide on how to install a WordPress plugin.
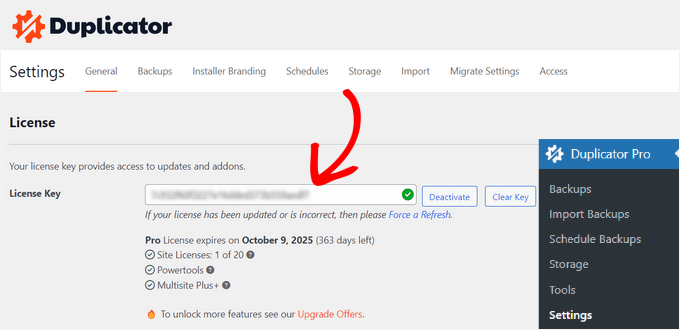
Upon activation, you need to head to Duplicator Pro » Settings from the WordPress admin panel and click the ‘Licensing’ tab.
Next, go ahead and enter your license key and click the ‘Activate’ button. You can easily find the license key in your Duplicator account area.
Once you do that, you’ll need to connect your Dropbox account with Duplicator.
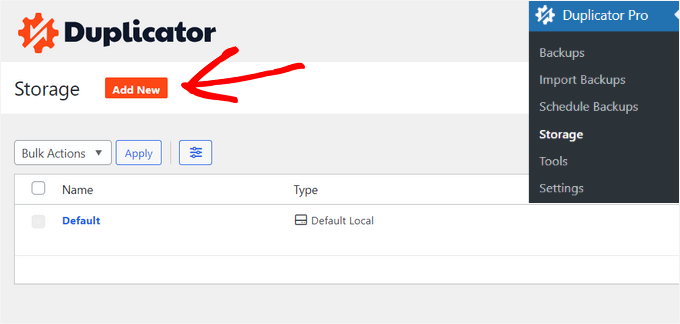
Simply go to Duplicator Pro » Storage from your WordPress dashboard. Here, you’ll see your local storage option, where the backups will be stored by default.
Go ahead and click the ‘Add New’ button to add Dropbox.
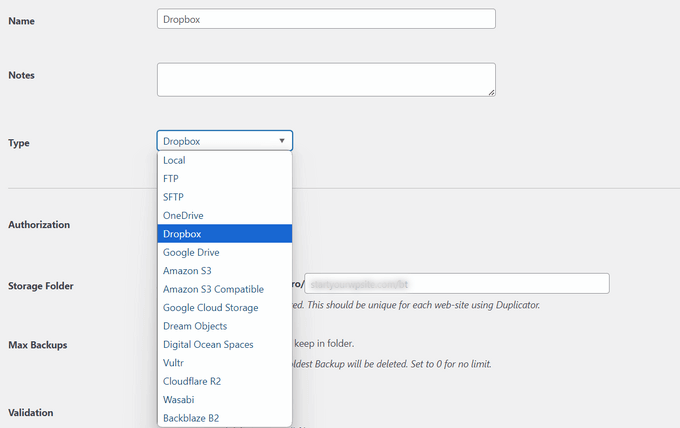
After that, you can enter a name for your new storage option so it is easily recognizable. For example, we will name it ‘Dropbox’.
The next step is to click the ‘Type’ dropdown menu and select the ‘Dropbox’ option.
From here, you will see new settings for your storage option.
Go ahead and click the ‘Connect to Dropbox’ button.

After clicking the button, more settings will appear in the Authorization section.
From here, you’ll need to click the ‘Authorize Dropbox’ button.
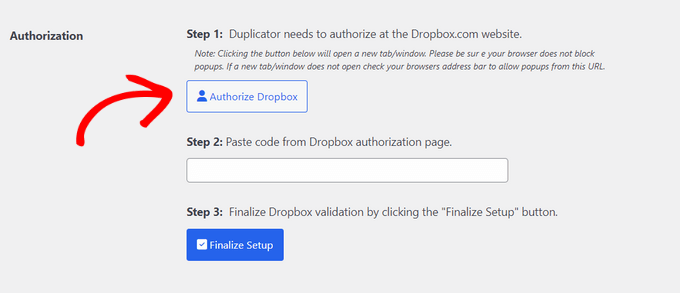
Then, a new window or tab will open. Simply log in to your Dropbox account.
You can sign in using your Google or Apple account or by entering the email and password you used when signing up for Dropbox.
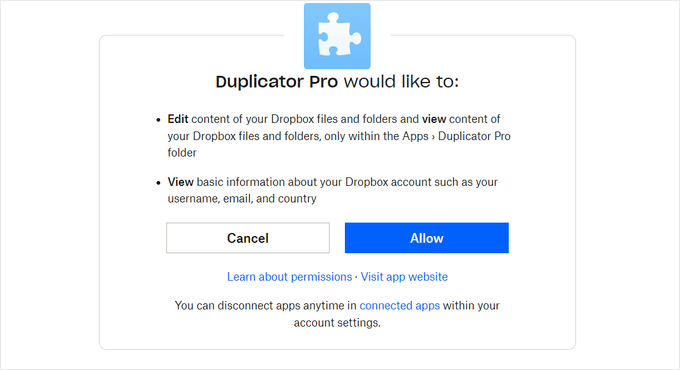
Once you are logged in, you will need to allow access to your Dropbox account.
Go ahead and click the ‘Allow’ button.
You will then see an authorization code.
All you have to do is simply copy this code.
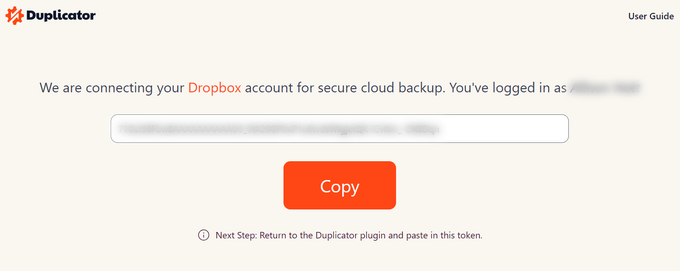
You can now return to the browser tab or window where you are configuring the Duplicator Pro storage settings.
Go ahead and paste the code into the ‘Step 2: Paste code from Dropbox authorization page’ field.
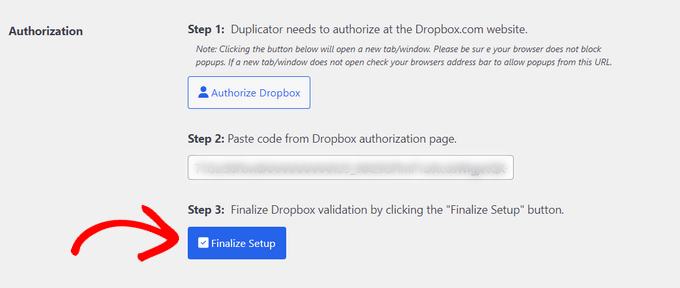
Once that’s done, simply click the ‘Finalize Setup’ button.
You have now successfully added Dropbox as a cloud storage option to save your WordPress backups.
Creating a Dropbox Backup of Your WordPress Website
The next step is to create a backup of your WordPress blog or website and save it to Dropbox.
To start, you’ll need to go to Duplicator Pro » Backups from the WordPress admin panel and click the ‘Add New’ button.
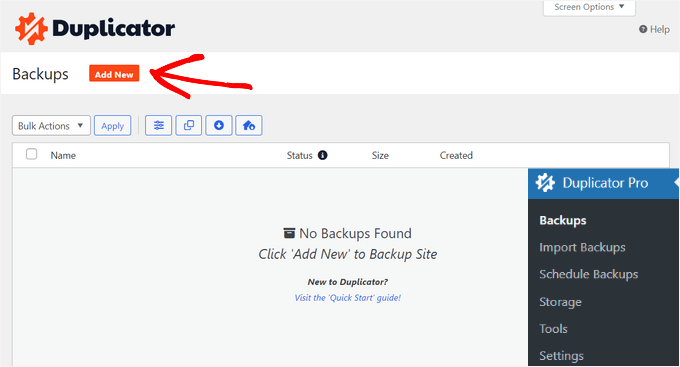
Then, you can name your backup package. You can also use the dynamic tags to automatically name your backup using a format like the date, time, and your site title, for example.
In this panel, Duplicator will also give you the option to select a template. We recommend keeping it as ‘Unassigned’ because it will keep the settings from the last scan/build.

After that, you’ll want to expand the ‘Storage’ section.
Here, you need to select ‘Dropbox’ as the storage option to store your WordPress backup.

You can also change the ‘Backup’ settings before backing up your site. By default, the plugin will package your site’s content, plugins, themes, databases, and all other files.
However, you can customize your backup by selecting which part of your site to back up. For instance, you might archive only the WordPress database.
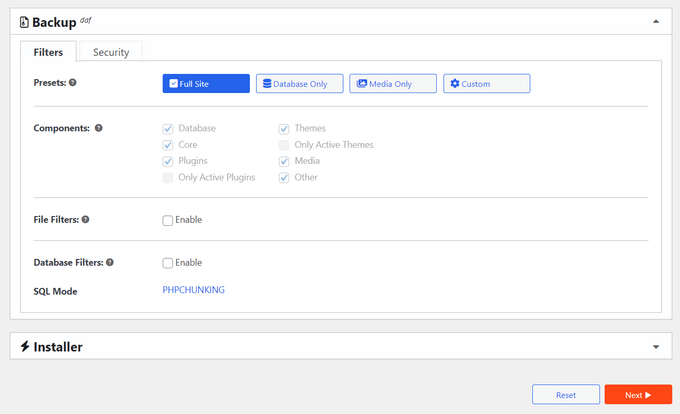
When you are done, simply click the ‘Next’ button at the bottom.
On the next screen, Duplicator will scan your website and check if everything is fine before creating a backup. You will see a notice or a warning for any issues that need to be resolved before backing up your site.
Once everything checks out, simply click the ‘Create Backup’ button.
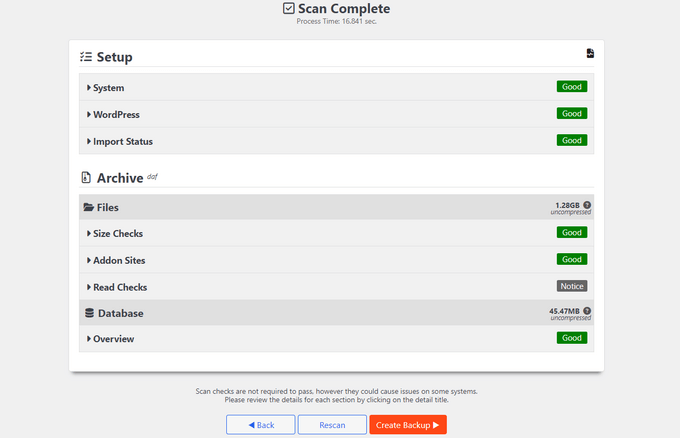
The plugin will take a few seconds or minutes to create a backup package. The time will depend on the size of the files and folders.
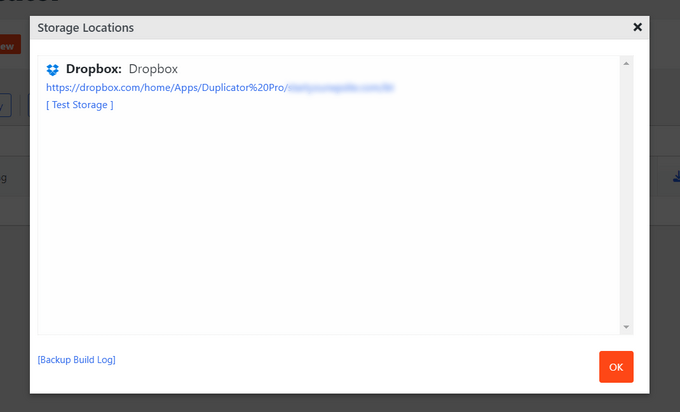
Once the package is ready, it will be saved in Dropbox. You can view the Dropbox location by clicking the ‘Storage’ icon.
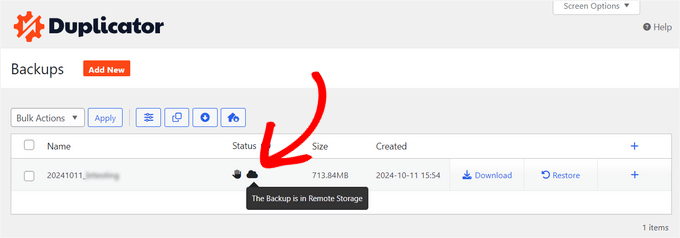
A new window will now open with the location.
You can simply click on the link to view your WordPress backup in the Dropbox dashboard.
Scheduling WordPress Backups to Dropbox (Pro Plugin Only)
With Duplicator Pro, you can schedule regular website backups and store them in Dropbox.
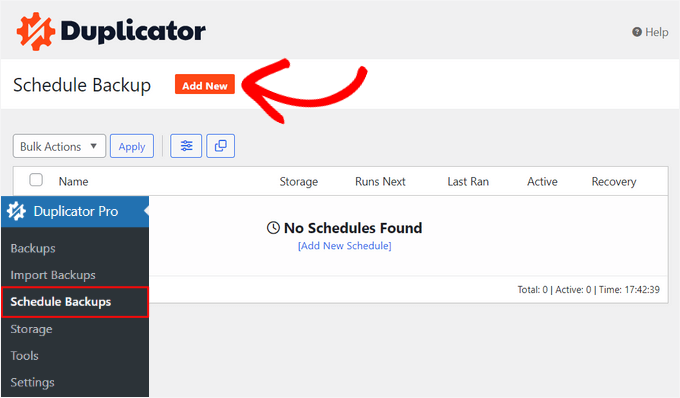
First, you’ll need to go to Duplicator Pro » Schedule Backups from the WordPress dashboard and click the ‘Add New’ button.
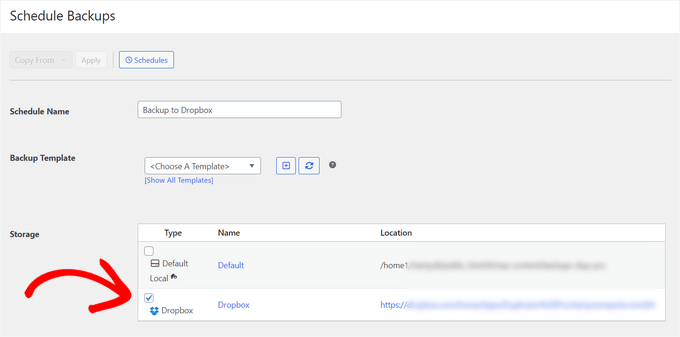
On the next screen, you can enter a name for your backup schedule and select a template. We recommend using the default template so that all your website files, folders, and databases are backed up.
After that, you can select ‘Dropbox’ as the storage location for your backups.
Then, you’ll need to scroll down and choose when the plugin should automatically create a backup.
You can select whether you’d like to build a package hourly, daily, weekly, or monthly. For instance, if you select the weekly option, then you can choose which day to schedule the backup.
There is also an option to choose the start time for your schedule. Lastly, make sure that the ‘Enable This Schedule’ option is checked so that your schedule is active.
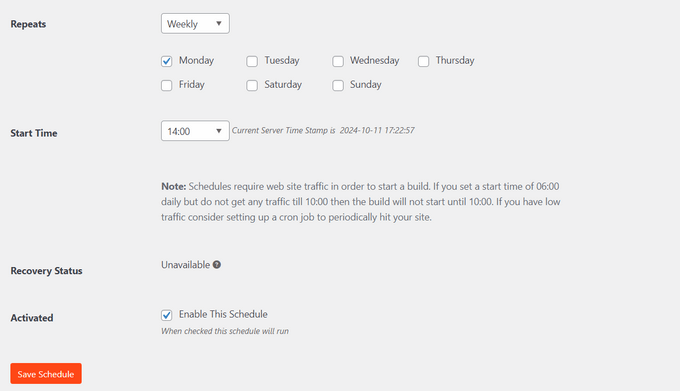
Once you are done, simply click the ‘Save Schedule’ button.
Restoring a WordPress Backup From Dropbox
Now that you have scheduled regular backups, you will always have a copy of your site in Dropbox. This way, you can easily restore the backup if there is a fatal error, data loss, or security breach.
To restore your site, you will first need to open your Dropbox account and head to the Duplicator Pro folder.
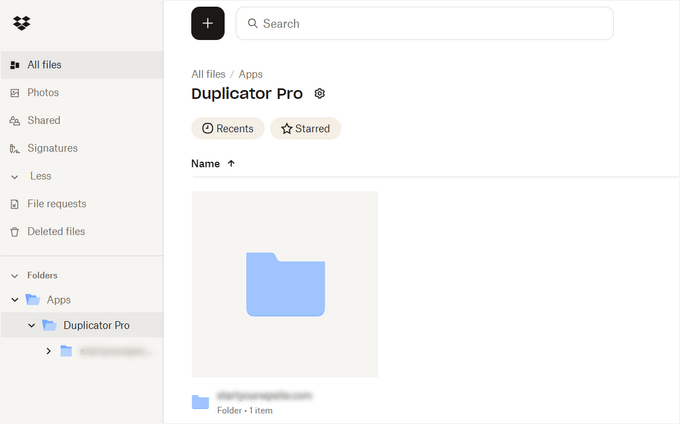
Next, go ahead and select the website backup you would like to download.
Simply click the 3 dotted icons and then select the ‘Download’ option.
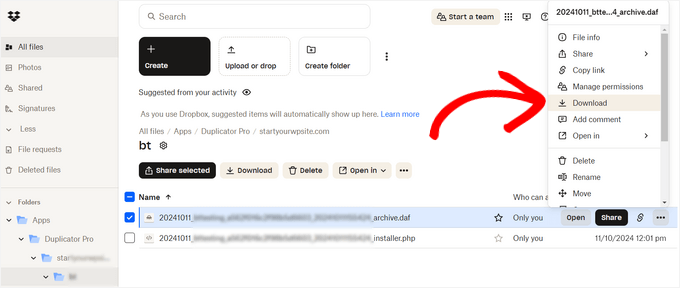
From here, you can save the zip file on your computer.
After that, you must go to your WordPress dashboard and head to Duplicator Pro » Import Backups. Go ahead and click the ‘Select File’ button.
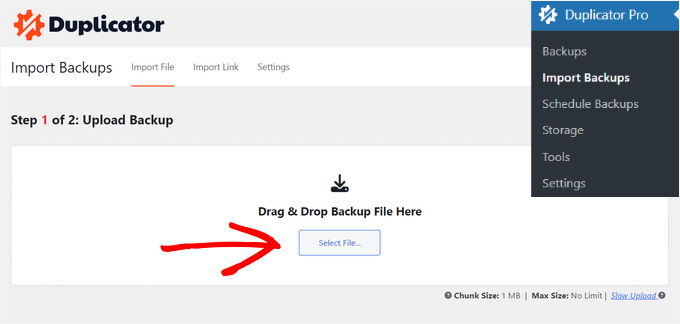
Next, you can select the zip file from your computer to restore the website backup.
Once the file is uploaded, you can scroll down to see the package details. Simply click the ‘Continue’ button.
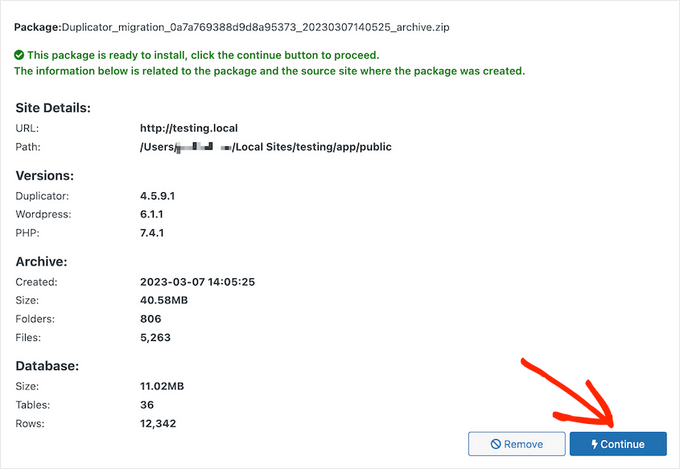
On the next screen, you’ll see an overview of your package. For instance, it will show the number of posts, pages, media files, plugins, and more that are in the backup.
Go ahead and click the ‘Launch Installer’ button.
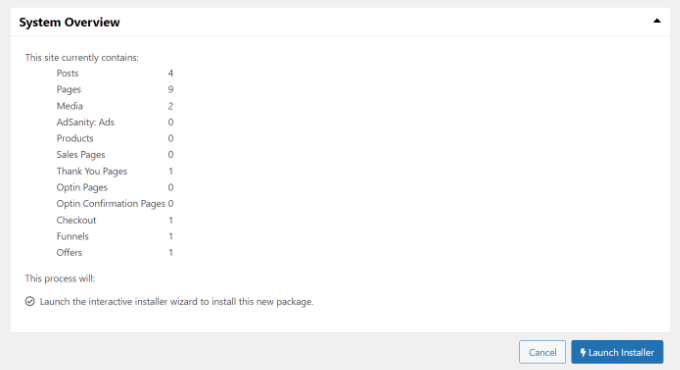
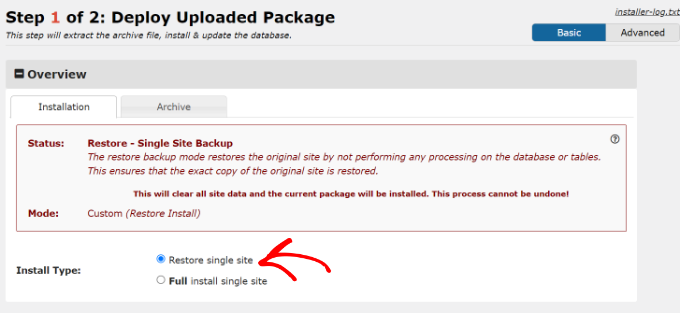
Once you click the button, the Duplicator installer wizard will launch.
First, you will need to choose an ‘Install Type’ for your package. Go ahead and select the ‘Restore single site’ option.
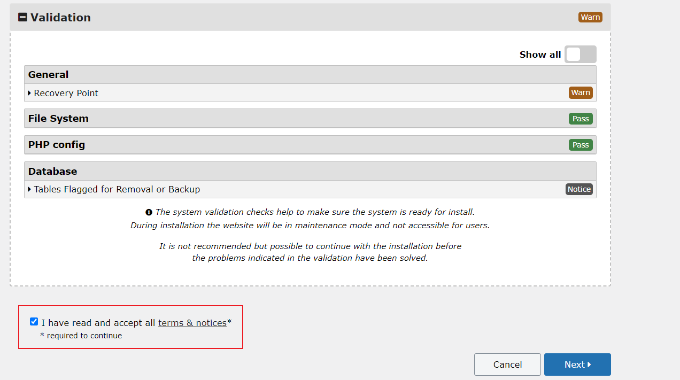
Next, you can scroll down to view the ‘Validation’ checkpoints and make sure the system is ready to install the backup. If there are any warnings or notices, then you must resolve them before restoring the backup.
Once that’s done, click the checkbox for ‘I have read and accepted all terms & notices’ and click the ‘Next’ button.
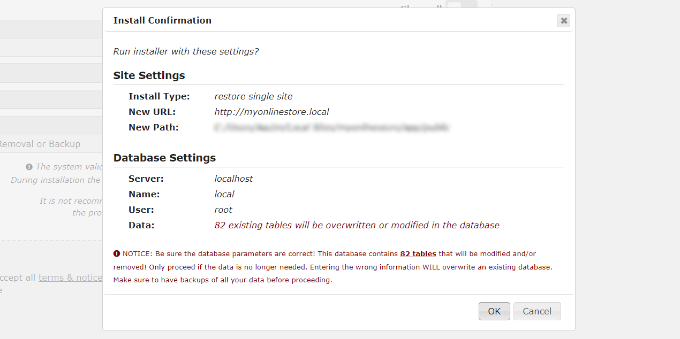
A popup will now open with install confirmation details.
You can click the ‘OK’ button to move forward.
The plugin will now extract archive files from the package.
Once the extraction is finished, you’ll see the install results. To complete the backup, you must click the ‘Admin Login’ button and log back in to your site to finalize the installation.
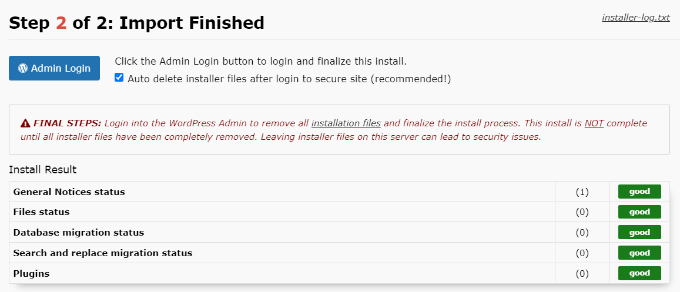
You have now successfully restored your website backup from Dropbox.
Further Reading About WordPress Backups
Here are some helpful guides to explore different ways to back up your WordPress site and expand your backup options:
- How to Backup a WordPress Site
- How to Create a Complete WordPress Backup for Free With BackWPup
- How to Backup Your WordPress Site to Google Drive
- How to Connect Google Drive to Your WordPress Media Library
- How to Create WordPress Backup Using JetPack
- How to Backup & Restore Your WordPress Site with UpdraftPlus
- How to Backup WordPress Multisite (Plugin + Manual Methods)
We hope this article helped you learn how to back up a WordPress site to Dropbox. You may also want to see our guide to WordPress security and our expert picks for the best Dropbox plugins for WordPress.
If you liked this article, then please subscribe to our YouTube Channel for WordPress video tutorials. You can also find us on Twitter and Facebook.


Jiří Vaněk
Sometimes with Duplicator, one needs to be careful regarding the terms of the web hosting provider. Duplicator creates a temporary folder on FTP to store the backup, then moves it to remote storage. If Duplicator fails during backup creation, the folder on FTP might become blocked. I’ve encountered this issue several times here in the Czech Republic. Providers here supposedly defend against people storing backups on FTP, so they prefer to block the entire folder, rendering everything non-functional.
WPBeginner Support
Thank you for sharing this in case someone else runs into this issue.
Admin
Dennis Muthomi
Cheers for sharing that insight!
That’s definitely something to keep in mind when setting up backups.
Always good to know about potential hiccups with different hosting providers. I’ll make sure to double-check my host’s policies before diving in.
Thanks for the HEADS UP!
Jiří Vaněk
You’re welcome. This issue can also occur if you run out of space on your FTP. For example, when the website is large. Duplicator first saves the backup to FTP, then sends it to the cloud, and only then deletes it from FTP. It saves it locally so that it can send it afterwards. Therefore, you need to have enough space on the FTP for the backup, even if you don’t plan to store it there permanently, so Duplicator can prepare it. Those who don’t have this information might encounter problems creating a backup, even if they’re not storing it on the FTP. I’m sharing this to help understand how this plugin works.
Ralph
There are two types of people :
1. People who do backup
2. People who will start doing backup after learning hard way
Jokes aside – I have backup made 4 times a day by my hosting but just in case I use plugin to save backup in cloud. I just don’t use dropbox but google drive instead but it is the same. I just use google drive more.
Whoever reads this guide: DO BACKUPS!
Dennis Muthomi
Haha, I’m definitely in that second category too!
Nothing teaches you the value of backups quite like losing site data. It’s a tough lesson, but boy does it stick with you. Now I’m religious about backing up my site.