We’ve heard from many WordPress site owners who put a lot of effort into creating detailed forms, only to find that barely anyone completes them. They don’t realize how overwhelming these forms can feel until a visitor confesses they gave up halfway through.
That’s where a Save & Continue feature comes in handy.
It lets users save their progress and return later to finish the form when it’s more convenient. Not only does this improve the user experience, but it can also lead to more completed forms and higher-quality submissions.
In this guide, we’ll show you how to easily add Save & Continue functionality to your WordPress forms – so you don’t miss out on potential leads or customers.
When to Use Save & Continue in WordPress Forms?
Often, people don’t submit a form if it takes a lot of time to complete. Having a save and resume feature for your WordPress forms can solve this issue.
Save and continue functionality allows users to save their form’s progress and resume filling it from where they left off.
It offers your visitors the flexibility to complete the form whenever they want, as they don’t have to do it in one go. As a result, you can get more form submissions and reduce form abandonment.
The save and continue feature works seamlessly if you have long forms like surveys, questionnaires, or job applications or require many people to fill out the details at different stages in a workflow.
That being said, we’ll show you how you can add the save and continue functionality in WordPress forms. Here’s a quick overview of all the steps we’ll cover in the following sections:
Let’s get started.
Install a WordPress Form Plugin to Add Save & Continue Functionality
The easiest way to add save and resume functionality in WordPress is by using WPForms. It is the best WordPress contact form plugin, and over 6 million website owners use it.
In fact, WPForms is our go-to form builder at WPBeginner. From contact forms to our annual user survey, we rely on it daily – and it’s never let us down. For more information, see our complete WPForms review!
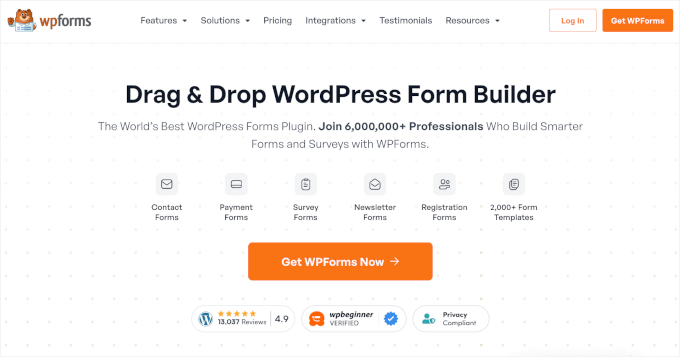
With WPForms, you can create any type of WordPress form, including a contact form, payment form, online order form, newsletter signup form, and more.
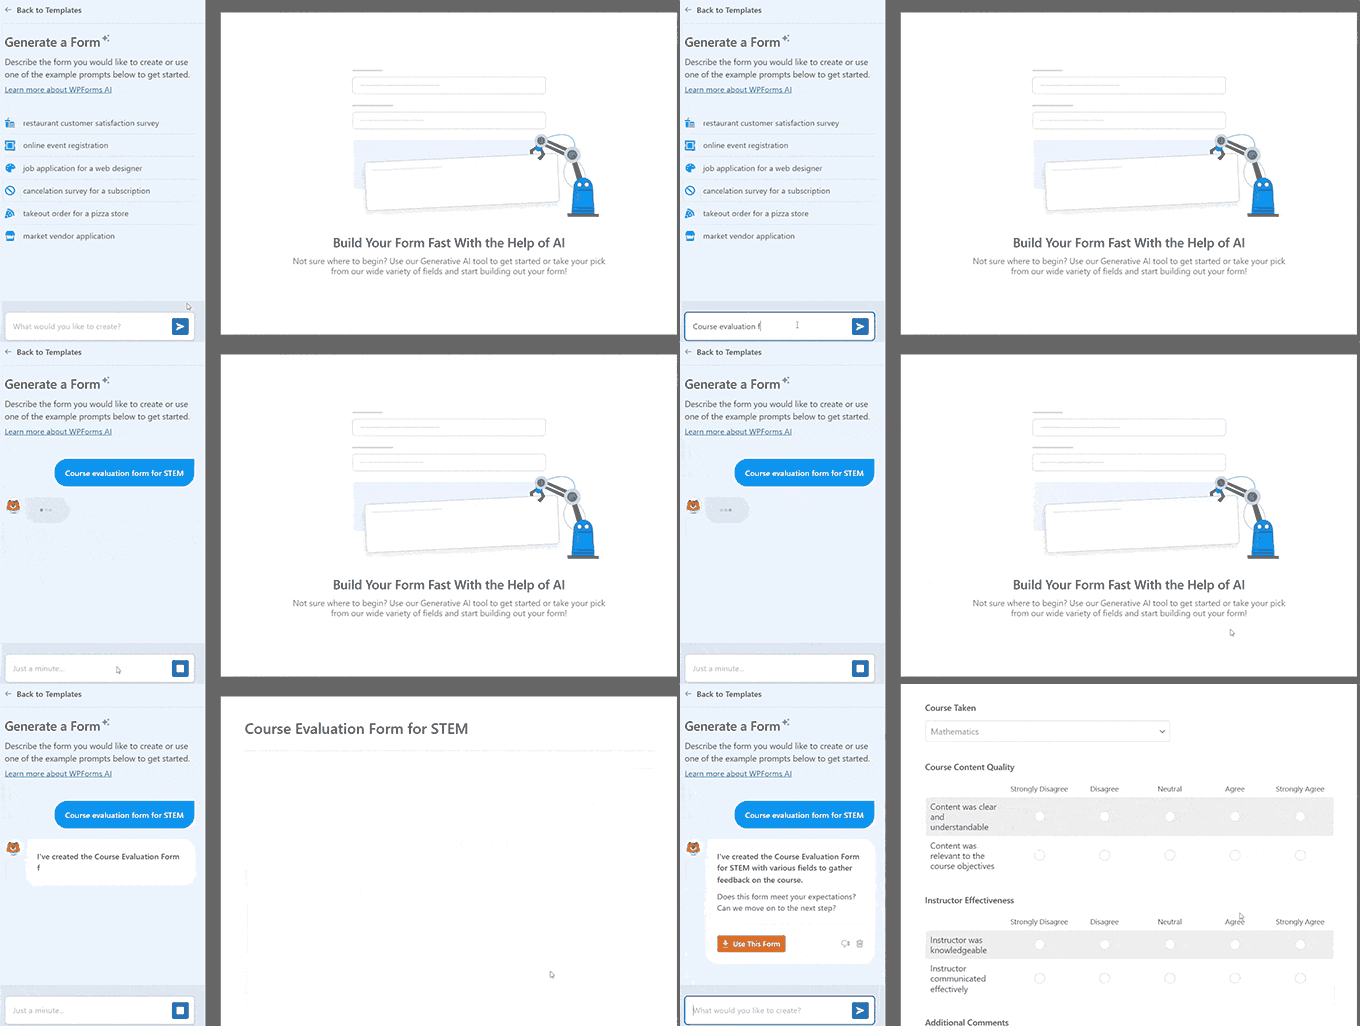
The plugin offers a drag-and-drop form builder and more than 2,000 pre-made form templates, which makes it beginner-friendly to use. Plus, with WPForms AI rolling out, you can create your own forms from scratch using a simple prompt.
You also get numerous form fields for customization and integration with popular email marketing tools and payment collection services like PayPal.
The best part? The WPForms Save and Resume addon allows your visitors to save their forms and complete them where they last left.
📝 Note: For this tutorial, we will be using the WPForms Pro version since it includes the Save and Resume addon and lets you access form entries. However, there is also a WPForms Lite version you can get started with.
First, you will need to install and activate WPForms on your website. If you need help, then please see our tutorial on how to install a WordPress plugin.
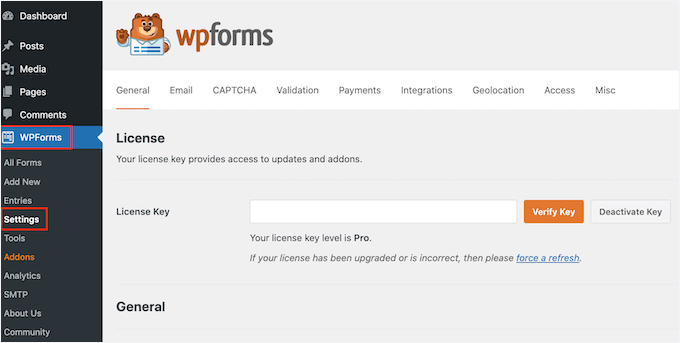
Upon activation, you can head over to WPForms » Settings from your WordPress dashboard and enter your license key. You can find the key in the WPForms account area.
After that, you will need to activate the ‘Save and Resume Addon.’
Let’s navigate to WPForms » Addons from your WordPress admin area. Then, simply click the ‘Install Addon’ button.
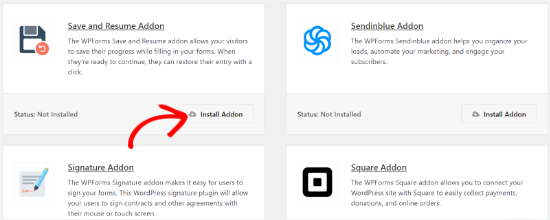
Once the addon is active, you can add the save and continue functionality to an existing form or create a new WordPress form.
Create a WordPress Form with Save & Continue Functionality
To start, simply head over to the WPForms » Add New page.
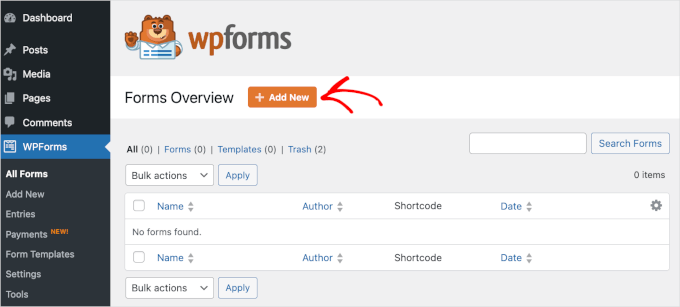
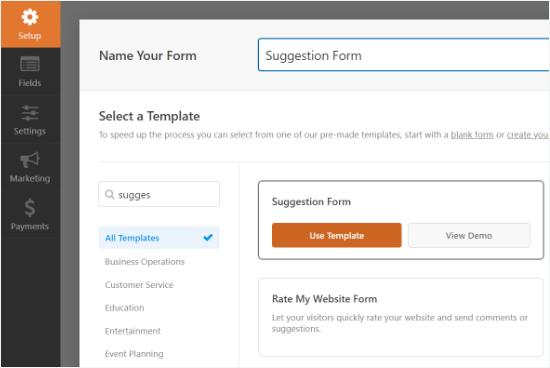
On the next screen, you will see pre-built templates for your form. You can enter a name for your form and select a template to get started.
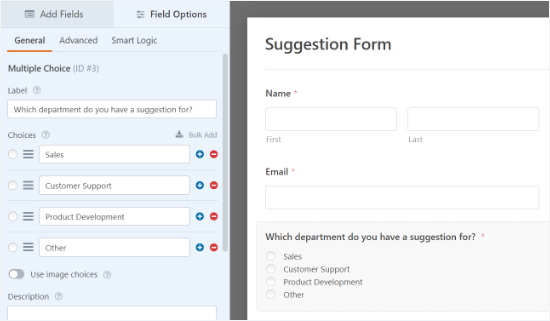
For this tutorial, we’ll select the Suggestion Form template to collect client feedback. Just hover over the template and click the ‘Use Template’ button.
Next, you can edit your form using the drag-and-drop builder.
Simply drag any form field you want to add to your form and drop it onto the template.
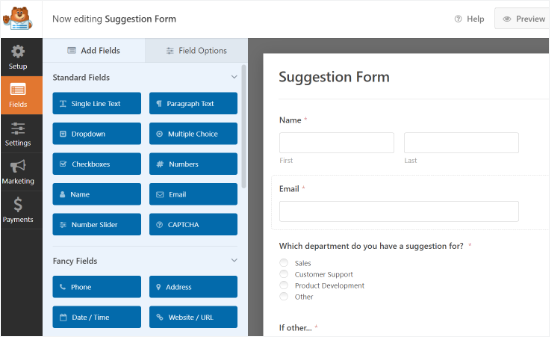
WPForms also lets you edit each field in the form.
For example, you can edit its label, add a description, change the order of the choices, make a field required, and more.
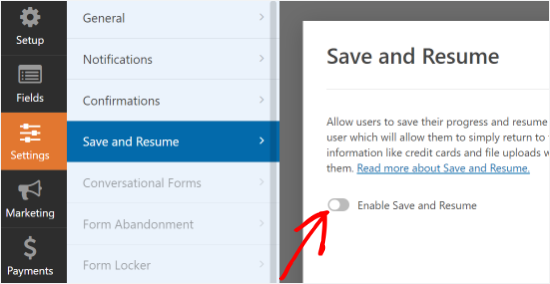
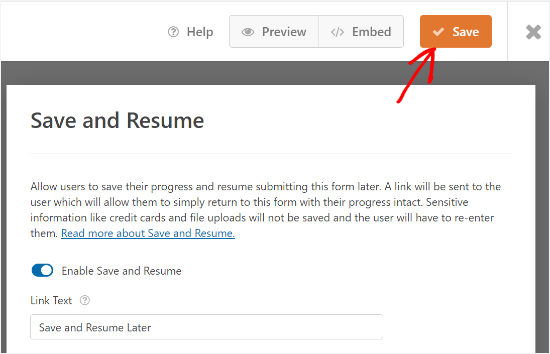
After that, you can head over to the ‘Settings’ tab from the menu on your left and then select ‘Save and Resume.’
Next, click on the toggle for the ‘Enable Save and Resume’ option. This will allow your user to save their form and continue completing it later.
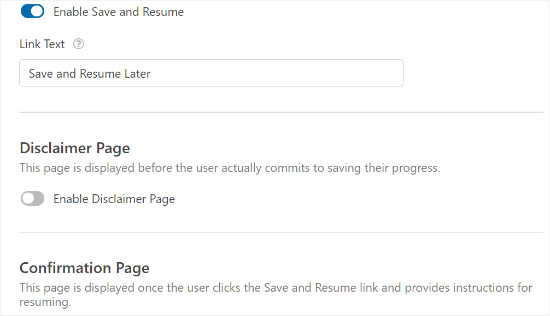
When you enable this option, you will unlock more settings to customize the save and resume functionality. For instance, you can change the text that is displayed next to the submit button and let users save their form’s progress.
Besides that, there is an option to enable a disclaimer page, which is shown to users before they save their progress. WPForms also lets you edit the confirmation page settings and change the text displayed on the page.
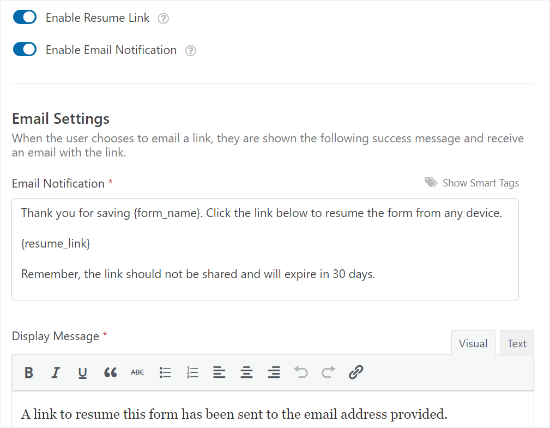
If you scroll down, you’ll find settings to ‘Enable Resume Link’ and allow users to copy the form link and paste it into their browsers to resume later.
There is also an option to ‘Enable Email Notification’ that sends the link to the user’s email address so that they can access their form from their inbox.
You can also edit the email text your visitors will see in their inbox and the display message.
WPForms also lets you change the notification settings and the confirmation email that people will get when they submit a form.
When you have made the changes, go ahead and click the ‘Save’ button at the top and exit the form builder.
Embed Your New Form Into Your WordPress Site
Next, you can add your form to any blog post or page.
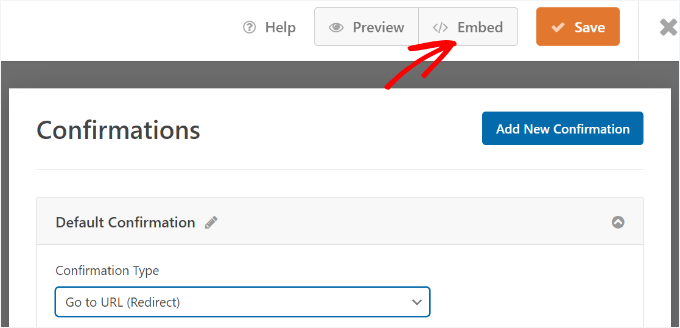
To start, simply click the ‘Embed’ button from the form builder.
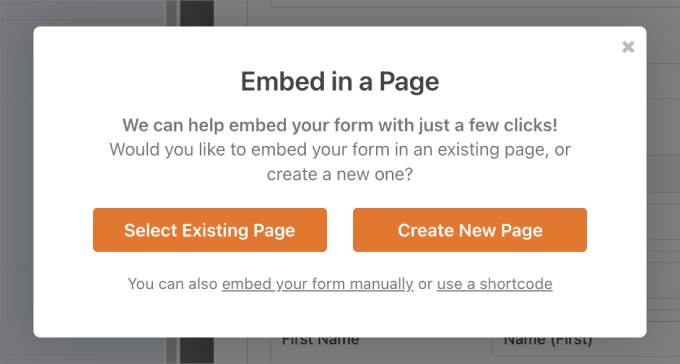
Then, you can choose to embed the form into an existing page or a new one.
For this tutorial, we’ll choose the ‘Create New Page’ option.
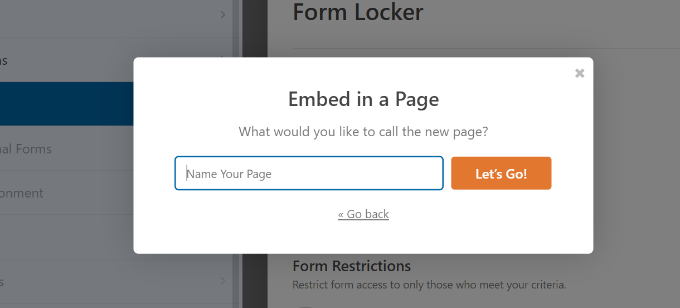
On the next popup, you can name your new page.
After that, go ahead and click the ‘Let’s Go!’ button.
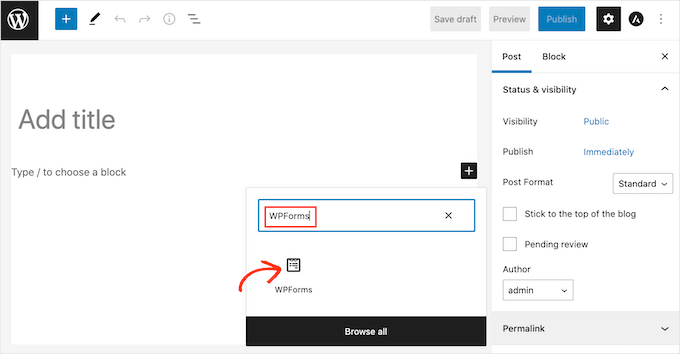
Once you are in the WordPress editor, click the ‘+’ button to add a block.
Then, simply search for the WPForms block and click on it to add it to the content editor.
After that, select the form you just created from the dropdown menu.
The WPForms block will load a preview of your form.
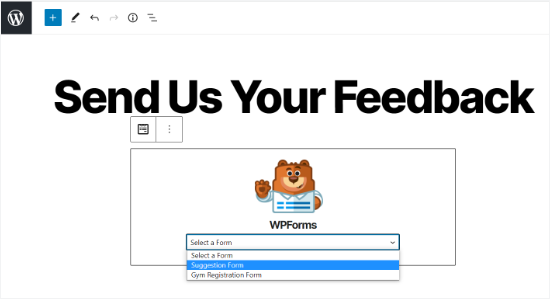
When you are happy with the appearance of your form, you can publish the page.
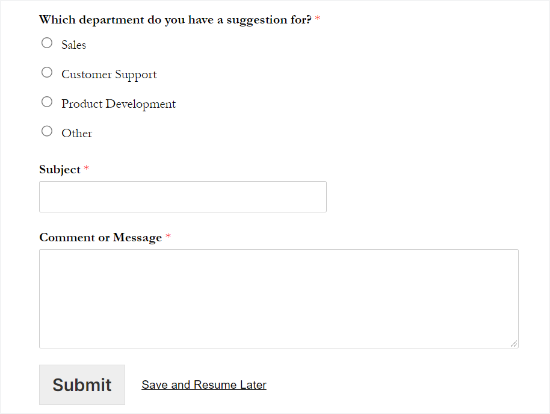
Now, you can visit your page and scroll down to the end of the form to see the ‘Save and Resume Later’ option next to the ‘Submit’ button.
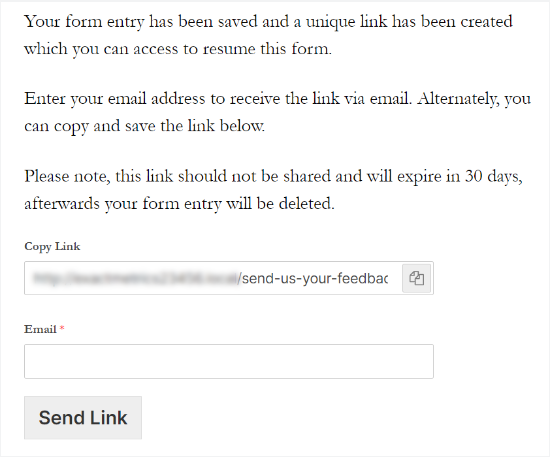
When someone clicks on ‘Save and Resume Later,’ they will see a link to the form, which they can copy.
There will also be an option to enter an email address to receive the form link via email.
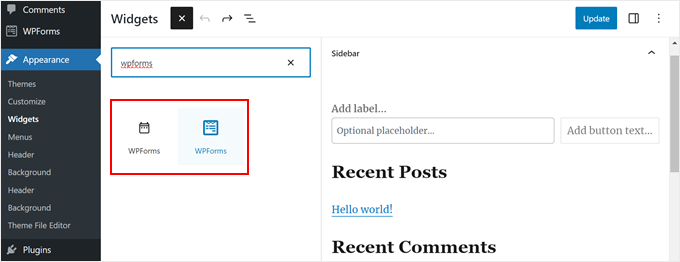
📝 Note: If you use the Classic Editor, you can add a WPForms widget to your sidebar or any other widget-ready area.
Just go to Appearance » Widgets, add a WPForms block to your sidebar, choose your survey form from the dropdown, and click ‘Update’ to save.
View Your WordPress Form Entries
To see if someone partially completed their form and used the save and continue option in WPForms, all you have to do is navigate to WPForms » Entries from the WordPress dashboard.
Then, go ahead and select your form to view its entries.
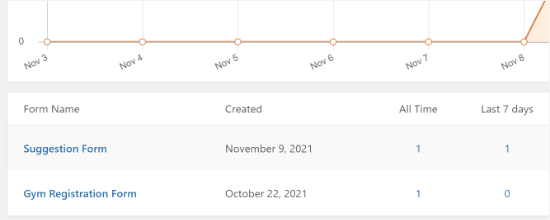
On the next screen, you can look for entries with a ‘Partial’ status. These are people who clicked the Save and Resume functionality and saved their form’s progress.
The status will change to ‘Completed’ automatically when your user returns and completes the form.

Bonus Tip: Set Up WordPress Form Conversion Tracking
Adding ‘Save & Continue’ is a great step toward improving the user experience. But how do you know if your forms are actually helping you grow your business?
That’s why we recommend setting up form tracking. By monitoring form submissions, you can:
- See which forms are performing best
- Identify pages where users are more likely to convert
- Spot drop-off points and reduce form abandonment
- Understand which traffic sources drive signups or leads
In our experience, optimizing forms is so much easier when you’re working with actual data – not just guesswork.
Check out our guide on how to track WordPress form conversions in Google Analytics and start making smarter decisions for your website!
We hope this article helped you learn how to add save and continue functionality in WordPress forms. You may also want to read our guide on how to customize and style your WordPress forms or see our picks of the best online form builders.
If you liked this article, then please subscribe to our YouTube Channel for WordPress video tutorials. You can also find us on Twitter and Facebook.


Dennis Muthomi
Love this save and continue feature! It’s been an absolute game-changer for my web design clients. We added it to our consultation forms, and wow – our completion rates jumped up by 40%!
The email notification option turned out to be super helpful. Most of our clients need to check with different team members to gather all their project details, so being able to save and come back later is perfect.
A little tip from my experience: definitely turn on both the email notifications and the resume link options. I’ve found it’s better to give clients both ways to get back to their form – if they can’t find the email, they’ve still got that resume link as backup!