The WordPress block editor is great for creating content, but one important thing it’s missing is a collaborative feature.
This feature is important for efficient teamwork, especially if you’re running a multi-author blog like WPBeginner. Thankfully, we’ve found an easy, codeless way to add this feature so that you can collaborate right inside WordPress.
This means you can leave comments, suggest edits, and work together on posts just like you would in Google Docs – all without leaving WordPress.
Here’s how you can add collaboration features to the WordPress block editor.
Why Use a Collaborative Editing Plugin for WordPress?
If you run a multi-author WordPress website, then you may often want to leave a suggestion or feedback for an author.
Similarly, you might need to work with multiple authors on the same article in WordPress. However, you’ll have to rely on external tools like email, Google Docs, or text to communicate with other authors.
Wouldn’t it be nice if you could communicate right inside the WordPress block editor? This way, your team can more efficiently collaborate to create better content for your users.
With that in mind, let’s see how to easily make collaborative editing possible in WordPress. Here are the topics we’ll cover, and you can use the quick links below to navigate through the article:
How to Enable Document Collaboration in WordPress Editor
By default, WordPress doesn’t come with a built-in solution for teams to communicate inside the WordPress admin area, so in this tutorial, we will be using a collaborative editing plugin.
First, you need to install and activate the Multicollab plugin. For more details, see our step-by-step guide on how to install a WordPress plugin.
Once the plugin has been activated, you will need to edit an existing WordPress post or page or create a new post.
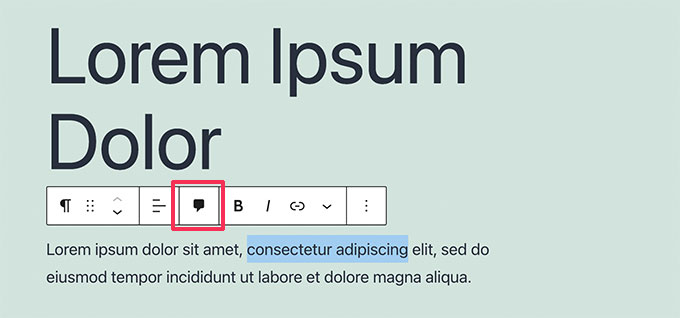
On the post edit screen, select any text that you want to highlight for your team members and click on the ‘Comment’ button in the toolbar.
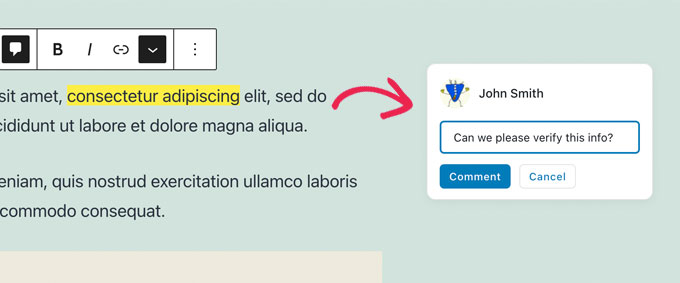
This opens a popup window where you can leave a comment for other team members to view.
Simply type in the field and click the ‘Comment’ button when you are done.
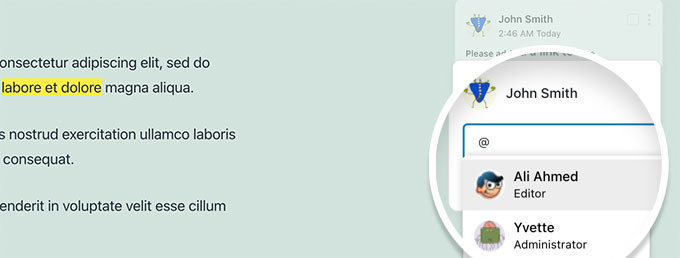
If you want to add a particular user to the conversation, that’s easy.
Just type the @ sign and select their username from the dropdown.
You can also choose to assign a particular comment to the tagged user.
This will allow them to track any tasks and feedback assigned to them and mark them complete.
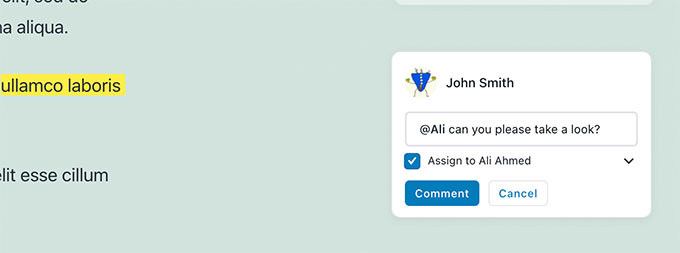
You’ll notice the comment assigned to the specific user you have tagged.
You can add comments on almost any text, anywhere on the post or page.
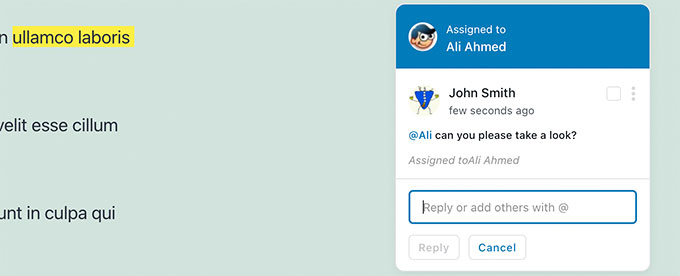
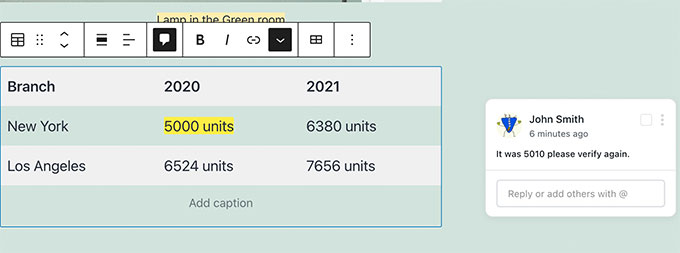
The comment button will appear on most blocks.
This includes headings, tables, columns, blockquotes, and more.
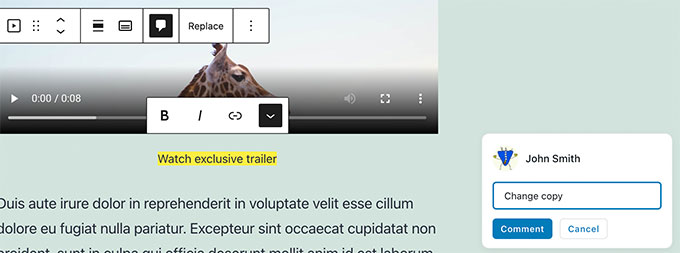
You can also add comments to the caption fields for images, audio, and video embeds.
Note: Adding comments does not save them. Your comments will only be saved when you save the post or page you are editing.
Now, you may want to see how it would appear for other users. To do that, you can simply log in to your WordPress website with another account.
Make sure this other account has the user role or permission to edit the post or page where you left comments.
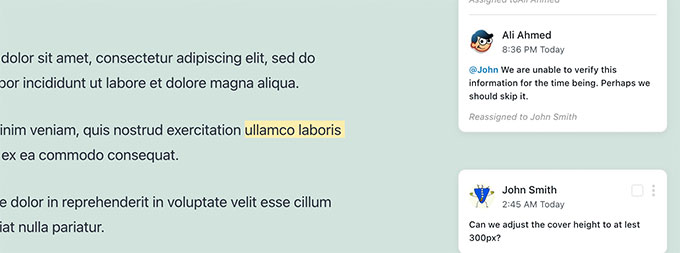
Once you have logged in, simply edit the post, and you’ll see that the text areas where you left comments earlier are highlighted. Clicking on them will bring up the comment popup.
Go ahead and feel free to add a reply to one of the comments. Your reply will then appear below the original comment.
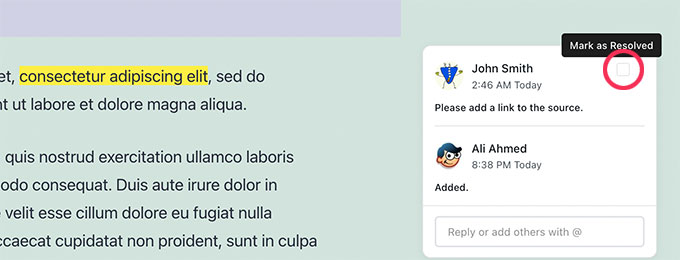
Once an issue is fixed, you can close that comment thread by clicking on the ‘Mark as Resolved’ checkbox.
How to Manage a Document’s Collaborative Activities and Comments
Want to see all of a post’s comments in one place?
You can view and manage all document activity and comments by clicking on the ‘Multicollab’ button in the top right corner of the screen.
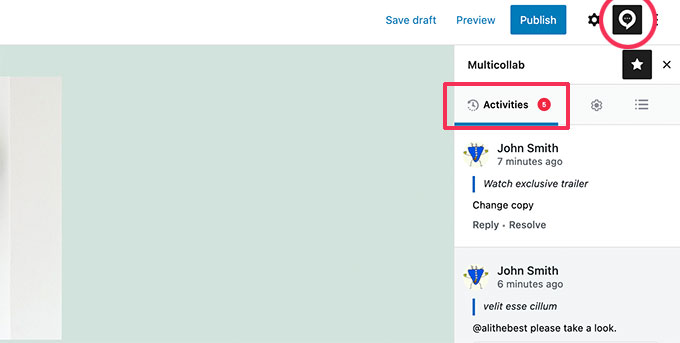
It will show you recent comments in the Activities tab. From here, you can directly reply to a comment or mark it as resolved.
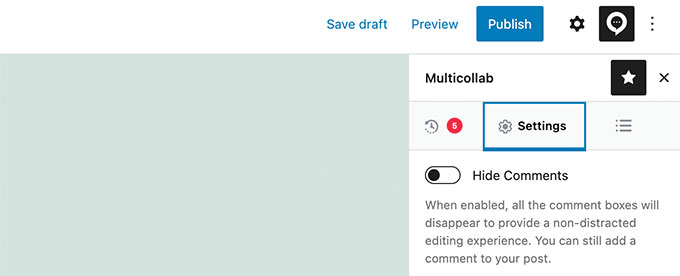
If you don’t want to see comments while working on an article, then simply switch to the Settings tab and turn on the ‘Hide Comments‘ option.
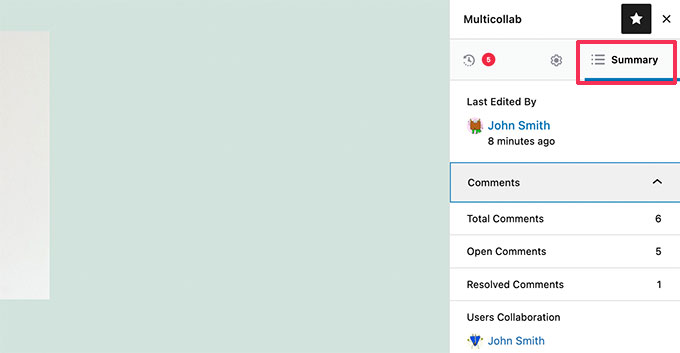
The plugin also lets you see the overall summary of activities on the current document under the Summary tab.
Here, you can see the last edited information and overall comment stats for the current article.
How to Receive Email Notifications for Editorial Comments in WordPress
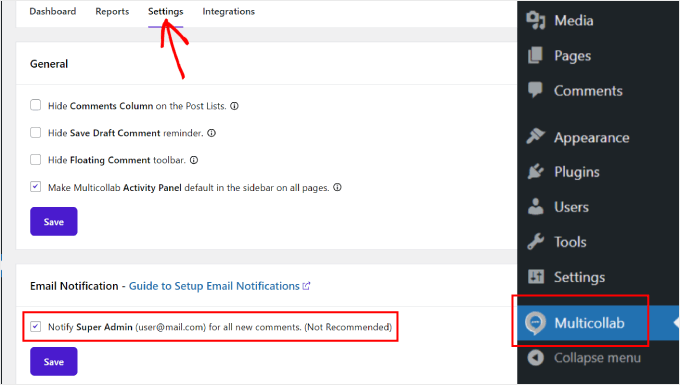
Multicollab can send email notifications to super admins when there are new comments.
You can activate it by going to the Multicollab menu in the admin panel and navigating to the ‘Settings’ tab.
Here, just tick the ‘Notify Super Admin for all new comments’ box.
For reliable email notifications, we recommend using the WP Mail SMTP plugin. It will make sure that all notification emails end up in users’ inboxes.
Our partner brands are currently using it and have reported a high deliverability rate. For more details, see our WP Mail SMTP review.
The plugin also has a free version available that’s more than sufficient.
By default, WordPress uses the PHP mail() function to send emails. However, this function can be easily abused, and most WordPress hosting companies don’t have it properly configured.
WP Mail SMTP fixes this problem by allowing you to easily send WordPress emails using a proper SMTP server.
For more details, please take a look at our guide on how to fix the WordPress not sending email issue.
We hope this guide helped you set up easy collaboration on your WordPress website, just like in Google Docs. You may also want to see our pick of the best Gutenberg block plugins and our beginner’s guide to WordPress post revisions.
If you liked this article, then please subscribe to our YouTube Channel for WordPress video tutorials. You can also find us on Twitter and Facebook.


Gilbert Quirino Baltazar
thank you for this piece of Information but abundant in knowledge. I have just started my website portfolio, WPbeginner helps me with a lot of things. thank you!!
WPBeginner Support
Glad to hear our articles are helpful!
Admin