Adding event timelines is a fantastic way to visually showcase your events and milestones, making them more engaging for your audience.
Whether they’re highlighting key moments of an event or presenting your company’s history, timelines make everything easier to follow.
That said, creating and displaying timelines on a WordPress site can be a bit confusing. Many website owners struggle with how to design and organize them in a way that’s both functional and visually appealing.
After extensive research, we found that the Cool Timeline plugin offers one of the easiest ways to create beautiful event timelines for WordPress. In this article, we’ll walk you through how to add stunning event timelines to your WordPress site.
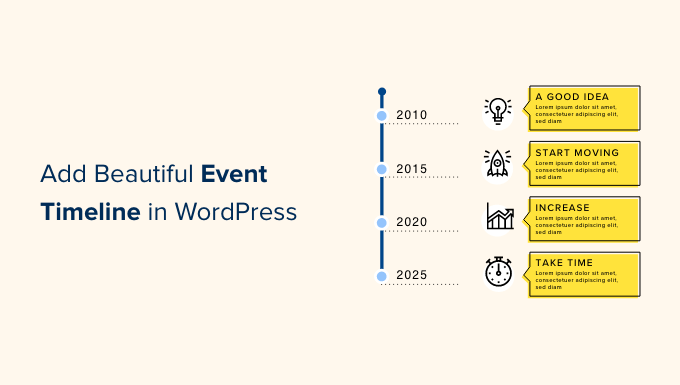
Why Add a Beautiful Event Timeline in WordPress
Event timelines highlight significant milestones with a clear, chronological structure. By using one, it can help enhance the storytelling aspect of your content.
Beyond milestones, timelines let you visually represent progress, phases, and the interconnection of events. This can make your content more engaging.
When it comes to use cases, many WordPress websites use timelines to display related events in an organized and visually appealing way.
Businesses and organizations also often use timelines to show their history.
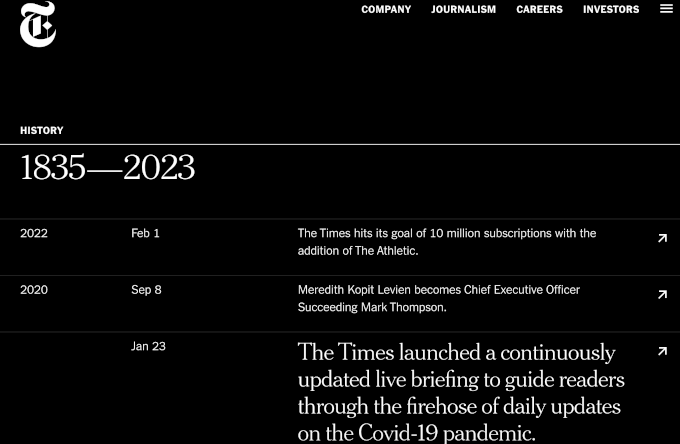
If you have a portfolio website, like an online photography portfolio, then you can show your photographs in a nice vertical timeline that shows your journey around the world.
This can be more engaging than writing your history and adding it to your site as a page of plain text.
How to Add an Event Timeline in WordPress
The easiest way to add an event timeline in WordPress is by using the Cool Timeline plugin. This free, user-friendly plugin allows you to create stunning timelines quickly and easily.
Upon activation, you’ll see a new Timeline Addons area in your WordPress dashboard.
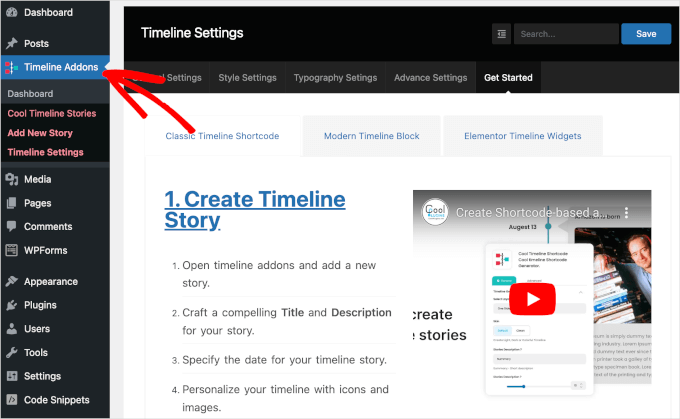
With this plugin, you can create event timelines in 2 methods.
The first one is by clicking the ‘Add New Story’ button from the Timeline Addons dashboard.
This will open the editor, where you can type in a title and description, set a featured image, and add other important information.
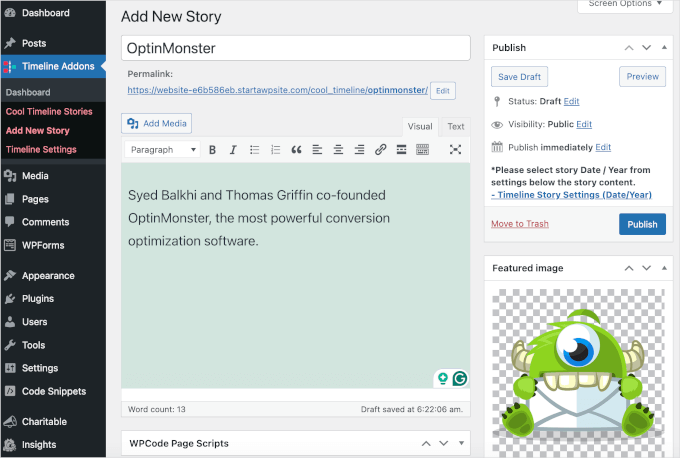
Once you’re done adding events, Cool Timeline will show all of these event stories on the same timeline. You can then add the timeline to any page or post.
This method is perfect for showing the same timeline multiple times across your website. However, it only lets you create a single timeline.
The other option is to use the Cool Timeline Block to build a visual timeline inside the WordPress block editor.
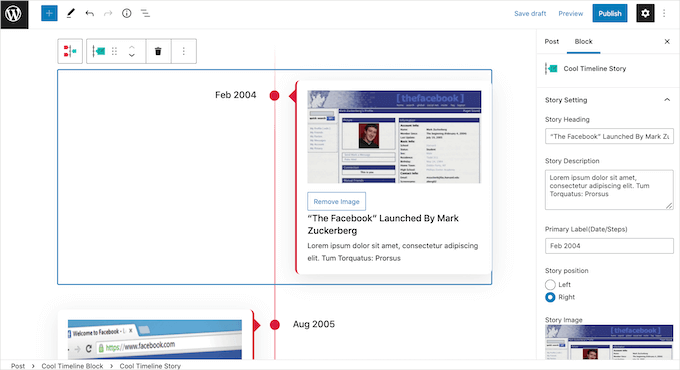
Adding multiple Cool Timeline Blocks to your website allows you to show different timelines on different parts of your site.
However, this method doesn’t let you reuse the same timeline across your website unless you save them as a block pattern yourself.
In this guide, we’ll cover both methods. No matter how you build your timeline, you’ll need to install and activate the Cool Timeline plugin. If you need more details, then please see our guide on how to install a WordPress plugin.
Once done, you’re ready to create your timeline using either the Timeline Addons menu or the block editor. If you prefer to jump straight to a particular method, then you can use the links below:
Ready? Let’s get started.
Method 1. How to Build a Reusable Event Timeline Using the Timeline Addons Menu
To create your first event, you can go to Timeline Addons » Add New Story from your WordPress dashboard.
You can then give the event a title by typing it into the ‘Add Title’ field.
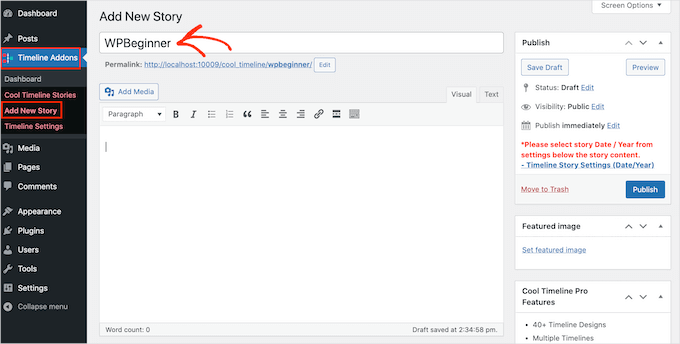
In the main editor, you can go ahead and type in all the text that you want to show on your timeline. This will typically be a description of the event.
Once you’ve done that, it’s time to click on the ‘Set featured image’ link.
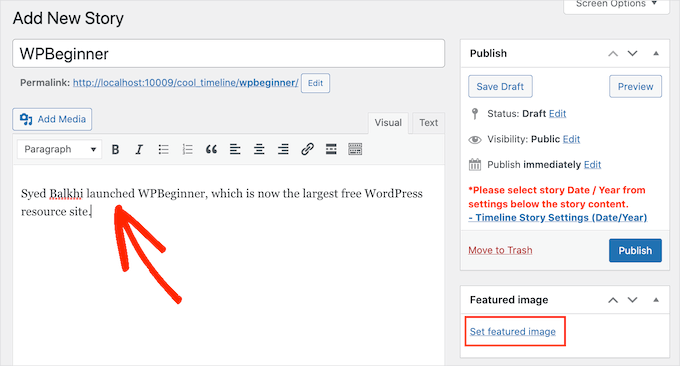
You can now choose the image that will represent the event on your timeline. You can either click to choose an image from the WordPress media library or upload a new image file from your computer.
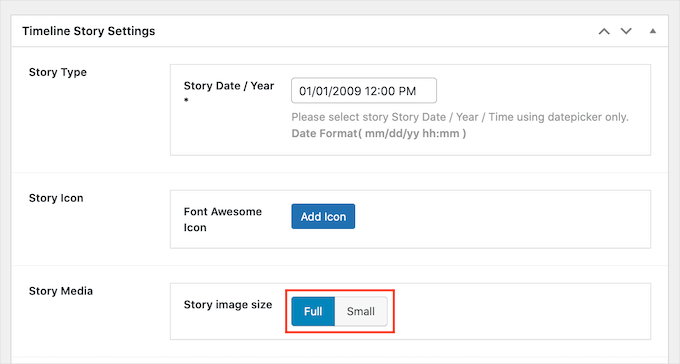
Next, you’ll want to scroll down to the ‘Timeline Story Settings’ section. Here, you can click on the ‘Story Date / Year’ field and use the calendar popup to select the time and date when the event happened.
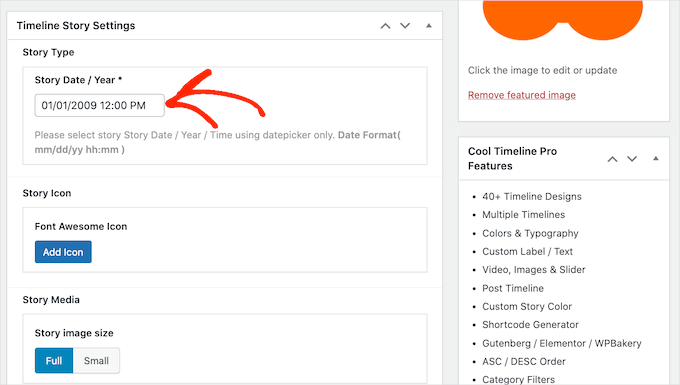
You can also choose between a ‘Full’ or ‘Small’ image for the event.
In the following image, you can see an example of a ‘Full’ image.
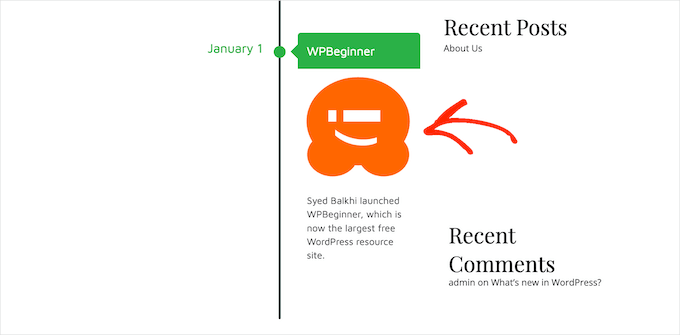
Larger images will draw the visitor’s attention towards the most important events on the timeline. However, ‘Full’ images take up more space.
The following image shows the same event, but this time with a ‘Small’ image instead.
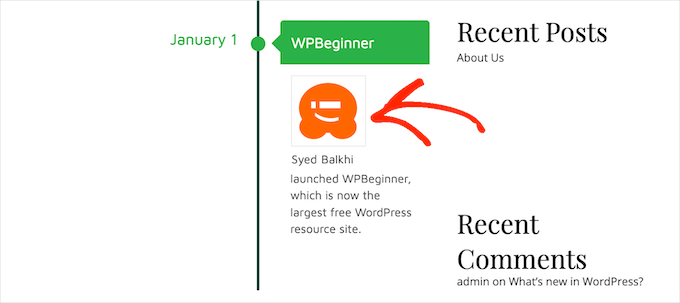
If you want to add lots of different events to your timeline, then you may want to use the ‘Small’ setting.
This can help prevent your timeline from looking cluttered.
After making these changes, you’ll want to scroll to the top of the page and click on the ‘Publish’ button.
And that’s it! You can now repeat these steps to create more events.
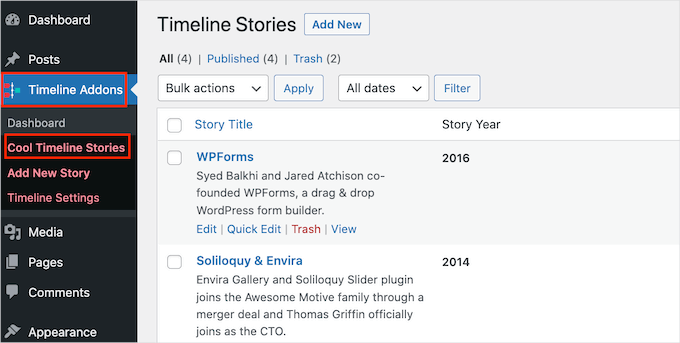
Want to see all the events you’ve created so far? Then simply go to Timeline Addons » Cool Timeline Stories.
Once you’ve created all your events, the next step is customizing how the timeline will look on your website.
To do this, you can go to Timeline Addons » Timeline Settings » General Settings.
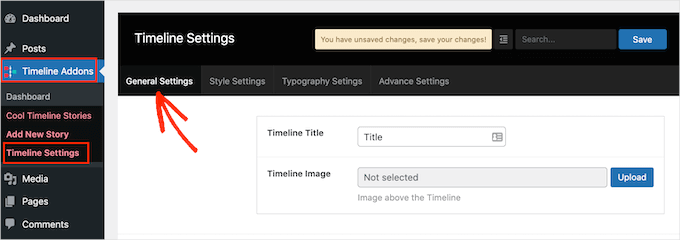
In the ‘Timeline Title’ section, you can type the title that will appear above your timeline.
Cool Timeline can also display an image above your timeline, such as your company logo. This can help reinforce your branding and let visitors know what the timeline is showing.
To add this optional image, you’ll want to click on the ‘Upload’ button.
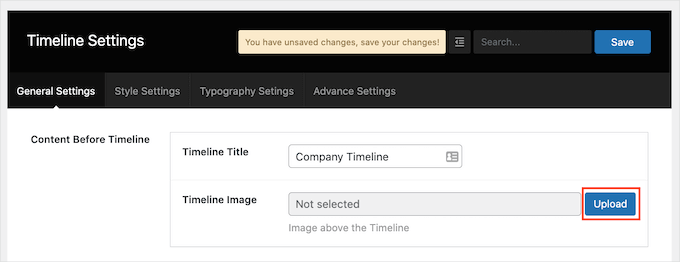
You can now either choose an image from your WordPress media library or upload a new file from your computer.
If you add lots of text to a timeline, then it can look cluttered and off-putting.
With this in mind, you may want to set a maximum number of words that will be shown on the timeline. To set a maximum word limit, simply type a number into the ‘Content Length’ field.
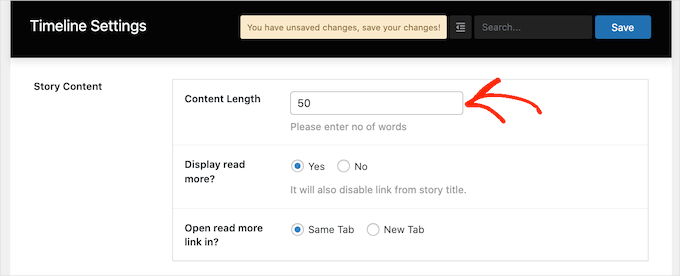
If you do set a limit, then it’s a good idea to add ‘Read More’ links to your timeline. Cool Timeline will then add this link to any descriptions that are bigger than your word limit.
To add this link, find the ‘Display read more?’ section and click the ‘Yes’ button.

You can now decide whether clicking the ‘Read More’ link will show the rest of your text in the same tab or a new browser tab. To make this choice, simply click on either the ‘Same Tab’ or ‘New Tab’ radio button.
By default, the timeline shows the year each event occurred. However, you may not always need to show this information. For example, if all the events happened in the same year.
To hide the year label, simply click on the ‘Year Label’ slider to turn it from ‘Show’ to ‘Hide.’

By default, the first event in your timeline will appear on the right-hand side of the timeline’s vertical line.
Want to show this event on the left-hand side of the timeline instead? Then, simply click on the ‘Left’ button next to ‘Vertical Timeline Stories Starts From.’
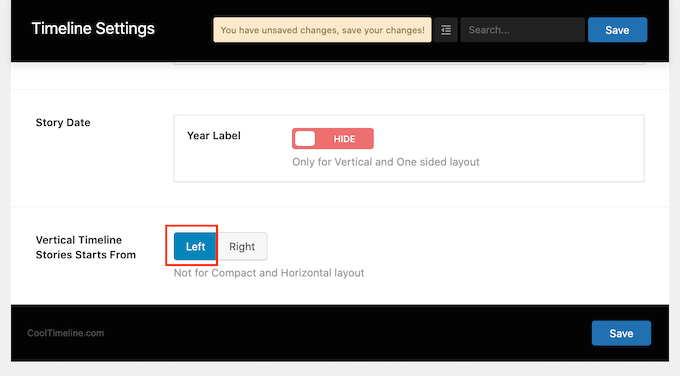
When you’re happy with your changes, click on the ‘Save’ button to save them.
Now, you can move on to the ‘Style Settings’ tab.
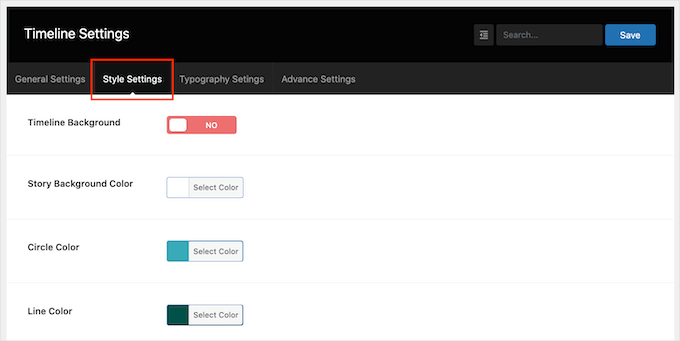
By default, the timeline doesn’t have a background.
If you want, then you can add a colored background to your timeline by clicking on the ‘Timeline Background’ slider to turn it from ‘No’ to ‘Yes.’
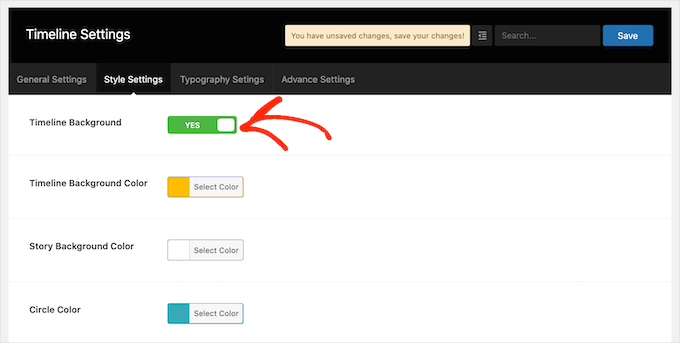
Then, go ahead and click on the button next to ‘Story background color.’
You should now be able to choose a background color using the color picker settings.
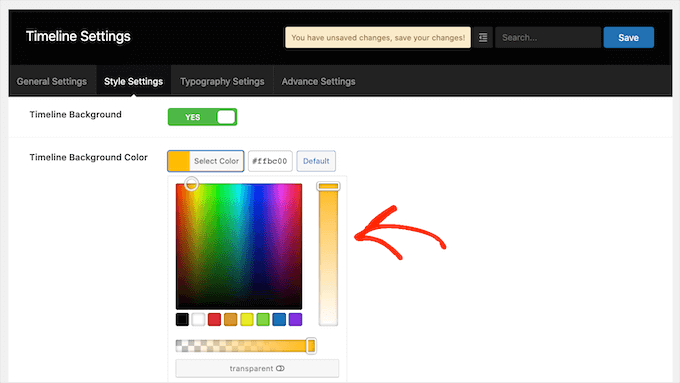
This screen also has similar color settings for all the different parts of your timeline, including the vertical line and the event titles. To change any of these default colors, simply click on the section’s button and then use the color picker that appears.
When you’re happy with the changes you’ve made, don’t forget to click on the ‘Save’ button.
Next, you might want to go to the ‘Typography Settings’ tab. Here, you can change the font and adjust the size of the different content in your timeline, such as the timeline title and story title.
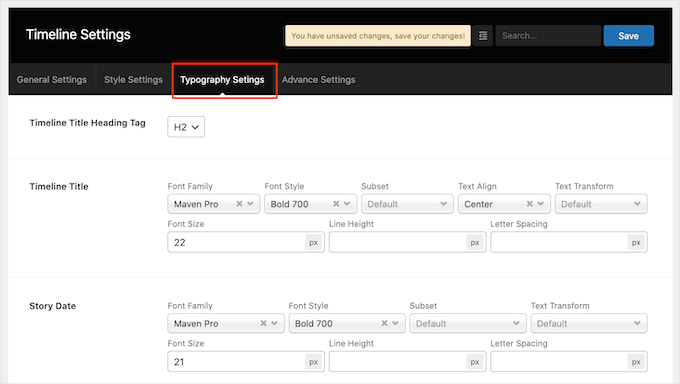
If you change the default typography settings, then don’t forget to save your changes by clicking the ‘Save’ button.
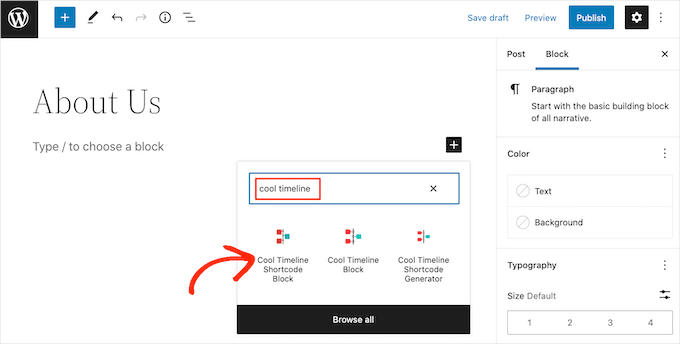
Once you’ve finished customizing the timeline, you’re ready to add it to your website. Simply open the page or post where you want to show it, and then click on the ‘+’ button.
Now, you’ll want to type ‘Cool Timeline’ into the search bar. This plugin has a few different blocks, so make sure you click on the ‘Cool Timeline Shortcode Block.’
You can now either update or publish your page as normal.
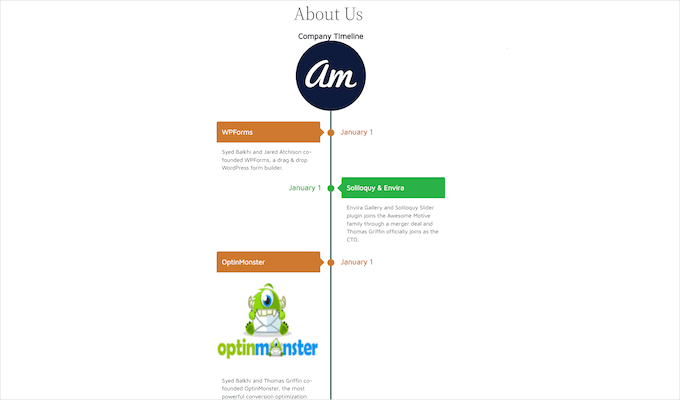
Now, if you visit your website, you’ll see the live timeline.
Method 2. How to Create Multiple Event Timelines in WordPress Using the Timeline Block
You can also build a beautiful event timeline in WordPress using the block editor and ‘Cool Timeline Block.’
This block has lots of placeholder content. To build your timeline, you simply need to replace each placeholder with your own text and images. This allows you to build your timeline more visually.
To start, simply open the page or post where you want to add a timeline.
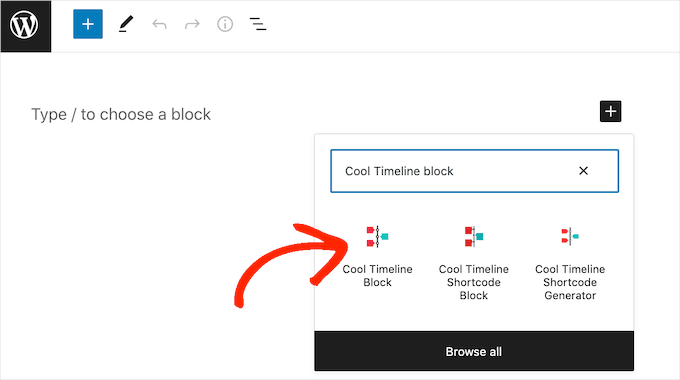
You can then click the ‘+’ icon and type in ‘Cool Timeline Block.’ When this block shows up, click to add it to the page or post.
The Cool Timeline block has 4 placeholder events. You can start editing them one by one by clicking on the first event in the timeline.
In the right-hand menu, simply replace the ‘Story Heading’ placeholder with the heading you want to use for this event.
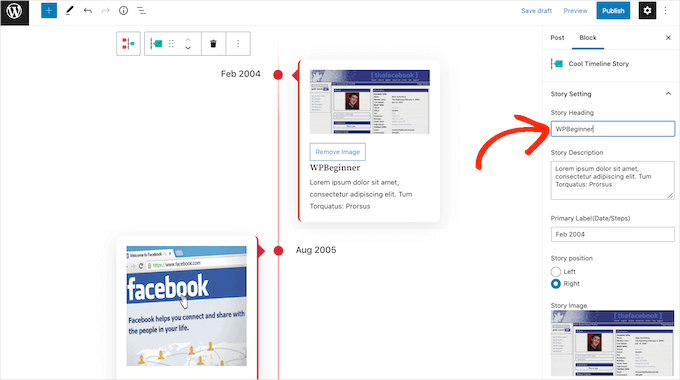
Next, you can add a description to the ‘Story Description’ field.
After that, you’ll want to find the ‘Primary Label (Date/Steps)’ field. Here, go ahead and type in the date when this event happened.
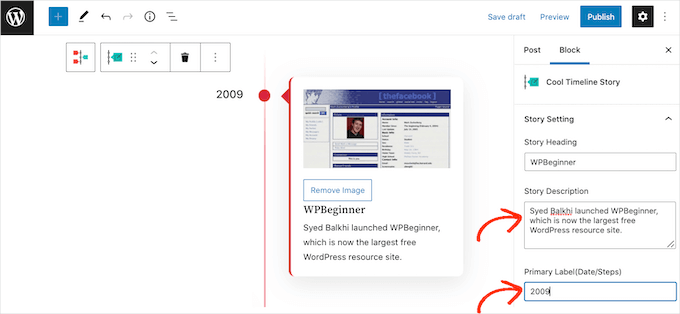
By default, the Cool Timeline block shows the first event on the right-hand side of the timeline.
If you prefer to show the event on the left-hand side of the vertical line, then you can click on the ‘Left’ radio button.
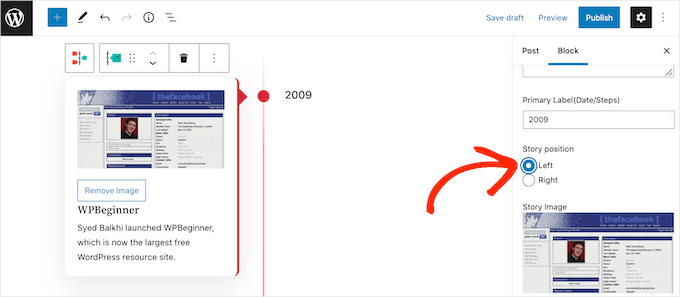
Now, the Cool Timeline block has a placeholder image for each event. To replace this placeholder with your own image, simply click on the ‘Remove’ button.
Once you’ve done that, go ahead and click on the ‘Upload/Choose Image’ button.
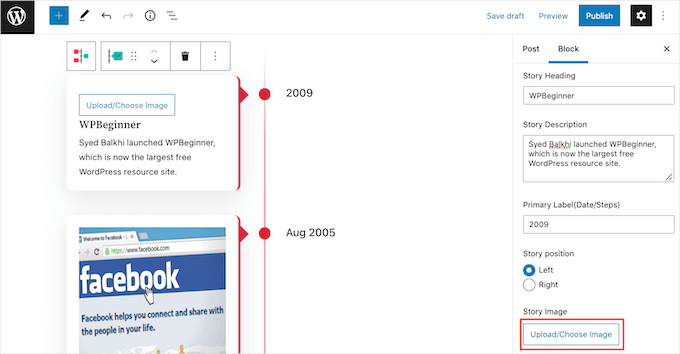
You can then either choose an image from the WordPress media library or upload a new file from your computer.
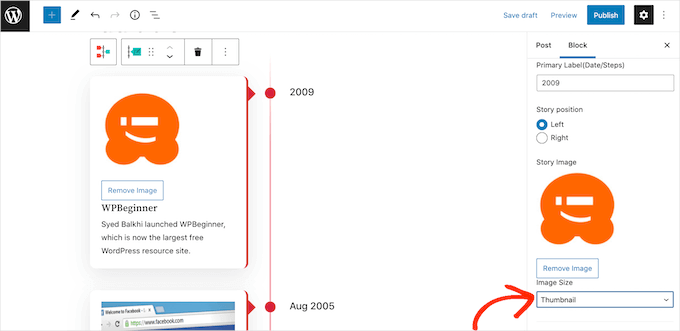
The Cool Timeline Block will show each image at its full size. To show a smaller image instead, open the ‘Image Size’ dropdown and choose either ‘Medium’ or ‘Thumbnail.’
As soon as you click on one of the different image sizes, the block will update to show the new image. This allows you to try out different sizes to see what looks best on your website.
By default, the timeline marks each event on the vertical line with a dot. You may want to replace this plain dot with a custom icon.
For example, you might use different icons for different types of events. Then, you can explore the different custom icons you can use for your timeline by clicking on the ‘Custom (Font Awesome Icon)’ radio button.
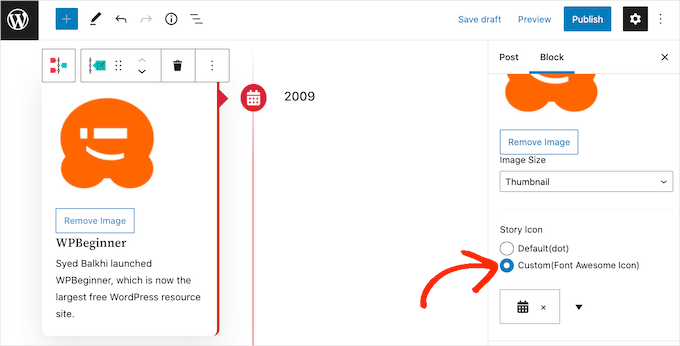
Once you do that, a dropdown with an arrow icon will appear. You’ll want to expand on it to scroll through all of the different icons.
When you find the perfect icon to use for your event, then you can click it.
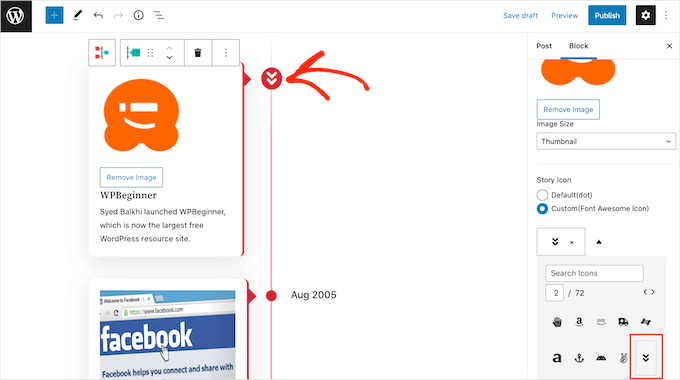
You can now customize the rest of the placeholder events following the same process described above.
If you want to add more events to the timeline, simply click on the ‘Add Story’ icon. This will add a new placeholder event that is ready for you to customize.
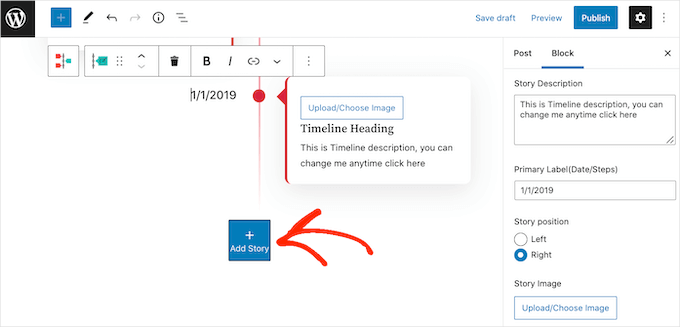
When you’re happy with how the timeline looks, you can either update or publish the page as normal. Once done, your timeline will be live on your WordPress website.
Expert Tip: Want to create a memorable impression online? Our professional web design team is here to help. We can craft visually stunning, responsive websites that reflect your brand and help you connect with your audience. Explore our WordPress Website Design Service today!
We hope this article helped you learn how to add a beautiful event timeline to your WordPress website. You may also want to check out our guides on how to create a simple event calendar and how to add a countdown timer widget in WordPress.
If you liked this article, then please subscribe to our YouTube Channel for WordPress video tutorials. You can also find us on Twitter and Facebook.


Dennis Muthomi
THis is why I love your tutorials, its easy to implement and follow along.
Thanks for the detailed walkthrough of both methods using the Cool Timeline plugin. I am implementing this to a client site, I am sure they will love a event timeline on their site.
BIG thank you to you WPBeginner!
Jiří Vaněk
A timeline is an absolutely great addition to a company’s website, especially for a startup. I learned to create them using Elementor and the Royal Addons for Elementor extension. It allows you to create beautiful timelines. However, on a website where the owner doesn’t want Elementor, my hands were tied, and I usually solved these things using Canva. Thanks for the tip on the perfect timeline plugin that I can use even without Elementor, just in Gutenberg. I see that the owner takes excellent care of the plugin, and it was even updated three days ago, which is another great piece of news.
Gunjan
Can you use create different timelines. For example, I want one to show my paid job and another with my Volunteering positions.
WPBeginner Support
The pro version of the plugin allows multiple timelines.
Admin
NICHOLAS AMOL GOMES
Thank you for given me best plugins
WPBeginner Support
Glad our recommendations are helpful
Admin
Sunday Adeniran
I got it like A B C. I was looking for cool timeline by searching for it in wpbeginners when I saw the express timeline.
Many thanks wpbeginners.
WPBeginner Support
Glad our recommendation could help
Admin
Thomas
I’m not sure if my first question has got lost, so i try again.
Any chance to include, to put older, already existing postings in the timeline?
I’ve got several postings that belong to historical information back to the beginning of 1900 and i want to connect it so that customers use the timeline functions to see what happend here 100 years ago.
WPBeginner Support
Hi Thomas,
You can create announcements with matching dates and then add the text you want to show in the timeline.
Admin
Syed
Hi . is it possible to change “Readmore” to have some other name like “Open to know more”
Jocelyn Edwards
Hi, just wondering if there is a way to change the settings on this plugin so that the dates can be displayed according to year (i.e. 2007) rather than a specific date of the year (July 17, 2007) Thanks.
Jan
Is there a similar plugin that can provide a sites member activity information as a timeline? I mean, to the member themselves, in their personal dashboard for example?
bob
I cannot download it. I went through all of the steps, but I cant find the add plugin section. So I need a different version of wordpress?
WPBeginner Support
Hi Bob,
You are probably using WordPress.com. Please see our guide on the difference between self hosted WordPress.org vs free WordPress.com blog.
Admin
Mariana Cubillos
Having trouble with the icons because every time I add a new post they don’t correspond to the post and go the opposite way. Is there anyway to make icons change respectively to the post? For example, if on one post there is an arrow to the right, as soon as I publish a new post the post moves to the left but the corresponding arrow stays to the right. How do I fix that?
Adam
Sorry doesnt work
a) cant put a date further back than 2007 – it’s a timeline !
b) dropdown for icon annoucement doesnt drop down
Waste of time
Ron
Sucks! Wasted time installing. Instructions are poor. Announcements? How about posts?
Sidhesh Halarnkar
Sir
I want to Create a website for an Research Department and its layout is as follow :
1)They are having main slider which goes across the home page.
3)After slider they are having about us section
2)after about us they are having two section basically they are News and Events in the Same Row with Scrolling Effects.
Im , finding very hard to create these two section at homepage do you have any suggestion’s for doing so then please tell me sir.
Waiting for your Response
Thanks and Regards,
Sidhesh Halarnkar
Owais Ali
How can I remove the announcement date in my post ?.
Evan Herman
Hi Owais,
You can easily hide the dates using the settings page. Head into ‘Timeline Express > Settings’ and toggle off the date visibility.
If you are still having issues, please see our documentation:
Evan
Lindsey @ Hut Marketing
Have you noticed that the images are not responsive? On my phone they look squished…
I’m about to just load a series of images instead of messing with a timeline lol
John Morken
I have six announcements posted. When you press the read more button, I get the additional text ok but then a big list below that of all the pages and more on my website. Also, the video (and image) from the first announcement migrates to the other announcements that are only videos and replaces them.
Chris
Hi there! The plugin is not working correctly. When you set up the announcements and post them to the page they are not displayed ok if you remove the “read more” option. Event icons are one over another and the text boxes have no space between them. The top one end just over the heading of the next one.
When you turn on the read more option the whole mess is fixed but not everyone wants to have the read more button
WPBeginner Support
Please try the plugin with a default theme and see if it still misbehaves. If it does not, then this means that your theme’s CSS is conflicting with the plugin’s CSS.
Admin
Andrew Hansen
This is awesome. I’m working on a novel and this will be great once I start blogging about my fiction writing. I’ll be able to use this to lay out my plot after my novel is published (hopefully lol), so peopl can review the order of events in any easily understandable format.