Are you looking for a way to add and customize admin columns in WordPress?
By default, the WordPress dashboard has columns for posts, pages, comments, users, and more. However, you may be able to work faster and improve the editorial flow by creating your own custom columns.
In this article, we will show you how to add and customize admin columns in WordPress.
Why Add Admin Columns in WordPress?
By default, the WordPress dashboard shows different columns in different areas.
For example, if you go to Posts » All Posts, then you’ll see columns for each post’s title, author, categories, tags, comment count, and the post’s publication date.
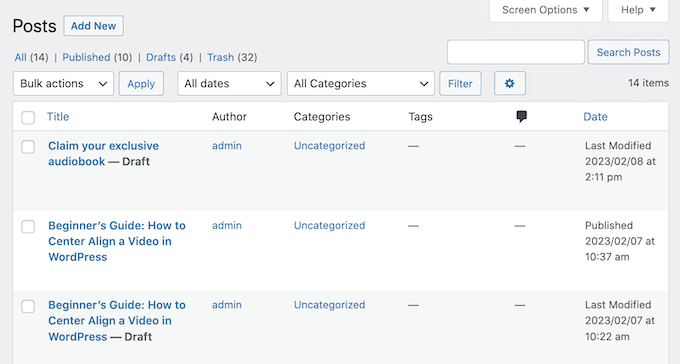
If you run a multi-author WordPress blog or have lots of content, then it can be difficult to manage that content in the WordPress dashboard, particularly if you can’t get the information you need at a glance.
That’s where custom admin columns come in.
By adding more columns to the admin area, you can show all the information that editors, admins, and other users need to complete their work successfully. This can improve the editorial workflow and help you get more work done.
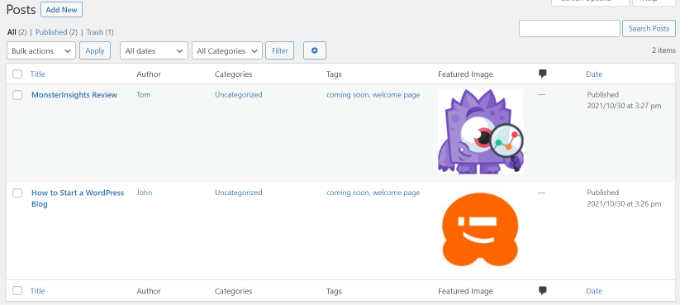
In addition, there are other attributes you can use to organize your content. For instance, if you add a column for ‘Featured Images,’ you can instantly see which posts are missing an image without opening each one. You can also quickly assess aspects of a blog post, such as the number of comments or the word count of an article.
Ultimately, adding admin columns helps you to see everything clearly and manage your site more efficiently.
With that being said, let’s see how you can add and customize admin columns on your WordPress website.
Video Tutorial
If you’d prefer written instructions, just keep reading.
Adding and Customizing Admin Columns in WordPress
The easiest way to add more columns in the admin area is by using Admin Columns. This plugin allows you to add custom columns and even edit the built-in admin columns.
First, you’ll need to install and activate the Admin Columns plugin on your website. For more details, please see our guide on how to install a WordPress plugin.
Upon activation, head over to Settings » Admin Columns to configure the plugin.
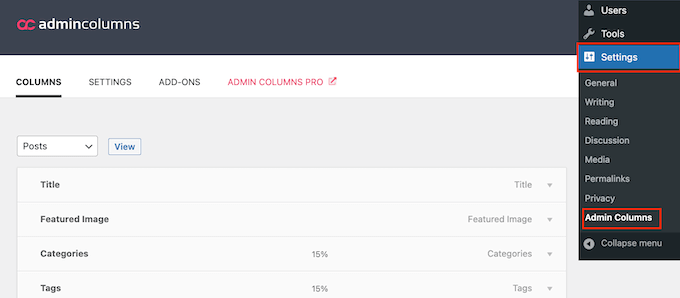
Admin Columns allows you to customize the columns on the pages, posts, comments, patterns, media, and user screens.
At the very top of the screen, open the dropdown menu and choose the page that you want to customize. Then, click on ‘View.’
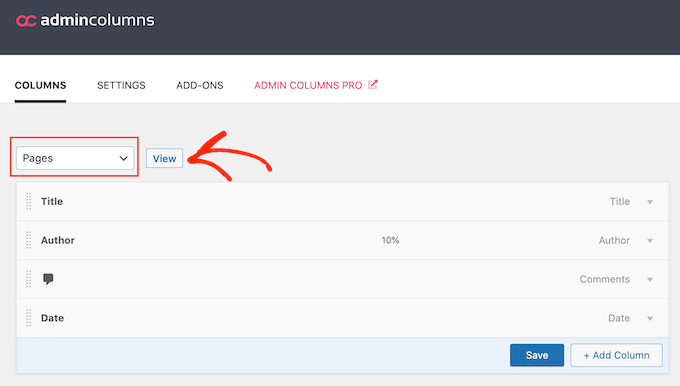
With that done, you can change the order of the built-in admin columns using drag and drop.
You can also customize any column by hovering your mouse it and then clicking on the ‘Edit’ link when it appears.

After that, you can change the column’s label by typing into the ‘Label’ field.
You can also change the column’s width to make sure all the information fits comfortably on the screen.
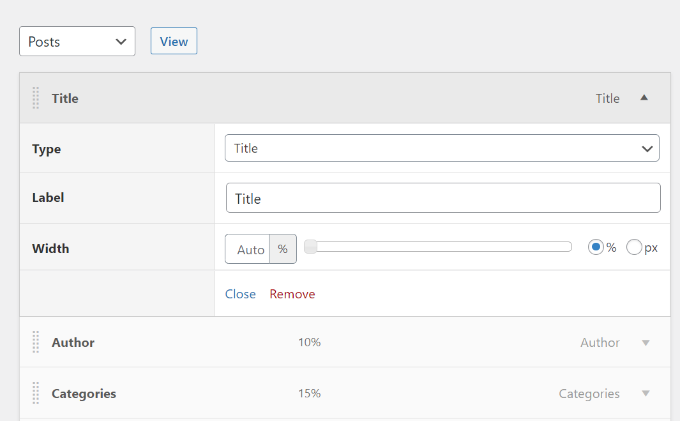
Finally, you can change the ‘Type’ to the information that appears in the admin column.
When you’re happy with how the built-in columns are set up, you may want to add your own custom columns.
For example, you might add a ‘Featured Image’ column to the Posts » All Posts screen so admins can see all the featured images on your WordPress website.
To get started, click on the ‘+ Add Column’ button. This adds a blank ‘Actions’ column that is ready for you to customize.
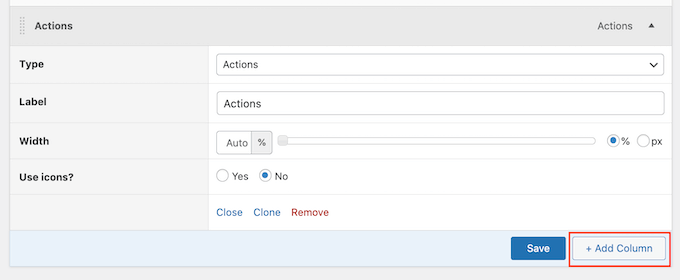
Simply use the different dropdown menus and settings to add a label and set the width. After that, you can use the ‘Type’ dropdown to choose the information you want to display, such as post format, permalink, or even custom fields.
Depending on your selection, you may get access to some extra settings. For example, if you select ‘Featured Image’ from the ‘Type’ dropdown, then you can choose between the different WordPress image sizes.
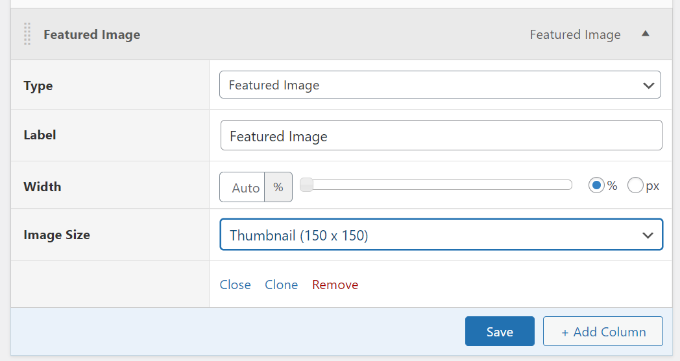
When you’re happy with the changes you’ve made, don’t forget to click on the ‘Save’ button.
If you want to, then you can customize other areas of the WordPress admin dashboard. Simply scroll to the top of the page and use the dropdown menu to choose a new section of your site.
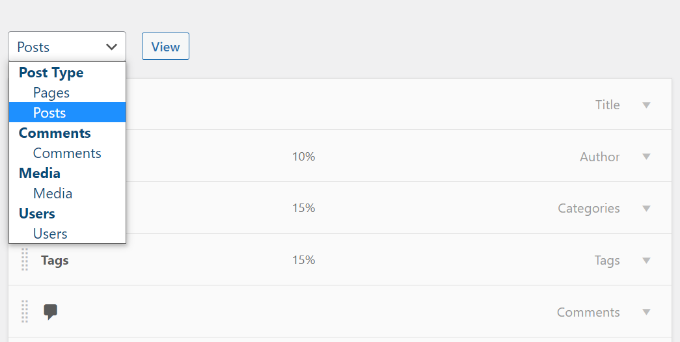
For example, if you choose ‘Media’, then you might add columns for the image dimensions, EXIF data, image alt text, and captions.
Customize Other Admin Columns in WordPress
Some popular WordPress plugins automatically add columns in the admin area.
For example, All in One SEO for WordPress adds columns where you can bulk edit SEO titles, meta descriptions, and more.
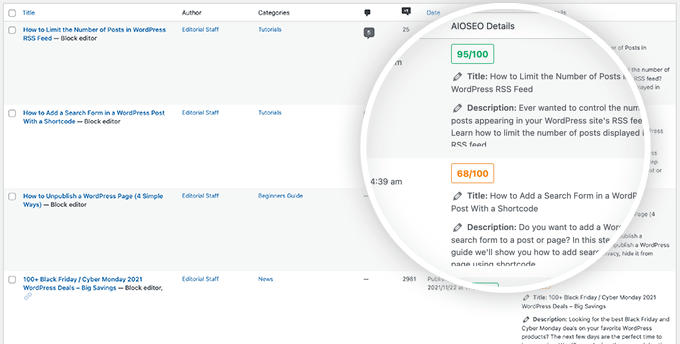
To remove a plugin-specific column from the admin screen, click on the Screen Options menu in the top right corner.
In the panel that appears, simply uncheck the box next to each column you want to remove.

We hope this article helped you customize and add admin columns in WordPress. You may also check out our guide on how to create an email newsletter or see our expert pick of the must-have WordPress plugins for business websites.
If you liked this article, then please subscribe to our YouTube Channel for WordPress video tutorials. You can also find us on Twitter and Facebook.


kzain
Thanks for this guide! It was a huge help when I was first setting up my WordPress site and learning the ropes.
Now that I’m more familiar with things, the Admin Columns plugin is great Being able to add and sort all those different columns keeps my admin area organized and saves me tons of time.
Goms
I want know if it is possible to reorganize a widget in post publisher admin wordpress by default for all users ?
Thomas Mosterd
Thanks for the guide, really helped me out at the start of my wordpress website.
Now though i use the plugin admin columns, it allows to add and sort a range of different columns which is really helpful.
Jatin Gupta
Hi Friends,
I am facing two problem in WordPress admin
1. Load custom CSS for wp-admin on user-role base (editor)
2. Remove some columns as per user-role in Woo-Commerce on products page
please reply if you can understood my problem…
Bongo
Looks cool, can’t wait to try it