Ever noticed that spinning icon or animation that appears while a website loads? That’s a preloader animation, and it’s a handy tool you can use across your WordPress projects.
Preloaders serve a real purpose. On content-heavy sites, they keep visitors engaged during those crucial loading seconds, which can reduce bounce rates. And for business sites, a branded preloader can even add a professional touch.
If you’re thinking this sounds complicated, don’t worry. We’ve come up with 2 methods for adding a WordPress preloader animation, suitable for users of all skill levels.
Why Add a Preloader Animation in WordPress?
A preloader or a page loader is an animation you see when waiting for a page to load. It tells users that the web page is still getting ready and asks them to wait patiently. Once it’s done loading, the preloader goes away, and the visitor can see the web page normally.
Here is an example of this WordPress design element:

One scenario where you may want to add a loading animation is if your web page has lots of large images or video embeds. In this case, your page loading time will be longer than normal, and you want users to stick around long enough for the page to fully appear.
If your page doesn’t have a lot of heavy elements, then it’s better to focus on improving your website’s speed and performance. You may also want to upgrade to a better WordPress hosting provider.
With that said, let’s look at how you can easily add a page loading animation to your WordPress website. Simply use the quick links below to jump straight to the method you want to use:
💡 Too busy to create your WordPress website? Let our expert WordPress design team build your dream site from the ground up – handling everything from custom design to performance optimization, so you can focus on your business.
How to Add a Simple Loading Animation with WP Smart Preloader
One easy way to add a preload animation in WordPress is by using WP Smart Preloader.
Of the 2 plugins we’re featuring in this guide, this one is the simplest version. That’s because it has 6 built-in WordPress preloader animations that you can use, and you don’t have to configure a lot of settings to enable the animation.
The first thing you need to do is install and activate the WP Smart Preloader plugin. For more details, see our step-by-step guide on how to install a WordPress plugin.
Upon activation, go to Settings » WP Smart Preloader and then open the ‘Smart Preloader’ dropdown. This shows all the different animations you can use.
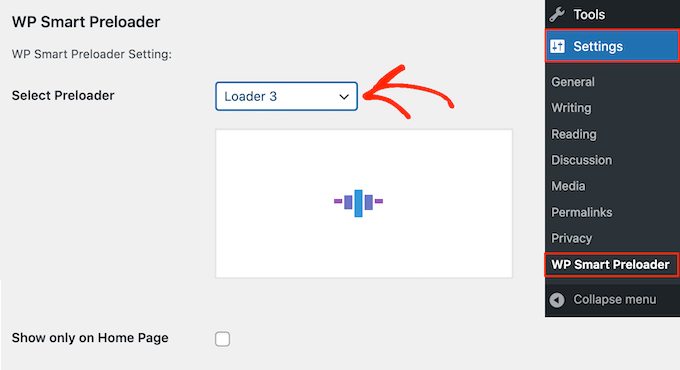
The plugin will show a preview of your chosen animation, so you can select different preloaders to see which you like the best.
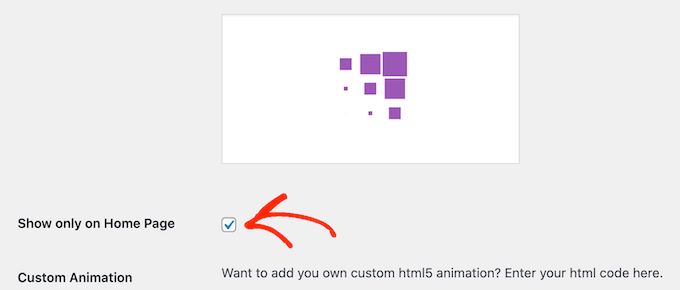
By default, the animation will appear across your WordPress website, but if you prefer, then you can use it on your homepage only. Simply check the ‘Show only on Home Page’ box.
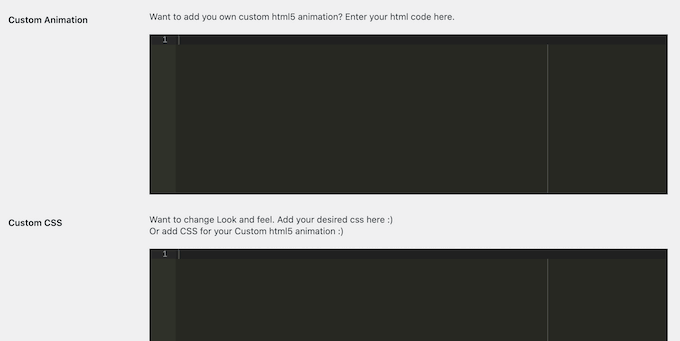
If you want to create your own CSS animation, then simply type your code into the ‘Custom CSS’ box.
Another option is to create a custom HTML5 animation by adding code to the ‘Custom Animation’ box.
After choosing an animation, scroll to the ‘Duration to show Loader’ section. Here, you can change how long the preloader plays for.
The default option is 1500 milliseconds or 1.5 seconds. This should work well for most sites, but you can type in a different number if you want.
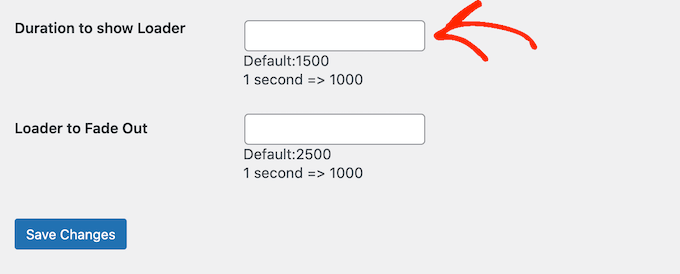
By default, the animation will take 2500 milliseconds or 2.5 seconds to fade out completely. To change this, simply type a bigger or smaller number into the ‘Loader to Fade Out’ field.
When you are happy with how the preloader is set up, just click the ‘Save Changes’ button to store your settings.
You can now visit your WordPress blog or website to see the preloader in action.

How to Add a Customizable Loading Animation With Safelayout Cute Preloader
The first plugin definitely makes it easy to add a loading animation in WordPress. However, it’s not the most customizable option.
If you want to add your own spin to the WordPress loading animation or even adjust the design to match your brand, then you can check out Safelayout Cute Preloader.
To use Safelayout Cute Preloader, go ahead and install the WordPress plugin in your admin area. Once the plugin is active, go to Settings » Safelayout Preloader.
The first tab you will see is called ‘Presets.’ Here, you can choose a premade preloader design for your website.
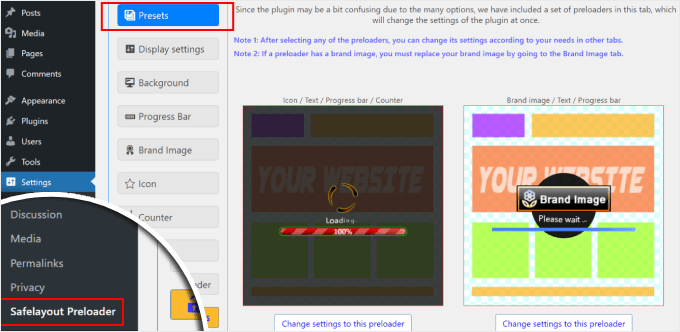
If you like one of the designs, you can click the ‘Change settings to this preloader’ button below the template.
From there, you can customize the preloader using the other design options available, which we will show you.
Otherwise, you can skip this step and switch to the next tab, which is ‘Display settings.’
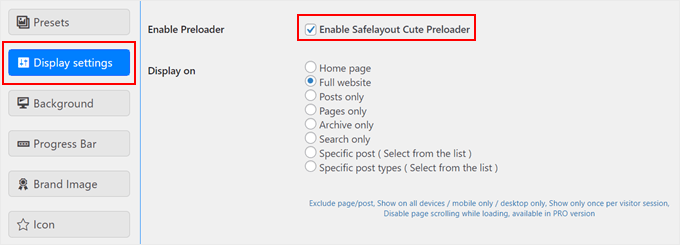
Here, you can choose where to display the preloader animation.
Make sure to tick the ‘Enable Safelayout Cute Preloader’ box so that the plugin works.
For the ‘Display on’ settings, you can choose any of the location options. For the sake of example, we will go with ‘Full website.’
If you scroll down, you can change how long the preloader animation lasts.
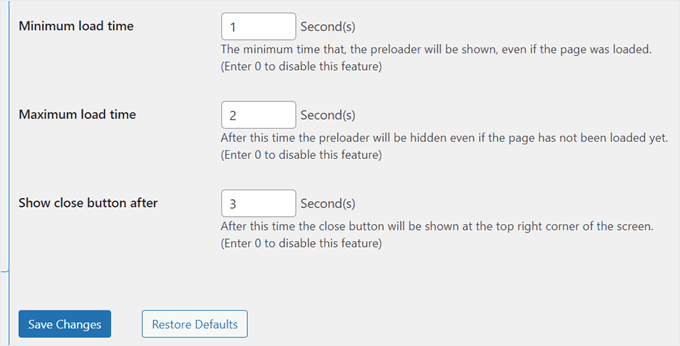
Minimum load time means how long the preloader animation will appear even if the page has finished loading.
On the other hand, maximum load time is the second at which the animation should disappear if the page takes longer than expected to load.
You can also choose to display a ‘Close’ button after a number of seconds has passed since the preloader is shown.
Once you have made your changes, just click ‘Save Changes.’
Next, let’s go to the ‘Background’ tab.
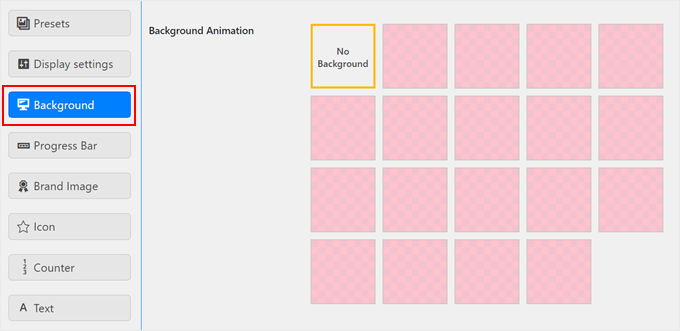
At the top, you can select a background animation. Each box shows what the animated effect will be like on your site later on.
If you don’t want to choose any of them, then just select ‘No Background.’
Moving down, you can choose the opacity of the background color, change the full-screen background into a small background, and select a background color.
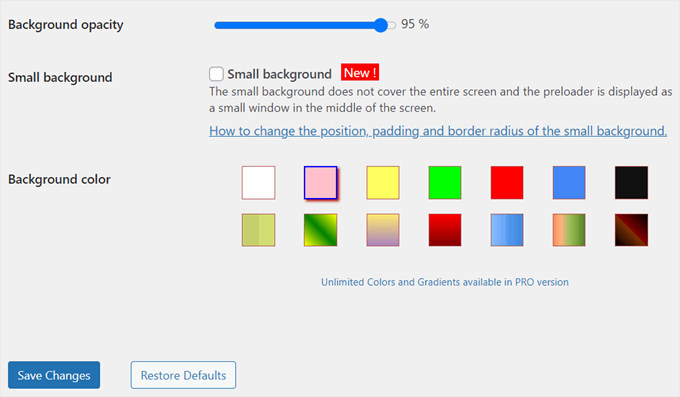
When you are happy with your picks, just click ‘Save Changes.’
The next setting is ‘Progress Bar.’
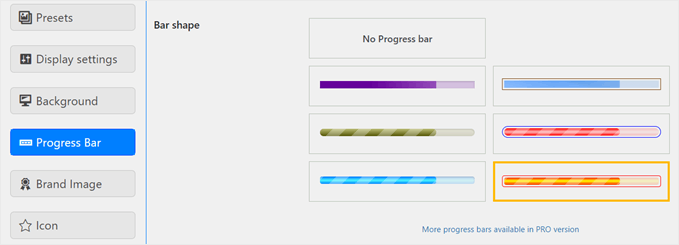
This is where you can optionally pick a progress bar shape to display on your preloader animation. It’s a good design feature that gives visitors the impression that the page is being loaded.
You can also choose ‘No Progress Bar’ if preferred.
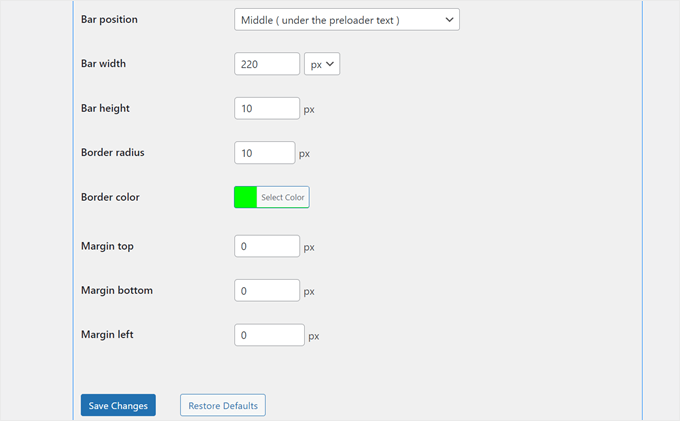
As you scroll down, you can change the progress bar’s color.

After that, you can modify the progress bar’s position, width, border radius, border color, and margins.
Make sure to click on the ‘Save Changes’ button before moving on to the next step.
With that done, go ahead and switch to the ‘Brand Image’ tab.
This is where you can add a logo to your preloader animation. To do this, just tick the ‘Show brand’ box and choose your logo image by clicking on the ‘Media Library’ button.
You can also add an animated effect if needed.
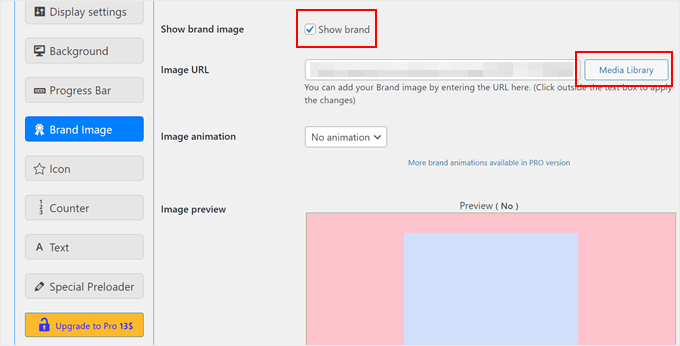
Once done, you can change the position of the logo image.
There are 4 options: above the preloader icon, above the preloader counter, above the preloader text, or under the text. If you’re not sure what these are, don’t worry, we’ll talk about them in a bit.
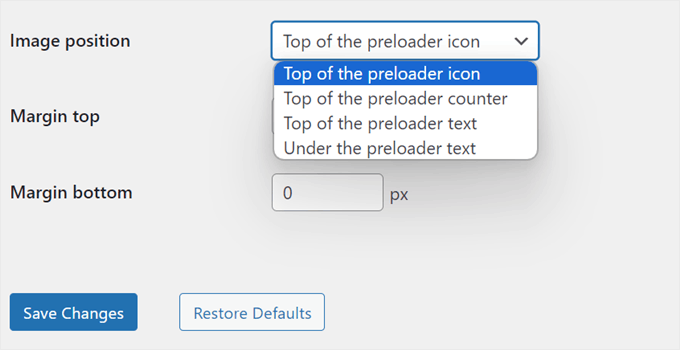
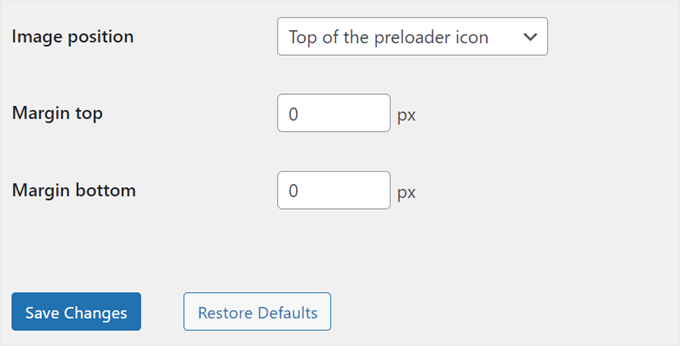
You can also change the logo image’s top and bottom margins so that it doesn’t look too close to other preloader elements. But in our case, we’re going to leave it as it is.
With all that set up, click ‘Save Changes.’
Let’s now navigate to the ‘Icon’ settings.
This is where you can display an animated image that typically appears on a preloader, like a circular progress bar.
If you’re already using a progress bar and feel like using an icon may be too much, then you can just select ‘No Icon.’
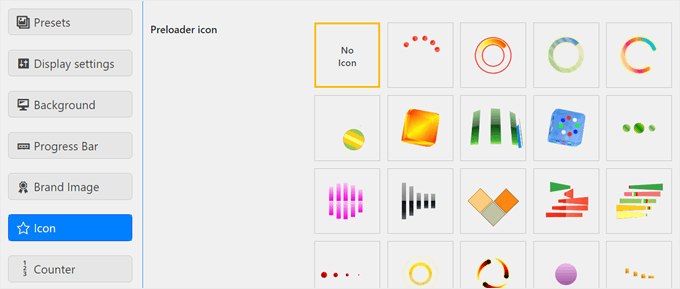
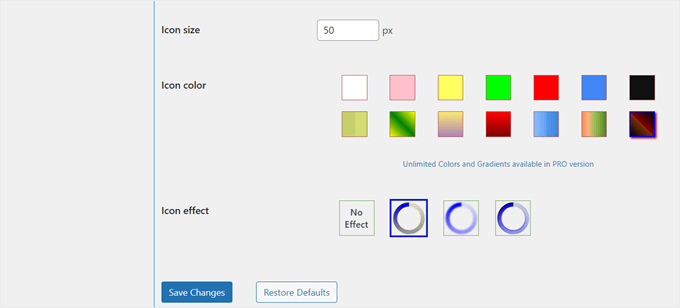
But if you do pick an icon, you also have the option to customize its appearance.
You can change the size, color, and animated effect.
When you’re satisfied with the icon design, just click ‘Save Changes.’
The next setting to configure is ‘Counter.’ This will show a numbered counter (like 0% to 100%) to indicate the loading progress. You can choose to disable or enable this feature.
Additionally, feel free to change the counter text that displays after the number if needed.
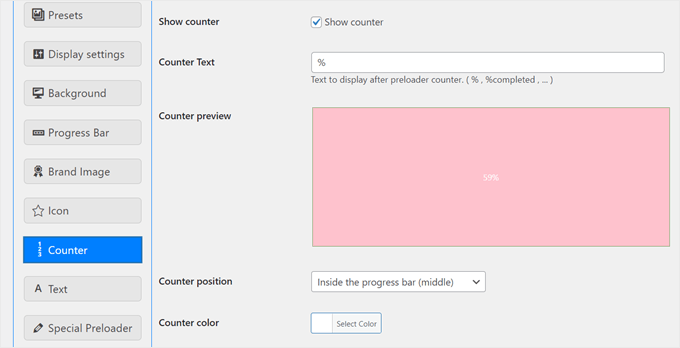
Another thing you can change is where the counter appears.
There are 4 options: under the preloader icon, in the middle of the progress bar, on the left side within the progress bar, and on the right side within the progress bar.

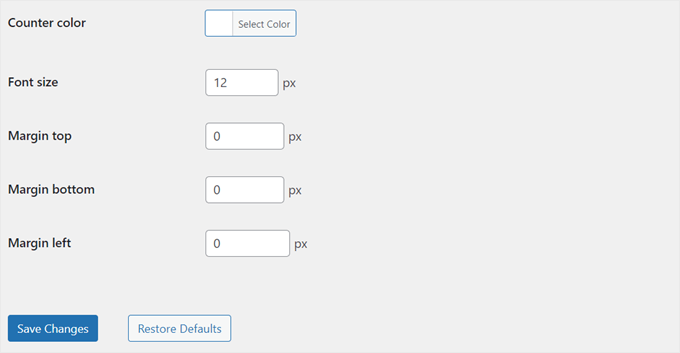
Moving down, you can change the counter’s color, font size, and margins.
After that, simply click on the ‘Save Changes’ button.
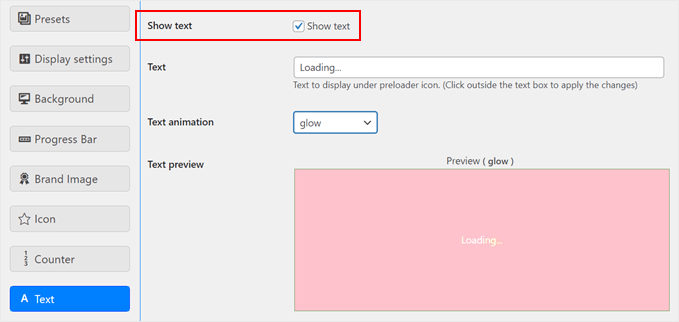
Finally, you can add and change the preloader’s text. To do this, make sure the ‘Show text’ box is ticked.
By default, the preloader will show a ‘Loading…’ text, but you can get more creative.
You can also add an animated effect to make the text stand out even more.
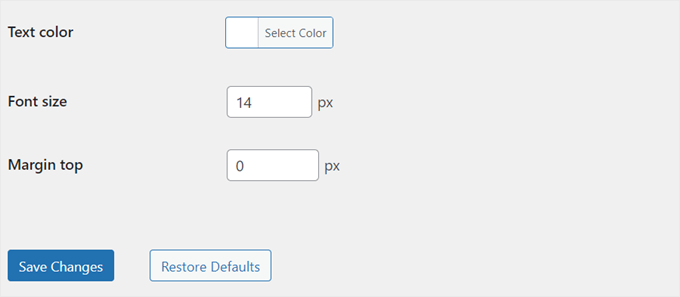
As you scroll down, you can change the text color, font size, and top margin.
Once done, just click on the ‘Save Changes’ button.
And that’s it! Your preloader animation should now appear based on your configurations. You can view your site on mobile, desktop, or tablet to see it in action.
Here’s what ours looks like:

More WordPress Tricks to Engage Your Website Visitors
Adding a preloader animation is just one of many ways to enhance your WordPress site. If you’re looking for more creative ideas to captivate your audience, we’ve got you covered:
- How to Add a Parallax Effect to Any WordPress Theme – Create depth and visual interest with this scrolling illusion technique.
- How to Add Falling Snowflakes in Your WordPress Blog – Delight your visitors with a touch of winter magic on your site.
- How to Easily Add Dark Mode to Your WordPress Website – Offer a more comfortable browsing experience with this popular feature.
- Ways to Bring Halloween Effects to Your WordPress Site – Spook up your site with these fun and festive Halloween tricks.
- How to Add an Animated Background in WordPress – Make a bold statement with eye-catching moving backgrounds.
- How to Add YouTube Video as Fullscreen Background in WordPress – Create a powerful first impression with dynamic video backgrounds.
- How to Add Infinite Scroll to Your WordPress Site (Step-by-Step Guide) – Keep visitors engaged by seamlessly loading more content as they scroll.
We hope this article has helped you learn how to easily add a preloader animation to your WordPress site. You may also want to check out our expert picks of the best drag-and-drop page builders in WordPress and our complete guide on how to edit a WordPress website.
If you liked this article, then please subscribe to our YouTube Channel for WordPress video tutorials. You can also find us on Twitter and Facebook.


Jiří Vaněk
I used to turn on this function in Elementor, which also implemented it from a certain version. It always made me even more sad when I couldn’t do this on a site where I couldn’t use Elementor. Great. If it is needed again, I finally know how to do it easily.
Vijay
Hi, I am a non techie. Is preloader possible only with plugins or can acheive by code as well? I feel it will be good to minimize plugins as much as possible to avoid unncessary conflicts with theme updates or with others in future.
WPBeginner Support
We do not have a beginner-friendly method for creating a preloader and manually creating the code would mean you are the author of a plugin added to your site rather than using a plugin someone has already created. You may want to take a look at our guide below:
https://www.wpbeginner.com/opinion/how-many-wordpress-plugins-should-you-install-on-your-site
Admin