Are you finding it hard to highlight your best content on your WordPress homepage? It’s actually a common issue – great posts often get buried in menus, and many visitors never even see them.
That’s where featured content sliders come in.
Based on our experience, a well-designed featured content slider can transform how your homepage feels. They make it more dynamic, improve navigation, and immediately show visitors your best content.
In this guide, we’ll show you how to properly add a featured content slider to WordPress step by step. By the end, you’ll have a clean, professional slider that makes your homepage more engaging and keeps visitors exploring. 🙌

Why Add a Featured Content Slider in WordPress?
A featured content slider makes your site more engaging by showcasing your top content. A great strategy is to create a slider that showcases your most popular posts or important content, making it easy for visitors to discover your best articles and pages right away.
In addition to important blog posts, you can add featured content sliders for upcoming events, popular categories, most used tags, and more.
For instance, a real estate website might use sliders to show property listings.
On the other hand, eCommerce sites can use sliders to display customer testimonials, adding social proof to boost trust and sales.
With that in mind, we’ll walk you through how to add a featured content slider in WordPress. Here’s everything we’ll share in this guide:
- Creating a Featured Content Slider in WordPress
- Displaying the Featured Content Slider in WordPress
- Bonus Tip: Add a Video Slider to Boost Engagement
- Frequently Asked Questions About WordPress Content Sliders
- Additional Resources: WordPress Guides to Using Media Files
Let’s get started.
Creating a Featured Content Slider in WordPress
The best way to create a featured content slider is by using Soliloquy. It is the best WordPress slider plugin on the market. It is super fast, easy to use, and comes with great features and add-ons.
We’ve extensively tested Soliloquy to learn about what it can do, and you can check out what we found in our in-depth Soliloquy review.
For this tutorial, we will be using the Soliloquy Pro version because it includes the Featured Content add-on and offers more features. There is also a free version of Soliloquy that you can use to get started.
First, you’ll need to install and activate the Soliloquy plugin. If you need help, please see our guide on how to install a WordPress plugin.
Upon activation, you’ll want to head over to Soliloquy » Settings from your WordPress dashboard. From here, simply enter your license key and click the ‘Verify Key’ button.
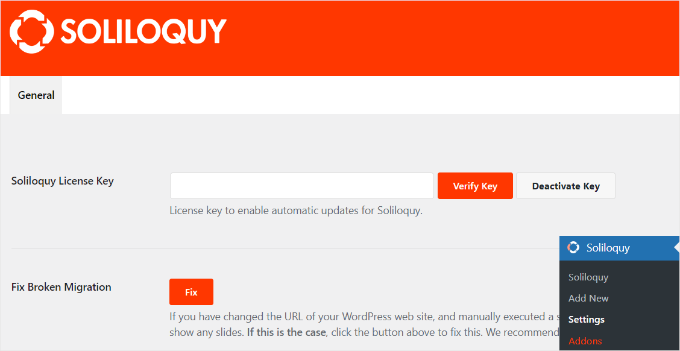
You can find the license key in your Soliloquy account area.
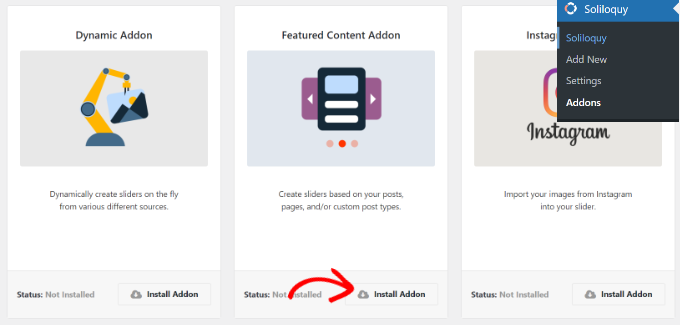
After that, you’ll want to go to Soliloquy » Addons from the WordPress admin panel.
Then, you can scroll down to locate the ‘Featured Content Addon’ and click the ‘Install Addon’ button.
Once you activate the addon, it’s time to create your first slider.
Simply go to Soliloquy » Add New from the WordPress dashboard to create your featured content slider.
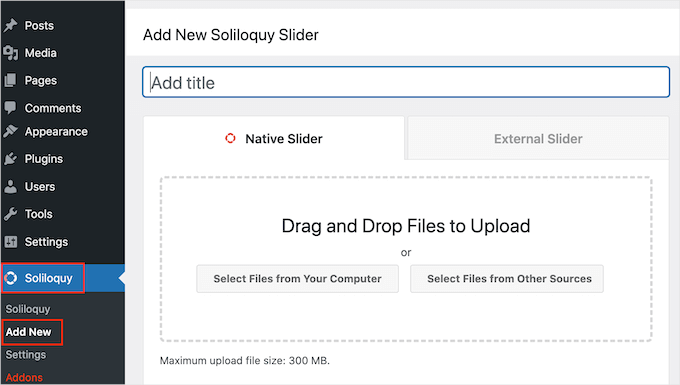
Next, you’ll need to enter a name for your slider at the top and then click on the ‘External Slider’ tab.
Here, you should see a new slider type called featured content. Go ahead and select this option.
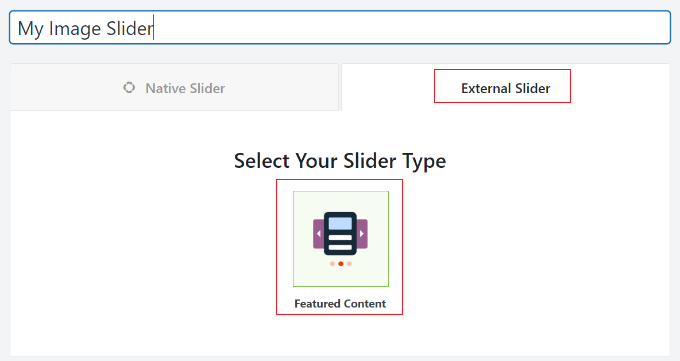
After that, let’s scroll down to the ‘Slider’ tab to configure the slider settings.
Simply select the post type you’d like to include in your featured content slider. You can choose posts, pages, custom posts, and more.
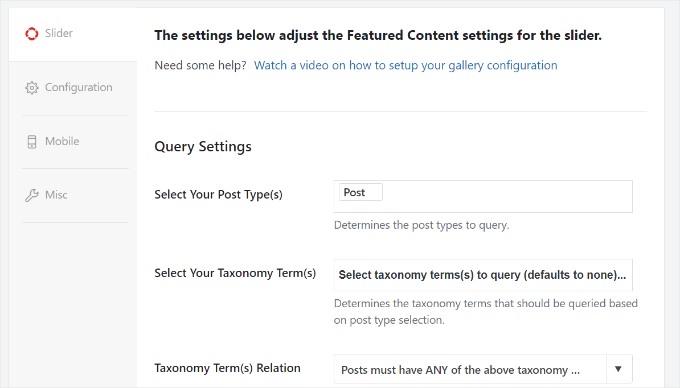
You can also select a taxonomy for your slider. In WordPress, a taxonomy is simply a way to group your content. For example, you can choose to display posts from certain categories, tags, or other taxonomies you’ve created.
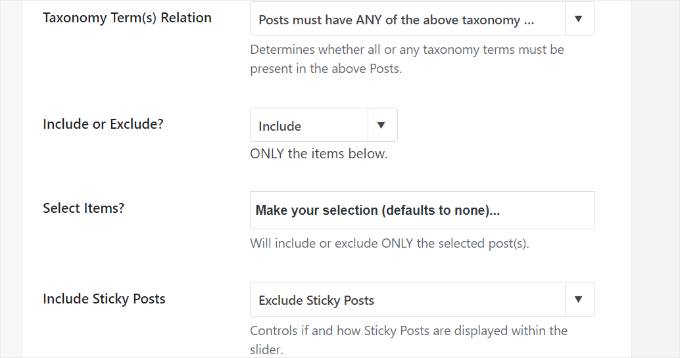
If you scroll down a bit further, then you’ll see more settings.
For instance, there are options to include and exclude posts, sticky posts settings, sort posts by, and more.
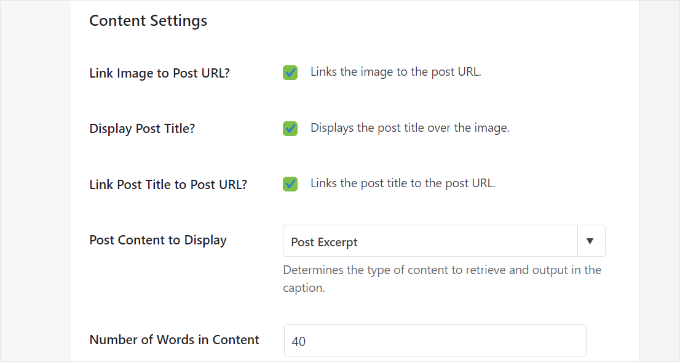
Soliloquy also offers different content settings you can control for your slider.
It lets you link images to post URLs, display post titles, show excerpts, choose the number of words in content, and more.
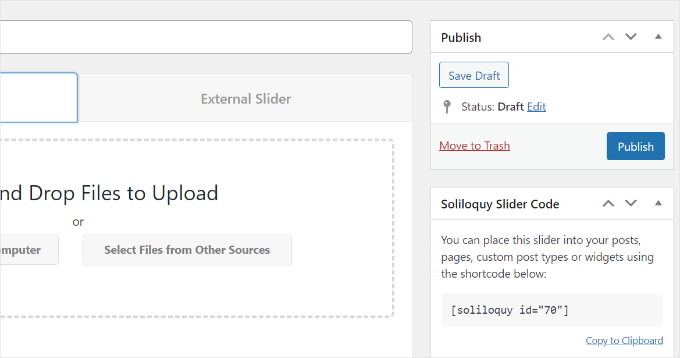
When you’re done, it’s time to click the ‘Publish’ button at the top.
You’ll also see a Soliloquy Slider shortcode that you can use to display the slider anywhere on your WordPress site.
Displaying the Featured Content Slider in WordPress
Soliloquy offers multiple ways to display the sliders at your desired location. You can use the Soliloquy block or use shortcodes to add the featured content slider.
First, you’ll need to edit or create a new post.
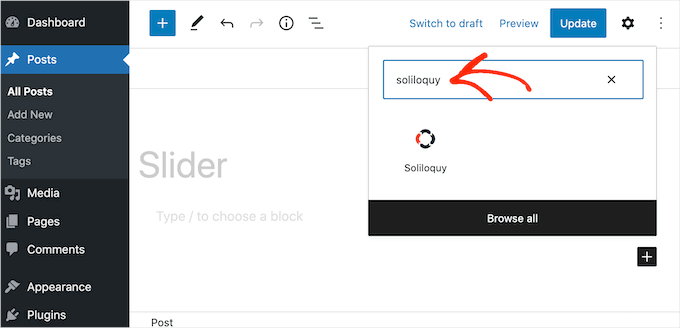
Once you’re in the content editor, click the ‘+’ button to add a new block and search for the Soliloquy block.
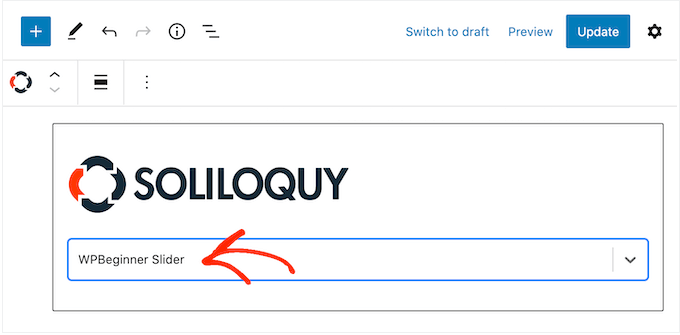
Next, you can select your featured content slider from the dropdown menu in the Soliloquy block.
Once that’s done, go ahead and publish or update your blog post or landing page.
You can now visit your website to see the featured content slider in action.

Bonus Tip: Add a Video Slider to Boost Engagement
Images are great, but videos can take your website to the next level. They grab attention, make a strong first impression, and keep visitors around longer!
Whether you’re showing off a product demo, displaying user testimonials, or promoting something exciting, videos help bring your content to life.

Luckily, you can also do this using Soliloquy. If you’re interested in learning more about it, go ahead and hop over to our guide on how to create a video slider in WordPress.
Frequently Asked Questions About WordPress Content Sliders
What is a featured content slider?
A featured content slider is a rotating slideshow that highlights your most important content. You can use it to showcase blog posts, pages, videos or images, products, or even testimonials right on your homepage or other key sections of your site.
Will a featured content slider slow down my website?
It can if the slider is poorly coded. But if you choose a well-optimized plugin, the impact on speed is minimal.
That’s why we recommend Soliloquy. It’s one of the best slider plugins available and is built with performance in mind.
Are featured content sliders good for SEO?
Yes, sliders can be good for SEO when used correctly.
They help visitors find your key content, which can boost pageviews and the time people spend on your site. These engagement signals are positive for your search engine rankings.
However, it is crucial to use a well-optimized plugin like Soliloquy. A slow-loading slider can harm your website’s performance, which can negatively affect your SEO.
Plus, you’ll always want to make sure your images are optimized for the web.
Additional Resources: WordPress Guides to Using Media Files
We hope this article helped you add a featured content slider to your WordPress site. If you’re looking for more ways to showcase your content, here are a few other guides you may find helpful:
- How to Add Thumbnails to Previous and Next Post Links
- How to Add a Background Image in WordPress
- How to Add a Gallery with a Lightbox Effect in WordPress
- How to Add Magnifying Zoom for Images in WordPress
- How to Easily Lazy Load Images in WordPress
- How to Add Audio Files and Create Playlists in WordPress
- How to Add Featured Videos Thumbnails in WordPress
If you liked this article, then please subscribe to our YouTube Channel for WordPress video tutorials. You can also find us on Twitter and Facebook.


Jiří Vaněk
One such tip on how to do it, albeit a slightly more challenging way without a plugin. Since I didn’t want to burden WordPress with another plugin, I used the commonly used WPCode for adding snippets and requested artificial intelligence in the form of Chat GPT to program such a block. I insert it into the website using WPCode, and it works perfectly. So even those who can’t code can take this path and save some performance for their website. Just a thought on another way to achieve it.
WPBeginner Support
The danger of adding it via code would be if a change needs to be made in the future which is why we recommend plugins that make the process simpler and allow for customization
Admin
Jiří Vaněk
You are right. In the end, I ended up modifying the code several more times and eventually switched to a plugin where the developer handles it for me. The snippet usually started acting up after an update. So your solution is simply better. I have to admit.
Ram E.
Going on experience, I can say that Soliloquy is among the best and user-friendly slider plugins in the market. Tried using it on a client ecommerce site and a personal project. However, I really hope that the next releases of Wordpress would add a slider feature to its Query block.
WPBeginner Support
Thanks for sharing your experience
Admin
Mike Childress
For $99 per year the Soliloquy plugin with the featured content add-on is definitely feature rich for those who want to drop that money on slider. One question I have: Can the Soliloquy featured content add on link to external websites?
Travis Pflanz
I’ve been meaning to give Soliloquy a try. That said, isn’t the slider phase on a downward trend?