Adding visual elements like timelines to your site used to mean hours of custom coding or hiring expensive developers. That’s why we were excited to discover a plugin that lets you add a Facebook-style timeline to your site in minutes.
If you want to showcase your life’s journey, business milestones, project history, or anything else, this free plugin lets you design an engaging, interactive timeline without having to write a single line of code – or hire expensive developers.
This method works with any WordPress theme, and you’ll be able to set it up in just a few minutes. We’ll walk you through the entire process, just like we’ve done for countless other WordPress users who wanted to make their sites more engaging.

Note: This tutorial will explain how to add a visual timeline to your website with your own information. If you’re looking for a way to create a social media timeline for multiple users, then please see our guide on how to make a social media website.
Why Add a Facebook Style Timeline in WordPress?
Whether you’re a business owner, blogger, non-profit, or anything inbetween, a visual timeline can be a valuable tool to elevate your WordPress website
Think about how easy and engaging it is to scroll through a timeline on Facebook. You can bring that same user experience to your own website. Letting visitors explore your timeline at their own pace makes your site more interactive and user-friendly.
Adding a timeline is also a fantastic way to tell stories with your content. For example, if you have a business website, you could visually show your brand’s history, when you launched new products, or important milestones you’ve reached. It’s a captivating and easy way for people to follow along.
A Facebook-style timeline also helps share your brand’s story in a creative and memorable way, connecting with your audience on an emotional level.
Another big plus is that it keeps visitors engaged. By giving them interesting and informative content in a timeline format, you can encourage visitors to stick around on your Wordpress website for longer.
That said, let’s look at how you can easily add a Facebook-style timeline to your WordPress blog or website.
Adding a Facebook Style Timeline in WordPress
The easiest way to create a timeline on your WordPress site is by using the Timeline Block For Gutenberg plugin. This free WordPress plugin is super simple to use. You won’t have to mess with any complicated settings, and you can do all the customization right in the WordPress content editor.
First, you will need to install and activate the Timeline Block For Gutenberg plugin. If you need help, then please see our guide on how to install a WordPress plugin.
Once the plugin is activated, just head over to the page or post where you want to add your Facebook-style timeline.
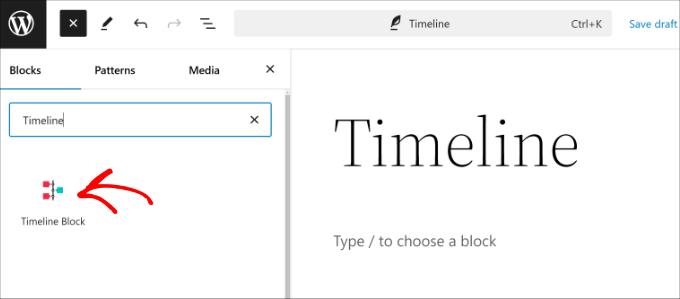
When you are in the content editor, just click the ‘+’ sign and add a ‘Timeline Block’.
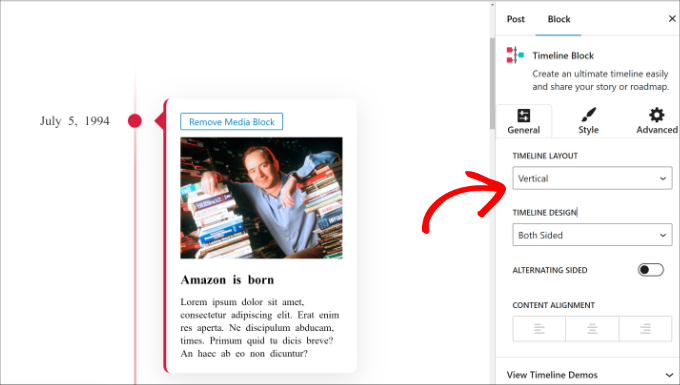
Next, you will see a timeline template added to the content editor.
From here, you can change the timeline layout and design from the settings panel on the right.
For instance, the plugin lets you change the layout from vertical to horizontal and choose whether you’d like to show the timeline on both sides or just one side.
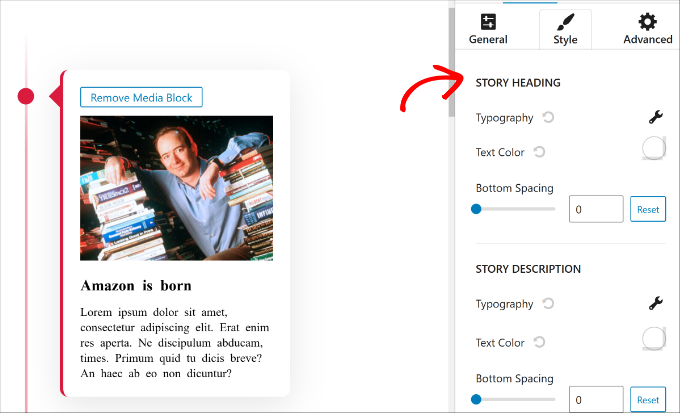
If you switch to the ‘Style’ tab in the settings panel, then you’ll get options to change the appearance of your timeline.
For instance, there are options to edit the typography, text color, and bottom spacing for the story heading and description.
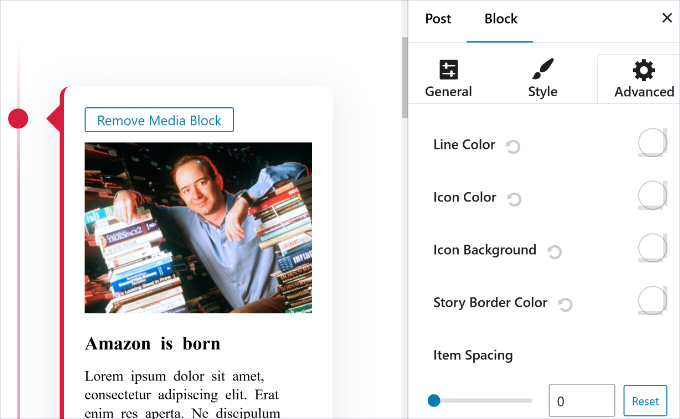
You can also find more customization options in the ‘Advanced’ tab.
The plugin lets you change the line color, icon color, icon background, item spacing, icon box size, container padding, and much more.
Next, you can edit the text and pictures in the timeline.
By default, the plugin will add dummy text and images. You can simply click on them to start editing.
For example, if you want to change the image, then simply select it and then click the ‘Replace’ option. You can upload a new image, select an existing picture, or even do something advanced like using AI to generate images.
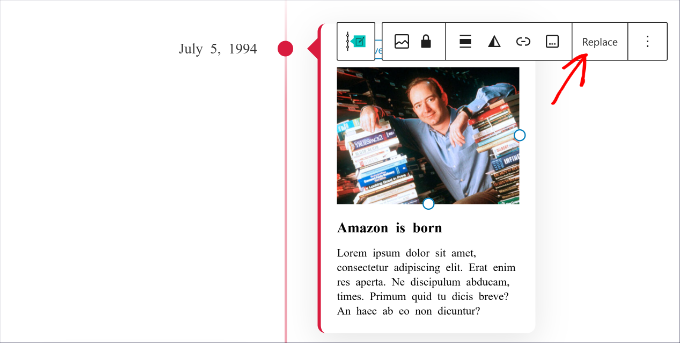
Similarly, you can also click on the text and replace it with your content in the timeline.
Next, if you need to add more stories to your timeline, then you can simply click the ‘+ Add Story’ button and enter an image and text.
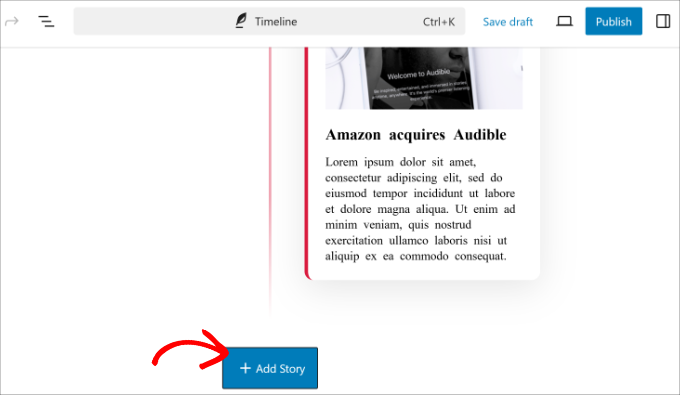
When you’re done, go ahead and click the ‘Publish’ button.
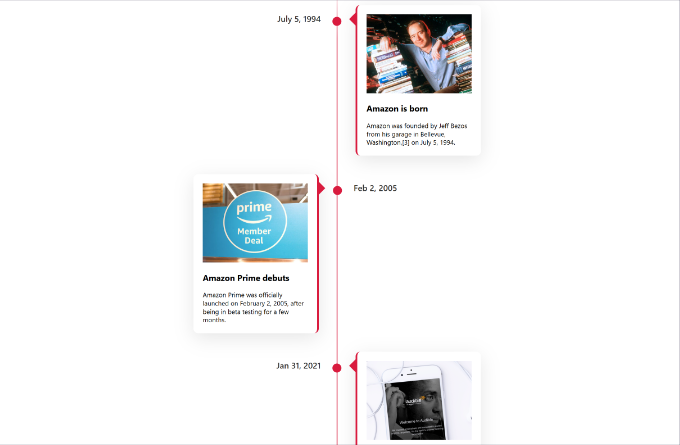
Now, you can visit your website to see the Facebook-style timeline in action.
Additional Resources on Creating Timelines in WordPress
Here are some more helpful guides on creating different types of timelines and improving the user experience of your site:
- How to Display Your Facebook Timeline in WordPress
- How to Add Beautiful Event Timelines in WordPress
- How to Create a Custom Facebook Feed in WordPress
- Best Small Business Website Builders (Tested & Compared)
- How to Make a Social Media Website (Beginner’s Guide)
We hope this article helped you add a Facebook-style timeline to your WordPress site. You may also want to see our guide on how to make a niche review site in WordPress and our expert pick of the best WordPress portfolio plugins for designers and photographers.
If you liked this article, then please subscribe to our YouTube Channel for WordPress video tutorials. You can also find us on Twitter and Facebook.


Preetam Kumar Patel
How to add data in timeline from front end .Means data will be enter from a webpage (like result of a student) and it will be shown in the the time line in defferent page.
Steve
Why can I not comment or see comments of those who go to our site? Also, why are the pictures not showing up by my posts?