PowerPoint is great, but have you ever noticed how clunky presentations look when embedded on a WordPress website? They often load slowly, look out of place, or break completely on mobile devices.
We’ve experimented a lot with WordPress over the years, and one thing we’ve found is how great it is for building responsive slide presentations that integrate seamlessly with your content.
This is especially valuable when you’re creating educational content, showcasing business presentations, or sharing slideshows that need to work flawlessly across all devices.
A lot of our readers have also asked how to create PowerPoint-style presentations in WordPress without sacrificing their site’s performance or user experience. So in this guide, we’ll show you exactly just that.

Why Create Slideshow Presentations in Your WordPress Blog?
From our experience, there are many cases where creating presentations in WordPress can be beneficial.
Let’s say you are running an educational blog. Adding a presentation in WordPress can make your content more engaging, especially for beginners. This can send positive signals to search engines, which may improve your WordPress SEO.
If you run a small business site and want to show off your recent industry report or a speaker deck, then it may be more user-friendly and interesting to display it in a presentation.
Sure, you could embed Google Slides or Microsoft PowerPoint presentations to your website. However, in our testing, there’s no guarantee the finished presentation will look good on your WordPress website. Plus, some standalone programs cost money.
The good news is that you can easily create beautiful presentations in WordPress using a WordPress plugin. We’ve tried several solutions, and we’ll show you our favorite method to create PowerPoint-style presentations in WordPress.
Feel free to use these quick links to navigate through the steps:
Step 1: Install Smart Slider 3 and Choose a Template
The easiest way to create and embed PowerPoint-style presentations in WordPress is by using Smart Slider 3.
This free plugin works with any WordPress theme and is optimized for SEO. It also comes with pre-made slides, animations, and templates, so you can create beautiful presentations, fast.
First, you will need to install and activate Smart Slider 3. If you need help, then please see our guide on how to install a WordPress plugin.
Upon activation, go to Smart Slider » Dashboard and then click on ‘Go To Dashboard.’
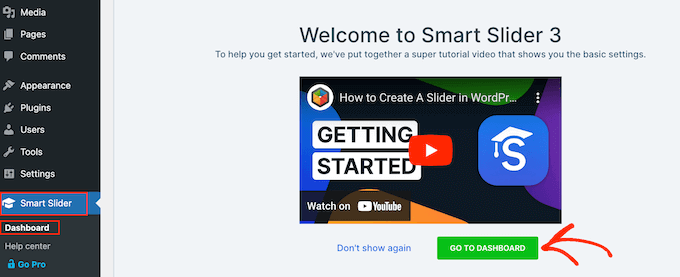
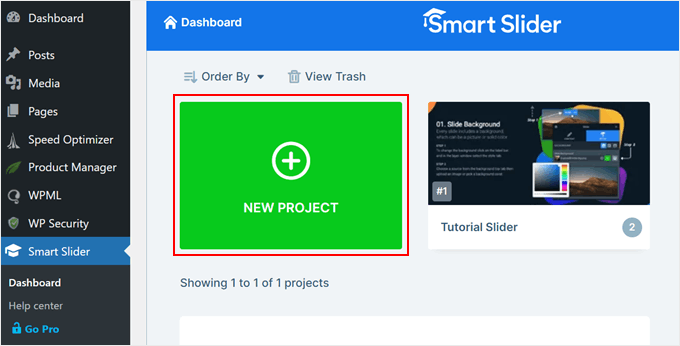
You will now arrive at the plugin’s dashboard where you can view all of your projects.
Here, simply click on ‘New Project.’
At this point, you can decide whether to start with a blank slate or use one of Smart Slider’s ready-made presentation templates.
If you want to create a professionally-designed presentation fast, then we recommend selecting ‘Start with a Template.’

Smart Slider will now show all the available templates.
To take a closer look at a design, hover your mouse over it and then click on the eye icon when it appears. This opens the presentation template in a new tab.
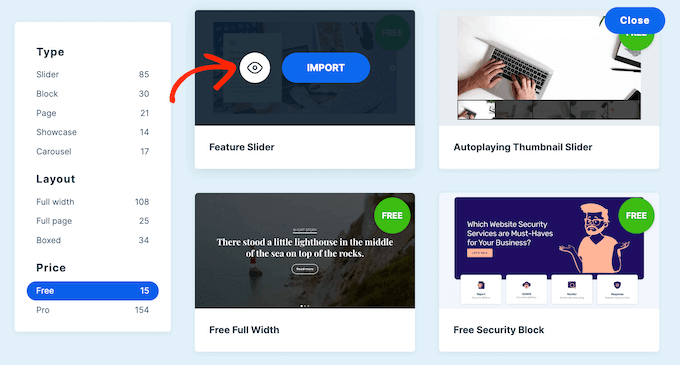
When you find a template you want to use, just hover over it and then click on the ‘Import’ button.
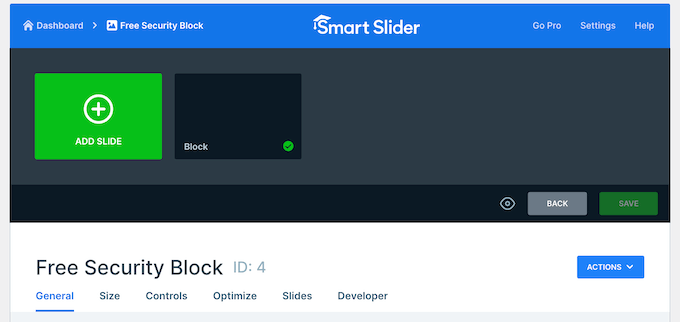
This will open your chosen template in the Smart Slider editor.
Step 2: Configure Your WordPress PowerPoint-Style Presentation
After choosing a template, it’s a good idea to configure the presentation’s settings. The options you see may vary depending on your template, but we will cover all the major settings.
Also, if you find yourself needing to configure these settings again after you create your presentation, you can always go back to this step.
Configure General and Size Settings
In the ‘General’ tab, you can give the presentation a name by typing it into the ‘Name’ field.
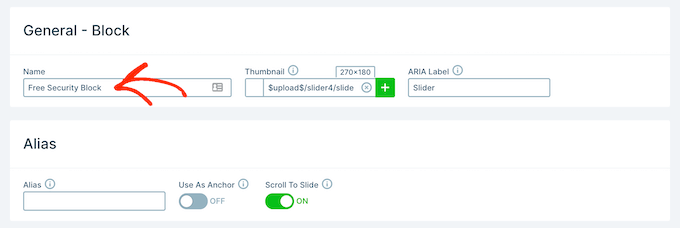
You can also add a thumbnail, which may be visible to visitors depending on how you configure the presentation.
Simply click on the ‘+’ icon next to ‘Thumbnail’ and then either choose an image from the WordPress media library or upload a new file from your computer.

With that done, you need to scroll to the ‘Slider Design’ section.
Here, you can change the slider’s alignment and add a margin to create more space around your slides.

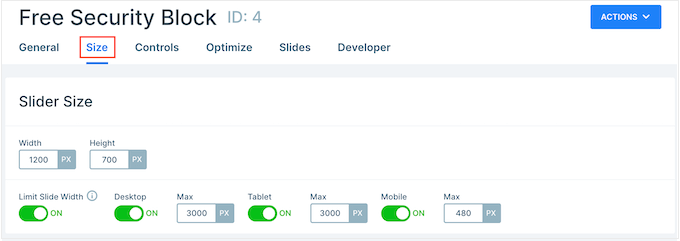
Next, you may want to make the slides bigger or smaller by selecting the ‘Size’ tab.
Here, you can set different maximum sizes for tablet, mobile, and desktop users. By doing so, you can be confident that the presentation will look great across all devices.
To set these maximum sizes, simply click to activate the Desktop, Mobile, and Tablet sliders and then type a number into the ‘Max’ field.
Moving down, you’ll find the ‘Breakpoints’ section. This helps you control how your presentation looks on different devices. For example, your presentation can switch from desktop view to tablet view if the screen width is between 768 and 1199 pixels.
You can enable Global Breakpoints to use the same settings across all your presentations. This saves time if you’re creating multiple slideshows and want them to behave consistently across different devices.

Under ‘Layouts’, you can choose whether the presentation should fill the entire width of the browser (‘Full width’) or fit the container it’s put in (‘Boxed’).
By default, the presentation will scale up and down automatically to fit the visitor’s screen. You will typically want to leave these settings enabled, but you may want to set a minimum height by typing it into the ‘Min Height’ box.

Configure Controls and Animation Settings
After that, click on the ‘Controls’ tab. Here, you can change how visitors move between the different slides. For instance, in the ‘General’ section, you can change the drag direction, enable the mouse wheel, and enable keyboard navigation.

The default settings should be a good fit for most WordPress blogs and websites, but you may want to change how the arrows look.
For example, you can change the color of the arrows and the inset, which controls where the arrows appear on the slide.
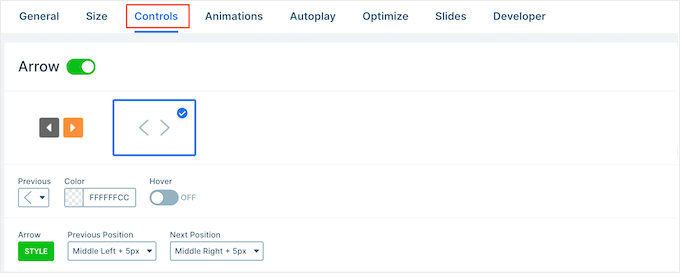
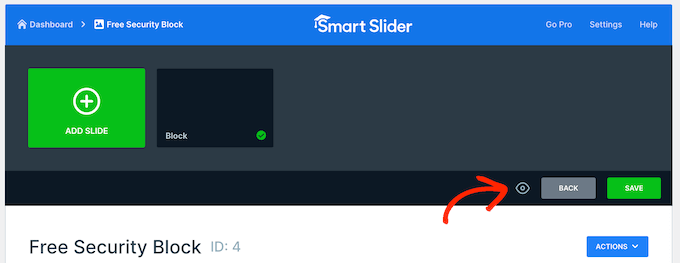
As you make changes, you may want to preview how the arrows will look in your presentation.
To do that, just click on the eye icon in the toolbar.
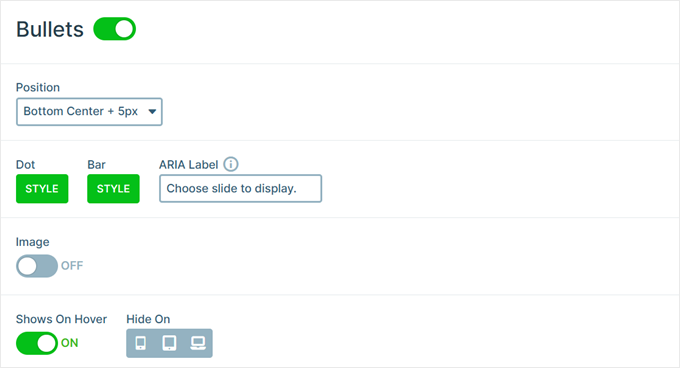
With that done, simply scroll to ‘Bullets.’
Here, you can customize the dotted icons that allow visitors to move between the different slides. You can try different bullet styles, change the corner radius, and more.
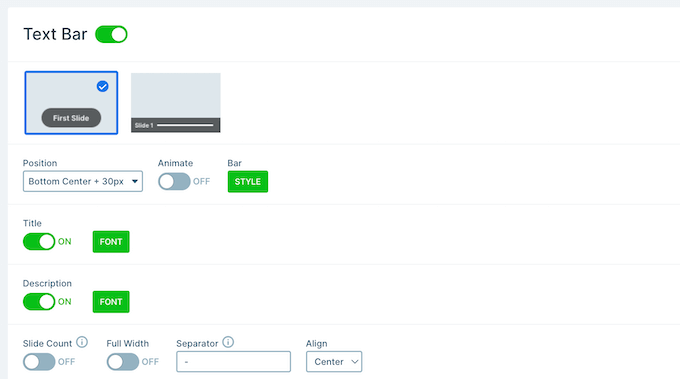
If you want to show each slide’s title, then just click to enable the ‘Text Bar’ toggle.
Here, you can customize how the text bar looks, where to position it, its alignment, and so on.
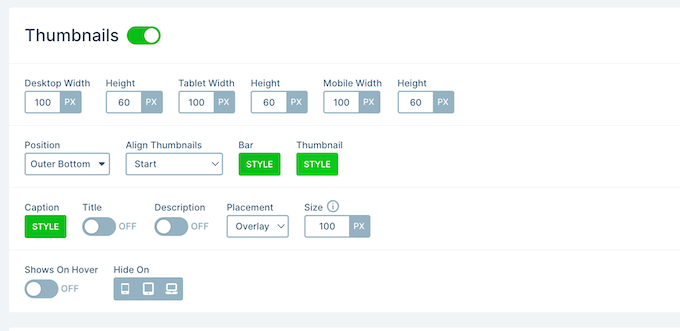
Another option is to show each slide’s thumbnail, which gives visitors another way to move between slides.
To do this, you need to enable the ‘Thumbnail’ toggle. You will now get access to some additional settings to fine-tune how the thumbnails look.
Finally, you may want to add a shadow to the bottom of your slideshow by clicking on the ‘Shadow’ toggle.
After that, you can open the dropdown and choose between the different shadow styles.

CSS animations are a great way to catch the visitor’s attention and encourage them to engage with your presentation. Smart Slider comes with built-in animations, so make sure you click on the ‘Animations’ tab to configure them.
Here, open the ‘Main Animation’ dropdown and choose the effect Smart Slider will play when switching between slides. You can also change how long the animations will play by typing a number into the ‘Duration’ field.
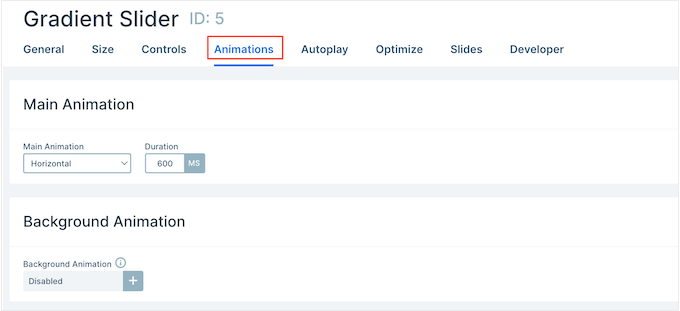
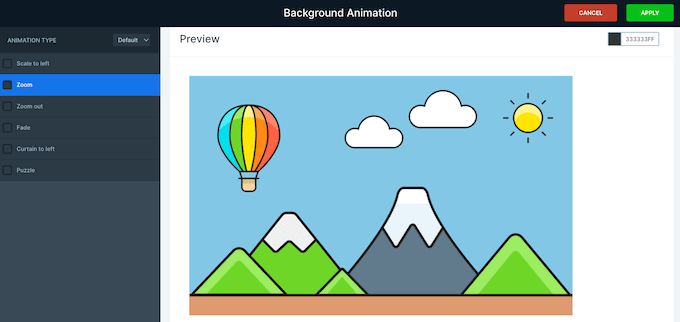
Depending on the template you are using, you may also see a ‘Background Animation’ option. This allows you to animate the slide’s background image and colors.
Just be aware that background animations don’t work on videos or any presentations that use parallax scrolling.
To take a closer look at Smart Slider’s background animations, click on the ‘+’ icon. This opens an editor where you can try different animations to see what effects you can create.
Configure Autoplay Settings
The next tab is ‘Autoplay.’
By default, visitors will need to move between your slides manually. If you want the presentation to play automatically instead, then simply click to enable the ‘Autoplay’ slider.
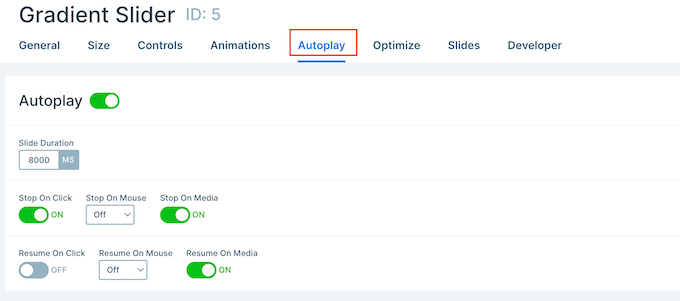
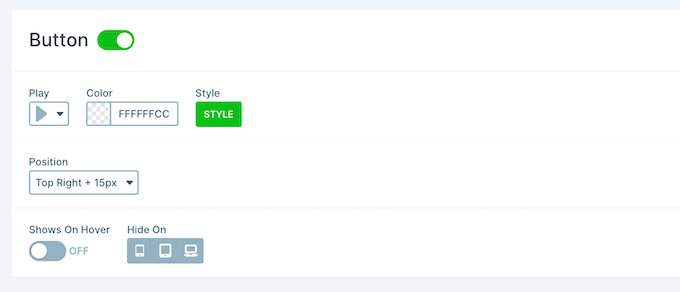
If you enable this option, then you will get access to some additional settings where you can change how long the presentation shows each slide and how visitors can stop the slideshow.
It also adds a ‘Buttons’ section, where you can customize the presentation’s ‘Play’ button.
Optimize Your Presentation
After that, select the ‘Optimize’ tab. Here, you will find the settings for Smart Slider’s lazy loading.
By default, the slider loads immediately, which is a good choice if the presentation is the first thing people see when they visit the page.
However, if you are planning to place the presentation further down the page, then we recommend opening the ‘Loading type’ dropdown and choosing ‘After page loaded.’

This can boost WordPress speed and performance, along with improving the visitor experience by loading the rest of the page first.
Another option is ‘After delay,’ which allows you to set a load delay for the slider.

Configure Slide Settings
By default, images will cover the entire slide, even if Smart Slider needs to crop the image to fit. This tends to work well for most presentations, but you can change this default setting by selecting the ‘Slides’ tab.
Here, simply open the ‘Slide Background Image Fill’ dropdown and choose a different option from the list, such as stretch, center, or blur fit.

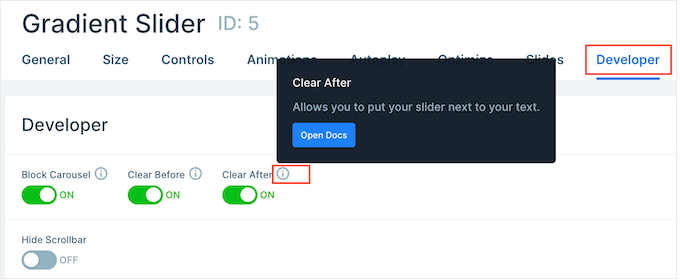
The ‘Developer’ tab has some advanced settings, including an area where you can add custom CSS to your presentations.
Most website owners won’t need to use these settings. However, if you want to learn more about any of the ‘Developer’ options, then simply hover over the little ‘i’ icon. This will show a tooltip with some more information, plus a link to the Smart Slider documentation.
Step 3: Create Slides for Your PowerPoint-Style Presentation
When you are happy with how the presentation is configured, it’s time to start creating slides.
Simply click on the ‘Add Slide’ button to get started.

Smart Slider lets you create a few different types of slides. It even has a ‘Post’ option, which allows you to embed a WordPress post inside a slide.
You can experiment with the different options, but in this guide, we will be using the ‘Blank’ design as an example.
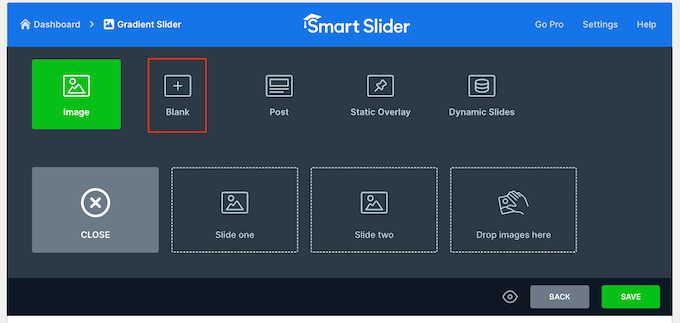
After choosing a slide type, you will see the slide’s thumbnail near the top of the screen.
Just hover your mouse over the thumbnail and then click on the ‘Edit’ button when it appears.
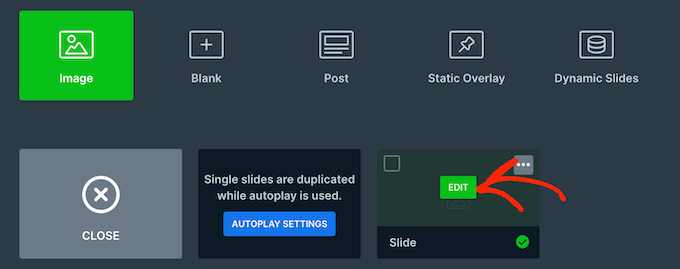
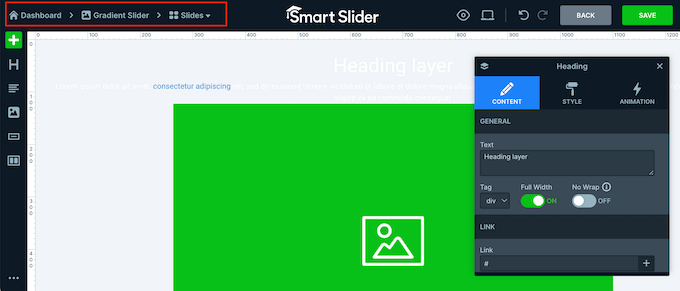
This opens the Smart Slider editor.
Along the top of the screen is a breadcrumb navigation bar where you can move between the different slides in the presentation.
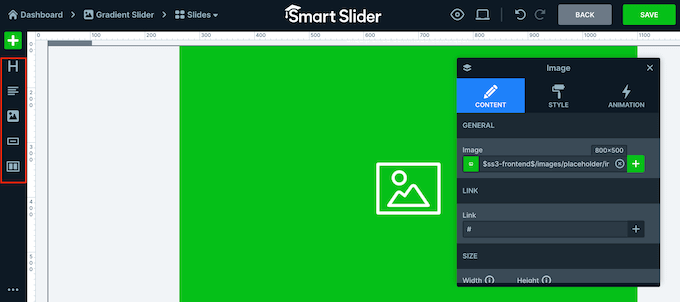
Along the left-hand side of the screen are all the layers that make up the slide. You can hover your mouse over any icon to see that layer’s name, such as Image or Row.
To edit a layer, just give it a click in the left-hand menu. This opens a popup with all the settings you can use to customize that layer.
You can also select a layer by clicking on it in the live preview. For example, to replace some of the default text with your own messaging, just click to select that layer.
In the popup that appears, type your message into the ‘Text’ field.
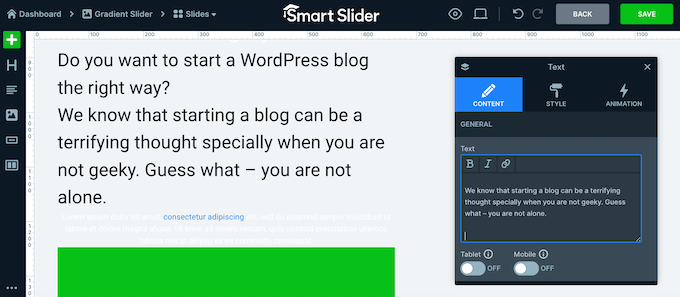
You can also change how the text looks by clicking on the ‘Style’ tab.
Here, you can change the text color, font, size, and more.
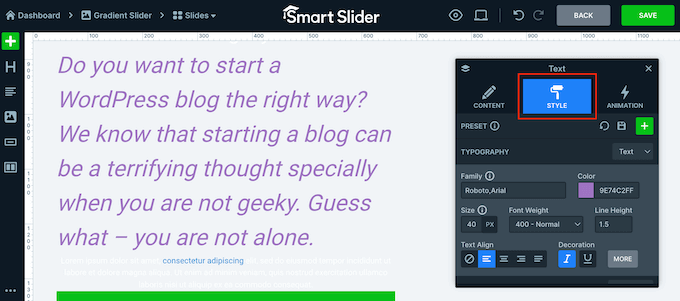
To customize the slide, simply click on the different layers and then make your changes in the popup that appears.
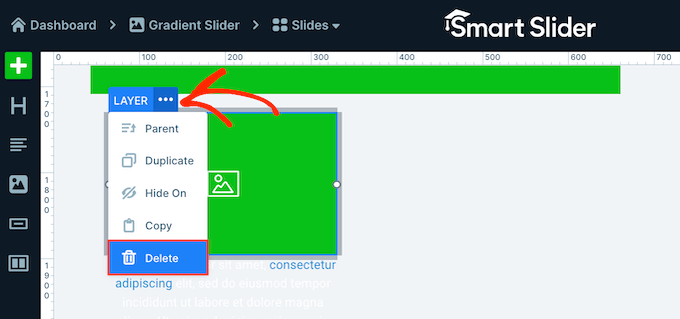
If you want to delete a layer, then just hover your mouse over it and then click on the dotted icon. In the dropdown menu, you need to select ‘Delete.’
Do you want to add more layers to the slide?
Simply click on the green ‘+’ icon in the left-hand menu.
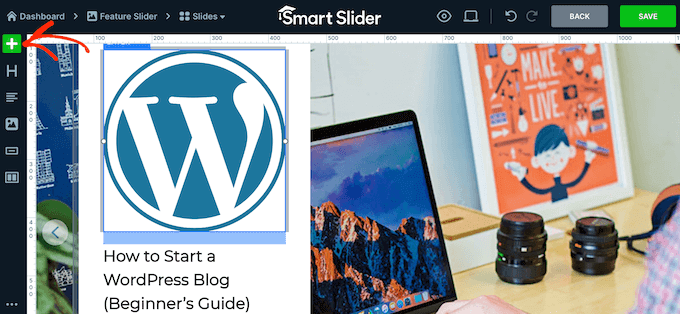
The ‘Layers’ tab shows some basic layers, such as images, buttons, and text.
You can add any of these layers to the slide using drag and drop.
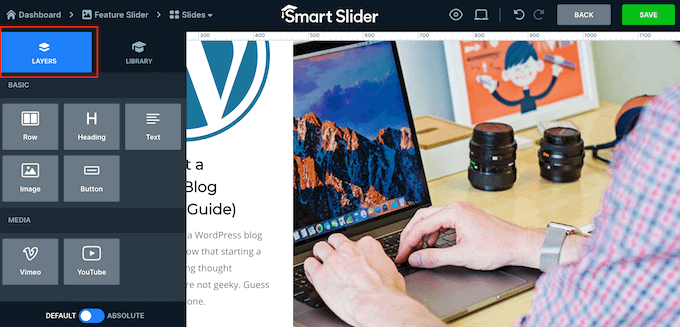
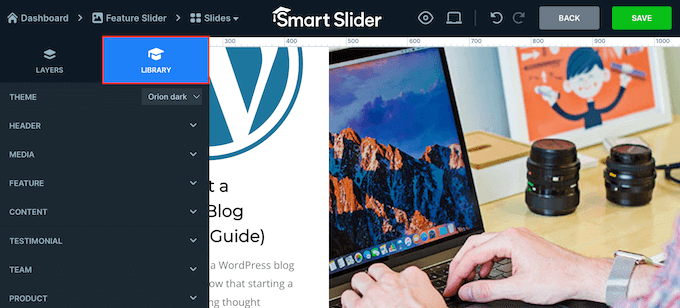
Smart Slider also has a library of pre-made slides that you can add to your presentation.
To take a look at these options, click on the ‘Library’ tab.
You can now continue working on this slide by adding layers and customizing them with your own content and settings.
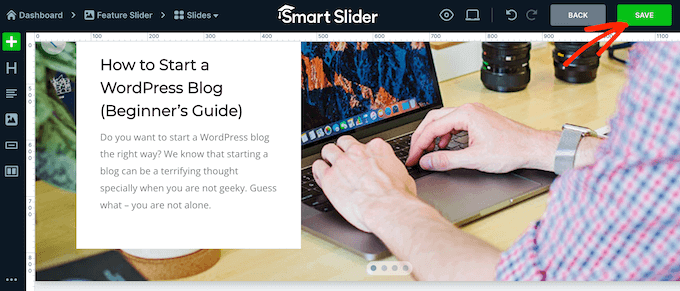
When you are happy with how the slide is set up, click on the ‘Save’ button.
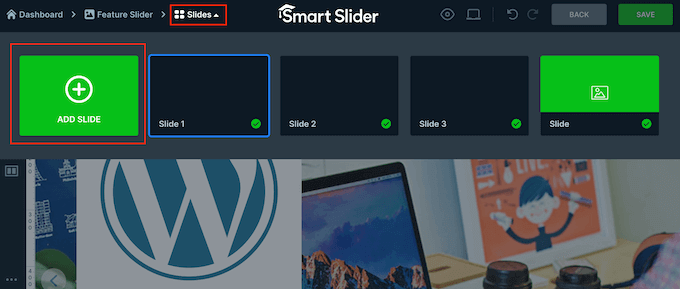
To start working on the next slide, you need to click on ‘Slides’ in the toolbar.
Then, select ‘Add Slide.’
Step 4: Embed Your Presentation Slides in WordPress
When you have finished working on the presentation, simply click on ‘Back’ to return to the main Smart Slider dashboard.
By default, Smart Slider publishes all your slides, but it’s still worth checking that there’s a green checkmark next to every slide you want to show on your site.
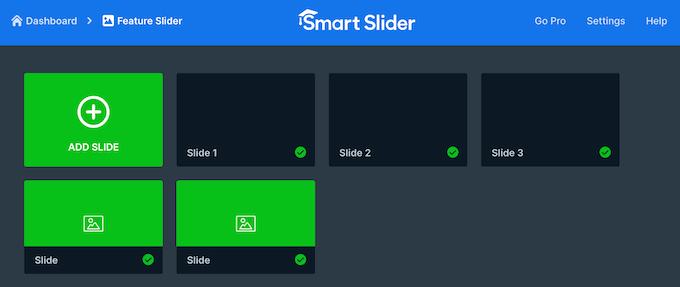
If you see an ‘x’ next to any slide, then it means the slide is unpublished. You will need to click on the ‘x’ to turn it into a green checkmark, which makes the slide live.
After that, you are ready to add the presentation directly to your online store, website, or blog. Simply open any post or page in the Gutenberg block editor and then click on the ‘+’ icon.
Next, you need to type ‘Smart Slider 3’ into the popup and select the right block when it appears in the block editor.
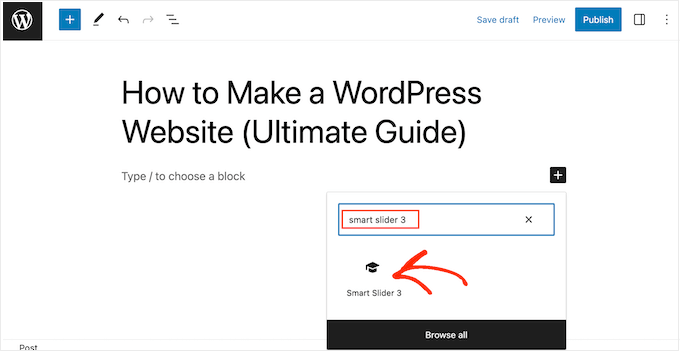
This adds a WordPress slideshow block by Smart Slider 3 to the page.
Next, go ahead and click on the ‘Select Slider’ button.
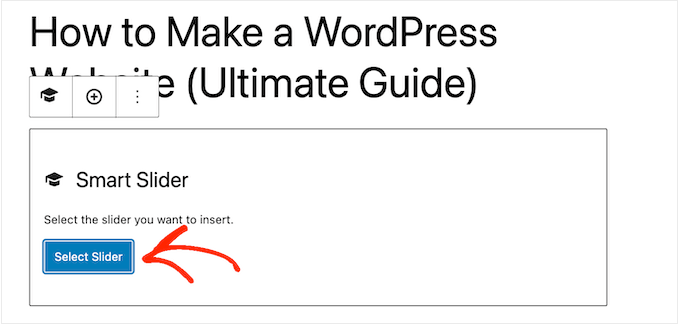
This opens a popup showing all the presentations you have created.
Simply click on the presentation you want to use and then select ‘Insert.’

This adds the presentation to your website. You can now either click on the ‘Update’ or ‘Publish’ button to make the presentation live.
Now, if you visit your website, you will see the PowerPoint-style presentation in action.

Learn How to Create More Engaging Blog Content
Adding a slideshow presentation is just one way to keep your readers engaged. Here are other ideas you can implement to improve your blog:
- How to Do Live Blogging in WordPress (Step by Step)
- How to Test the Best Time to Publish a Blog
- How to Effectively Attract and Manage Guest Bloggers in WordPress
- How to Add and Improve Readability Score in WordPress Posts
- How to Create a Roundup Post in WordPress (The Easy Way)
- How to Add a Blogroll in Your WordPress Site (without a Plugin)
We hope this article helped you learn how to create presentations in WordPress. You may also want to see our list of the best dynamic content plugins in WordPress and our top WordPress blog examples.
If you liked this article, then please subscribe to our YouTube Channel for WordPress video tutorials. You can also find us on Twitter and Facebook.


kzain
Using a WordPress plugin like Smart Slider 3 opens up new possibilities.
The pre-made templates and drag-and-drop editing sound like real time-savers, especially for those comfortable with the WordPress interface. The SEO optimization aspect is also interesting, especially if you plan to embed presentations publicly on your website.
THANKGOD JONATHAN
Who knew creating presentations in WordPress could be so easy? This guide opened up new possibilities for my content.
Thanks for introducing a creative alternative to traditional tools.
WPBeginner Support
You’re welcome
Admin
Tracy Snar
I’m so excited about this feature!
WPBeginner Support
Glad you found this recommendation helpful
Admin
Dave
Can you add audio and set the presentation up to run as an automted presentation ?
WPBeginner Support
You would want to reach out to the plugin’s support for if that is an option with their current tools.
Admin
Kevin Kovadia
Very good plugins, it is great. I will try to create slide from WordPress. If is possible to create google doc & Google sheet using such a way with WordPress.
WPBeginner Support
If you’re looking to embed a google doc, you would want to take a look at our guide below:
https://www.wpbeginner.com/plugins/how-to-embed-pdf-spreadsheet-and-others-in-wordpress-blog-posts/
Admin
Sefa Tsegha
Wow. I never knew there’s a WordPress plugin for that. Thank you for sharing. I always learn something new from this site.
WPBeginner Support
You’re welcome glad we could share something new
Admin
Gursimran Kaur
Hi
Tnx for sharing
WPBeginner Support
You’re welcome
Admin
Maddie
Great article. Just letting you know that presentation is spelt wrong twice in the second paragraph under the heading ‘How to Create a Presentation in Wordpress.’
Here is the referenced sentence:
“Upon activation, you need to visit Presenation » Add New page to create your first presenation.”
WPBeginner Support
Thanks for catching that, we’ll be sure to fix the typo
Admin
JIM C
This looks great. More use learning Wordpress while making some presentations for different segments of the client base!
WPBeginner Support
Glad you liked our guide
Admin