
Jeśli kiedykolwiek przewinąłeś na dół jednego z naszych artykułów, prawdopodobnie zauważyłeś nasz widżet “Popularne na WPBeginner właśnie teraz!”. Ta funkcja stała się hitem wśród naszych czytelników, pomagając im odkryć nasze najbardziej wartościowe treści i zachęcając ich do odkrywania większej części naszej witryny.
Wyróżniając najpopularniejsze posty na blogu WordPress, nie tylko pomagasz czytelnikom znaleźć najlepsze treści, ale także zwiększasz wskaźniki zaangażowania w witrynie. Jest to korzystne dla obu stron: odwiedzający otrzymują świetne treści, a ty zatrzymujesz ich dłużej na swojej stronie.
W tym artykule pokażemy, jak łatwo wyświetlać najpopularniejsze posty na podstawie ich wyświetleń w WordPress.

Dlaczego warto wyświetlać popularne wpisy według wyświetleń w WordPress?
Gdy użytkownicy zobaczą twoje najpopularniejsze wpisy na blogu WordPress, mogą dowiedzieć się, jakie treści najbardziej lubią ich koledzy. W ten sposób mogą sprawdzić te artykuły i dołączyć do rozmowy.
Co więcej, wyświetlanie twoich najpopularniejszych treści w WordPressie może zwiększyć twój dowód społeczny. To tak, jakby powiedzieć nowym użytkownikom, że “Hej, inni ludzie uznali te wpisy za bardzo pomocne i ty też możesz!”.

Wreszcie, wyświetlanie wpisów na twoim blogu, które cieszą się popularnością, może sprawić, że ludzie pozostaną dłużej na twojej witrynie internetowej, zwiększając liczbę odsłon i zmniejszając współczynnik odrzuceń.
Im bardziej rośnie zaangażowanie Twoich użytkowników, tym bardziej Google uważa Twoje treści za dobre i ważne. Z kolei WordPress SEO poprawia się, a twoja witryna może zajmować wyższe pozycje w rankingu.
Niestety, WordPress nie ma wbudowanej funkcji ani bloku do wyświetlania twoich najpopularniejszych wpisów według wyświetleń strony. W tym przewodniku pokażemy, jak to zrobić za pomocą wtyczki i kodu.
Wystarczy kliknąć jeden z poniższych odnośników, aby przejść bezpośrednio do Twojej preferowanej metody:
Metoda 1: Wyświetlanie popularnych postów WordPress według wyświetleń za pomocą MonsterInsights (zalecane)
Najprostszym sposobem na wyświetlenie popularnych wpisów według zobacz w WordPress jest wtyczka. W rzeczywistości dostępnych jest wiele popularnych wpisów WordPress, ale naszym zdaniem najlepszym wyborem jest MonsterInsights.

Używany przez ponad 3 miliony witryn internetowych na całym świecie, MonsterInsights jest najlepszą wtyczką Google Analytics dla WordPress. Chociaż jej główną funkcją jest analityka, posiada ona również przyjazną dla użytkownika funkcję wyświetlania twoich najpopularniejszych wpisów.
Po pierwsze, musisz zainstalować wtyczkę MonsterInsights i połączyć ją z twoim kontem Google Analytics. Aby uzyskać więcej informacji, zapoznaj się z naszym przewodnikiem krok po kroku, jak zainstalować Google Analytics w WordPress dla początkujących.
Uwaga: Chociaż dostępna jest darmowa wersja MonsterInsights, będziemy korzystać z wersji Pro, ponieważ zawiera ona funkcję popularnych wpisów.
Wybór motywuwidżetu popularnych wpisów
Po włączaniu i skonfigurowaniu wtyczki, przejdź do Insights ” Popular Posts z kokpitu WordPress. Następnie kliknij pozycję menu “Widżet popularnych wpisów”.

Przewijając w dół, należy wybrać motyw do wyświetlania widżetu popularnych wpisów. Dostępne są różne opcje.
Niektóre zawierają obrazek wyróż niający wpis, podczas gdy inne są bardziej minimalistyczne.

Jeśli chcesz zobaczyć, jak wygląda twój motyw przed dokonaniem wyboru, po prostu przejdź w dół strony do sekcji Podgląd motywu.
Możesz również wyświetlić podgląd motywu w formacie Wide lub Narrow. W przypadku formatu Wide twoje wpisy będą wyświetlane pod treścią strony lub wpisu, podczas gdy format Narrow wyświetla wpisy po prawej stronie, jak panel boczny.

Następnie przewińmy w dół do sekcji “Dostosuj wygląd”. Tutaj możesz zmodyfikować kolory motywu, wielkość liter, układ i liczbę wpisów do wyświetlenia.
Opcje konfiguratora mogą się różnić w zależności od używanego motywu. Warto więc zapoznać się z różnymi motywami, aby wybrać ten, który najbardziej Ci odpowiada.

Konfiguracja zachowania widżetu popularnych wpisów
Po skonfigurowaniu wyglądu motywu należy przejść do sekcji Zachowanie. To tutaj będziesz kontrolować sposób wyświetlania widżetu popularnych wpisów na twojej witrynie internetowej WordPress.
W ustawieniach stylizacji widżetu możesz wybrać użycie projektu, który stworzyłeś powyżej lub zdecydować się nie stylizować widżetu w ogóle. W przypadku drugiej opcji widżet będzie zgodny z CSS twojego motywu witryny WordPress.
Następnie możesz wybrać sposób, w jaki widżet ma wybierać twoje najpopularniejsze wpisy. W tym poradniku wybraliśmy opcję “Curated”, ale możemy również wyświetlić najpopularniejsze wpisy na podstawie liczby komentarzy.

Następnie należy włączyć opcję “Dodaj 5 najlepszych wpisów z Google Analytics” poniżej. Ale zanim to zrobisz, będziesz potrzebował MonsterInsights Dimensions Add-On i wpisu typu treści jako nowego konfiguratora.
Pozwoli to MonsterInsights wybrać najpopularniejsze wpisy na podstawie danych Google Analytics.
W tym celu należy pobrać dodatek MonsterInsights Dimensions i zainstalować go jako wtyczkę w systemie WordPress. Aby uzyskać instrukcje krok po kroku, zapoznaj się z naszym przewodnikiem na temat instalacji wtyczki WordPress.
Następnie przejdź do sekcji Insights “ Settings i przejdź do karty “Conversions”. Następnie kliknij “Utwórz nowy konfigurator”.

Gdy już to zrobisz, wybierz “Typ treści” z rozwijanego menu.
Włączy to MonsterInsights do śledzenia wydajności twoich wpisów na blogu i innych niestandardowych typów treści.

Teraz wystarczy wrócić do Insights ” Popularne wpisy i przejść do “Widżetu popularnych wpisów”.
Wystarczy włączanie przycisku “Dodaj 5 najlepszych wpisów z Google Analytics”. Następnie kliknij przycisk “Testuj zautomatyzowane wpisy”, aby sprawdzić, czy konfiguracja przebiegła pomyślnie.

Jeśli tak, pojawi się komunikat o powodzeniu.
Powinno być napisane: “Dane popularnych wpisów mogą być pobierane poprawnie. Uwaga: w zależności od tego, kiedy skonfigurowano ustawienia własnych wymiarów, wczytywanie odpowiednich danych popularnych wpisów z Google Analytics może potrwać do 7 dni”.

Przechodząc do kolejnych kroków, możesz teraz dodać tytuł, który pojawi się nad widżetem. Może to być coś w stylu “Sprawdź nasze najpopularniejsze wpisy” lub coś podobnego.
Poniżej można wybrać, czy widżet ma być wyświetlany we wszystkich typach treści, być wykluczony z określonych wpisów i/lub pojawiać się tylko w niektórych kategoriach postów.
Te ustawienia są przydatne, jeśli utworzyłeś własne typy treści inne niż wpisy na blogu i czujesz, że widżet popularnych wpisów będzie tam wyglądał nieistotnie.

Jednym z ostatnich kroków jest osadzanie widżetu popularnych wpisów. Istnieje kilka opcji: umieszczenie go automatycznie, użycie bloku Gutenberg, dodanie go jako panelu bocznego lub użycie krótkiego kodu.
Przeanalizujmy każdą opcję po kolei.

Automatyczne osadzanie widżetu popularnych wpisów
Automatyczne umieszczanie jest zalecane, jeśli chcesz, aby widżet pojawiał się we wszystkich wpisach, które pasują do ustawień Zachowania, które ustawiłeś wcześniej.
W tym celu wystarczy włączyć przycisk Automatyczne umieszczanie.

Wadą tej opcji jest to, że nie można dostosować wyglądu widżetu w oparciu o to, co najlepiej wygląda na wpisie lub stronie. Jeśli potrzebujesz tego rodzaju funkcjonalności, możesz wypróbować następną metodę.
Osadzanie bloku popularnych wpisów na stronie lub wpisie
Jeśli chcesz mieć większą kontrolę nad wyglądem widżetu na stronie lub we wpisie, ta metoda jest dla Ciebie.
Najpierw przejdź do edytora bloków wpisu lub strony, na której chcesz umieścić widżet. Następnie kliknij przycisk dodawania bloku “+” w dowolnym miejscu edytora i poszukaj bloku Popularne wpisy.

W panelu ustawień bloku znajdują się opcje zmiany motywu widżetu, wielkości liter, kolorów, tytułu, układu i liczby wpisów.
Ustawienia te są podobne do tych, które widzieliśmy we wtyczce MonsterInsights.

Jedyną różnicą jest to, że nie można zmienić wpisów, które zostaną wybrane w widżecie.
W ustawieniach zachowania można jednak wyświetlać wpisy tylko z określonych kategorii. W ten sposób możesz sprawić, że wybór popularnych wpisów będzie bardziej dostosowany do twoich potrzeb.

Gdy będziesz zadowolony z ustawień bloków, po prostu kliknij przycisk “Aktualizuj” w edytorze wpisów i stron.
Oto jak wygląda blok popularnych wpisów na naszej testowej witrynie internetowej:

Osadzanie widżetu popularnych wpisów w panelu bocznym
Jeśli korzystasz z nieblokującego motywu WordPress, który ma panel boczny z widżetami, możesz dodać do niego widżet Popularne wpisy. To właśnie zrobiliśmy w naszym artykule na temat dodawania wpisów z funkcjami do twojego panelu bocznego WordPress.
Wszystko, co musisz zrobić, to przejść do Wygląd ” Widżety. Następnie kliknij przycisk “+” dodaj widżet w panelu bocznym i poszukaj widżetu Popularne wpisy – MonsterInsights.

Podobnie jak w poprzedniej metodzie, widżet zawiera podobne ustawienia umożliwiające dostosowanie wyglądu twojego motywu.
Różnica polega na tym, że interfejs jest nieco trudniejszy w użyciu. Podczas zmiany ustawień nie można zobaczyć, jak faktycznie wygląda widżet. Będziesz musiał kliknąć inny widżet lub inny obszar, aby go podglądnąć.
Jeśli jesteś zadowolony z wyglądu widżetu, po prostu kliknij “Aktualizuj” w prawym górnym rogu.

Upewnij się, że wszedłeś na swoją witrynę internetową, aby sprawdzić, czy panel boczny wygląda prawidłowo.
Oto jak wygląda nasz:

Jeśli chcesz, aby widżet Popularne wpisy pojawiał się tylko na określonych stronach, możesz przeczytać nasz przewodnik na temat pokazywania lub ukrywania widżetów na określonych stronach WordPress.
Osadzanie widżetu popularnych wpisów za pomocą krótkiego kodu
Ostatnią opcją jest użycie krótkiego kodu. Ta metoda jest zalecana, jeśli powyższe opcje nie działają w twoim konkretnym przypadku użycia.
W karcie widżetu Popularne wpisy przewiń w dół do sekcji “Opcje osadzania”. Następnie wybierz opcję “Wyświetl za pomocą krótkiego kodu” i kliknij przycisk “Kopiuj krótki kod”.

Następnie wystarczy umieścić krótki kod w dowolnym miejscu. Aby uzyskać więcej informacji, zapoznaj się z naszym przewodnikiem na temat dodawania krótkich kodów w WordPress.
Metoda 2: Wyświetlanie popularnych postów WordPress według wyświetleń za pomocą kodu (bardziej zaawansowana)
Metoda MonsterInsights to najprostszy sposób na wyświetlenie twojej najpopularniejszej i najlepszej treści według zobacz w WordPress. Ale jeśli czujesz się komfortowo z kodowaniem, możesz również użyć kodu, aby wyświetlić twoje najpopularniejsze wpisy WordPress.
W przypadku tej metody zalecamy użycie wtyczki do fragmentów kodu, takiej jak WPCode, której użyjemy w tym przewodniku.

WPCode umożliwia bezpieczne wstawienie własnego kodu bez bezpośredniej interakcji z twoimi plikami WordPress. Ponadto, ponieważ ta metoda wymaga użycia wielu fragmentów kodu, wtyczka znacznie ułatwi zarządzanie i śledzenie ich wszystkich.
Najpierw należy zainstalować WPCode w WordPressie. Dostępna jest darmowa wersja WPCode, ale my skorzystamy z wersji Pro, ponieważ zawiera ona funkcje potrzebne do wstawienia kodu w odpowiednich miejscach.
Aby uzyskać przewodnik instalacji krok po kroku, przeczytaj nasz artykuł o tym, jak zainstalować wtyczkę WordPress.
Dodanie funkcji licznika wpisów w WordPressie
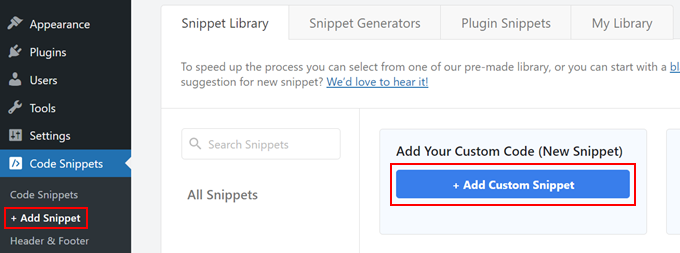
Po aktywacji wtyczki należy przejść do sekcji Fragmenty kodu ” + Dodaj fragment z kokpitu. Następnie należy najechać kursorem na “Add Your Custom Code (New Snippet)” i kliknąć “+ Add Custom Snippet”.
Teraz znajdujesz się w edytorze fragmentów kodu WPCode. Zanim wstawisz jakikolwiek kod, dodaj tytuł fragmentu kodu.
W przypadku tego pierwszego kodu możesz nazwać go czymś w rodzaju “WordPress Post Views Counter Function”. Wynika to z faktu, że celem tego pierwszego kodu jest utworzenie funkcji do zliczania wpisów w WordPressie.
Następnie zmień fragment kodu na “PHP Snippet”. Zauważ, że każdy fragment kodu, który będziesz musiał dodać z tego artykułu, jest w PHP.

Następnie możesz skopiować i wkleić poniższy kod:
1 2 3 4 5 6 7 8 9 10 11 12 13 14 | function wpb_set_post_views($postID) { $count_key = 'wpb_post_views_count'; $count = get_post_meta($postID, $count_key, true); if($count==''){ $count = 0; delete_post_meta($postID, $count_key); add_post_meta($postID, $count_key, '0'); }else{ $count++; update_post_meta($postID, $count_key, $count); }}//Get rid of prefetching to keep the count accurateremove_action( 'wp_head', 'adjacent_posts_rel_link_wp_head', 10, 0); |
Teraz wystarczy przewinąć w dół do sekcji “Wstawianie” i wybrać “Wstaw automatycznie” dla metody wstawiania i “Uruchom wszędzie” dla lokalizacji. Działa to tak samo, jak wstawienie kodu do pliku functions.php twojego motywu.
Następnie przejdź do prawego górnego rogu strony i włącz kod.
Następnie kliknij “Zapisz fragment kodu”.

Na tym etapie musisz dodać kolejny nowy niestandardowy fragment kodu. Możesz nazwać go “Wywołanie funkcji śledzenia wpisów zobacz”.
Ten kod wywoła powyższą funkcję i włączy ją na twoich stronach z pojedynczymi wpisami.
Gdy już to zrobisz, skopiuj i wklej poniższy fragment kodu:
1 | wpb_set_post_views(get_the_ID()); |
Zamierzasz wybrać lokalizację “Wstaw po wpisie”, ponieważ ma ona działać na twoich stronach z pojedynczymi wpisami.

Po zakończeniu wystarczy włączyć kod i zapisać go.
Wstawienie haka do śledzenia widoków wpisów w WordPressie
Teraz należy utworzyć nowy fragment kodu, który sprawdzi, czy obecna strona jest pojedynczym wpisem. Jeśli tak, wywoła funkcję WordPress Post Views Counter, aby śledzić i aktualizować liczbę wyświetleń wpisu.
W ten sposób za każdym razem, gdy użytkownik przejdzie na wpis, jego liczba wyświetleń zostanie zaktualizowana.
Nazwijmy ten fragment kodu “WordPress Post Views Tracking Hook”. Następnie wstaw następujące linie kodu:
1 2 3 4 5 6 7 8 9 | function wpb_track_post_views ($post_id) { if ( !is_single() ) return; if ( empty ( $post_id) ) { global $post; $post_id = $post->ID; } wpb_set_post_views($post_id);}add_action( 'wp_head', 'wpb_track_post_views'); |
Można wybrać metodę wstawienia jako “Auto Insert” i lokalizację jako “Frontend Only”.
Tak samo jak w poprzednich krokach, po prostu włącz kod i zapisz fragment kodu.

Uwaga: Jeśli korzystasz z pamięci podręcznej wtyczki, ta technika może nie działać domyślnie. Możesz użyć funkcji buforowania fragmentów, która jest oferowana przez niektóre wtyczki buforujące, takie jak W3 Total Cache.
Dodanie funkcji pobierania liczby wyświetleń wpisów i wyświetlania najpopularniejszych wpisów z liczbą wyświetleń
Jesteśmy teraz w ostatnich krokach tego przewodnika. Musisz dodać fragment kodu, który pobiera i formatuje liczbę wyświetleń danego wpisu WordPress. Przyda się to później podczas wyświetlania listy najczęściej zobaczonych wpisów.
Możesz nazwać ten kod jako “Retrieve Post Views Count Function” i ustawić lokalizację na “Run Everywhere”.
Oto fragment kodu:
1 2 3 4 5 6 7 8 9 10 | function wpb_get_post_views($postID){ $count_key = 'wpb_post_views_count'; $count = get_post_meta($postID, $count_key, true); if($count==''){ delete_post_meta($postID, $count_key); add_post_meta($postID, $count_key, '0'); return "0 View"; } return $count.' Views';} |
Ponownie, upewnij się, że kod jest włączony w WPCode i zapisz go po zakończeniu.
Gdy to zrobisz, ponownie utwórz nowy fragment kodu i nazwij go “Wyświetl najpopularniejsze wpisy z liczbą wyświetleń”. Jest to kod, który wyświetli twoje najpopularniejsze wpisy na dole wpisów na blogu.
W oknie podglądu kodu wstaw poniższy fragment kodu:
1 2 3 4 5 6 7 8 9 10 11 12 13 14 15 16 17 18 19 20 21 22 23 24 | // Customize the query parameters as needed$popularpost = new WP_Query( array( 'posts_per_page' => 3, // Feel free to adjust the number of posts to display 'meta_key' => 'wpb_post_views_count', 'orderby' => 'meta_value_num', 'order' => 'DESC'));?><div class="popular-posts"> <h2>See Our Most Popular Posts</h2> <!-- Feel free to customize the title --> <ul> <?php while ( $popularpost->have_posts() ) : $popularpost->the_post(); ?> <li> <a href="<?php the_permalink(); ?>"><?php the_title(); ?></a> - <?php echo wpb_get_post_views(get_the_ID()); ?> </li> <?php endwhile; ?> </ul></div><?php wp_reset_postdata(); |
Jak zaznaczono w kodzie, możesz swobodnie dostosować liczbę wpisów do wyświetlenia i dostosować tytuł tej sekcji.
W sekcji Wstawianie WPCode upewnij się, że wybrałeś “Wstaw po wpisie” dla Lokalizacji. Następnie wystarczy włączyć kod i zapisać fragment kodu.
Teraz pozostaje tylko przejść na jeden z twoich wpisów na blogu i sprawdzić, czy kod działa. Oto jak wyglądają najpopularniejsze wpisy według sekcji zobacz na naszym testowym blogu WordPress:

Porada eksperta: Jeśli chcesz jeszcze bardziej dostosować kod, ale nie masz doświadczenia w kodowaniu, możesz skorzystać z Generatora kodu AI WPCode. Ta funkcja może edytować istniejący kod, aby dokładnie odpowiadał twoim potrzebom.
Więcej informacji można znaleźć w naszej pełnej recenzji WPCode.
Film instruktażowy
Jeśli wolisz instrukcje wizualne, obejrzyj poniższą wersję wideo tego poradnika:
Mamy nadzieję, że ten poradnik WordPress pomógł ci dowiedzieć się, jak wyświetlać popularne posty według wyświetleń. Zachęcamy również do zapoznania się z naszym wyborem najlepszych wtyczek powiązanych postów dla WordPressa i naszym artykułem na temat tego , co sprawia, że strona docelowa zapewnia wysoką konwersję.
If you liked this article, then please subscribe to our YouTube Channel for WordPress video tutorials. You can also find us on Twitter and Facebook.


Bigdragon13th
Hello,
I’ve using this code for months and it’s work greats! That’s until I start using W3 Total Cache and this code stop count views for me.
I’m struck at where do I need to put the mfunc to let the code work with cache. Can you point that out?
FYI, I put all the code in a site-specific plugin.
AJ
Hell this is great! How would I display the view count outside of the post loop like in the sidebar?
leslie
hello, I have some problem on how setting up like when the login user won’t include on the count while viewing any pages?? how to do that.. please need some help on these. thanks
Sarah
Hey there, thanks for this. REALLY helpful!! Would you know how to apply a time range to this code? For example to show the most popular posts in the last day, week or month etc? I know there are plugins for this but I would like to do it without one
Dale Knight
Great!
Denis
Hello,
thanks for this nice tutorial. It works on my page!
– how can I exclude robots and spiders that hit my posts?
– May be I can set a timer of 10 seconds. after that the count should rise. So the people who only click thourgh the posts are not counted.
Cheers,
Denis
Sarah
You have no idea how much time you saved me. Thank you, works perfectly!
Clay Hickman
Thanks for the tip. Will use.
Jenni B
Hello – thanks so much for this! I noticed the question regarding the W3TC workaround, but have a slightly different question: does that still apply if I’m hooking into wp_head from functions.php, and if so, how exactly do I implement it there? Thank you!
rafi
this is really easy and very helpful! thanks man!
Kosmos
Hello, thanks for this snippet.
I have a problem, the orderby don’t work. I have five posts :
– Post 1 : 85 views
– Post 2 : 35 views
– Post 3 : 165 views
– Post 4 : 1 view
– Post 5 : 1 view
When i displayed it the order was : 1, 2, 4, 5 and 3
Do you have an idea please ?
Raj
It might be integer type issue ..
Iftekhar
following your article I am using post view count in my site since 6 months. It was working fine, but recently I am having problem with this. If a visitor view a post the count is increasing by 1 but the problem is the count is increasing in all other posts. I have w3 total installed and I m using mfunc according to your article. Please help me if you have any idea about this issue… Thanks.
WPBeginner Support
Iftekhar can you check what happens when you turn off w3 total cache?
Admin
Iftekhar
The problem seems to w3. Post view count is OK since deactivated. But I want to use both of them
ivan
Hello,
I am wanting to switch from using the plugin because it doesn’t support the polylang language (the author’s not getting back to me and I don’t really know if it’s possible to filter functions for the plugin..)
Two questions:
– I examined the code a bit and I’m not sure if this code starts counting posts from when it’s implemented? Or does it somehow retrieve where the post counts are currently?
– The current code on this website uses the get_posts() function so it creates an args array instead of using WP_Query(). Is this the same thing? I’m guessing not. And if it isn’t is the code below correct to get the array? I tried implementing this but it didn’t seem to work.
$args = array( ‘meta_key’ => ‘wpb_post_views_count’, ‘orderby’ => ‘meta_value_num’, ‘order’ => ‘DESC’,’numberposts’ => 6, ‘post_status’=>”publish”,’post_type’=>”post”,’lang’ => ‘en’);
thanks!
Tomas
This approach is very basic. If you want to count clicks from the same user (same IP) only every 5 minutes or 10 minutes etc. you need to have a separate table for that and before adding a new row in db you need to check the ip and time. If there is a record saved 3 minutes ago, the click is not added. Otherwise, it is added. Also this aproach allows you to create custom list of most viewed articles in 7 dyas, month, all time etc. Or even by category, user etc. (if you store appropriate values in appropriate table columns.
boson
i am trying .. when you say put code wpb_set_post_views(get_the_ID()); inside of single post loop, does that mean use this code inside of the theme single.php anywhere?
thank you for your help
WPBeginner Support
No it means paste the code inside the loop between
<?phpif( have_posts() ) :while( have_posts() ) : the_post(); ?>1-click Use in WordPress
and
<?phpendwhile;else: ?><p><?php _e('Sorry, no posts matched your criteria.'); ?></p><?phpendif; ?>1-click Use in WordPress
Admin
Cory Dobson
Is there a way of restricting when the post views are collected from? For example, I am looking to display the posts with the most views in the last 24 hours, how would you do something like that using this code?
Great post by the way, really helpful!
igor
how can I paginate the results.
10 results by page lets say
Mark
What if your single-xxxx.php doesn’t use the loop but custom fields. How can I use this code if I don’t use the loop?
WPBeginner Support
single-xyz.php means that file is used for a single post with xyz slug. You can still add the last code snippet in your template just where you think that the template ends displaying content.
Admin
quocminh86
comment policy,
Dusan
I’m confused as to where to put the mfunc code?
WPBeginner Support
If you are using W3 Total Cache then you can add this code just before wpb_get_post_views(get_the_ID()); in your templates where you want to display the popular posts. The purpose of this code is to allow W3 Total Cache to dynamically display popular posts and not cache it.
Admin
Waqas Munir
Dear, i am really confused about that… I am trying to add this to my blog, but I have no experience in all this.
WPBeginner Support
Then perhaps you should try using WordPress Popular Posts plugin instead.
Admin
Aleksander
What about using update_post_meta function instead of delete_post_meta and add_post_meta ?
George
Thanks for this post! Really really good.
I’ve two question:
1. Is there any possibility to count just one visit for each IP adress? How?.
2. Can i show the most popular posts by a specific period of time? For example, most visited posts this month, or the most popular posts from 1 of may to 1 of june…
Thank you!
Igor Gumush
thanks , working great
shishir umrao
Hi,
This code is working but whenever i reload the page , it is adding “2” to the total page count. For example if page count is 14 and after reloading total page count is 16 … can anyone guess where’s the problem ?
Shishir Umrao
Editorial Staff
Its happening because the function is loading twice somehow.
Admin
shishir umrao
Yeah. I figured out this piece of code was responsible for this.
Nick
Very useful post, I managed to make my Tag pages to order posts by a custom field value similar to post view count, however, I ave pagination on my tag pages and it keeps showing the same top ranking posts on all pages, even after I have removed this code:
‘posts_per_page’ => 4,
How do I fix the pagination so it show other posts on subsequent Tag pages?
Chris
How did you manage to make your Tag pages order posts by a custom field value similar to post view count?
It looks like the popular posts plugin only takes categories as a parameter.
Mike
Thanks for the very detailed instructions. Will using this to display the most popular posts cause a lot of additional server load if a site has significant traffic? Some of the WP plugins for this sort of thing tend to have this problem.
Editorial Staff
How much is significant traffic? We’re using it on WPBeginner.
Admin
Ryan Karpeles
Uh, awesome! Just awesome. THANK YOU for this!!! Works perfectly!
Lowell
I’m still learning this stuff so pardon my ignorance.
How do you allow the user to choose between queries like they do on codecanyon when they allow you to sort by price, sales, date etc.?
Thanks so much.
saeed
How can I change number of popular posts that display?
Editorial Staff
Change the posts_per_page to whatever number you like.
Admin
Adam Davies
Thank you so much for this. Life saver and a great tip that I definitely will be using more often.
Md. Ariful Islam
Hey, Really , Many Many thanks for this useful tips. I am highly glad to you.
Ar Ya
Hi , that’s great !
But ‘orderby’ => ‘wpb_post_views_count meta_value_num’ not working.
please use : ‘orderby’ => ‘meta_value_num’
thnx
nick
Thanks, it works for me, just with one important exception – popular posts are not as links, just their titles. How can I fix this, please?
Preston
I added this code in the manner described in the article and upon activation, I saw this….
The plugin generated 2 characters of unexpected output during activation. If you notice “headers already sent” messages, problems with syndication feeds or other issues, try deactivating or removing this plugin.
Preston
Fixed. I did two things:
1. Switched my permalink structure to a custom structure /%category%/%postname%/
2. Check through all of my pages for extra spaces.
One of them worked.
…go figure
Preston
Jose Vega
Hi, I think it´s necesary add – wp_reset_query(); – at the end of the query to destroys the previous query used on a custom Loop.
I hope It helps somebody.
Jon Edwards
I have this working to 95% using a custom WP Query to display popular posts from each category.
The only bit not working for me is the order – mine won’t display in descending order of views.
Cameron
Thanks for the post! This really helped.
I’m not sure if anyone else ran into this issue, but when you set up the arguments for WP_Query, you have orderby => ‘wpb_post_views_count’. This was a problem for me because I wasn’t sure how it was ordering my posts. In the codex it says that if your using numbers they will only sort by the first digit. To fix this, you can simply replace the ‘wpb_post_views_count’ with ‘meta_value_num’. This basically will tell the query to reach inside the post’s meta value and probably cast it to an integer before it sorts. Hope this helps anyone running into the same issues.
Overall, it works great! I have the 4 most popular posts in a slider on the home page. Thanks again!
Editorial Staff
Good suggestion. Updated the article with this.
Admin
efishinsea
Hi. Your code sample up top is *not * updated.
Instead of this:
‘orderby’ => ‘wpb_post_views_count meta_value_num’
you should have this as suggested :
‘orderby’ => ‘meta_value_num’
if you want to sort by “Most to Least”
Minh
Why it only shows posts which have count view < 100?
Editorial Staff
If you are using a caching plugin, then it doesn’t always update.
Admin
George
Thanks for the tutorial. How do you exclude current posts from displaying?
Kris
This looks great on my home page but it seem to want to display on my single.php or anywhere else on my site. I tried creating a sidebar-single.php and inserting the code but still no luck. Any idea why it wouldn’t work on other areas my theme?
Kris
i got it working. Thanks for this.
Anderson
Dont work, its show randomic posts :S and i use post_type = > ‘post-type-name’
Mody
This usually happens when meta key wpb_post_views_count is not available for posts, make sure you add the function that tracks views within wp while loop, otherwise it will keep showing random posts.
– Mody
Bent
Hello,
I’m using your code for track post view in the wordpress theme.
function wpb_get_post_views($postID){
$count_key = ‘wpb_post_views_count’;
$count = get_post_meta($postID, $count_key, true);
if($count==”){
delete_post_meta($postID, $count_key);
add_post_meta($postID, $count_key, ‘0’);
return “0 View”;
}
return $count.’ Views’;
}
The problem is that when I use W3 Total Cache the track view is not working right.
Is there a way in the W3 Total Cache’s Options to put ignore only on this function, but in the same time I want the code to work with W3 Total Cache?
Thank you!
Editorial Staff
Read the article again. We have already covered this “Fragmented Caching”.
Vaibhav
Hello
i followed your tutorials and have done exactly what u said.
i also added ur snippet
php query_posts(‘meta_key=post_views_count&orderby=meta_value_num&order=DESC’);
in index.php
i am facing a little error,
i am using infinite scrolling
when i put this snippet in index.php
the infinite scroll instead of loading next set of post
loads the same sets of post
For better Understanding u can check it live here
blog.newgags,com
Henry
For some reason my post views are incrementing by 2 on each page refresh. What could be happening there?
Henry
I do apologise. I had added the tracker to both the WP header and also to the single post body. Very stupid on my part :}
Nice tutorial, very easy to follow.
Brandon
First of all thanks for this post. Second I have been using this script for a few days now and for some reason it started out fine and now it is not displaying the most viewed posts, I don’t see any rhyme or reason to what posts are now being displayed. The last I checked the post that it is displaying at the top has 8 page views. I know there are posts with 25+ recorded page views. I would like to figure this out. Can you possibly point me in the right direction. I followed this post word for word. The post views are being recorded properly.
Editorial Staff
Not sure what could be going wrong. The WP_Query is suppose to list the posts with the highest counts first.
Admin
Einar Ólafsson
Hi. This works grade up until the view count gets over 999. All post with more view counts than 999 are not displayed, the query never post them. The latest post is the one with exactly 999 and the rest are under that. I have over 100 post that have more than thousand and are not being included.
Editorial Staff
Interesting. We have posts with over 10k views and it seems to be working just fine.
Admin
Martinbeasnunez
Guys you rockkk
Quick question:
If i have add a custom post type in your code ?
(popular post from especific custom post type)
Regards (:
Editorial Staff
This should work with CPTs as well.
Admin
Artem Russakovskii
This is a good basic tutorial, but be warned: it’s not going to work if you use caching strategies that bypass PHP (like wp-supercache, W3TC, nginx/varnish, etc). The only way to count those would be via Javascript or log parsing.
Editorial Staff
Hey Artem, Thanks for dropping by. Actually using W3 Total Cache, you can use fragment caching and it works just fine. Going to update the article for those who are using the caching plugin.
Admin
Artem Russakovskii
Interesting. However, I run nginx in front of W3TC, and it does a whole lot of its own caching, so it’s always safer/more reliable to use an AJAX approach. Nice info on the fragment caching though, I had no idea W3TC had it.
Ramon Fincken
Why use
//To keep the count accurate, lets get rid of prefetching
remove_action( ‘wp_head’, ‘adjacent_posts_rel_link_wp_head’, 10, 0); ?
if you can use the main loop or the footer ?
Editorial Staff
Some browsers prefetch the rel links with the next value. So technically when a user views one post, it can act as if they had viewed both posts. This will cause inaccurate count. If you like inflated views, then don’t take it off.
Admin
Nino Blasco
Great article! Explanation useful and easy to understand.
Thank you.
Connor Crosby
Yay! A tutorial that doesn’t require a plugin!
Editorial Staff
Yeah we try to balance things out for our audience. This was requested by the users, and we were using it on our own site.
Admin
Zach
Please stop saying stuff like this. Plugins aren’t bad, it’s articles like this that make them look bad. Enough articles have come out over the past few weeks to fully explain this – it’s getting a little embarrassing.
Editorial Staff
How would you suggest titling future posts instead? DIY prefix? These are different then just using a pre-made plugin. Also, if you read the article, there is no where in our article that we say “plugins are bad”. We clearly state that the only reason why coded this was to get more customization. It is up to a user to take either stance. Some can think that plugins are bad… whereas others like yourself can think that we are saying that plugins are bad…
Zach
I don’t think any type of prefix is needed. It’s one of the great/scary things about WordPress. You COULD put this code in your theme, but then begs the argument about needing to either, 1) Loose those customizations when you change your theme, or 2) have the knowledge to properly pull those over to another theme.
A lot of the users here are beginners (hence the point of this site), so many will just copy/paste what you give them. WP Beginner is obviously a fantastic resource (reason why I follow you on Twitter), but you have a responsibility to not put a false notion about how plugins/themes work.
Correct, you don’t flat out say, “Plugins are bad, put this in your theme instead!”, but the original commenter to the thread I replied to, said, “Yay! A tutorial that doesn’t require a plugin!” – so even though you didn’t say it, that’s how it was taken.
I’d suggest doing was Pippin does for his plugins – he has a simple starter plugin he uses for all of his tutorials. Why not create a blank “Starter Plugin” download, with just the basics, so others can download and put their customizations in there instead? Reference it in each article you do and it takes out some of the confusion. Thanks.
Editorial Staff
We have been following Otto’s advice on site-specific plugin for quite some time. It is probably similar to what Pippin does. If you read this article, site-specific plugin is hyperlinked. It is in most other articles as well. That article shows users the importance of site-specific plugin and advise users to not put everything in functions.php file. At the bottom of that article, the sample “starter plugin” is there for anyone to start with.
codekipple
In fairness this tutorial helped me out. I wanted a simple solution for popular posts after trying some of the plugins and not being able to fully control the markup. This tutorial helped me quickly implement some popular posts functionality into my own plugin.
So i agree that using pre-built plugins is not a bad thing, but at times tutorials like this are useful to take control and build out a plugin that works the way you need it to instead of fighting against an already built plugin.
Pippin
As Zach said, please stop using “without a plugin”. Sure, it’s cool to see how to code this yourself but there is literally no difference between this code and the code in a plugin. You could place this code into a plugin and it would function identically to placing it in your theme.
Ruben
If you say there’s no difference, you have no idea what you’re talking about. Lets say your are working on a site and don’t have access to the plugins directory, making a solution that works “without using a plugin” would be a viable alternative.
As for the title, semantically the title should reflect the content of the post and could be “How to Display Popular Posts by Views in WordPress with or without a Plugin”.
However, taking SEO in to consideration, lets say he would like this post to reach a specific audience, for example, people who don’t want to or can’t use a plugin, the title would probably be best as is.
Gautam Doddamani
i am using genesis child theme..can u tell me which all functions and codes to use..i am sorry i am a noob to genesis…
Editorial Staff
For child theme users, the wp_head solution would work to track post views. Not sure what else you meant.
Admin
Gautam Doddamani
is it true? as artim told, does this code become unresponsive when we use a caching plugin?? for example i currently use W3 total cache and i want to use this method to build my custom popular post by views widget…i read this kind of post on wpsnipp.com and the users suggested it does not work when we enable caching plugins…reply soon…
Editorial Staff
Read the comment reply to Artem. You can use fragment caching to make it work just fine.