Pokazaliśmy już, jak zainstalować WordPressa na Windowsie i Macu. Jednak ostatnio jeden z naszych użytkowników zapytał, czy możliwe jest korzystanie z tej samej lokalnej instalacji WordPress zarówno w pracy, jak i w domu. W tym artykule pokażemy, jak zainstalować WordPressa na pamięci USB za pomocą XAMPP, dzięki czemu będziesz mógł korzystać z twojej lokalnej instalacji WordPressa na dowolnym komputerze.
XAMPP to pakiet oprogramowania zawierający serwer WWW Apache, PHP, MySQL i phpMyAdmin. Możesz go zainstalować na twoim systemie operacyjnym Windows, Linux lub Mac. Pokażemy ci, jak zainstalować go na dysku USB podłączonym do komputera z systemem Windows, ale metoda instalacji jest prawie taka sama bez względu na to, gdzie go zainstalujesz.
Pierwszą rzeczą, którą musisz zrobić, jest pobranie XAMPP lite. Przejdź na stronę pobierania X AMPP, a następnie kliknij na More downloads.
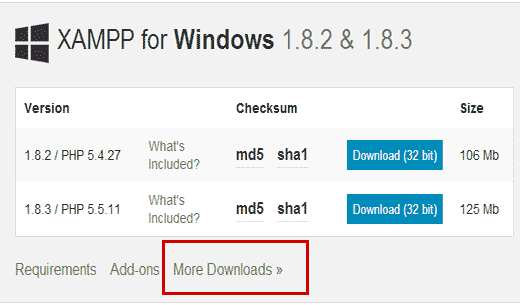
Zostaniesz przekierowany do witryny internetowej sourceforge, gdzie musisz najpierw kliknąć XAMPP dla Windows, a następnie kliknąć najnowszą wersję.
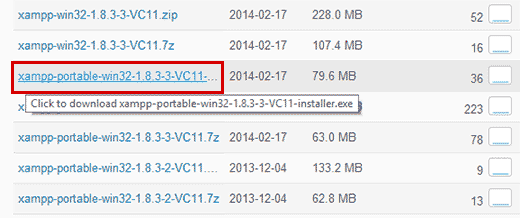
Na następnym ekranie pojawi się lista plików dostępnych dla tej wersji. Przewiń w dół i znajdź wersję przenośną w formacie .exe. Kliknij nazwę pliku, aby rozpocząć pobieranie.
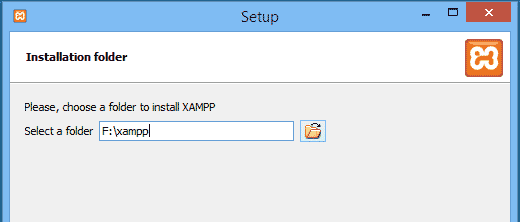
Po pobraniu przenośnego pliku XAMPP należy dwukrotnie kliknąć plik, aby uruchomić instalację. Podczas instalacji zostaniesz poproszony o wybranie lokalizacji, w której chcesz zainstalować XAMPP. Należy kliknąć ikonkę katalogu, a następnie wybrać twój dysk USB.
Kliknij next, aby kontynuować instalację. Instalator zainstaluje teraz XAMPP na twoim dysku USB. Po zakończeniu instalacji należy przejść do twojego dysku USB, a następnie otworzyć katalog XAMPP.
Aby uruchomić XAMPP, musisz uruchomić xampp-control.exe z twojego napędu USB. Spowoduje to wyświetlenie Centrum sterowania XAMPP, które wygląda następująco:
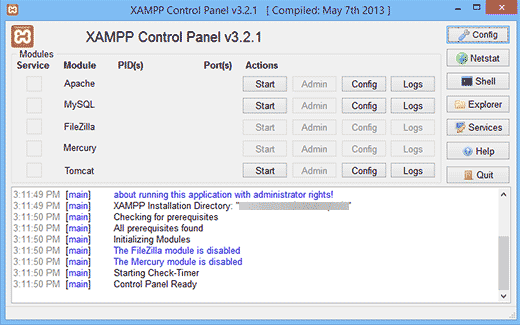
Musisz uruchomić serwer WWW Apache i MySQL, klikając przycisk start obok nich. Zostaniesz poproszony przez Zaporę systemu Windows i musisz zezwolić na dostęp do obu aplikacji.
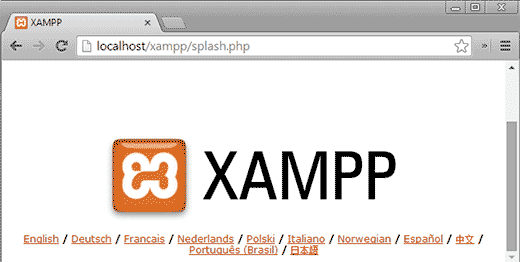
Teraz otwórz przeglądarkę internetową i w pasku adresu wpisz rodzaj http://localhost/. Zostaniesz powitany ekranem powitalnym XAMPP. Oznacza to, że pomyślnie zainstalowałeś XAMPP na twoim dysku USB.
Instalacja WordPress na pamięci USB
Do tej pory pomyślnie zainstalowałeś serwer WWW Apache z MySQL i PHP na twojej pamięci USB. Następnym krokiem jest instalacja samego WordPressa. Instalacja WordPressa w pamięci USB nie różni się zbytnio od instalacji na twoim komputerze z systemem Windows lub Mac.
Najpierw musisz otworzyć dysk USB i przejść do katalogu htdocs w twoim katalogu instalacyjnym XAMPP. Utwórz nowy katalog w htdocs. Ten katalog będzie twoją regionalną witryną WordPress. Możesz nadać mu dowolną nazwę. Na potrzeby tego poradnika nazwijmy go site1.
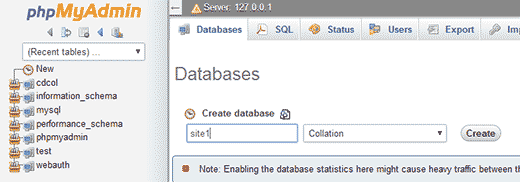
WordPress potrzebuje bazy danych MySQL do działania, więc przed instalacją należy utworzyć bazę danych. Aby ją utworzyć, należy otworzyć przeglądarkę internetową i wpisz http://localhost/phpmyadmin w pasku adresu. Spowoduje to otwarcie phpMyAdmin, który jest internetowym oprogramowaniem do zarządzania bazą danych. Kliknij Bazy danych na górnym pasku menu, a następnie podaj nazwę twojej bazy danych przed naciśnięciem przycisku Utwórz.
Teraz potrzebujemy WordPressa. Wystarczy przejść na stronę WordPress.org i pobrać świeżą kopię WordPressa na twój komputer. Rozpakuj pobrany plik .zip na twój pulpit i otwórz go.
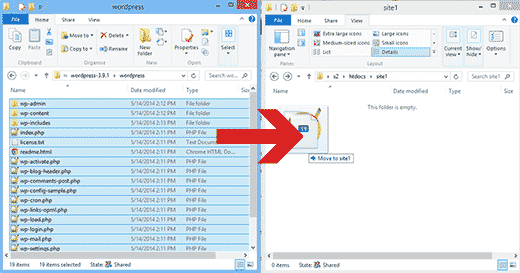
Teraz musisz skopiować treść katalogu wordpress i wkleić go do katalogu /htdocs/site1 na twoim dysku USB.
Po skopiowaniu plików WordPressa można uruchomić instalację WordPressa, uzyskując dostęp do twojej witryny pod adresem http://localhost/site1 w przeglądarce internetowej.
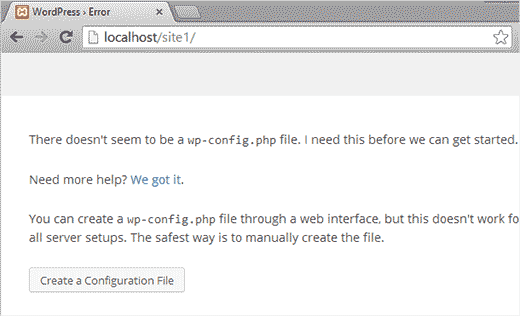
WordPress poinformuje Cię, że nie znalazł pliku konfiguracyjnego WordPress, więc musisz go utworzyć, klikając przycisk Utwórz plik konfiguracyjny.
Na kolejnym ekranie należy podać utworzoną wcześniej nazwę bazy danych. W polu nazwy użytkownika wpisz root, a pole hasła pozostaw puste. Naciśnij przycisk przesyłania, aby kontynuować.
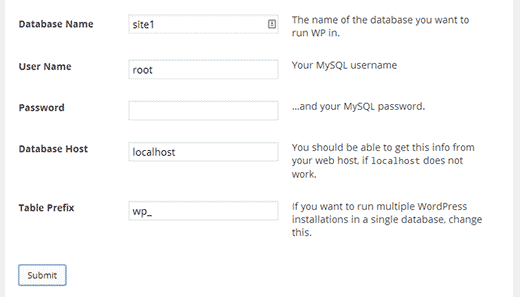
WordPress spróbuje teraz połączyć się z twoją bazą danych. Po powodzeniu zostanie wyświetlony komunikat o powodzeniu. Kliknij przycisk Uruchom instalację, aby kontynuować.
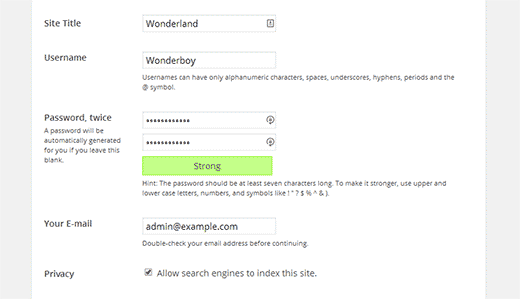
Zostaniesz poproszony o podanie informacji o twojej witrynie i utworzenie nazwy użytkownika i hasła administratora. Ta nazwa użytkownika i hasło administratora będą używane do logowania się do obszaru administracyjnego WordPress. Konieczne będzie również podanie adresu e-mail. W sekcji prywatności możesz odznaczyć pole Zezwalaj wyszukiwarkom na indeksowanie tej witryny. Po zakończeniu kliknij przycisk Zainstaluj u dołu.
To wszystko, pomyślnie zainstalowałeś WordPress. Możesz teraz zalogować się do swojej witryny i robić, co chcesz. Aby utworzyć inną witrynę WordPress na tym samym USB, wystarczy utworzyć inny katalog w katalogu htdocs i powtórzyć proces.
Mamy nadzieję, że ten artykuł pomógł ci zainstalować WordPress na pamięci USB. Możesz teraz zabrać tę pamięć USB ze sobą. Pamiętaj, że twoja pamięć USB będzie działać tylko z komputerami z systemem Windows. Możesz również zapoznać się z naszym przewodnikiem na temat korzystania z WordPressa w przeglądarce za pomocą WordPress Playground lub z naszymi eksperckimi wyborami najlepszych kreatorów stron WordPress typu “przeciągnij i upuść“.
If you liked this article, then please subscribe to our YouTube Channel for WordPress video tutorials. You can also find us on Twitter and Facebook.


martine
Hi,
Installed all in good order. When trying to login into wordpress I get the following error : One or more database tables are unavailable. The database may need to be repaired.
Clicking on the link for repair I get the below and I have to delete the last line referring to the repair. If I do this I get another pop up saying I need to add it again and try again. It is a continious circle with no end.
How to solve this?
The wp_users table is okay.
The wp_usermeta table is okay.
The wp_posts table is okay.
The wp_comments table is okay.
The wp_links table is okay.
The wp_options table is okay.
The wp_postmeta table is okay.
The wp_terms table is okay.
The wp_term_taxonomy table is okay.
The wp_term_relationships table is okay.
The wp_termmeta table is okay.
The wp_commentmeta table is okay.
Repairs complete. Please remove the following line from wp-config.php to prevent this page from being used by unauthorized users.
define(‘WP_ALLOW_REPAIR’, true);
WPBeginner Support
Hi Martine,
If this is a fresh WordPress install and you don’t have any content, then you may want to resinatll WordPress. If it does have content, then you may need to repair tables from PhpMyAdmin.
Admin
rajendra upadhyaya
sir
is there any way to install wordpress on usb with WAMP and how much memory it uses
Miran Potocnik
Hello,
We use WP on server. If I install Apache web server with MySQL and PHP on my USB stick and copy the contents of wordpress folder from server and paste it in the /htdocs/site1 folder on my USB drive. Does it mean that the web pages will be the same? How I can synchronize them?for example: If I change something WP on server side that will be changed on local side, when network be up.
Armando
I used (Microsoft) DISKPART in order to change my USB stick into a bootable disk (FAT32) to be used with XAMPP. Before, it would not install.
You may want to add this tip to the tutorials.
Thanks for your tutorial and best regards!
Jay
I’m not sure these steps still work – I have done the process before (year or so ago) and it worked. Now doing it again on a new drive, and with all updated components, step two of the wordpress installation is always (almost) blank. So something is going wrong. I have tried twice and same thing.
Any tips, based on updated components?
Joshua Harman
Is there any way you’d e willing to do this tutorial for Mac? I’ve been wracking my brain for hours trying to get it to work but don’t have a ton of experience
brainfreeze
hi joshua. i am wondering if you have found a way for Mac? if yes, please share. thanks.
Mahendra
can we run php file in another computer which does not have xampp using usb sticks
Amonza
I am not quite exactly sure what you are asking, but if you have xampp installed on a usb stick as described you should be able to take that stick to any computer and run the apache server and be able to serve php pages from the htdocs folder on the pen drive.
If you are running an IDE that needs the path to php.exe you could point it to the php folder on the pen drive.
Lisa
For those who have done this, what size USB drive do you suggest?
Ahmad Fahrurroji
Good idea, I’ve never used this option installing xampp on usb stick but It’s good to try. Thanks.
WPBeginner Staff
you can transfer your site using BackupBuddy (here is a tutorial) or using Duplicator.
Ian Delemare
I like the idea of having a portable version of WordPress and being able to develop a site in many locations. But what is the procedure to transfer a developed site (including images, posts plugins etc) from a USB stick to the web?
Bill Gibson
I had put a multisite version of WP on a USB stick a couple of years ago. I added a portable version of Firefox, and included the Mobile Barcoder plugin. The multiple sites could be used for classes, projects or presentations, and it was a nice organizational tool. Add text, links & images, and embed for videos or larger files. As long as you put your USB stick in an Internet connected device, you had a great presentation tool. The “Mobile Barcoder” app created QR codes, on the fly, so I could pull up a site from the Flash drive, and then generate a QR code to share links with the audience.
WPBeginner Staff
Yes there is, but we are not sure whether it works as a portable app or not
Zeeshan Asif
What about Mac ???
WPBeginner Staff
Unfortunately MAMP the mac alternative to XAMPP can not be run from an external drive. There is an alternative called AMPPS but we have not tried it.
DigitizedSociety
XAMPP has a mac version.
James B.
Great post. I’ve been using “Instant WP” for my local and USB stick installs of WordPress…but I may try XAMPP out! Thanks for the great work.