
Jeśli chodzi o wprowadzanie aktualizacji lub znaczących zmian w twojej witrynie WordPress, robienie tego bezpośrednio może być ryzykowne. W tym miejscu pojawia się witryna testowa.
Jest to idealny klon twojej działającej witryny internetowej, w którym możesz bezpiecznie testować zmiany, rozwiązywać problemy i udoskonalać aktualizacje przed wdrożeniem ich na głównej witrynie. Stworzenie witryny testowej może uchronić cię przed potencjalnymi przestojami, niedziałającymi funkcjami i innymi komplikacjami.
W WPBeginner używamy witryn przejściowych do testowania aktualizacji witryn internetowych przed opublikowaniem ich na naszych witrynach rzeczywistych.
W tym przewodniku krok po kroku pokażemy, jak łatwo utworzyć środowisko przejściowe dla twojej witryny WordPress. Omówimy kilka różnych metod, a większość z nich wymaga tylko kilku kliknięć.

Co to jest witryna testowa?
Witryna testowa to klon twojej działającej witryny internetowej, który służy do testowania zmian przed ich uruchomieniem. Witryny pomostowe pomagają wychwycić błędy, dzięki czemu nie zepsujesz swojej działającej witryny internetowej.
W przeszłości skonfigurowanie witryny pomostowej WordPress było bardzo trudne, ale teraz to się zmieniło, więc nawet osoba nietechniczna może to zrobić.
Wielu użytkowników instaluje WordPressa lokalnie na swoich komputerach z systemem Windows lub Mac, aby przetestować zmiany. Po zakończeniu aktualizacji po prostu przesyłają te zmiany z lokalnego hosta na serwer na żywo.
Największym problemem tego podejścia jest to, co jeśli coś, co działało na twoim lokalnym serwerze, nie działa na serwerze live?
Często witryny regionalne i serwery hostingowe WordPress na żywo nie działają w tym samym środowisku.
Ponieważ witryna tymczasowa działa na twoim serwerze WWW, możesz łatwo uniknąć wszystkich tych błędów, ponieważ działa ona w tej samej konfiguracji serwera, co twoja witryna na żywo.
Mając to na uwadze, przyjrzyjmy się, jak skonfigurować witrynę pomostową dla WordPress.
Jak łatwo stworzyć witrynę WordPress Staging Site
Istnieje wiele sposobów na utworzenie witryny testowej dla WordPress. Najprostszym z nich jest skorzystanie z wbudowanej funkcji witryny przejściowej dostawcy hostingu.
Niektóre z najlepszych firm hostingowych WordPress oferują już witryny internetowe z funkcją 1-click staging. Jeśli twoja witryna internetowa jest hostowana przez jedną z nich, możesz łatwo utworzyć witrynę pomostową bez żadnych kłopotów.
Jeśli nie masz jednego z tych popularnych rozwiązań hostingowych, mamy również rozwiązanie, które pomoże Ci stworzyć witrynę przejściową WordPress za pomocą wtyczki (a nawet ręcznie).
Aby przyspieszyć przeglądanie, możesz skorzystać z poniższej nawigacji, aby przejść do sekcji, która najbardziej Ci odpowiada:
Tworzenie witryny testowej na Bluehost
Bluehost jest jedną z najlepszych firm hostingowych WordPress. Oferują szybkie rozwiązanie 1-click staging witryny we wszystkich swoich planach.
Najpierw musisz przejść do kokpitu twojego Bluehost i przejść do sekcji “Moje witryny”.
Następnie przejdź do karty “Wtyczki” i przełącz przełącznik obok opcji “Wtyczka Bluehost”.

Następnie przejdź do kokpitu twojej witryny WordPress i przejdź na stronę Bluehost ” Staging.
Teraz kliknij przycisk “Utwórz witrynę testową”.

Bluehost przygotuje teraz środowisko przejściowe dla twojej witryny internetowej.
Po wykonaniu tej czynności wyświetlona zostanie sekcja “Witryna testowa”, w której należy zaznaczyć pole “Nie jest obecnie edytowana”.

Na twoim ekranie zostanie wyświetlony monit z prośbą o przejście do witryny przejściowej.
Następnie kliknij przycisk “Przełącz”.

Po przełączeniu na ekranie pojawi się przycisk wskazujący, że pracujesz na witrynie internetowej.
Możesz kontynuować pracę nad twoją witryną internetową bez obawy, że będzie to miało wpływ na twoją witrynę na żywo.

Wdrażanie zmian z witryny Staging do witryny Live na Bluehost
Gdy będziesz gotowy do przeniesienia zmian z wersji testowej do witryny na żywo, po prostu przejdź do strony Bluehost ” Staging z panelu bocznego administratora WordPress.
Z tego miejsca zobaczysz rozwijane menu opcji wdrażania obok twojej witryny internetowej. Możesz wdrożyć tylko pliki, tylko bazę danych lub wdrożyć wszystkie zmiany.
Jeśli nie masz pewności, kliknij przycisk “Wdróż wszystkie zmiany”, aby kontynuować.

Następnie kliknij przycisk “Wdróż witrynę” znajdujący się obok rozwijanego menu.
Spowoduje to wyświetlenie wyskakującego okienka, w którym zostaniesz poproszony o potwierdzenie, że chcesz wdrożyć witrynę testową w witrynie produkcyjnej. Kliknij przycisk “Deploy”, aby kontynuować.

Bluehost rozpocznie teraz wdrażanie Twojej witryny tymczasowej do witryny na żywo. W zależności od rozmiaru Twojej witryny internetowej może to chwilę potrwać.
Możesz teraz przełączyć się z powrotem na twoją witrynę internetową, aby zobaczyć zmiany w działaniu, klikając przycisk Radio pod opcją Witryna produkcyjna.

Klonowanie witryny produkcyjnej do wersji Staging
Teraz, gdy przełączysz się z powrotem na witrynę produkcyjną, wszelkie zmiany, które tam wprowadzisz, nie zostaną automatycznie zsynchronizowane z twoją witryną pomostową.
W przyszłości, jeśli będziesz chciał przetestować więcej rzeczy na witrynie pomostowej, będziesz musiał zduplikować twoją witrynę internetową.
Aby to zrobić, należy przejść na stronę Bluehost ” Staging i kliknąć przycisk “Clone to staging”.

Następnie Bluehost sklonuje najnowsze zmiany w Twojej witrynie internetowej na żywo do witryny przejściowej. Następnie można przełączyć się na tymczasową witrynę internetową w celu testowania i rozwoju.
Tworzenie witryny testowej na SiteGround
SiteGround to kolejna czołowa firma hostingowa WordPress oferująca funkcję 1-click staging w swoich planach GrowBig i GoGeek.
Jeśli twoja witryna jest hostowana przez SiteGround, to w ten sposób skonfigurujesz witrynę internetową.
Najpierw musisz logować się do kokpitu SiteGround i przejść do karty Witryny internetowe. Następnie należy wybrać Narzędzia witryny znajdujące się pod twoją witryną internetową.

Na następnym ekranie należy kliknąć menu WordPress ” Staging z lewej kolumny.
W tym miejscu wybierz swoją witrynę internetową, a następnie podaj nazwę kopii testowej.

Kliknij przycisk “Utwórz”, aby kontynuować, a Siteground utworzy tymczasową kopię twojej witryny internetowej.
Następnie należy kliknąć przycisk “Przejdź do zabezpieczonych adresów URL”, aby zabezpieczyć hasłem twoją witrynę internetową i zachować jej prywatność.

Na następnym ekranie Siteground automatycznie wprowadzi adres URL i ścieżkę do twojej witryny internetowej.
Musisz wpisz nazwę użytkownika i hasło, których chcesz użyć do zabezpieczenia twojej witryny.

Kliknij przycisk “Zabezpieczony”, aby zapisać twoje ustawienia.
Możesz teraz wrócić do strony WordPress ” Staging i kliknąć przycisk “Loguj się do panelu administracyjnego” obok twojej witryny internetowej.

SiteGround otworzy teraz obszar administracyjny WordPress twojej witryny internetowej. Możesz przetestować twoje zmiany na tej witrynie internetowej.
Wdrożenie zmian z powrotem do twojej aktywnej witryny internetowej
Po wypróbowaniu twoich zmian na witrynie pomostowej, możesz chcieć połączyć je z witryną internetową na żywo.
SiteGround również to ułatwia.
Wystarczy kliknąć menu WordPress ” Staging w lewej kolumnie. Następnie kliknij menu z trzema kropkami obok twojej witryny w sekcji “Zarządzaj kopiami Staging”.

Menu wyświetli dwie opcje wdrożenia. Możesz wybrać opcję “Full Deploy” lub “Custom Deploy”.
Opcja “Full Deploy” łączy wszystko z witryny pomostowej z twoją witryną internetową. Opcja “Custom deploy” pozwala wybrać pliki lub dane, które mają zostać scalone.
Jeśli nie masz pewności, wybierz opcję “Full Deploy”.
SiteGround skopiuje witrynę testową na twoją witrynę internetową.
Łączenie Live z twoją witryną internetową Staging
Zmiany wprowadzone w twojej witrynie internetowej nie są automatycznie kopiowane do witryny testowej.
Za każdym razem, gdy musisz pracować nad twoją witryną internetową, powtórz powyższy proces, aby utworzyć nową witrynę internetową.
Tworzenie witryny Staging na WP Engine
WP Engine to najlepsza zarządzana przez WordPress firma hostingowa na świecie. Zarządzany hosting WordPress to usługa concierge dla twojej witryny WordPress, w której dostawca hostingu dba o aktualizacje, kopie zapasowe, zabezpieczenia i wydajność.
WP Engine oferuje rozwiązanie staging jednym kliknięciem we wszystkich swoich planach. Jeśli korzystasz z WP Engine do hostowania swojej witryny internetowej, w ten sposób skonfigurujesz środowisko pomostowe dla swojej witryny.
Najpierw musisz logować się do twojego kokpitu WP Engine. Następnie przejdź do strony “Witryny” i wybierz swoją witrynę internetową, klikając na nią.

Spowoduje to przejście do kokpitu twojej witryny internetowej.
Teraz musisz kliknąć odnośnik “Add Staging” w lewej kolumnie lub wybrać go pod nazwą twojej witryny u góry.

Spowoduje to przejście do ekranu “Dodaj środowisko”.
Zostaniesz poproszony o wybranie sposobu, w jaki chcesz kontynuować pracę ze swoim środowiskiem testowym.

Oto, co robi każda z tych opcji:
- “Rozpocznij od nowej pustej witryny” tworzy nową pustą witrynę.
- “Zacznij od przewodnika” tworzy nową witrynę z przewodnikiem i treścią demonstracyjną.
- Opcja “Kopiuj istniejące środowisko do tej witryny” spowoduje skopiowanie twojego środowiska produkcyjnego lub deweloperskiego do tej witryny (np. skopiowanie działającej witryny do tego środowiska).
- “Przenieś istniejące środowisko” przenosi środowisko do tej witryny (np. przenosi środowisko programistyczne do Staging).
- “Zacznij od witryny WooCommerce” tworzy nową witrynę WordPress z preinstalowanym WooCommerce.
Ponieważ chcemy utworzyć kopię testową naszej działającej witryny internetowej, musimy kliknąć opcję “Skopiuj istniejące środowisko do tej witryny”.

Po wybraniu środowiska wybierz najnowszą kopię zapasową, którą chcesz skopiować, a następnie kliknij przycisk “Dalej”, aby kontynuować.
Teraz musisz podać nazwę twojej witryny testowej. Nazwa ta będzie używana w adresie URL twojej witryny przejściowej. Następnie wybierz STG (staging) jako twój rodzaj środowiska.

Kliknij przycisk “Utwórz środowisko”, aby kontynuować.
WP Engine utworzy teraz witrynę testową. Następnie zostaniesz przekierowany do kokpitu twojego środowiska Staging.

Następnie należy kliknąć przycisk Kłódka, aby włączyć ochronę hasłem dla twojej witryny pomostowej.
Następnie należy przejść do karty “Narzędzia”, aby skopiować nazwę użytkownika i hasło do Twojej witryny.

Możesz teraz kliknąć przycisk “WP Admin” u góry, aby logować się do twojej witryny internetowej.
Możesz swobodnie wprowadzać zmiany i wypróbowywać funkcje w witrynie internetowej, tak jak w typowej witrynie WordPress, którą instalujesz gdziekolwiek indziej.

Wdrażanie zmian z witryny Staging do witryny Live na WP Engine
Chcesz połączyć zmiany wprowadzone w witrynie pomostowej z twoją witryną internetową na żywo?
Wystarczy kliknąć przycisk “Kopiuj środowisko”, aby rozpocząć wdrażanie.

Spowoduje to przejście do strony opcji. W tym miejscu należy wybrać twoje środowisko źródłowe i docelowe dla kopii.
Tutaj wybierzesz twoją witrynę internetową jako środowisko źródłowe, a witrynę produkcyjną lub działającą jako środowisko docelowe.

Możesz wybrać, co chcesz skopiować. Można na przykład skopiować wszystkie tabele i pliki bazy danych, określone pliki i tabele bazy danych lub tylko system plików.
Uwaga: Jeśli skopiujesz wszystko, utracisz wszelkie dane przechowywane na twojej działającej witrynie internetowej po użyciu jej do utworzenia środowiska przejściowego. Może to obejmować ważne dane, takie jak nowe wpisy, strony, klienci i zamówienia. Dobrym pomysłem jest więc wykonanie kopii zapasowej twojej działającej witryny przed wdrożeniem jej ze środowiska staging.
Następnie kliknij przycisk “Sprawdź i potwierdź”, aby rozpocząć wdrażanie. Skopiowanie wszystkiego na twoją witrynę internetową zajmie chwilę.
Po zakończeniu procesu otrzymasz powiadomienie e-mail.
Tworzenie witryny Staging przy użyciu wtyczki WordPress
Jeśli twój dostawca hostingu WordPress nie udostępnia funkcji witryny przejściowej, nadal możesz utworzyć witrynę przejściową za pomocą wtyczki WordPress.
Korzystanie z tej metody ma pewne wady.
Po pierwsze, wtyczka będzie miała ograniczoną kontrolę nad twoim serwerem hostingowym. Z tego powodu może nie zawsze dawać najlepsze wyniki.
Po drugie, wtyczka, której będziemy używać, będzie przechowywać twoją witrynę testową na własnych serwerach. Jeśli Zamierzasz dbać o prywatność i ochronę danych, może to nie być dla Ciebie idealne rozwiązanie.
Wreszcie, wtyczka ma kilka znanych niezgodności. Sprawdź ich stronę niezgodności, aby upewnić się, że twoja witryna jest zgodna [może być też “kompatybilny”].
Mając to na uwadze, zobaczmy, jak utworzyć witrynę WordPress typu staging przy użyciu wtyczki WordPress.
Pierwszą rzeczą, którą musisz zrobić, jest zainstalowanie i włączanie wtyczki WP Stagecoach. Aby uzyskać więcej informacji, zapoznaj się z naszym przewodnikiem krok po kroku, jak zainstalować wtyczkę WordPress.
Po włączaniu wtyczka doda nowy element menu o nazwie WP Stagecoach do twojego paska administratora. Kliknięcie go spowoduje przejście do strony ustawień wtyczki.

Będziesz musiał wpisz swoją nazwę użytkownika WP Stagecoach i klucz API, który znajdziesz na swoim koncie w witrynie internetowej wtyczki.
Następnie musisz przejść na stronę WP Stagecoach ” WP Stagecoach i wybrać nazwę Twojej witryny przejściowej. Nazwa ta będzie również używana jako subdomena Twojej witryny internetowej WordPress.

Nie zapomnij zaznaczyć pola obok opcji “Zabezpiecz witrynę tymczasową hasłem”. Zabezpieczy to twoją witrynę internetową przed publicznym zobaczeniem i wyszukiwarkami.
Kliknij przycisk “Jazda dyliżansem”, aby kontynuować.

Wtyczka utworzy teraz kopię zapasową twoich plików WordPress i bazy danych, aby wyeksportować je do witryny testowej.
Może to trochę potrwać w zależności od rozmiaru twojej witryny internetowej WordPress.
Po zakończeniu zobaczysz odnośnik do twojej witryny testowej i jej obszaru administracyjnego.

Możesz kliknąć odnośnik, aby przejść na twoją witrynę pomostową i rozpocząć na niej pracę.
Na pasku administratora u góry pojawi się jasnopomarańczowe powiadomienie wskazujące, że pracujesz nad twoją witryną testową.

Wdrażanie witryny Staging do Live przy użyciu WP Stagecoach
Gdy będziesz już gotowy do importowania zmian na twoją witrynę, przejdź do strony WP Stagecoach ” Importuj zmiany i kliknij przycisk Sprawdź zmiany.

Wtyczka sprawdzi teraz zmiany na twojej witrynie testowej, a następnie wyświetli opcje ich importowania.
Do wyboru są wszystkie zmiany, zmiany w plikach lub zmiany w bazie danych.

Wtyczka pokaże postęp importowania i powiadomi o jego zakończeniu.
Możesz teraz przetestować swoją witrynę na żywo, aby sprawdzić, czy wszystkie zmiany zostały pomyślnie zaimportowane.
Ręczne utworzenie witryny pomostowej dla WordPressa
Ta metoda nauczy cię ręcznie tworzyć witrynę pomostową dla twojej instalacji WordPress. Jest ona przeznaczona dla zaawansowanych użytkowników i wymaga więcej pracy niż inne metody opisane powyżej.
Inną wadą tej metody jest to, że twoja witryna internetowa będzie tymczasowo niedostępna podczas wdrażania zmian z serwera staging na serwer rzeczywisty.
W związku z tym zobaczmy, jak ręcznie utworzyć środowisko przejściowe dla twojej witryny WordPress.
Po pierwsze, musisz utworzyć subdomenę dla twojej witryny internetowej. Jeśli korzystasz z Bluehost, przejdź do kokpitu swojego konta hostingowego i przejdź do karty “Zaawansowane”.
Następnie kliknij przycisk “Zarządzaj” obok opcji “cPanel”.

Spowoduje to otwarcie cPanelu w nowej karcie, w której należy przewinąć w dół do sekcji “Domena”.
Następnie kliknij opcję “Domeny”.

Spowoduje to otwarcie listy wszystkich domen na Twoim koncie hostingowym. W tym miejscu należy kliknąć przycisk “Utwórz nową domenę”.
Gdy to zrobisz, na ekranie otworzy się nowa strona, na której musisz wpisać twoją subdomenę, a następnie nazwę domeny w polu “Domena” w następujący sposób:
subdomena.example.com
Następnie wystarczy kliknąć przycisk “Prześlij”, aby zapisać twoje ustawienia.

Uwaga: Na naszych przykładowych zrzutach ekranu używamy Bluehost, więc twój ekran może wyglądać inaczej.
Twój panel kontrolny hostingu doda teraz twoją subdomenę, której możesz użyć do importowania witryny WordPress na żywo.
Następnie należy zainstalować i aktywować darmową wtyczkę Duplicator na swojej stronie. Jeśli potrzebujesz pełnych funkcji, możesz uzyskać wersję premium Duplicator tutaj.
Po aktywacji należy kliknąć menu Duplicator na pasku bocznym administratora WordPress i kliknąć przycisk “Utwórz nowy” w sekcji Kopie zapasowe.
Następnie można wprowadzić nazwę kopii zapasowej i kliknąć przycisk “Dalej”, aby kontynuować.
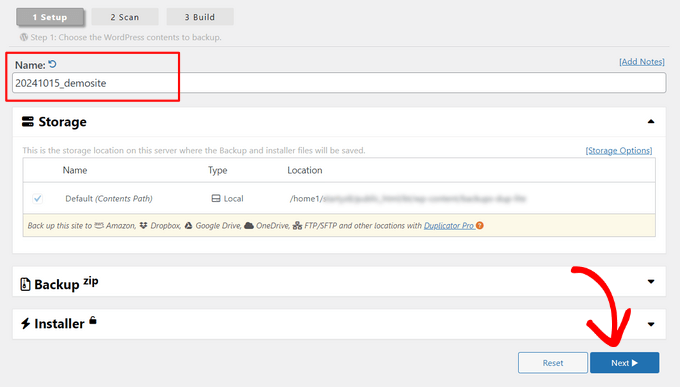
Następnie Duplicator uruchomi kreator duplikatora stron internetowych.
Najpierw uruchomi kilka testów, aby sprawdzić, czy wszystko jest w porządku. Jeśli wszystkie elementy są oznaczone jako “Dobre”, kliknij przycisk “Buduj”.

Wtyczka rozpocznie teraz tworzenie pakietu kopii zapasowej Duplicator dla Twojej witryny WordPress. Proces ten może potrwać kilka minut w zależności od rozmiaru witryny.
Po zakończeniu wyświetlone zostaną opcje pobierania instalatora i pakietu archiwum. Musisz kliknąć przycisk “Pobierz oba pliki”, aby pobrać oba pliki na twój komputer.

Będziesz musiał przesłać oba te pliki do katalogu plików właśnie utworzonej subdomeny. Aby uzyskać szczegółowe informacje, zobacz nasz przewodnik na temat korzystania z FTP do przesyłania plików do twojej witryny internetowej WordPress.
Następnie twoja nowa witryna WordPress będzie potrzebowała nowej bazy danych. Utwórzmy ją.
Przejdź do panelu sterowania twojego konta hostingowego WordPress i przejdź do karty “Zaawansowane”.
Następnie przewiń w dół do sekcji “Bazy danych” i kliknij znajdujący się obok przycisk “Zarządzaj”.

Jeśli nie korzystasz z Bluehost, to twoje środowisko hostingowe WordPress może wyglądać nieco inaczej. Nie martw się i po prostu poszukaj sekcji Bazy danych.
Spowoduje to przejście do strony “Bazy danych MySQL”, gdzie możesz zacząć od podania nazwy twojej bazy danych.
Następnie kliknij przycisk “Utwórz bazę danych”.

Następnie musisz utworzyć użytkownika MySQL dla twojej bazy danych.
Przewiń w dół do sekcji Użytkownicy MySQL i podaj nazwę użytkownika i hasło dla twojego nowego użytkownika bazy danych.

Teraz musisz nadać temu użytkownikowi uprawnienia dostępu i modyfikacji utworzonej wcześniej bazy danych.
Wystarczy przewinąć w dół do sekcji “Dodaj użytkownika do bazy danych” i wybrać twoją bazę danych oraz użytkownika, którego właśnie utworzyłeś.

Następnie kliknij przycisk “Dodaj”, aby kontynuować.
Zostaniesz poproszony o wybranie uprawnień dla użytkownika. Zaznacz pole wyboru “Wszystkie uprawnienia”, a następnie kliknij przycisk “Wprowadź zmiany”.

Teraz twoja baza danych jest gotowa do użycia w witrynie internetowej.
Następnie należy otworzyć nową kartę przeglądarki i wpisz subdomenę twojej witryny w następujący sposób:
https://yoursubdomain.example.com/installer.php
Nie zapomnij zastąpić yourubdomain rzeczywistą subdomeną, a example.com twoją własną nazwą domeny.
Spowoduje to uruchomienie kreatora instalacji programu Duplicator.

W sekcji “Konfiguracja” instalator poprosi cię o wpisz informacji o twojej bazie danych WordPress.
Twoim hostem będzie prawdopodobnie localhost. Następnie wpiszesz dane bazy danych, którą utworzyłeś dla swojej nowej domeny we wcześniejszym kroku.
Kliknij przycisk “Validate”, aby upewnić się, że Duplicator może połączyć się z twoją bazą danych.

Po zakończeniu kliknij przycisk “Dalej”, aby kontynuować.
Duplicator rozpakuje teraz twoją bazę danych i pliki WordPress i zaimportuje je do witryny testowej.
Po zakończeniu zostanie wyświetlony komunikat o powodzeniu.

Możesz kliknąć przycisk “Admin Login”, aby wpisz obszar administracyjny WordPress twojej witryny internetowej na nowej witrynie pomostowej.
Teraz masz już skonfigurowaną twoją witrynę testową. Możesz ją zabezpieczyć, dodając ochronę hasłem do subdomeny.
Przejdź do kokpitu swojego konta hostingowego i przejdź do karty “Zaawansowane”.
Następnie przewiń w dół do sekcji “cPanel” i kliknij znajdujący się obok przycisk “Zarządzaj”.

Spowoduje to otwarcie cPanelu w nowym oknie, w którym należy przewinąć w dół do sekcji “Pliki”.
Następnie kliknij ikonkę “Prywatność katalogu”.

Następnie należy wybrać katalog subdomeny, a następnie zaznaczyć opcję “Zabezpiecz hasłem ten katalog”.
Zostaniesz poproszony o podanie nazwy tego ustawienia, a następnie kliknij przycisk “Zapisz”.

Twoja witryna tymczasowa będzie teraz zabezpieczona hasłem, dzięki czemu nie będzie dostępna dla wyszukiwarek i osób postronnych.
Możesz teraz pracować nad twoją witryną pomostową i wprowadzać w niej wszelkie zmiany.
Ręczne przeniesienie witryny Staging do trybu Live
Gdy będziesz gotowy do wdrożenia zmian z twojej witryny tymczasowej na serwerze rzeczywistym, wykonasz te same kroki opisane powyżej.
Wystarczy utworzyć nowy pakiet Duplicator na twojej witrynie i pobrać pliki instalatora i archiwum na swój komputer (patrz instrukcje powyżej).
Następnie musisz udać się do twojej witryny na żywo i utworzyć pełną kopię zapasową WordPress (możesz również użyć Duplicatora, aby utworzyć pełną kopię zapasową).
Po zakończeniu będziesz musiał usunąć wszystkie pliki i katalogi WordPress z twojej witryny internetowej na żywo. Oznacza to, że twoja witryna WordPress będzie przez jakiś czas niedostępna.
Na koniec postępuj zgodnie z powyższymi instrukcjami, aby uruchomić kreator instalatora Duplicator i importować witrynę pomostową na serwer rzeczywisty.
Jak widać, ostatnia metoda wcale nie jest najlepsza. Jest wiele rzeczy podczas tego procesu, które mogą uszkodzić twoją witrynę.
Sugerujemy unikanie tej metody za wszelką cenę, chyba że nie masz innego wyboru. Zalecamy korzystanie z niezawodnego dostawcy hostingu, takiego jak Bluehost, SiteGround lub WP Engine z wbudowanymi funkcjami staging site.
Mamy nadzieję, że ten artykuł pomógł ci dowiedzieć się, jak łatwo utworzyć środowisko przejściowe dla twojej witryny WordPress. Jeśli napotkasz jakieś problemy, zapoznaj się z naszym przewodnikiem po poprawkach najczęstszych błędów WordPress. Możesz również dowiedzieć się, jak korzystać z WordPress Playground w twojej przeglądarce do testowania.
If you liked this article, then please subscribe to our YouTube Channel for WordPress video tutorials. You can also find us on Twitter and Facebook.


")

Beulah Wellington
If I download WAMP on my computer and use the localhost, couldn’t install the UpdraftPlus plugin and let that be my staging site? Isn’t this another alternative?
WPBeginner Support
Rather than UpdraftPlus, we would recommend taking a look at our guide here for using local for staging: https://www.wpbeginner.com/wp-tutorials/how-to-move-wordpress-from-local-server-to-live-site/
Admin
Jan Stetson
I’m trying to set up a staging environment on my WordPress site hosted by Bluehost. I’m stopped at step one! when I go to the WordPress admin area, I don’t see bluehost at the top of the page. The topmost option in the nav menu on the left is “Dashboard”. No sign of “Staging” anywhere. Help?
WPBeginner Support
You likely removed the BlueHost plugin, if you reach out to BlueHost’s support they should be able to let you know their current methods available
Admin
Shashank Sachan
Hello
I tried but did not succeed. Getting error ” this site can’t be reached”.
I am on Godaddy and using Cloudflare. And I have not created a separate FTP account.
WPBeginner Support
To start troubleshooting that you could try the steps in our article here: https://www.wpbeginner.com/wp-tutorials/how-to-fix-the-403-forbidden-error-in-wordpress/
or reach out to your hosting provider for them to take a look.
Admin
simona
thank you for the article. one question: If I update WordPress ONLY on the staging site, will it affect also my live-site?
thank you for your answer. regards, s.
WPBeginner Support
No, if you update one site it should not affect the other.
Admin
oshibiko
Thank you for this article.
Do you know of a way to test membership (loginlogoff ) functionality without going live on the actual site. In the staging environment or developing. TIA
WPBeginner Support
You would likely need to create a test user for you to log in with to test that.
Admin
Mark E
Great article, with one step missing for the manual instructions.
After downloading the duplicator files to your computer, you then have to upload the installer file and archive file to your newly created subdomain directory.
Otherwise when you try to run the installer you get a 404 page.
Otherwise great guide!
Thanks….
WPBeginner Support
Thank you for pointing that out
Admin
Charlene Marsh
No option to try the staging feature on Bluehost yet. Message says “Please contact support to find out how to enable staging.” I was just on the phone with Bluehost about another issue and the rep I was speaking with never heard of this new feature.
WPBeginner Support
It would depend on what rep you were talking to as it is a new feature so not all reps may be knowledgeable yet
Admin
Matt Stephen
To be able to use the staging feature provided by Bluehost, you must install and activate the Blushost plugin.
Sean
Thank you for this great info, as always. Now is this something I could use to play around with a new page builder? I want to test out Thrive Architect but want to do so without messing anything up. Or, suppose I wanted to play around with a new theme. These may be 2 different questions.
WPBeginner Support
You could certainly test those changes with a staging environment without having to worry about what people see on the site.
Admin
Vanessa
Thanks for the info. I currently use Bluehost but don’t have the staging site option I would love to test it out for a new theme I’d like to try before purchasing it. I contacted BH tech support the rep told me the feature is in development. Thanks again for the info.
WPBeginner Support
Glad we could bring this feature to your attention even if it is currently being developed
Admin
Vanessa
I was able to access the feature today. I’m excited to use it. Thanks again for the info. I’m excited to try out the staging feature.
Ani Chijioke
this is a great information, I have two websites, but I don’t feel like having both look the same.
pls, I need help.
is there any code I can add on >dashboard >customize >additional css,,, for the font color of my site to be pure black in color..
I have this theme that I am using, it gives me everything I want. but the font color of my blog posts are light black. I will like to change the color to pure black
any solution?
thank you.
WPBeginner Support
For finding the CSS you need to change, you would want to take a look at our article on how to use inspect element here: https://www.wpbeginner.com/wp-tutorials/basics-of-inspect-element-with-your-wordpress-site/
Admin
alykhan
Great article but the push back to live is a little brief. I have a WooCommerce site that needs a theme change. I used Duplicator Pro to make a copy on a staging server. I’ve made all the changes to the site including adding a couple of new plugins.
Now I want to push the site back but I can’t do the same thing as there are new orders on the live site. How do I copy the site back without affecting the orders etc..?
WPBeginner Support
Sadly, the safest method for that would be to prevent orders while updating from staging.
Admin
Jennifer Verdin
I haven’t read the comments yet, but I’ve been at this all day. The reason why is because this page does not tell you how to create a database user and assign privileges to the said user.
Thankfully, I was able to figure it out, but that’s a KEY step that is missing to connect the site and database.
WPBeginner Support
Apologies about the confusion, we will certainly look into clarifying that. If you reach out to your hosting provider they normally have a user already created.
Admin
Max
Hi guys,
Thanks for your awesome post. I like the idea that the provider has the staging, productive and a test environment out of box.
But I have two questions:
1. Can write a little bit how it works by your suggested providers?
2. Have you also providers which are located in the EU or better in Germany? And offer staging environment out of box?
Kind regard
Chris
Thank you so much for this information! And if anyone’s wondering, yes, it’s still relevant 4.5 years later.
Jess
Hi there
I am in the process of setting up a new WordPress site but I was planning to start building everything in my staging environment because I would like my live site to have a “under construction” landing page.
What I am not sure of is how to push my changes from the staging site to my live site when I am ready. Would you mind describing this process please?
Thank you
Jess
Johnny
If it’s simply a matter of wanting a “Under Construction” page while keeping the rest of the sight off limits to the public, there are plugins that will do that. Search “under construction.”
Russell
How does this process compare to using a plugin like wp-staging.
Fernando Lisboa
Hi, my question is, i created a staging environment, work there make some updates on structure of pages, layouts, new categories, new pluig-in.
Ok, but in real live, my site is growing with new posts, comments, images, videos, etc…
When i push stage back to life, i will lost thes new itens that were create in real live ??? I test this in sitegroud, and i loose ever with advanved “push to live”
tks
WPBeginner Support
Hi Fernando,
The solution described above only syncs your website files not the database.
Admin
Ravindra
Hi,
Thank you very much. This article was very helpful.
Chris
Hi, thanks for such a useful article,
I’m having a small issue when I give it a go,
I have got as far down as
“Once WordPress has connected to your staging database, it should detect that WordPress has been installed, and prompt you to login” and I am stuck – it autoredirected to the wp-login and gave me a blank page. Not a 404, just a clean white screen.
On the main page the login has been renamed so I try to navigate to that instead and again just a clean white screen.
Can anyone give me any pointers on where I’m going wrong?
WPBeginner Support
Please see our guide on how to fix white screen of death in WordPress.
Admin
Smitha
Hi,
Thanks for this article!
I followed all the steps but I think I have missed one
I created a staging environment and checked site url in wp-options and updated wp-config file but the staging site is being redirected to the primary site.
Do I need to change any other setting?
Ruth
Hi! Thanks for the useful article!
Question, is it necessary to create a new database for your subdomain? Can’t you just use your root domain’s database?
Same for the FTP account, is it necessary to create a new one? I can now access my subdomain easily through my main FTP.
Thanks!
Best,
Ruth
WPBeginner Support
Hi Ruth,
Yes, it is necessary to create a separate database and a separate FTP account.
Admin
Courtney
Hello!
Perhaps this was already covered. Do I need a child theme on my sub-domain serving as my staging site? I am adding custom code and modifications to the new theme on my subdomain with the intention of switching all of this over to the live site when finally ready. Would this complicate things when switching from the staging site to replacing what is currently the live site?
Thank You!
Lee Perry
Hi, this article is super helpful. I have encountered one problem though, when I go to visit my staging URL, I have the following message appear ‘server DNS address could not be found’. I have also cleared my cache and browser history as someone wrote this might help, but it hasn’t worked. I’m wondering what I am doing wrong. Any help would be great.
Lee
Georgia
I’m having the same problem – did you manage to resolve this issue?
Thanks, Georgia
Adrien
While I appreciate the detailed instructions (I don’t like installing plugins to accomplish such tasks), I don’t see any advice concerning keeping the staging and live sites in sync. WordPress sites are generally edited live with respect to content—posts, products, media, etc. Once you follow these directions, the two content sets will diverge as users add content to the live site while the developer’s staging version remains an old copy. I don’t see a good solution for this save a cron rsync job. Any tips?
Jason
After you create the staging subdomain and ftp account.
Skip all the other copying and database junk.
Install duplicator on your live site. Make a duplicate backup, which includes a zipped copy and an install. Php file.
Upload both to your staging area. (Maybe go in and create a database and user for the staging site in cpanel while you wait for the two fingers to upload)
Point your browser to staging.domain.com/install.php and follow the prompts.
Then go back to the rest of this tutorial for locking it down.
Gus Reyes
Hi, I followed another tutorial before I found this one and I installed WordPress BEFORE copying files over and running the SQL queries. My staging site does not populate with live site’s data. Any help you can offer about what to do at this point would be appreciated…
Martin
The staging site does not look exactly like my primary site. The default banner is there instead of my uploaded media (even though that file has transfered) and rather than a nav bar with drop down menus, I have a list of all of my site’s webpages. Is this normal? If not, could you point me where to sort it out?
Thanks for this article!
BLZ
I keep getting this error when I try to run SQL queries ” #2013 – Lost connection to MySQL server during query”
Stefan
Thank you for the great tutorial! I followed it thourgh and created a staging site. However, the staging site seems to be missing some settings from the original site (where I am working with a template), e.g. the font is different, the menu and logo is missing and some other settings are just off. Are there additional files I need to copy?
Thanks a lot!
Lynn Fontaine
Very thorough instructions! We currently have WordPress 4.3.6 version. I think there is a newer version 4.7; however, I am not updating due to past problems with my theme and child after an update. If I follow your instructions to install WordPress on computer, it most likely will affect the existing site as well which will cause a problem. Do you agree? and how do I proceed? thanks.
WPBeginner Support
Hi Lynn,
You can safely install WordPress on your computer and import content from your live site. This way you will be able to test drive new WordPress version with your current theme and child theme.
Admin
Mike
Couple years later, is there an easier way to do this?
Sandy
Lol, Mike, you’re my kinda person! And although you’ve probably sped ahead to something easier by now, I thought I would mention something that I saw but haven’t tried: Backup Buddy. I don’t know how thorough it would be for this purpose. Since my site is pretty static, I used a subdomain to reconstruct my site – just copied and pasted my content as ascii text. Bluehost said they could make it my main site (not subdomain with redirect – make it a domain) when I’m done. Of course you have to set up the widgets, plugins, etc. Still working on it because I’m definitely a beginner. This would be really laborious for a more sophisticated site.
Luke Marshall
I like the well documented article but maybe it’s just me but I can’t find anything anywhere which starts a github repository with a site that’s only on your live server! How do I pull it down to the repository and why does Cloudway s have all the addressing options. What all do I need to pull down do I need to use My SQL Work Bench?
David Borrink
Well done tutorial. I gave up on a staging plug-in after several attempts failed, and found this one to be easy to follow and implement.
One issue to mention and that’s the need to have a database user set up. I had to redo the process and choose the database wizard on CPanel in order to be able to set that up. That allowed my wp-config file to be set up with the info and then it worked. (My first attempt resulted in “unable to establish a database connection.” Once I established a database user, it went through.
And thank you for the the note to check the URL, with the notes to look at site URL and home on the wp-options table. That allowed to me to confirm and get going on a re-design.
Martin Klasson
I guess I found an easier way – that works for me in a project right now!
1. I just clone the files in the ftp to a /staging/ site,
2. clones the database to a dbname_stage
3. Changes the wp-config.php in /staging/ – by changing database to dbname_stage
4. Adds in wp-config in /staging/ the new WP_HOME and WP_SITEURL
define(‘WP_HOME’,’http://example.com’);
define(‘WP_SITEURL’,’http://example.com’);
Then it is super-easy to just copy the dbname_stage back to the live database called dbname
Super easy.
And if you like, you can also in the wp-config change default uploads directory to the same as the live one.. as long as you just dont have the need to “delete” media files that is.
And your changes in the theme files are easily moved back to the live site.
What about that?
Mike
I love the article – so clear instructions and well written. I’m having problems getting it working though.
I followed the instructions to get from production (www.) to test (test.) and dev (dev.)
I’ve tried all this several times in dev … two things happen
dev.example.com … goes to http://www.example.com
test.example.com … goes to test.example.com
On test when I open a post form the menu as a user – it does not show the post but a reference to the post which when I click on it, it takes me back to the same page
I’m wondering if you have any ideas on what may not have worked?
Thanks
Julio
The problem is in your DB, maybe you did left some original (www.example.com) URL’s on your dev.example.com database
sat
Thanks for the great article. It helped me to set up a staging website for testing my new theme. But you have omitted one critical information, after copying the database the MySQL user setup for the wp to access the database needs to be given permission to access the database through the CPanel -> Mysql databases -> add a user to the database option. Otherwise, you will get “cannot connect to the database” when trying to access the admin page through the URL.
Hesli Brito
I am getting lost here:
After copying your database, you need to copy your WordPress files, plugins, themes, and uploads. First download a fresh copy of WordPress from WordPress.org. Upload the contents of WordPress to your staging site. Note, do not run the WordPress install yet.
Once you have uploaded WordPress, the next thing you need to copy is media files, plugins, and themes. The following folders will need to be copied :
Could you guys be more detailed here? Cause I don’t know the right way to upload WordPress without installing… I am missing something here, cause I can’t get it right…
Please, could you guys update this article with more information in this part?
Thanks
WPBeginner Support
Please see our guide on how to upload WordPress files using FTP.
Admin
Sion
Thank you for this amazing guide! I’ve successfully created a staging site with this.
What steps do you recommend to do from Staging to Live?
Right now, I’m just writing down every changes I make and repeat it on the live site.
I’m not sure I know the appropriate method to copy Stage site to Live.
Barbara
I have set up the staging site as outlined above – but now how do I get it to the live site?
I’ve been looking here, but can’t seem to find the answers. Help please?
Peter
What about using Git to track the changes made in DB ? with wordpress, there is a very high likelihood that changes made are in DB instead of in files on hosting server
Rajit
Hi, got stuck at the first step itself. I followed the steps but for some reason not being able to set up a staging environment through cpanel. When I type the link i get the message ‘This site can’t be reached’.
Rajit
I removed it and created again. Now I am getting 403 Forbidden error.
Hesli Brito
Same here
Mike
Thank you for this! What process do you suggest for going live with the staging site?
Craig Watson
Hi, I have followed your steps as above but for some reason the staging URL is redirecting to the normal live URL.
I have ran the queries in the database and copied the files including updating the wp-config.php
Do you have any idea what may be going on here as the staging URL was not redirecting yesterday when I put a small test HTML page up there..
Hope you can advise
Craig
Craig Watson
OK so I was inpatient and didn’t clear cache…. However now I’m on the staging site the database has clearly not moved well…
Lots of setting seem to have been lost.
Glauber Oak
Hi there,
Thank you so much for the detailed instructions.
Does this work for MU site?
Multi-site is at the root, and I would like to copy only the root to an especial folder. Server has other sites as subdirectories. Do not need to be copied at this point (in the futures, a couple of sites will be cloned as well)
Root should go to a subdomain for testing purposes.
Thank you in advance!
Gemma
HI. I am following your tutorial and i got stuck in media files has been copied section. Checking with my FTP and Cpanel files are existing but is not showing in my media library . How can i rectify this? Thanks and your tutorial is very helpful for noobs . 5 thumbs up.
WPBeginner Support
While your media files are stored on server. WordPress can’t show them unless you import data and database. Information about your media files is stored in WordPress posts table as attachment post type.
Admin
Serhan
Thank you for this article; very helpful.
I’d like to add one more point; as it might help other readers too.
After you make a copy of your database, you may need to add the user from previous database to the newly created one.
Otherwise, while setting up your wp-config, you might face with authentication problem.
sam
How do i set-up the staging environment on AWS?
Guvenc Kaplan
Very nice and helpful article. However;
Replacing all the references in the DB (example.com with staging.example.com) will most likely break all the serialized values and you will have BIG issues on the staging site. You need to use a replacer that has serialization support.
Sina
Can you please suggest one with this serialization feature?
Mohammad
Thank you for this great article!
Kris Parker
Excellent article, helped in great detail. thank you