
Jeśli chodzi o wprowadzanie aktualizacji lub znaczących zmian w twojej witrynie WordPress, robienie tego bezpośrednio może być ryzykowne. W tym miejscu pojawia się witryna testowa.
Jest to idealny klon twojej działającej witryny internetowej, w którym możesz bezpiecznie testować zmiany, rozwiązywać problemy i udoskonalać aktualizacje przed wdrożeniem ich na głównej witrynie. Stworzenie witryny testowej może uchronić cię przed potencjalnymi przestojami, niedziałającymi funkcjami i innymi komplikacjami.
W WPBeginner używamy witryn przejściowych do testowania aktualizacji witryn internetowych przed opublikowaniem ich na naszych witrynach rzeczywistych.
W tym przewodniku krok po kroku pokażemy, jak łatwo utworzyć środowisko przejściowe dla twojej witryny WordPress. Omówimy kilka różnych metod, a większość z nich wymaga tylko kilku kliknięć.

Co to jest witryna testowa?
Witryna testowa to klon twojej działającej witryny internetowej, który służy do testowania zmian przed ich uruchomieniem. Witryny pomostowe pomagają wychwycić błędy, dzięki czemu nie zepsujesz swojej działającej witryny internetowej.
W przeszłości skonfigurowanie witryny pomostowej WordPress było bardzo trudne, ale teraz to się zmieniło, więc nawet osoba nietechniczna może to zrobić.
Wielu użytkowników instaluje WordPressa lokalnie na swoich komputerach z systemem Windows lub Mac, aby przetestować zmiany. Po zakończeniu aktualizacji po prostu przesyłają te zmiany z lokalnego hosta na serwer na żywo.
Największym problemem tego podejścia jest to, co jeśli coś, co działało na twoim lokalnym serwerze, nie działa na serwerze live?
Często witryny regionalne i serwery hostingowe WordPress na żywo nie działają w tym samym środowisku.
Ponieważ witryna tymczasowa działa na twoim serwerze WWW, możesz łatwo uniknąć wszystkich tych błędów, ponieważ działa ona w tej samej konfiguracji serwera, co twoja witryna na żywo.
Mając to na uwadze, przyjrzyjmy się, jak skonfigurować witrynę pomostową dla WordPress.
Jak łatwo stworzyć witrynę WordPress Staging Site
Istnieje wiele sposobów na utworzenie witryny testowej dla WordPress. Najprostszym z nich jest skorzystanie z wbudowanej funkcji witryny przejściowej dostawcy hostingu.
Niektóre z najlepszych firm hostingowych WordPress oferują już witryny internetowe z funkcją 1-click staging. Jeśli twoja witryna internetowa jest hostowana przez jedną z nich, możesz łatwo utworzyć witrynę pomostową bez żadnych kłopotów.
Jeśli nie masz jednego z tych popularnych rozwiązań hostingowych, mamy również rozwiązanie, które pomoże Ci stworzyć witrynę przejściową WordPress za pomocą wtyczki (a nawet ręcznie).
Aby przyspieszyć przeglądanie, możesz skorzystać z poniższej nawigacji, aby przejść do sekcji, która najbardziej Ci odpowiada:
Tworzenie witryny testowej na Bluehost
Bluehost jest jedną z najlepszych firm hostingowych WordPress. Oferują szybkie rozwiązanie 1-click staging witryny we wszystkich swoich planach.
Najpierw musisz przejść do kokpitu twojego Bluehost i przejść do sekcji “Moje witryny”.
Następnie przejdź do karty “Wtyczki” i przełącz przełącznik obok opcji “Wtyczka Bluehost”.

Następnie przejdź do kokpitu twojej witryny WordPress i przejdź na stronę Bluehost ” Staging.
Teraz kliknij przycisk “Utwórz witrynę testową”.

Bluehost przygotuje teraz środowisko przejściowe dla twojej witryny internetowej.
Po wykonaniu tej czynności wyświetlona zostanie sekcja “Witryna testowa”, w której należy zaznaczyć pole “Nie jest obecnie edytowana”.

Na twoim ekranie zostanie wyświetlony monit z prośbą o przejście do witryny przejściowej.
Następnie kliknij przycisk “Przełącz”.

Po przełączeniu na ekranie pojawi się przycisk wskazujący, że pracujesz na witrynie internetowej.
Możesz kontynuować pracę nad twoją witryną internetową bez obawy, że będzie to miało wpływ na twoją witrynę na żywo.

Wdrażanie zmian z witryny Staging do witryny Live na Bluehost
Gdy będziesz gotowy do przeniesienia zmian z wersji testowej do witryny na żywo, po prostu przejdź do strony Bluehost ” Staging z panelu bocznego administratora WordPress.
Z tego miejsca zobaczysz rozwijane menu opcji wdrażania obok twojej witryny internetowej. Możesz wdrożyć tylko pliki, tylko bazę danych lub wdrożyć wszystkie zmiany.
Jeśli nie masz pewności, kliknij przycisk “Wdróż wszystkie zmiany”, aby kontynuować.

Następnie kliknij przycisk “Wdróż witrynę” znajdujący się obok rozwijanego menu.
Spowoduje to wyświetlenie wyskakującego okienka, w którym zostaniesz poproszony o potwierdzenie, że chcesz wdrożyć witrynę testową w witrynie produkcyjnej. Kliknij przycisk “Deploy”, aby kontynuować.

Bluehost rozpocznie teraz wdrażanie Twojej witryny tymczasowej do witryny na żywo. W zależności od rozmiaru Twojej witryny internetowej może to chwilę potrwać.
Możesz teraz przełączyć się z powrotem na twoją witrynę internetową, aby zobaczyć zmiany w działaniu, klikając przycisk Radio pod opcją Witryna produkcyjna.

Klonowanie witryny produkcyjnej do wersji Staging
Teraz, gdy przełączysz się z powrotem na witrynę produkcyjną, wszelkie zmiany, które tam wprowadzisz, nie zostaną automatycznie zsynchronizowane z twoją witryną pomostową.
W przyszłości, jeśli będziesz chciał przetestować więcej rzeczy na witrynie pomostowej, będziesz musiał zduplikować twoją witrynę internetową.
Aby to zrobić, należy przejść na stronę Bluehost ” Staging i kliknąć przycisk “Clone to staging”.

Następnie Bluehost sklonuje najnowsze zmiany w Twojej witrynie internetowej na żywo do witryny przejściowej. Następnie można przełączyć się na tymczasową witrynę internetową w celu testowania i rozwoju.
Tworzenie witryny testowej na SiteGround
SiteGround to kolejna czołowa firma hostingowa WordPress oferująca funkcję 1-click staging w swoich planach GrowBig i GoGeek.
Jeśli twoja witryna jest hostowana przez SiteGround, to w ten sposób skonfigurujesz witrynę internetową.
Najpierw musisz logować się do kokpitu SiteGround i przejść do karty Witryny internetowe. Następnie należy wybrać Narzędzia witryny znajdujące się pod twoją witryną internetową.

Na następnym ekranie należy kliknąć menu WordPress ” Staging z lewej kolumny.
W tym miejscu wybierz swoją witrynę internetową, a następnie podaj nazwę kopii testowej.

Kliknij przycisk “Utwórz”, aby kontynuować, a Siteground utworzy tymczasową kopię twojej witryny internetowej.
Następnie należy kliknąć przycisk “Przejdź do zabezpieczonych adresów URL”, aby zabezpieczyć hasłem twoją witrynę internetową i zachować jej prywatność.

Na następnym ekranie Siteground automatycznie wprowadzi adres URL i ścieżkę do twojej witryny internetowej.
Musisz wpisz nazwę użytkownika i hasło, których chcesz użyć do zabezpieczenia twojej witryny.

Kliknij przycisk “Zabezpieczony”, aby zapisać twoje ustawienia.
Możesz teraz wrócić do strony WordPress ” Staging i kliknąć przycisk “Loguj się do panelu administracyjnego” obok twojej witryny internetowej.

SiteGround otworzy teraz obszar administracyjny WordPress twojej witryny internetowej. Możesz przetestować twoje zmiany na tej witrynie internetowej.
Wdrożenie zmian z powrotem do twojej aktywnej witryny internetowej
Po wypróbowaniu twoich zmian na witrynie pomostowej, możesz chcieć połączyć je z witryną internetową na żywo.
SiteGround również to ułatwia.
Wystarczy kliknąć menu WordPress ” Staging w lewej kolumnie. Następnie kliknij menu z trzema kropkami obok twojej witryny w sekcji “Zarządzaj kopiami Staging”.

Menu wyświetli dwie opcje wdrożenia. Możesz wybrać opcję “Full Deploy” lub “Custom Deploy”.
Opcja “Full Deploy” łączy wszystko z witryny pomostowej z twoją witryną internetową. Opcja “Custom deploy” pozwala wybrać pliki lub dane, które mają zostać scalone.
Jeśli nie masz pewności, wybierz opcję “Full Deploy”.
SiteGround skopiuje witrynę testową na twoją witrynę internetową.
Łączenie Live z twoją witryną internetową Staging
Zmiany wprowadzone w twojej witrynie internetowej nie są automatycznie kopiowane do witryny testowej.
Za każdym razem, gdy musisz pracować nad twoją witryną internetową, powtórz powyższy proces, aby utworzyć nową witrynę internetową.
Tworzenie witryny Staging na WP Engine
WP Engine to najlepsza zarządzana przez WordPress firma hostingowa na świecie. Zarządzany hosting WordPress to usługa concierge dla twojej witryny WordPress, w której dostawca hostingu dba o aktualizacje, kopie zapasowe, zabezpieczenia i wydajność.
WP Engine oferuje rozwiązanie staging jednym kliknięciem we wszystkich swoich planach. Jeśli korzystasz z WP Engine do hostowania swojej witryny internetowej, w ten sposób skonfigurujesz środowisko pomostowe dla swojej witryny.
Najpierw musisz logować się do twojego kokpitu WP Engine. Następnie przejdź do strony “Witryny” i wybierz swoją witrynę internetową, klikając na nią.

Spowoduje to przejście do kokpitu twojej witryny internetowej.
Teraz musisz kliknąć odnośnik “Add Staging” w lewej kolumnie lub wybrać go pod nazwą twojej witryny u góry.

Spowoduje to przejście do ekranu “Dodaj środowisko”.
Zostaniesz poproszony o wybranie sposobu, w jaki chcesz kontynuować pracę ze swoim środowiskiem testowym.

Oto, co robi każda z tych opcji:
- “Rozpocznij od nowej pustej witryny” tworzy nową pustą witrynę.
- “Zacznij od przewodnika” tworzy nową witrynę z przewodnikiem i treścią demonstracyjną.
- Opcja “Kopiuj istniejące środowisko do tej witryny” spowoduje skopiowanie twojego środowiska produkcyjnego lub deweloperskiego do tej witryny (np. skopiowanie działającej witryny do tego środowiska).
- “Przenieś istniejące środowisko” przenosi środowisko do tej witryny (np. przenosi środowisko programistyczne do Staging).
- “Zacznij od witryny WooCommerce” tworzy nową witrynę WordPress z preinstalowanym WooCommerce.
Ponieważ chcemy utworzyć kopię testową naszej działającej witryny internetowej, musimy kliknąć opcję “Skopiuj istniejące środowisko do tej witryny”.

Po wybraniu środowiska wybierz najnowszą kopię zapasową, którą chcesz skopiować, a następnie kliknij przycisk “Dalej”, aby kontynuować.
Teraz musisz podać nazwę twojej witryny testowej. Nazwa ta będzie używana w adresie URL twojej witryny przejściowej. Następnie wybierz STG (staging) jako twój rodzaj środowiska.

Kliknij przycisk “Utwórz środowisko”, aby kontynuować.
WP Engine utworzy teraz witrynę testową. Następnie zostaniesz przekierowany do kokpitu twojego środowiska Staging.

Następnie należy kliknąć przycisk Kłódka, aby włączyć ochronę hasłem dla twojej witryny pomostowej.
Następnie należy przejść do karty “Narzędzia”, aby skopiować nazwę użytkownika i hasło do Twojej witryny.

Możesz teraz kliknąć przycisk “WP Admin” u góry, aby logować się do twojej witryny internetowej.
Możesz swobodnie wprowadzać zmiany i wypróbowywać funkcje w witrynie internetowej, tak jak w typowej witrynie WordPress, którą instalujesz gdziekolwiek indziej.

Wdrażanie zmian z witryny Staging do witryny Live na WP Engine
Chcesz połączyć zmiany wprowadzone w witrynie pomostowej z twoją witryną internetową na żywo?
Wystarczy kliknąć przycisk “Kopiuj środowisko”, aby rozpocząć wdrażanie.

Spowoduje to przejście do strony opcji. W tym miejscu należy wybrać twoje środowisko źródłowe i docelowe dla kopii.
Tutaj wybierzesz twoją witrynę internetową jako środowisko źródłowe, a witrynę produkcyjną lub działającą jako środowisko docelowe.

Możesz wybrać, co chcesz skopiować. Można na przykład skopiować wszystkie tabele i pliki bazy danych, określone pliki i tabele bazy danych lub tylko system plików.
Uwaga: Jeśli skopiujesz wszystko, utracisz wszelkie dane przechowywane na twojej działającej witrynie internetowej po użyciu jej do utworzenia środowiska przejściowego. Może to obejmować ważne dane, takie jak nowe wpisy, strony, klienci i zamówienia. Dobrym pomysłem jest więc wykonanie kopii zapasowej twojej działającej witryny przed wdrożeniem jej ze środowiska staging.
Następnie kliknij przycisk “Sprawdź i potwierdź”, aby rozpocząć wdrażanie. Skopiowanie wszystkiego na twoją witrynę internetową zajmie chwilę.
Po zakończeniu procesu otrzymasz powiadomienie e-mail.
Tworzenie witryny Staging przy użyciu wtyczki WordPress
Jeśli twój dostawca hostingu WordPress nie udostępnia funkcji witryny przejściowej, nadal możesz utworzyć witrynę przejściową za pomocą wtyczki WordPress.
Korzystanie z tej metody ma pewne wady.
Po pierwsze, wtyczka będzie miała ograniczoną kontrolę nad twoim serwerem hostingowym. Z tego powodu może nie zawsze dawać najlepsze wyniki.
Po drugie, wtyczka, której będziemy używać, będzie przechowywać twoją witrynę testową na własnych serwerach. Jeśli Zamierzasz dbać o prywatność i ochronę danych, może to nie być dla Ciebie idealne rozwiązanie.
Wreszcie, wtyczka ma kilka znanych niezgodności. Sprawdź ich stronę niezgodności, aby upewnić się, że twoja witryna jest zgodna [może być też “kompatybilny”].
Mając to na uwadze, zobaczmy, jak utworzyć witrynę WordPress typu staging przy użyciu wtyczki WordPress.
Pierwszą rzeczą, którą musisz zrobić, jest zainstalowanie i włączanie wtyczki WP Stagecoach. Aby uzyskać więcej informacji, zapoznaj się z naszym przewodnikiem krok po kroku, jak zainstalować wtyczkę WordPress.
Po włączaniu wtyczka doda nowy element menu o nazwie WP Stagecoach do twojego paska administratora. Kliknięcie go spowoduje przejście do strony ustawień wtyczki.

Będziesz musiał wpisz swoją nazwę użytkownika WP Stagecoach i klucz API, który znajdziesz na swoim koncie w witrynie internetowej wtyczki.
Następnie musisz przejść na stronę WP Stagecoach ” WP Stagecoach i wybrać nazwę Twojej witryny przejściowej. Nazwa ta będzie również używana jako subdomena Twojej witryny internetowej WordPress.

Nie zapomnij zaznaczyć pola obok opcji “Zabezpiecz witrynę tymczasową hasłem”. Zabezpieczy to twoją witrynę internetową przed publicznym zobaczeniem i wyszukiwarkami.
Kliknij przycisk “Jazda dyliżansem”, aby kontynuować.

Wtyczka utworzy teraz kopię zapasową twoich plików WordPress i bazy danych, aby wyeksportować je do witryny testowej.
Może to trochę potrwać w zależności od rozmiaru twojej witryny internetowej WordPress.
Po zakończeniu zobaczysz odnośnik do twojej witryny testowej i jej obszaru administracyjnego.

Możesz kliknąć odnośnik, aby przejść na twoją witrynę pomostową i rozpocząć na niej pracę.
Na pasku administratora u góry pojawi się jasnopomarańczowe powiadomienie wskazujące, że pracujesz nad twoją witryną testową.

Wdrażanie witryny Staging do Live przy użyciu WP Stagecoach
Gdy będziesz już gotowy do importowania zmian na twoją witrynę, przejdź do strony WP Stagecoach ” Importuj zmiany i kliknij przycisk Sprawdź zmiany.

Wtyczka sprawdzi teraz zmiany na twojej witrynie testowej, a następnie wyświetli opcje ich importowania.
Do wyboru są wszystkie zmiany, zmiany w plikach lub zmiany w bazie danych.

Wtyczka pokaże postęp importowania i powiadomi o jego zakończeniu.
Możesz teraz przetestować swoją witrynę na żywo, aby sprawdzić, czy wszystkie zmiany zostały pomyślnie zaimportowane.
Ręczne utworzenie witryny pomostowej dla WordPressa
Ta metoda nauczy cię ręcznie tworzyć witrynę pomostową dla twojej instalacji WordPress. Jest ona przeznaczona dla zaawansowanych użytkowników i wymaga więcej pracy niż inne metody opisane powyżej.
Inną wadą tej metody jest to, że twoja witryna internetowa będzie tymczasowo niedostępna podczas wdrażania zmian z serwera staging na serwer rzeczywisty.
W związku z tym zobaczmy, jak ręcznie utworzyć środowisko przejściowe dla twojej witryny WordPress.
Po pierwsze, musisz utworzyć subdomenę dla twojej witryny internetowej. Jeśli korzystasz z Bluehost, przejdź do kokpitu swojego konta hostingowego i przejdź do karty “Zaawansowane”.
Następnie kliknij przycisk “Zarządzaj” obok opcji “cPanel”.

Spowoduje to otwarcie cPanelu w nowej karcie, w której należy przewinąć w dół do sekcji “Domena”.
Następnie kliknij opcję “Domeny”.

Spowoduje to otwarcie listy wszystkich domen na Twoim koncie hostingowym. W tym miejscu należy kliknąć przycisk “Utwórz nową domenę”.
Gdy to zrobisz, na ekranie otworzy się nowa strona, na której musisz wpisać twoją subdomenę, a następnie nazwę domeny w polu “Domena” w następujący sposób:
subdomena.example.com
Następnie wystarczy kliknąć przycisk “Prześlij”, aby zapisać twoje ustawienia.

Uwaga: Na naszych przykładowych zrzutach ekranu używamy Bluehost, więc twój ekran może wyglądać inaczej.
Twój panel kontrolny hostingu doda teraz twoją subdomenę, której możesz użyć do importowania witryny WordPress na żywo.
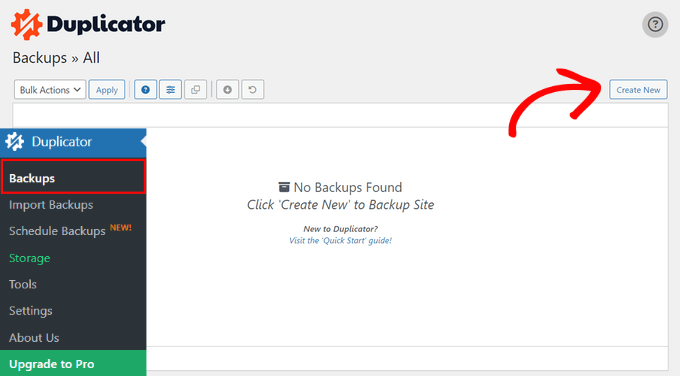
Następnie należy zainstalować i aktywować darmową wtyczkę Duplicator na swojej stronie. Jeśli potrzebujesz pełnych funkcji, możesz uzyskać wersję premium Duplicator tutaj.
Po aktywacji należy kliknąć menu Duplicator na pasku bocznym administratora WordPress i kliknąć przycisk “Utwórz nowy” w sekcji Kopie zapasowe.
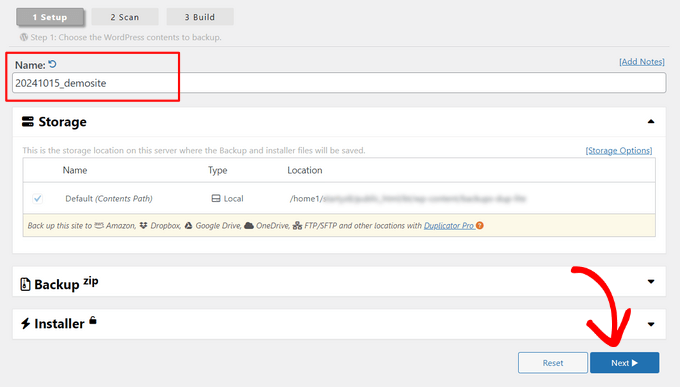
Następnie można wprowadzić nazwę kopii zapasowej i kliknąć przycisk “Dalej”, aby kontynuować.
Następnie Duplicator uruchomi kreator duplikatora stron internetowych.
Najpierw uruchomi kilka testów, aby sprawdzić, czy wszystko jest w porządku. Jeśli wszystkie elementy są oznaczone jako “Dobre”, kliknij przycisk “Buduj”.

Wtyczka rozpocznie teraz tworzenie pakietu kopii zapasowej Duplicator dla Twojej witryny WordPress. Proces ten może potrwać kilka minut w zależności od rozmiaru witryny.
Po zakończeniu wyświetlone zostaną opcje pobierania instalatora i pakietu archiwum. Musisz kliknąć przycisk “Pobierz oba pliki”, aby pobrać oba pliki na twój komputer.

Będziesz musiał przesłać oba te pliki do katalogu plików właśnie utworzonej subdomeny. Aby uzyskać szczegółowe informacje, zobacz nasz przewodnik na temat korzystania z FTP do przesyłania plików do twojej witryny internetowej WordPress.
Następnie twoja nowa witryna WordPress będzie potrzebowała nowej bazy danych. Utwórzmy ją.
Przejdź do panelu sterowania twojego konta hostingowego WordPress i przejdź do karty “Zaawansowane”.
Następnie przewiń w dół do sekcji “Bazy danych” i kliknij znajdujący się obok przycisk “Zarządzaj”.

Jeśli nie korzystasz z Bluehost, to twoje środowisko hostingowe WordPress może wyglądać nieco inaczej. Nie martw się i po prostu poszukaj sekcji Bazy danych.
Spowoduje to przejście do strony “Bazy danych MySQL”, gdzie możesz zacząć od podania nazwy twojej bazy danych.
Następnie kliknij przycisk “Utwórz bazę danych”.

Następnie musisz utworzyć użytkownika MySQL dla twojej bazy danych.
Przewiń w dół do sekcji Użytkownicy MySQL i podaj nazwę użytkownika i hasło dla twojego nowego użytkownika bazy danych.

Teraz musisz nadać temu użytkownikowi uprawnienia dostępu i modyfikacji utworzonej wcześniej bazy danych.
Wystarczy przewinąć w dół do sekcji “Dodaj użytkownika do bazy danych” i wybrać twoją bazę danych oraz użytkownika, którego właśnie utworzyłeś.

Następnie kliknij przycisk “Dodaj”, aby kontynuować.
Zostaniesz poproszony o wybranie uprawnień dla użytkownika. Zaznacz pole wyboru “Wszystkie uprawnienia”, a następnie kliknij przycisk “Wprowadź zmiany”.

Teraz twoja baza danych jest gotowa do użycia w witrynie internetowej.
Następnie należy otworzyć nową kartę przeglądarki i wpisz subdomenę twojej witryny w następujący sposób:
https://yoursubdomain.example.com/installer.php
Nie zapomnij zastąpić yourubdomain rzeczywistą subdomeną, a example.com twoją własną nazwą domeny.
Spowoduje to uruchomienie kreatora instalacji programu Duplicator.

W sekcji “Konfiguracja” instalator poprosi cię o wpisz informacji o twojej bazie danych WordPress.
Twoim hostem będzie prawdopodobnie localhost. Następnie wpiszesz dane bazy danych, którą utworzyłeś dla swojej nowej domeny we wcześniejszym kroku.
Kliknij przycisk “Validate”, aby upewnić się, że Duplicator może połączyć się z twoją bazą danych.

Po zakończeniu kliknij przycisk “Dalej”, aby kontynuować.
Duplicator rozpakuje teraz twoją bazę danych i pliki WordPress i zaimportuje je do witryny testowej.
Po zakończeniu zostanie wyświetlony komunikat o powodzeniu.

Możesz kliknąć przycisk “Admin Login”, aby wpisz obszar administracyjny WordPress twojej witryny internetowej na nowej witrynie pomostowej.
Teraz masz już skonfigurowaną twoją witrynę testową. Możesz ją zabezpieczyć, dodając ochronę hasłem do subdomeny.
Przejdź do kokpitu swojego konta hostingowego i przejdź do karty “Zaawansowane”.
Następnie przewiń w dół do sekcji “cPanel” i kliknij znajdujący się obok przycisk “Zarządzaj”.

Spowoduje to otwarcie cPanelu w nowym oknie, w którym należy przewinąć w dół do sekcji “Pliki”.
Następnie kliknij ikonkę “Prywatność katalogu”.

Następnie należy wybrać katalog subdomeny, a następnie zaznaczyć opcję “Zabezpiecz hasłem ten katalog”.
Zostaniesz poproszony o podanie nazwy tego ustawienia, a następnie kliknij przycisk “Zapisz”.

Twoja witryna tymczasowa będzie teraz zabezpieczona hasłem, dzięki czemu nie będzie dostępna dla wyszukiwarek i osób postronnych.
Możesz teraz pracować nad twoją witryną pomostową i wprowadzać w niej wszelkie zmiany.
Ręczne przeniesienie witryny Staging do trybu Live
Gdy będziesz gotowy do wdrożenia zmian z twojej witryny tymczasowej na serwerze rzeczywistym, wykonasz te same kroki opisane powyżej.
Wystarczy utworzyć nowy pakiet Duplicator na twojej witrynie i pobrać pliki instalatora i archiwum na swój komputer (patrz instrukcje powyżej).
Następnie musisz udać się do twojej witryny na żywo i utworzyć pełną kopię zapasową WordPress (możesz również użyć Duplicatora, aby utworzyć pełną kopię zapasową).
Po zakończeniu będziesz musiał usunąć wszystkie pliki i katalogi WordPress z twojej witryny internetowej na żywo. Oznacza to, że twoja witryna WordPress będzie przez jakiś czas niedostępna.
Na koniec postępuj zgodnie z powyższymi instrukcjami, aby uruchomić kreator instalatora Duplicator i importować witrynę pomostową na serwer rzeczywisty.
Jak widać, ostatnia metoda wcale nie jest najlepsza. Jest wiele rzeczy podczas tego procesu, które mogą uszkodzić twoją witrynę.
Sugerujemy unikanie tej metody za wszelką cenę, chyba że nie masz innego wyboru. Zalecamy korzystanie z niezawodnego dostawcy hostingu, takiego jak Bluehost, SiteGround lub WP Engine z wbudowanymi funkcjami staging site.
Mamy nadzieję, że ten artykuł pomógł ci dowiedzieć się, jak łatwo utworzyć środowisko przejściowe dla twojej witryny WordPress. Jeśli napotkasz jakieś problemy, zapoznaj się z naszym przewodnikiem po poprawkach najczęstszych błędów WordPress. Możesz również dowiedzieć się, jak korzystać z WordPress Playground w twojej przeglądarce do testowania.
If you liked this article, then please subscribe to our YouTube Channel for WordPress video tutorials. You can also find us on Twitter and Facebook.


")
Lynda Joy
Hi,
I just did the first five or so steps of this, and then got lost at “upload your WordPress content to. So now I have completely messed up my site and I would like to know how to undo what I have done.
Thanks.
– Lynda
Rachel
Thanks so much for this – I am very much a beginner but trying to figure out how to do these things myself so I can launch a new design by first using a test site in order to get it right. I have managed to follow your instructions perfectly until this part:
“After copying your database, you need to copy your WordPress files, plugins, themes, and uploads. First download a fresh copy of WordPress from WordPress.org. Upload the contents of WordPress to your staging site. Note, do not run the WordPress install yet”
Can you please advise as to how this is done or direct me to another instruction article? I can’t seem to find out how to do it otherwise. Many many thanks in advance
Sanket D.
So I’ve managed to create my staging environment successfully — I’ve all my media, themes, plugins, everything else properly transferred. However, I’d made some changes to my theme (not through any codes, but through the theme’s inbuilt settings — basic stuff like a custom logo (which I can see in my media library), theme color, homepage layout, etc. These changes are the only thing that for some reason are missing from my staging site. Anybody knows why this might be?
byberkan
I’m hoping you can find the solution. Same problem exists for me.
Joe
It seems we have to do the steps in here after we have our theme, plugin etc.
Mark Park
Great article! Just one thing that isn’t clear to me.
If I have the current non-wordpress website on a domain name example.com and I want to build a new website using WordPress and develop it on a staging environment on a sub-domain dev.example.com – is this possible?
Can I make a sub-domain dev.example.com and install WP on the same server used by the current non-WP website?
Later when the website is finished I want to connect my WP developed site with the domain name example.com.
Thank you for your help.
WPBeginner Support
Yes this is possible. Make sure you block search engines on your development subdomain.
Admin
Maria
Thanks for a Very helpful article! I am in a similar situation as Mark, however my current website is a WordPress site. Can I still develop the redesigned website on a staging site within a sub domain? And if so do I have to create a new database?
byberkan
You really didn’t read the article, do you?
Benito
Hello, great article, but what if I don’t want to use XAMPP, and I just want to use a subdomain as a staging site and then push changes to live? What would be the best way to deploy the changes?
Raj
Will this process create a Database User and add it to the database we created while copying giving it all privileges by itself? or do we need to create a database user at some point?
Raj
Okay I tried it.. both ways.
Once I created the database user before installing wordpress on the staging site and it worked. The other time around, I didn’t and got the issue “We were able to connect to the database server (which means your username and password is okay) but not able to select the a*******_ata_d2db database.”
That to me means that one has to create a user manually, only copying database won’t do. Right?
Sanny
Raj, I see the same error (“Can’t select database”). How did you fix it ?
Scott
Hopefully you guys figured this out, but just to leave this here for others to find, you do indeed need to create a database user (which is not clear in this article). While using Bluehost, I had to do about three steps. First step is to use the MySQL Database cPanel to get access to the list of MySQL databases. Once there, I could see that the new staging database that I had copied using phpMyAdmin per the article, did not have a privileged user assigned to it. So, I created a user, but then discovered that the user I created had too many characters (16 is the max). Once I got that straightened out, I then had to Add this user to a database using the same MySQL page. As part of this assignment step, I was able to select “ALL PRIVILEGES” to make this user a privileged user for this new staging database. Once that was all setup, I was able to configure WordPress to connect up to the staging database.
Gayle
Terrific resource! Reached a WP staging breaking point and then found this. Lifesaver! Thank you! Only things I’d add would be some meta information for newbies like me. : )
LizP
Yikes, too hard for me!
Deborah
Thanks for the tutorial. I seem to be stuck on one of the very first steps. When clicking go after changing the URL’s in SQL, I get a message of ‘# MySQL returned an empty result set (i.e. zero rows)’
This is how I’ve entered the data:
UPDATE wp_options SET option_value = REPLACE(option_value, ‘http://www.example.co.za/wp’, ‘http://staging.example.co.za’);
UPDATE wp_postmeta SET meta_value = REPLACE(meta_value, ‘http://www.example.co.za/wp’, ‘http://staging.example.co.za’);
UPDATE wp_posts SET guid = REPLACE(guid, ‘http://www.example.co.za/wp’, ‘http://staging.example.co.za’);
UPDATE wp_posts SET post_content = REPLACE(post_content, ‘http://www.example.co.za/wp’, ‘http://staging.example.co.za’);
Can anyone please help me with this?
Thanks
Andreas Kofoed
Hi,
First of all thanks for an amazing tut on this.
I’ve encountered one problem so far and that is when I try to enter my subdomain through
www.staging.example.com. I get this message: err_connection_timed_out ???Andreas Kofoed
Hi,
I figured this out as I was due to some table prefix.
Now my staging.mysite.com is up and running, but the styling and layout is totally different.
How do I do, so my files in my child theme applies to the current theme???
It seems like it is missing a lot of pictures, css and some basic settings?…
Patrick
Thanks for this great tutorial!
I’m finding that after setting everything up, comments on the live blog are now going to the sub-domain staging blog. I can’t find anything in the settings that explains this behavior. Do subdomains perhaps take precedence for some reason?
Any ideas?
Jennifer Filgate
Perhaps when you ran the operation to update the URLs in your database you performed it on your live site’s database instead of the new staging site’s database? You have to select the staging site’s database after you create it before you run the operation. Maybe you missed that selecting step.
Arjun Singhal
I got errors regarding SSL certificates. I am a newbie when it comes to using Git and the command prompt on my Mac. So I couldn’t get to syncing everything like I wanted.
Also, how it appears is that the steps are good to sync the local disks files to the server – changes in the theme folder etc.
However, there is no syncing mechanism highlighted for the MySQL server changes in the case of WordPress.
Evan
I don’t know. This just seems really confusing.
So, a Git Bucket is like an intermediary between your local computer and the hosted dev server? For example, if I have website.com then I create dev.website.com then I create an account and empty repository in Git Bucket then I create an empty folder on my local computer, and I edit files locally and sync them to the Git Bucket repository and then how do I commit to the live site? Is there any connection and control to the live site? It seems like from here, you sync your Git Bucket repository to the dev.website.com
Then what? I wish this article had a diagram to understand how this all works. It might make sense to you guys because you do it all day, but for the first time, this is a dizzying experience. Especially since multiple points in this setup failed and I had to go about custom fixing each one. At this point, I have created dev.website.com, copied all files from the live site to it, copied the database, connected it in, logged into the dev.website.com wordpress site, made sure all is cool, but now … I am lost as to what I do next.
In your article, you ask us to INIT a local directory on our computer. Well, I’m trying out Git Bucket’s SOURCE TREE, which by the way looks great. But now what? Any help on what is the procedure from here? What’s the logic to all this?
I create a folder on my local drive, it syncs to a Git Bucket Repository so that people can develop collaboratively. But who uploads the changes to the dev.website.com server? Don’t users need to be able to do that to see live changes on the server? So how does that all connect?
And how do you update the final changes to the live website once you’re ready? Man I’m confused. I spent 3 days getting this setup and I can’t figure out this next step, because I don’t understand how that all works.
Any help?
Oscar
Hi Evan, although I am sure you figured it out by now as its months later, I figured it may help others with the same question. After you have committed your code to version control, you would move your changes over to the server of your choice (dev/staging/production) using the deploy feature. This is described in the section above titled, “Deploying Changes From BitBucket to Staging Site”. Hope this helps clarify!
vjohnson
I am truly a beginner at this, and I have read the article a couple of times. I think my environment is almost set up, the piece that appears to be missing is in the install step. The directions say copy the files but do not install “yet”, when in this process do I run an install of wp? I am unsure if some of the issues that i ran into are due to my host which is hostgator or something that I’ve done wrong. Any input would be great.
What is happening at this point is no errors but nothing is rendered on at the url for my staging area.
Martin
Nice article. Although, the whole way, you’re talking about setting up a development site on the server as a subdomain. But at the end your using a local Xammp server.
How would you setup a test environment on the server where the doomain is hosted? Do you use bitbucket for it as well?
Thanks, cheers.
Alberto Serrano
Hello , I made a staging site successfully but my live site already had a little problem with a plug in , I contacted the developer and he asked for my admin credentials , following your advice on other article I gave him log in credentials to my staging site and he fixed the issue , to make the changes on the live site he told me to import the database from the staging site to the live site , my concern is the sql changes I made to the staging database , if I copy the database isn’t my live site going to redirect to the staging site now ? I can’t find the SQL queries to delete them
Thanks
WPBeginner Support
See our tutorial on how to update URLS when moving WordPress site.
Admin
isagani
hey,
nice article, i followed all instructions and gave me a clean view process on using git and staging environment. hope all experienced people do what you did so many can step forward from beginner to advance.
Thanks a lot.
Isagani
Kristof Bernaert
Just a perfect article that helped me to setup the whole thing.
My staging environment is on the same shared linux hosting, just in another directory.
I used this also as the repo for git.
With Coda, I’m working online in that staging. As I save changed files (mainly css), I see instantly the updates.
So I don’t need the local files on my laptop.
But how to checkout those remote files under the staging folder, without fetching a local copy?
Thx!
Kristof
bcall
Thanks for the article!
I have one problem, though: I have two databases and am not sure which one (or maybe both) is connected to my live site. I checked the wp-config.php file and it’s linking to a database with a different name, one that does not appear in my database list (in phpMyAdmin). Is it possible that the database was renamed?
Nick Jubrey
Look in your wp-config.php file that’s where wp is directed to that particular database, the db your using will be listed there.
Tiffany Johnson
I’m having some issues with the dev site recognizing my theme and content. I copied over the following files prior to running my installation of wordpress, however the pages and content are still not being recognized. I checked the files and my media is in the uploads file, my themes are present, as are my plugins, but none of them are recognized in the actual wordpress site.
/wp-content/uploads
/wp-content/themes
/wp-content/plugins
Any suggestions on what else I can try? Thanks!
Nicole
I’m having this same problem. Any suggestions of what to try? I followed the instructions to copy those files from one folder to the other, and it is in the right place.
Brad Scott
@WPBeginner,
For my case.
Create subdomain: staging.example.com
Create Document Root: public_html/staging
Need to run the following SQL queries:
The NEW_URL should be http://example.com/staging not http://staging.example.com
Login: http://example.com/staging/wp-login.php
Cheers & Thanks
byberkan
Brad, so that means you are not using the subdomain. You are just using it as a subdirectory which you didn’t have to create a subdomain to use that..
Paula Lay
Thank you so much for this tutorial! The step-by-step instructions are perfect for someone who hasn’t done this before. I encountered a snag where I was getting an error message after creating a subdomain (something like a problem configuring the DNS). For anyone that encounters this problem – clear your browser cache and cookies, and then you will see the correct screen. Took me days to figure this out (I gave it a few days because I thought it would take 24hrs or so for the domain to propogate).
Random Dev
Whoa. Wouldn’t it be simpler, cutting down on quite a few steps and reducing the technical nature of this process, to just use a backup plugin with a migrator (search/replace the database) function… instead of copying the databases manually, *and* instead of using Git/Bitbucket? Or am I not understanding something?
Cannonpult
For smaller sites, maybe. But plugins like Duplicator start to fail or have significant diminishing returns on larger sites. For example, if you were working on a site with a lot of media, Duplicator will never be able to transfer everything. You will get warning messages and have to leave media behind in the transfer.
Yes, this tutorial would be overkill for a small blog. But it’s absolutely the way you should go for say, a woocommerce site with 3,000 products (including images and custom data).
The other big consideration is frequency of changes. Some sites are fairly hands-off after they go live. Maybe you just update core + plugins and perform a few minor changes per year. Other sites might require weekly or even more frequent changes. If this were the case, it would become a pain to wait for backups and then drop a backup on the new site (crossing your fingers that it works each time). By using the method described in the tutorial, you can commit smaller changes at a time right after testing them.
mgiulio
Excellent article.I was looking for info about best practices for wordpress staging sites. The additional section on the git-bitbucket workflow is very much appreciated.
nwesource
Fantastic tutorial, thank you! I know WPEngine.com has a staging site built into their hosting options which seems fantastic although I haven’t tried it just yet. Are there any other easier options you know of to setup and operate a staging site, with more of a plugin functionality like WPEngine? They literally have a clone to staging button and a clone to live button that makes this seem like a process from the 80’s LOL…
Amazing tutorial, thank you for enterprise level content!
WPBeginner Staff
No you first need to extract the zip folder and then upload the contents of wordpress directory to your staging site.
Tony Leary
Can someone elaborate on this one step:
“First download a fresh copy of WordPress from WordPress.org. Upload the contents of WordPress to your staging site. Note, do not run the WordPress install yet.”
I read that as “1) download WordPress zip file from WordPress.org and 2) upload .zip file to /staging folder via File Manager.” However, I don’t think that’s correct.
bcall
You can upload the .zip file and then extract the contents within file manager.
WPBeginner Staff
Most probably your subdomain is not configured correctly.
Julius
I actually found out the problem..and it’s been resolved…however, I am unable to add images to my library….anyone else experienced this challenge.
Hans Lindgren
Is the wordpress install running on Windows?
(If so, you need to grant Modify NTFS permissions to IUSR on C:WindowsTemp)
Julius
Awesome tutorial…however, after I attempt to log into the staging site I am taking to the “Opps! Google Chrome could not find http”. What am I doing wrong?
Julius
This is really a great tutorial and something I been wanting to do for quite sometime. My problem is that when I visit the WP login screen it appears that the styling from my theme isn’t applied. Is this normal? Also, when I enter my credentials from the live site into the fields for the staging site, it doesn’t log me in. It’s taking me to the “Oops! Google Chrome could not find http”. Am I doing something wrong?
Sloan Stewart
Very helpful article. Only issue I have is that when it begins discussing version control, it switches from focusing on the alternate wordpress installation on the server to a local installation on one’s machine.
I am assuming one would build your site locally (I am using WAMP) and then use Git/Bitbucket & Ftploy to update your dev/staging wordpress install? That would mean one would have three versions of the wordpress site at all times [Production, Dev/Staging, Local].
How does one ensure your local wordpress install remains compatible with the database and other configuration on the server? Or is there a way to utilize Git/Bitbucket/Ftploy on the server without having to involve a local copy of your wordpress site.
Karlis
Do you need to create user for your freshly created phpmyadmin database?
WPBeginner Staff
No this tutorial is not written for WordPress multisite.
Aathi
Hi,
Will the above process works for wordpress multisite ?
Cheryl S.
Because I typically develop in a staging area on my server and then move it to the clients server to go live, rolling back to previous versions is nearly impossible. This article has made me seriously consider implementing version control with Git and Bitbucket. Thank you so much for this tutorial.
WPBeginner Staff
Yes this would be a better approach.
Mimi Bondi
Thank you. Is it safe to simply copy all the files from the ”test” site and paste them over the current ”live” files via FTP? Or is there more to it?
Mimi Bondi
Would this be the best way to duplicate a website, set it up with a new theme/content then copy it over to the current live website?
I want to change theme but it’s quite a big job so instead of activating it then frantically trying to fix things for days, I’m looking for a way to copy my current site, change it all ”in the background” then make the new one live. Please let me know if it’s even possible?
Mimi Bondi
Once i have my site exacty how i want it in the staging environment,
is there a safeway to copy those files to the real live site?
My goal is to change themes but because this would involve quite a bit of
setting up, i am looking for a way to do this safely and only replace my
current content with the new content when it’s ready (without changing
permalinks and SEO hopefully). Is that possible?
Larry
Excellent article….I was able to follow the instructions step-by-step and complete the creation of development site on my hosting server. Kudos to the writter.
Mike
I’m having some issues when I try to run the SQL queries to change the references to the staging site. I am receiving the following error:
”
#1064 – You have an error in your SQL syntax; check the manual that corresponds to your MySQL server version for the right syntax to use near ‘1
UPDATE wp_options SET option_value = REPLACE(option_value, ‘http://example’ at line 1
”
My SQL query is as follows:
”
1
UPDATE wp_options SET option_value = REPLACE(option_value, ‘http://example.com’, ‘http://dev.example.com’);
2
UPDATE wp_postmeta SET meta_value = REPLACE(meta_value, ‘http://example.com’, ‘http://dev.example.com’);
3
UPDATE wp_posts SET guid = REPLACE(guid, ‘http://example.com’, ‘http://dev.example.com’);
4
UPDATE wp_posts SET post_content = REPLACE(post_content, ‘http://example.com’, ‘http://dev.example.com’);
”
As I missing a step or do I have something incorrect in query? Thanks for your help.
Mike
Never mind, I figured out my issue. Feel free to delete this comment.
djramc
i have the same problem. could i ask how did you solve this issue?
thanks by advance
#1064 – You have an error in your SQL syntax; check the manual that corresponds to your MySQL server version for the right syntax to use near ‘)’ at line 1
WPBeginner Support
You need to remove numbers from lines, replace example.com with your live site url and dev.example.com with your development or staging site URL.
Admin
Bevis Larsen
This article is most useful for the user who want to make advance wordpress application
Brad E
I followed the directions and am able to get the staging site to work. However, every link, page and even login revert to the live site not the staging site. How do I fix this?
WPBeginner Support
you need to change site address and wordpress address. To do that you need to run this SQL query in phpmyadmin for the database of your staging site:
UPDATE wp_options SET option_value = REPLACE(option_value, ‘ORIGINAL_URL’, ‘NEW_URL’);
UPDATE wp_postmeta SET meta_value = REPLACE(meta_value, ‘ORIGINAL_URL’, ‘NEW_URL’);
UPDATE wp_posts SET guid = REPLACE(guid, ‘ORIGINAL_URL’, ‘NEW_URL’);
UPDATE wp_posts SET post_content = REPLACE(post_content, ‘ORIGINAL_URL’, ‘NEW_URL’);
Don’t forget to replace the original url with the url of your live site and new url with the URL of your staging site.
Admin
Brad E
OK – it works now. I had to run the query several times, but got it to work. The problem I am having now, is that all of the theme settings are missing. The header, widgets, background, etc. are set to the theme’s defaults. I am not sure how to update the settings to what the live site has. I copied the 3 files from the wp-content directory. Thanks for the outstanding article and support.
ROHIT
Hi,
As usual, just read you well written article on staging. I’ve got only question in mind right now and is that if there is any changes made in database while working on any project then do I need to upload it seperately on server from local environment whereas files would automatically get deployed via ftploy.
Cheers and Thanks.
Keep your good work up.
Clive
If I make changes on my local WP project, I understand files in my theme are changed, and those are uploaded to staging via BitBucket/Ftploy. What about the database/tables from my local project? I don’t understand why those aren’t also included? Or would the database/tables in staging be updated based on theme changes that are uploaded? Thanks!!
WPBeginner Support
Clive, in your BitBucket repository you can only store your WordPress files. FTPloy simply syncs those files to your staging site.
Admin
Paul Sweany
What do you recommend for when database changes are made? Let’s say I create a new page; should I just re-import the database on the dev server after I make changes to it on my local copy? Also, moving it from dev to live, any recommendations other than manually importing it and running a search and replace to fix the URL?
Glen Clay
As usual, great article and right when I need it. Keep up the great work! On another note, I am on my iPhone and that annoying floating black ‘Trending’ bar keeps getting in the way of me commenting. This article benefited me so much that I went through the several tries it took for me to comment.
WPBeginner Support
Glen, thanks for your feedback. We will look into it.
Admin
Eben
I wasn’t really mentioned on what to do with the staging database and how to transfer the changes to the live database, especially if your client has been making changes to the live site while you’ve been making changes to the staging site and there are changes in both databases.
This is one area of staging environments with wordpress that I haven’t been able to get my head around.
WPBeginner Support
Staging is basically for development, when working on themes or plugins. We imported the database only so that we have actual data to test with. It is not supposed to be a synchronized mirror of your live site.
Admin
Juliana Maggioli
I don’t know if is the same as Eben’s question, but everything is going fine till…: upload/transfer the staging content to the live site. supposing everything is perfect in the staging, how do i make all this perfect structure/content be the live site, without risks?
Damien Carbery
I have started using WP Migrate DB (http://wordpress.org/plugins/wp-migrate-db/) to convert urls and paths in the DB. It will also convert urls and paths that are in serialised data.
So I copy the files to the staging server and create a database and then export the live db via WP Migrate DB and import it to the new database via phpMyAdmin.
The biggest issue is when the live site is updated before I bring the staging server db back.
Zimbrul
If you have Softaculous is even easier to deploy a staging site to the live site: you can clone the site to a location within the same server.
It’s what I’m doing: I create the staging environment and when done I just go the the list of my WordPress installs in Softaculous control panel and “clone” the site to the live location. The live location must be empty by other files for this to work.
WPBeginner Support
Thats another way to do it.
Admin
Giacomo Ardesi
Hey Zimbrul, can you give some more details about Softaculous and how you used it please?
Giacomo Ardesi
Hey Zimbrul, could you please give some more details on how you use Softaculous to clone your WP staging site? Thank you!
M Asif Rahman
Thanks Syed & The Team, that’s one of the most complete and understandable for normal readers Staging Guide for WP. Nicely done.