
Prawo Unii Europejskiej dotyczące RODO wymaga wyraźnej zgody przed przechowywaniem danych użytkownika, a twoja sekcja komentarzy WordPress nie jest wyjątkiem.
Wielu użytkowników WordPressa pytało o dostosowanie sekcji komentarzy do RODO. Na szczęście wdrożyliśmy systemy komentarzy zgodne z RODO na wielu witrynach WordPress i pokażemy Ci dokładnie, jak to zrobić.
W tym artykule pokażemy, jak dodać pole wyboru prywatności komentarzy GDPR do twojej witryny internetowej WordPress.

Dlaczego warto dodać pole wyboru prywatności komentarzy w WordPress?
Ogólne rozporządzenie o ochronie danych (GDPR) ma na celu zapewnienie obywatelom UE większej kontroli nad ich danymi osobowymi.
Wprowadzenie tego prawa zmieniło podejście wielu organizacji do prywatności danych. Aby dowiedzieć się więcej na ten temat, zapoznaj się z naszym przewodnikiem po WordPress i zgodności z GDPR.
Jeśli nie zastosujesz się do RODO, możesz zostać ukarany grzywną lub nawet więzieniem. Dlatego ważne jest, aby Twoja witryna internetowa była zgodna z RODO, w tym formularz komentarzy.
Formularz komentarza zbiera dane osobowe od odwiedzających, w tym ich imiona i nazwiska, adresy e-mail i opcjonalnie adresy URL witryn internetowych. WordPress przechowuje również te informacje w pliku ciasteczka przeglądarki, dzięki czemu może automatycznie uzupełnić informacje o autorze komentarza w przyszłości.
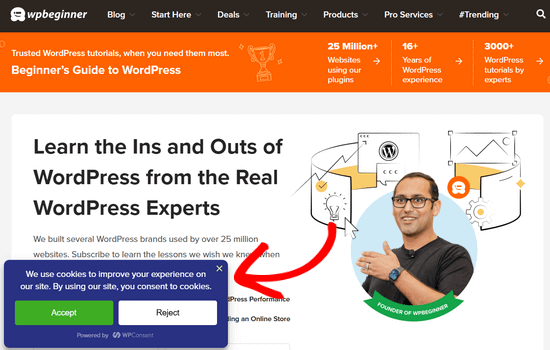
Domyślnie formularz komentarza WordPress wyświetla pole wyboru prywatności komentarza.

Jeśli jednak nie widzisz tego pola wyboru na twojej witrynie internetowej, może być ono wyłączone przez twój motyw WordPress.
Wpisy powiązane: Jak tworzyć formularze kontaktowe zgodne z RODO w WordPress
Jak włączyć pole wyboru prywatności komentarzy w WordPress?
Przed utworzeniem własnego pola prywatności komentarzy warto sprawdzić, czy twój motyw ma już wbudowaną tę funkcję.
Najpierw sprawdźmy, czy zarówno twój motyw, jak i rdzeń WordPressa są aktualne, przechodząc do kokpitu ” Aktualizacje.

Jeśli dostępne są jakiekolwiek aktualizacje, należy je zainstalować. Jeśli potrzebujesz pomocy, zapoznaj się z naszym przewodnikiem na temat bezpiecznej aktualizacji WordPressa.
Następnie przejdź do Ustawienia ” Dyskusja i przewiń do “Inne ustawienia komentarzy”. Tutaj zaznacz pole obok opcji “Pokaż pliki ciasteczka w komentarzach….”.

Po wykonaniu tej czynności wystarczy kliknąć przycisk “Zapisz zmiany”, aby zapisać twoje ustawienia.
Teraz możesz przejść na swoją witrynę internetową WordPress, aby sprawdzić, czy te zmiany dodały brakujące pole wyboru zgody na pliki ciasteczka.

Jeśli jesteś w pełni zaktualizowany i nadal nie widzisz pola wyboru prywatności komentarzy, oznacza to, że twój motyw zastępuje domyślny formularz komentarza WordPress.
Mając to na uwadze, zalecamy zwrócenie się do dewelopera motywu o poprawienie tego problemu poprzez otwarcie biletu pomocy technicznej. Aby uzyskać poradę, zapoznaj się z naszym przewodnikiem na temat tego, jak prawidłowo poprosić o pomoc techniczną WordPress.
Inną opcją jest samodzielne dodanie pola wyboru prywatności komentarzy do twojego motywu WordPress. Istnieje kilka różnych sposobów, aby to zrobić, więc skorzystaj z poniższych odnośników, aby przejść bezpośrednio do metody, której chcesz użyć:
Metoda 1: Korzystanie z formularza komentarzy Thrive Comments (zalecane)
Najprostszym sposobem na dodanie pola wyboru prywatności komentarzy jest zastąpienie twojego obecnego, aktualnego formularza komentarzy formularzem Thrive Comments.
Thrive Comments to wtyczka do komentowania na WordPressie, która posiada wiele funkcji zwiększających twoje zaangażowanie w komentarze. Oprócz konfigurowalnego formularza komentarza, wtyczka posiada również funkcje do:
- Umożliwienie użytkownikom lubienia i nielubienia komentarzy
- Funkcja lub zakopywanie komentarzy WordPress
- Przekierowanie komentujących do innego wpisu na blogu po pozostawieniu przez nich komentarza.
Powodem, dla którego ta metoda jest najłatwiejsza, jest to, że nie musisz majstrować przy kodzie w plikach twojego motywu, aby dodać pole wyboru. Wystarczy zainstalować wtyczkę, włączyć funkcję RODO i to wszystko.
To powiedziawszy, nie ma darmowej wersji wtyczki, więc może się ona wydawać inwestycją. Możesz dowiedzieć się więcej o Thrive Comments w naszej recenzji Thrive Themes.
Pierwszym krokiem jest zainstalowanie Thrive Comments. Aby to zrobić, możesz przejść do witryny internetowej Thrive Themes i uzyskać płatny plan.

Następnie wystarczy logować się, aby przejść do kokpitu konta.
Na tej stronie kliknij “Pobierz i zainstaluj wtyczkę Thrive Product Manager”.

Teraz wystarczy zainstalować wtyczkę Thrive Product Manager na twojej witrynie WordPress. Aby uzyskać więcej informacji, zapoznaj się z naszym przewodnikiem na temat instalacji wtyczki WordPress.
Następnie wystarczy przejść do strony Menedżera produktów z twojego obszaru administracyjnego WordPress i kliknąć “Zaloguj się na moje konto”.

Znajdujesz się teraz w kokpicie Thrive Product Manager.
Na tym etapie, przejdź dalej i wybierz Thrive Comments. Następnie kliknij przycisk “Zainstaluj wybrane produkty”.

Po zakończeniu instalacji pojawi się komunikat “Gotowe do użycia”.
Wystarczy kliknąć przycisk “Przejdź do kokpitu Thrive Themes” na dole.

Zobaczysz teraz wszystkie twoje zainstalowane wtyczki w pakiecie.
Kliknij przycisk “Thrive Comments”, aby rozpocząć korzystanie z wtyczki.

Na następnej stronie otwórz menu “Ustawienia ogólne”.
Następnie włącz sekcję Thrive Comments dla całej twojej witryny internetowej i zaznacz pole “Włącz zgodę RODO”.

Po wykonaniu tej czynności możesz wyświetlić podgląd twojej sekcji komentarzy.
Jak widać, domyślny formularz komentarza został zastąpiony i jest teraz pole wyboru zgody, które mówi: “Korzystając z tego formularza, zgadzasz się na przechowywanie i przetwarzanie twoich danych przez tę witrynę internetową”.

To wszystko. Zachęcamy również do zabawy z innymi ustawieniami Thrive Comments, aby jeszcze bardziej ulepszyć twoją sekcję komentarzy.
Na przykład, możesz zezwolić użytkownikom na subskrybowanie komentarzy WordPress i powiadamianie ich o odpowiedziach na ich komentarze.
Rozumiemy, że korzystanie z płatnej wtyczki do komentarzy tylko po to, by dodać to jedno pole wyboru, wydaje się przesadą.
W takim przypadku zalecamy wypróbowanie dwóch kolejnych metod. Obie biorą udział w pewnym niestandardowym kodowaniu, ale przeprowadzimy Cię przez ten proces, abyś mógł z powodzeniem dodać pole wyboru prywatności, nawet jeśli nie masz doświadczenia w kodowaniu.
Uwaga: Przed wykonaniem poniższych poradników zdecydowanie zalecamy wykonanie kopii zapasowej twojej witryny internetowej na wypadek nieoczekiwanych błędów. Możesz użyć wtyczki do tworzenia kopii zapasowych, takiej jak Duplicator.
Metoda 2: Dodanie pola wyboru RODO do twojego motywu WordPress za pomocą kodu
Ta metoda powinna działać w przypadku większości motywów WordPress. Pozwoli ona również zachować nienaruszony styl i układ formularza twojego motywu.
Najpierw musisz połączyć się z twoją witryną WordPress za pomocą klienta FTP, takiego jak FileZilla, lub możesz użyć menedżera plików w cPanelu hostingu WordPress. Jeśli jesteś klientem SiteGround, możesz użyć menedżera plików w kokpicie Narzędzia witryny.
Jeśli po raz pierwszy korzystasz z FTP, zapoznaj się z naszym kompletnym przewodnikiem na temat łączenia się z witryną za pomocą FTP.
Po nawiązaniu połączenia należy przejść do katalogu /wp-content/themes/ i otworzyć katalog dla obecnego, aktualnego motywu WordPress.

Będziesz musiał znaleźć kod, który zastępuje domyślny formularz komentarza WordPress. Zwykle można go znaleźć w pliku comments.php lub functions. php w katalogu twojego motywu.
Po otwarciu jednego z tych plików poszukaj kodu, który ma filtr comment_form_default_fields. Motywy używają tego filtra, aby zastąpić domyślny formularz komentarza WordPress.
Będzie on zawierał linie dla wszystkich twoich pól formularza komentarza. Każdy motyw jest inny, ale oto przykład kodu, którego szukasz:
1 2 3 4 5 6 7 8 9 10 11 12 13 14 15 16 17 18 19 20 21 22 23 24 25 26 27 28 29 | $comments_args = array( // change the title of send button 'label_submit'=> esc_html(__('Post Comments','themename')), // change the title of the reply section 'title_reply'=> esc_html(__('Leave a Comment','themename')), // redefine your own textarea (the comment body) 'comment_field' => ' <div class="form-group"><div class="input-field"><textarea class="materialize-textarea" type="text" rows="10" id="textarea1" name="comment" aria-required="true"></textarea></div></div>', 'fields' => apply_filters( 'comment_form_default_fields', array( 'author' =>'' . '<div><div class="input-field">' . '<input class="validate" id="name" name="author" placeholder="'. esc_attr(__('Name','themename')) .'" type="text" value="' . esc_attr( $commenter['comment_author'] ) . '" size="30"' . $aria_req . ' /></div></div>', 'email' =>'' . '<div><div class="input-field">' . '<input class="validate" id="email" name="email" placeholder="'. esc_attr(__('Email','themename')) .'" type="email" value="' . esc_attr( $commenter['comment_author_email'] ) . '" size="30"' . $aria_req . ' /></div></div>', 'url' =>'' . '<div class="form-group">'. '<div><div class="input-field"><input class="validate" placeholder="'. esc_attr(__('Website','themename')) .'" id="url" name="url" type="text" value="' . esc_attr( $commenter['comment_author_url'] ) . '" size="30" /></div></div>', ) ), ); comment_form($comments_args); ?> |
W tym kodzie można zauważyć, że filtr comment_form_default_fields jest używany do modyfikacji pól autora, e-maila i adresu URL.
Wyświetla każde pole w następującym formacie:
1 2 | 'fieldname' => 'HTML code to display the field','anotherfield' => 'HTML code to display the field', |
Teraz dodamy pole wyboru prywatności komentarzy na końcu bloku kodu przed linią comment_form($comments_args); ?>.
Tak powinien teraz wyglądać kod, ale możesz po prostu skopiować i wkleić kod z // Teraz dodamy nasz nowy komentarz opt-in do pola wyboru prywatności:
1 2 3 4 5 6 7 8 9 10 11 12 13 14 15 16 17 18 19 20 21 22 23 24 25 26 27 28 29 30 31 32 33 34 | $comments_args = array( // change the title of send button 'label_submit'=> esc_html(__('Post Comments','themename')), // change the title of the reply section 'title_reply'=> esc_html(__('Leave a Comment','themename')), // redefine your own textarea (the comment body) 'comment_field' => ' <div class="form-group"><div class="input-field"><textarea class="materialize-textarea" type="text" rows="10" id="textarea1" name="comment" aria-required="true"></textarea></div></div>', 'fields' => apply_filters( 'comment_form_default_fields', array( 'author' =>'' . '<div><div class="input-field">' . '<input class="validate" id="name" name="author" placeholder="'. esc_attr(__('Name','themename')) .'" type="text" value="' . esc_attr( $commenter['comment_author'] ) . '" size="30"' . $aria_req . ' /></div></div>', 'email' =>'' . '<div><div class="input-field">' . '<input class="validate" id="email" name="email" placeholder="'. esc_attr(__('Email','themename')) .'" type="email" value="' . esc_attr( $commenter['comment_author_email'] ) . '" size="30"' . $aria_req . ' /></div></div>', 'url' =>'' . '<div class="form-group">'. '<div><div class="input-field"><input class="validate" placeholder="'. esc_attr(__('Website','themename')) .'" id="url" name="url" type="text" value="' . esc_attr( $commenter['comment_author_url'] ) . '" size="30" /></div></div>', // Now we will add our new privacy checkbox opt-in 'cookies' => '<p class="comment-form-cookies-consent"><input id="wp-comment-cookies-consent" name="wp-comment-cookies-consent" type="checkbox" value="yes"' . $consent . ' />' . '<label for="wp-comment-cookies-consent">' . __( 'Save my name, email, and website in this browser for the next time I comment.' ) . '</label></p>', ) ), ); comment_form($comments_args); ?> |
Po dokonaniu tej zmiany, zapisz i prześlij plik z powrotem na twoje konto hostingowe WordPress.
Po zakończeniu możesz przejść na twój blog WordPress, aby zobaczyć zmiany w działaniu.
Metoda 3: Zastąp formularz komentarzy twojego motywu domyślnym formularzem WordPressa
Ta metoda po prostu zastępuje formularz komentarza twojego motywu domyślnym formularzem komentarza WordPress.
Ta metoda może zmienić wygląd formularza komentarza, więc nie jest to najlepsza metoda, jeśli chcesz zachować styl i układ formularza. Jednak po wprowadzeniu tej zmiany zawsze możesz nadać styl twojemu formularzowi komentarza za pomocą własnego CSS.
Podobnie jak w poprzedniej metodzie, pierwszym krokiem jest połączenie się z twoim serwerem za pomocą FTP lub otwarcie menedżera plików twojego hosta.
Następnie otwórz plik comments.php i poszukaj wiersza z funkcją comment_form(). Twój motyw będzie miał zdefiniowany argument, funkcję lub szablon, którego używa do wczytywania własnego formularza komentarza. Linia comment_form będzie wyglądać mniej więcej tak:
1 | <?php comment_form( custom_comment_form_function() ); ?> |
Należy ją zastąpić następującym wierszem:
1 | <?php comment_form(); ?> |
Gdy to zrobisz, zapisz swoje zmiany.
Teraz, jeśli przejdziesz na twoją witrynę internetową, zobaczysz domyślny formularz komentarza WordPress z polem wyboru prywatności komentarza.

Porada bonusowa: Poprawa zgodności z RODO dzięki MonsterInsights i WPConsent
Włączenie pola wyboru prywatności komentarzy jest jednym ze sposobów, aby Twoja witryna internetowa była bardziej zgodna z RODO. Jeśli zbierasz inne dane i chcesz mieć pewność, że Twoja witryna internetowa jest zgodna z RODO, zalecamy zainstalowanie MonsterInsights.
MonsterInsights to wtyczka, która ułatwia połączenie twojej witryny internetowej z Google Analytics. Co więcej, posiada ona dodatek EU Compliance, dzięki któremu twoje śledzenie jest zgodne z RODO.
Dzięki temu MonsterInsights będzie czekać na zgodę użytkownika na śledzenie jego aktywności, zamiast robić to w momencie, gdy użytkownik pojawi się na twojej witrynie.

Aby uzyskać więcej informacji na temat MonsterInsights, możesz przeczytać naszą recenzję MonsterInsights.
Kolejnym niezbędnym narzędziem do zapewnienia zgodności z RODO jest WPConsent, który obsługuje zarządzanie zgodami na pliki ciasteczka w całej Twojej witrynie internetowej. Jest to jedna z najlepszych na rynku wtyczek do WordPressa zapewniających zgodność z RODO.
Wtyczka ta automatycznie skanuje całą instalację WordPressa w celu wykrycia plików ciasteczek pochodzących ze skryptów innych firm, rdzeni funkcji WordPressa i wtyczek, znajdując nawet ukryte pliki ciasteczek, o których możesz nie wiedzieć.
Po wykryciu można automatycznie utworzyć własne wyskakujące okienko zgody na pliki ciasteczka, które uniemożliwia tym skryptom śledzenie aktywności użytkownika do czasu udzielenia wyraźnej zgody.
Korzystanie zarówno z MonsterInsights, jak i WPConsent wraz z polem wyboru prywatności komentarzy tworzy kompleksowy system zgodności z RODO, który zabezpieczy zarówno Ciebie, jak i Twoich użytkowników.
Mamy nadzieję, że ten artykuł pomógł ci dowiedzieć się, jak dodać pole wyboru prywatności komentarzy RODO w WordPress. Możesz również zapoznać się z naszym przewodnikiem dla początkujących na temat moderacji komentarzy WordPress i naszym artykułem o tym , jak umożliwić użytkownikom zgłaszanie nieodpowiednich komentarzy WordPress.
If you liked this article, then please subscribe to our YouTube Channel for WordPress video tutorials. You can also find us on Twitter and Facebook.


 in 2024")
Jiří Vaněk
I live in the Czech Republic, which is subject to the GDPR law and it is a rather complex and comprehensive law. As far as websites are concerned, we now have to be really very careful about how we handle the data that the user sends to the website. These guides are great because they help people better prepare their website for this law and not forget anything. Thanks for the guide, you really have to be very careful about GDPR and these guides are a great help.
Kris
What I just don’t understand or maybe I am missing something, is how to put the Privacy Policy checkbox as in what you have on your comments. Something like, “by using this form you agree to us collecting and storing data as per our privacy policy. Nobody seems to have this information – just the usual comment checkbox which is straight forward to do.
WPBeginner Support
If I understand what you’re looking to do, you can change the text by editing the text on line 29 in our code above that currently has ‘Save my name, email, and website in this browser for the next time I comment.’ when replacing, ensure you keep the single quotes.
Admin
Stephen Ho
Thank!
mike carpenter
Got this working and checked that the cookie was being created as expected, but when I browse away from the blog page and then return to it, I expected the form values to be pre-populated with the values stored in the cookie, but this doesn’t happen and the fields are left blank! I think I assumed that the line $commenter = wp_get_current_commenter(); and subsequent lines esc_attr( $commenter[‘comment_author_url’] ) etc. would retrieve the stored field values from the cookie. Have I missed something, or am I msundersatding the way the checkbox is supposed to work?
Sefket
Do you have one for contact forms?
WPBeginner Support
Hi Sefket,
Please see our article on how to create GDPR compliant forms in WordPress.
Admin
Tara
I normally find great info on your site, but I have to speak up and say in this case, this is not accurate to be ready for GDPR, you need get consent to save their data for the comment/email/name/ip etc in your website database, whether or not they choose to save their details in a cookie for faster commenting at a later time.
I used css to hide this checkmark and installed a GDPR plugin, unfortunately now that plugin is not prompting people that they have to checkmark to leave their comment, so now we are losing comments. What’s also frustrating is that it appears for all users with no option to show only for EU. Another frustration is that with hiding the wordpress added checkmark, now the users do not see “your comment is awaiting moderation”.
parijatak ayurveda
Thanks for the sharing of information.
Mirko
What if I don’t want the commenters to store a cookie with their personal data at all? Is there a way to deactivate the whole process and to hide this cookie consent for good?
Uphoria
What if the code is there in my theme already? It’s still not showing up, but it has each of the fields there.
Peter
Thx for the guide,
but everything described doesn’t seem to be possible, if it’s a wordpress.com page (free/no plan).
There is no updating and there is nothing in the settings to add an opt-in check box or any other specific code. The only thing in the settings, that implies a possibility to achieve GDPR-compliance is to add a short info, that data will be provided to and stored at automaticc with a link to their privacy disclaimer. Furthermore, plug-ins and access via ftp can not be used.
—
Any suggestions on how to include an opt-in check box for users who only use the free wordpress.com solution?
Or is it not even needed due to the fact that user access to the web space is only possible via the rather limited wordpress configuration page – or due to any other means?
WPBeginner Support
Hi Peter,
Please reach out to WordPress.com support, they will be able to help you better.
Admin
Bryan
Hello, I was able to add this in my theme and it works, but there is one problem. I check consent box. Next time, my name and email are filled in, but I have to check consent box again. In default WP theme, if I check remember name, email fields box once, next time it comes checked by default. Is there problem with my theme or this code can be improved?
Jim
Hey there! Great instruction! I am trying to get some sites GDPR compliant as well.
I was wondering about Genesis websites, I couldn’t find this code in either comments.php OR functions.php so I first tried loading the code from Method 1 in via Simple Hooks after the comment form then I used the code you gave to Mateja in my functions.php. Both gave me a checkbox but… is it supposed to do anything else? Is there somewhere that I can see whether a commenter has checked this box? Thanks in advance for any help.
Jim
Elisa
Unfortunately I cannot apply any of the mentioned solutions as none of the CSS can be found. Contacted the comoany I got my theme from, hope they can help.
Alexander
Hi,
I was not helped by Method 1 and Method 2.
I could not find the code I needed to edit.
I’m using the “publisher” (themeforest) template.
Can you tell me how to configure the “publisher” template?
Thank you
WPBeginner Support
Hi Alexander,
Unfortunately, it is not possible for us to come up with a solution for each theme as they use different methods. It would be best to contact your theme developer for support.
Admin
Samantha
I also got the “Undefined variable: consent” message when I tried to do this, although the checkbox appeared along with the message.
Vicdayo
What if I’m using facebook comment system on my blog?
Mateja
Hi, I disabled the Jetpack comment form and now I can see the checkbox. All good. BUT, I don’t like how the text looks like….save my name, address and so on…..I would like to insert my own text with a link to the privacy policy,,,,,….is that possible? and how I do that? Thank you
WPBeginner Support
Hi Mateja,
You can try this code in your theme’s functions.php file. You’ll be able to change the label text for the consent checkbox.
functionwpb_comments_privacy($arg) {$arg['cookies'] ='<p class="comment-form-cookies-consent"><input id="wp-comment-cookies-consent" name="wp-comment-cookies-consent" type="checkbox" value="yes"'.$consent.' />'.'<label for="wp-comment-cookies-consent">'. __('Save my name, email, and website in this browser for the next time I comment.') .'</label></p>';return$arg;}add_filter('comment_form_default_fields','wpb_comments_privacy');1-click Use in WordPress
Admin
Inayatali
Thank you so much.
WPBeginner Support
You’re welcome
Kamran Khan
Thank you sir. I have applied the 1st method. Its working but after inserting the code some of the code elements also shown with the checkbox and message which I manually removed. Is it OK? Now its working fine but the checkbox is showing above the message and not inline. How I can inline both the checkbox and the message.
WPBeginner Support
Hi Kamran,
No, there is probably something missing in the code. Most likely a quote or a php start or end tag. Carefully review the code to make sure that all quotes are closed and code is properly formatted.
For styling you will need to use custom CSS to adjust the field.
Admin
Carey
Ok, I am ignorant about adding code. I am using the K2 theme, which does not seem to have the updated comments form. I installed Code Snippets, but I don’t understand – does it just know where to put the snippet? I looked at the comments code in the theme files, but it doesn’t look anything like your example here. In fact it has 189 lines of code for comments. Do I just add your “new privacy checkbox optin” code to snippets and click activate and it inserts it in the correct place? So confused…
WPBeginner Support
Hi Carey,
If you find editing theme files difficult, then ask your theme author to release an update.
Admin
Brian Sanderson
Hi! I do not have the above code in your article, as is, but i do have the following code in the comments.php file. The code includes the 4 fields;
Could you please advise how my code could be edited? Thanks in advance.
WPBeginner Support
Hi Brian,
It depends on rest of the code in your theme. Unfortunately, we cannot cover all the possible ways in which a theme may display a comment form. You will need to reach out to your theme author for support.
Admin
Mark Corder
Thanks for this – I know it was quick work on your part too!
Thomas
I tried using this and got the following notice in place of the checkbox:
Undefined variable: consent
So you didn’t define it? How do I do that?
Mark Corder
Huh… It’s working for me. I just need to get the checkbox and label lined-up to match the rest of my form…
Thomas
Just so everyone knows I opened up comments-template.php file from the wp-includes folder and found this:
$consent = empty( $commenter[‘comment_author_email’] ) ? ” : ‘ checked=”checked”‘;
Adding this to the above defines the consent and in doing so will remove the notice if you have debug turned on.
You have to add it before the $comments_args = array. This all depends on how you have your template configured.
Hope it helps.