
Za każdym razem, gdy przesyłasz obraz, WordPress automatycznie tworzy kilka kopii tego obrazu w różnych rozmiarach. Motywy i wtyczki WordPress mogą również tworzyć własne kopie o różnych rozmiarach. Czasami jednak te domyślne ustawienia nie są tym, czego szukasz.
Może są zbyt duże i spowalniają Twoją witrynę, a może są zbyt małe i tracą swój wpływ. W WPBeginner wiemy, jak ważne są piękne obrazy, które idealnie pasują do Twojej witryny. Więc nie panikuj – pomożemy Ci rozwiązać te problemy.
W tym artykule pokażemy ci, jak łatwo utworzyć dodatkowe rozmiary obrazków w WordPressie i wykorzystać je na twojej witrynie internetowej.

Po co tworzyć dodatkowe rozmiary obrazków w WordPress?
Zazwyczaj popularne motywy i wtyczki WordPress automatycznie tworzą dodatkowe rozmiary obrazów. Na przykład, motyw może tworzyć różne rozmiary do wykorzystania jako miniatury na stronach archiwum lub niestandardowych stronach głównych.
Czasami jednak obrazy te mogą nie spełniać idealnie Twoich wymagań. Na przykład, możesz chcieć użyć różnych rozmiarów obrazów w motywie podrzędnym lub układzie siatki.
Aby to zrobić, musisz utworzyć dodatkowe rozmiary obrazów w WordPress, a następnie wywołać odpowiedni obraz w razie potrzeby.
Mając to na uwadze, pokażemy ci, jak tworzyć dodatkowe rozmiary obrazów w WordPress. Oto krótki przegląd wszystkich wskazówek, które omówimy w tym artykule:
Gotowy? Zaczynamy!
Rejestrowanie dodatkowych rozmiarów obrazków dla twojego motywu
Większość motywów WordPress obsługuje wyróżnione obrazy, znane również jako miniatury postów. Jeśli jednak tworzysz niestandardowy motyw WordPress, musisz dodać obsługę wyróżnionych obrazów.
Większość ekspertów WordPress może zalecić dodanie następujących niestandardowych fragmentów kodu do pliku functions.php motywu.
1 | add_theme_support( 'post-thumbnails' ); |
Nie jest to jednak całkiem przyjazne dla początkujących, ponieważ istnieje ryzyko zepsucia witryny z powodu jednego drobnego błędu. Zamiast tego zalecamy dodanie niestandardowych fragmentów kodu za pomocą WPCode.

WPCode to potężna wtyczka do fragmentów kodu, która upraszcza dodawanie niestandardowego kodu do WordPressa, używana przez ponad 2 miliony klientów. Uruchamia fragmenty kodu tak, jakby znajdowały się w plikach motywu, dzięki czemu dostosowania są przyszłościowe i łatwe w zarządzaniu, nawet dla początkujących.
Dobrą wiadomością jest to, że darmowa wersja WPCode pozwala na dodawanie własnych fragmentów kodu. Zainstalujmy więc i aktywujmy wtyczkę. Jeśli potrzebujesz pomocy, możesz zapoznać się z instrukcjami krok po kroku w naszym przewodniku na temat instalacji wtyczki WordPress.
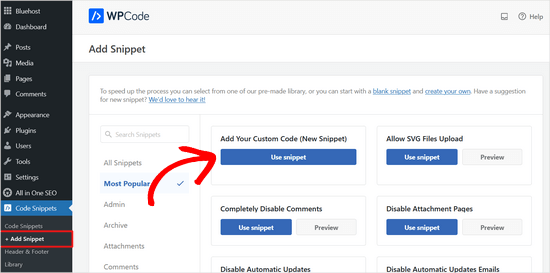
Po aktywacji możesz przejść do fragmentu kodu ” + Dodaj fragment kodu z kokpitu WordPress. Następnie kliknij przycisk „Dodaj swój niestandardowy kod (nowy fragment kodu)”.
Na następnym ekranie nadasz nazwę swojemu niestandardowemu fragmentowi kodu. Na przykład, możesz nazwać go „Obsługa miniatur postów”.
Następnie możesz skopiować i wkleić ten kod do obszaru „Podgląd kodu”:
1 | add_theme_support( 'post-thumbnails' ); |
Oto jak może to wyglądać w edytorze:
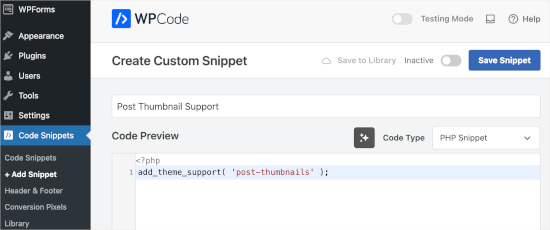
Następnie zmieńmy typ kodu na „Fragment kodu PHP”.
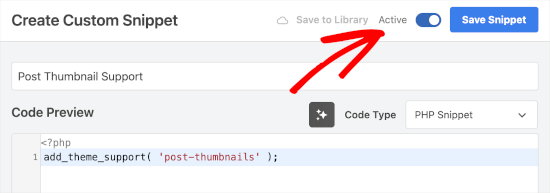
Następnie możesz przełączyć przełącznik z „Nieaktywny” na „Aktywny” i kliknąć „Zapisz fragment kodu”.
Po dodaniu niestandardowego fragmentu kodu do obsługi miniatur postów, można zarejestrować dodatkowe rozmiary obrazów za pomocą funkcji add_image_size().
Ponownie otwórzmy edytor niestandardowych fragmentów kodu WPCode, przechodząc do opcji Fragment kodu ” + Dodaj fragment. Następnie wybierzmy przycisk „Dodaj swój niestandardowy kod (nowy fragment kodu)”.
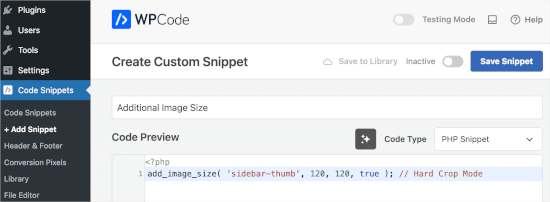
Następnie możesz nazwać ten fragment kodu „Dodatkowe rozmiary obrazów”.
Następnie w edytorze kodu należy użyć funkcji add_image_size w następującym formacie:
1 | add_image_size( 'name-of-size', width, height, crop mode ); |
Oto kilka przykładów tego, jak może wyglądać pełna funkcja:
1 2 3 | add_image_size( 'sidebar-thumb', 120, 120, true ); // Hard Crop Modeadd_image_size( 'homepage-thumb', 220, 180 ); // Soft Crop Modeadd_image_size( 'singlepost-thumb', 590, 9999 ); // Unlimited Height Mode |
Określiliśmy 3 różne rozmiary obrazów WordPress. Każdy z nich ma różne tryby, takie jak twarde przycinanie, miękkie przycinanie i nieograniczona wysokość. Możesz wybrać jeden z nich w zależności od potrzeb.
Oto podgląd w edytorze kodu:
Nie zapomnij zmienić typu kodu na „PHP”, przełączyć z „Nieaktywny” na „Aktywny” i kliknąć przycisk „Zapisz”.
Mając to na uwadze, przyjrzyjmy się, jak można wykorzystać każdy z tych trybów na własnym blogu lub stronie internetowej WordPress.
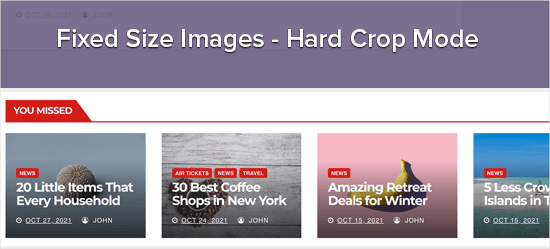
1. Tryb twardego kadrowania
W powyższym przykładzie użyliśmy wartości „true” po wysokości. Mówi to WordPressowi, aby przyciął obrazek do dokładnie zdefiniowanego przez nas rozmiaru, który w tym przypadku wynosi 120px na 120px.
Funkcja ta automatycznie przycina obraz z boków lub z góry i z dołu, w zależności od jego rozmiaru. W ten sposób możesz upewnić się, że wszystkie Twoje obrazy są proporcjonalne i dobrze wyglądają na Twojej stronie WordPress.
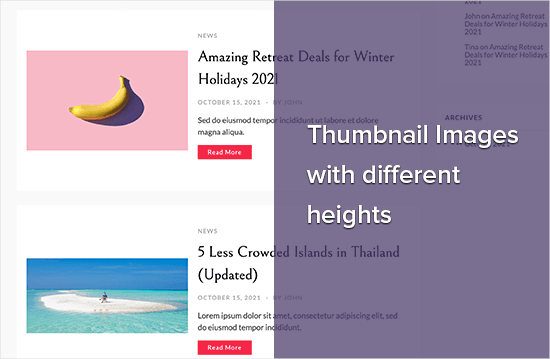
2. Tryb miękkiego przycinania
Jak widać w naszym przykładzie miękkiego przycinania, nie dodaliśmy wartości „true” po wysokości:
1 | add_image_size( 'homepage-thumb', 220, 180 ); |
Dzieje się tak, ponieważ tryb miękkiego przycinania jest domyślnie włączony.
Miękkie kadrowanie zmienia rozmiar obrazu proporcjonalnie bez zniekształcania go, więc możesz nie uzyskać dokładnych żądanych wymiarów. Zazwyczaj miękkie kadrowanie dopasowuje wymiary szerokości, ale wymiary wysokości mogą być różne w zależności od proporcji każdego obrazu.
Oto przykład tego, jak może to wyglądać:
3. Tryb nieograniczonej wysokości
Czasami możesz mieć długie obrazy, które chcesz wykorzystać na swojej stronie internetowej, jednocześnie ograniczając ich szerokość. Na przykład, mogłeś stworzyć infografikę dla swojej witryny biznesowej. Infografiki są zwykle bardzo długie i zazwyczaj szersze niż szerokość treści.
Tryb nieograniczonej wysokości pozwala określić szerokość, która nie zepsuje układu bez ograniczania wysokości.

Wyświetlanie dodatkowych rozmiarów obrazków w twoim motywie WordPress
Po dodaniu większej liczby rozmiarów obrazków do twojej witryny internetowej, nadszedł czas, aby wyświetlić je w twoim motywie WordPress.
Po prostu otwórz plik motywu, w którym chcesz użyć innego rozmiaru obrazka, a następnie dodaj następujący kod wewnątrz pętli wpisu:
1 | <?php the_post_thumbnail( 'your-specified-image-size' ); ?> |
Możesz dodać trochę stylizacji, aby obrazek idealnie pasował do reszty twojej witryny. Jest to jednak wszystko, czego potrzebujesz, aby wyświetlać dodatkowe rozmiary obrazków w twoim motywie.
Regenerowanie dodatkowych rozmiarów obrazków
Funkcja add_image_size( ) tworzy dodatkowe rozmiary tylko po przesłaniu nowego obrazu. Oznacza to, że obrazy przesłane przed utworzeniem funkcji add_image_size( ) nie będą miały nowych rozmiarów.
Aby poprawić ten problem, należy zregenerować miniatury witryny WordPress za pomocą Perfect Images. Wtyczka ta zregeneruje również wyróżnione obrazy i obrazy siatkówki oraz zaktualizuje metadane multimediów.
Najpierw należy zainstalować i włączyć wtyczkę. Jeśli potrzebujesz pomocy, zapoznaj się z naszym przewodnikiem na temat instalacji wtyczki WordPress.
Po aktywacji można przejść do Media „ Perfect Imagely.
Aplikacja Perfect Imagely przeskanuje teraz bibliotekę multimediów WordPress, więc może być konieczne odczekanie kilku chwil na jej zakończenie.

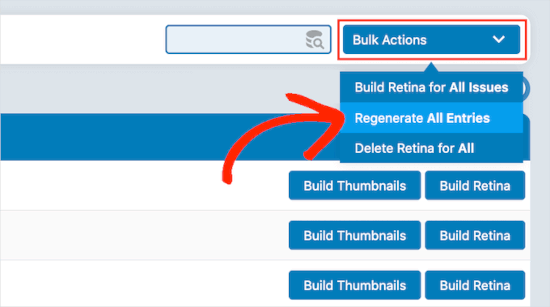
Po zakończeniu należy otworzyć menu rozwijane, które domyślnie pokazuje „Działania zbiorcze”, a następnie wybrać „Regeneruj wszystkie wpisy”.
Perfect Images zregeneruje teraz wszystkie twoje miniaturki.
Więcej informacji na ten temat można znaleźć w naszym artykule na temat regeneracji nowych rozmiarów obrazów.
Włączanie dodatkowych rozmiarów obrazków dla treści twojego wpisu
Nawet jeśli dodałeś kilka nowych rozmiarów obrazów, możesz ich używać tylko w motywie WordPress, a nie w treści posta.
Aby udostępnić te nowe rozmiary w edytorze treści WordPress, należy zarejestrować następujący kod w WPCode:
1 2 3 4 5 6 7 8 | function wpb_custom_image_sizes( $size_names ) { $new_sizes = array( 'homepage-thumb' => 'Homepage Thumbmail', 'singlepost-thumb' => 'Infographic Single Post' ); return array_merge( $size_names, $new_sizes );}add_filter( 'image_size_names_choose', 'wpb_custom_image_sizes' ); |
Wystarczy powtórzyć ten sam proces, aby dodać niestandardowy fragment kodu, który udostępniliśmy. Następnie nie zapomnij aktywować i zapisać fragmentu kodu po dodaniu kodu.
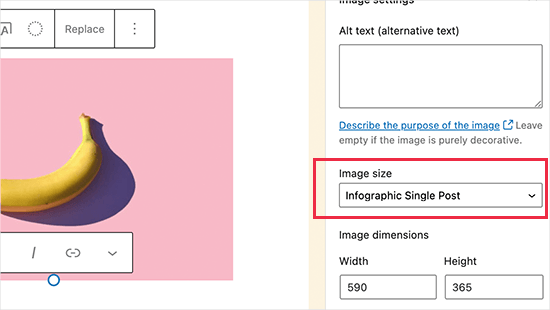
Teraz, gdy prześlesz obraz do WordPressa, zobaczysz wszystkie niestandardowe rozmiary w sekcji „Rozmiar obrazu”. Możesz teraz zmienić rozmiar obrazu podczas pracy nad dowolną stroną lub postem.
Wskazówka bonusowa: Poprawka problemu z przesyłaniem obrazów w WordPressie
Jeśli masz problem z ładowaniem obrazów, to warto wiedzieć, co go powoduje. W przypadku WordPress może się to zdarzyć z kilku różnych powodów.
Po pierwsze, różne przeglądarki obsługują przesyłanie na swój własny sposób, więc to, co działa w jednej przeglądarce, może nie działać w innej. Problemem może być również pamięć podręczna witryny. Jeśli jest nieaktualna, może zakłócać przesyłanie, więc jej wyczyszczenie może pomóc.
Czasami problemem mogą być również wtyczki i motywy. Niektóre wtyczki mogą zakłócać proces przesyłania bez wiedzy użytkownika. Niektóre motywy nie są dobrze zakodowane i mogą powodować konflikty podczas próby przesłania zdjęć.
Aby uzyskać wskazówki dotyczące rozwiązywania problemów, możesz przeczytać nasz przewodnik na temat tego , jak poprawić problemy z przesyłaniem obrazów w WordPress.
Mamy nadzieję, że ten artykuł pomógł ci dowiedzieć się, jak tworzyć dodatkowe rozmiary obrazów w WordPress. Zachęcamy również do zapoznania się z naszą ekspercką listą najlepszych wtyczek WordPress do zarządzania obrazami lub z naszym przewodnikiem na temat masowej zmiany rozmiaru dużych obrazów.
If you liked this article, then please subscribe to our YouTube Channel for WordPress video tutorials. You can also find us on Twitter and Facebook.
 in 2024")


Jiří Vaněk
Thanks for the tutorial, I’m trying to do the same thing using another tutorial but it didn’t work. This works perfectly.
axel
That was easy, thanx.
Something harder:
How do i get rid of old, unused thumbnail sizes?
(best without a plugin)
Kind regards
axel
WPBeginner Support
We cover how you can remove the unused image sizes in our article below:
https://www.wpbeginner.com/wp-tutorials/how-to-prevent-wordpress-from-generating-image-sizes/
We recommend plugins to simplify the process, if you’re worried about the number of plugins on your site, we would recommend taking a look at our article below:
https://wpbeginner.com/opinion/how-many-wordpress-plugins-should-you-install-on-your-site/
Admin
B Toro
Very simple and helpfull
WPBeginner Support
Glad our guide was helpful
Admin
JKLYN
Quite helpful tutorial. But how to set class for image??
Kim
Thanks WPBeginner, this worked a treat!
Thiago
Hi,
Great article! However, I still do not understand the usefulness of hard crop tool; I uploaded an image with 306×165, and after that I created two custom sizes: 256×148 (Soft Crop) and 256×148 (Hard Crop), however, as you can see in this print taken from the post: [http://prnt.sc/eromp3] both Options remain the same. I created a file in Photoshop containing 256×148 and I dragged the original image without resizing anything, and the result you can see in example 4 of the image above. So, my question is this: should image 2 not look like the image generated by Photoshop?
Follows below the code used on functions.php:
//Soft Crop used in example 2
if ( function_exists( 'add_image_size’ ) ) {
add_image_size( 'new-size8′, 256, 148 );
}
add_filter(’image_size_names_choose’, 'my_image_sizes8′);
function my_image_sizes8($sizes) {
$addsizes = array(
„new-size8” => __( „New Size8”)
);
$newsizes = array_merge($sizes, $addsizes);
return $newsizes;
}
////Hard Crop used in example 3
if ( function_exists( 'add_image_size’ ) ) {
add_image_size( 'new-size9′, 256, 148, true, array( 'center’, 'center’ ) ); //(cropped)
}
add_filter(’image_size_names_choose’, 'my_image_sizes9′);
function my_image_sizes9($sizes) {
$addsizes = array(
„new-size9” => __( „New Size9”)
);
$newsizes = array_merge($sizes, $addsizes);
return $newsizes;
}
Thanks in advance!
Kevin
This works great, but on thing that always bothers me is that if someone uploads an image that is smaller than one of your cropped sized then that image will not be created, which ruins the layout if you wanted equal height images
Matt Rock
Struggling with the same issue, Kevin (uploading smaller image does not create cropped size). I understand why this might make sense (system will not produce unnecessary images), but a low/poor resolution would look better than an ill-cropped one…
gonza
Thanks for the info
you help me so much!
Sakshi
I write this code can.
Actually i want to set the post thumbnail size for the banner image.Which i was uploading through featured image in the background please suggest me.
Aakash
Hi,
I m new in wordpress,and accept i have many problems,and the first is,i created lot of post in wordpress,suppose A B C D,and when i update this in my website they look like first is D and then c and then b and then a means when i upload first they are show in last.if any solution that first they look in series not DCBA like ABCD…plz help
Daniel Knoflicek
awsome… so helpfull for a lot of gallery plugins…
Lavinia Manzanarez
Excellent! I read the use of this function on the Codex of WordPress but sometimes I need a step by step thing, thank you!
WPBeginner Staff
Yes it is possible.
Farmer John
I too want to do the same as Ali Rohan wants to do. can you kindly elaborate pleas.. 'coz i tried to implement the method explained by you but could not succeed. I can’t understand where I am doing wrong. How do I link the text of resolution to image file?
Ali Rohan
Thanks for nice article.
I wanna start a wallpapers website in wordpress so is it possible that when i upload one big wallpaper then it auto resized to many resolutions for users. For example when i upload 1920×1280 wallpaper then it must be resized to 1024×768, 800×600 etc resolution … so users can easily view and download desired size wallpaper ?
Aayush
Hi Dear. i need your urgent help. i have a problem with the images size. actually i am using a plugin WP Gallery Custom Links. i have uploaded lot of images in a post but every images has a different height and width so they are appearing with different different sizes. i want to set them with the same size which i want to set. please tell me any idea to solve this problem.
Here
I just needed to say thanks for saying this. You’re right on.|
Shoaib
Excellent explanation
Andrew
I’ve set this up and it’s working splendidly minus the suggestion MIKE LITTLE made above – the thumbnail is changed and it shows up that way in the backend in the media gallery – but on the frontend where my loop is – the image thumb is still what WP defaults to – i’ve even run REGEN THUMBS and it still doesn’t fix the issue – anyone else having this problem or know the fix???
WPBeginner Support
Look at your loop and use
<?php the_post_thumbnail('your-specified-image-size'); ?>instead ofthe_post_thumbnail()Admin
Tomasz
Nice tutorial!
Please check out the plugin which allows to manually crop the registered image sizes:
http://wordpress.org/plugins/manual-image-crop
WPBeginner Support
Thanks, looks like a nice plugin. We will look into it.
Admin
Marc C
Good tutorial – many thanks WPBEGINNER.
I too was having the problem of not being able to crop the new registered image sizes but the plugin posted by TOMASZ does the job nicely – thanks TOMASZ!
Robbe Clerckx
Still helpfull after all this time :). Thank you.
Danny
Thank you for this very clear and helpful tutorial. It saved me a lot of time since the WP documentation is very cryptic.
lydia karanja
I have a wordpress account but I did not know how to manage it but now I know all thanks to this tutorial, thank you very much for helping people understand more on how to create and manage their websites.
andy19at
@jezThomp Great if your images work
jezThomp
@andy19at Link…?
andy19at
@jezThomp A link? I didn’t post it cos it didn’t work.
jezThomp
@andy19at http://t.co/YvmiX9hR
mikelittle
You say: „The downside of hard cropping is that you cannot control which part of the image is displayed.” Not true.
When you have uploaded an image and before you insert into post, you can click on 'edit image’ and from there change the thumbnail or the whole image, scale, rotate, or flip the image , and for the thumbnail select the exact portion of the image you want.
wpbeginner
@mikelittle Thanks for the correction Mike. Just edited the article
clelandillustration
I can’s seem to get the custom crop to work for new image sizes. The custom crop will work for the default „thumbnail” size version, but that crop won’t apply to new image sizes. It seems the crop is still uncontrollable for custom image sizes.
Brent Norris
good insight into the edit flow…
TdGon
Good article ..and photos to go along with it too…nice. I saw in a few places how to do this but they did not explain it as well as you do here. I am off to try it out.
Thanks a lot ! (0.o)
PaulDeWoutersd'Oplinter
excellent explanation for a confusing topic. and very useful plugin
mssbee
Great tutorial! Thanks for explaining the different crop options. It really helped me to understand how they work.
tjhakan
Nice tutorial. good job
defries
Nice round up of what can be done with just the default featured image feature. One extra tip: you can also set the width of your content area as a featured image and define that same width in Settings > Media. This way you can select a featured image to use in your theme and it will be automatically the maximum size of the content area.
Also great having those values in there for <a href=”http://codex.wordpress.org/Embeds”>oEmbed</a>.
Ordinary Randomness
Thanks for this tutorial, I was wondering why sometimes I had images that were not cropping to the size I had coded.