
読者向けにチュートリアルを作成する際、WordPressの機能、プラグイン、テーマを素早くテストする方法が必要になることがよくあります。結局のところ、最初にそれらを徹底的にテストすることなく解決策を推奨することは、あまり役に立ちませんよね?
WordPress Playgroundは、ブラウザー上でWordPressを直接操作できる実用的なツールです。複雑な設定は必須ではなく、さらに重要なことは、既存のサイトにリスクを与えないことです。
WordPress Playgroundは、私たち自身のテストプロセスにおいて非常に便利であり、その機能を最大限に活用する賢い方法をいくつか発見しました。WordPressを始めたばかりでも、新しいツールを安全に試したい場合でも、素早くテストできる環境が必要な場合でも、このツールはあなたの生活をずっと楽にしてくれます。
このガイドでは、WordPress Playgroundを効果的に使用するために必要なすべてのことを説明します。

WordPress Playgroundとは?
WordPress Playgroundは、一時的なブラウザー内のWordPressインスタンスで、コンテンツ管理システムについて実験し、さらに詳しく学ぶことができます。
実際のライブサイトを立ち上げることなく、WordPressの開発をすべて行うことができるテスト環境のようなものです。
WordPress Playgroundのサイトにアクセスして開くだけでいい。その後、新規ページを追加したり、プラグインをインストールしたり、新しいテーマを試してみたりと、普段と同じようにWordPressを使うことができる。
WordPress Playgroundのページを更新すると、カスタマイザーはすべて消えてしまいます。しかし、WordPressインスタンスをダウンロードし、WordPress Playgroundに再度アップロードすることもできます。
WordPress Playgroundの仕組みは?
WordPress Playgroundは、通常のWebサーバーやデータベースのセットアップなしでWordPressをテストすることができるクールな技術で動作します:
- WebAssemblyバイナリ(Wasm):ウェブブラウザーで直接PHPコードを実行することができ、従来のサーバーなしでWordPressを動作させることができます。また、ChromeやEdgeからFirefoxやSafariまで、すべてのブラウザーと互換性があります。
- SQLiteデータベース:WordPress Playgroundでは、MySQLの代わりにSQLiteと呼ばれるファイルベースの軽いデータベースシステムを使用しており、ブラウザー上で動作します。
- Service Worker および Worker Threads API:これらのウェブツールは、リクエストの処理とバックグラウンドJavaScriptスクリプトの実行を支援し、WordPress PlaygroundがブラウザーでPHPアプリをスムーズに実行できるようにします。
これらの技術により、開発者はWordPress Playgroundをnode.js、Visual Studio Code、CLIアプリ、さらにはOpenAIと統合することも有効化できる。
これらのツールを使えば、開発者はWordPress Playgroundをテストやステージングの目的で開発プラットフォーム上で使用することもできます。
WordPress Playgroundの限界とは?
その利点にもかかわらず、WordPress Playgroundにはいくつかの制限がある:
- WordPress Playgroundでのカスタマイズは一時的な ものです – ブラウザーに変更を保存しないことに決めた場合、進行状況を失わないように、誤ってページを更新しないように注意する必要があります。
- エラーが発生 しやすい – WordPress Playgroundを使ってプラグインをテストした経験から、すべてが正しく動作するとは限りません。WordPress Playground を使ってプラグインをテストした経験から言うと、すべてのプラグインが正しく動作するわけではありません。そのため、あちこちで不具合が発生することが予想されますが、プラットフォームを改善するために WordPress にフィードバックを提供することができます。
- iFrameの問題はよくあることです – WordPress Playgroundのインスタンスをページに埋め込む場合、iFrameが動作しない、誤ってリフレッシュされるなどの問題が発生する可能性があります。
WordPress Playgroundがどんなものかわかったところで、使い方を説明しましょう。以下のクイックリンクからチュートリアルをナビゲートできます:
- How to Set Up WordPress Playground
- How to Use WordPress Playground Blueprints
- How to Install Themes and Plugins in WordPress Playground
- How to Save a WordPress Playground Instance in Your Browser
- How to Download/Restore a WordPress Playground Site
- How to Import/Export WordPress Playground to GitHub
- How to Embed WordPress Playground on Your Website
- How to Report an Error in WordPress Playground
- Frequently Asked Questions About WordPress Playground
WordPress Playgroundの設定方法
WordPress Playgroundを使用するには、ウェブブラウザーでこのドメイン名に直接アクセスできます:https://playground.wordpress.net
サイトにアクセスしたら、Playgroundがセットアップされるまでしばらくお待ちください。その後、初期設定のWordPressテーマを使用したサイトのフロントエンドが表示されます。
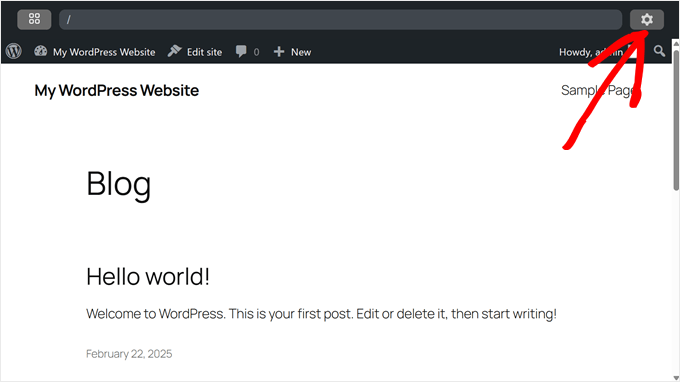
テスト用にWordPress Playgroundを使用している場合は、実際のサイトのWordPressソフトウェアを反映するように環境を設定するとよいでしょう。
これを行うには、右上にある歯車の「設定」アイコンをクリックします。
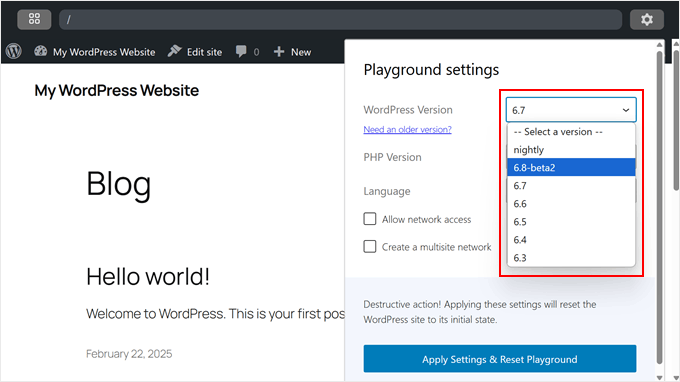
まず最初にWordPressのバージョンを選択します。すでに使用している、またはWordPressサイトで使用する予定のバージョンを選択することができます。
WordPressは「WordPress Nightly」バージョンも提供しています。これは、WordPress開発チームによる最新の変更を含むWordPressの開発バージョンです。
プラグインやテーマの開発者で、次のWordPress更新との互換性をテストしたい場合に使用できます。
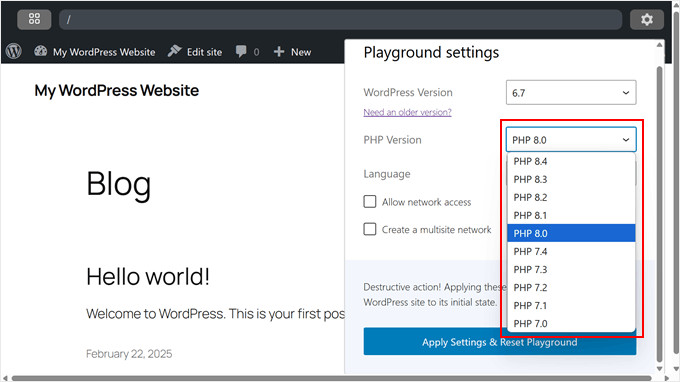
次に設定したいのは、PHPのバージョンだ。
あなたのサイトで使用しているPHPのバージョンと同じにすることをお勧めします。とはいえ、7.0より古いPHPバージョンはここにはないかもしれません。
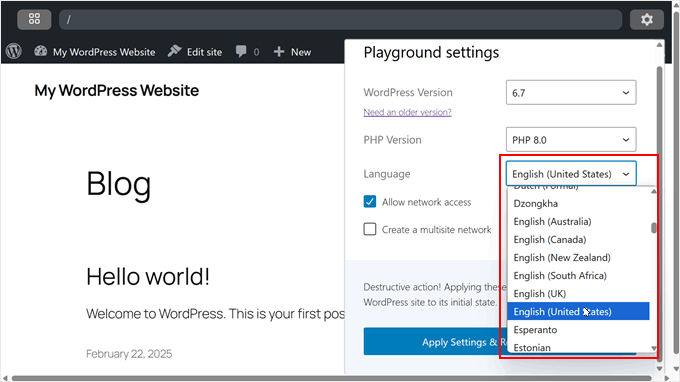
WordPress Playgroundでできるもう一つのことは、管理エリアの言語を選択することです。
何十種類もの中から選ぶことができるが、デモンストレーションのために『英語(アメリカ)』を使うことにする。
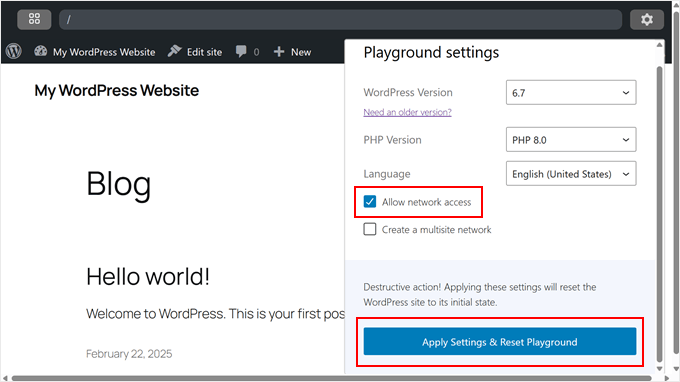
その下にある「ネットワークアクセスを許可する」と「マルチサイトネットワークを作成する」の設定を有効化します。
WordPressのテーマやプラグインを環境からすぐにインストールできるようになるため、サイトネットワークへのアクセス機能を許可することをお勧めします。そうすれば、手動で設定する必要はありません。
テスト用のWordPressマルチサイトネットワークを作成したい場合は、2番目の設定を有効化することをお勧めします。
設定が完了したら、’Apply Settings & Reset Playground’をクリックします。
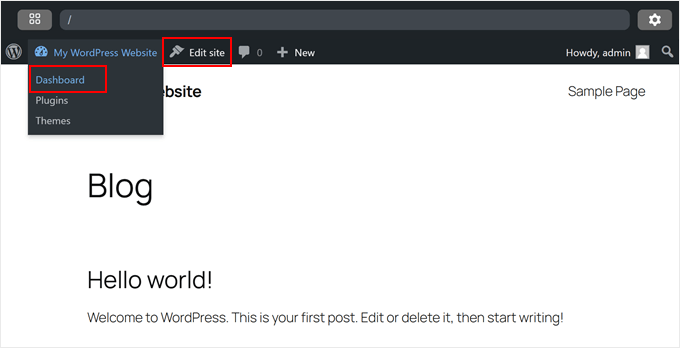
管理エリアを開くには、サイトタイトルメニューにマウスオーバーし、「ダッシュボード」をクリックします。
または、’サイトを編集’をクリックしてフルサイト編集に移動することもできます。
WordPress Playgroundの基本的な設定はこれで完了ですが、さらに使い勝手を向上させる設定をいくつか試してみましょう。
WordPress ブループリントの使い方
WordPressでは、ブループリントは、カスタムのWordPress環境を迅速かつ簡単に設定するのに役立つシンプルなJSONファイルです。これには、WordPressやPHPのバージョン、インストールするプラグインやテーマ、WordPressのデザイン要素などの設定が含まれます。
テスト環境を頻繁に作成するが、素早く設定する必要がある場合に最適なオプションです。また、WordPressの特定の設定を他の人と共有する必要がある場合にも便利です。
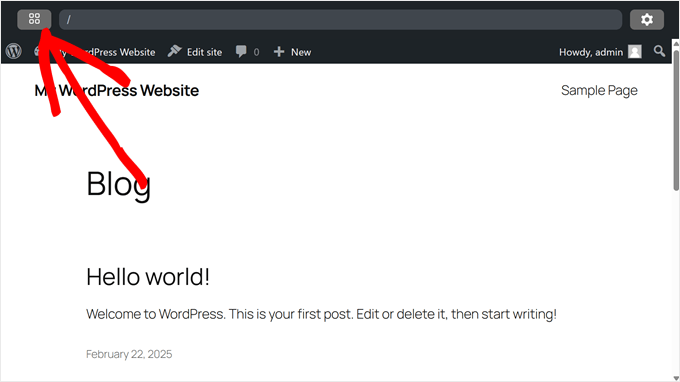
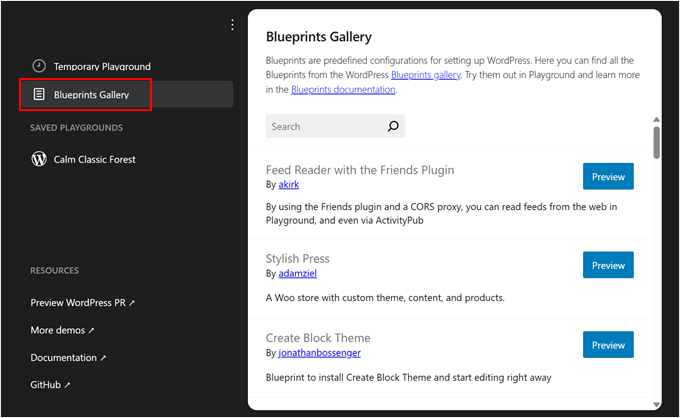
設計図にアクセスするには、左上の小さなSquareアイコンをクリックします。
次に、’Blueprints Gallery’ タブに移動します。
ここでは、他のユーザーによって共有された公開設計図を見つけることができます。多くのオプションから選ぶことができます。Create Block Theme」オプションを使用して、Create Block Themeプラグインを使用してカスタムブロックテーマを構築したり、「Stylish Press」を使用してデモWooCommerceサイトをセットアップしてみることができます。
特にStylish Pressは、チュートリアルでWooCommerceプラグインやテーマをテストするのにとても便利なので、とても気に入っています。
ブループリントを使用するには、「プレビュー」ボタンをクリックしてWordPressプレイグラウンドに読み込むだけです。
また、自分のWordPress Playgroundインスタンスを設計図にすることもできます。
Temporary Playground」タブに切り替え、「Homepage」の隣にある3つの点のボタンをクリックし、「View Blueprint」を選択するだけだ。
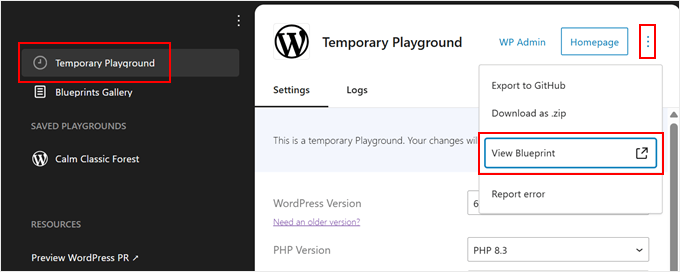
これでインスタンスがブループリントの.jsonファイルとして表示されます。
設計図ファイルをコンピューターに保存したい場合は、フロッピーディスクの「保存」アイコンをクリックしてください。
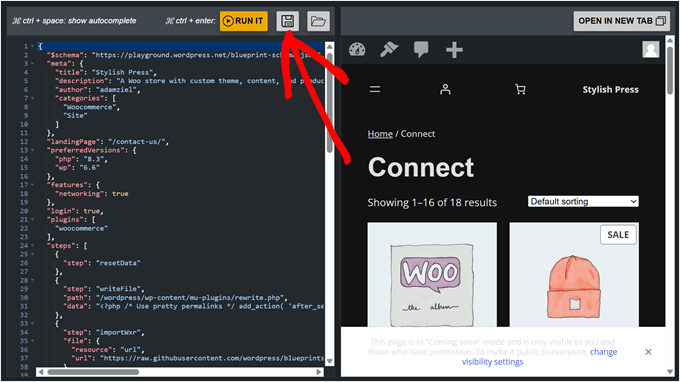
設計図を保存しておくと、将来参照するのに便利です。また、投稿ガイドラインに従って設計図ギャラリーで共有することもできます。
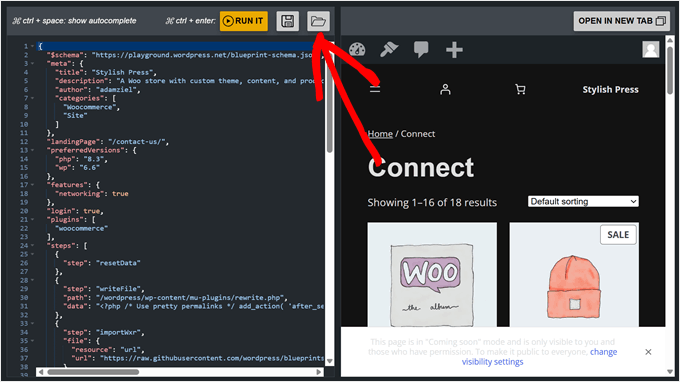
保存したブループリントを読み込むには、フロッピーディスクボタンの隣にあるフォルダーを開くアイコンをクリックします。
blueprint.jsonファイルを選択するだけで、WordPressはその設定に基づいて自動的に環境をセットアップします。
WordPress Playgroundでテーマとプラグインをインストールする方法
WordPress PlaygroundにWordPressプラグインやテーマをインストールするには、いくつかの方法があります。セットアップ時にネットワークアクセス機能を有効化した場合、通常のWordPressサイトと同じように、WordPressダッシュボードから直接インストールすることができます。
標準的なインストール手順については、詳細ガイドをご覧ください:
ネットワークアクセスを有効化していない場合、またはプレミアムWordPressプラグインやテーマをインストールしている場合は、手動でインストールする必要があります。
まず、テーマまたはプラグインファイルをダウンロードする。無料オプションの場合は、WordPress.orgにアクセスし、希望のプラグインまたはテーマを見つけ、「ダウンロード」ボタンをクリックします。これでコンピューターにzipファイルが保存されます。
プラグインについては、WordPressプレイグラウンドのダッシュボードに移動し、プラグイン ” 新規プラグインの追加に移動するだけです。
その後、「プラグインをアップロード」ボタンをクリックし、「ファイルを選択」を選択して、先ほどダウンロードしたプラグインZIPファイルをアップロードする。最後に「今すぐインストール」をクリックする。

テーマに関しては、最初にプレイグラウンドを使用するときにWordPressはあなたのためにデフォルトテーマをインストールしています。
しかし、別の無料またはプレミアムWordPressテーマを使用したい場合は、ソースから手動でダウンロードすることができます。そして、プレイグラウンドで、外観 ” テーマに行き、「新規テーマを追加」をクリックする。

次の画面で「テーマのアップロード」ボタンをクリックします。
その後、先ほどダウンロードしたテーマファイルを選択し、「今すぐインストール」をクリックする。

テーマやプラグインをインストールするもう一つの方法は、WordPress PlaygroundのクエリーAPIを使用することです。この方法では、WordPress PlaygroundのURLにいくつかのクエリーパラメータを追加する必要があります。
例えば、AIOSEOの無料版をWordPress Playgroundにインストールしてテストしたい場合は、AIOSEOのWordPress.orgのページにアクセスすればいい。その後、AIOSEOのURLスラッグに注意してください。
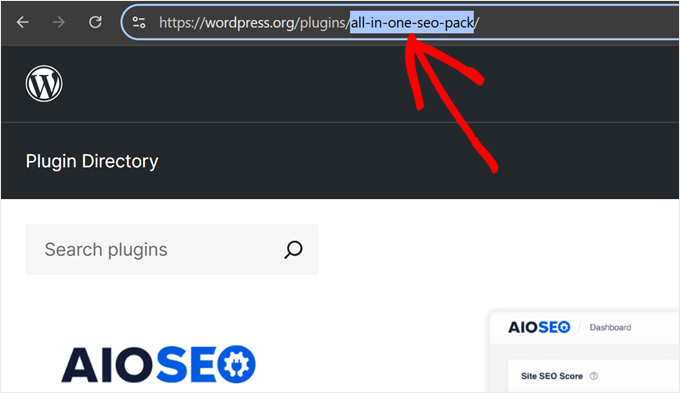
新しいブラウザータブで、WordPress PlaygroundのURLにAIOSEOのスラッグを入力する:
https://playground.wordpress.net/?plugin=all-in-one-seo-pack
Enterキーを押すと、WordPress Playgroundが自動的にAIOSEOプラグインをインストールした新しい環境を作成します。
テーマをインストールしたい場合は、プラグインパラメータを テーマに置き換えてください:
https://playground.wordpress.net/?theme=neve
WordPressコアの上に複数のプラグインやテーマをインストールしたい場合は、複数のクエリーパラメータを組み合わせることもできる。各パラメータをアンパサンドと記号で区切ってください。
AIOSEOとMonsterInsightsプラグイン、Neveテーマをインストールした場合のURLは以下のようになります:
https://playground.wordpress.net/?theme=neve&plugin=all-in-one-seo-pack&plugin=google-analytics-for-wordpress
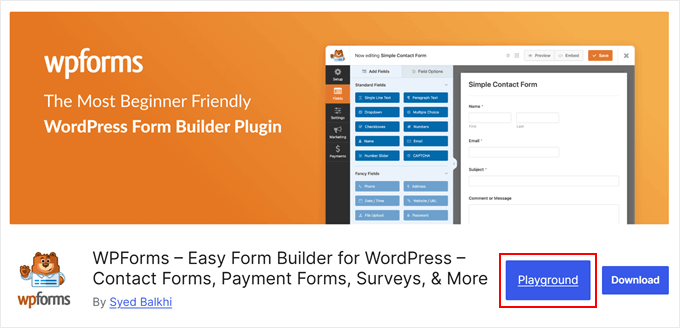
Chromeユーザーなら、Open in WordPress Playground拡張機能をインストールすることもできる。これを使うと、WordPress.orgのプラグインやテーマのページに行くたびに、「Playground」ボタンが表示されます。
クリックすると、プラグインまたはテーマがインストールされた新しいWordPress Playground環境が開きます。クエリーパラメータメソッドを簡素化します。
WordPress Playgroundインスタンスをブラウザーに保存する方法
WordPress Playgroundを使って、ウェイティングリストのランディングページやサイトを作成したとしましょう。タブを閉じるだけで、進捗をすべて失ってしまうのはもったいない。
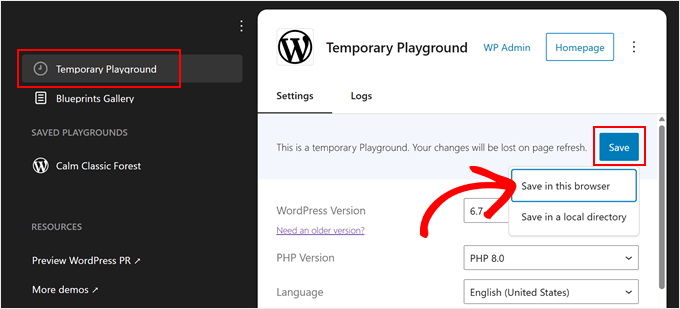
幸いなことに、WordPress Playgroundではブラウザーにインスタンスを保存することができます。これを行うには、左上の小さなSquareアイコンをクリックします。
本当に〜してもよいですか?
次に、「保存」ボタンをクリックし、「このブラウザーで保存」を選択する。
WordPressがこのプレイグラウンドをブラウザーに保存するのを待ちます。経験上、数分かかります。
そうすると、「Saved Playgrounds」という新しいセクションが表示されます。WordPressは、あなたのプレイグラウンドに「Happy Sunny Country」や「Calm Classic Forest」のようなクリエイティブな名前を自動的につけます。
前のセクションと同様に、ここでも環境設定を行うことができます。ただし、PHPのバージョンとネットワークアクセス設定の変更に限られます。
変更後、「Save & Reload」をクリックしてインスタンスを開きます。

これでWordPressは、ブラウザータブを閉じても、Playgroundインスタンスに加えたすべての変更を保存します。
WordPressでは、「ローカル・ディレクトリに保存」することもできます。先ほどと同じ「保存」ボタンをクリックし、「ローカルディレクトリに保存」を選択するだけです。
私たちが発見したのは、このオプションは、通常のWordPressインストールと同じように、すべてのPlaygroundファイルを解凍してダウンロードするということです。あなたは、wp-content、wp-adminなどの標準的なWordPressフォルダを取得します。
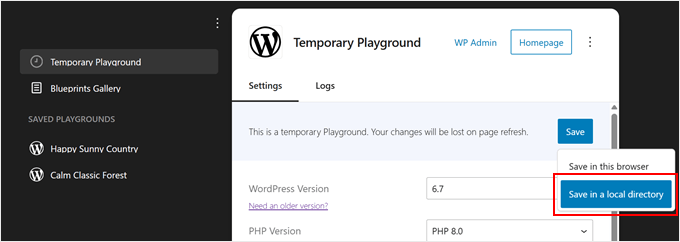
これらのファイルをステージング環境またはホスティングサービス上の空のサイトにアップロードする場合は、このオプションを使用することをお勧めします。
WordPress Playgroundでビルドしてから、Playground環境の外で作業したい場合に特に便利です。
WordPressプレイグラウンドサイトのダウンロード/復元方法
ブラウザーにプレイグラウンドを保存しておけば素早くアクセスできて便利だし、解凍したファイルを保存しておけばライブサイトでもうまくいく。
WordPress PlaygroundをZIPファイルとしてダウンロードすることで、保存や共有が簡単なポータブルバックアップができます。また、どのWordPress Playgroundインスタンスにも復元できます。
開始するには、左上の小さな四角いアイコンをクリックします。
Temporary Playground’タブにいること、または保存したプレイグラウンドにいることを本当に〜してもよいですか?次に、右上の「ホームページ」ボタンの隣にある3つの点のメニューをクリックしてください。
Download as .zip」をクリックすると、ブラウザーがコンピューターへのダウンロードを開始します。
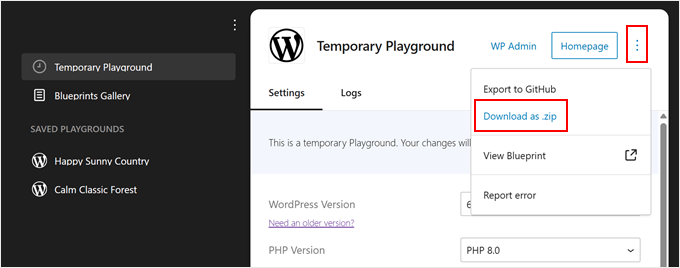
ブラウザーがファイルをコンピューターにダウンロードし始めます。
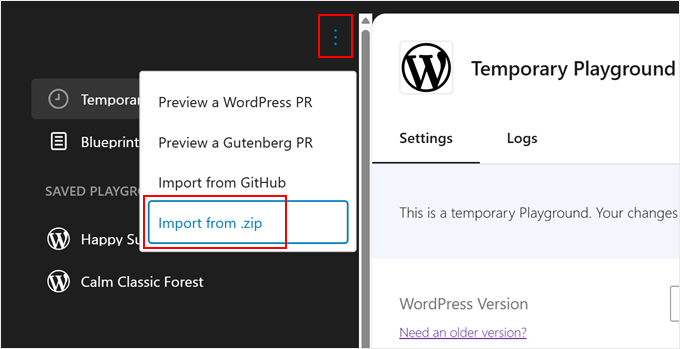
ダウンロードしたプレイグラウンドを復元するには、「Temporary Playground」の上にある三点メニューをクリックし、「Import from .zip」を選択します。
ポップアップが外観され、エクスポートするファイルを選択するよう求められます。
それを選択し、『インポート』をクリックする。
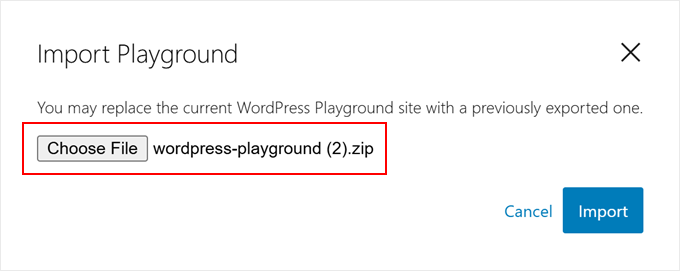
ファイルが正しい場合、成功のメッセージが表示され、プレイグラウンドは復元されたセットアップで更新されます。
OK」をクリックしてポップアップを閉じ、復元したサイトで作業を開始します。

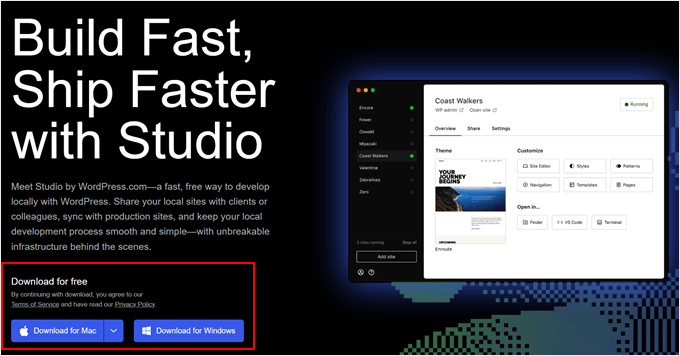
WordPress PlaygroundのZIPエクスポートのクールな点は、WordPress.comのローカル開発ツールであるStudio by WordPress.comで使用できることです。これにより、適切なローカル環境でサイトの作業を続けることができます。
まず、Studio by WordPress.comのサイトにアクセスし、お使いのコンピューターに応じて「Download for Windows」または「Download for Mac」をクリックします。
ダウンロードしたファイルを開き、インストーラを開始します。
インストールの進行状況を示すポップアップウィンドウが表示されます。

インストーラが終了したら、最初のサイトを追加する準備ができました。
WordPress Playgroundのzipファイルを「バックアップのインポート」フィールドにドラッグするだけです。あなたのサイトを簡単に識別できるように任意の名前を付けることができます。

インポートされると、ローカルのWordPressサイトのダッシュボードが表示されます。
サイトでの作業を開始するには、右上の「開始」ボタンをクリックします。これでローカルサイトがコンピューター上で有効化されます。

Start」ボタンが「Running」に変わるのを待ち、左上の「WP Admin」リンクをクリックする。
これでローカルのWordPress管理ページが開き、サイトの開発を続けることができます。

WordPress PlaygroundをGitHubにインポート/エクスポートする方法
GitHubアカウントを持っていれば、WordPress Playground からサイトをエクスポートしたりインポートしたりすることもできます。GitHub はサイトの変更をトラッキングしたり、ファイルをバックアップしたり、他のユーザーとコラボレーションしたりできる素晴らしいプラットフォームです。
左上の小さな四角いアイコンをクリックします。
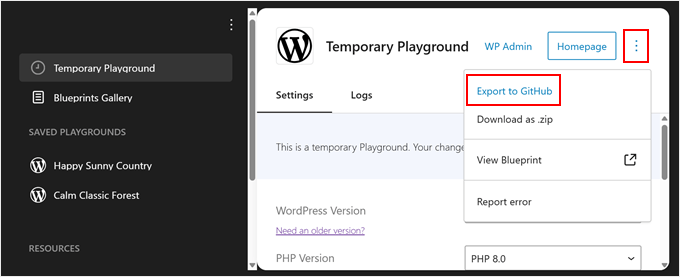
WordPress PlaygroundからGitHubにサイトをエクスポートするには、’Homepage’ボタンの隣にある三点メニューをクリックします。
その後、’Export to GitHub’を選択する。
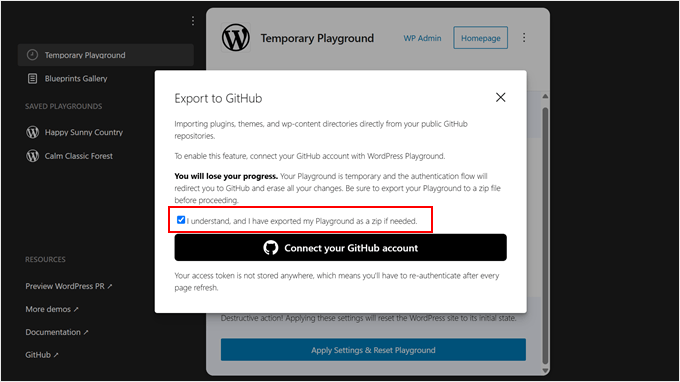
次のポップアップでは、WordPressがあなたのサイトをバックアップとしてコンピューターに保存することを勧めていることがわかります。保存したら、’I exported my Playground as zip’にチェックを入れてください。
そして、’Connect your GitHub account’ ボタンをクリックします。
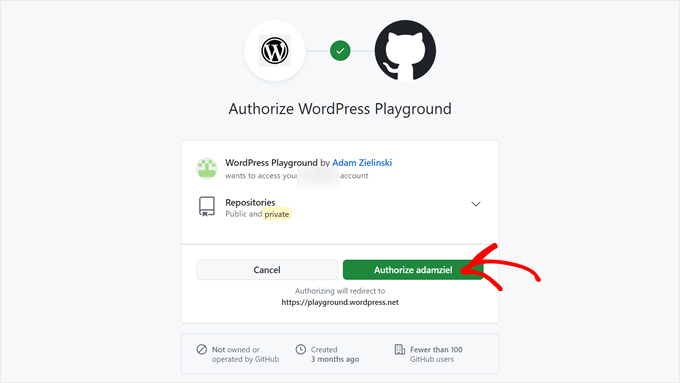
次に、WordPress Playgroundがリポジトリにアクセスすることを投稿者に許可していることを確認する必要があります。
adamzielを投稿する」をクリックしてください。
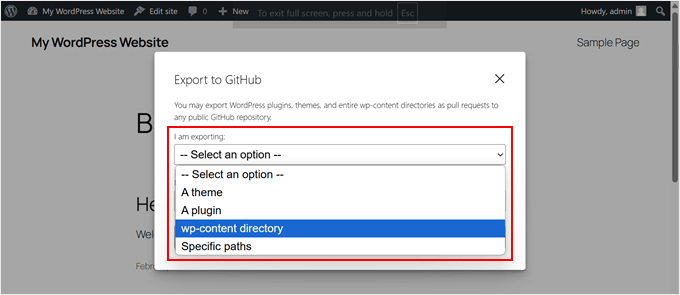
この段階で、エクスポートするファイルの種類(プラグイン、テーマ、wp-contentディレクトリ、特定のパス)を選択します。
プラグイン、テーマ、メディアファイル、ウィジェット、メニュー、フォントをすべてエクスポートしたい場合は、最後のオプションを選択してください。
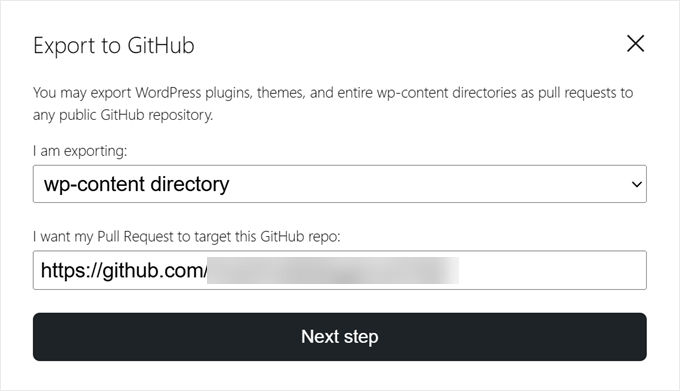
サイトをエクスポートする GitHub 公開リポジトリの URL も指定する必要があります。
そして、「次のステップ」ボタンをクリックする。
そうしたら、新しいプルリクエストを作成するか、既存のものを更新するかを選択する必要があります。デモンストレーションのため、最初のオプションを選択します。
その後、変更をコミットするリポジトリのパスを入力する。
また、WordPress Playgroundを使用して行った変更を指定するために、コミットメッセージを挿入する必要があります。
すべて終わったら、『プル・リクエストを作成』をクリックする。

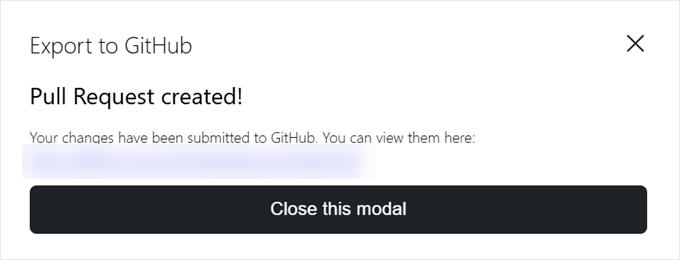
エクスポートが成功すると、WordPressは新しいプルリクエストへのリンクをポップアップで表示します。
リンクをクリックすれば、その様子を見ることができる。
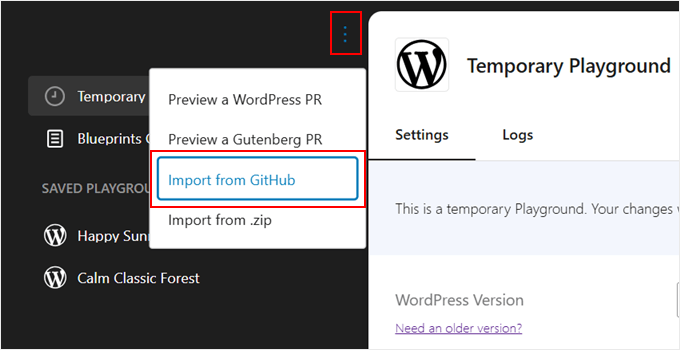
さて、GitHubからWordPress Playgroundにサイトをインポートしたい場合は、「Temporary Playground」の上にある三点メニューをクリックするだけです。
そして、「GitHubからインポート」を選択する。
まったく新しい WordPress Playground 環境を立ち上げる場合は、GitHub Playground の認証プロセスをすべてやり直す必要があるかもしれません。
その後、インポートしたいGitHubリポジトリまたはパスのURLを入力するだけです。
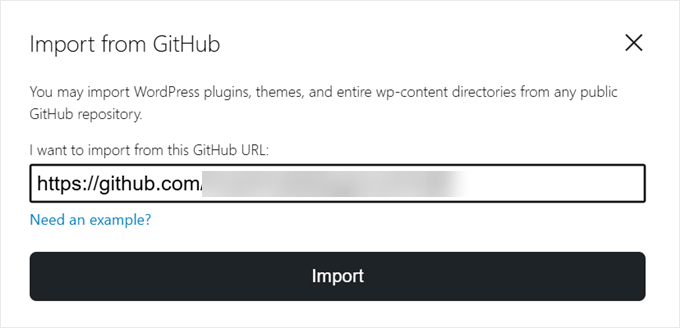
次に、インポートするファイルを指定する必要があります:テーマ、プラグイン、またはwp-contentディレクトリ全体。
必要であれば、インポート元のリポジトリのパスを再度入力することもできます。そうでない場合、WordPressがすでにインポートするパスを知っていれば、WordPressが自動的にこのフィールドに入力します。
完了したら、『インポート』をクリックするだけです。

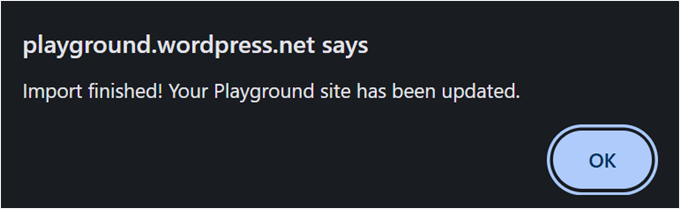
インポートが成功すると、成功メッセージがポップアップ表示されます。
OK」をクリックして閉じる。
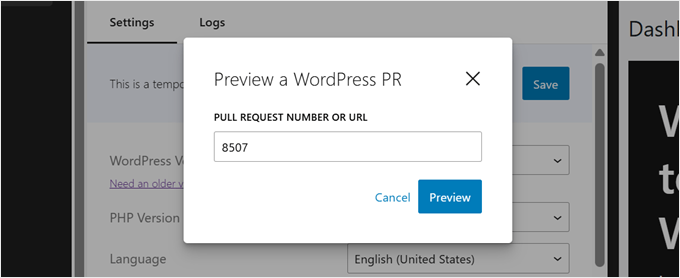
WordPress PlaygroundとGitHubでできるもう一つのことは、WordPressプロジェクトの既存のGitHubプルリクエストをプレビューすることです。こうすることで、WordPress にどのような改善や開発者が加わっているかを確認し、それをテストすることができます。
本稿執筆時点では、この機能はWordPress DevelopまたはGutenbergリポジトリからのプルリクエストをプレビューする場合にのみ機能することに注意してください。
これを行うには、もう一度三点メニューボタンをクリックし、「WordPress PRをプレビュー」または「Gutenberg PRをプレビュー」を選択します。

次に、プルリクエストのURLまたはIDを適切なフィールドに挿入します。
その後、『Go』をクリックする。
WordPress Playgroundをサイトに埋め込む方法
WordPressのチュートリアルを書いている場合、ユーザーを案内するためにWordPressダッシュボードのスクリーンショットを掲載することが多いでしょう。しかし、スクリーンショットだけでは、あなたが説明しているアクションを正確に説明できないことがあります。
そこでWordPress Playgroundが役に立ちます。ページや投稿日に埋め込むことで、ユーザーによりインタラクティブな読書体験を与えることができます。ユーザーは、Playgroundを使ってあなたの指示に従うことができます。
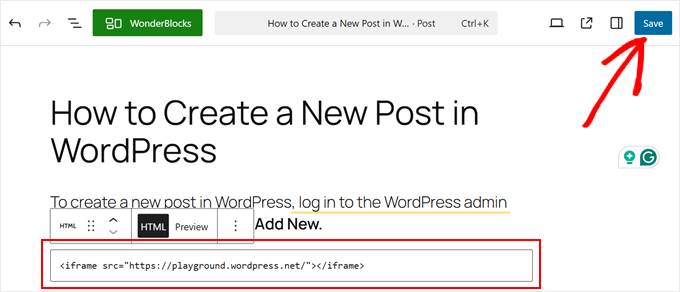
まず、ページまたは投稿のGutenbergブロックエディターを開く必要があります。そこで「+」ブロック追加ボタンをクリックし、「カスタムHTML」ブロックを選択します。
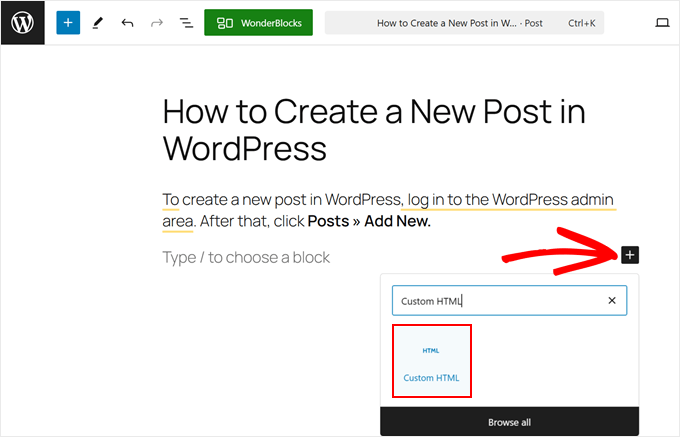
では、以下のコードをコピー&ペーストして、HTMLブロックに貼り付けてください:
1 | <iframe src="https://playground.wordpress.net/"></iframe> |
必要であれば、先に示したように、このURLにクエリーパラメータを追加することもできる。
その後、’Save’または’Publish’をクリックして変更を公開します。
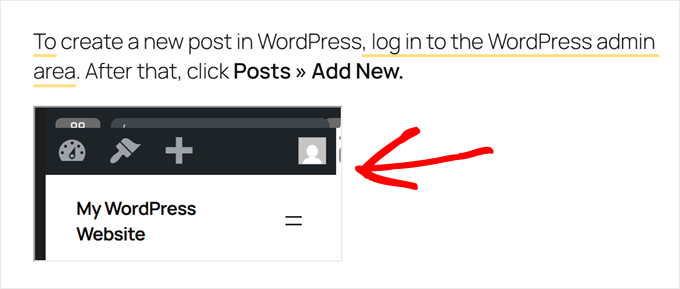
WordPress Playgroundは、テーマによって表示が異なる場合があります。
私たちの場合、このエレメントは上のブロックと一直線に並んでいるようには見えず、エレメント自体も小さすぎてインタラクションしにくかった。
これを避けるには、代わりにこのコードを使うことができる:
1 | <div class="iframe-container"><iframe src="https://playground.wordpress.net/" style="width: 100%; height: 500px"></iframe></div> |
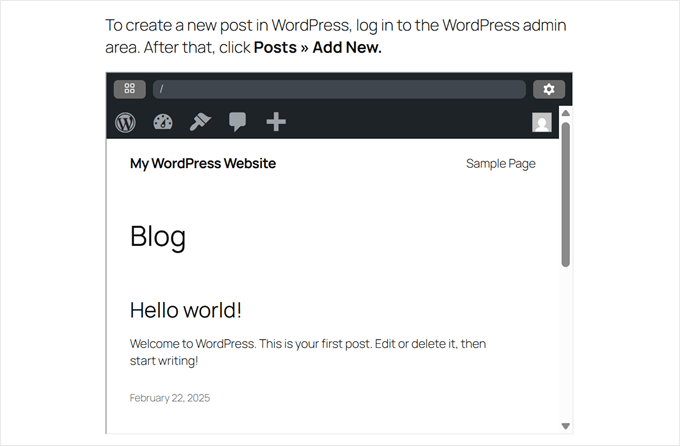
ここでは、iFrameタグをdivタグで囲むことで、Playgroundの埋め込みがコンテナのパディングとマージンに従うようにしています。
また、iFrameの幅をコンテナの100%に、高さを500ピクセルに設定するstyle属性も追加しました。
フロントエンドはこんな感じだ:
WordPress Playgroundでエラーを報告する方法
WordPress Playgroundでエラーが発生した場合は、WordPressチームに報告してエラーを修正してもらうことができます。
左上の小さなSquareアイコンをクリックしてください。
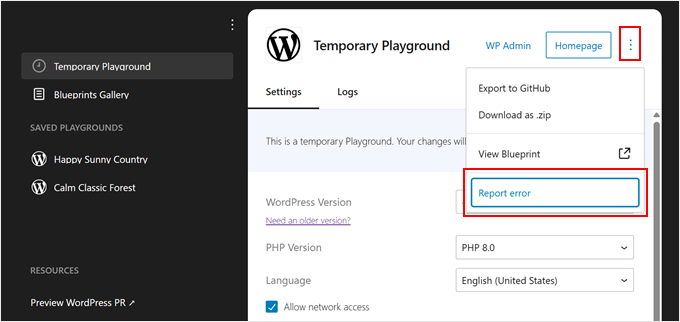
その後、ページ右上の三点メニューをクリックすればいい。
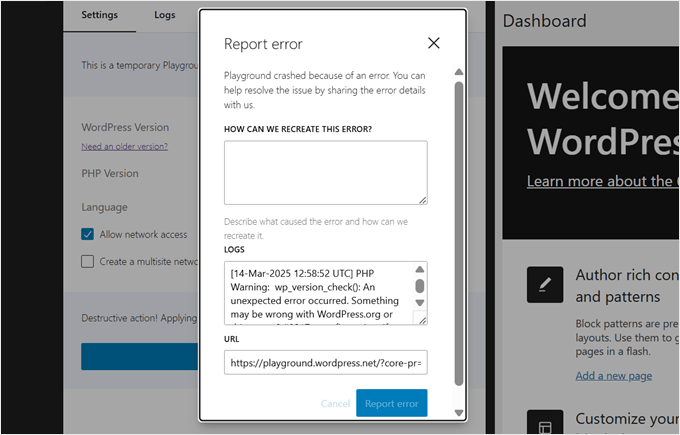
次に、「エラーを報告する」オプションをクリックします。
ポップアップが表示されるので、エラーがどのように発生したかを説明してください。また、WordPress Playground環境のURLもインサーターに入れて、何が起こったのかをチームが確認できるようにしてください。
完了したら、「エラーを報告する」をクリックするだけです。
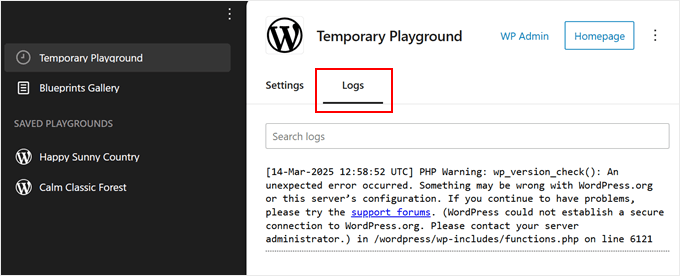
さらに、WordPress Playgroundでは、あなたの環境のエラーログを表示することができます。
これは、”Temporary Playground “タブの “Logs “セクションにナビゲーションするか、保存したプレイグラウンドのいずれかで行うことができます。
WordPress Playgroundについてよくある質問
WordPress Playgroundについて、よくある質問を取り上げてみましょう。
WordPressはブラウザーで使えますか?
WordPress Playgroundでは、ブラウザー上で直接WordPressを使用することができます。サイトを構築し、ライブサイトにインストールする前にテーマやプラグインを試すことができます。
WordPress Playgroundにカスタムテーマやプラグインをインストールできますか?
はい、WordPress Playgroundでテーマやプラグインをインストールしたり変更したりすることで、管理エリアでの動作や特定のWordPressバージョンとの互換性を確認することができます。
WordPress Playground で作成したサイトをホスティングサービスにアップロードできますか?
はい、WordPress Playgroundからサイトをエクスポートし、WordPressホスティングサービスアカウントにインポートすることができます。ちょうどローカルディレクトリにWordPress Playgroundのファイルを保存し、あなたのホスティングアカウント内の空のサイトにアップロードします。
WordPressのプラグインやテーマをローカルで実行するには?
WordPressのプラグインやテーマをローカルの開発環境で実行したい場合は、まずローカルのWordPressサイトを作成する必要があります。ステップバイステップの手順については、WordPressのローカルサイトを構築する方法のチュートリアルをお読みください。
この投稿が、WordPress Playgroundとは何か、ブラウザーでどのように使用するのかを知る一助となれば幸いです。また、ドラッグ&ドロップで使えるWordPressページビルダーの投稿や、WordPressで動的コンテンツを追加する方法についてのガイドもご覧ください。
If you liked this article, then please subscribe to our YouTube Channel for WordPress video tutorials. You can also find us on Twitter and Facebook.


")
Jiří Vaněk
Wow, that’s awesome. I had no idea there was such a thing as Worpdress Playground. Thank you for expanding my knowledge. Thanks to wpbeginner, every day I come across new topics and things that I didn’t know before. I will definitely try the WordPress playground as well.
WPBeginner Support
Glad we could share this helpful tool
Admin
Mrteesurez
This is fantastic and I love it.
I am telling you WordPress is still coming up with more great features, WordPress is a future.
I would like to try WordPress Playground, explore it and experience how it works in reality.