
WordPressユーザーの多くは、コンピューター上のローカルサーバーを使用してサイトで作業することを好みます。これにより、オンラインで変更を公開する前に、個人的にサイトで作業することができます。
最終的には、ライブサーバーに移行し、オンライン訪問者がアクセスできるようにする必要があります。この移行は、本番サイトでサイトが正しく機能するようにするために非常に重要です。
私たちは多くのローカルサイトに携わってきたので、コンテンツをライブサイトに移行する最も簡単な方法を学ぶ必要がありました。
この投稿では、WordPressをローカルサーバーからライブサイトに移行する方法をステップバイステップで説明します。
")
なぜWordPressをローカルサーバーからライブサイトに移行するのか?
WordPressブログをローカルサーバーに構築することは、訪問者に影響を与えることなくサイトの変更をテストする安全な方法です。
サイトの完成度が高まったら、次のステップはローカルサーバーからライブサイトに移行することです。
ローカルサーバーからライブサイトにサイトを移動する2つの方法を紹介しよう。
最初の方法はWordPressの移行プラグインを使用するもので、初心者におすすめです。
2つ目の方法では、WordPressをローカルサーバーからライブサイトに手動で移動する方法を紹介します。
自分に合った方法を選べばいい:
WordPressサイトを移行する前に
WordPressをローカルサーバーからライブサーバーに移行するには、いくつかの準備が必要です。
まず、コンピューター上のローカルサーバー(localhostとも呼ばれる)でWordPressサイトが稼動しており、そのサーバーにフルアクセスできると仮定する。
次に、ドメイン名と ホスティングサービスが必要です。
私たちは、貧弱なプロバイダーや無料のホスティングサービスから始めて後悔した初心者から数え切れないほどの話を聞いてきました。私たちの経験では、適切なホスティングサービスを選択することは、任意のサイトの成功に不可欠です。
あなたの決定を容易にするために、私たちはBluehostを使用することをお勧めします。Bluehostは公式推奨のWordPressホスティングサービス会社で、WPBeginnerユーザーに限定割引+ドメインとSSLを無料で提供しています。
基本的に、月額1.99ドルから始めることができる。
あなたは偉大なBluehostの代替をしたい場合は、Hostingerを見ることができます。彼らはまた、無料のドメイン名とWPBeginnerユーザーに排他的な割引を提供しています。
もう少し支払う余裕があるなら、SiteGroundをチェックしよう。WPBeginner読者向けの特別価格もあります。
サイトの立ち上げにお困りの方は、ステップ・バイ・ステップのガイドに従ってください。
最後に、FTPプログラムと、ローカルサーバーのサイトをライブサイトにアップロードするためのFTPの使い方を知っている必要があります。
準備はいいですか?WordPressサイトの移行を始めましょう。
動画チュートリアル
もし、文章での説明がお望みなら、このまま読み進めてほしい。
方法1:移行プラグインを使ってWordPressをローカルサーバーからライブサイトに転送する(推奨)
この方法は簡単で、初心者におすすめです。WordPress移行プラグインを使用して、WordPressをローカルホストからライブサイトに移行します。
ステップ1:Duplicatorプラグインのインストールとセットアップ
まず、ローカルサイトにDuplicatorプラグインをインストールして有効化する必要があります。詳しくは、WordPressプラグインのインストール方法のステップバイステップガイドをご覧ください。
プロのヒント Duplicatorのプロバージョンもあり、安全なバックアップ、クラウドストレージ、簡単なサイトの復元などが可能です。
アクティベーションが完了したら、Duplicator ” Backupsページで’新規作成’ボタンをクリックしてください。
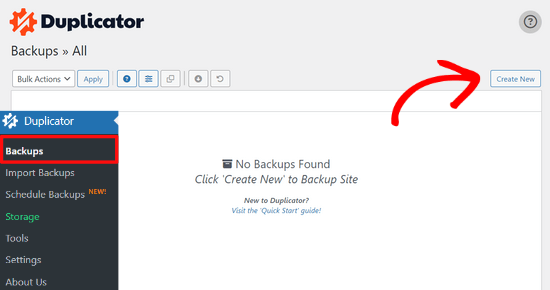
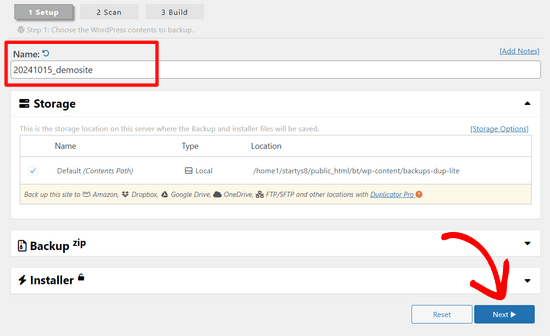
バックアップに名前を付ける画面になります。
そして、「次へ」ボタンをクリックする。
Duplicatorはいくつかのテストを実行し、すべてが正常かどうかを確認します。
すべての項目が「Good」となっていれば、「Build」ボタンをクリックする。

サイトのサイズによっては、この処理に数分かかる場合があります。完了するまで、このタブを開いたままにしておく必要があります。
完了すると、「インストーラー」と「アーカイブ」パッケージのダウンロードオプションが表示されます。両方のファイルをコンピュータにダウンロードするには、「Download Both Files」ボタンをクリックする必要があります。

アーカイブ」ファイルはWordPressサイトの完全なコピーです。WordPressのコアファイル、画像、アップロード、テーマ、プラグイン、WordPressデータベースのバックアップがすべて含まれています。
インストーラ」ファイルは、サイトを含むアーカイブファイルを解凍することで、移行プロセス全体を自動化するスクリプトです。
ステップ2: WordPressサイトのデータベースを作成する
インストーラを実行したり、WordPressウェブサイトをローカルホストからホスティングサービスサーバーにアップロードしたりする前に、新しいライブウェブサイト用のMySQLデータベースを作成する必要があります。
すでにMySQLデータベースを作成している場合は、このステップは省略できる。
データベースを作成するには、ホスティングサービスのcPanelダッシュボードにアクセスする必要があります。次に、「データベース」セクションを探し、「MySQLデータベースウィザード」アイコンをクリックします。

次の画面では、新しいデータベースを作成する欄がある。
データベースの名前を入力し、「データベースを作成」ボタンをクリックします。

cPanelはあなたのために新しいデータベースを作成します。
その後、新規ユーザーのユーザー名とパスワードを入力し、「Create User」ボタンをクリックします。

次に、作成したユーザーをデータベースに追加する必要があります。
まず、「すべての権限」のチェックボックスをクリックします。

その後、下にスクロールして「変更を加える」ボタンをクリックし、変更を保存します。
これでWordPressサイトでデータベースを使用する準備が整いました。データベース名、ユーザー名、パスワードは本当に〜してもよいですか?この情報は次のステップで必要になります。
ステップ3:ローカルサーバーからライブWordPressサイトへのファイルのアップロード
ここで、アーカイブとインストーラファイルをローカルサイトからホスティングサービスアカウントにアップロードする必要があります。
まず、FTPクライアントを使用してライブサイトに接続します。接続したら、サイトのルートディレクトリが完全に空であることを確認してください。
通常、ルート・ディレクトリは/home/public_html/フォルダーです。
WordPressホスティングサービス会社によっては、サインアップすると自動的にWordPressがインストールされます。もしそこにWordPressのファイルがあるなら、削除する必要がある。
その後、Duplicatorから空のルートディレクトリにarchive.zipとinstaller.phpファイルをアップロードします。

ステップ4:移行スクリプトの実行
移行ファイルのアップロードが完了したら、ブラウザーで以下のURLにアクセスする必要があります:
http://example.com/installer.php
example.com」を自分のドメイン名に置き換えることをお忘れなく。
Duplicator 移行ウィザードが起動します。
インストーラはいくつかのテストを実行し、スクリプトを初期化します。

Setup セクションでは、MySQL ホスティングサービス、データベース名、ユーザ名、パスワードを入力するよう求められます。
ホスティングサービスはローカルホストになるでしょう。その後、先のステップで作成したデータベースの詳細を入力します。
その後、’Validate’ボタンをクリックし、入力した内容が正しいことを確認します。

その後、「Next(次へ)」ボタンをクリックして進みます。
Duplicatorはアーカイブから新しいデータベースにWordPressデータベースのバックアップをインポートします。
また、ローカルサイトと新しいライブサイトを指すURLも更新されます。
管理者ログイン」ボタンをクリックして、ライブサイトのWordPress管理エリアに入ることができます。

ライブサイトにログインすると、Duplicatorは自動的にインストールファイルをクリーンアップします。
これですべてです。ローカルサーバーからライブサイトへのWordPressの移動は成功です。
方法2:WordPressをローカルサーバーからライブサイトに手動で転送する。
この方法では、WordPressをローカルサーバーからライブサイトに手動で移動する方法を紹介します。最初の方法がうまくいかなかった場合や、手動で行いたい場合に役立ちます。
ステップ1:ローカルのWordPressデータベースをエクスポートする
最初に行う必要があるのは、ローカルのWordPressデータベースをエクスポートすることです。そのためにphpMyAdminを使用します。
phpMyAdminに慣れていない方は、phpMyAdminを使ったWordPressデータベース管理のガイドをご覧ください。
http://localhost/phpmyadmin/、WordPressデータベースをクリックします。次に、上のメニューバーから「エクスポート」ボタンをクリックします。

Export method:’オプションで、’Quick’または’Custom’を選択できます。カスタマイザーでは、データベースをエクスポートするためのオプションが増えます。
しかし、「クイック」を選択し、「Go」ボタンをクリックしてデータベースをダウンロードすることをお勧めします。

ステップ2:WordPressファイルをライブサイトにアップロードする
次に、すべてのウェブサイトファイルをライブサイトに移動する必要があります。
まず、FTPクライアントを開き、ホスティングサービスアカウントに接続します。
ライブサイトに接続したら、正しいディレクトリにファイルをアップロードしていることを確認してください。例えば、サイトを’yoursite.com’にホスティングサービスしたい場合、public_htmlディレクトリにすべてのファイルをアップロードします。
ローカルのWordPressファイルを選択し、ライブサーバーにアップロードします。

ステップ3: ライブサイトにMySQLデータベースを作成する
FTPクライアントがWordPressファイルをアップロードしている間に、データベースのライブサーバーへのインポートを開始できます。
ほとんどのWordPressホスティングサービスプロバイダは、あなたのホスティングアカウントを管理するためにcPanelを提供していますので、我々はcPanelを使用してデータベースを作成する方法を紹介します。
まず、cPanelダッシュボードにログインし、「データベース」セクションにある「MySQLデータベースウィザード」アイコンをクリックします。

次の画面では、新しいデータベースを作成することができます。
データベースの名前を入力し、「データベースを作成」をクリックします。

cPanelは自動的に新しいデータベースを作成します。
次に、新規ユーザーのユーザー名とパスワードを入力し、「ユーザーを作成」をクリックします。

その後、作成したユーザーをデータベースに追加する必要がある。
まず、’All Privileges’ チェックボックスをチェックする。

その後、下にスクロールして「変更を加える」をクリックし、変更を保存します。
WordPressサイトの新規データベースの作成が完了しました。
ステップ4:WordPressデータベースをライブサイトにインポートする
次のステップでは、WordPressデータベースをインポートします。
cPanelのダッシュボードに行き、「データベース」セクションまでスクロールダウンし、「phpMyAdmin」をクリックします。

phpMyAdminに移動し、先ほど作成したデータベースをクリックします。phpMyAdminには、テーブルのない新しいデータベースが表示されます。
次に、上部メニューの「インポート」タブをクリックします。インポートページで「ファイルを選択」ボタンをクリックし、最初のステップで保存したローカルサイトのデータベースファイルを選択します。

その後、ページ下部の「Go」ボタンをクリックします。データベースが自動的にphpMyadminにインポートされます。
ステップ5:サイトURLの変更
次に、データベースのサイトURLを変更して、ライブWordPressサイトに接続できるようにする必要がある。
phpMyAdminで、先ほどインポートしたデータベースのwp_optionsテーブルを探します。
データベースのプレフィックスを変更した場合、wp_optionsの代わりに{new_prefix}_optionsになるかもしれません。
次に、wp_optionsの隣にある「Browse」ボタンをクリックします。または、サイドバーのリンクをクリックして、wp_optionsテーブル内のフィールドのリストがあるページを開きます。

次にoptions_nameカラムでsiteurlオプションを探す必要があります。
次に「編集」アイコンをクリックする。

フィールドを編集するウィンドウが表示されます。
入力ボックスoption_valueには、ローカルインストールのURLが表示されます。http://localhost/test のようなものです。
このフィールドに新規サイトのURLを挿入する必要があります。例:https://www.wpbeginner.com.
その後、「Go」ボタンをクリックしてフィールドを保存することができます。

次に、上記と同じ手順でホーム・オプション名を設定します。wp_optionsメニューは数ページにわたることがあります。通常、ホームオプションは2ページ目に設定されます。
次に、ホームURLを更新し、ライブサイトのURLと同じにする。
ステップ6: ライブサイトのセットアップ
データベースのインポートとコンテンツのアップロードが完了したら、次はWordPressの設定です。
このとき、サイトには「Error establishing a database connection(データベース接続の確立エラー)」というエラーが表示されているはずです。
これを修正するには、FTPクライアントを使用してサイトに接続し、wp-config.phpファイルを開きます。
以下のコード行を探すことになる:
// ** MySQL settings - You can get this info from your web host ** //
/** The name of the database for WordPress */
define( 'DB_NAME', 'database_name_here' );
/** MySQL database username */
define( 'DB_USER', 'username_here' );
/** MySQL database password */
define( 'DB_PASSWORD', 'password_here' );
/** MySQL hostname */
define( 'DB_HOST', 'localhost' );
先に作成したデータベース名、ユーザー名、パスワードをプロバイダーとして入力する必要があります。
次に、wp-config.phpファイルを保存し、WordPressホスティングサービスサーバーにアップロードします。
さて、あなたのサイトにアクセスすると、それはライブであるべきだ。
その後、WordPress管理画面にログインし、設定 ” 一般に移動する必要があります。その後、何も変更せずに一番下までスクロールし、「変更を保存」ボタンをクリックします。

これにより、サイトのURLが必要な場所に修正されるようになります。
それができたら、設定 ” パーマリンクに行き、スクロールダウンして「変更を保存」をクリックし、すべての投稿リンクが問題なく機能していることを確認してください。

ステップ7:パスの更新によるImagelyとリンク切れの修正
WordPressサイトをあるドメインから別のドメインへ、またはローカルサーバーからライブサイトへ移動する際には、必ずリンク切れや画像の欠落に直面します。
URLを更新する2つの方法をご紹介します。あなたに最適な方法を選んでください。
1.Search & Replace Everythingプラグインを使ってURLを更新する(推奨)
これを解決する最も安全な方法は、Search & Replace Everythingを使用することです。これは強力なWordPressプラグインで、複雑なデータベースクエリーを書くことなく、簡単にサイトの一括更新作業を行うことができます。
まず、Search & Replace Everythingプラグインをインストールして有効化する必要があります。
有効化した後、Tools ” WP Search & Replaceページにアクセスしてください。

ここから、’Search for’フィールドにローカルサイトのURLを、’Replace with’フィールドにライブサイトのURLを入力する必要があります。
少しスクロールして、テーブルの下の「すべて選択」をクリックします。これにより、プラグインがデータベース内のあらゆる場所で古いURLを探すようになります。

ここで「検索と置換のプレビュー」ボタンをクリックして続行する。
プラグインは、古いURLのすべてのインスタンスをデータベースから検索し、結果をプレビューします。

問題がなければ、「すべて置換」をクリックして変更を保存する。
変更についての警告が表示されます。続行するには「はい」をクリックしてください。
プラグインはデータベースを更新し、ローカルのURLを現在のサイトのURLに置き換えます。
2.手動でURLを更新する(上級者向け)
URLを更新するもう一つの方法は、以下のSQLクエリーを使うことである:
UPDATE wp_posts SET post_content = REPLACE(post_content, 'localhost/test/', 'www.yourlivesite.com/');
phpMyAdminにアクセスしてデータベースをクリックし、上部メニューから「SQL」をクリックして上記のクエリーを追加するだけです。
ローカルサイトとライブサイトのURLに変更し、「Go」ボタンをクリックすることを本当に〜してもよいですか?

これで完了です。これでローカルサーバーからライブサイトへのWordPressの移行は成功です。
うまくいけば、あなたのライブサイトはスムーズに稼働しています。エラーにお気づきの場合は、WordPressの一般的なエラーガイドをご覧いただき、トラブルシューティングにお役立てください。
この投稿が、WordPress をローカルサーバーからライブサイトに移行する際にお役に立てば幸いです。また、ライブサイトからローカルサーバーへの移行に関するガイド、または WordPress 移行の実践的な手順に関する究極のウェブサイト移行チェックリストもご覧ください。
If you liked this article, then please subscribe to our YouTube Channel for WordPress video tutorials. You can also find us on Twitter and Facebook.
")


WPBeginner Staff
You can try deactivating all the plugins at once by renaming the /wp-content/plugins directory. Here is a tutorial.
Usually plugins store settings in WordPress database so hopefully most of your settings will not get affected by the change.
Neville Campher
I have moved my site from one domain to another, but my all my plugins are not working. If I re-install the plugins I will loose my settings, is there a way to keep my setting without loosing them
orangedrum
I’m wondering the same thing. Just uploading my files didn’t work and when I try and re-export the database I’m getting an error telling me these databases already exist. Help!
santhosh
thanks a lot it was easy and helpful for any beginner like me
Ajay Walia
Thanks wpbeginner.com. i got an Error Establishing Database Connection error (local host to server). then i found your post on google. now i solved this error.
David A. Bennett
Awesome tutorial! Just wondering, if I continued to develop on my website locally, could I simply re-upload the new files (‘m guessing the wp-content folder) via FTP to my site, or would I need to re-export the database everytime?
Naveen Mallikarjuna
After trying another method, I tried your method outlined above and it worked perfectly. Thanks much!
WPBeginner Staff
are you sure you have your site URL as your mysql host? it is usually localhost or a subdomain on your site like mysql.example.com. If you are unsure ask your hosting provider.
Chandara Tieng
Thank you WPBeginner, now every thing are working fine with your guide.
Chandara Tieng
“Error establishing a database connection” I am getting this problem and now not yet fixed.
here is my configuration in wp-config.php
<>
please help me define problem and fixed this.
Thank ahead for kindness.
ben
I quite appreciate your article but i have few problems. i have succesfully uploaded my site but the site is not recognising the style sheet and my admin page is blank after i logged in. what is the way out please?
Anjali
Thank you for this guide. You mention that a plugin such as Backup Buddy or Duplicator can be used to make the migration easier. I’m VERY new to using WordPress, so the answer to this question may be painfully obvious. Would you install the plugin to the local site or the live site before the migration?
Wasim
After completing all the above steps , do in need to replace my index.html file
WPBeginner Staff
No, you don’t.
Roland
First off: thanks a lot for your great blog – it gave me the idea to try WAMP to develop my three current WP site projects!!
I did not install WP on localhost yet, because i am wondering if there could be a problem when I use a multisite installation during the move to the live server of my client.
I would like to develop the 3 sites for my client in one single database through the WP multisite feature. However i am unsure if everything will be fine when going live because I intend to use an alternative multisite installation method by mapping the three distinct domains onto one SQL database (via this plugin: http://wordpress.org/plugins/wordpress-mu-domain-mapping/). I.e. I want to develop example1.com + example2.com + example3.com on my localhost in a multisite setup and export the sites later onto the production server.
If someone could clear my doubts as to whether this could be a potential source for problems later on, please do so.
In that case i would develop 3 separate instances of wordpress, although i would like to avoid this at all costs.
Thank you! Roland
dpi
It works fine. Awesome guide. Thanks WPB
Jørgen Wolf
I loved this. Very good guide. Thank you very much, my site is now online!
Ramo
Thank you very much
WPBeginner Staff
The most probably cause is that your new database is empty, WordPress successfully connects to your new database. Then it finds out that the database is empty and assumes that its a new site. What you need to do is to import your old database. After that you will need to change your sitename and site url and update your links. See this guide.
John Kiathe
That was a nice guide. Thank you.
Crocker27
Hi,
Great tutorials thanks very much! I’ve created my own theme from scratch and am just in the final stages of putting it online, but I have hit a snag…
What could cause the 5 minute install page to come up when I direct my page to the new sql database?
I have exported the SQL database from my localhost. Created a new database on the server and imported it there and I changed the wp-config file to direct to the new database. When I did that I was directed to the 5 minute install page.
When I leave it on the old database, my theme works (although the content/posts/menus etc are all wrong) so I don’t understand what I’ve done. I am guessing it’s something wrong with the database but I have no idea what!
Thanks for your help!
Paul Seidel
I’ve uploaded my website multiple times to the FTP, changed the wp-config, the SQL databases, etc – but for some reason “wordpress” is still in the address ( , etc.) and I can’t log into the backend. Help !
Christopher
i have the same problem
WPBeginner Staff
Those changes will be lost if you uploaded an older version of the database from your local server.
Andrew Avantgardian
Worked like a charm, except i didn’t even need the last step (the MySQL query) for some reason all my links and pictures were fine after the transfer, perhaps it has something to do with the new version of WordPress.
Anyways thanks for this guide
Naveed
Thanks a lot for the tutorial. I was mislead by some plugins claiming automatic transfer.
Excellent work. Keep it up.
WPBeginner Staff
This article assumes that your live site is actually developed on localhost, so it does not assume that you have already taken down a live site to to work on it.
In case you are working on a live site by creating a local copy on your computer. Then this strategy is usually used to only work on site’s layout, adding new features, or testing some functionality. This way you can work on your website without modifying any data and when you move the site from localserver to livesite your database usually remains unchanged.
Hope this helps
npp07
Thanks, but do you have any articles to recommend on how (if possible) to make changes to a website with a community contribution aspect (comments, forums, etc) and be able to develop to include creating posts (not just used for a blog, but something like BuddyPress or Symposium) without overwriting comments added between development versions?
Guest
Yse Livefyre and Disquss comment system
npp07
I thought I replied, but I don’t see it here… by adding new features, do you mean like adding pages and posts using BuddyPress? If a conversation keeps going on the live site while I am developing, will those conversations be lost or merged when I upload to the live site?
npp07
Thanks for the great article, I have done this with a static site before, but in the article you say this is how WPBeginner.com does it daily (but with BackUpBuddy). I haven’t used BackUpBuddy yet, but plan to for a new project.
My question is how does this work for a site with the community commenting? Wouldn’t you lose the comments already on the database if you repeat this process daily and overwrite a database? Is there a slightly different step involved for building development updates onto an already live site?
Husnain
All works fine .. but my header image not work (Crash) .. and when i save permalink in setting it says Connection not established !!
Jenna
Hello!
When I try to import gripped database I get:
SQL query:
—
— Database: `wpdb`
—
— ——————————————————–
—
— Table structure for table `wp_commentmeta`
—
CREATE TABLE `wp_commentmeta` (
`meta_id` BIGINT( 20 ) UNSIGNED NOT NULL AUTO_INCREMENT ,
`comment_id` BIGINT( 20 ) UNSIGNED NOT NULL DEFAULT ‘0’,
`meta_key` VARCHAR( 255 ) DEFAULT NULL ,
`meta_value` LONGTEXT,
PRIMARY KEY ( `meta_id` ) ,
KEY `comment_id` ( `comment_id` ) ,
KEY `meta_key` ( `meta_key` )
) ENGINE = INNODB DEFAULT CHARSET = utf8 AUTO_INCREMENT =1;
MySQL said:
#1046 – No database selected
—
How can I fix this?
Thanks,
Jenna
landi
clean and simple
Changa Masomakali
This is a great article!! Thanks so much for it. But I am not able to pull my site up. I think it has something to do with with the DB Hostname in the wp-config file. What should this be?
Bloodico
This is absolutely a great article !! THANK YOU !!
It would be perfect if you mentioned to also check the wp_postmeta when replacing ‘localhost/test/’ by ‘www.yourlivesite.com/’ on step 7
and added a Step 8 for the.htaccess file which have to be modified too (if it isn’t done automatically ?)
the line “RewriteBase /test/” has to be suppressed and the line “RewriteRule . /test/index.php [L]” has to be changed to “RewriteRule . /index.php [L”
Once again a BIG thank you for this great article that made my day so easy !!
B-Designs
This was exactly the fix I needed for my clients site.
Thank you so much for your insight
David
Im having issues logging in to my admin panel. Site displays correctly but links dont work even after executing the sql script. When I try to log in, no error is returned, the form just clears. Any ideas?
Miguel Leite
Hey there.
Wonderful post!! Thanks a lot, helped me doing this for my very first time, correctly.
I’d like to ask: to do the reverse: moving wordpress from live site to local site, I just have to do de process starting with the live server and ending in the local?
Transient
thanx a lot
Hardeep Kaur
Thank you very much !!! really helpful.
nickesh
i complete all the steps but wp-admin page cannot be accessed and it shows following error
Warning: Cannot modify header information – headers already sent by (output started at /home/sulakasa/public_html/sulakasa/wp-content/themes/CherryFramework/includes/less-compile.php:155) in/home/sulakasa/public_html/sulakasa/wp-includes/pluggable.php on line 1121
Marisa Di Monda
This might be too late but if you or anyone has this problem again this helped me:
https://wordpress.org/support/topic/wp-admin-has-a-redirect-loop-after-migrating-to-new-server
WPBeginner Staff
WordPress.com is still managing your domain name. You can transfer your domain’s registration to your new webhost. Or you can simply update nameserver information for your domain on WordPress.com and point it to your new webhost. Please see the instructions in our guide on how to properly move your WordPress.com blog to WordPress.org
WPBeginner Staff
Yes you could just simply install WordPress and then upload your theme.
jellman
I’m confused, is this to also migrate posts? I have a wordpress site developed locally but with zero content yet. therefore can’t I just install wordpress on my dreamhost site, then move the theme files on my computer to the live server?
WPBeginner Staff
You can not edit theme or install plugins on WordPress.com. Please see our guide on the difference between WordPress.com vs WordPress.org
Mawuli
I have already exported my wordpress.com site to wordpress.org during the installation as your tutorial guided me.
But my problem is, I already have a domain with wordpress.com and when i was trying to move my site to live, i received those feedbacks….May i know if wordpress.com is still my host or i need to purchase another hosting account?
Mawuli
I have a domain with wordpress.com. After successfully installing wordpress with wampserver through your tutorial, I managed to design a new website, uploaded and used all the necessary plugins.
Now, the next thing I want to do is to move to a live site and that’s why I arrived here to be able to display my new site but am stucked in the first step.
I am using File Zilla as my FTP client. I was asked to enter my host name which I did with the name (wordpress.com). I entered my username, password and port number (21). But this is what I get when I try to connect
“Error: Connection timed out
Error: Could not connect to server”
What shall I do? Do I need to buy a hosting service or wordpress.com is still my host. I don’t seem to get this hosting thing at all. Explain this to me.
Thanks you
WPBeginner Staff
Installing WordPress using Sofaculous is not a requirement,
MHK
All the steps in this work as expected….WONDERFUL!!!!, however it should be include in this tutorial as Step One or Prerequisite………That we need to install wordpress from Softaculous and then delete the database created by it and import the database into it and after installing wordpress from softaculous should import the WP files from FTP.
I am facing a strange error. Chrome is opening my website as expected……IE keeps showing the Under construction page?? Any thoughts will be highly appreciated…….I have deleted the index.html file
Yazz Am
Hello, I get ‘Error establishing a database connection’ at step 6 when I try to login to my wordpress admin panel. Help please.
Ferdinand
I want to set up a site on local host which I want to manage locally. I would write the articles and upload them to webhost after I write them. Do I need to update the site and php database in the way that you mentioned above every single time I write a post? Or is there any way to upload only the files that got changed? This I want to know since it would be very time saving to manage the site offline for me.
Rizky M R
My site has working, but i can’t open any page and post of my website, and also the image still doesn’t show up after the sql query fix
Charlie Barnett
Hi, I have found your explanation extremely useful and have managed to trasnfer my locally hosted wp site live. However when I try step 6 to login I can’t seem to login and it throws the following error:
Internal Server Error
The server encountered an internal error or misconfiguration and was unable to complete your request.
Please contact the server administrator, and inform them of the time the error occurred, and anything you might have done that may have caused the error.
More information about this error may be available in the server error log.
Additionally, a 500 Internal Server Error error was encountered while trying to use an ErrorDocument to handle the request.
Does this make sense have I missed something in my upload?
Thanks Charlie
WPBeginner Support
Please take a look at how to fix the internal server error in WordPress. Due to generic nature of this error, it usually does not tell you where to look for the problem.
Admin
wanda serros
My site is up but it’s still not completely functional. When I click on some of my images to get an enlarged view I get a message saying ‘The requested content cannot be loaded. Please try again later.’
I’ve looked in my database and I see that there are still instances of ‘localhost’…. in some fields. I did run the Update to ‘post_contents’ query already. Should I run additional queries to change every mention of ‘localhost’ in the database to my website address?
Thank you. Your site has been very helpful.
Timothy
Ofcourse, replace every instance of localhost and localhost/
Lisa
I figured out how to upload the database, finally. made those text editor changes within the sql file first. Now I’ve done all of the other steps, including changing the wp_options “home” and “siteurl” … and also editing the wp_config.php file from within my live c panel file manager and making those updates. I still get an “error establishing database connection”. I did notice when I installed wordpress on my new hosted site, it created its own database (ss_1). Should i delete that one?
WPBeginner Support
The most common reason for the error is usually incorrect password, database, username or host information. It has nothing to do with other databases on your mysql server, so there is no need to delete them. Make sure you are entering correct information for your database in your wp-config.php file.
Admin
Karlo
I followed your instructions to make a local copy of my live website (the other way around).
The only problem I’m experiencing is that the stylesheet isn’t loading and that my images arent showing up, not even on WP backend.
Do I need to run another SQL query to fix this?