WordPress ウェブサイトを長年構築してきた経験から、コンピューター上にローカル WordPress 環境を持つことの重要性を学びました。
個人のコンピューターに WordPress があれば、ライブサイトを危険にさらすことなく新しい機能を試したり、WordPress 開発に深く入り込んだり、公開前にウェブサイト全体を構築したりできます。すべての WordPress プロジェクトのためのプライベートサンドボックスを持っているようなものです。
Windowsユーザーの場合、WordPressをローカルにセットアップする方法はたくさんあります。しかし、最も簡単な2つの方法に絞り込みました。このガイドでは、お使いのバージョンに関係なく、WindowsコンピューターにWordPressを簡単にインストールする方法を説明します。
WindowsにWordPressをインストールすべき理由
Windowsユーザーの場合、コンピューターにWordPressをローカルにインストールすると、いくつかの利点があります。
ローカルのWordPressインストールは、ライブウェブサイトに影響を与えないテスト環境を作成します。ローカルサーバーまたはlocalhostと呼ばれるこのセットアップは、WordPressの個人的な遊び場です。
WordPress開発者は、作業にローカルインストールを定期的に使用します。たとえば、新しいプラグインやテーマを試したり、Gutenbergブロックエディターにアップデートする前にサイトをテストしたりするために使用することがあります。
しかし、プロだけのものではありません。WordPress初心者の方でも、ローカル環境は学習に最適です。ライブサイトを壊す心配なく、機能を探求したり、テーマやプラグインをテストしたり、自由に実験したりできます。
WindowsにWordPressをローカルにインストールした場合、サイトを見ることができるのはあなただけであることに注意することが重要です。公開ウェブサイトを作成したい場合は、ドメイン名とウェブホスティングが必要になります。
技術的には、XAMPPを使用してWindowsにWordPressをインストールすることができます。以前にそのチュートリアルを作成しました。
それはさておき、XAMPPよりもさらに簡単な2つの方法でローカルWordPress環境をセットアップできることがわかりました。これらは初心者やローカルサイトを素早く作成する必要があるユーザーに最適です。興味のある方法にジャンプするには、以下のリンクをクリックしてください。
- 方法1:Studioを使用してWindowsにWordPressをインストールする(迅速かつ簡単)
- 方法2:Local WPを使用してWindowsにWordPressをインストールする(よりカスタマイズ可能)
- Alternative: Use WordPress Playground to Test Themes, Plugins, and More
方法1:Studioを使用してWindowsにWordPressをインストールする(迅速かつ簡単)
最初の方法では、Studio を使用します。これは Automattic 製のローカル WordPress ソフトウェアです。Automattic は、WordPress ソフトウェアに基づいたウェブサイトビルダーである WordPress.com を管理および運営している会社です。
この方法は、初心者にとって非常に迅速で簡単なため、まずこの方法について説明します。
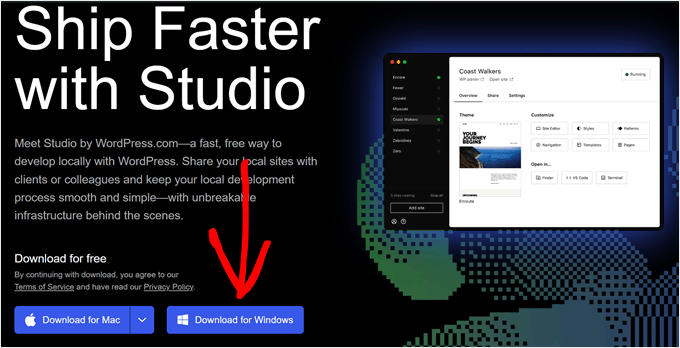
まず、Studio by WordPress.com のウェブサイトを開く必要があります。次に、「Windows 用ダウンロード」ボタンをクリックします。
それが完了したら、ダウンロードしたファイルを開いてインストールを開始してください。
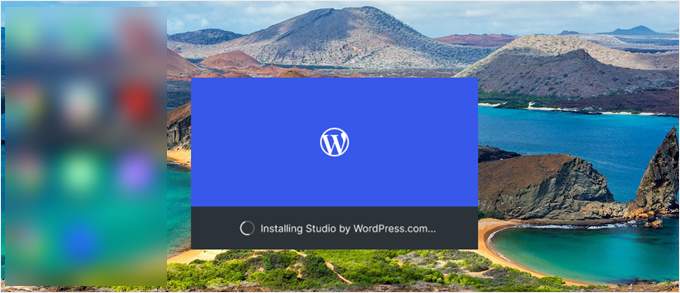
アプリケーションがインストール中であることを示すポップアップウィンドウが表示されます。
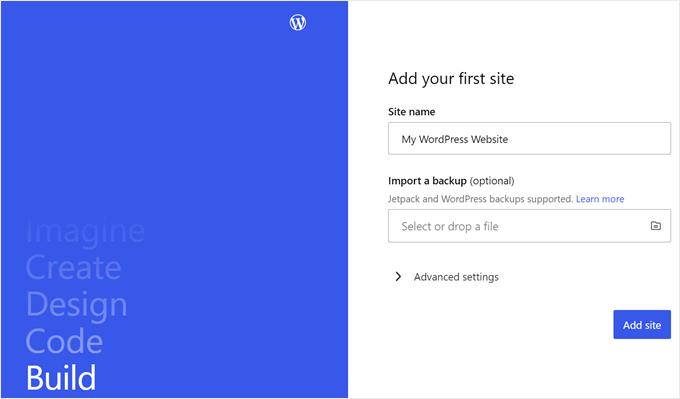
これで、最初のサイトを追加できます。
これを行うには、新しいローカルWordPressサイト名を入力して「サイトを追加」をクリックするだけです。サイト名は、簡単に識別できる限り、好きなように名前を付けることができます。
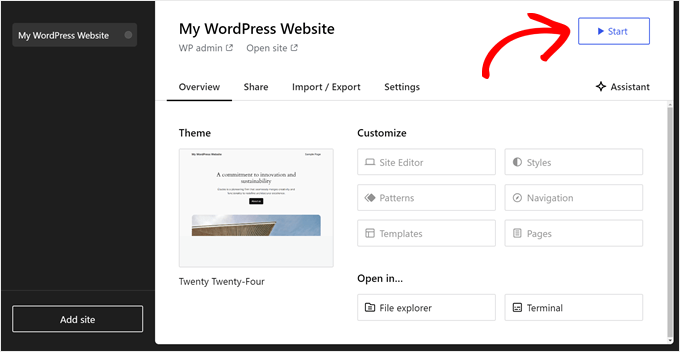
これで、ローカルのWordPressサイトのダッシュボードが表示されるはずです。
WordPressダッシュボードにアクセスしてウェブサイトを編集するには、右上隅にある「開始」ボタンをクリックするだけです。これにより、ローカルウェブサイトにコンピューターからアクセスできるようになります。
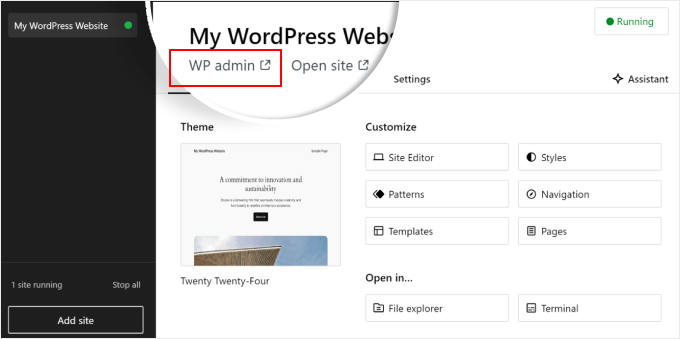
「開始」ボタンが「実行中」に変わったら、ページ左上の「WP Admin」リンクをクリックできます。
これにより、ローカルのWordPress管理ページが表示されます。
これで、セットアップはほぼ完了です。ローカルウェブサイトを構築する際に必要となる可能性のあるその他の設定を見てみましょう。
「概要」タブでご覧いただけるように、Studioダッシュボードから直接、WordPressのフルサイトエディターメニューにすぐにアクセスできます。「ファイルエクスプローラー」をクリックしてWordPressウェブサイトのフォルダやファイルを開くこともできますし、「ターミナル」をクリックしてWP-CLIを使用してウェブサイトを管理することもできます。
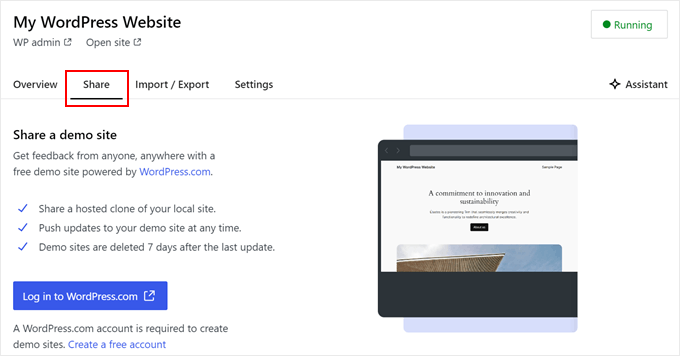
「共有」タブに切り替えると、WordPress.comアカウントにログインし、ローカルサイトをクローンして、WordPress.comのサーバーにアップロードできます。これにより、クローンされたサイトが一時的にオンラインになり、デモサイトをクライアントやチームメンバーと共有するのに便利です。
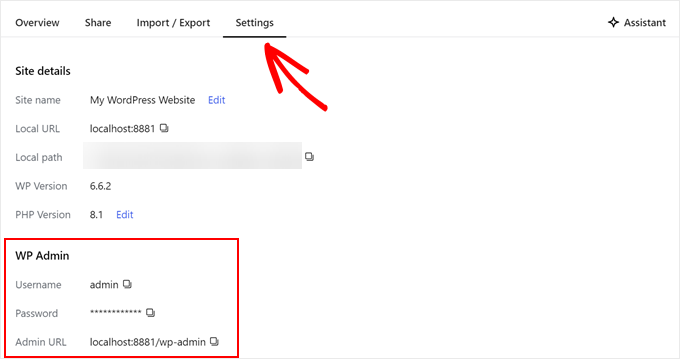
ブラウザから直接ローカルサイトにログインしたい場合があります。その場合、wp-admin の認証情報を知っている必要があります。
それらを見つけるには、「設定」タブに切り替えて、WordPressの管理者ユーザー名、パスワード、およびログインURLを見つけることができます。
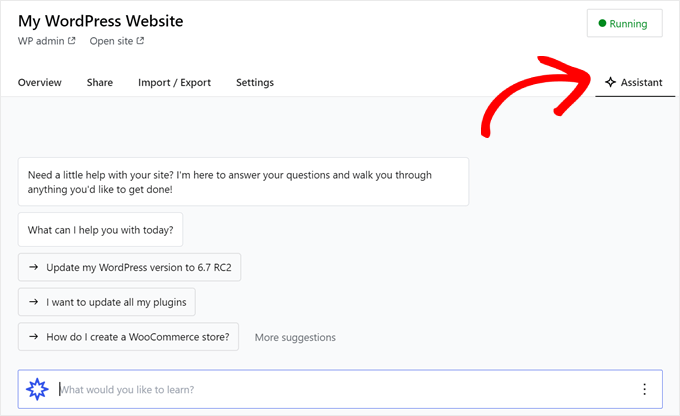
Studioのもう1つの便利な機能は、組み込みのAIチャットボットです。「アシスタント」ボタンをクリックして対話できます。
ここでは、Studioに、すべてのプラグインを一度に更新する、WordPressコアバージョンを更新する、またはカスタムブロック用のコードを作成するなどのタスクについて支援を求めることができます。
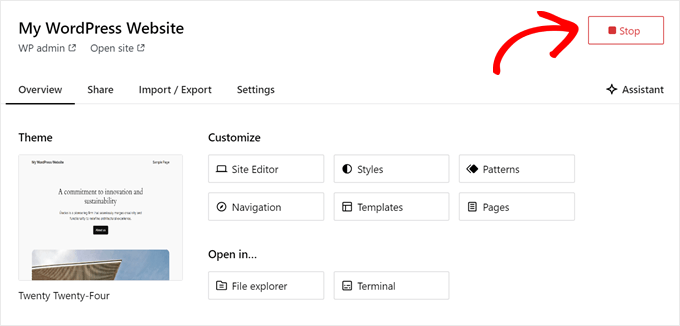
ローカルサイトでの作業が終了したら、右上隅にある「実行中」ボタンにカーソルを合わせ、「停止」と表示されるまで待ちます。
次に、ウェブサイトを停止するボタンをクリックします。
Studio の 1 つの欠点は、WordPress 環境をお好みに合わせて設定できないことです。これは、PHP のバージョン、Web サーバー、およびデータベースがすでに選択されていることを意味します。
特定のサーバー構成でウェブサイトやプラグインをテストする必要がある場合、これは欠点となる可能性があります。
ローカルのWordPress環境をより細かく制御したい場合や、ローカルセットアップを特定のライブサーバー構成と一致させたい場合は、次の方法であるLocal WPを使用することを検討してください。
方法2:Local WPを使用してWindowsにWordPressをインストールする(よりカスタマイズ可能)
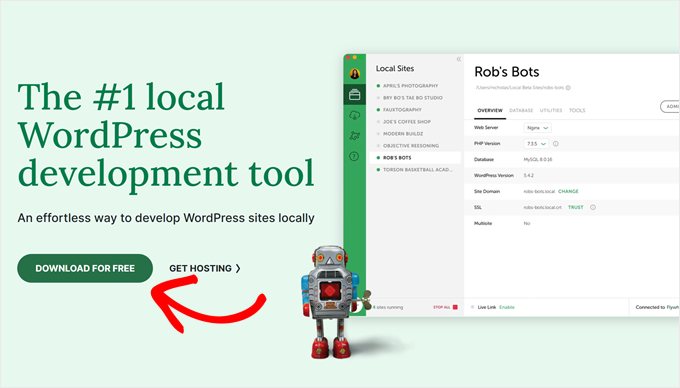
まず、Windows コンピューターに Local WP ソフトウェアをダウンロードしてインストールする必要があります。Local WP ウェブサイトにアクセスし、「無料でダウンロード」ボタンをクリックするだけです。
その後、プラットフォームを選択する必要があるポップアップウィンドウが表示されます。ドロップダウンメニューから「Windows」を選択してください。
次に、ソフトウェアをダウンロードするために、名、姓、仕事用メールアドレス、電話番号などの詳細を入力できます。
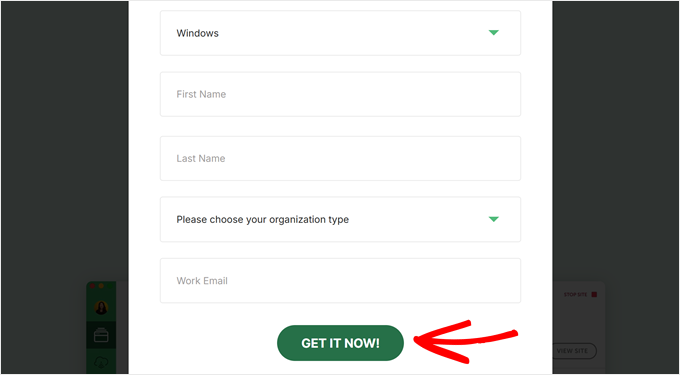
詳細を入力したら、「今すぐ入手」ボタンをクリックしてください。
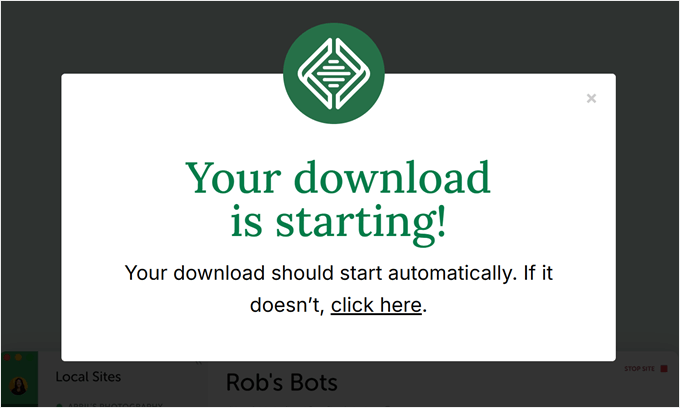
その後、ソフトウェアは自動的にコンピューターにダウンロードされます。または、「ここをクリック」リンクをクリックしてダウンロードを開始することもできます。
ファイルがダウンロードされたら、セットアップウィザードを起動してください。
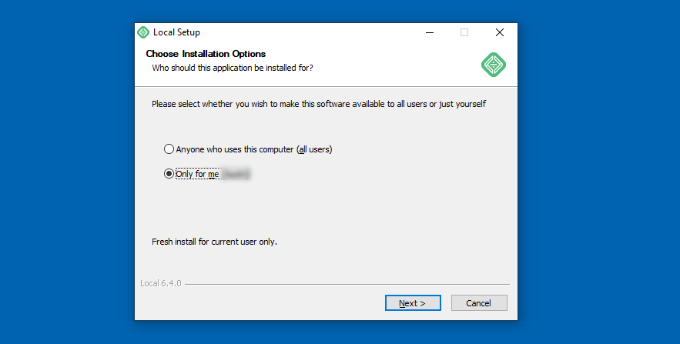
次に、ソフトウェアをすべてのユーザー向けにインストールするか、自分だけ向けにインストールするかを選択する必要があります。
オプションを選択したら、「次へ」ボタンをクリックしてください。
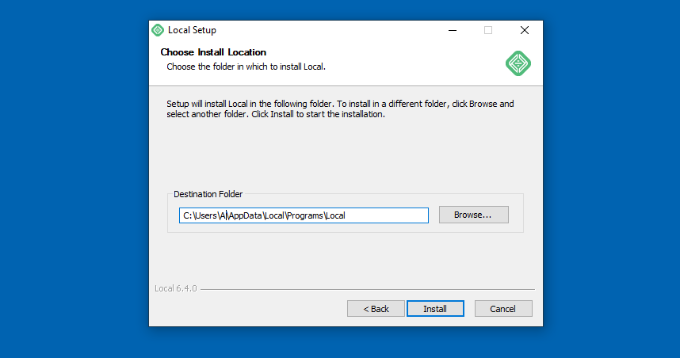
次のステップでは、ソフトウェアがインストールされる「インストール先フォルダ」を選択できます。
「参照」ボタンをクリックしてパスを設定し、「インストール」ボタンをクリックするだけです。
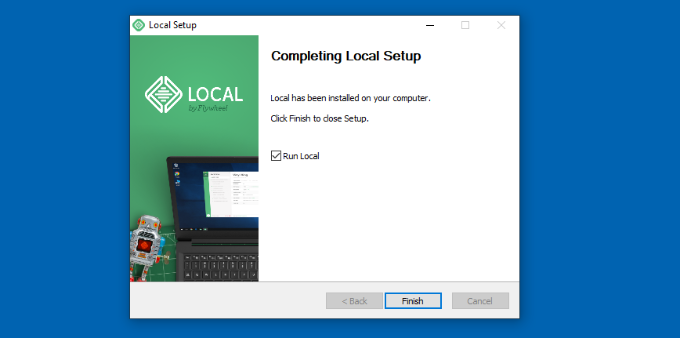
Local WPソフトウェアがWindowsコンピューターにインストールされます。
完了したら、「ローカルで実行」チェックボックスをオンにして、セットアップウィザードの「完了」ボタンをクリックできます。
ソフトウェアが Windows デバイスで起動します。
次のステップは、新しいローカルウェブサイトを追加することです。これを行うには、下部にあるプラス「+」ボタンをクリックするだけです。
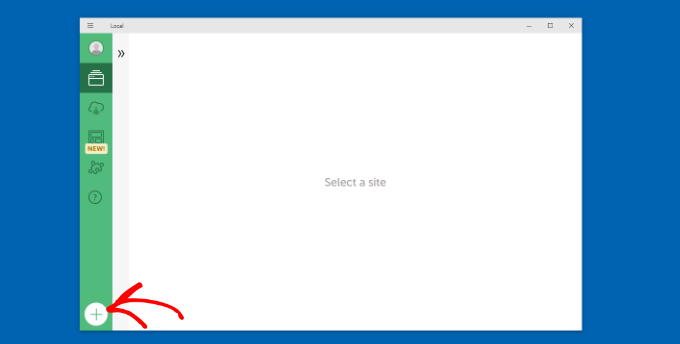
その後、Localソフトウェアでサイトを作成できます。
「新しいサイトを作成」オプションを選択し、「続行」ボタンをクリックします。ブループリントや既存のウェブサイトファイルからサイトを作成するオプションもありますが、デモンストレーションのために最初のオプションを選択します。
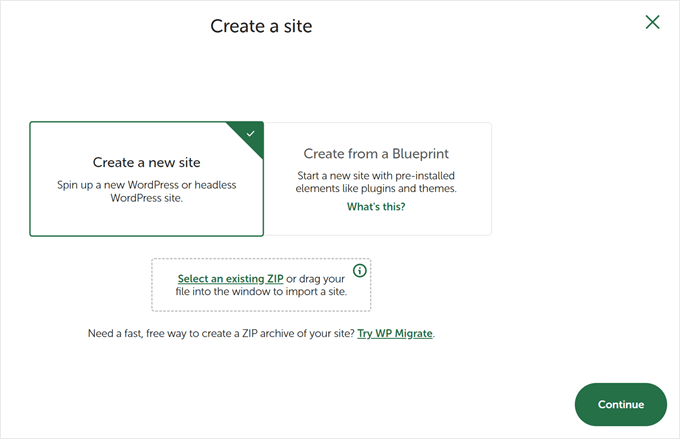
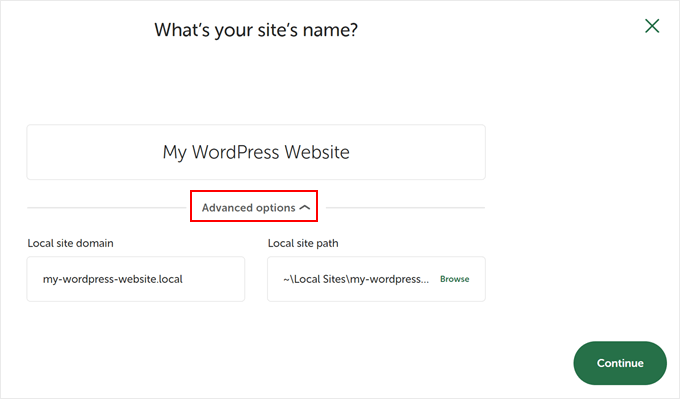
次に、「マイ WordPress ウェブサイト」のようなローカルウェブサイトの名前を入力できます。
ローカルサイトのドメインとローカルサイトのパスを入力できる高度なオプションもあります。デフォルトでは、ドメインはウェブサイトのタイトルを使用しますが、ダッシュで区切られます。
完了したら、「続行」ボタンをクリックするだけです。
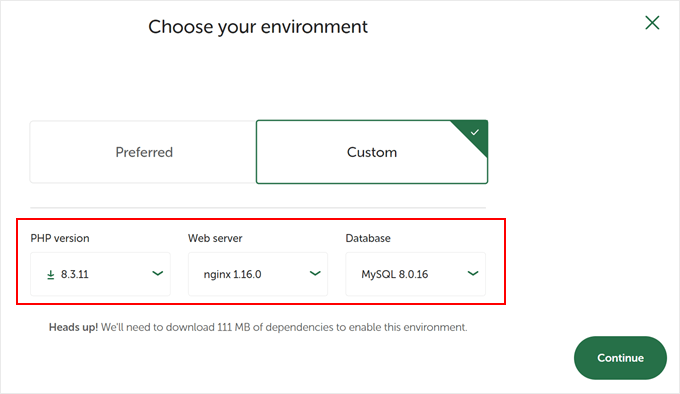
その後、ローカルウェブサイトの環境を選択する必要があります。
ソフトウェアが自動的に PHP バージョン、Web サーバー、MySQL バージョンを選択する「推奨」環境を使用できます。一方、「カスタム」を選択して環境の詳細を入力することもできます。
Local WP は最新の PHP バージョンを提供します。Web サーバーについては、Nginx または Apache を選択できます。データベースについては、MySQL または MariaDB を選択することもできます。
一部のPHP、Webサーバー、およびデータベースのバージョンでは、正常に機能するためにいくつかの依存関係をダウンロードする必要があることに注意してください。
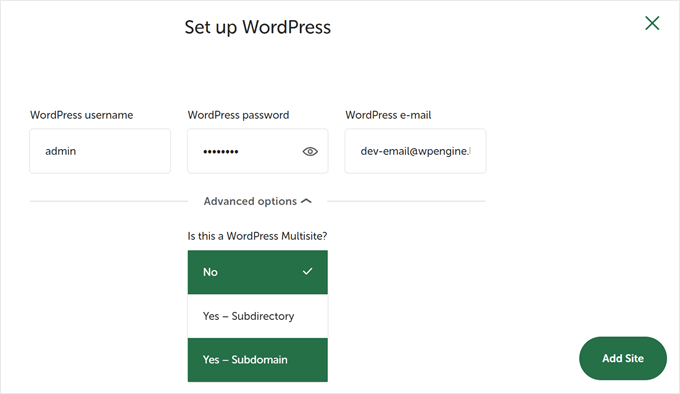
次に、ローカルウェブサイトのWordPressユーザー名とパスワードを入力できます。さらに、すべてのメール通知を受信するWordPressのメールアドレスを選択するオプションもあります。
それ以外に、ソフトウェアがWordPressマルチサイトネットワークを持っているかどうかを尋ねる高度なオプションがあります。持っていない場合は、「いいえ」をクリックしてください。
これらの詳細を入力したら、「サイトを追加」ボタンをクリックするだけです。
ソフトウェアがWordPressをインストールし、ウェブサイトをセットアップします。
ローカルウェブサイトを起動するには、右上隅にある「サイトを開始」ボタンをクリックしてください。
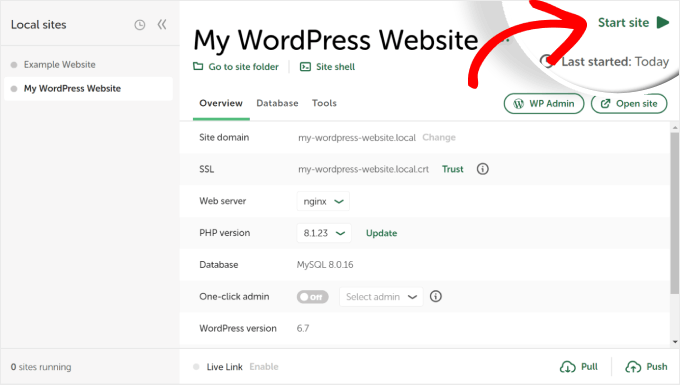
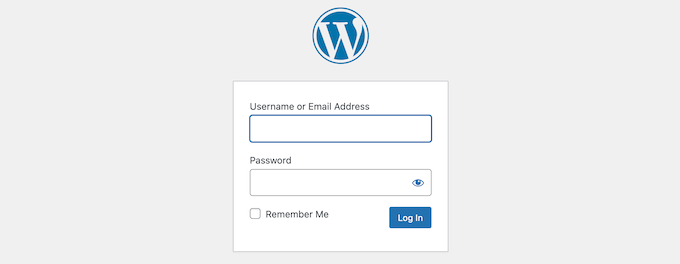
次に、「WP Admin」ボタンをクリックすると、WordPressの管理者ログインページが表示されます。
ローカルウェブサイトの設定時に以前に入力したユーザー名とパスワードを入力し、「ログイン」ボタンをクリックするだけです。
これで、Windowsコンピューターでローカルサイトを編集できます。
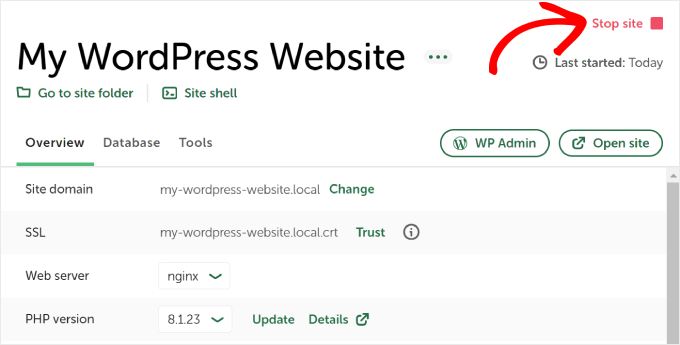
完了したら、ローカルWPソフトウェアの「サイトを停止」ボタンをクリックして、サイトを停止することを忘れないでください。
プロのヒント: ログインプロセスをスキップしたい場合は、Local WPでワンクリック管理者ログインを有効にできます。
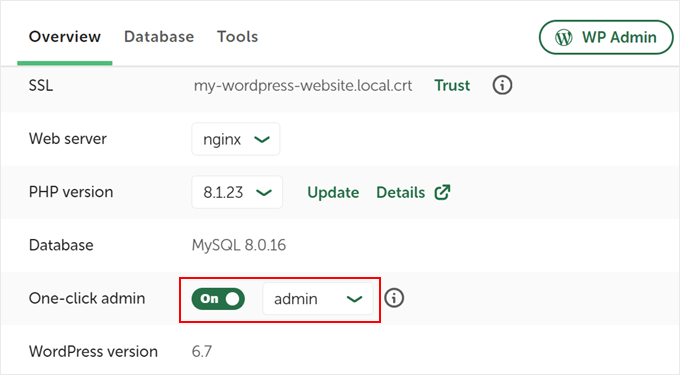
これを行うには、Local WPダッシュボードに戻り、「ワンクリック管理」ボタンを「オン」と表示されるまで切り替えます。次に、ドロップダウンメニューで、このワンクリックログイン機能を使用できる管理者ユーザーを選択します。
代替案:WordPress Playground を使用してテーマ、プラグインなどをテストする
WordPress Playgroundは、Webブラウザで直接WordPressを試すことができる革新的なツールです。これは仮想サンドボックスであり、実際のウェブサイトに影響を与えることなく、新しいWordPressテーマ、プラグイン、および機能を試すことができます。
WordPress Playgroundは、ローカルWordPress環境とはいくつかの重要な点で異なります。
まず、コンピューターへのインストールは不要で、使用後にリセットされるため、永続的なローカルセットアップとは異なります。ブラウザがあればどのデバイスからでもアクセスできますが、ローカルインストールは1台のコンピューターに紐付けられます。
WordPress Playground は簡単なテストや学習に最適ですが、Windows コンピューター上のローカル WordPress 環境は、長期的な開発プロジェクトにより多くの柔軟性を提供します。
ブラウザでWordPress Playgroundを使用する方法については、ブラウザでWordPress Playgroundを使用する方法のガイドをご覧ください。
Windows コンピューターに WordPress をインストールしましたが、次はどうすればよいですか?
コンピューターにWordPressがインストールされたので、次にできることはいくつかあります。
- あなたのサイトをより良く使うための基本的なWordPressのヒントとコツを学びましょう。
- さまざまなWordPressテーマを試して、サイトの外観を確認してください。
- サイトに新機能を追加するために、必須のWordPressプラグインをインストールしてテストします。
- 一般的な WordPress エラーを自分で修正する方法を学びましょう。
- サイトをきれいに見せるために、さまざまなドラッグ&ドロップページビルダーを試してみてください。
- ローカルホストでWordPressの管理者パスワードをリセットする方法を学び、サイトへのアクセスを回復してください。
- 自動ワークフローを設定することで、サイトの管理をより簡単に行えます。
- ハッカーからサイトを安全に保つために、WordPressのセキュリティについて学びましょう。
- 準備ができたら、ローカルWordPressサイトをライブサーバーに移動して、皆に共有しましょう。
この記事が、Windows コンピューターに WordPress をローカルにインストールする方法を学ぶのに役立ったことを願っています。また、Mac コンピューターに WordPress をローカルにインストールする方法や、WordPress ステージングサイトを作成するための究極ガイドに関する記事もご覧ください。
この記事が気に入ったら、WordPressのビデオチュートリアルについては、YouTubeチャンネルを購読してください。 TwitterやFacebookでもフォローできます。


レオーネ・アゴヤ
この記事をありがとうございます。非常に役立ちましたし、動作しました。
Vivek Sharma
Best tuts awesome explanation , best website
WPBeginnerサポート
ヴィヴェックさん、当社のウェブサイトをご利用いただきありがとうございます。WordPressのヒントやチュートリアルについては、Twitterでフォローしてください。
管理者
Stephen Rea
ありがとうございます…新しい力を学ぶのは素晴らしい気分です…WPとWAMPがデスクトップにインストールされました…次はWPを学びます!
Dave
素晴らしいチュートリアルです!!! 助けてくれてありがとう!!!
Elaine
わあ、本当にありがとうございます。とても助かりました。
Manuel
完全に素晴らしいです!C++ 13 & 14で問題がありましたが、非常に分かりやすく説明されており、正しい方向を示してくれたおかげで解決でき、Windows 10ラップトップに開発用のWordPress環境を構築できました。本当にありがとうございました。
Jonathan
Do I need have basic in knowledge coreldraw and or photoshop to become a professional web designer.
Thanks for your sincere answer.
WPBeginnerサポート
特にPhotoshopは非常に役立ちます。
管理者
カルティク
とても役に立ちました。ありがとうございます..:)
マイケル・ジョーリ
素晴らしいチュートリアル、ありがとう!
提案が1つあります。チュートリアルで遭遇する可能性のあるポイントで、Skypeのポート80の問題に言及してください。最後に言及されたのは役に立ちませんでした。なぜなら、何がうまくいかないのかを理解するのにすでにかなりの時間を費やしていたからです。簡単なメモとして、「phpMyAdminを選択したときにブラウザ画面が空白の場合は、Skypeとの競合がある可能性があります(下記参照)。」と記載してください。
マーク・K
チュートリアルのための感謝。WAMPの起動に問題が発生しました(localhost/phpmyadminで空白ページ)、wins 10ではwwwサービスが実行されていたためApacheが停止しました。そのため、services.mscを実行してそれを停止しました。
wpが設定を作成しようとしたときに発生した唯一の問題は、デフォルトでtxtBoxが「password」で自動補完されるため、削除することを忘れないでください。簡単な修正ですが、2分間悩みました。
もう一度ありがとう
フランク・ジョージ
至急ヘルプをお願いします。サイトを公開したいのです…。ローカルホストでWordPressをMicrosoft Web MatrixとIIS7を使って実行しています。どうすれば公開できますか?至急ヘルプが必要です!
ahmed
Hi
Wamp WindowsベースのサーバーにWordPressをインストールする予定です。問題が発生した場合、誰に連絡すればよいですか?教えてください。
事前に感謝します。
Ahmed
vijay
Bitnamiソフトウェアを使用してWordPressをインストールしました。
WAMPも試しましたが、どちらも素晴らしいです。
Johari
マニュアルを簡略化してくれてありがとう。提供された手順はわかりやすいです。素晴らしい記事を投稿し続けてください!
cornel
素晴らしい仕事です、ありがとうございます
ヴィカシュ・グプタ
素晴らしいガイダンスを提供していただきありがとうございます。
私にはうまくいきました。
Ahmed
wamp を起動しようとすると、vcruntime.dll が見つからないというエラーが表示されます…何か解決策はありますか?
Mayur
phpmyadminをクリックするとエラーが表示されます。
Web ページが見つかりません
助けてください..
Ruben Tahir
phpMyAdminを初めて実行しようとすると、ユーザー名とパスワードの入力を求められます。デフォルトのユーザー名とパスワードがあるはずだと思います。それらは何ですか、または自分で設定するにはどうすればよいですか?
Ruben Tahir
単にグーグルで検索したところ、ユーザー名は root でパスワードなしであることがわかりました。
チュートリアルで言及すべきです。
J Robinson
私のWAMP-64は以前Dドライブにインストールしました。最近WPを追加しました。http://localhost/wp-admin/(WPフォルダ名を元に戻しました)にブラウザでアクセスすると、以下のエラーが表示されます。
Warning: require_once(D:\wamp64\www/wp-load.php): failed to open stream: No such file or directory in D:\wamp64\www\wp-admin\admin.php on line 31
そして
Fatal error: require_once(): Failed opening required ‘D:\wamp64\www/wp-load.php’ (include_path=’.;C:\php\pear’) in D:\wamp64\www\wp-admin\admin.php on line 31
すべて削除して最初からやり直すべきですか、それともこれを修正するための設定がありますか?
manjeet kaur
こんにちは、WordPressを学びたいのですが。オンラインで学習できますか?私の将来がかかっています。
Dipankar Ray
ステップバイステップの情報ありがとうございます。しかし、データベースの作成方法がわかりません。WampアイコンをクリックしてphpMyAdminをクリックするたびに、URLが「http://localhost/phpmyadmin」の空白の新しいブラウザウィンドウが表示されます。
そのため、データベースをクリックしてWordPress用のデータベースを作成するという次のステップに進むことができません。
私が正しい道筋をたどっていない場合は、指摘して助けてください。
ありがとう。
WPBeginnerサポート
URLの末尾にスラッシュを追加してみてください。例:
http://localhost/phpMyAdmin/
管理者
Dipankar Ray
上記のURLを使用するというご提案ありがとうございます。以前の問題は解決し、先に進むことができました。しかし、その後、MySQLのエラーなどの別の問題が発生し、WAMPサーバーをコンピューターからアンインストールすることにしました。
ところで、私のOSはWindows XPです。
このソフトウェアをダウンロードして再インストールしようとすると、次のエラーメッセージが表示されます。「Aestan Tray Menuに問題が発生したため、閉じる必要があります。ご迷惑をおかけして申し訳ありません。」これは3回発生しました。ありがとうございます。
どこで間違っているのか分からないので、助けてください。
WP 完全初心者
Microsoft IISが実行されていて、この問題を引き起こしている可能性が非常に高いです。私にも起こりました。WAMP > Apache > Test Port 80 オプションに移動してください。
ポート80で間違ったサービスが実行されています。といったメッセージが表示されます。実際に実行されているサービスはMS IIS X.0です。
管理者としてcmdを起動し、コマンドラインに iisrest / stop と入力します。
次に WAMP > Apache > Service Administration > Install Service に進みます。
最後に、WAMP > Apache > Service Administration > Start Service に進みます。
うまくいくはずです!私のコメントがお役に立てたかどうか教えてください。
Jun Allan
ありがとうございます!
ファワズ
どうもありがとうございます。いくつかのエラーを修正する必要がありましたが、最終的にうまくいきました。非常に分かりやすいガイドでした。すでにブックマークしました。
Vassilis
同じサーバーで 2 つ以上のサイトを確立するにはどうすればよいですか (可能であれば)。
よろしくお願いします。
Krishna
本当に役立ち、完璧に機能しました。どうもありがとうございました。
ART
私はVista SP2を使用している上級初心者です。32ビットと64ビットの両方を実行していると思います。VCRunTime140.dllが見つからないというエラーで大きな問題がありました。最初にWamp 64ビットを試しましたが、次に最新のWamp 32ビットを試しました。次に、VCRunTime140.dllがWindows\System32フォルダにインストールされていることを確認し、更新されたFirefoxがPrograms(86)フォルダにあることを確認しました。それでも*.dllが見つからないというエラーが発生しました。その後、古いWamp 32ビットを試しました。問題は解決しました。
私が犯したもう2つの間違いは、WordPressフォルダを解凍せずにコピーしたことです。その後、コピーした場所を削除し、正しく解凍してからコピーしました。しかし、Wamp\wwwではなくWampにコピーしました。
2番目の間違った場所から削除した後、Wamp\www にコピーしたら、その後うまく動作しました。
初心者のエラーをいくつか指摘して、他の人の頭痛を防ぐのに少しでも役立つことを願っています。
Wampバージョン2.5が必要です
最近、WampとGoogle Mapsのバージョンまたは設定が変更されました。Vista SP2では最新のWampを実行できません。バージョン2.5、特にMYSQL 5.6.XX(xx=17が見つかりましたが、xx=26が利用可能だと言う人もいます)を使用してください。
これらの指示を本当にありがとうございます!! 他の指示リストは非常に難しく、あまり役に立ちませんでした。
Vianney kirumira
皆さん、本当にありがとうございます。おかげで一日が明るくなりました!少なくとも
アイリス・インディア
素晴らしい!ステップバイステップの説明、ありがとうございます
Sid
おそらく私が愚かなだけかもしれませんが、ウェブサイトのプロジェクトを再度表示して作業するにはどうすればよいですか?再度開くために、「wamp」アイコンを選択し、ダッシュボードが開いてプロジェクトフォルダが見えました。それを開くためにダブルクリックしましたが、私のサイトの代わりに「エラー、ページが見つかりません」というページが表示されました。wampアイコンを選択してもWordPressのダッシュボードが見えませんでしたし、WordPressを開くオプションもありませんでした。何かアドバイスをいただけますか?ありがとうございます。
マイケル
ブラウザに localhost/site-name と入力します。管理画面を表示するには localhost/sitename/wp-admin と入力します。
ニコ・ジョンソン
phpMyAdminをクリックすると、「サイトにアクセスできません」と表示されます。何が問題でしょうか?
Sid
ありがとうと言いたいです!このようなことをしたのは初めてですが、あなたのステップは非常に役立ち、わかりやすかったです。
NOURI
WAMPをインストールしようとすると、エラーメッセージが表示されます
JP
指示に従いましたが、ブラウザを開こうとすると次のようになります。
http://localhost/mysite/
404ファイルが見つかりませんというエラーが出ます。何が原因か何かヒントはありますか?よろしくお願いします。
WPBeginnerサポート
WAMPのWebフォルダにmysiteディレクトリが見つかりません。
管理者
kittyket
そして、その後どうすればいいのですか?
WPBeginnerサポート
それによります。ユーザーがhtdocsまたはwwwディレクトリにWordPressをインストールした可能性があります。または、mysiteフォルダを別の場所に作成し、WAMPがwwwディレクトリで見つけられない可能性があります。
Maya
Wampserverのインストールに少し苦労しましたが、最終的にはすべてスムーズに進みました。ステップバイステップの説明に感謝します。
WPBeginnerサポート
お役に立てて嬉しいです。
管理者
プリ・シャンカー・ドビ
WAMPサーバーを使用してWordPressでPHPテンプレートを開く方法
Gold
どうもありがとうございました!!!! あなたは素晴らしいです。このチュートリアルは非常に非常に役立ちました。すべてが完璧に機能しました。もう一度ありがとう!
veena
wp_config ファイルの後、突然以下のエラーが表示されます。
データベース接続エラー
データベースを作成し、mysql、apache、php はすべて動作していますが、この解決策をどのように見つけられますか?
スージー
パスワードを使用していなかったため、同じエラーが発生していました。また、前のページでMySQLパスワードを尋ねられた際に「password」という単語を削除するのを忘れていました!
Erling Bergan
指示に従い、すべて順調に進んでいるように見えました。Wampserverアイコンをクリックし、次にphpmyadminをクリックしました。ブラウザウィンドウが開きますが、phpMyAdminは表示されません。ウェブページは空白です。何が間違っている可能性があるか、ヒントをいただけますか?
スージー
私も同じような問題を抱えていました。これには非常に多くの原因が考えられます。すべての指示、特に視覚的なダウンロードやSkype、ポート80の問題をすべて実行しましたか?アイコンが緑になっても機能しなかったので、アンインストールして、PCには64ビットが搭載されていますが、32ビットバージョンを使用しました。その後、機能しました!
ジミー・カラゴ
本当にありがとう、迷っていましたが、これでとても助かりました
soheib
ありがとうございます、本当に助かりました!!!!!!!!
Mxolisi Maphosa
どうもありがとうございました、これは私をとても助けてくれました。
ana
素晴らしいチュートリアルです!本当に助かりました。フォローさせていただきます。
Jeremy
こんにちは、ローカルマシンにAcquia Dev Desktop(Drupal)のインスタンスがある場合はどうなりますか?これをインストールしても問題ありませんか?
ありがとう
Paul Gomez
こんにちは、現在 WAMPサーバーを設定しようとしていますが、4つのバージョンが見えます。32ビット用が2つ、64ビット用が2つです。どちらのバージョンを選べばよいですか?2つのバージョンの違いがよくわかりません。Apache、PHP、MySQLのバージョンは異なりますが、確信が持てません。
WPBeginnerサポート
基本的に同じです。ほとんどの最新コンピューターは64ビットアーキテクチャを採用しています。古いマシンを使用している場合は32ビット版を試してください。それ以外の場合は64ビット版を試してください。
管理者
Paul Gomez
理解しましたが、それは私の質問ではありませんでした。元のメッセージを読んでください。
ジェイソン
これは、プロセッサが処理できるデータ型のサイズと、レジスタに保持できるメモリのアドレスのサイズに関連しています。64ビットアプリケーションは、指数関数的に多くのそれらのアドレスを利用できるため、より多くのRAMを利用できますが、独自の「ビッグデータ」タイプのアプリケーションを作成している場合や、追加のメモリを必要とするプラグインを使用している場合を除き、ほとんど完全に無関係です。どちらを選んでも違いはわかりませんので、どちらかを選んでください。
フィル
これについて何か回答はありますか?私も同じ質問をしています。64ビットが必要なことはわかっていますが、どのPHPバージョンを選択すべきですか?
HV
2つの64ビットインストールでは、ソフトウェアのバージョンが異なります。
一方には Apache : 2.4.17 MySQL : 5.7.9 PHP : 5.6.16
もう一方には Apache : 2.4.9 MySQL : 5.6.17 PHP : 5.5.12
2つの32ビットバージョンは似ています
開発環境に特定のバージョンの Apache、PHP、または MySQL が必要な場合に備えて、オプションが提供されています。
Prasad Sagare
phpmyadminをクリックするとエラーが表示されます。
IIS 8.5 詳細エラー - 404 見つかりません。
助けてください。。
デビッド
phpmyadminをクリックすると、同じ404エラーページが表示されます。何か解決策はありますか?このコンピューターにはSkypeはインストールされていません。
Luc
数回の失敗の後、この指示はうまくいきました!ありがとう。
dicegeorge
ありがとうございます。
問題なく動作しました。
ずっとこれをやりたかったんです!
マイケル
データベースを最初にセットアップする必要があるのか、それとも現在のライブバックアップをインポートしてローカルで作業できるのか、私にははっきりしません。
既存のWordPressブログをローカルハードディスクにインポートし、インポートプロセスでテーブルとデータベースがすべて作成されることを期待していました。
ありがとう
Ron
ありがとうございます。この素晴らしい情報ページは本当に助かりました!!!
Prashant Menase
簡単な手順をありがとうございます!!! とても助かりました!これからも追加してください……。