これまで、Windowsと Macに WordPressをインストールする方法をご紹介してきました。しかし、最近あるユーザーから、同じローカルWordPressインストールを職場と自宅の両方で使用できないかという質問がありました。この投稿では、XAMPPを使ってUSBスティックにWordPressをインストールする方法を紹介します。
XAMPPはApache Webサーバー、PHP、MySQL、phpMyAdminを含むソフトウェアパッケージです。Windows、Linux、Mac OSにインストールすることができます。ここではWindows PCに接続したUSBドライブにインストールする方法を紹介しますが、インストール方法はどこにインストールしてもほとんど同じです。
まず最初にXAMPP liteをダウンロードします。XAMPPのダウンロードページに行き、「More downloads」をクリックしてください。
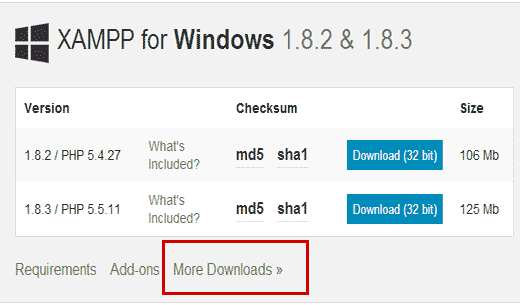
sourceforgeのサイトにリダイレクトされますので、まずXAMPP for Windowsをクリックし、最新版をクリックしてください。
次の画面では、そのバージョンで利用可能なファイルのリストが表示されます。下にスクロールして、.exe形式のポータブルバージョンを見つけてください。ファイル名をクリックしてダウンロードを開始します。
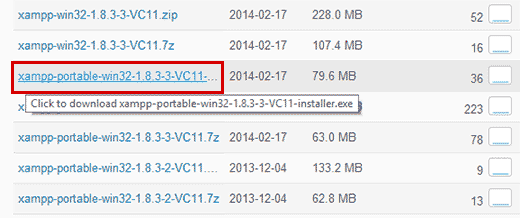
XAMPPポータブルファイルをダウンロードしたら、ファイルをダブルクリックしてインストーラを実行してください。インストール中、XAMPPをインストールする場所の選択を求められます。フォルダーアイコンをクリックし、USBドライブを選択してください。
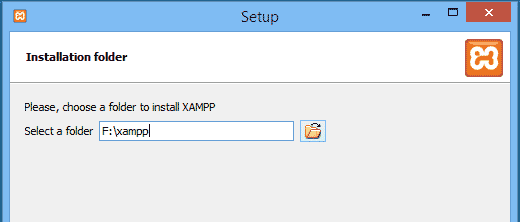
次へ」をクリックしてインストールを続行します。インストーラがXAMPPをUSBドライブにインストールします。インストールが終わったら、USBドライブに移動し、XAMPPフォルダを開いてください。
XAMPPを起動するには、USBドライブからxampp-control.exeを実行する必要があります。すると、以下のようなXAMPPコントロールセンターが表示されます:
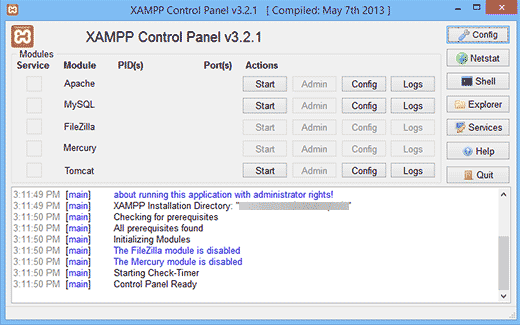
Apache WebサーバーとMySQLの横にあるスタートボタンをクリックして起動する必要がある。Windowsファイアウォールによってプロンプトが表示されるので、両方のアプリケーションへのアクセスを許可する必要があります。
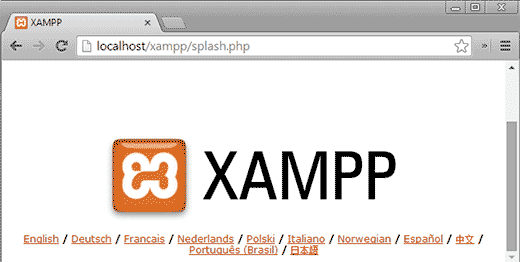
ウェブブラウザを開き、アドレスバーに「http://localhost/」と入力してください。XAMPPのスプラッシュ画面が表示されます。これでXAMPPのUSBドライブへのインストールは成功です。
USBメモリにWordPressをインストールする
ここまでで、MySQLとPHPを備えたApache WebサーバーをUSBメモリーにインストールすることに成功した。次のステップはWordPress自体のインストールです。USBメモリへのWordPressのインストールは、WindowsやMacコンピューターへのインストールと大差ありません。
まずUSBドライブを開き、XAMPPインストールディレクトリのhtdocsフォルダに移動します。htdocsに新規フォルダーを作成します。このフォルダがあなたのローカルWordPressサイトになります。好きな名前をつけてください。このチュートリアルではsite1とします。
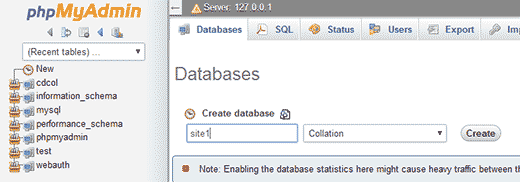
WordPressの実行にはMySQLデータベースが必要なので、インストール前にデータベースを作成する必要がある。データベースを作成するには、ウェブブラウザーを開き、アドレスバーに「http://localhost/phpmyadmin」と入力します。ウェブベースのデータベース管理ソフトウェアであるphpMyAdminが開きます。上部メニューバーのデータベースをクリックし、作成ボタンを押す前にデータベースの名前を入力します。
WordPressが必要だ。WordPress.orgにアクセスし、新しいWordPressをコンピューターにダウンロードする。ダウンロードした.zipファイルをデスクトップに解凍し、開きます。
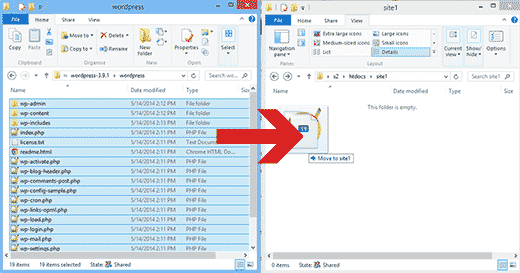
WordPressフォルダーのコンテンツをコピー&ペーストし、USBドライブの/htdocs/site1フォルダーに貼り付けます。
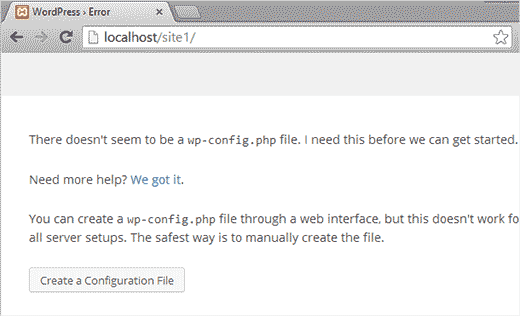
WordPressファイルをコピーしたら、ウェブブラウザでhttp://localhost/site1、サイトにアクセスしてWordPressインストールを実行できます。
WordPressは、WordPressの設定ファイルが見つからなかったことを通知しますので、設定ファイルを作成するボタンをクリックして作成する必要があります。
次の画面で、先ほど作成したデータベース名をプロバイダーに入力する。ユーザー名欄にはrootと入力し、パスワード欄は空欄のままにしておく。送信ボタンを押して次に進む。
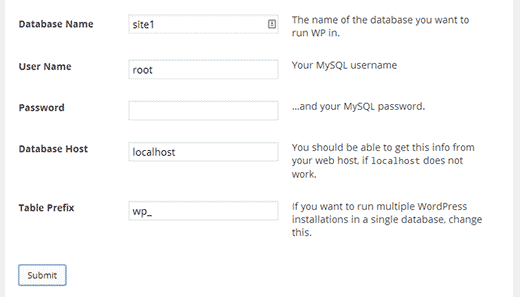
WordPressがデータベースへの接続を試みます。成功すると、成功のメッセージが表示されます。インストールの実行ボタンをクリックして次に進みます。
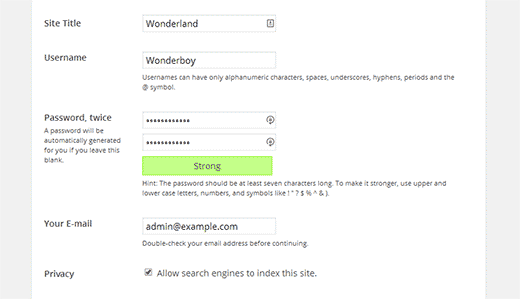
サイト情報を入力し、管理者ユーザー名とパスワードを作成します。この管理者ユーザー名とパスワードはWordPressの管理エリアにログインするために使用されます。また、メールアドレスを入力する必要があります。プライバシーの項目では、検索エンジンにこのサイトをインデックスさせることを許可するというボックスのチェックを外してください。完了したら、一番下のインストールボタンを押してください。
これでWordPressのインストールはすべて完了です。これでサイトにログインして、好きなことをすることができる。同じUSBに別のWordPressサイトを作成するには、htdocsディレクトリに別のフォルダーを作成し、このプロセスを繰り返すだけです。
この投稿が、USBメモリにWordPressをインストールするのにお役に立てば幸いです。これで、このUSBメモリを持ち運ぶことができます。なお、USBメモリはWindowsコンピューターでのみ動作します。また、WordPress Playgroundを使ってブラウザーでWordPressを使う方法や、ドラッグ&ドロップでWordPressを作成できるページビルダーをご紹介しています。
If you liked this article, then please subscribe to our YouTube Channel for WordPress video tutorials. You can also find us on Twitter and Facebook.


martine
Hi,
Installed all in good order. When trying to login into wordpress I get the following error : One or more database tables are unavailable. The database may need to be repaired.
Clicking on the link for repair I get the below and I have to delete the last line referring to the repair. If I do this I get another pop up saying I need to add it again and try again. It is a continious circle with no end.
How to solve this?
The wp_users table is okay.
The wp_usermeta table is okay.
The wp_posts table is okay.
The wp_comments table is okay.
The wp_links table is okay.
The wp_options table is okay.
The wp_postmeta table is okay.
The wp_terms table is okay.
The wp_term_taxonomy table is okay.
The wp_term_relationships table is okay.
The wp_termmeta table is okay.
The wp_commentmeta table is okay.
Repairs complete. Please remove the following line from wp-config.php to prevent this page from being used by unauthorized users.
define(‘WP_ALLOW_REPAIR’, true);
WPBeginner Support
Hi Martine,
If this is a fresh WordPress install and you don’t have any content, then you may want to resinatll WordPress. If it does have content, then you may need to repair tables from PhpMyAdmin.
Admin
rajendra upadhyaya
sir
is there any way to install wordpress on usb with WAMP and how much memory it uses
Miran Potocnik
Hello,
We use WP on server. If I install Apache web server with MySQL and PHP on my USB stick and copy the contents of wordpress folder from server and paste it in the /htdocs/site1 folder on my USB drive. Does it mean that the web pages will be the same? How I can synchronize them?for example: If I change something WP on server side that will be changed on local side, when network be up.
Armando
I used (Microsoft) DISKPART in order to change my USB stick into a bootable disk (FAT32) to be used with XAMPP. Before, it would not install.
You may want to add this tip to the tutorials.
Thanks for your tutorial and best regards!
Jay
I’m not sure these steps still work – I have done the process before (year or so ago) and it worked. Now doing it again on a new drive, and with all updated components, step two of the wordpress installation is always (almost) blank. So something is going wrong. I have tried twice and same thing.
Any tips, based on updated components?
Joshua Harman
Is there any way you’d e willing to do this tutorial for Mac? I’ve been wracking my brain for hours trying to get it to work but don’t have a ton of experience
brainfreeze
hi joshua. i am wondering if you have found a way for Mac? if yes, please share. thanks.
Mahendra
can we run php file in another computer which does not have xampp using usb sticks
Amonza
I am not quite exactly sure what you are asking, but if you have xampp installed on a usb stick as described you should be able to take that stick to any computer and run the apache server and be able to serve php pages from the htdocs folder on the pen drive.
If you are running an IDE that needs the path to php.exe you could point it to the php folder on the pen drive.
Lisa
For those who have done this, what size USB drive do you suggest?
Ahmad Fahrurroji
Good idea, I’ve never used this option installing xampp on usb stick but It’s good to try. Thanks.
WPBeginner Staff
you can transfer your site using BackupBuddy (here is a tutorial) or using Duplicator.
Ian Delemare
I like the idea of having a portable version of WordPress and being able to develop a site in many locations. But what is the procedure to transfer a developed site (including images, posts plugins etc) from a USB stick to the web?
Bill Gibson
I had put a multisite version of WP on a USB stick a couple of years ago. I added a portable version of Firefox, and included the Mobile Barcoder plugin. The multiple sites could be used for classes, projects or presentations, and it was a nice organizational tool. Add text, links & images, and embed for videos or larger files. As long as you put your USB stick in an Internet connected device, you had a great presentation tool. The “Mobile Barcoder” app created QR codes, on the fly, so I could pull up a site from the Flash drive, and then generate a QR code to share links with the audience.
WPBeginner Staff
Yes there is, but we are not sure whether it works as a portable app or not
Zeeshan Asif
What about Mac ???
WPBeginner Staff
Unfortunately MAMP the mac alternative to XAMPP can not be run from an external drive. There is an alternative called AMPPS but we have not tried it.
DigitizedSociety
XAMPP has a mac version.
James B.
Great post. I’ve been using “Instant WP” for my local and USB stick installs of WordPress…but I may try XAMPP out! Thanks for the great work.