
WordPressのフォーム入力をサイトのフロントエンドに表示することで、よりインタラクティブで魅力的なサイトにすることができます。
この方法によって、訪問者が見ることのできる場所に重要な情報を表示することができます。例えば、次のような使い方ができます:
肯定的な評価を強調する、
🗂️ ディレクトリを作成する、
🗓️ イベントカレンダーなどを表示!
これを実現する方法はいくつかありますが、Formidable FormsとWPFormsが最も簡単な方法であることがわかりました。この投稿では WordPress フォームエントリーをサイトに表示するための 2 つの方法を説明します。

なぜWordPressのフォーム入力をフロントエンドに表示するのか?
フォームはユーザーと連絡を取り合ったり、フィードバックや提案を得たり、ユーザーの問題を解決するのに役立ちます。WordPress サイトの訪問者にフォームを表示することは、特定の状況において役に立ちます。
例えば、ユーザーがオンラインフォームから送信した体験談や製品レビューを表示することができます。このようにして、社会的証明を活用してブランドの信頼を築き、コンバージョンを高めることができます。
また、フォームに入力された内容を表示してビジネスディレクトリを作成したり、ユーザーが送信したイベントをカレンダーに表示したり、統計情報を表示したり、オンラインフォームで収集したその他の重要な情報をサイトに表示することもできます。 あなたのビジネスに信頼性を加えながら、製品やサービスの貴重な社会的証明を提供する素晴らしい方法です。
しかし、WordPress サイトでユーザーがフォームを送信した場合、その入力内容は初期設定では非公開になります。フォームの入力内容を表示できるのは、管理者と権限を持つユーザーだけです。
以下のセクションでは Formidable Forms と WPForms を使って WordPress サイトのフロントエンドにフォームエントリーを表示する方法を紹介します。下のリンクをクリックするとお好きなセクションにジャンプできます:
準備はいいかい?始めよう
方法 1: Formidable Forms を使って WordPress のフォーム入力を表示する
WordPress でフォーム入力を表示する最も簡単な方法はFormidable Forms を使うことです。Formidable Forms は人気のWordPress お問い合わせフォームプラグインで、カスタマイザー機能をすべて備えたオールインワンのフォームビルダーです。
すべての種類のフォーム、特にイベントカレンダー、ディレクトリ、電卓のような高度なフォームを作成することができます。
ℹ️ Formidable Formsを徹底的にテストし、そのすべての機能について学びました。Formidable Formsをおすすめする理由は、Formidable Formsのレビューをご覧ください。

まず始めに、あなたのサイトに Formidable Forms プラグインをインストールして有効化しましょう。このチュートリアルではFormidable Forms Pro を使います。Formidable FormsPro には ‘Visual Views’ アドオンが含まれているからです。
WordPressプラグインのインストール方法については、こちらをご覧ください。
有効化した後、Formidable ” Formsにアクセスし、上部にある「+新規追加」ボタンをクリックします。

その後、お問い合わせフォーム、ユーザー登録フォーム、アンケートなど、フォームの種類を選択するポップアップが外観に表示されます。
お好きなフォームタイプを選択してください。このチュートリアルでは、ユーザーの声を集めるためのお問い合わせフォームを作成します。

次に、フォーム名と説明を入力する必要があります。
完了したら、「作成」ボタンをクリックするだけです。

フォームビルダーを使ってフォームをカスタマイズすることができます。
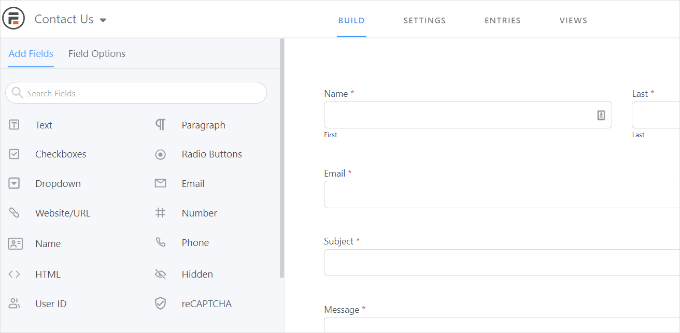
Formidableはドラッグ&ドロップで簡単にフォームを作成できます。左側のオプションからフォームに追加したいフォームフィールドを選択し、フォームテンプレートに配置するだけです。
カスタマイザー後、サイト上の任意の場所にフォームを埋め込むことができます。
プラグインにはフォームを追加するための複数のオプションがあります。最も簡単な方法は、フォームビルダー上部の「埋め込み」ボタンをクリックし、既存のページを選択するか、新規ページを作成してフォームを追加することです。
あるいは、WordPressのコンテンツエディターで「Formidable Forms」ブロックやショートコードブロックを使ってフォームを埋め込むこともできます。
このチュートリアルでは、「新規ページを作成」オプションを選択します。

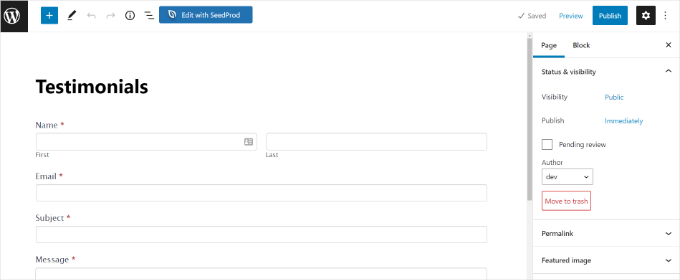
コンテンツエディター内に入ると、Formidable Forms フォーム専用のページが作成されていることがわかります。
本番させる前に、「プレビュー」ボタンをクリックしてプレビューしておくとよいだろう。
外観に満足したら、ページを公開してください。
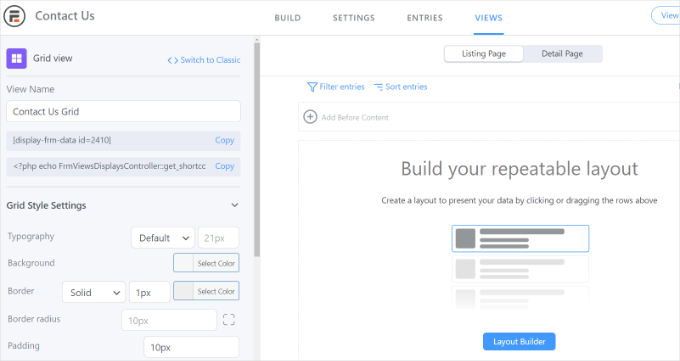
フォームが公開され、エントリーを受け取るようになったら、Formidable Forms の ‘Visual Views’ アドオンをインストールして有効化してください。
WordPressのダッシュボードからFormidable ” Add-Onsにアクセスします。次に、「Visual Views」アドオンまでスクロールダウンし、「インストール」ボタンをクリックします。

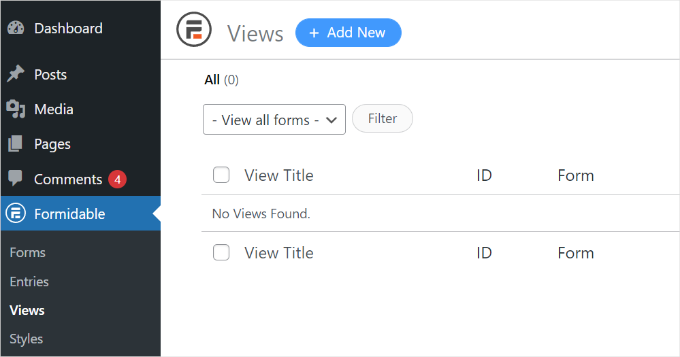
アドオンを有効化したら、WordPressダッシュボードからFormidable ” 表示に移動できます。
次に、一番上の「+新規追加」ボタンをクリックします。
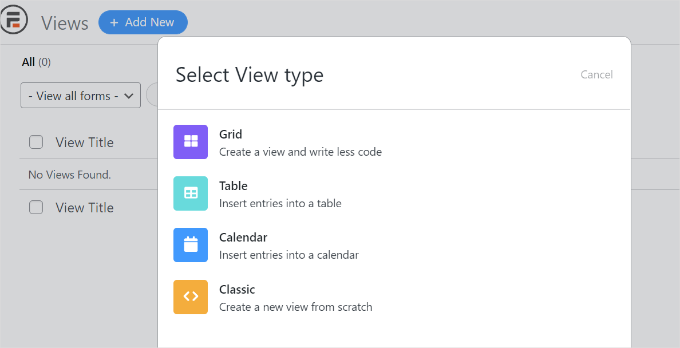
ポップアップ・ウィンドウが外観表示されます。ここで、グリッド、テーブル、カレンダー、クラシック表示などの表示タイプを選択する必要があります。
このチュートリアルでは、フォームのエントリーを表示するために「グリッド」表示を選択します。
次のステップは、表示用のデータソースを選択することです。
フォームからのエントリーを使用する」ドロップダウンメニューをクリックして、フォームを選択してください。表示名を入力することもできます。
データソースを選択したら、「表示作成」ボタンをクリックします。

これで Formidable Forms のビュービルダーが起動します。
まずは「レイアウト・ビルダー」ボタンをクリックしてください。
次に、フォーム・エントリーを表示するレイアウトを選択する必要があります。
上部にある設定オプションからレイアウトを選択するだけです。フォームのエントリーを表示するために複数のレイアウトを追加することができます。
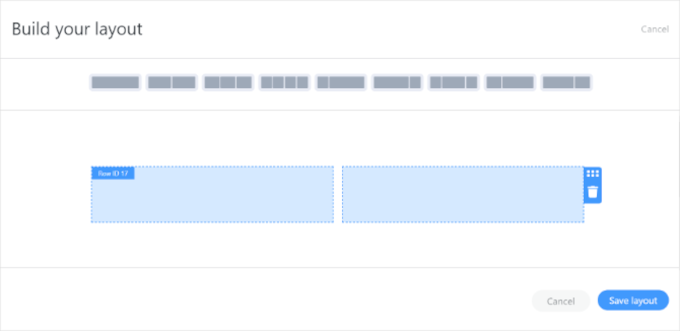
レイアウトを選択したら、「レイアウトを保存」ボタンをクリックします。
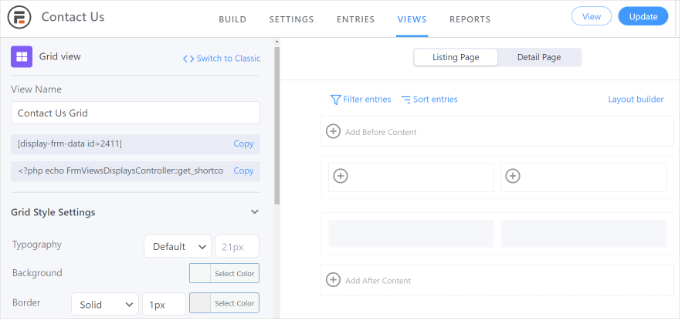
ボタンをクリックして表示ビルダーにコンテンツを追加することができます。フォームエントリーのレイアウトをカスタマイズしたり、フォームエントリーの前後にコンテンツを追加するオプションがあります。
プラグインは、左側の「Grid Style Settings」パネルで、タイポグラフィ、背景色、枠線などを変更するオプションも提供している。
また、’表示名’フィールドの下にショートコードが表示されますが、これはサイト上でフォームエントリーを表示する際に必要になります。
グリッド・スタイル設定」パネルには、さらに高度な設定があります。高度な設定では、エントリー数やページサイズなどを制限することができます。
表示のカスタマイザーが完了したら、上部にある「更新」ボタンを忘れずにクリックしてください。
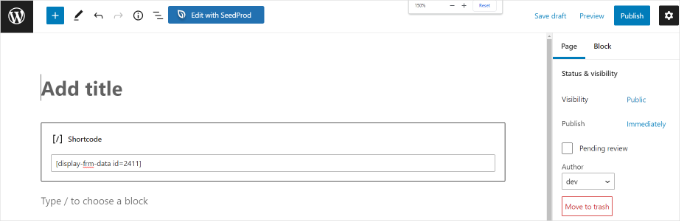
次に、WordPressサイトにフォームエントリーを表示する必要があります。そのためには、’表示名’の下に与えられたショートコードをコピーしてください。
ショートコードは次のようになる:
1 | [display-frm-data id=2410] |
ショートコードをクリップボードにコピーしたら、フォームエントリーを表示したい投稿やページに移動できます。コンテンツエディターで、’ショートコード’ブロックを追加するだけです。

先ほどコピーしたショートコードをショートコード・ブロックに入力する。
その後、ページを公開する前にプレビューしたほうがいいかもしれない。
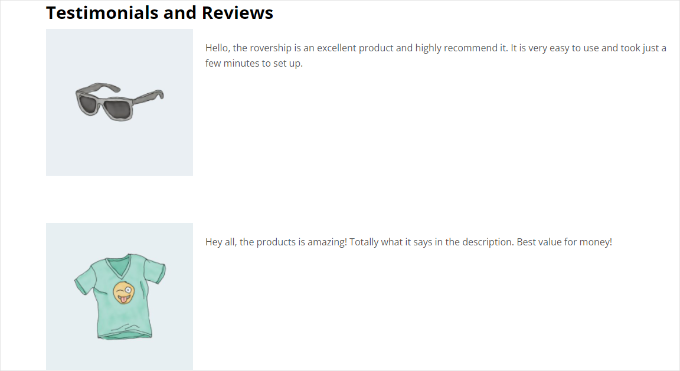
これで、あなたのサイトにアクセスして、フォーム入力の動作を確認することができます。
デモサイトではこんな感じです:
方法 2: WPForms を使って WordPress のフォーム入力を表示する
WordPressサイトのフロントエンドにフォーム入力を表示するもう一つの方法はWPFormsを使うことです。ただし、この方法はコードの編集が必須なので、コーディングの知識がある上級ユーザーにお勧めします。
WPFormsはWordPressのための最高のお問い合わせフォームプラグインで、AIを搭載したフォームビルダーとドラッグアンドドロップエディターを使って様々なタイプのフォームを作成することができます。
ℹ️ WPBeginnerではWPFormsを使ってお問い合わせフォームやユーザーアンケートなど様々なフォームを作成しています。詳しくはWPFormsのレビューをご覧ください!
まず、WPFormsプラグインをインストールして有効化する必要があります。詳しくはWordPressプラグインのインストール方法をご覧ください。
重要: WordPressダッシュボードでフォームエントリを確認したい場合は、WPForms Proバージョンが必要です。無料で使用できるWPForms Liteバージョンもあり、こちらはすべてのフォームエントリのメール通知を送信します。
有効化した後、WPFormsを使ってオンラインフォームの作成を開始できます。WordPressでお問い合わせフォームを作成する方法については、ステップバイステップのガイドをご覧ください。
フォーム入力ができるようになったら、テーマのfunctions.phpファイルに以下のコードを入力する必要があります。
しかし、そうすることで、少しでもミスをするとサイトが壊れてしまう可能性があることに注意してください。
WPCodeはWordPressに最適なコードスニペットプラグインです。私たちのパートナーブランドのいくつかは、カスタム・コード・スニペットを追加・管理するためにこのプラグインを使用しています。WPCodeの詳細については、WPCodeのレビューをご覧ください。
その後、コードを入力しますが、詳しくはWordPressでカスタマイザーコードを簡単に追加する方法をご覧ください。
1 2 3 4 5 6 7 8 9 10 11 12 13 14 15 16 17 18 19 20 21 22 23 24 25 26 27 28 29 30 31 32 33 34 35 36 37 38 39 40 41 42 43 44 45 46 47 48 49 50 51 52 53 54 55 56 57 58 59 60 61 62 63 64 65 66 67 68 69 70 71 72 73 74 75 76 77 78 79 80 81 82 83 84 85 86 87 88 89 90 91 92 93 94 95 96 97 98 99 100 101 102 103 104 105 106 107 108 109 110 111 112 113 114 115 116 117 118 119 120 121 122 123 124 125 126 127 128 129 130 131 132 133 134 135 136 137 138 139 140 141 142 143 144 145 146 147 148 149 150 151 152 153 154 155 156 157 158 159 160 161 162 163 164 165 166 167 168 169 170 171 | /** * Custom shortcode to display WPForms form entries in table view. * * Basic usage: [wpforms_entries_table id="FORMID"]. * * Possible shortcode attributes: * id (required) Form ID of which to show entries. * user User ID, or "current" to default to current logged in user. * fields Comma separated list of form field IDs. * number Number of entries to show, defaults to 30. * * @link https://wpforms.com/developers/how-to-display-form-entries/ * * Realtime counts could be delayed due to any caching setup on the site * * @param array $atts Shortcode attributes. * * @return string */ function wpf_entries_table( $atts ) { // Pull ID shortcode attributes. $atts = shortcode_atts( [ 'id' => '', 'user' => '', 'fields' => '', 'number' => '', 'type' => 'all' // all, unread, read, or starred. ], $atts ); // Check for an ID attribute (required) and that WPForms is in fact // installed and activated. if ( empty( $atts['id'] ) || ! function_exists( 'wpforms' ) ) { return; } // Get the form, from the ID provided in the shortcode. $form = wpforms()->form->get( absint( $atts['id'] ) ); // If the form doesn't exists, abort. if ( empty( $form ) ) { return; } // Pull and format the form data out of the form object. $form_data = ! empty( $form->post_content ) ? wpforms_decode( $form->post_content ) : ''; // Check to see if we are showing all allowed fields, or only specific ones. $form_field_ids = isset( $atts['fields'] ) && $atts['fields'] !== '' ? explode( ',', str_replace( ' ', '', $atts['fields'] ) ) : []; // Setup the form fields. if ( empty( $form_field_ids ) ) { $form_fields = $form_data['fields']; } else { $form_fields = []; foreach ( $form_field_ids as $field_id ) { if ( isset( $form_data['fields'][ $field_id ] ) ) { $form_fields[ $field_id ] = $form_data['fields'][ $field_id ]; } } } if ( empty( $form_fields ) ) { return; } // Here we define what the types of form fields we do NOT want to include, // instead they should be ignored entirely. $form_fields_disallow = apply_filters( 'wpforms_frontend_entries_table_disallow', [ 'divider', 'html', 'pagebreak', 'captcha' ] ); // Loop through all form fields and remove any field types not allowed. foreach ( $form_fields as $field_id => $form_field ) { if ( in_array( $form_field['type'], $form_fields_disallow, true ) ) { unset( $form_fields[ $field_id ] ); } } $entries_args = [ 'form_id' => absint( $atts['id'] ), ]; // Narrow entries by user if user_id shortcode attribute was used. if ( ! empty( $atts['user'] ) ) { if ( $atts['user'] === 'current' && is_user_logged_in() ) { $entries_args['user_id'] = get_current_user_id(); } else { $entries_args['user_id'] = absint( $atts['user'] ); } } // Number of entries to show. If empty, defaults to 30. if ( ! empty( $atts['number'] ) ) { $entries_args['number'] = absint( $atts['number'] ); } // Filter the type of entries all, unread, read, or starred if ( $atts['type'] === 'unread' ) { $entries_args['viewed'] = '0'; } elseif( $atts['type'] === 'read' ) { $entries_args['viewed'] = '1'; } elseif ( $atts['type'] === 'starred' ) { $entries_args['starred'] = '1'; } // Get all entries for the form, according to arguments defined. // There are many options available to query entries. To see more, check out // the get_entries() function inside class-entry.php (https://a.cl.ly/bLuGnkGx). $entries = wpforms()->entry->get_entries( $entries_args ); if ( empty( $entries ) ) { return '<p>No entries found.</p>'; } ob_start(); echo '<table class="wpforms-frontend-entries">'; echo '<thead><tr>'; // Loop through the form data so we can output form field names in // the table header. foreach ( $form_fields as $form_field ) { // Output the form field name/label. echo '<th>'; echo esc_html( sanitize_text_field( $form_field['label'] ) ); echo '</th>'; } echo '</tr></thead>'; echo '<tbody>'; // Now, loop through all the form entries. foreach ( $entries as $entry ) { echo '<tr>'; // Entry field values are in JSON, so we need to decode. $entry_fields = json_decode( $entry->fields, true ); foreach ( $form_fields as $form_field ) { echo '<td>'; foreach ( $entry_fields as $entry_field ) { if ( absint( $entry_field['id'] ) === absint( $form_field['id'] ) ) { echo apply_filters( 'wpforms_html_field_value', wp_strip_all_tags( $entry_field['value'] ), $entry_field, $form_data, 'entry-frontend-table' ); break; } } echo '</td>'; } echo '</tr>'; } echo '</tbody>'; echo '</table>'; $output = ob_get_clean(); return $output;}add_shortcode( 'wpforms_entries_table', 'wpf_entries_table' ); |
無料のWPCodeプラグインを使用してサイトにコードを追加したら、フォームのエントリーを表示するために、以下のショートコードを任意のページや投稿に入力する必要があります。
このショートコードをクリップボードにコピーするだけです:
1 | [wpforms_entries_table id="FORMID"] |
FORMIDをフォームのIDに置き換えるだけです。
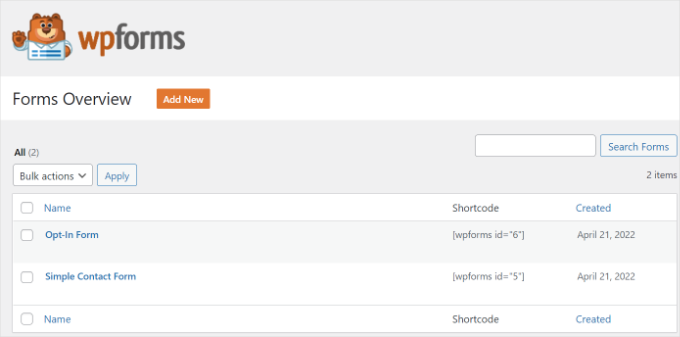
フォーム ID はWPForms ” All Formsで Shortcode カラムを見ればわかります。
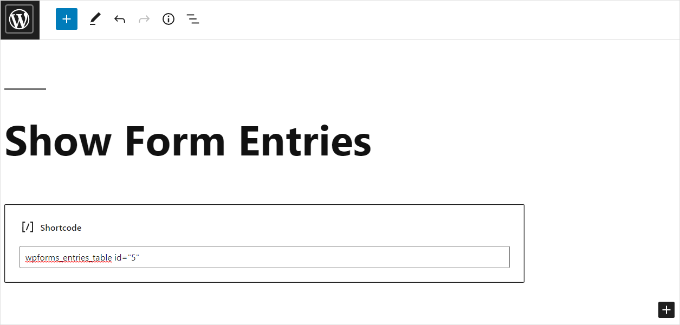
ショートコードを追加するには、新規ページを作成するか、既存のページを編集するだけです。
次に、「ショートコード」ブロックを追加する。
ブロックを追加したら、ショートコードを入力するだけです。
WordPressページをプレビューし、上部にある「公開する」ボタンをクリックします。
それがすべてだ!
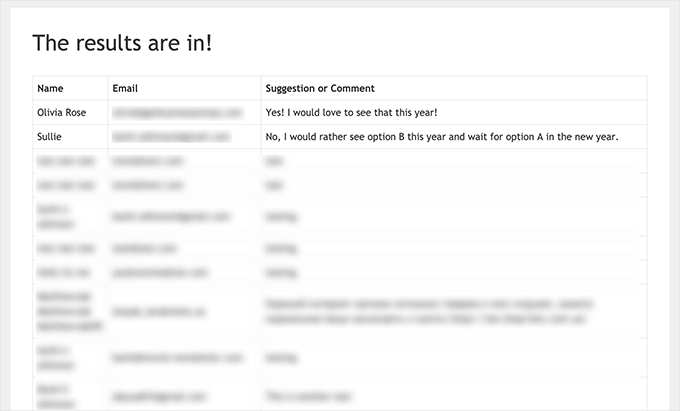
フロントエンドでのフォーム入力のプレビューはこんな感じです:
必要に応じて、カスタムCSSスタイルを使用して表示をさらにカスタマイズすることができます。
ボーナスのヒントGDPR対応フォームの作成
一般データ保護規則(GDPR)は、2018年5月25日にスタートした欧州連合(EU)の法律である。これは、EUの人々が自分の個人データをよりコントロールできるようにし、企業がこのデータを適切に取り扱えるようにすることをすべて目的としている。
WordPressサイトをお持ちの場合、特にフォームを通じてユーザー情報を収集していることでしょう。あなたのフォームがGDPRのルールに従うことを確認するために、あなたは?
- 明確な同意を得る:ユーザーに、個人情報を保存・利用しても良いかどうかを尋ねる。
- アクセスリクエスト:ユーザーにユーザーに関する個人情報を閲覧させます。
- 削除リクエスト:ユーザーが自分のデータをサイトから削除できるようにします。

詳しくは、WordPressでGDPRに準拠したフォームを作成する方法についてのガイドをご覧ください。すべての疑問にわかりやすくお答えします。
動画チュートリアル
🎬 実際に見てみましょう!WordPressのフォーム入力をサイトに表示するチュートリアル動画をご覧ください:
WordPress のフォーム入力項目をサイトに表示する方法について、この投稿がお役に立てれば幸いです。オンライン注文フォームの作成方法や、フォームにクーポンコードフィールドを追加する方法についてのガイドもご覧ください。
If you liked this article, then please subscribe to our YouTube Channel for WordPress video tutorials. You can also find us on Twitter and Facebook.


 in 2024")
Melanie
I made this table for a front end page for a Wpforms form. But I’d like to add a filter where users can select date range like you see on the back end when you view entries. How can I do that?? Thanks!
WPBeginner Support
We don’t have a recommended method at the moment but should that change we will be sure to share!
Admin