
あるサイトを訪れて、「わあ、ここは有効化したんだ、私もその一員になりたい!」と思ったことはありませんか?それが、最新メンバーをアピールする力です。
WordPressサイトに最近登録されたユーザーを表示することで、コミュニティ意識を醸成し、より多くの人々の参加を促します。有効化したユーザーベースを強調することで、信頼を築き、エンゲージメントを促進します。
しかし、それにはキャッチがあります。それは、プライバシー、デザイン、シームレスな統合のバランスを取ることです。
この投稿では、WordPressで最近登録されたユーザーを表示し、参加者を増やす方法を紹介します。
")
WordPressで最近登録されたユーザーを表示する理由
会員制サイト、オンラインコース、フォーラムなど、ユーザー登録が可能なWordPressサイトを運営している場合、最近登録されたユーザーを表示したいと思うかもしれません。
これにより、社会的証明が追加され、他のメンバーがコミュニティに新しいメンバーを歓迎する機会にもなります。中小企業のサイトを運営している場合は、チームメンバーや寄稿者のフィルター可能なディレクトリを作成することもできます。
WordPressで最近登録したユーザーを表示する理由はすべてあります:
- 共有連絡先情報のリソースを作成する。
- 非営利団体のための寄付者リストを紹介しましょう。
- 最近登録された事業主のリストを強調表示する。
- 大規模で有効化したコミュニティを示すことで、フォーラムの新規登録を促します。
そこで、WordPressで最近登録したユーザーを表示する方法をご紹介します。以下のクイックリンクから、使いたい方法にすぐにジャンプできます:
準備はいいかい?始めよう
方法1.WordPressにコードを追加して、最近登録されたユーザーを表示する。
最近登録したユーザーを表示する最も簡単な方法は、WordPressにコードを追加することです。
一般的には、テーマのfunctions.phpファイルにカスタマイザーコードを追加するように言われます。
しかし、これは避けることを強くお勧めします。初心者に優しくありません。ちょっとしたミスでサイトが壊れてしまう危険性があります。
代わりに、WPCodeのようなコードスニペットプラグインを使用することをお勧めします。こうすることで、サイト上にカスタム・コード・スニペットを安全に追加・管理することができます。
WPCodeは、最高のコードスニペットプラグインで、私たちは自分のサイトで使用しています。WPCodeの詳細については、WPCodeのレビューをご覧ください。

それでは、WPCodeプラグインをインストールして有効化しましょう。ヘルプが必要な場合は、WordPressプラグインのインストール方法のガイドを参照してください。
WPCodeプラグイン(無料)を使って、カスタムコードスニペットを追加することができます。 しかし、コードスケジューリングや履歴アクセスのような追加特典が必要な場合は、WPCode Proにアップグレードすることをお勧めします!
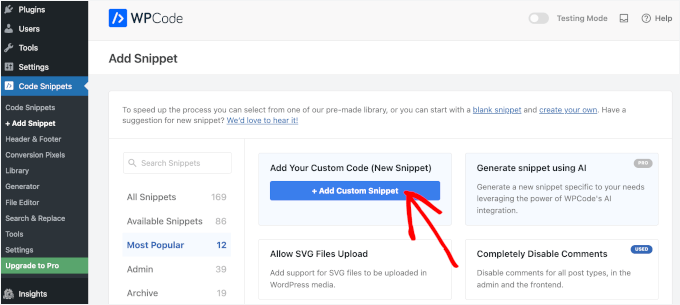
有効化したら、まずCode Snippet ” + Add Snippetに移動しよう。
次の画面で、「Add Your Custom Code (New Snippet)」にマウスオーバーし、「+ Add Custom Snippet」ボタンをクリックします。
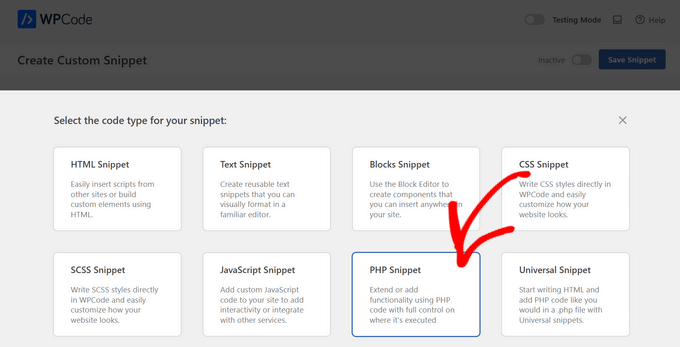
その後、WPCodeはコードタイプの選択を促します。
ここで、「PHPスニペット」をクリックする必要がある。
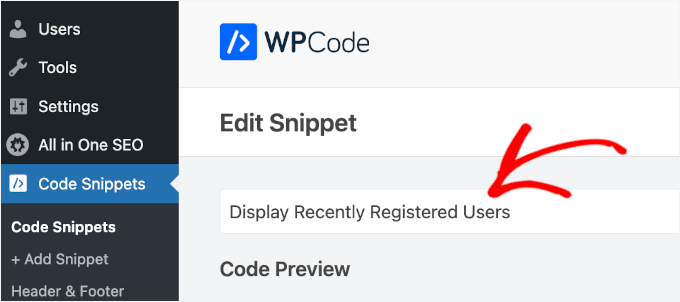
コードエディターが表示されます。
最初にすることは、カスタム・コード・スニペットに名前をつけることです。これは参考用なので、自由に名前をつけてください。本当に〜してもよいですか?
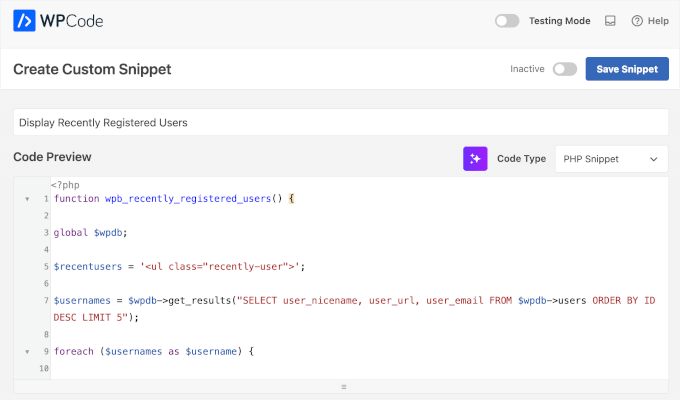
次に、次のカスタム・コード・スニペットを「コード・プレビュー」エリアに貼り付けます:
1 2 3 4 5 6 7 8 9 10 11 12 13 14 15 16 17 18 19 20 21 22 23 24 25 | function wpb_recently_registered_users() { global $wpdb;$recentusers = '<ul class="recently-user">';$usernames = $wpdb->get_results("SELECT user_nicename, user_url, user_email FROM $wpdb->users ORDER BY ID DESC LIMIT 5");foreach ($usernames as $username) {if (!$username->user_url) :$recentusers .= '<li>' .get_avatar($username->user_email, 45) .$username->user_nicename."</a></li>";else :$recentusers .= '<li>' .get_avatar($username->user_email, 45).'<a href="'.$username->user_url.'">'.$username->user_nicename."</a></li>";endif;}$recentusers .= '</ul>';return $recentusers;}add_shortcode('wpb_newusers', 'wpb_recently_registered_users'); |
こんな感じだろう:
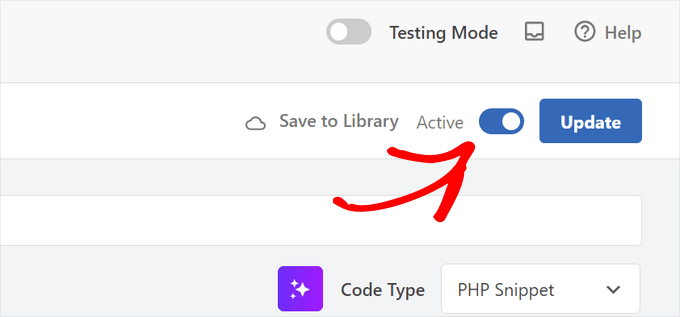
その後、「Inactive」スイッチを「Active」に切り替えることができる。
そして最後に、「スニペットを保存」ボタンをクリックするのをお忘れなく。
このコード・スニペットは、最近登録したユーザーのシンプルなリストを作成し、アバター画像とユーザー名を表示します。
投稿日やページにリストを表示するには、以下のショートコードを使います:
[wpb_newusers】。]
ショートコードをサイトに追加するには、ユーザーリストを表示したいページを開くだけです。
次に、「+」追加ブロックアイコンをクリックし、「ショートコード」を検索して選択する。

その後、上記でコピーしたショートコードをショートコードボックスに貼り付けます。
変更が完了したら、「更新」または「公開」ボタンをクリックして変更を反映させます。

投稿やウィジェットエリアにショートコードを追加することで、同じ手順を踏むことができます。
これで、最近登録したユーザーのリストを表示できます:

方法2.Formidable Formsを使って最近登録されたユーザーを表示する。
最近登録されたユーザーを表示するもう一つの方法はFormidable Formsプラグインを使うことです。
WordPressのお問い合わせフォームプラグインやユーザー登録プラグインの中でもトップクラスのプラグインです。このプラグインには高度な機能があり、ユーザープロフィールなどのユーザー送信データをサイトのフロントエンドにフォーマット、フィルター、表示することができます。
Formidable Formsのレビューで、私たちがテストしたすべての機能をご覧ください。

さらに、ウェブディレクトリや オンライン計算機など、便利なオンラインツールをすべて作成できます。また、ユーザーディレクトリの外観や機能を完全にコントロールできます。
MemberPressとの統合も可能ですので、会員制サイトに最近登録された会員のリストを簡単に表示することができます。
🚨重要です:Formidable Formsは新規ユーザーをすべて自動的に表示するわけではありません。その代わり、どのユーザーにどんな情報を表示させるかを完全にコントロールすることができます。
ディレクトリにユーザーを表示するには、区切りのフォームを作成して入力する必要があります。その方法をお見せします。
まず最初にFormidable Formsプラグインをインストールして有効化します。詳しくはWordPress プラグインのインストール方法をご覧ください。
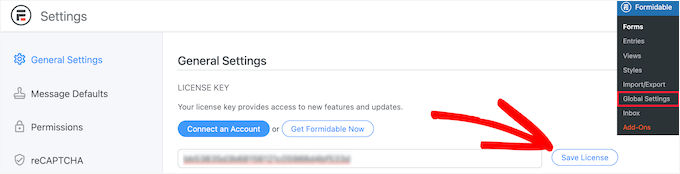
有効化した後、Formidable ” Global Settingsにアクセスしてください。
その後、「アカウントに接続」ボタンをクリックするか、ライセンスキーを手動で入力してください。この情報は、Formidable Forms サイトのお客様のアカウントの下にあります。
それが済んだら、「Save License」ボタンをクリックしてください。
次に、Formidable Directoryアドオンをインストールする必要があります。プランによっては、このアドオンがすでに有効化されている場合があります。
そうでない場合は、Formidableディレクトリのページで「Formidableディレクトリを取得する」ボタンをクリックしてください。
購入完了後、自動的にアカウントに追加されます。
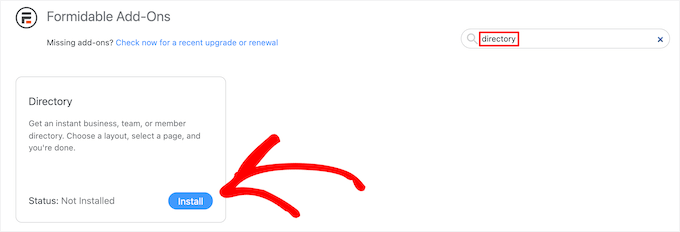
次にFormidable Forms ” Add-Onsで ‘Directory’ アドオンを探しましょう。
見つかったら、「インストール」ボタンをクリックします。
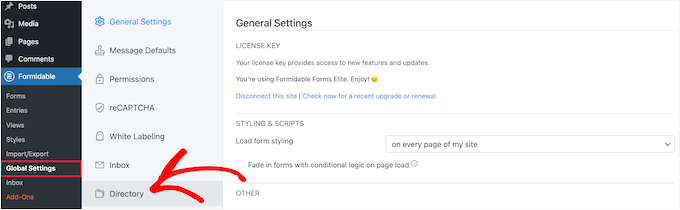
その後、Formidable ” Global Settings に移動します。
次に、「ディレクトリ」メニューオプションをクリックする。
これで自動的にユーザーディレクトリを作成するためのセットアップウィザードが開始されます。もしあなたのサイトを Formidable Forms に接続していない場合は、今すぐ接続するよう求められます。
次のステップは、「インストール&有効化」ボタンをクリックして、必要なアドオンを使用できるようにすることです。

ユーザー/メンバー」ボックスをクリックして、最近登録したユーザーを表示し、「2カラム」または「テーブルリスト」表示を選択することができます。
次に、掲載フォームとディレクトリページのページ名を入力し、「今すぐ作成」ボタンをクリックするだけです。
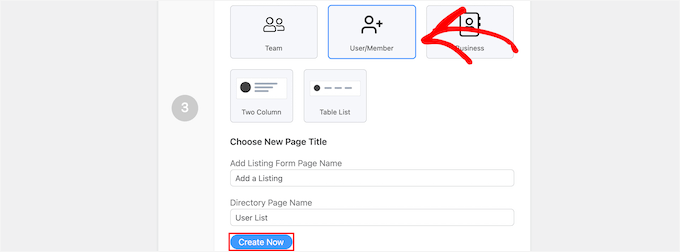
これにより、ユーザーを表示するために必要なフォーム、表示、ページが自動的に作成されますが、まだ公開されませんので、まだ変更することができます。
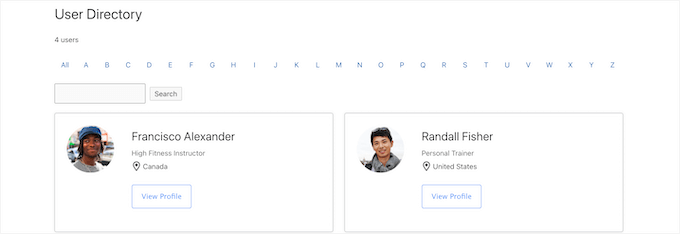
その後、「新規ページのカスタマイズ」セクションの「ページを表示」ボタンをクリックします。

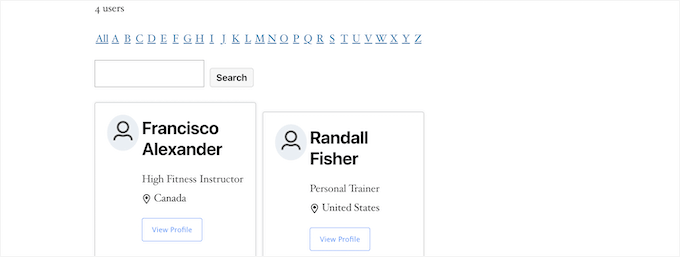
登録ユーザーリストのページが表示されます。
このページには、検索バー、五十音フィルター、登録ユーザーを表示するボックスがあります。これらの機能を自由に活用して、ユーザーリストを検索してください。
すべてが決まったら、いよいよ公開する。
これを行うには、画面上部の「ページを編集」ボタンをクリックするだけです。
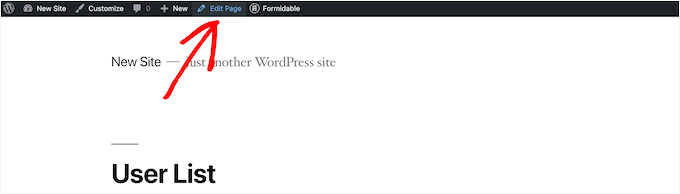
ページエディター画面が開きます。他のWordPressページと同じように、このページを編集し、必要な調整を行うことができます。
ページの編集が終わったら、’公開する’ボタンをクリックして公開します。
登録ユーザーディレクトリの見た目をカスタマイズしたい場合は、Formidable ” 表示に進んでください。
このエリアで、作成したばかりの表示にマウスオーバーし、「編集」をクリックします。

これで表示エディター画面になります。
ここでは、ユーザーディレクトリの外観を完全にカスタマイズすることができます。 例えば、1ページあたりのユーザー数を制限したり、ユーザーエントリをフィルターしたりソートしたり、個々のプロフィールにコンテンツを追加したりすることができます。
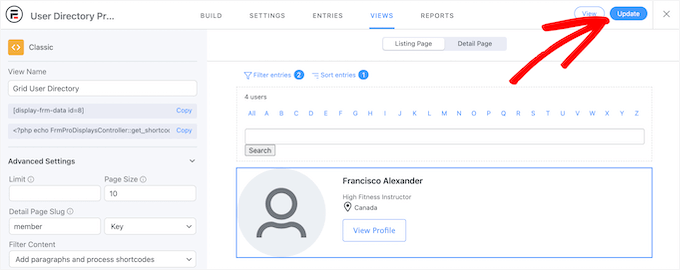
変更が終わったら、「更新」ボタンをクリックします。
先に公開したユーザーディレクトリが自動的に更新されます。
新規ユーザーから情報を収集するためにフォームを公開する
ユーザーディレクトリをカスタマイズして公開したら、そのディレクトリに接続されているフォームも公開する必要があります。
すでにWordPressサイトに登録しているユーザーは、ユーザーディレクトリに登録するためにこの区切りフォームに入力する必要があります。
まず、「ページ ” すべてのページ」にナビゲーションし、先に作成したページをクリックします。この場合、「リスティングの追加」です。

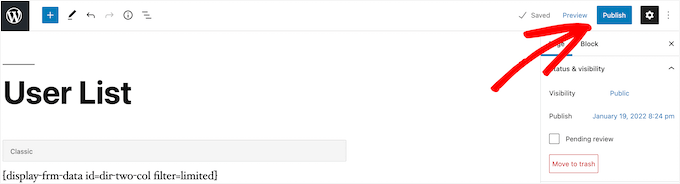
ページエディター画面が表示され、ページタイトルとショートコードが表示されます。
次に、「公開する」ボタンをクリックするだけで、ページが公開されます。
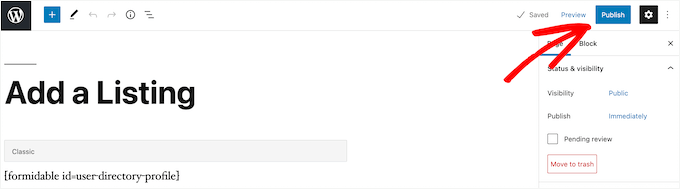
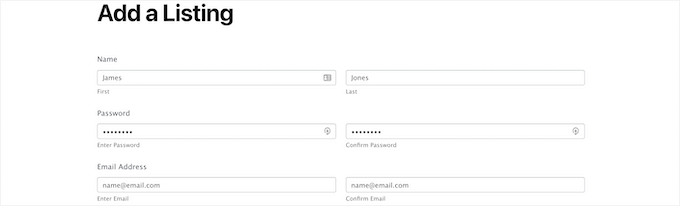
これで、ページとユーザー登録フォームを表示することができます。
新規ユーザーはこのフォームを使用して、サイト上のユーザーディレクトリのプロフィール情報を入力することができます。
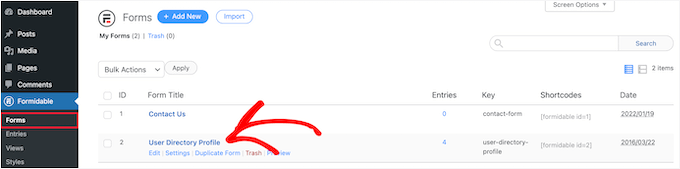
フォームフィールドをカスタマイズしたい場合は、Formidable ” Formsに移動してください。
次に、先ほど指定したフォームをクリックします。この場合、「ユーザー・ディレクトリ・プロフィール」フォームです。
これでフォームビルダーが起動します。
新しいフォームフィールドを追加したい場合は、左側のオプションパネルからフォーム上にドラッグするだけです。
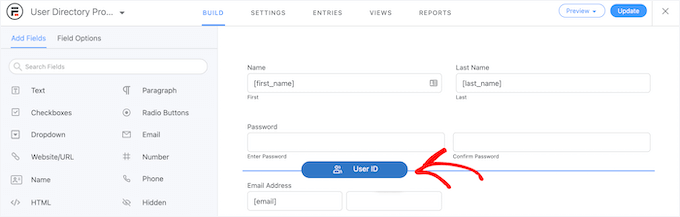
既存のフォームフィールドを削除するには、フィールドをクリックし、「3つの点」メニューオプションをクリックします。
ドロップダウンメニューから「削除」をクリックする。

フォームのカスタマイザーが完了したら、必ず「更新」ボタンをクリックして変更を保存してください。フォームが自動的に更新されます。
方法3.ダイナミックユーザディレクトリで最近登録されたユーザを表示する。
最近登録したユーザーを表示するもう一つの方法は、無料のDynamic User Directoryプラグインを使うことです。Formidable Forms ほど高度なカスタマイズはできませんが、最近登録したユーザーのシンプルなリストを表示することができます。
最初に行う必要があるのは、プラグインのインストールと有効化です。詳しくは、WordPressプラグインのインストール方法のステップバイステップガイドをご覧ください。
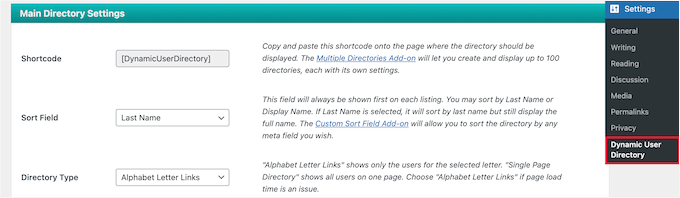
その後、Settings ” Dynamic User Directoryでディレクトリの設定を行います。
ソートフィールド’ドロップダウンで登録ユーザーリストのソート方法をコントロールできます。次に、’Directory Type’から表示するディレクトリタイプを選択します。
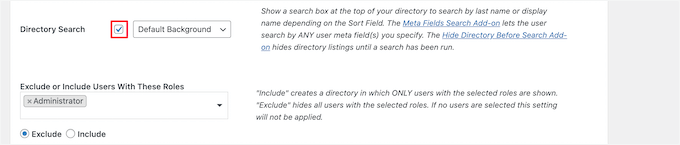
その後、「ディレクトリ検索」ボックスをチェックすることで、ディレクトリ検索機能を有効化することができます。
特定のユーザー権限グループや特定のユーザーを除外したい場合は、ドロップダウン・リストから選択することができます。
次に、ディレクトリの見た目と表示されるユーザー情報をコントロールしましょう。
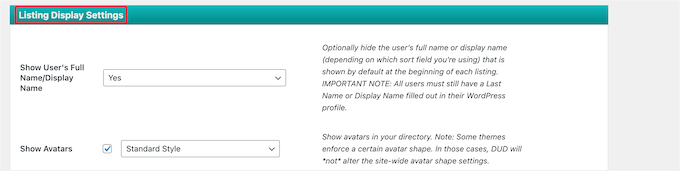
これを行うには、単に「リスティング表示設定」セクションに移動します。ここでは、ユーザー名、アバター、枠線などをコントロールすることができます。
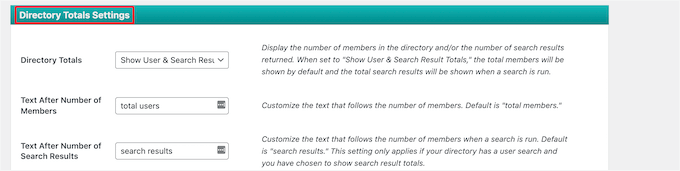
その下の「ディレクトリ合計設定」メタ情報では、ユーザーの合計数を選択したり、テキストをカスタマイズしたりすることができます。
ソーシャルプルーフ(社会的証明)を使って新規ユーザーにサイトのアカウント作成を促したい場合、ユーザーの総数を表示することは有効です。
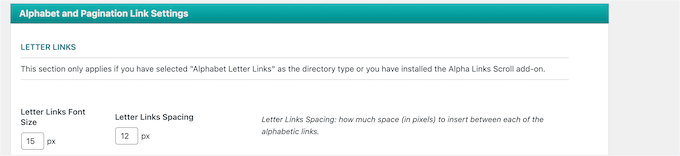
次に、レターリンクとページ送りがユーザーリストにどのように表示されるかをカスタマイズできます。
ページごとに表示するユーザー数を設定したり、間隔を変更したり、他にもいろいろなことができる。
終了したら、画面下の「オプションを保存」ボタンをクリックしてディレクトリを保存します。
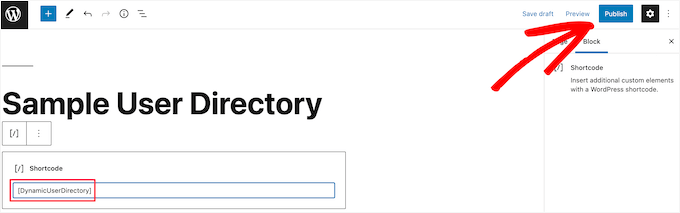
これでユーザーディレクトリのショートコードが作成され、ページ上部に表示されます。これをコピーしてサイトにディレクトリを追加してください。

ページ、投稿、ウィジェットエリアを開くだけで、ユーザーリストが表示されます。
次のステップは、「+」アイコンをクリックして「ショートコード」を検索することだ。見つけたら、それをクリックします。
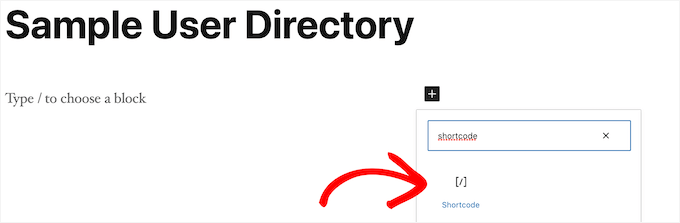
エディターに「ショートコード」ブロックを追加したら、ショートコードをボックスに貼り付けます。
そして、「公開する」または「更新する」ボタンをクリックしてください。
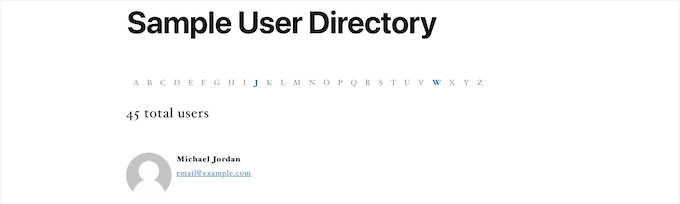
これで、サイトに最近登録されたユーザーのリストを表示することができます。
最近登録したユーザーのリストを投稿やウィジェットエリアに追加するには、上記の手順を繰り返します。
さらに読むユーザー管理のヒント
もっと深く知りたいですか?WordPressサイトをよりスムーズに運営するためのユーザー管理に関するヒントをご紹介します:
- WordPressでユーザーが友達を招待して登録できるようにする方法
- WordPressで異なるユーザーにパーソナライズされたコンテンツを表示する方法
- WordPressで登録ユーザーすべてにメールを送信する方法
- WordPressでユーザーログインを1端末に制限する方法
- WordPressで特定のユーザー権限グループにCSSを適用する方法
WordPress で最近登録したユーザーを表示する方法について、この投稿がお役に立てば幸いです。次に、WordPress ユーザーのアカウントを削除せずにブロックする方法や、WordPressのエキスパートが選ぶ無料のユーザー管理プラグインもご覧ください。
If you liked this article, then please subscribe to our YouTube Channel for WordPress video tutorials. You can also find us on Twitter and Facebook.


")

FM Brohi
Great! But with the Avatar, the Usernames of the members are coming on the list but I need to show their First Names.
How can I do that?
Jimmy
Hi,
This Recently Registered functions works great!
Just I have 2 questions you can help with?
1. The members (avatar) is there, but can it make it clickable to their profile? Right now is NOT clickable but just an avatar.
2. However, the users shown all in one column straight down, any possible to make it for example: 5 members on each row, 5 on 2nd row and so on… Total of 5 rows.
A mean if you have 100 plus new members registered, then it will keep auto scroll up or down for the newest members to show. like carousel.
Please advise help, Thanks
Uday
How to display users with only specific role?
Jonas
How can display registered users when they are logged in?
For example…….”Who are online”.
WPBeginner Support
See how to show real time online users in WordPress.
Admin
Edmond
So, how can i make it display like horizontally?
Adam
Hi,
Is there a possibility to display only users with specified roles?
I’d be really greatfull if you help me on that.
dimmka
Thanks for tutorial.
How to display quantity recently registered users in wordPress?
Edosa Uyi
Hello Editorial Staff, this post really helped me a lot. Please I want to display the date of registration along with each username,how can I do this?
andrewmichaelsa
Great post, managed to get it working easily. I would now like to style the list any ideas on how that is done?
Ben
I am wondering how to insert a space in between the avatar and the name. Also would like to know how to use the “username” of a buddypress username instead of registered name.
laura
Thank you. I really did not want to “wade in” to the level of just using plug ins for everything I do. However, I want to create a list that no plug in exists to create for me. So, I’ll try to “do it myself”. This helped because I see the basics of “how to do it”. Then, I just have to be more specific in what I do to try to make it put the fields in order that I want listed. LOL ~~ Let’s see how this works! (I will make sure to do backups before trying anything… and I am using a child theme also.) Thanks!
mark taylor
This is very good, how do i stop it showing admin username? Is there some code that can be added to stop admin from being shown, only blog subscribers.
WPBeginner Support
You can modify the SQL query on line 07 like this:
$usernames=$wpdb->get_results("SELECT user_nicename, user_url, user_email FROM $wpdb->users WHERE user_login != 'admin' ORDER BY ID DESC LIMIT 5");1-click Use in WordPress
Admin
Chris McCoy
you can also use the wp user query.
$user_query = new WP_User_Query( array(‘orderby’ => ‘user_registered’) );
Rick Meader
None of my new subscribers (including me, as a test) received their password from WordPress. Is there a setting I need in order to have that done?
WPBeginner Support
You might have some email configuration issue. Are you getting any emails from your WordPress site? Like for example when a new user registers on the site or when a comment is awaiting moderation? If you are not, then we would recommend you to try WP Mail SMTP plugin.
Admin