YouTubeクリエイターの方は、WordPressに自動的に動画を投稿する方法を探しているかもしれません。この作業を自動化することで、貴重な時間を節約しながら、サイトのマルチメディアを拡大することができます。
幸いなことに、YouTubeからWordPressに自動投稿する方法はいくつかある。Smash BalloonやIFTTTのようなツールを使ってYouTubeチャンネルとWordPressを接続し、新しい動画を投稿として公開することができる。
この記事では、YouTubeの動画からWordPressの投稿を簡単に作成する方法を順を追ってご紹介します。私たちの方法は超初心者向けで、あなたの側でコーディングする必要はありません。

なぜWordPressにYouTube動画を自動投稿するのか?
動画は、インターネット上で最も魅力的なコンテンツの1つです。ユーザーのエンゲージメントとウェブサイトでの滞在時間は、SEOランキングの重要な要素です。
WordPressでは、投稿やページにYouTube動画を埋め込むのがとても簡単です。
ただし、その都度手動で行う必要がある。これは、YouTube動画に付随する詳細な記事を作成しているYouTubeチャンネルには最適です。
一方、YouTubeの公開者の中には、単に最新の動画をサイトに自動投稿したい人もいるだろう。
そこで、WordPressサイトにYouTube動画を自動投稿する簡単な方法を2つご紹介しよう:
方法1:IFTTTを使ってYouTube動画からWordPressの新規投稿を作成する。
IFTTTは、ユーザーが人気のアプリを自動化できるオンラインツールだ。IFTTTは「if this then that」の略。指定した条件に基づいて特定のタスクを自動化できる強力なサービスだ。例えば
新規動画がYouTubeにアップロードさ れました。
新規投稿をWordPressで作成します。
上の例はアプレットと呼ばれるものです。多くのウェブベースのサービス、ソーシャル・メディア・プラットフォーム、スマート端末、そしてWordPressサイト用に作成することができます。
IFTTTでWordPressとソーシャルメディアを自動化する方法の投稿をご覧ください。
IFTTTからWordPressにYouTube動画を投稿するには、まずIFTTTのサイトにアクセスします。
IFTTTにはプレミアムプランがあるが、無料でサイトに登録することもできる。
サインアップしたら、上部の「作成」ボタンをクリックして、最初のアプレットを作成できます。
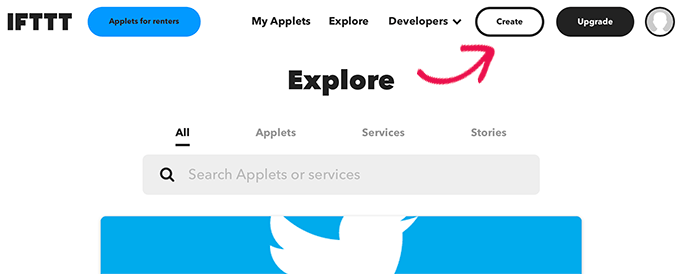
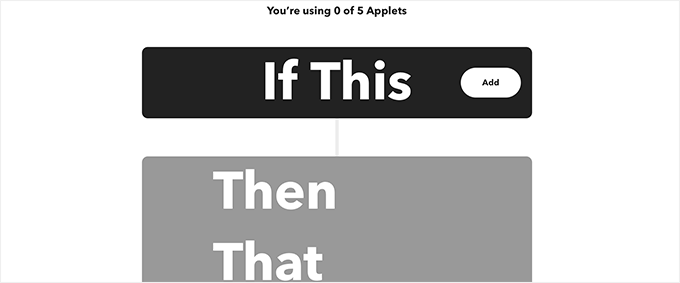
これでIf This Then Thatウィザードが表示される。
まず、「追加」ボタンをクリックして、このアプレットを実行するトリガーとなるアプリを選択します。
サービスの選択」ページが表示されます。
YouTube動画を自動投稿したいので、プラットフォームとしてYouTubeを選択する必要があります。
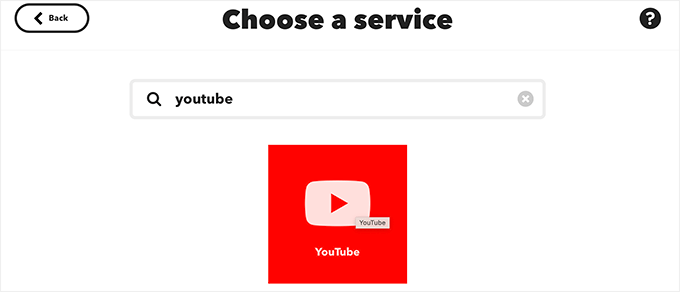
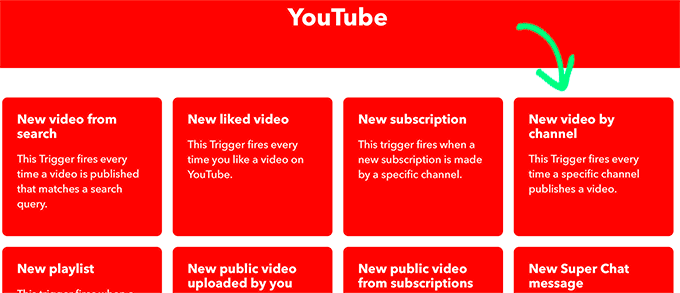
YouTubeを選択するとすぐに、IFTTTは使えるトリガーをたくさん表示する。
トリガーとして「チャンネル別新規動画」を選択する必要があります。
次に、YouTubeアカウントをIFTTTに接続するよう求めるプロンプトが表示される。
接続』ボタンをクリックしてください。

新しいウィンドウにポップアップが表示されます。
ここで、あなたのチャンネルを管理するために使用するYouTubeアカウントを選択する必要があります。
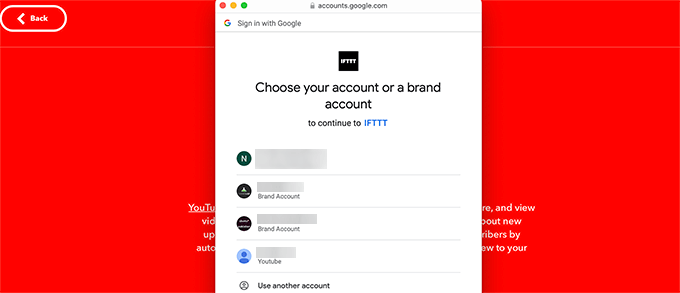
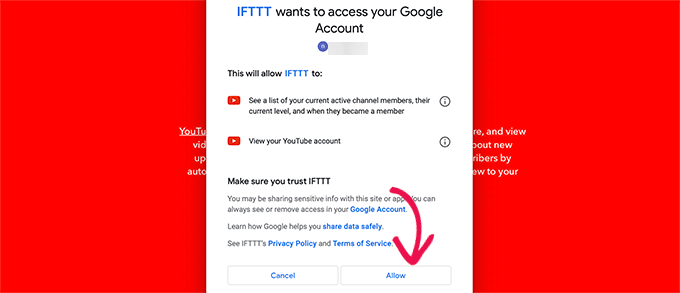
次のステップに進み、IFTTTがYouTubeアカウントの表示権限を尋ねてきます。
許可」ボタンをクリックして先に進む。
投稿者の認証後、YouTubeアカウントとチャンネルIDを入力する必要があります。
そうしたら、「トリガーを作成」ボタンをクリックする。
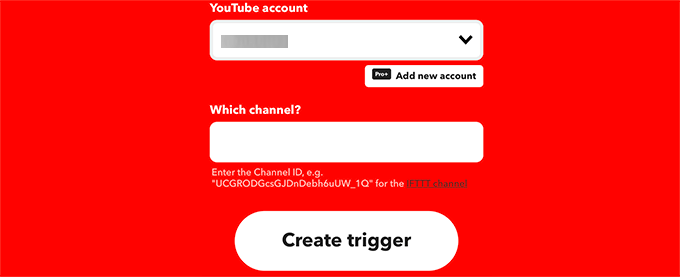
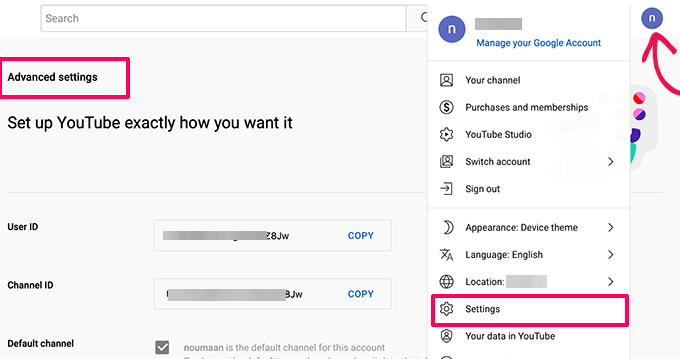
注:自分のチャンネルIDは、YouTubeのサイトにアクセスし、プロフィールアイコンをクリックすることで確認できます。
そこから「設定」を選択し、「高度な設定」タブに切り替えます。
トリガーを作成すると、IFTTTはThen Thatの部分を入力するよう促す。
これは、IFTTTがあなたのチャンネルで公開した新しい動画を見つけた後に実行したいアクションです。
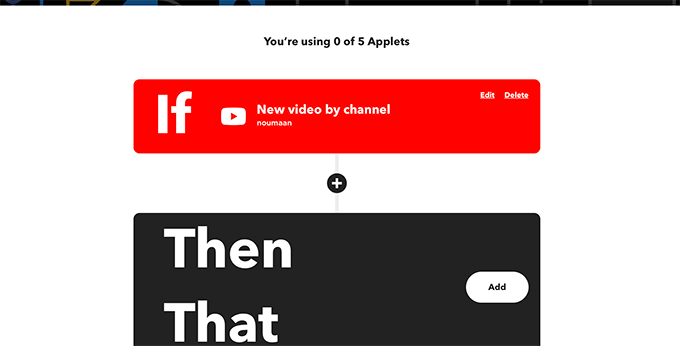
Addボタンをクリックして続けます。
次の画面では、WordPressを検索して選択する必要があります。
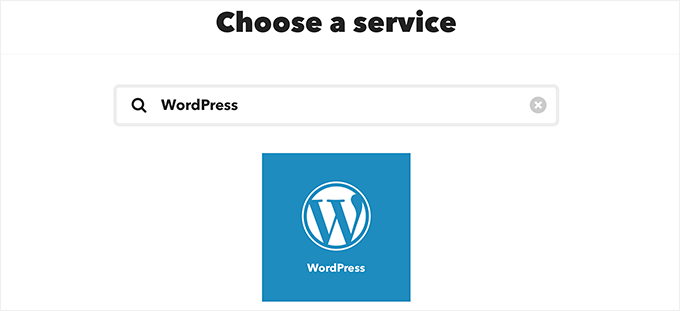
その後、実行したいアクションとして「投稿日を作成」をクリックする必要があります。
これで次のステップに進むことができる。
ここで、IFTTTがWordPressサイトとの接続を促す。
WordPressサイトのURL、ユーザー名、パスワードを入力すればOKです。
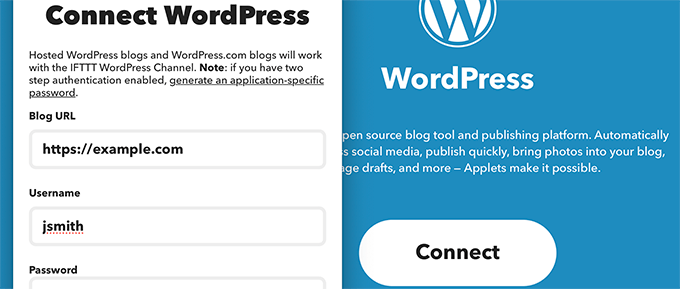
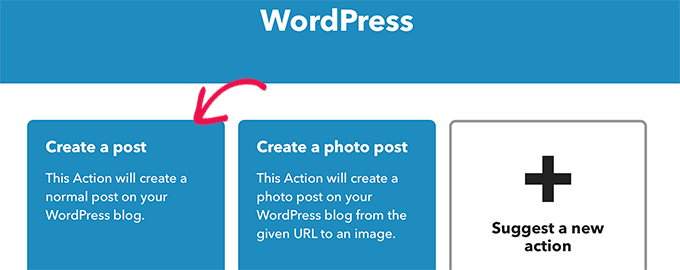
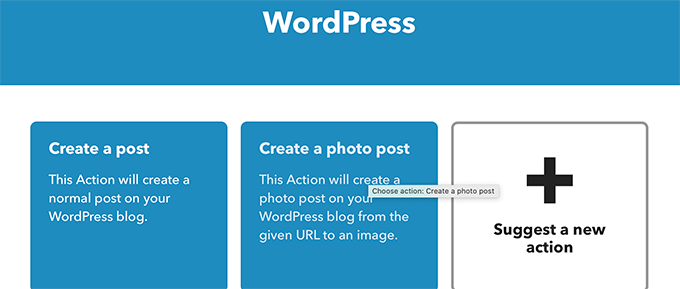
接続が完了すると、実行したいアクションを選択するよう求められます。
投稿を作成する」アクションをクリックして続けます。
次の画面では、YouTube動画から作成するWordPress投稿のさまざまなオプションを選択できます。
重要:YouTube動画のURLタグが段落タグで囲まれていることを確認してください。こうすることで、WordPressが動画を検出して埋め込むことができます。
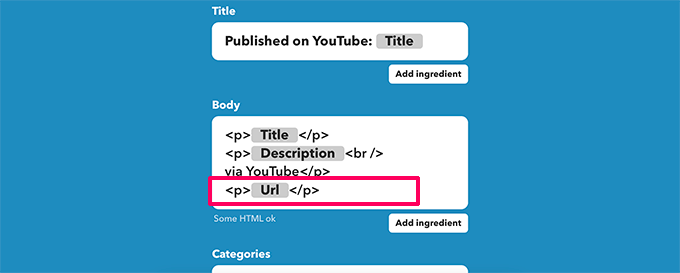
投稿タイトル、コンテンツ、カテゴリー、タグを変更することができます。必要であれば、Add Ingredientボタンをクリックして動的要素を追加することもできます。
また、投稿をすぐに公開するか、下書きとして保存して後で公開するかを選択することもできます。
これらのオプション設定は自由に変更してください。投稿本文に含める必要がある唯一のオプションは、WordPressブログの投稿に動画が表示されるようにするためのYouTube動画のURLです。
完了したら、createボタンをクリックして続行すると、IFTTTがアプレットの概要を表示する。
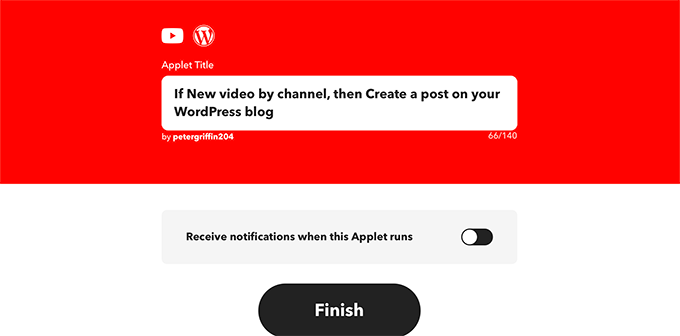
オプションで、このアプレットの実行時に通知をオンにすることができます。アプレットを保存して有効化するには、[完了] ボタンをクリックすることを忘れないでください。
IFTTTでURL短縮をオフにする
さて、IFTTTアプレットをテストする前に、まずIFTTTのURL短縮機能をオフにする必要がある。
初期設定では、IFTTTはYouTubeのURLにURL短縮サービスを使用するため、WordPressが動画を埋め込むことができない。
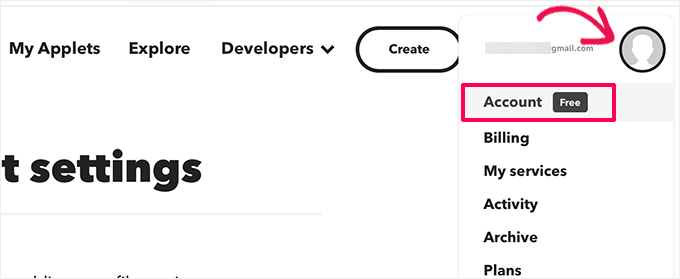
これを修正するには、上部のプロフィールアイコンをクリックし、アカウントメニュー項目を選択するだけです。
ここから、URL短縮のセクションまでスクロールダウンする。
その後、’Auto-shorten URL’オプションの隣のボックスのチェックを外す。
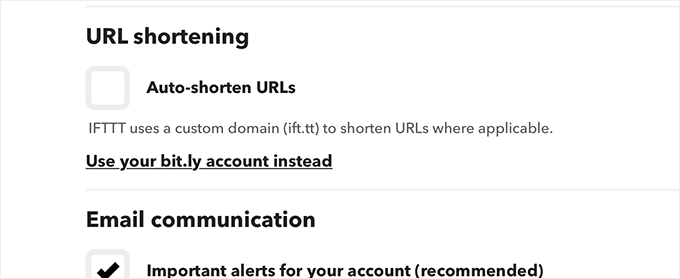
更新」ボタンをクリックして変更を保存することをお忘れなく。
YouTubeチャンネルに新しい動画をアップロードすると、WordPressサイトの新しい投稿として自動的に表示されるようになりました。
方法2:Smash Balloonを使ってYouTube動画をWordPressに自動投稿する。
この方法で、WordPressサイトにYouTube動画を自動的に表示することができます。
YouTube動画ごとに新しいブログ投稿を作成することはありません。その代わり、最新の動画を自動的に取得し、美しく表示します。
この方法は、重複コンテンツや動画のみの投稿日のオリジナルコンテンツ不足によるWordPress SEOの悪影響を回避するのに役立ちます。
また、カスタムYouTubeギャラリーフィードを作成し、サイト上の任意の場所に埋め込むことができます。
このチュートリアルでは、Smash Balloon YouTube Feedプラグインを使用します。Smash Balloon YouTube Feedプラグインは、WordPressのYouTubeプラグインとして最も優れており、ソーシャルメディアの投稿をWordPressサイトに自動的に表示することができます。
まず、Smash Balloon YouTube Feedプラグインをインストールし、有効化する必要があります。詳しくはWordPressプラグインのインストール方法をご覧ください。
アクティベート後、WordPressの管理ダッシュボードからYouTube Feed ” Settingsページにアクセスします。ここでライセンスキーを入力し、「アクティベート」ボタンをクリックします。
この情報は、Smash Balloonサイトのアカウントから取得できます。
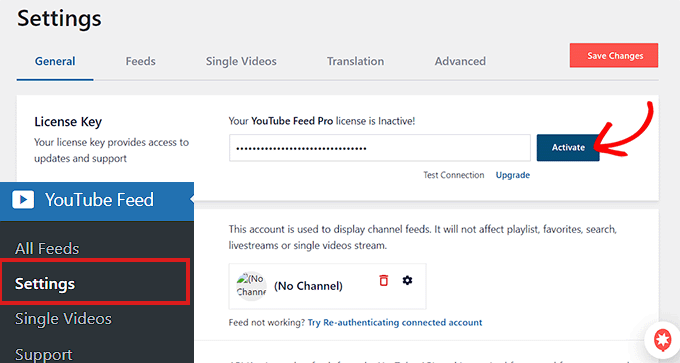
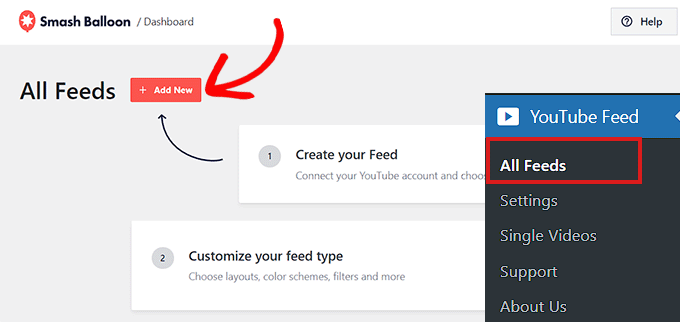
次に、WordPressの管理サイドバーからYouTubeフィード ” すべてのフィードのページに移動します。
ここで「新規追加」ボタンをクリックしてYouTubeフィードを作成します。
プレイリスト、個別動画、ライブストリームのいずれをサイトに追加するかを選択できます。
YouTubeの新しい動画を自動的に表示したい場合は、「チャンネル」オプションを使用することをお勧めします。
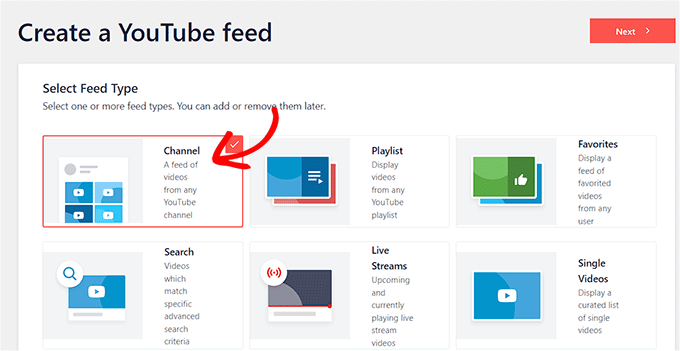
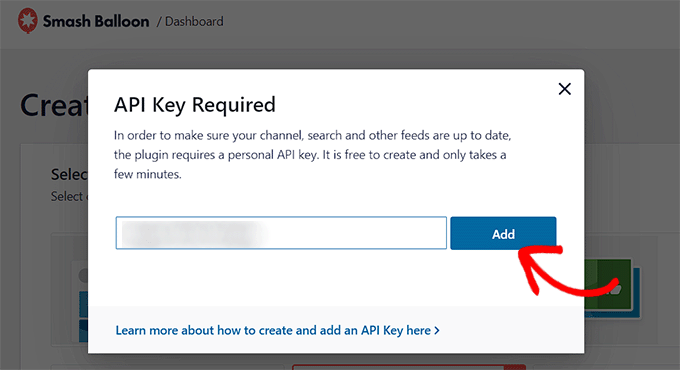
そうすると、Smash Balloonはプラグインと接続するためにYouTubeアカウントのAPIキーを要求します。
すでにAPIキーをお持ちの場合は、「Enter API Key」ボックスにコピー&ペーストし、「Add」ボタンをクリックしてください。
ただし、YouTubeアカウントのAPIキーをお持ちでない場合は、WordPressで動画ギャラリーを作成する方法のチュートリアルをご覧ください。
ソースを追加」ページに移動し、WordPressサイトに接続するためにチャンネルIDを追加する必要があります。
これを行うには、YouTubeチャンネルにアクセスし、上部にあるURLの’/channel/’または’/ユーザー/’の後に来るテキストをコピーします。
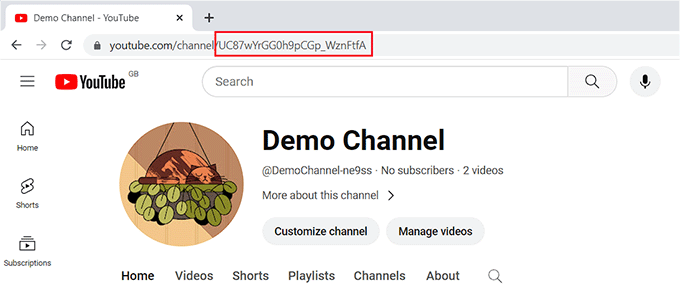
WordPressの管理ダッシュボードに戻り、「ソースを追加」設定にIDを貼り付けます。
次に、「接続」ボタンをクリックして、YouTubeチャンネルとプラグインを接続します。

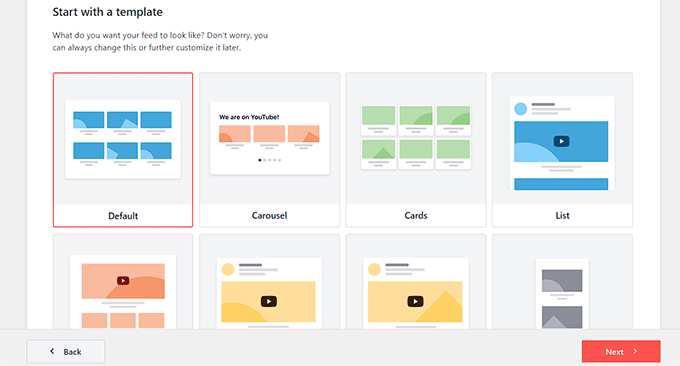
YouTubeフィードのテンプレートを選択します。
選択したら、「次へ」ボタンをクリックして次に進む。
Smash Balloonのフィードエディターが画面に表示され、右側にYouTubeチャンネルのプレビュー、左側にカスタマイザーの設定が表示されます。
ここから、レイアウトの変更、ボタンの追加、動画の設定などを行うことができます。詳しくは、WordPressでYouTubeチャンネルの最新動画を表示する方法のチュートリアルをご覧ください。
カスタマイザーをカスタマイズしたら、「保存」ボタンをクリックして設定を保存し、「埋め込み」ボタンをクリックするだけです。
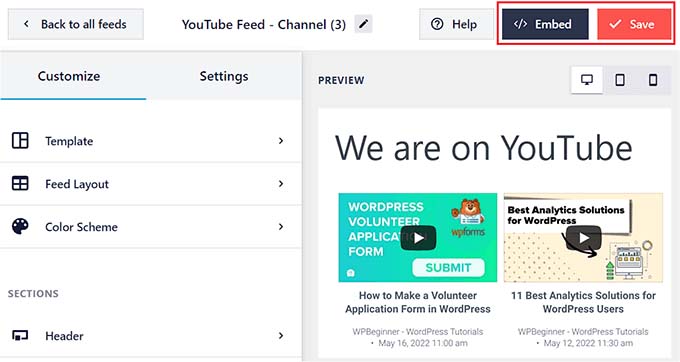
これで画面にプロンプトが表示される。
ここから、YouTubeフィードの埋め込みコードをコピーします。その後、「X」アイコンをクリックしてフィードエディターを終了します。
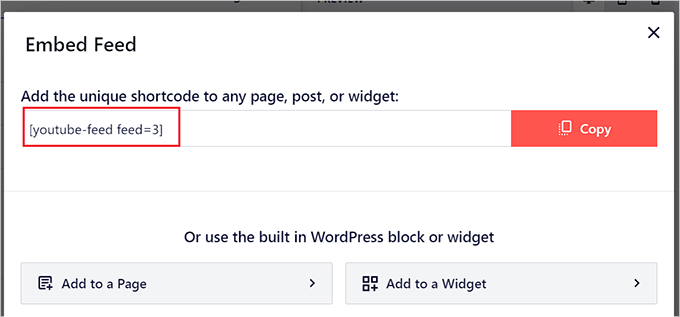
WordPressダッシュボードから、YouTubeチャンネルのフィードを表示したいページまたは投稿を開きます。
ブロックメニューが表示されたら、左上の「ブロックを追加」(+)ボタンをクリックします。ここから「Feed For YouTube」ブロックを追加します。
次に、ブロックパネルの「ショートコード設定」オプションにYouTubeフィード用のショートコードを貼り付けるだけです。
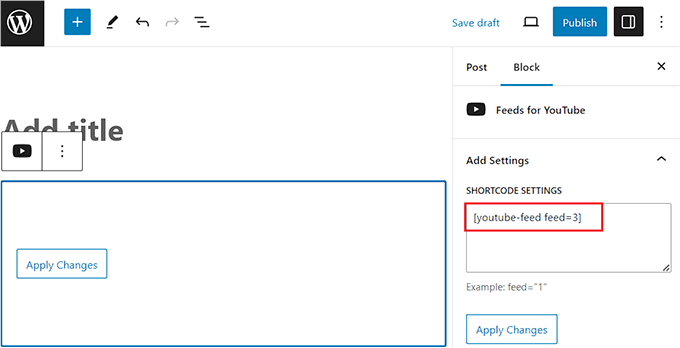
最後に、「更新」または「公開」ボタンをクリックして、設定を保存します。
投稿やページを表示すると、YouTube動画がすっきりとしたグリッドレイアウトで表示されるようになりました。
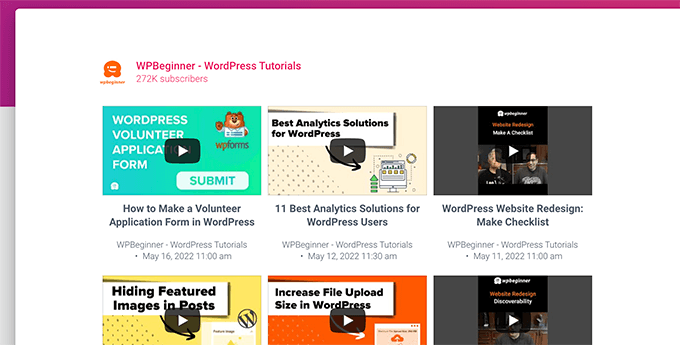
これで、YouTubeチャンネルに新しい動画を投稿するたびに、WordPressサイトのフィードが自動的に更新されます。
ボーナス:Facebookの投稿から自動的に投稿を作成する
また、IFTTTを使って、WordPressブログの新規投稿を公開するたびにFacebook投稿を作成することもできる。これにより、ソーシャルメディアプラットフォームへのトラフィックを増やし、ソーシャルメディアでの存在感を高め、ウェブサイトの知名度を上げることができる。
そのためには、IFTTTのサイトにアクセスし、アカウントを作成する。その後、’Explore’ページに移動し、そこで自分に合うアプレットを検索することができる。
リストから「WordPress to FB Page」アプレットをクリックすることをお勧めします。
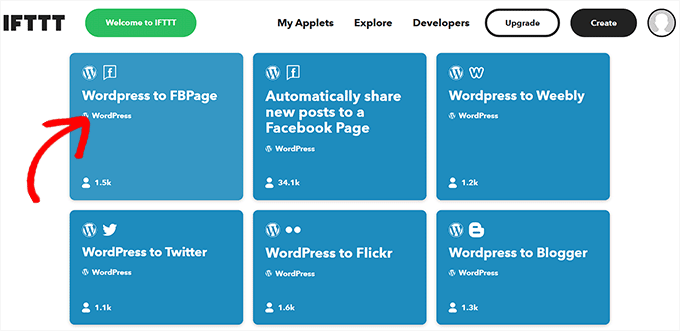
新しい画面が表示されるので、「Connect」スイッチを「ON」に切り替える。その後、WordPressブログとFacebookアカウントの詳細を追加します。
次に、上部にある「設定」ボタンをクリックします。
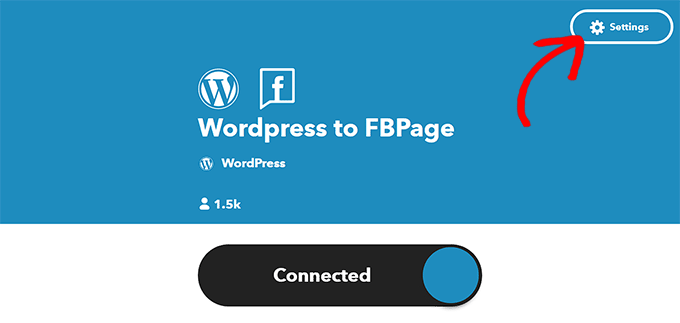
トリガーとアクションを選択し、効果的な自動ワークフローを作成することができます。
これを行うには、「If This」オプションの隣にある「Add」ボタンをクリックする。
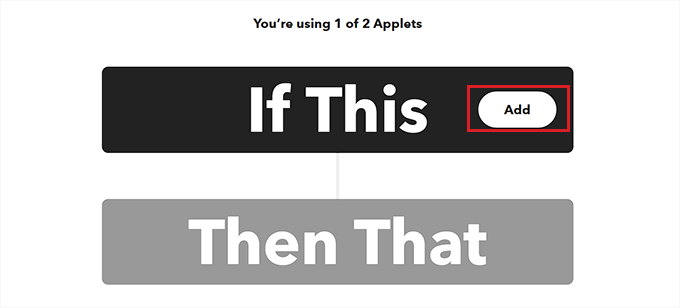
WordPressトリガーのリストが開きますので、「新規投稿」を選択してください。
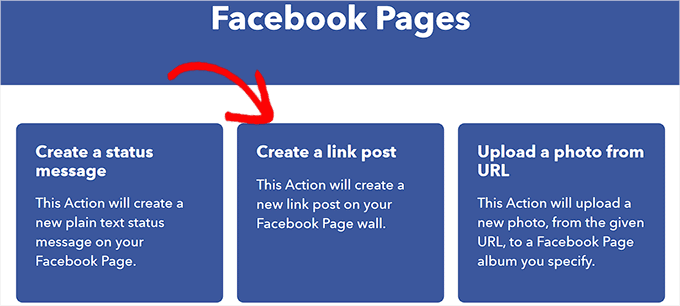
すると、再び「作成」ページが表示されるので、「Then That」オプションの隣にある「Add」ボタンをクリックする。
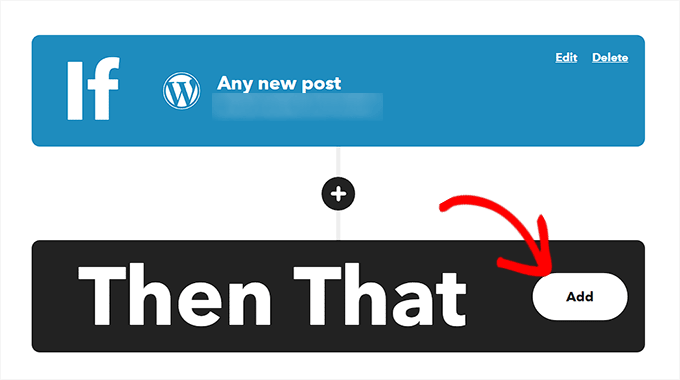
次のステップでは、サイトに新しい投稿が公開されたら、WordPressの投稿リンクをFacebookページで共有するようIFTTTに指示します。
次に、「Add Action」ボタンをクリックする。
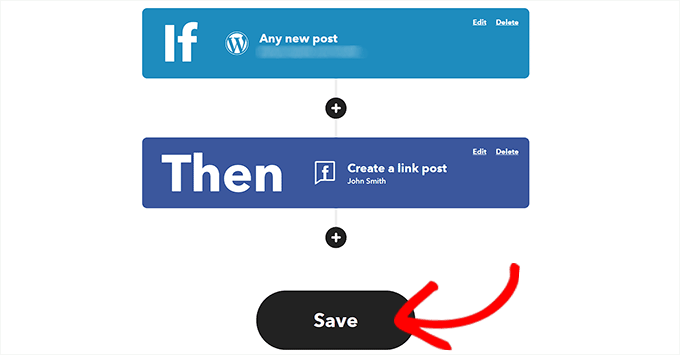
これでIFTTTワークフローの作成は完了です。保存」ボタンをクリックして有効化してください。
詳しくは、IFTTTでWordPressとソーシャルメディアを自動化する方法のチュートリアルをご覧ください。
この投稿が、YouTubeの動画からWordPressの投稿を自動的に作成する方法を学ぶのにお役に立てば幸いです。WordPressに最適なソーシャルプルーフプラグインのリストや、WordPressにYouTube購読ボタンを追加する方法のチュートリアルもご覧ください。
If you liked this article, then please subscribe to our YouTube Channel for WordPress video tutorials. You can also find us on Twitter and Facebook.


Mike
Hi, this is a good thing on IFTTT for NEW videos, but what if I wanted to generate posts from existing videos on youtube, for example, videos in a playlist. Is there a way to do that?
WPBeginner Support
For the moment we do not have a recommended retroactive method for creating the posts.
Admin
Zakir A. Qureshi
Hello Every One if i do AutoBlog With YouTube is there any issue of Copyright Please guide Me Thanks .
WPBeginner Support
Hi Zakir,
If you created the video and own the rights, then there wouldn’t be a copyright issue.
Admin
John
Please I tried to use the ifttt to WordPress after connected it does not create post at my website. When I check the report on ifttt it say. Something wrong with WordPress services.
WPBeginner Support
Hey John,
Try to connect again. If it doesn’t work then you probably have xmlrpc disbaled. If you are using 2-step verification for login, then you will need to create application specific password for IFTTT to use.
Admin
Nick Barban
Hi found this article by accident. I was investigating autoblogging after an article i read on google+ from WP B. ive signed up with IFTTT but i dont know know wether im being blind or stupid i ve tried to set up an application password but I cant find anywhere to set this up within my wordpress site. Im guessing that as im using clef authentication to log in, this is causing the problem. Can i get round this problem by deactivating clef and relogging in via login and password? will that give me the option to set up application passwords. And can i reactivate clef once this is set up and the application passwords still work. Primary reason for setting this up is to have a live autoblog update of new videos being posted on YouTube. Im likely to be posting quite a few this year. Thanks for your help in advance. Nick
WPBeginner Support
You can try deactivating Clef for testing and if it works then ask Clef support how to get around that.
Admin
WPBeginner Staff
You are welcome.
WPBeginner Staff
No, IFTTT does not add embed code in your posts. It only adds the YouTube video URL. WordPress then gets the embed code using oEmbed. You may want to take a look at this guide about how to make your videos responsive in WordPress Using Fitvids.
Jose_Martino
Thank for explaining the nature of the problem better, however, I still havent been able to fix the issue with the oembed adding the old flash code when using IFTTT.
I did add the Fitvids plugin and configured as mentioned in the article, but issue still persist. I did not notice that if I manually add the youtube url to an article the proper ifram code is used, but I still see the problem only occurring when I use IFTTT.
Do you have any ideas as to what may causing this issue. I’ve been dealing with this issue for a while and it has been frustrating not finding the fix. Other then this problem, it works great! Thanks again for answering.
Jose_Martino
wow, I just noticed what I was doing wrong, I choose embed code instead of URL in the recipe. With the URL, the recipe works as you mention, URL is translated by the website automatically into iframe code.
If you use the EmbedCode ingredient the embed code is added to the post but it uses the flash code. Thank God I read your post, and realized I could just use the URL ingredient and did not need to used EMbedCode.
Thanks again for all your help
Jose_Martino
I use this service for posting my youtube videos, however, I recently became aware that ifft uses the old youtube embed code to post the youtube videos on your word press page, and therefore when a visitor views your article on the phone the videos do not display. I wish IFTTT would upgrade to use the iframe format of the embed code, because otherwise it is a great function
Rareș Ghinga
It says that it will scan for NEW videos. What about older uploads/favorites?
WPBeginner Staff
This can be caused by a security plugin installed on your site.
Also make sure that your WordPress Address and Site Address are the same URLs in settings. If you have a setup where WordPress is installed in a different directory than the site address, then you will need to use the WordPress address on IFTTT.
Michiel Andreae
Great idea. I was looking for exactly this. Unforunately my IFTTT can’t connect to my WordPress site. It returns “Live channel fields value is not a valid WordPress url”. Any idea how I can fix this?
jc
you have a super website and this is information I am looking for right now. I already have an account and will set this up today. as always, thanks so very much for sharing all of this pertinent information. whilei am fairly new to WordPress, these articles are a great help. you explain directions in a very clear, concise and easy to understand manner. thanks again!
Syntocode Tomisin
Wow! great service from IFTTT..Thanks for sharing
Mohammed
Thank you,
IFTTT great service I already use it on many sites.