フィーチャーボックスは、製品やサービスの最大のセールスポイントを強調します。また、新規: 顧客がこの製品やサービスが自分に適しているかどうかを判断できるように、特徴を提示するのに最適な方法です。
長年にわたり、私たちのパートナーブランドの多くは、製品の機能を強調するためにフィーチャーボックスを使用してきました。例えば、WPFormsやMonsterInsightsのサイトでは、フィーチャーボックスを見ることができます。
私たちの経験に基づいて、WordPressにそれらを追加する2つの方法があります。ブロックエディタを使い、異なるカラムに機能をリストアップすることができます。あるいは、もっと魅力的で魅力的なものをお探しなら、ページビルダーを使ってカスタムフィーチャーボックスのあるページをデザインすることもできます。
この投稿では、WordPressサイトにアイコン付きの機能ボックスを追加する方法を紹介します。
アイコン付きフィーチャーボックスとは?
特にテキストが多いページの場合、ほとんどの人はWordPressウェブサイトのすべての単語を読むことはないでしょう。
その代わり、訪問者は探している情報を素早く見つけるためにページをスキャンします。つまり、重要な情報をスキャンしやすく魅力的な方法で提示する必要があり、これが多くのサイトでフィーチャーボックスが使われている理由です。
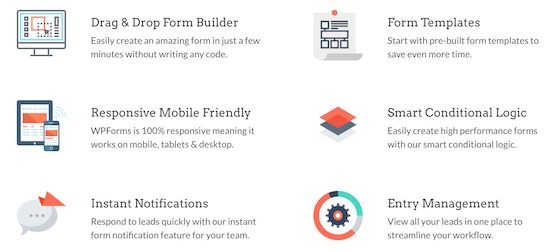
次の画像では、WPFormsがどのようにフィーチャーボックスを使用してプラグインの最大のセールスポイントを強調しているかがわかります。
ユーザーが特定の機能についてさらに詳しく知ることができるように、行動喚起ボタンを追加することもできます。
それでは、WordPressでアイコンを使って機能ボックスを追加する方法をご紹介しましょう。以下のクイックリンクから、お好きな方法にジャンプしてください:
方法1:WordPressブロックエディター(プラグイン必須)を使ってアイコン付きフィーチャーボックスを追加する。
標準のコンテンツエディターとカラムブロックを使って、WordPressサイトにアイコン付きフィーチャーボックスを追加することができます。つまり、WordPressプラグインを新規インストールする必要がなく、手軽で簡単な方法です。
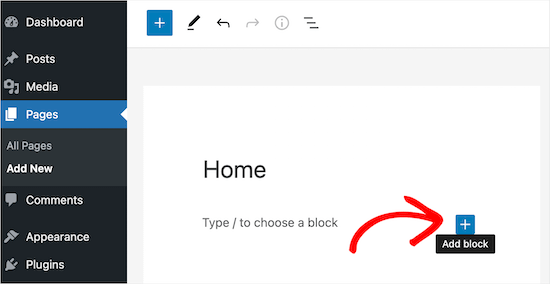
まずは、フィーチャーボックスを追加したいページを開いてください。次に、「+」ブロック追加アイコンをクリックします。
次に、検索ボックスに「カラム」と入力する。
適切なブロックが外観されたら、クリックしてページに追加する。
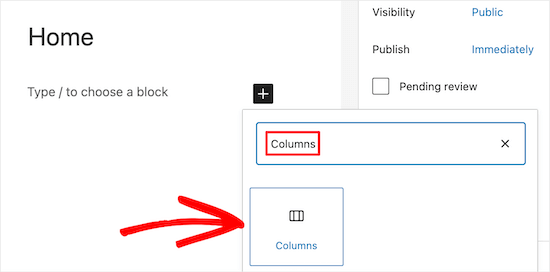
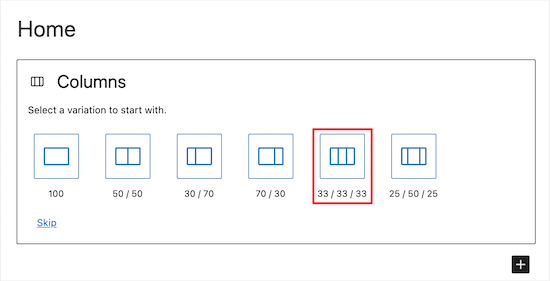
カラムブロックがすべて表示されます。数字は、各カラムがブロック内で占めるスペースです。例えば、’50/50’は、それぞれ利用可能な幅の50%を占める2つのカラムを作成します。
例として、「33/33/33」カラムブロックを選びますが、これは幅が等しい3カラムが得られるからです。
これでカラムにアイコンを追加する準備が整った。
これを行う最も簡単な方法は、リサイズ可能なシンボルであり、サイトの表示速度を低下させないアイコンフォントを使用することです。Font Awesomeを使用することをお勧めします。Font Awesomeは無料のアイコンのコレクションが最大級だからです。
WordPressテーマにアイコンフォントを追加したら、ショートコードを使ってカラムに表示させるのは簡単だ。
カラムの「+」アイコンをクリックし、「ショートコード」と入力するだけです。右のブロックが表示されたら、クリックしてレイアウトに追加する。
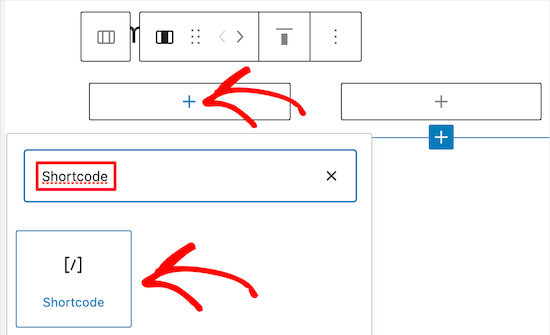
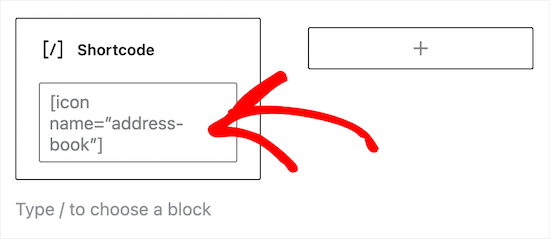
その後、以下のショートコードを入力しますが、’bus’を使用したいアイコンの名前に置き換えてください:
[icon name="バス"]]
利用可能なアイコンの全リストを見るには、Font Awesomeアイコンライブラリにアクセスするだけです。
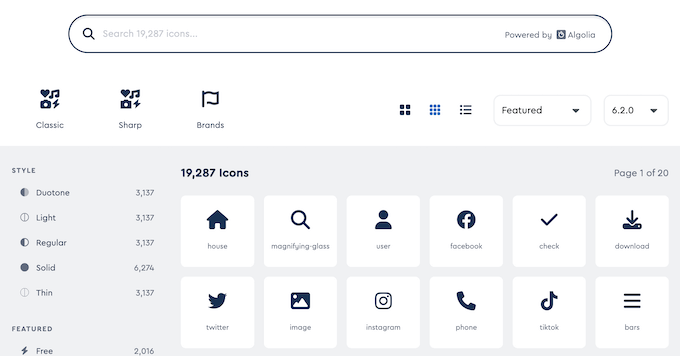
気に入ったアイコンが見つかったら、それをクリックするとアイコンの名前が表示されます。
例えば、次の画像では「アドレス帳」というアイコンを見ている。
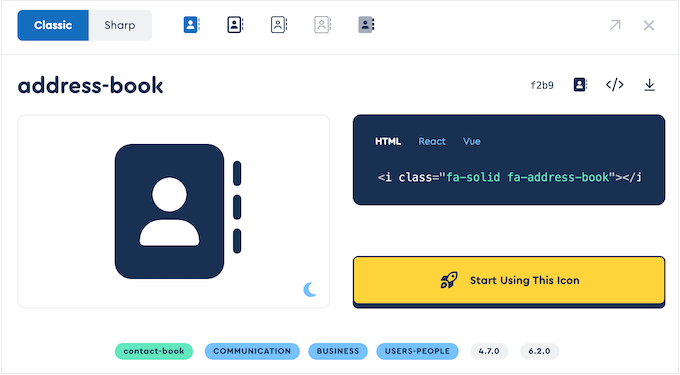
この名前をショートコードに追加することができます。
さらに詳しく知りたい方は、WordPressでショートコードを追加する方法の初心者ガイドをご覧ください。
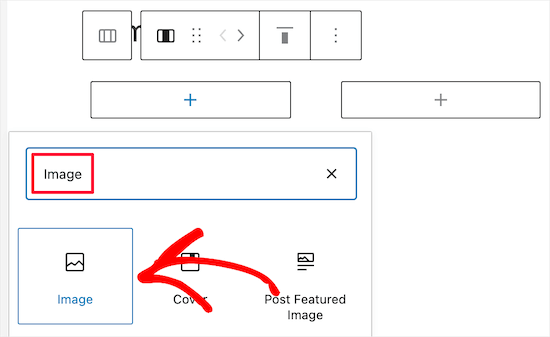
WordPressのメディアライブラリから画像を使用したい場合は、アイコンフォントを使用する代わりに画像ブロックを追加することができます。
これを行うには、最初のカラムの「+」をクリックし、ショートコード・ブロックの代わりに「Image」ブロックを追加するだけです。
メディアライブラリから画像を選択するか、コンピューターから新しいファイルをアップロードすることができます。
アイコンをすべて追加したら、次はフィーチャーボックスにテキストを追加します。
これを行うには、カラムブロック内の「+」ボタンをクリックします。次に、段落ブロックを追加します。
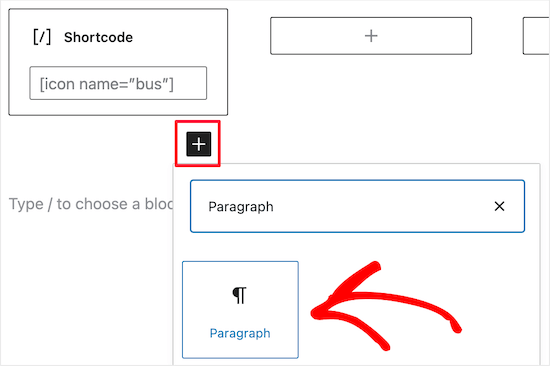
その後、テキストを段落ブロックにタイプするだけです。
同じ作業を繰り返すことで、他のカラムにもアイコンやテキストを追加できる。
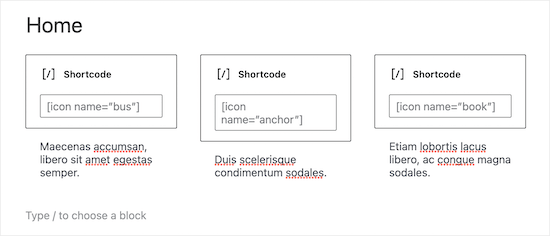
フィーチャーボックスを複数行にしたいですか?
カラムブロックをクリックし、ツールバーの3つの点を選択するだけです。そして「Duplicate」を選択します。
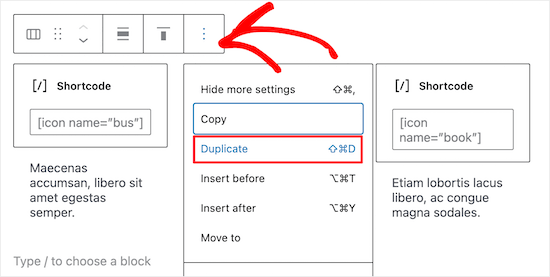
これでカラム・ブロックのコピーが作成される。
あとは、上記と同じ手順で2行目にコンテンツを追加するだけだ。
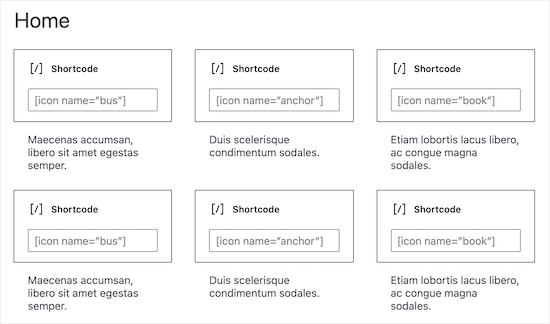
フィーチャーボックスが完成したら、商品の画像やカテゴリー、タグなど、他のコンテンツをページに追加することができます。
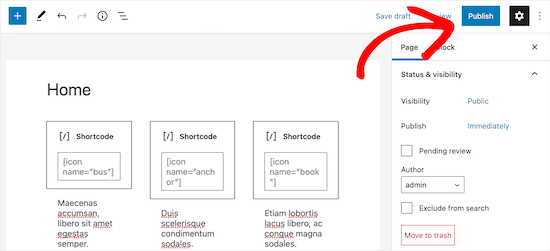
フィーチャーボックスをライブにするには、「更新」または「公開」ボタンをクリックするだけです。
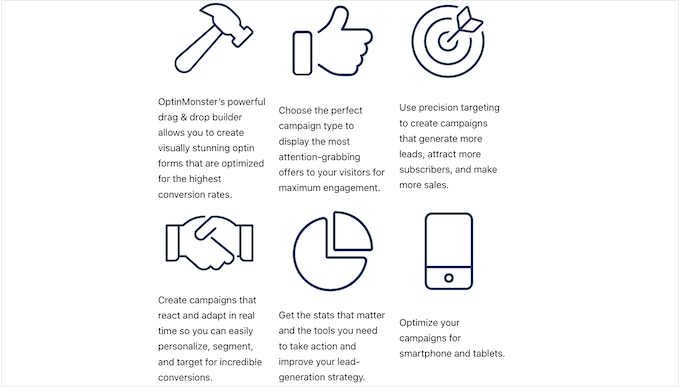
あなたのサイト、ブログ、オンラインストアで、このアイコンボックスを実際にご覧いただけます。
あなたのワードプレスブログを訪問した人が見るものの例です。
方法2:ページビルダープラグインを使ってアイコンのついたフィーチャーボックスを追加する(推奨)
シンプルなフィーチャーボックスを作成したいのであれば、WordPressブロックエディターが良い選択です。しかし、完全にカスタマイザーなデザインでより高度なボックスを作成したい場合は、ページビルダープラグインが必要です。
SeedProdは、ドラッグアンドドロップエディターを使用してカスタムページを作成することができ、市場で最高のWordPressページビルダーです。
SeedProdには、プロがデザインした300以上のテンプレートがあり、美しいページを素早く作成することができます。また、アイコンのライブラリも充実しており、個別クリックでフィーチャーボックスに追加できます。
SeedProdの既製のブロックとアイコンを使用して作成したフィーチャーボックスの例です。
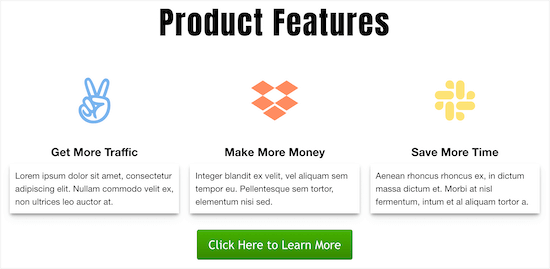
最初に行う必要があるのは、SeedProdプラグインをインストールして有効化することです。詳細については、WordPressプラグインのインストール方法についての初心者ガイドをご覧ください。
注: SeedProdには無料版もありますが、今回はより多くの機能があるPro版を使用します。もし、メールマーケティングを使用して商品を宣伝するのであれば、SeedProd Proは多くの最高のメールマーケティングサービスとも統合しています。
有効化した後、SeedProd ” Settingsに進み、ライセンスキーを入力してください。
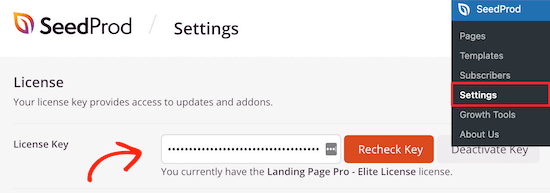
この情報は、SeedProdアカウントにログインすることで確認できます。
プロがデザインしたテンプレートを選ぶ
開始するには、SeedProd ” ランディングページに行き、「新規ランディングページを追加」をクリックします。
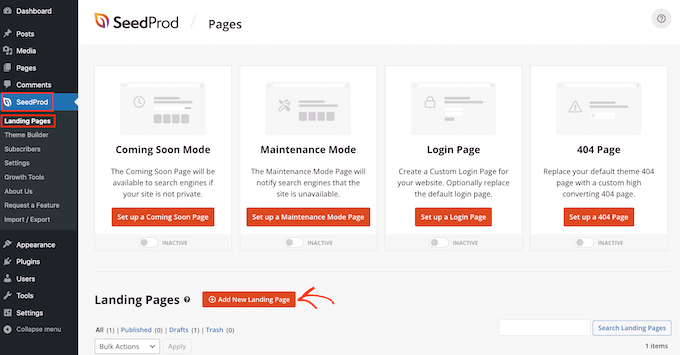
次の画面では、テンプレートを選択することができます。SeedProdのドラッグアンドドロップビルダーを使えば、これらのテンプレートをすべてカスタマイズすることができますが、やはりあなたの目標に一致するテンプレートを選ぶのが良いでしょう。
SeedProdのテンプレートはすべて、近日公開キャンペーンやリードスクイーズキャンペーンなど、さまざまなキャンペーンタイプに分類されています。SeedProdのテンプレートを使って404ページを改善することもできます。
このガイドでは「ブランク・テンプレート」を使用しますが、お好きなテンプレートをお使いください。
テンプレートを選択するには、マウスオーバーして「チェックマーク」アイコンをクリックするだけです。
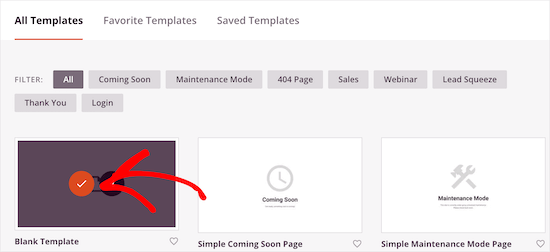
ポップアップが表示され、ページに名前を付けることができます。SeedProdはURLにページ名を使用しますが、必要であればこのリンクを変更することができます。例えば、関連するキーワードを入れてWordPressのSEOを改善したい場合などです。
その後、’Save and Start Editing the Page’ボタンをクリックします。
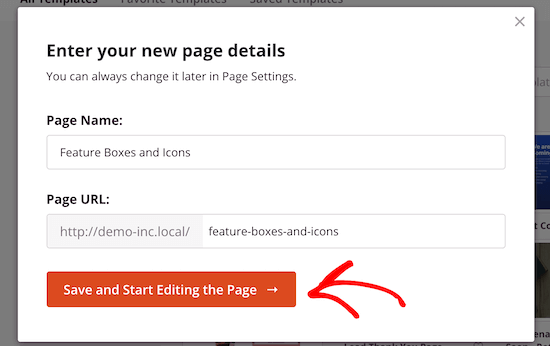
これはSeedProdのドラッグ&ドロップページエディターでテンプレートを開きます。
フィーチャー・ボックスをデザインする
空白のテンプレートを使用しているので、最初のステップはレイアウトの選択です。これを行うには、カラムレイアウトのどれかをクリックするだけです。
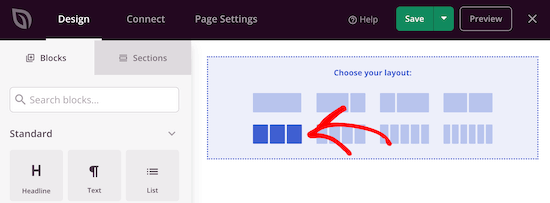
その後、左側のメニューから「Icon」ブロックを見つける。
このブロックを最初の空のカラムにドラッグ・アンド・ドロップすることができる。

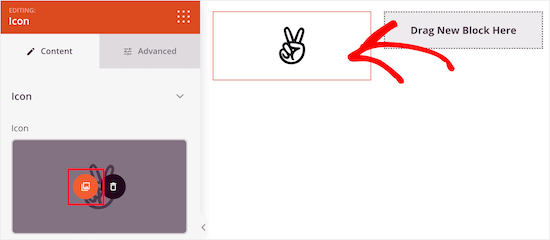
これはアイコンブロックをレイアウトに追加するもので、初期設定のアイコンがすでに選択されています。
アイコンを変更するには、アイコンをクリックし、「Choose Image」ボタンを選択します。
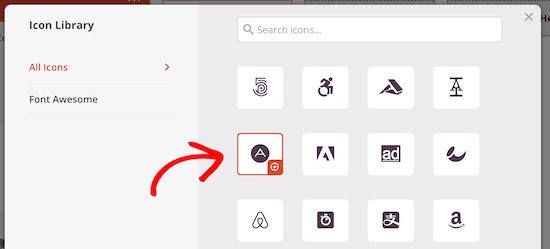
アイコン・ライブラリが表示され、数百のアイコンから選択できます。検索バーを使って特定のアイコンを探したり、リスト全体をブラウズすることができます。
使いたい画像を見つけたら、マウスオーバーして「+」ボタンをクリックするだけで、ページに追加できます。
アイコンをカスタマイズするには、クリックして選択します。
このアイコンは、左側のメニューにある設定を使って、配置やサイズ、色などを調整することができます。
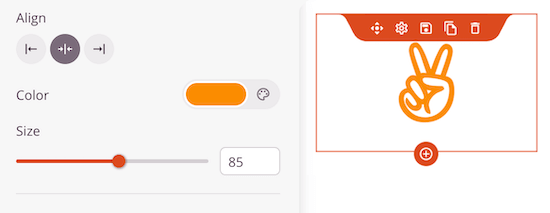
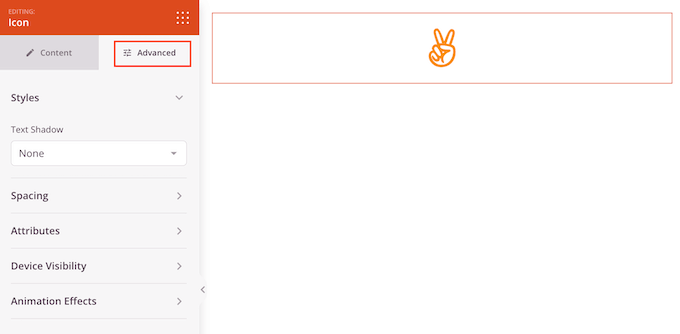
より多くのオプションを見るには、先に進み、’Advanced’タブをクリックします。
ここでは、スペーシングを変更したり、ボーダーを追加したり、CSSアニメーション効果を追加することもできる。
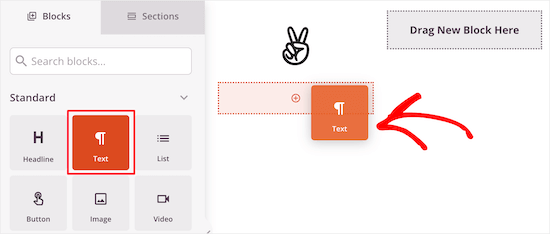
そうしたら、アイコンの下に「テキスト」ブロックを追加する。
左側のメニューから「テキスト」ブロックを見つけ、ドラッグ&ドロップでアイコンの下に配置するだけです。
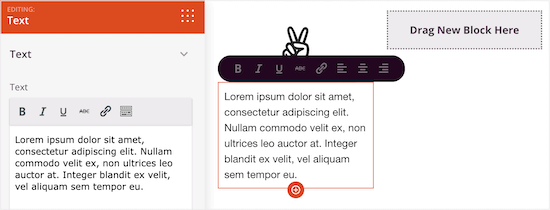
テキストを追加するには、クリックしてブロックを選択します。その後、左側のメニューにある小さなテキストエディターに入力することができます。
ここでは、リンクを追加したり、テキストの配置を変更したり、テキストの色を変更したりすることができます。
その他のカラムをカスタマイズするには、上記と同じ手順を踏むだけです。
アイコンのあるフィーチャーボックスをもう一列追加したい場合は、セクションにマウスオーバーして「Duplicate Row」ボタンをクリックします。
このセクションは何度でも複製でき、アイコンの付いた機能ボックスを素早く作成できます。
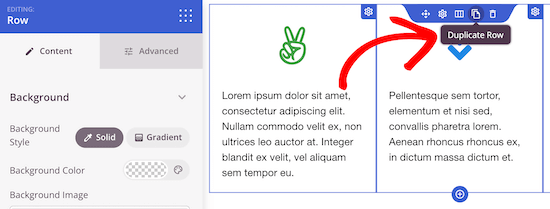
その後、上記と同じ手順で新しいアイコンとテキストを追加できます。
さらにブロックを追加し、左側のメニューでそれらのブロックをカスタマイザーすることで、ページでの作業を続けることができます。
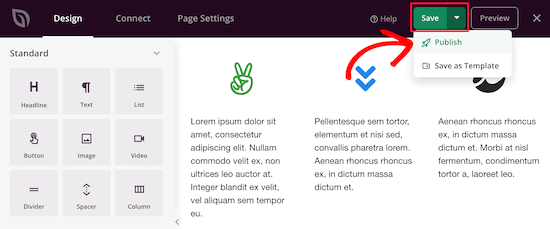
ページの見た目に満足したら、「保存」ボタンをクリックしてください。その後、’公開する’を選択すると、そのページを公開することができます。
この記事で、WordPressでアイコン付きの機能ボックスを追加する方法をご理解いただけたでしょうか。WordPress サイトの色をカスタマイズする方法や、モバイルフレンドリーな WordPress サイトを作成する方法については、こちらもご覧ください。
If you liked this article, then please subscribe to our YouTube Channel for WordPress video tutorials. You can also find us on Twitter and Facebook.


micahel
Really nice article and it help solve my problem. But here is my question.
-How to you create the beautiful sidebars in see in this post such as how to start a blog, website blueprint, I need help with …, useful wordpress guides, Deals & Coupons
-I really need help with creating this sidebars since am reading how to create a blog
Ashutosh Panda
It was an awesome article..
Helped me a lot
Rob
Hey. My icons won’t centre in the column itself. Is there a parameter we can add to ensure it centres? 2 of my icons centre fine, but 2 will only align left, even if I align it to center using formatting in the WordPress formatting editor (using a plugin).
Thanks.
Hassan NAITALI
Great article, i love it,
so, i have one question, can i make changes to these icons and set them bigger by making change in the parent theme graphicaly and without touching css code ?
Thank you !!
WPBeginner Support
Hi Hassan,
You would still need some CSS.
Admin
Chris
I tried everything that was said in the tutorial but instead of it being set into columns, everything is set under one column. While the icon are set beside the words. I wanted to create three columns and everything in under one another in one column. Why is that that?
Roshni
Thank you. So useful!
Paul
Do you have a tutorial on how to do this with css, html and php without having to use a plugin? I’ve looked around but cannot seem to find anything.
john
How do I get the icon to center over the content?
Evan herman
For anyone using WP SVG Icons that isn’t comfortable writing CSS, you can actually adjust the icon size by passing in a size=”#px” parameter to the wp-svg-icons short code.
Example:
[wp-svg-icons icon=”rocket” wrap=”span” size=”100px”]
That will set the icon to 100px and avoid the step of writing custom CSS. You may still need to adjust the padding.
Andre Page
That was very helpful Evan, thank you!!
Roshni
Thanks, Evan. That worked.
Bobby
Good article about an important feature for your site. However, the plugin recommended has not been updated for 2 years. I am relatively new to WordPress and I was told to steer from plugins that have not been updated in the past year. I am guessing that it depends since you are very knowledgeable about WordPress and highlighted the plugin in this article. Let me know your thoughts.
WPBeginner Support
Bobby, the plugin works fine we tested it. We have also reached out to plugin author so that they can update the plugin.
Ideally you should install plugins that are recently updated. However, there are plenty of WordPress plugins that don’t need updates. Plugin authors feel that since a plugin is not broken and works great, then there is no need for them to update it.
Admin
Bobby
Ok, that’s good to know. Thanks again.
arun
Great post, i am also running wordpress blog. i will apply these icons on my blog thanks for sharing.
Hemang Rindani
Nice article. WordPress is a great enterprise content management solution that can cater to any complex business requirements and develop powerful websites. It contains thousands of flexible, customizable and responsive themes, modules and plugins that can be utilized to design multiple websites effortlessly. Increasing competition demands an interactive and engaging website and thus it is important to include variety of tools that encourage visitors to stay more on a page. Plugins in WordPress adds value to the web page specially by making it more interesting. Utilizing right tools like Call to action buttons and social media login and sharing buttons with on page content helps to enhance user experience. Article rightly highlighted the point that selecting a right tool and utilizing its powers allows a CMS developer to have better control over the website.