通常の画像ファイルを使用してWordPressウェブサイトのアイコンを作成している場合、より良いものを見逃しているのではないかと考えてしまいます。
なぜなら、アイコンフォントの方が賢い選択だからです。アイコンフォントはピクセルベースの画像ではなく、ベクトルベースのテキストです。
これは、読み込みがはるかに速く、どの画面サイズでも鮮明に見え、ブランドに合わせてサイズや色を簡単に変更できることを意味します。
このガイドでは、WordPressテーマにアイコンフォントを追加する最も簡単な方法を紹介します。これらの方法は実際にテスト済みで、お使いのテーマでも問題なく動作します。
💡クイックアンサー:WordPressにアイコンフォントを追加する方法
お急ぎの場合は、サイトにアイコンフォントを追加するための2つの最良の方法の概要を以下に示します。
- 方法1:Font Awesomeプラグイン(無料&簡単) – WordPressブロックエディターを使用して、通常の投稿やページにアイコンを追加するのに最適です。無料のAPIトークン設定が必要です。
- 方法2:SeedProdページビルダー(最もカスタマイズ可能) – 完全なデザインコントロールを備えたカスタムランディングページを作成するのに最適です。1400以上のアイコンの組み込みライブラリが含まれています。
アイコンフォントとは何ですか?なぜそれらを使用すべきなのですか?
アイコンフォントは、文字や数字の代わりに記号や小さな画像を含んでいます。
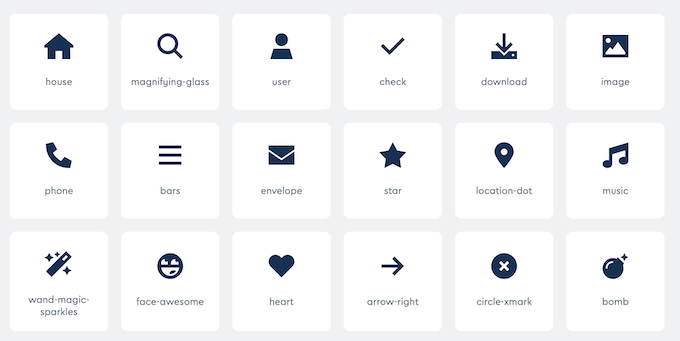
これらのアイコンフォントは、さまざまな方法で使用できます。たとえば、ショッピングカート、ダウンロードボタン、フィーチャーボックス、プレゼント企画、さらにはWordPressのナビゲーションメニューなどと組み合わせて使用できます。
実際、WordPressは管理画面でフォントアイコンを使用しています。
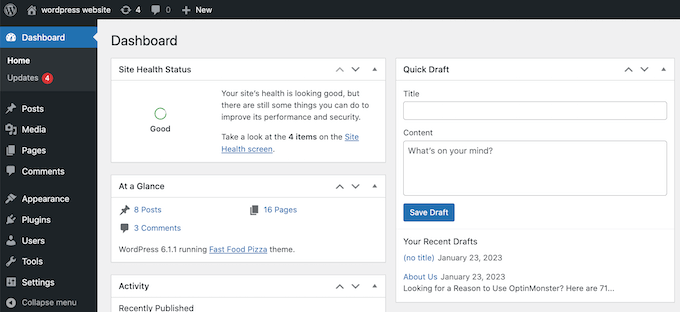
ほとんどの訪問者は、一般的に使用されるアイコンの意味をすぐに理解できるため、サイトのナビゲーションが容易になります。また、ほとんどの人が共通のアイコンフォントを話している言語に関係なく理解できるため、多言語ウェブサイトを作成するのにも役立ちます。
画像ベースのアイコンと比較して、フォントアイコンははるかに高速に読み込まれるため、WordPress の速度とパフォーマンスを向上させることができます。
無料で使用できるオープンソースのアイコンフォントセットはいくつかありますが、このガイドでは、最も人気のあるオープンソースアイコンセットであるFont Awesomeを使用します。
それでは、WordPressテーマにアイコンフォントを簡単に追加する方法を見ていきましょう。使用したい方法に直接ジャンプするには、以下のクイックリンクを使用してください。
- Method 1. Adding Icon Fonts Using a WordPress Plugin (Free and Easy)
- Method 2. Using Icon Fonts with SeedProd (More Customizable)
- WordPressアイコンフォントに関するよくある質問
方法1. WordPressプラグインを使用してアイコンフォントを追加する(無料で簡単)
WordPressにカスタムアイコンフォントを追加する最も簡単な方法は、Font Awesomeプラグインを使用することです。
このプラグインを使用すると、WordPressのテーマファイルを変更することなく、ページや投稿で無料のアイコンフォントを使用できます。プラグインを更新するたびに、新しいFont Awesomeアイコンも自動的に取得できます。
ステップ1. Font Awesomeプラグインのインストールと有効化
まず最初に行う必要があるのは、WordPressにFont Awesomeを追加することです。詳細については、WordPressプラグインのインストール方法に関するステップバイステップガイドをご覧ください。
有効化すると、ショートコードブロックにFont Awesomeアイコンを追加できます。
ステップ2. ショートコードブロックの追加
アイコンフォントを表示したいページまたは投稿を開き、「+」アイコンをクリックするだけです。
「ショートコード」を検索し、表示されたら適切なブロックを選択できるようになりました。
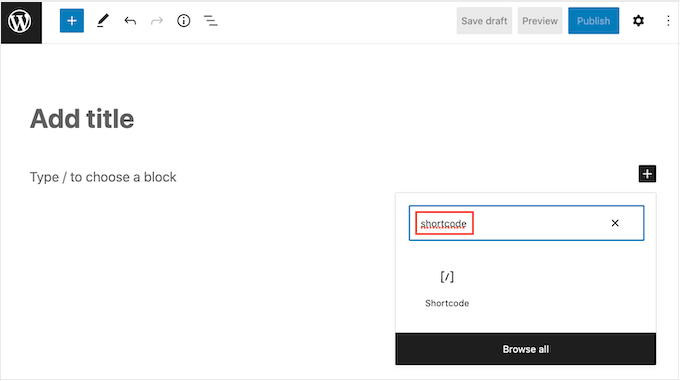
これが完了したら、次のショートコードを使用してFont Awesomeアイコンを追加できます。
[icon name="rocket"]
ステップ3. ライブラリでアイコン名を見つける
「rocket」を、表示したいアイコンの名前に置き換えるだけです。名前を取得するには、Font Awesome ライブラリにアクセスし、使用したいアイコンをクリックしてください。
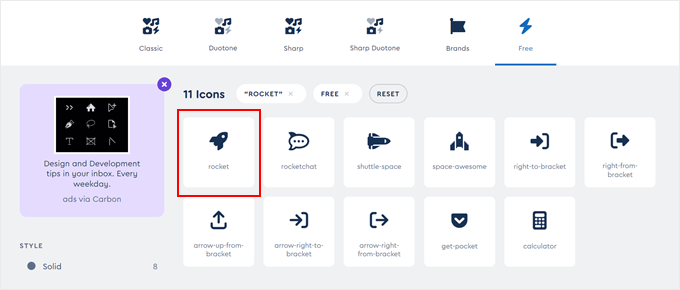
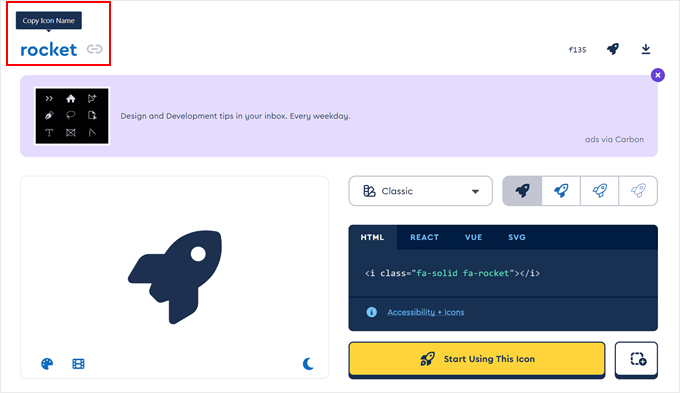
表示されるポップアップで、アイコンをクリックしてください。
Font Awesome は、名前を自動的にクリップボードにコピーします。
ステップ4. 変更の公開
これが完了したら、ショートコードに名前を貼り付けるだけです。これで、「公開」または「更新」をクリックしてアイコンフォントを公開できます。
時には、テキストブロック内にアイコンフォントを表示したい場合があります。例えば、ブランド名の後に「コピーライト」記号を表示する必要があるかもしれません。
これを行うには、ショートコードを任意の段落ブロック内に貼り付けるだけです。
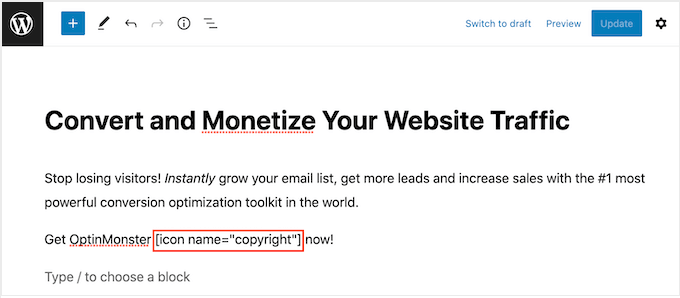
その後、右側のメニューの設定を使用して、テキストブロックのオプションをカスタマイズするのと同様にアイコンをカスタマイズできます。たとえば、テキストの色、フォントサイズ、WordPressの背景色を変更できます。
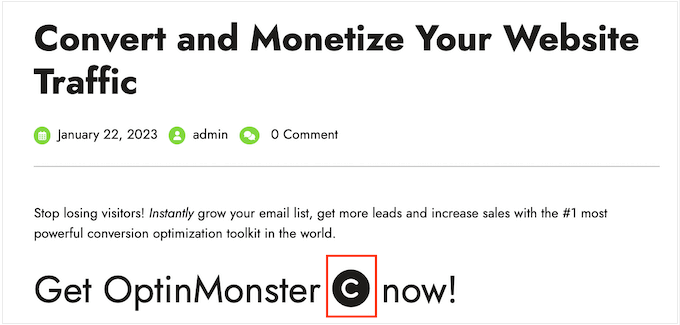
WordPressはショートコードをFont Awesomeアイコンに変換し、テキストの横に表示します。
ステップ5. メニューとウィジェットにアイコンを追加する(オプション)
他のオプションとして、ショートコードをウィジェット対応エリアに追加することもできます。
例えば、ショートコードブロックをサイトのサイドバーや同様のセクションに追加できます。
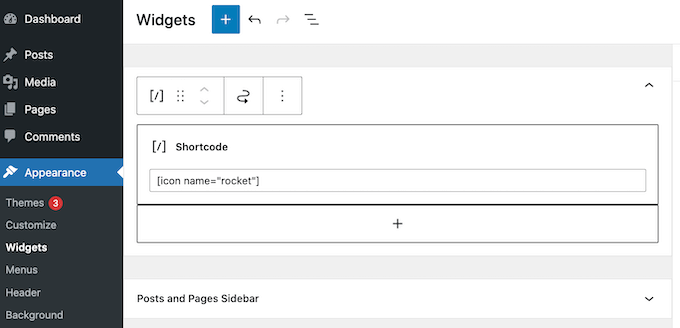
詳細については、WordPressサイドバーウィジェットでショートコードを使用する方法に関するガイドをご覧ください。
アイコンショートコードを列に追加して、美しい機能ボックスを作成することもできます。

WordPressでアイコン付きのフィーチャーボックスを追加する方法については、WordPressでアイコン付きのフィーチャーボックスを追加する方法のガイドをご覧ください。
多くのウェブサイトでは、訪問者がナビゲーションしやすくするために、メニューにアイコンフォントを使用しています。アイコンを追加するには、WordPressダッシュボードで新しいメニューを作成するか、既存のメニューを開きます。
WordPressでのナビゲーションメニューの追加方法については、WordPressでのナビゲーションメニューの追加方法の初心者向けガイドをご覧ください。
外観 » メニュー ページで、「画面オプション」をクリックし、「CSSクラス」の横にあるチェックボックスをオンにします。
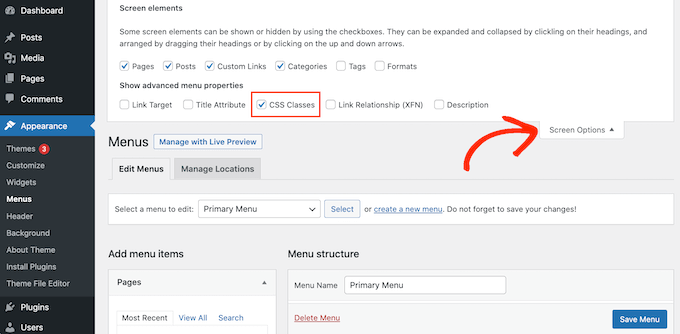
これが完了したら、アイコンを表示したいメニュー項目をクリックして展開します。
新しい「CSS クラス」フィールドが表示されるはずです。
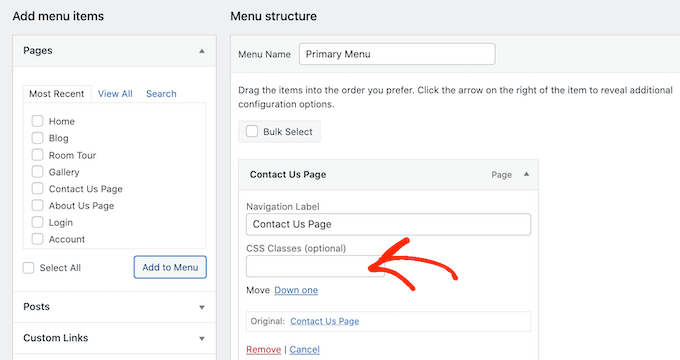
アイコンのCSSクラスを取得するには、Font Awesomeのウェブサイトで目的のアイコンフォントを見つけてクリックするだけです。必要であれば、さまざまな設定をクリックしてアイコンのスタイルを変更することもできます。
ポップアップには、HTMLコードスニペットが表示されます。CSSクラスは、引用符の間のテキストです。例えば、次の画像では、CSSクラスはfa-solid fa-address-bookです。
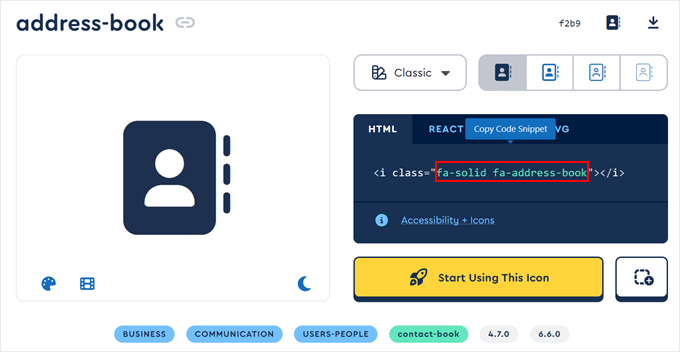
引用符内のテキストをコピーし、WordPressダッシュボードに戻ってください。
テキストを「CSSクラス」フィールドに貼り付けることができます。
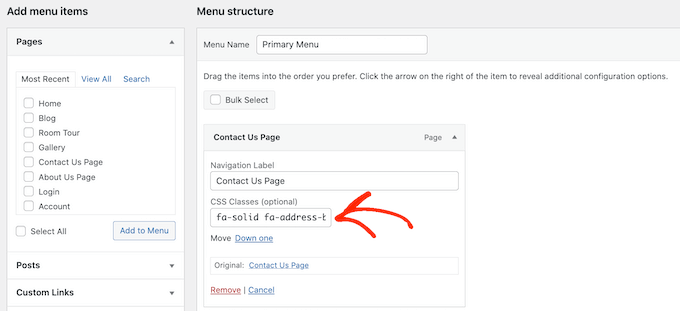
アイコンフォントを追加するには、上記と同じ手順に従ってください。
メニューの設定が完了したら、「保存」をクリックします。これで、WordPressウェブサイトにアクセスすると、更新されたナビゲーションメニューが表示されます。
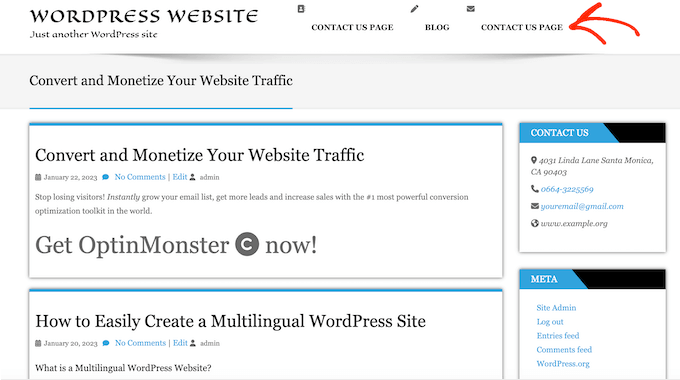
方法 2. SeedProd でアイコンフォントを使用する(よりカスタマイズ可能)
サイトのどこにでもフォントアイコンを使用する自由が欲しい場合は、ページビルダープラグインの使用をお勧めします。
SeedProdは、市場で最高のドラッグ&ドロップWordPressページビルダーであり、1400以上のFont Awesomeアイコンが組み込まれています。また、ドラッグ&ドロップで任意のページに追加できる、すぐに使えるアイコンブロックも備えています。
当社のパートナーブランドのいくつかは、このツールを使用してウェブサイト全体を作成しており、素晴らしい経験をしています。詳細は、SeedProd のレビューをご覧ください。
ステップ1:SeedProdをインストールしてライセンスを入力する
まず、プラグインをインストールして有効化する必要があります。詳細については、WordPressプラグインのインストール方法の初心者向けガイドをご覧ください。
注意: SeedProdの無料バージョンもありますが、アイコンブロックが付属しているため、ここではProバージョンを使用します。
有効化したら、 SeedProd » 設定 に移動してライセンスキーを入力します。
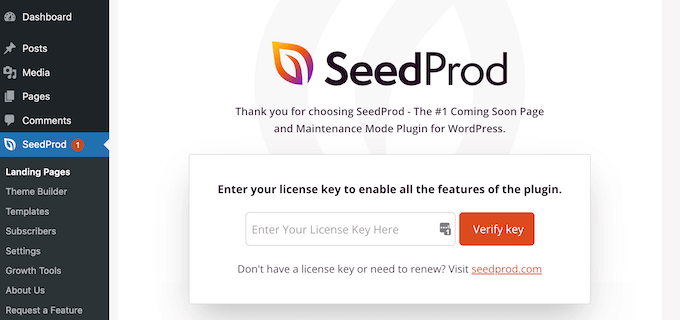
この情報はSeedProdウェブサイトのあなたのアカウントで見つけることができます。ライセンスキーを入力したら、「キーの検証」ボタンをクリックしてください。
ステップ2:新しいランディングページを作成する
次に、SeedProd » Pagesにアクセスし、「新しいランディングページを追加」ボタンをクリックする必要があります。
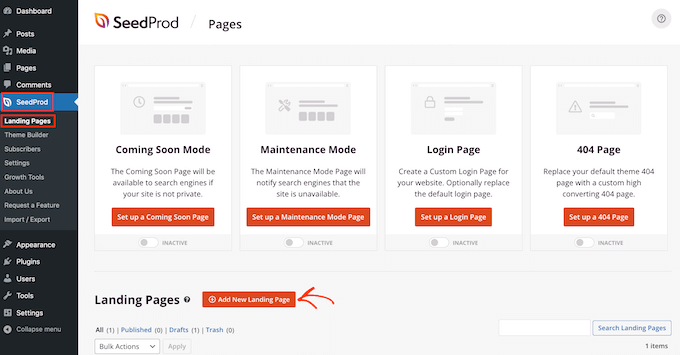
次に、ページの基盤として使用するテンプレートを選択できます。SeedProdには、WordPressブログまたはウェブサイトのニーズに合わせてカスタマイズできる350以上のプロフェッショナルにデザインされたテンプレートがあります。
例えば、バイラル待機リストのランディングページ、スqueezeページ、あるいはカスタム404エラーページを作成して、ユーザーを惹きつけることができます。
テンプレートを選択するには、好きなデザインの上にマウスカーソルを合わせ、クリックして選択するだけです。
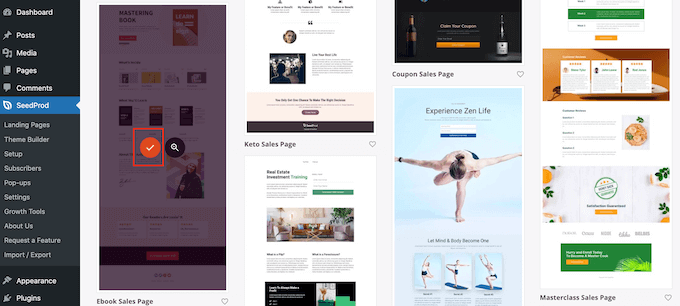
すべての画像で「Ebook Sales Page」テンプレートを使用しています。これはデジタル製品の販売に最適です。ただし、好きなデザインを使用できます。
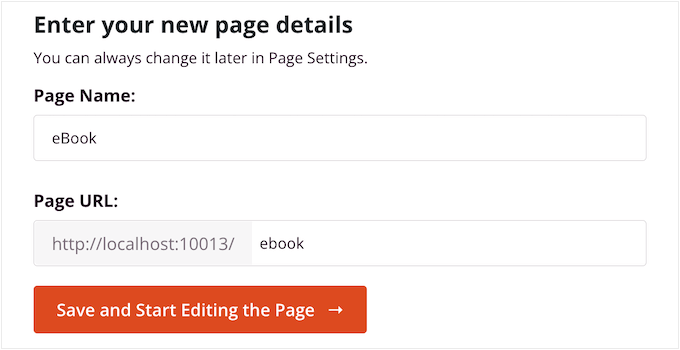
次に、カスタムページの名称を入力します。SeedProdはページのタイトルに基づいてURLを自動的に作成しますが、このURLは好きなものに変更できます。
入力した情報に満足したら、「保存してページの編集を開始」ボタンをクリックします。
ステップ3:デザインにアイコンブロックを追加する
次に、SeedProdのドラッグアンドドロップページビルダーに移動し、そこでテンプレートをカスタマイズできます。
SeedProd エディタは、右側にデザインのライブプレビュー、左側にブロック設定を表示します。
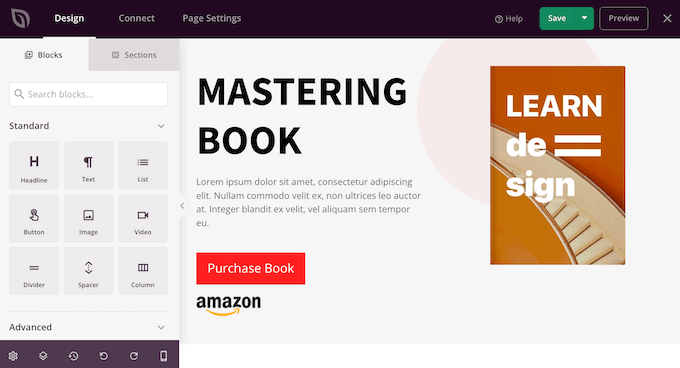
左側のメニューには、デザインにドラッグできるブロックもあります。
ボタンや画像などの標準ブロックをドラッグアンドドロップしたり、お問い合わせフォーム、カウントダウン、ソーシャルメディア共有ボタンなどの高度なブロックを使用したりできます。
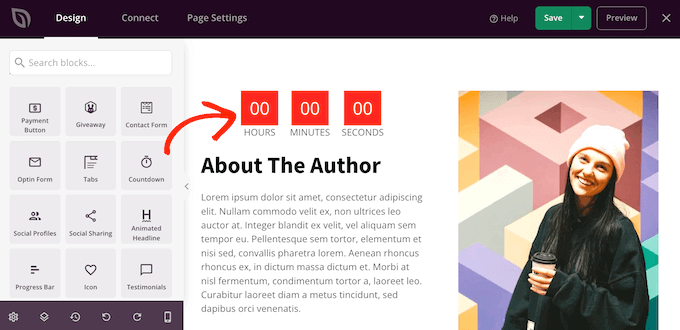
ブロックをカスタマイズするには、レイアウトでそれをクリックして選択するだけです。
左側のメニューに、そのブロックをカスタマイズするために使用できるすべての設定が表示されます。たとえば、背景色を変更したり、背景画像を追加したり、ブランドに合わせて配色やフォントを変更したりすることができます。
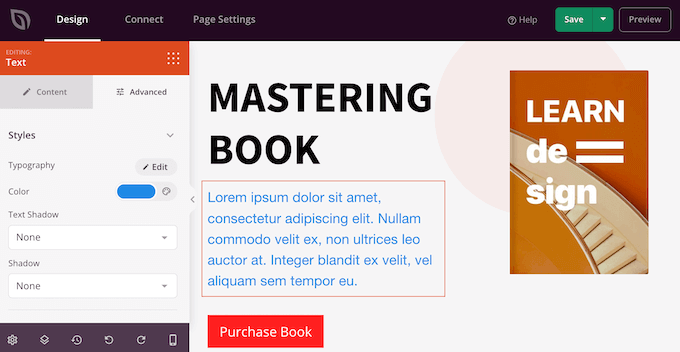
ページにアイコンフォントを追加するには、左側の列にある「アイコン」ブロックを見つけて、レイアウトにドラッグするだけです。
SeedProdはデフォルトで「矢印」アイコンを表示します。
ステップ4:ライブラリからアイコンを選択する
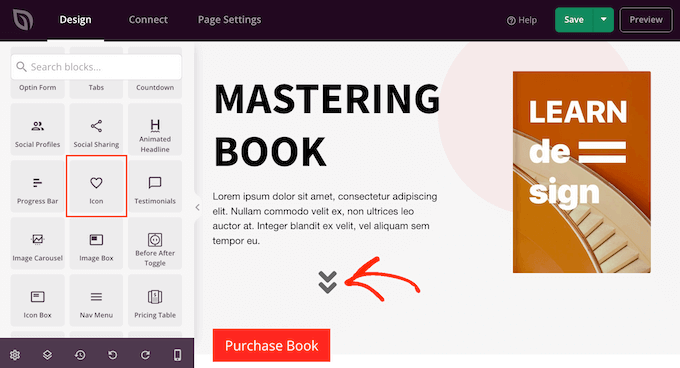
別のFont Awesomeアイコンを表示するには、アイコンブロックをクリックして選択するだけです。
左側のメニューで、アイコンの上にマウスカーソルを合わせ、表示される「アイコンライブラリ」ボタンをクリックします。
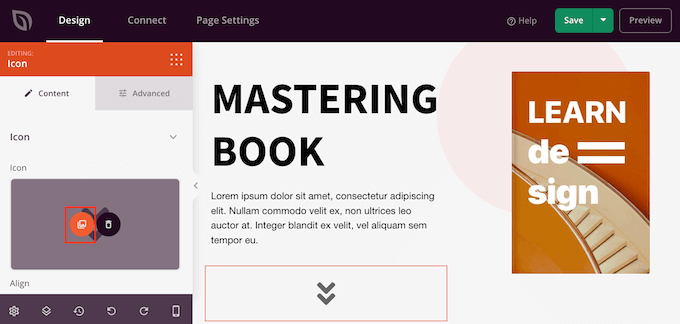
これで、選択できるさまざまなFont Awesomeアイコンが表示されます。
使用したいフォントアイコンを見つけてクリックするだけです。
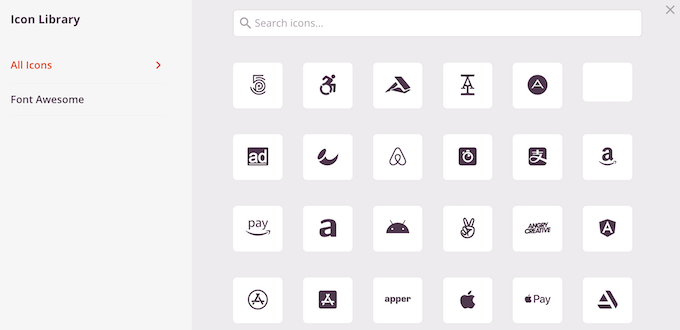
SeedProd は、アイコンをレイアウトに追加します。
ステップ5:カスタマイズして公開する
アイコンを選択した後、左側のメニューの設定を使用して、その配置、色、サイズを変更できます。
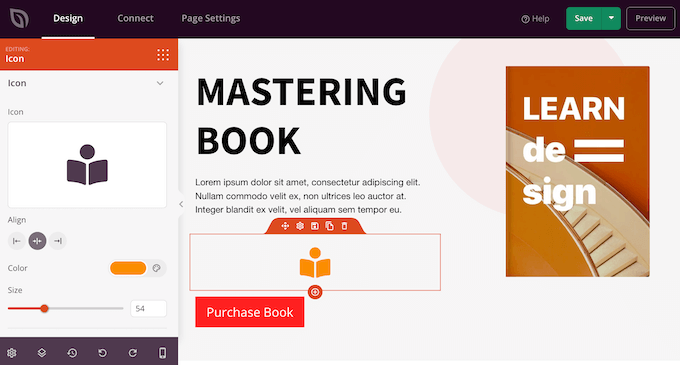
左側のメニューの「リンク」フィールドに入力して、フォントアイコンにリンクを追加することもできます。
もう一つの選択肢は、SeedProdの既製のアイコンボックスを使用することです。
これにより、テキストを入力し、その横にフォントアイコンを表示できるため、フィーチャーボックスに最適です。

左側のメニューからアイコンボックスを見つけて、レイアウトにドラッグするだけです。
その後、ブロックをクリックして選択し、上記と同じプロセスに従ってアイコンを変更できます。
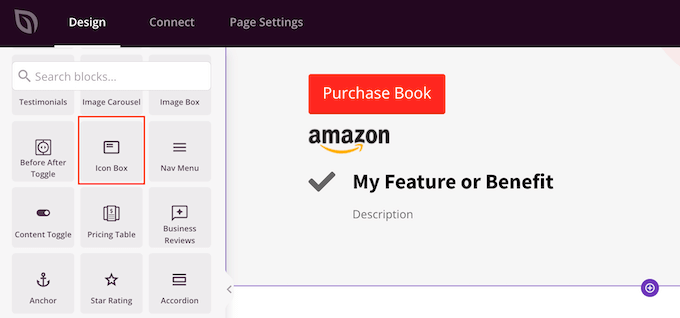
その後、ヘッダーテキストと本文テキストを入力できます。
「詳細設定」タブを選択すると、ブロックのパディングとマージンを変更したり、CSSアニメーションを追加したりすることもできます。
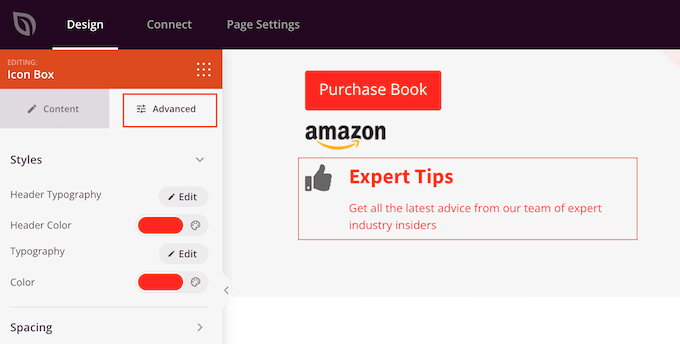
左側のメニューでさらにブロックを追加し、それらのブロックをカスタマイズすることで、ページでの作業を続けることができます。
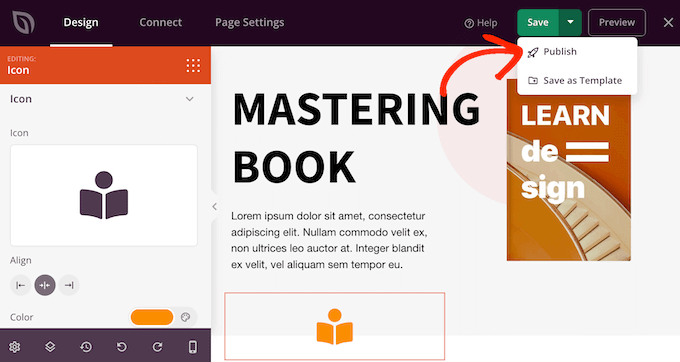
ページの見た目が気に入ったら、「保存」ボタンをクリックします。その後、「公開」を選択してページを公開できます。
代替案:SVG アイコンを使用する
WordPressにアイコン画像を追加する別の方法として、SVGアイコンを使用する方法があります。スケーラブルベクターグラフィックスの略で、ベクターグラフィックスで一般的に使用される画像形式です。
多くの人が、アイコンに複数の色を追加したい場合に、アイコンフォントよりもSVGベクターアイコンを使用しています。これらのファイルは、SEOフレンドリーであり、他の画像アイコンよりも読み込みに必要なサーバーリクエストが少ないことでも知られています。
SVG についてさらに詳しく知りたい場合は、WordPress に SVG 画像ファイルを簡単に追加する方法に関するステップバイステップガイドをご覧ください。
WordPressアイコンフォントに関するよくある質問
WordPressのテーマにWordPressアイコンフォントを追加することに関して、読者からよく寄せられる質問をいくつかご紹介します。
WordPressにFont Awesomeアイコンを追加する方法は?
最も簡単な方法は、公式のFont Awesomeプラグインをインストールすることです。セットアップが完了したら、WordPressのコンテンツエディタ内のショートコードブロックを使用して、アイコンをすぐに挿入できます。
WordPressメニューにカスタムアイコンを追加するにはどうすればよいですか?
外観 » メニューに移動し、上部にある「画面オプション」をクリックして「CSSクラス」ボックスにチェックを入れます。次に、任意のメニュー項目を展開し、アイコンを表示するために特定のアイコンクラス名(fa-solid fa-homeなど)をCSSクラスフィールドに貼り付けます。
WordPressに記号を挿入するにはどうすればよいですか?
ブロックエディタで直接Insert Special Charactersプラグインを使用できます。有効化すると、ツールは「特殊文字」(オメガ記号)アイコンを追加し、それをクリックして任意の記号を追加できます。
詳細については、WordPress投稿に特殊文字を追加する方法に関するチュートリアルをご覧ください。
プラグインなしでWordPressにメニューアイコンを追加するにはどうすればよいですか?
まず、アイコンライブラリのスタイルシートへのリンクをテーマのヘッダーまたはfunctions.phpファイルに手動で追加する必要があります。ライブラリがサイトにロードされたら、メニュー項目の「CSSクラス」フィールドにアイコンの特定のクラス名を追加できます。
WordPressに絵文字を挿入するにはどうすればよいですか?
コンピュータのネイティブキーボードショートカットを使用して、絵文字ピッカーを開くことができます。WindowsではWin + .(ピリオド)を押し、MacではCmd + Ctrl + Spaceを押して、コンテンツのどこにでも絵文字を選択して挿入します。
このチュートリアルでWordPressテーマにアイコンフォントを追加する方法を学べたことを願っています。また、最適なWordPressテーマビルダーやWordPressテーマのフォントを変更する方法に関するガイドも参照してください。
この記事が気に入ったら、WordPressのビデオチュートリアルについては、YouTubeチャンネルを購読してください。 TwitterやFacebookでもフォローできます。


Shraddha Patil
とても参考になりました!このような解決策を探していました。ここで見つけられて嬉しいです。ありがとうございます!!
WPBeginnerサポート
Glad our guide was helpful
管理者
Juan
こんにちは、このような素晴らしい説明をありがとうございます。
しかし、一つ理解できないことがあります。
wp_enqueue_style()関数では、最初のパラメータは「wpb-fa」という文字列です。ドキュメントで確認しましたが、これはスタイルシートの名前であるはずです。しかし、理解できません。この名前は何のためにあるのですか?この場合、そのように名前を付けることは必須ですか?スタイルシートは「style.css」という名前ではないのですか?
初心者向けの質問ですみません。
ありがとう
WPBeginnerサポート
wpb-fa はスクリプトの一意の名前であり、そのセクションはスタイルシートの名前ではありません
管理者
M. Hridoy
こんにちは、
これは素晴らしいです!あなたの素晴らしい情報満載で読む価値のある投稿をありがとうございます。確かにタイムリーで役立つ投稿であり、この件について貴重な情報をいくつか得ることができました。新しい提案を私たちに更新し続けてください…
WPBeginnerサポート
Thank you and you’re welcome
管理者
drkumar kumar
素晴らしい記事です。共有ありがとうございます。
WPBeginnerサポート
Thank you, glad you liked our article
管理者
Niranjan G Vala
WP Beginnersサポートチームの皆様、私は視覚障害のあるウェブデザイナーです。
この記事をすべて読みましたが、ウェブサイトにフォントアイコンを統合することについて、まだいくつか質問があります。
テーマでFont Awesomeを使用したいと考えています。記事に記載されている手順はすでに実行しました。
投稿やページではアイコンは正常に機能していますが、メニューで使用したいと考えています。
CSSで以下のように設定しました。
.shoppingcart::before { font-family: FontAwesome; content: "\f07a"; color: #ffffff; }
しかし、それでもうまくいきませんでした。では、何が間違っていたのでしょうか?
この問題から抜け出すのを手伝ってください。
いつも感謝しています。
wp beginners の皆様、本当にありがとうございます。
WPBeginnerサポート
ニランジャンさん、
Font Awesome を追加する簡単な方法は、個々のメニュー項目に CSS クラスを追加することです。フォントスタイルシートをエンキューした後。
外観 » メニューページに移動し、画面オプションボタンをクリックします。そこから、CSSクラスチェックボックスがチェックされていることを確認してください。
次に、個々のメニュー項目をクリックして展開すると、CSSクラスを追加するオプションが表示されます。各Font Awesomeアイコンには独自のCSSクラスがあります。例えば、fa fa-lg fa-home CSSクラスはホームアイコンに使用されます。これらはすべてFont Awesomeのウェブサイトで見つけることができます。
CSSクラスを追加した後、カスタムCSSでこれらのクラスを使用してアイコンをスタイル設定できます。
管理者
Niranjan G Vala
WP Beginnersの皆様、貴重なご回答をいただき、誠にありがとうございました。また、フィードバックが遅くなり申し訳ございません。残念ながら、メールが迷惑メールフォルダに入っていたため、迅速な返信ができませんでした。現在は正常に動作しており、ナビゲーションメニューでFont Awesomeを使用できるようになりました。
記事を投稿する際には、プラグイン/テーマのアクセシビリティレベルを明記していただけると幸いです。WordPressコアは完全にアクセシブルですが、プラグインとテーマの60%は、World Wide Web Consortium (w3.org) の推奨事項であるWebアクセシビリティガイドライン (WCAG 2.0) に準拠していません。または、アクセシビリティ向上のために、ウェブサイトにスキップリンクを追加していただけると幸いです。ウェブサイトをアクセシブルにすることは、私のような障害を持つ人々がウェブサイトをより簡単にナビゲートするのに大いに役立ちます。ありがとうございました。
ripon
ウェブサイトにはFont Awesomeアイコンが必要です。これを動的にしたいです。WordPressコントロールパネルからアイコンを変更したいです。例えば、「なぜ私たちを選ぶのか」セクションにはレスポンシブデザインのフォントアイコンが必要です。これをWordPressテーマオプションから変更したいです。
Tobias
こんにちは、素晴らしいチュートリアルをありがとうございます!
助けていただけますか?
Operaでアイコンを適切にスケーリングするために「-o-transform: scale(1);」というコード行を使用しましたが、効果がありませんでした。もしかしたら、私が使用している特定のアイコンが原因かもしれません。
それらに何か問題がある可能性はありますか?どう思われますか?チュートリアル、ありがとうございました!
valldahi
Isyさん、本当にありがとうございます。方法1
Nrusingh Pr Acharya
この方法に感謝します。WP v4.7 では better がサポートされなくなったため、手動で FA を挿入しました。
最初の頃からあなたのチュートリアルに従ってきました。今ではWordPressにかなりの自信があります。ありがとうございます。
zeniwo
非常に有益な記事で、WordPress テーマにアイコンフォントを追加することに関する疑問を解消するのに本当に役立ちました。あなたのようなブロガーは、私のような何百人もの新規および意欲的なブロガーが物事を理解し、前進するのを助けてくれます。この役立つ記事を本当にありがとうございます。
WPBeginnerサポート
Glad you found it helpful
管理者
Rhonda
ありがとうございます!フォントアイコンの使い方を理解しようとしていたのですが、これは非常に分かりやすく役立ちました。
WPBeginnerサポート
Glad you found it helpful
管理者
神戸
この投稿、ありがとうございます。とても参考になりました。Better Fonts Awesomeプラグインを使用していましたが、とても役立ちました。しかし、コンテンツをレスポンシブな列に整形する必要があり、それができるプラグインを探し始めました。偶然MotoPress Editorに出会いました。実際、私はビジュアルエディタに依存するのが好きではありませんが、列を視覚的に整形し、Font Awesomeアイコンを使用してサイズや色を簡単に選択できたため、助かりました。改めて、素晴らしい仕事に感謝します。