私たちは長年にわたってWordPressサイトを数多く手掛けてきましたが、私たちがいつも戻ってくるカスタマイザーのひとつが、bodyクラスにページスラッグを追加することです。とてもシンプルなことですが、デザインの柔軟性という点では雲泥の差があります。
WordPressテーマでページスラッグを追加することで、複雑な作業をすることなく、望むすべてのカスタマイゼーションを行うことができます。サイトの他の部分に影響を与えることなく、個々のページの色やフォント、その他の項目を簡単に変更することができます。
この投稿では、WordPressテーマのbodyクラスにページスラッグを追加する方法を紹介します。
なぜテーマのBodyクラスにページスラッグを追加するのか?
サイト上の特定のページをカスタマイズし、ページを正しく識別したい場合、テーマのbodyクラスにページスラッグを追加するととても便利です。
初期設定では、WordPressサイトには投稿IDクラスしか表示されないため、正しいページを認識する際に厄介なことがあります。ページスラッグはブログ投稿のURLを表示するので、ページのカスタマイザーが簡単になります。
そのほかにも、ページスラッグボディクラスを使ってページにさまざまなカスタマイザーを施すことができます。例えば、特定の投稿日のフォントや色を変更したり、特定のランディングページのコールトゥアクションボタンを強調したりすることができます。
ということで、WordPressテーマのbodyクラスにページスラッグを追加する方法を見てみましょう。
WordPressテーマにページスラッグを追加する
WordPressテーマのbodyクラスにページのURLを追加するには、テーマのfunctions.phpファイルに以下のコードを入力します。
1 2 3 4 5 6 7 8 | function add_slug_body_class( $classes ) {global $post;if ( isset( $post ) ) {$classes[] = $post->post_type . '-' . $post->post_name;}return $classes;}add_filter( 'body_class', 'add_slug_body_class' ); |
WordPressのテーマエディター(コードエディター)からテーマのfunctions.phpファイルにアクセスすることができます。しかし、テーマファイルを直接編集するのは非常に危険です。
コードを追加する際にミスがあると、サイトが壊れたり、WordPressダッシュボードへのログインがブロックされたりする可能性があるからだ。
テーマのbodyクラスにコードを追加するもっと簡単な方法は、WPCodeのようなWordPressプラグインを使うことだ。

WPCodeを使用すると、簡単に数分で、エラーなしでサイトにコードを追加することができます。さらに、将来テーマの更新や変更があった場合でも、コードが削除されることはありません。
また、1クリックでインストールできる専門家が作成したコードスニペットのライブラリが付属しています。そのため、高度なWordPressカスタマイザーを作成するためのコーディングスキルは必要ありません。
実際、bodyクラスにページスラッグを追加する方法は、WPCodeライブラリにあらかじめスニペットとして用意されています。これが最も簡単な方法です。
まず、あなたのサイトに無料のWPCodeプラグインをインストールし、有効化する必要があります。ステップバイステップの手順については、WordPressプラグインのインストール方法のガイドを参照してください。
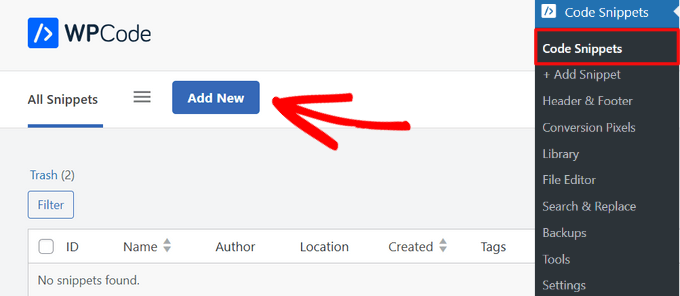
プラグインを有効化すると、WordPressの管理バーに「Code Snippets」という新しいメニュー項目が追加されます。それをクリックすると、コードスニペットをすべて管理するページに移動します。
最初のコード・スニペットを追加するには、「新規追加」ボタンをクリックします。
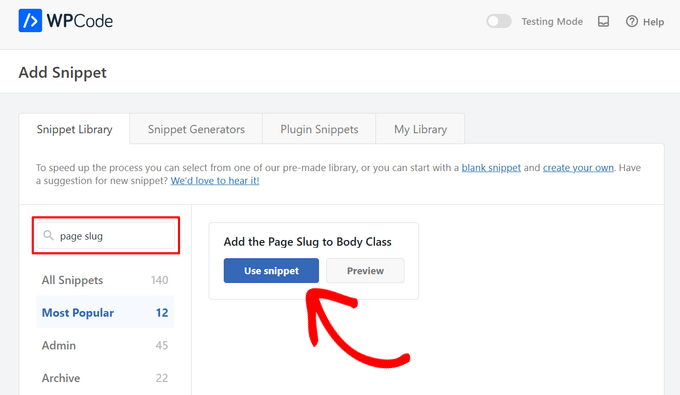
スニペットの追加」ページが表示され、あらかじめ用意されたライブラリからコード・スニペットを選ぶことができる。
Add the Page Slug to Body Class」スニペットを検索し、見つけたら「Use snippet」ボタンをクリックするだけです。
これで、WPCodeは自動的にコードを追加し、適切な挿入方法を設定します。
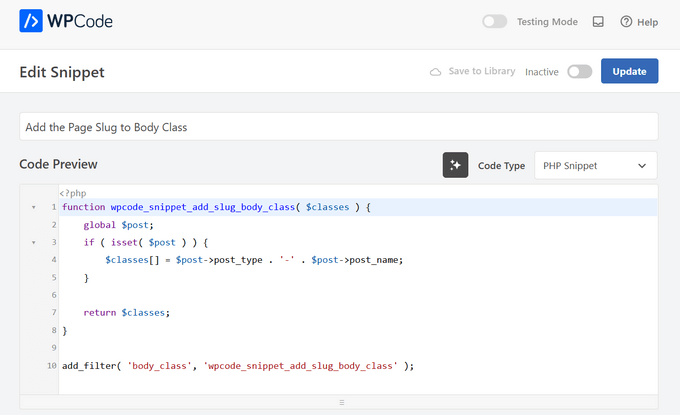
スイッチを「非活性」から「有効化」に切り替えるだけです。最後に、ページ上部の『更新』ボタンをクリックする。
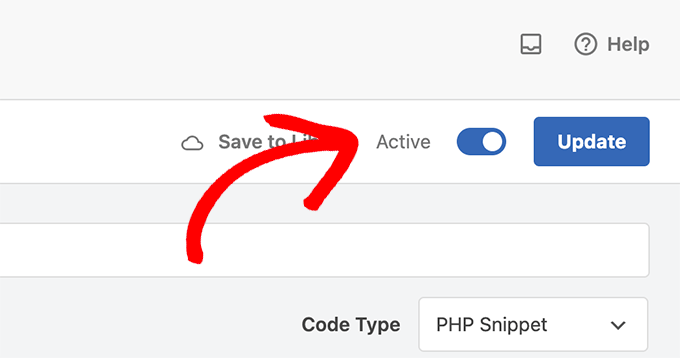
新規のボディ・クラスが次のように出力されます: page-{スラッグ}。このクラスを使って、初期設定のスタイルを上書きし、特定のページ用に要素をカスタマイズしてください。
例えば、サイドバーウィジェットを“education “というスラッグがあるページにのみ表示したいとします。その場合、次のようなCSSを追加できます:
1 2 | #sidebar .widgets{background: #fff; color: #000;}.page-education #sidebar .widgets{background: #000; color: #fff;} |
詳しくは、WordPressにカスタムCSSを追加する方法をご覧ください。
カスタムコードを手動で追加する
上記のカスタムコードを手動で追加したい場合は、こちらをご覧ください。
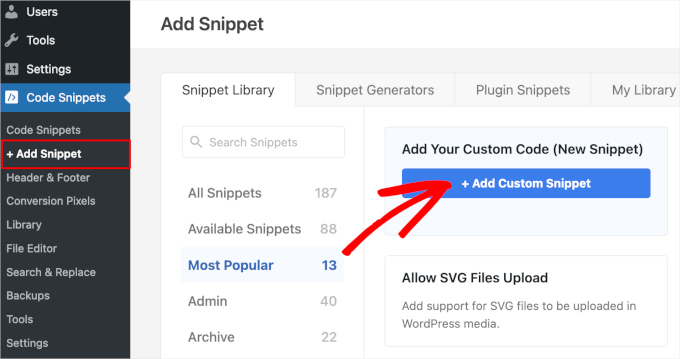
まず、WordPressダッシュボードからCode Snippets“ Add Snippetページに移動します。
そこから「カスタムコードの追加(新規スニペット)」設定に進み、「+カスタム・スニペットの追加」ボタンをクリックします。
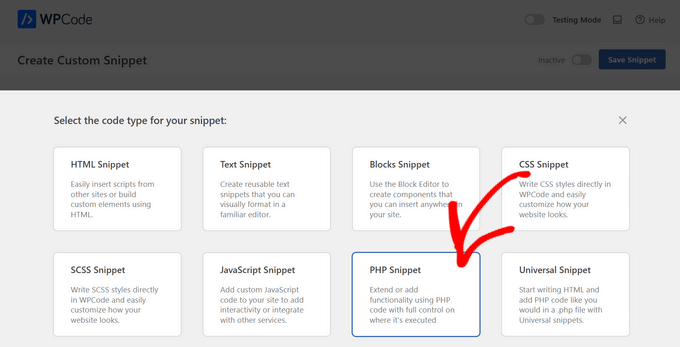
次に、画面に表示されるオプションのリストからコードタイプを選択する必要がある。このチュートリアルでは、’PHP Snippet’を選択します。
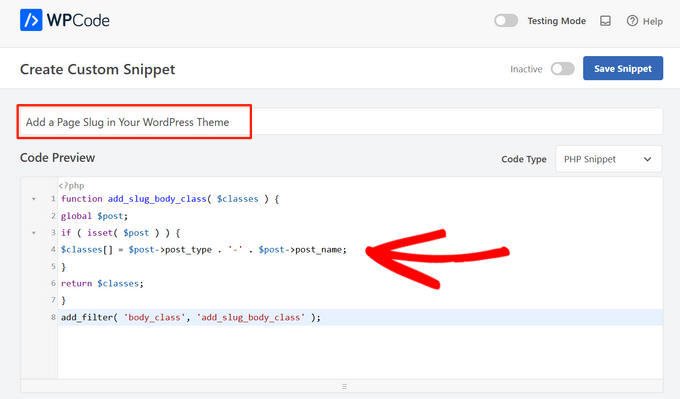
コード・スニペットにはタイトルを付けます。これは参考用で、コードを識別するのに役立つものであれば何でもかまいません。
その後、上記のコードをコピー&ペーストして「コード・プレビュー」ボックスに入れてください。
次に、「インサーター」セクションまでスクロールダウンします。ここで「Auto Insert」メソッドを選択すると、管理画面やフロントエンドなど、WordPressの特定の場所にコードを自動的に挿入して実行することができます。
不安な場合は、初期設定の「Run Everywhere」のままにしておいてください。
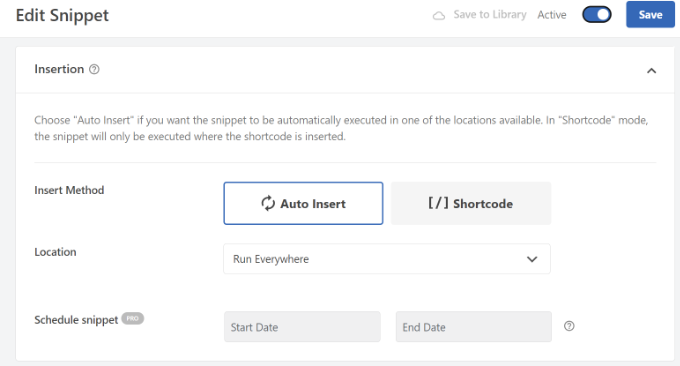
または、「ショートコード」メソッドを選択することもできます。この方法では、スニペットは自動的に挿入されません。あなたのサイトの任意の場所に手動で挿入できるショートコードが得られます。
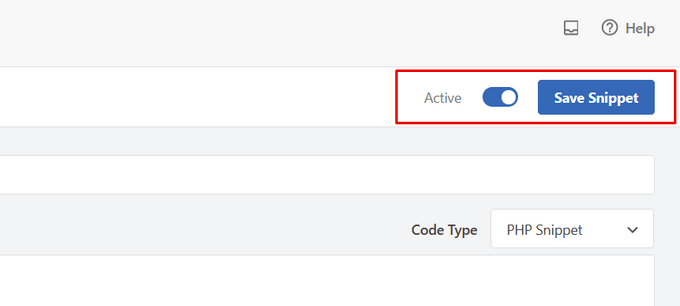
準備ができたら、スイッチを「Inactive」から「Active」に切り替え、右上の「Save Snippet」ボタンをクリックする。
詳しくは、WordPressでカスタマイザーコードを追加する方法をご覧ください。
この投稿が、WordPressテーマのbodyクラスにページスラッグを追加する方法を学ぶのにお役に立てば幸いです。WordPressのボディクラスと 最適なデザインソフトの選び方についてのガイドもご覧ください。
If you liked this article, then please subscribe to our YouTube Channel for WordPress video tutorials. You can also find us on Twitter and Facebook.


David
Thanks! Simple and effective.
WPBeginner Support
You’re welcome!
Admin
jeba
Thanks. Its working
WPBeginner Support
Glad our method worked for you
Admin
Bradley
Many thanks! Literally copied & pasted this code into my functions.php. Worked perfectly.
Alds
How about using global $wp_query instead of $post? I’ve noticed that $post gets overwritten if you’ve run a wp_query before the functions.php gets executed.
Pete
This needs a conditional statement to only apply it to single.php, not archive.php etc.
Chris
How can I put the post-id in the body class?
Aaron McGraw
Awesome! Just what I needed. Thank you so much!
Daneil
Thank you for putting it out there, simple bit of code, but useful and allows you to write more human friendly css files, rather than classes based on ID. Cheers
Austin
Thank you so much for this! I found out the hard way that page-id can change given different circumstances. This allows me to style individual pages without as much worry.
Kevin
Many thanks for this. Had some problems initially due to the position of code in my stylesheet CSS but once moved to the bottom worked great. Just wish this was standard for WP as others have said and that i had known about this a long time ago
Tom McGinnis
This code works quite well. I was finding, however, that search results would end up with the body class including the slug from the first item listed. Sometimes the first item would have styles that would override the styles for the search results page. Strange, huh!
I figured out that if you put !is_search() inside the if statement, then this problem is eliminated. If anybody else runs into this problem, the fix is simple.
Did you use &&?
When you put in !is_search() –How did you write the code?
Murhaf Sousli
This’s exactly what I’m looking for, I pasted the code in function.php, but unfortunately there is no class added to body! any ideas?
Asaf
I have the exactly same issue
Ahir Hemant
Hello, it working for me. send me your link so i can check.
Thank you
WPBeginner Staff
It is bundled with WordPress. However the front-end of your site is handled by themes that’s why it is left for theme authors to decide whether or not to use it.
MJ
Awesome! I wish this functionality was bundled with WP though
Miluette
Thank you sooo much. Just what I needed.
Suat
It’s great way for editing css.
Thank you
Weerayut Teja
You save my work time.
Thanks Syed
Mike
Thanks for this. I just used it to create a quick plugin to add the slug and ancestor slugs to the body class. Anyone interested can get that here: https://github.com/bigmikestudios/bms-bodyclass-slug
Todd M.
This is a great snippet for all WordPress devs. Comes as standard in my theme setup now.
Gaurav Ramesh
Thanks for this. Such small tips and tricks help a lot to beginners like me.
Randy Caruso
Thanks for this – been stuck hacking myself to bits with the page-id and suffering the consequences.