
Lightroomでの写真編集は、多くのフォトグラファーにとって欠かせない作業だ。しかし、手作業でWordPressにアップロードするのは面倒で時間がかかります。⏱️
幸いなことに、Envira Galleryはそれを簡単かつ迅速に行うことができます。Adobe Lightroomとの統合により、数回クリックするだけで、画像をWordPressサイトに直接送信することができます。
さらに、多くの人気プラグインとテスト・比較しましたが、常に最高のパフォーマンスを発揮しています!
この投稿では、Adobe LightroomからWordPressサイトに写真をアップロードする方法を順を追って説明します。最後には、ワークフローを効率化し、写真のアップロードをよりスムーズに行えるようになります。🧑💻

Adobe Lightroomとは?
Adobe Lightroomは、画像に基本的な変更や調整を加えるのに役立つ写真編集スイートです。Photoshopや Illustratorなどの他のツールを含むAdobe Creative Cloudの一部です。
Adobe Lightroomを使えば、写真を管理したり、露出やコントラストの調整、トリミングなどの仕上げを加えることができる。
このツールはAdobe Photoshopとは異なり、LightroomではPhotoshopのような幅広い編集権限や機能は得られません。そのため、Adobe Lightroomは、コレクションを作成して基本的な編集を行いたいプロのフォトグラファーに適している。
適切なWordPressプラグインを使えば、Lightroomアカウントをサイトに接続し、コレクションから写真を簡単にアップロードできる。
どうすれば始められるか見てみよう。
Adobe LightroomからWordPressへのアップロードに必要なもの
まず、コンピューターにAdobe Lightroom Classicがインストールされている必要があります。Lightroom 6またはCreative Suite以降のバージョンであれば、どのバージョンでも動作します。
そのためには、Adobe Creative Cloudのサイトにアクセスし、アカウントを登録する必要があります。

次に、WordPressのための最高のギャラリープラグインであるEnvira Galleryを使用します。WordPressで美しいレスポンシブ画像ギャラリーを作成することができます。
Envira Galleryは、ゴールド、プラチナ、エージェンシー、プロライセンスでLightroomアドオンを提供しています。このアドオンは、Adobe LightroomとWordPressサイト間のシームレスな統合を提供します。プラグインの詳細については、Envira Galleryのレビューをご覧ください!
以下のセクションでは、Adobe LightroomをWordPressに統合する方法をご紹介します。ここでは、すべての手順を簡単に説明します:
始めよう!
WordPressでEnviraギャラリーを設定する
最初に必要なことは、Envira Galleryプラグインをインストールして有効化することです。より詳細な手順については、WordPressプラグインのインストール方法のステップバイステップガイドを参照してください。
有効化したら、WordPressダッシュボードからEnvira Gallery ” 設定に移動する必要があります。
Enviraギャラリーのサイトのアカウントページにあるライセンスキーを入力してください。

キーを入力したら、「Verify Key」ボタンをクリックします。
次に、Envira Gallery ” Addonsにナビゲーションし、スクロールダウンしてLightroom Addonを見つけましょう。
アドオンを見つけたら、適切な「インストール」ボタンをクリックするだけです。

Envira GalleryはLightroomアドオンをインストールし、有効化ボタンをクリックして有効化する必要があります。
次に、Envira Gallery ” 設定に移動し、’Lightroom’タブをクリックする必要があります。
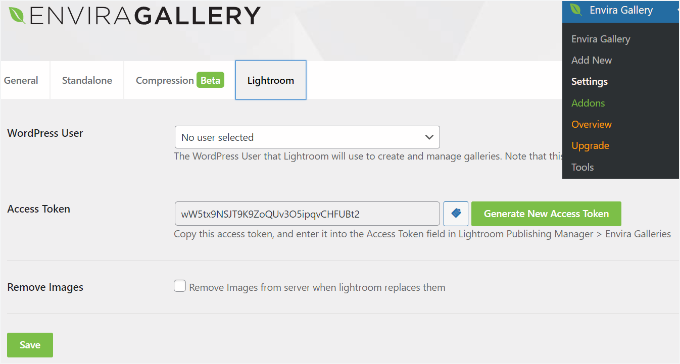
ここで、2つのオプションが表示されます。
まず、Lightroomから画像を公開するために使用するユーザーアカウントを選択します。次に、アクセストークンを生成します。
新規アクセストークンの生成」ボタンをクリックし、トークンをコピーしてください。
保存』ボタンをクリックして設定を保存するのをお忘れなく。
コンピューターにAdobe Lightroom Classicをセットアップする
このステップでは、コンピューターにAdobe Lightroomクラシックアプリをインストールし、セットアップする必要があります。
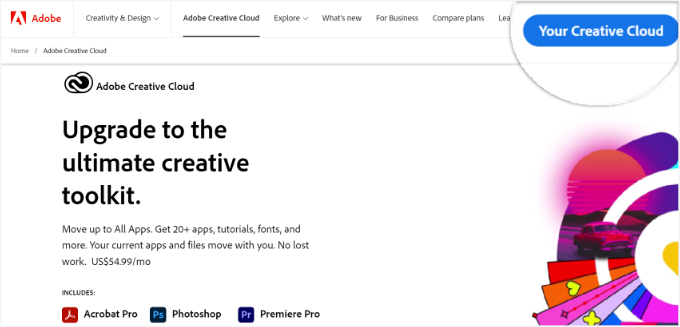
まず、Adobe Creative Cloudのサイトにアクセスし、上部にある「Your Creative Cloud」ボタンをクリックします。Adobeアカウントにサインインしていることを本当に〜してもよいですか?
Creative Cloudのホームページが表示されます。
ユーザー名の右隅にある「Creative Cloudアプリのインストール」オプションをクリックします。

次に、ダウンロードファイルをコンピューターに保存し、インストールします。
インストーラをインストールしたら、コンピューターでCreative Cloudアプリを開きます。ここから「アプリ」セクションに移動し、Lightroomクラシックを開きましょう。
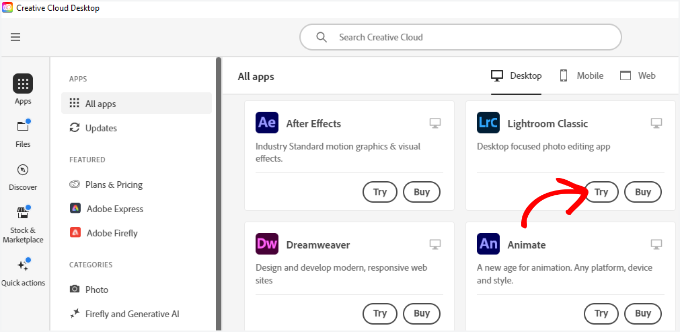
Lightroomクラシックの「試す」ボタンをクリックします。
ここで、サブスクリプションプランを選択する必要があります。Adobeは7日間の無料トライアルを提供しているので、プランを選んで「続ける」ボタンをクリックします。

サブスクリプションプロセスが完了すると、Lightroom Classicがコンピューターにインストールされます。
Adobe LightroomクラシックとEnviraギャラリーの接続
次のステップは、Adobe Lightroom用のEnvira Galleryアドオンをインストールすることです。
Enviraアカウントエリアにアクセスし、「ダウンロード」タブに切り替えることで可能です。
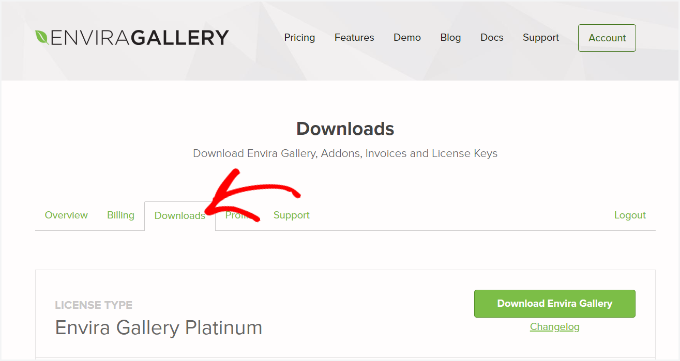
ここから下にスクロールして、「Lightroom Addon (Adobe)」オプション設定に移動しましょう。
アドオンの下にあるダウンロードアイコンをクリックしてください。

その後、コンピューターにアドオンのzipファイルを保存します。
コンピューターのダウンロードフォルダーにenviralrplugin.zipがあるはずです。このファイルにはenvira.lrpluginという名前のファイルが含まれていますので、解凍する必要があります。
Macユーザーはファイルをダブルクリックするだけで解凍できる。Windowsユーザーは、ファイルを右クリックしてコンテンツを解凍できます。
次に、Adobe Lightroomを開き、ツールバーのファイル ” プラグインマネージャーをクリックします。
プラグインマネージャーのウィンドウが表示されます。
Add’ボタンをクリックし、コンピューターからEnvira.lrpluginファイルを選択します。

Enivraアドオンフォルダーを追加したら、「完了」をクリックしてプラグインマネージャーウィンドウを閉じます。
これで、Adobe Lightroomクラシックの[公開するサービス]セクションにEnvira Galleryが表示されるはずです。

Adobe LightroomにEnvira Galleryを公開サービスとして追加しました。
Envira GalleryとLightroomの両方をセットアップしたので、次のステップは、LightroomがWordPressサイト上のEnvira Galleryと会話できるようにすることです。
Adobe Lightroomクラシックアプリを開き、’公開するサービス’パネルのEnviraギャラリーの横にある’設定’リンクをクリックするだけです。

パブリッシング・サービス・マネージャーのウィンドウが開きます。
ここでは、WordPressサイトのアドレスと、先ほど生成したアクセストークンを入力する必要があります。

認証」ボタンをクリックします。
LightroomがWordPressサイトに接続され、接続成功のメッセージが表示されます。
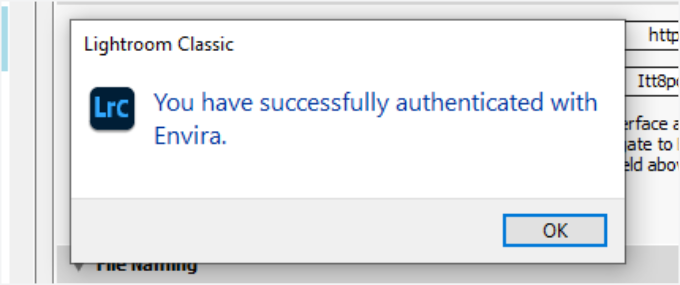
成功メッセージの「OK」ボタンをクリックし、公開するサービスマネージャのウィンドウで「保存」ボタンをクリックします。
LightroomからWordPressへの写真のアップロード
Envira Galleryを使って、Adobe LightroomクラシックからWordPressに写真を簡単にアップロードできるようになりました。
まずAdobe Lightroomに入り、”Publish Services “パネルの下にある “Envira “を右クリックする。
その後、メニューの『公開するコレクションを作成する』オプションをクリックします。

すると、コレクションの名前を入力するポップアップウィンドウが表示されます。
この名前はWordPressサイトの画像ギャラリーの名前にもなることに注意してください。

名前を決めたら、「Create」ボタンをクリックして次に進みましょう。
Lightroomが空のコレクションを作成します。ライブラリから新しいコレクションに画像をドラッグ&ドロップできます。
コレクション内の画像を追加、削除、編集するとすぐに、その下に’公開’ボタンが表示されます。公開’ボタンをクリックすると、写真がWordPressにアップロードされ、Enviraギャラリーに保存されます。

Lightroomで画像の編集を続け、変更を加えたり、画像を追加したり削除したり、好きなことができます。
このアドオンはLightroomとWordPressの同期を保つので、いつでも「公開する」ボタンをクリックすれば、Enviraギャラリーが更新されます。
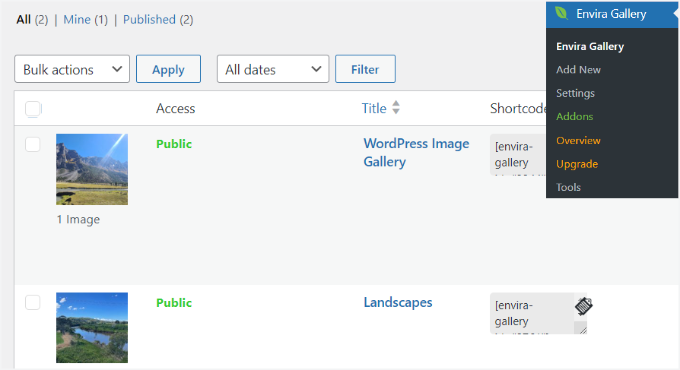
すべて完了したら、WordPressの管理エリアにアクセスし、Envira Galleryに移動して、ギャラリーとして追加されたLightroomコレクションを見ることができます。
詳細については、Envira Galleryでイメージギャラリーを作成する方法についてのガイドをご覧ください。
ボーナスのヒントWordPressにFlickrウィジェットを追加する
LightroomからWordPressに写真をアップする方法をさらに詳しく学んだところで、あなたのオンライン・ポートフォリオをさらに際立たせるための次のステップは何でしょうか?
Flickrを使って自分の作品を紹介し、より多くの人々とつながりたいのであれば、WordPressサイトに専用のFlickrウィジェットを追加するのは素晴らしいアイデアです。💡
このウィジェットはあなたのサイトを新しいコンテンツで新鮮に保ち、Flickrプロフィールへの訪問者を増やすのに役立ちます。

さらに、新しい写真をアップロードするたびにサイトを手動で更新することなく、最新の作品を紹介できる素晴らしい方法です。
これまでの経験から、Photonicはこの作業に最適なプラグインの一つです。Flickrのアルバムを取り込み、サイトに美しく表示するのがとても簡単になります。
詳しくは、WordPressにFlickrウィジェットを追加する方法をご覧ください。
この投稿が、Adobe LightroomからWordPressに写真をアップロードする方法のお役に立てば幸いです。また、画像SEOの初心者ガイドとWordPressのベストスライダープラグインのエキスパートピックもご覧ください。
If you liked this article, then please subscribe to our YouTube Channel for WordPress video tutorials. You can also find us on Twitter and Facebook.


")
 in 2024")
Jiří Vaněk
I have a photographer friend who was looking for a similar solution on the web. Thanks for this article, I will forward it to him and we will look into this possibility together. I think he’ll be thrilled.
Shafqat Khan
This guide is a game-changer! As a photographer using Adobe Lightroom, the integration with Envira Gallery for WordPress is a time-saver. The step-by-step instructions were clear, and setting up the connection was a breeze, thanks to the detailed walkthrough. Managing my WordPress gallery directly from Lightroom is a huge plus. Kudos to the editorial team for this user-friendly guide! Will be sharing with fellow photographers.
WPBeginner Support
Glad our guide was helpful!
Admin
Navin
Importing or embedding photos right from Lightroom into a WordPress website is very useful for people who like to travel, food bloggers, and photographers as well.
Creating a photo gallery on the website makes a lot of sense for most bloggers these days. Thankful Lightroom and WordPress make it easier. glad i landed here.
WPBeginner Support
Glad you found our article helpful
Admin
Konrad
i appreciate small details that still significantly improve the workflow. And the setup looks very straightforward, thanks
WPBeginner Support
You’re welcome, glad we could help improve your workflow
Admin
Duane Stevens
Wish this article made it clear that this requires a PAID license. Not all WP beginners understand that “premium” means you have to pay.
Mark
With Flothemes you can upload photos into blog posts and if using a Flothemes right into galleries from Lightroom:
https://flothemes.com/lightroom-plugin/