ウィジェットを使えば、WordPress標準のコンテンツエディターでは編集できないエリアに動的なコンテンツを追加することができる。よくサイドバーにウィジェットを追加する人がいますが、他のエリアにも複数のカラムで表示することができます。
このアプローチにより、コンテンツをより効果的に整理して表示することができ、視覚的に魅力的でナビゲートしやすいサイトにすることができます。
WPBeginnerでは、サイトフッターをユーザーエクスペリエンスの向上とエンゲージメントの促進に活用しています。カラムに複数のウィジェットを巧みに配置することで、ブランドを紹介し、無料ツールへの簡単なアクセスを提供し、重要なリソースへのリンクを提供し、サイトのさらなる探索を促します。
この投稿では、WordPressのウィジェットをカラムに簡単に表示する方法を紹介します。
なぜWordPressのウィジェットをカラム表示するのか?
ウィジェットは、画像ギャラリー、ソーシャルメディアフィード、カレンダー、ランダムな引用、人気投稿、その他の動的コンテンツをWordPressサイトに追加するのに最適な方法です。
しかし、たくさんのウィジェットを追加すると、混乱して乱雑に見えてしまう。
このような場合は、ウィジェットをカラムにまとめることをお勧めします。これによって、たくさんのコンテンツを構造的に表示することができます。カラムに小見出しを追加して、訪問者が探しているものを素早く見つけられるようにすることもできます。
それでは、ウィジェットをカラムに表示する方法を見ていきましょう。以下のクイックリンクを使って、使いたい方法にジャンプしてください:
方法1:WordPressテーマでウィジェット対応フッターを確認する
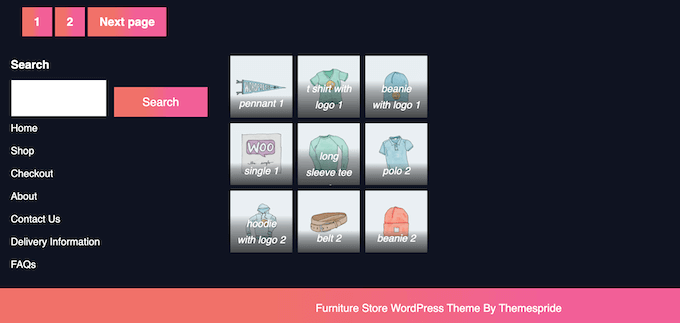
WordPressテーマによっては、フッターに複数のウィジェット対応エリアがあります。この場合、各エリアは独立したカラムとして表示されます。
サイトのフッターに情報やリンクを掲載したい場合に最適です。例えば、連絡先、WooCommerceストアのすべての商品リスト、サイトの最も重要なリンクなどを表示することができます。
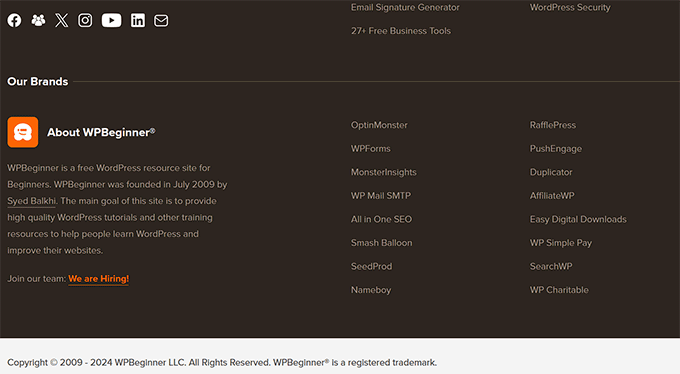
その他のアイデアについては、WordPressフッターエリアに追加するもののチェックリストをご覧ください。
お使いのテーマにフッターに複数のウィジェット対応エリアがあるかどうかを確認するには、WordPressダッシュボードの外観 ” ウィジェットにアクセスしてください。
ここで、「フッター」などと表示されているエリアを探す。
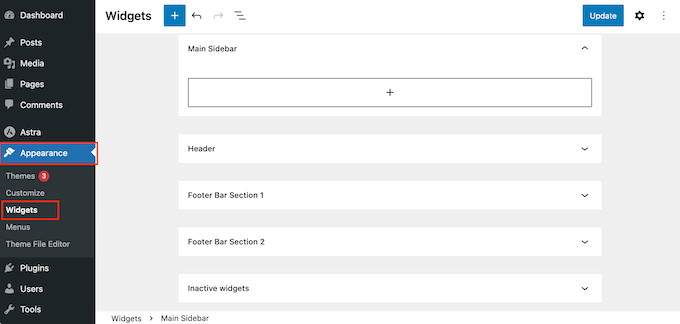
上のテーマにはウィジェット対応エリアが2つあるので、それらを使ってウィジェットをカラムに表示することができる。
これらのエリアのいずれかをクリックして展開し、表示したいウィジェットの追加を開始します。より詳細な手順については、WordPressでウィジェットを追加して使用する方法のガイドを参照してください。
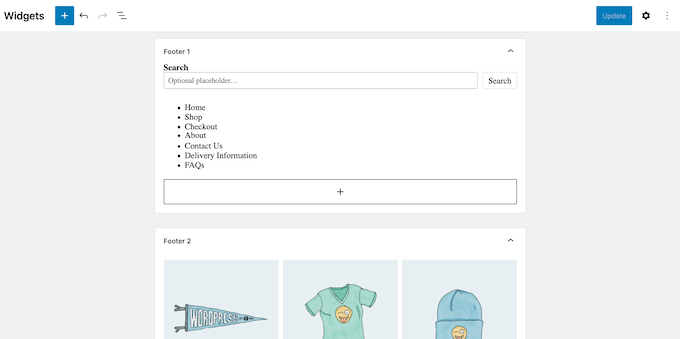
それが完了したら、クリックして次のウィジェット対応フッターエリアを展開し、そのカラムに表示したいウィジェットを追加します。
フッターエリアごとに、この手順を繰り返すだけです。
ウィジェットの追加が完了したら、「更新」ボタンをクリックして変更を保存することを忘れないでください。これで、WordPressサイトにアクセスし、フッターまでスクロールすると、ウィジェットがカラムに整理されているのを確認できます。
方法2:ページと投稿エディターを使う(すべてのテーマで使える)
もう一つのオプションは、WordPressの初期設定のブロックエディターを使って、ページや投稿にカラムを追加することです。これにより、投稿コンテンツ内を含め、サイト上のウィジェットの外観を正確にコントロールすることができます。
各ページにユニークなウィジェットを表示したい場合にも良い設定です。
しかし、各ページと投稿にウィジェットを手動で追加する必要があります。つまり、この方法は、特にすべてのページに同じウィジェットを表示したい場合、時間がかかることがあります。
この方法を使用するには、カラムにウィジェットを追加したいページまたは投稿を開きます。そして、’+’ボタンをクリックし、’カラム’と入力する。
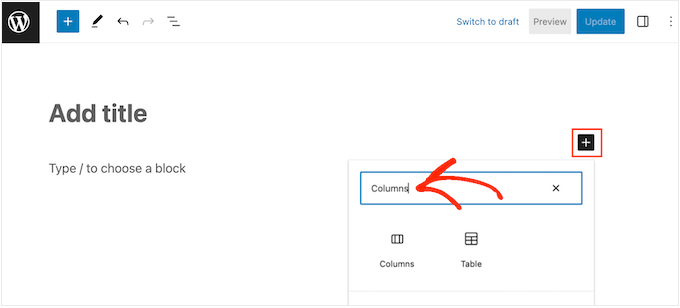
適切なブロックが外観に表示されたら、レイアウトにドラッグ&ドロップします。
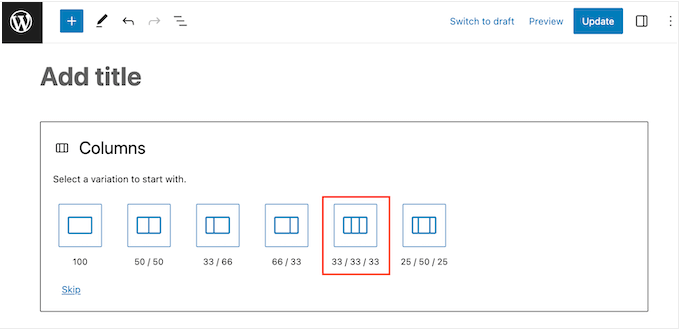
これで、表示したいカラムの数と、各カラムが占めるスペースを選択できる。
例えば、以下の画像では、それぞれ利用可能なスペースの33%を占める3つのカラムを作成している。
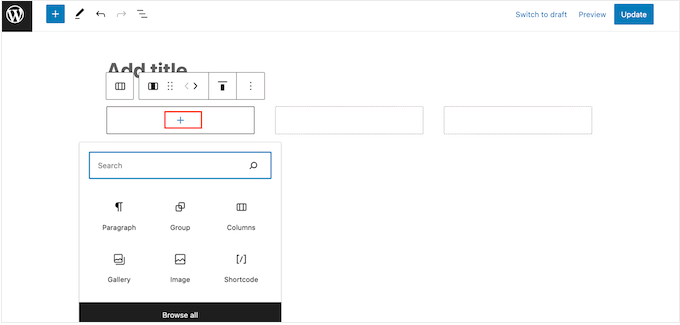
そうしたら、最初のカラムにある「+」アイコンをクリックする。
表示されるポップアップで、このカラムに追加したいウィジェットを選択します。
右側メニューの設定を使って、ウィジェットをカスタマイズできます。例えば、背景色を変更したり、リンクを追加したり、フォントサイズを変更したりすることができます。
ブロックを使って、小見出し、リスト、その他のコンテンツを作成することもできます。これにより、ウィジェットに構造とコンテキストを追加できます。
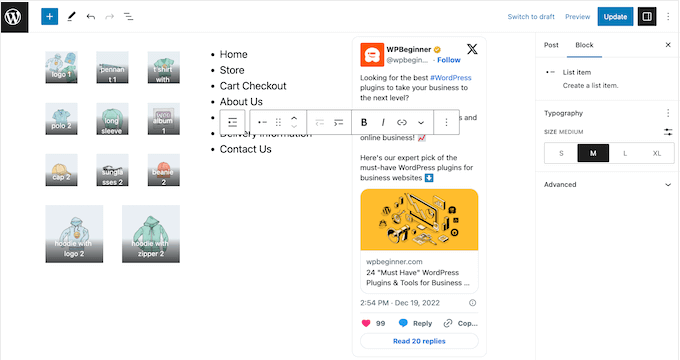
カラムにさらにウィジェットを追加するには、この手順を繰り返すだけです。
カラムの設定に満足したら、’更新’または’公開’をクリックして、カラムとウィジェットをライブにします。
方法3:カスタムWordPressテーマを作成する(フルカスタマイズ可能)
WordPressのビルトインツールを使って複数のカラムにウィジェットを整理して表示することは可能ですが、レイアウトをもっとコントロールしたい場合もあるでしょう。
また、完全にカスタムデザインされた美しいランディングページや セールスページにカラムを追加したい場合もあるだろう。
その場合は、SeedProdの使用をお勧めします。
SeedProdは市場で最高のWordPressページビルダープラグインであり、コードを一行も書かずにテーマをデザインすることができます。つまり、サイトのどのエリアにも好きなだけカラムやウィジェットを追加することができます。
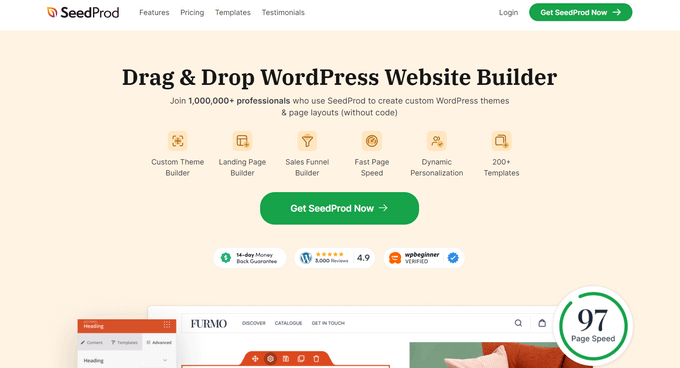
SeedProdには、個別クリックでサイトに追加できるプロフェッショナルなテンプレートサイトキットのライブラリも増えています。
まず、SeedProdプラグインをインストールして有効化する必要があります。詳しくは、WordPressプラグインのインストール方法のステップバイステップガイドをご覧ください。
注: SeedProdには無料版があり、予算に関係なく、メンテナンスページや近日公開ページを含むカスタムページを作成することができます。しかし、このガイドでは、テーマビルダーに付属しているプレミアムプラグインを使用します。テーマビルダーを使用するには、SeedProd Pro以上のプランが必要であることに注意してください。
有効化した後、SeedProd ” Settingsにアクセスし、ライセンスキーを入力してください。
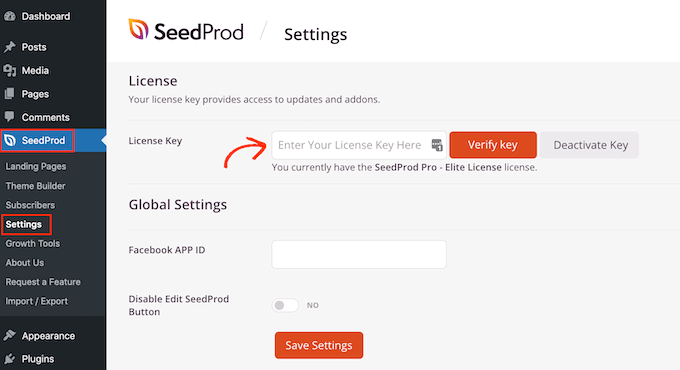
この情報は、SeedProdサイトのアカウントで確認できます。その後、「Verify Key」ボタンをクリックしてください。
これで、SeedProd ” Theme Builderのページに行き、’Theme Template Kits’ボタンをクリックしてください。
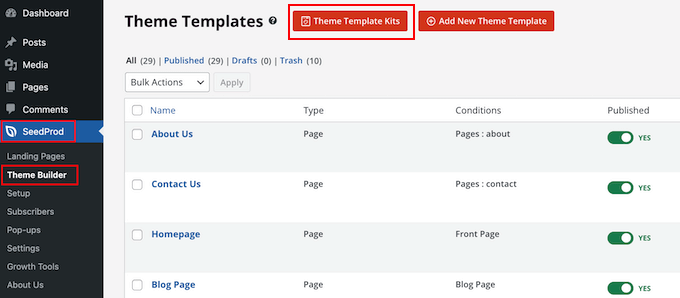
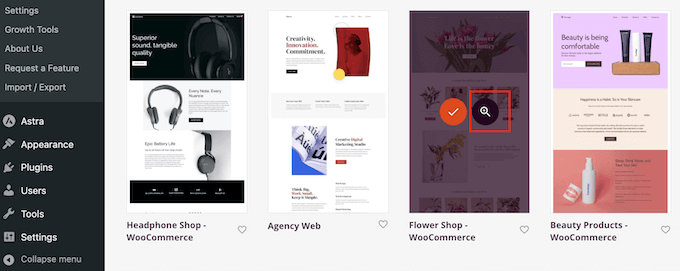
SeedProdのサイトキットライブラリが表示されます。
テンプレートを詳しく見るには、マウスオーバーして虫眼鏡のアイコンが現れたらクリックするだけ。
新しいタブでテンプレートキットが開きます。
完全なサイトキットなので、さまざまなリンクやボタン、メニュー項目をクリックすることで、より多くのページやデザインを見ることができます。
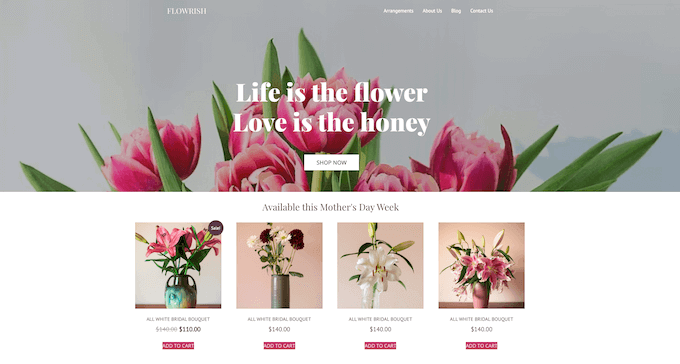
SeedProdには、レストランサイト、旅行ブログ、マーケティングコンサルタントなど、さまざまな業界やニッチ向けのテンプレートキットがあります。
使いたいテンプレートキットが見つかったら、マウスオーバーしてチェックマークアイコンが表示されたらクリックするだけです。
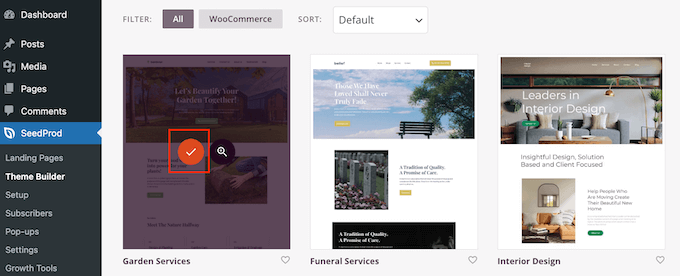
SeedProdはすべての異なるテンプレートをWordPressダッシュボードに追加します。
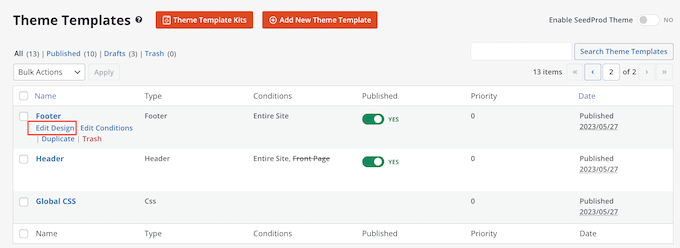
詳しく見るには、SeedProd ” Theme Builderにアクセスしてください。使用しているキットによって若干異なるオプションが表示されるかもしれません。
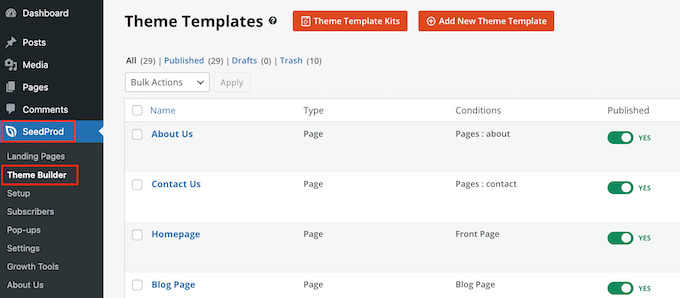
ウィジェットカラムを追加したいテンプレートにマウスオーバーし、’Edit Design’リンクをクリックするだけです。
例えば、フッターエリアにウィジェットカラムを表示したい場合、フッターテンプレートを編集する必要がある。
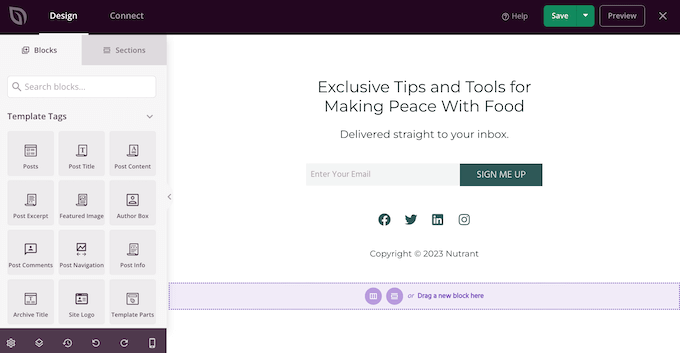
これでSeedProdエディターが画面右のテンプレートでロードされます。
左側には、さまざまなオプション設定があるメニューが表示されます。
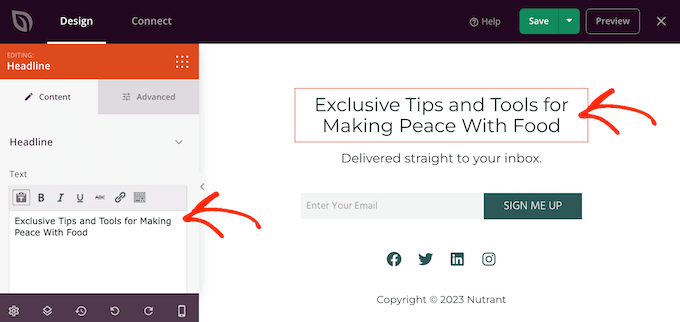
ほとんどのキットにはすでにビルトインブロックが付属しています。ブロックをカスタマイズするには、ページプレビューでクリックして選択し、左側のメニューで変更します。
例えば、プレースホルダーを置き換えたい場合、テキストまたは見出しブロックを選択し、小さなテキストエディターに入力する必要がある。
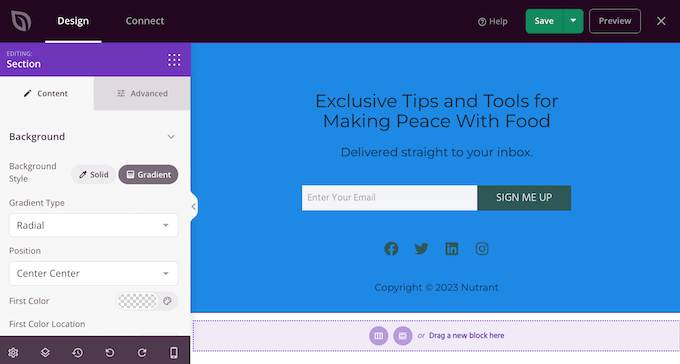
また、左側のメニューにある設定を使って、配色、フォントの選択、リンクの色、ボタンの変更など、キットの見た目を完全に変更することもできます。
これらの設定のほとんどはかなり自明なので、レイアウトでさまざまなブロックを選択し、設定に目を通す価値がある。
カラムを作成するには、左側のメニューから「スタンダード」セクションにスクロールします。
ここで「カラム」ブロックを見つけ、ウィジェットをカラムに並べたいエリアにドラッグ&ドロップします。
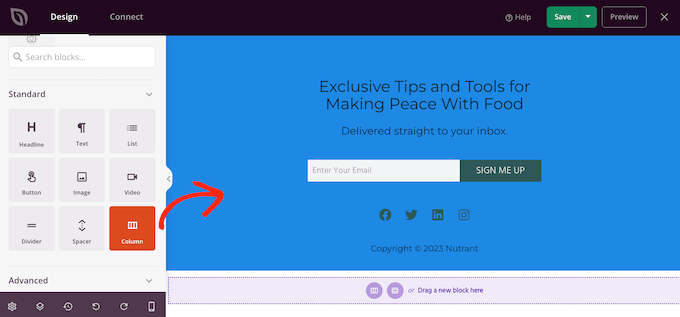
これで、作成したいカラムの数と、各カラムが占めるスペースの量を選択できる。
そのためには、使いたいレイアウトをクリックするだけです。
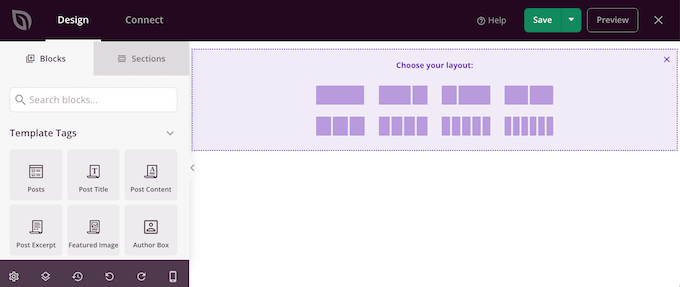
これでカラムにウィジェットを追加し始めることができます。
左側のメニューで各ウィジェットを見つけて、そのウィジェットを表示したいカラムにドラッグします。
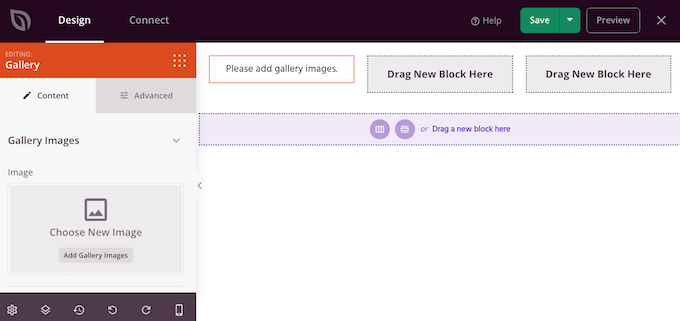
ウィジェットを追加した後、クリックしてライブプレビューで選択してください。
その後、左側のメニューの設定を使用して、そのウィジェットをカスタマイズできます。さらに多くのカスタマイザー設定を見るには、’高度な’タブをクリックしてください。
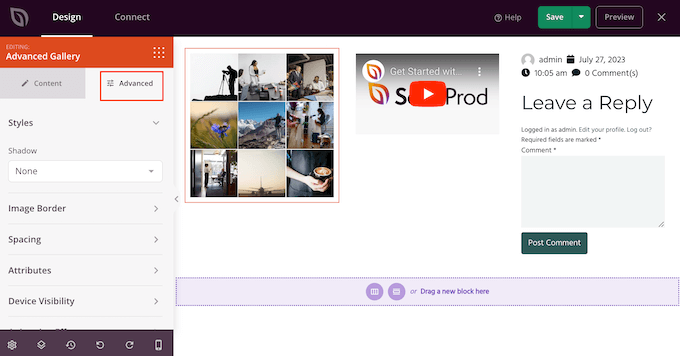
ここでは、CSSアニメーションの追加、スペーシングの変更、枠線の追加などができる。
カラムにウィジェットを追加するには、この手順を繰り返します。ページの外観に満足したら、’保存’ボタンをクリックして変更を保存します。
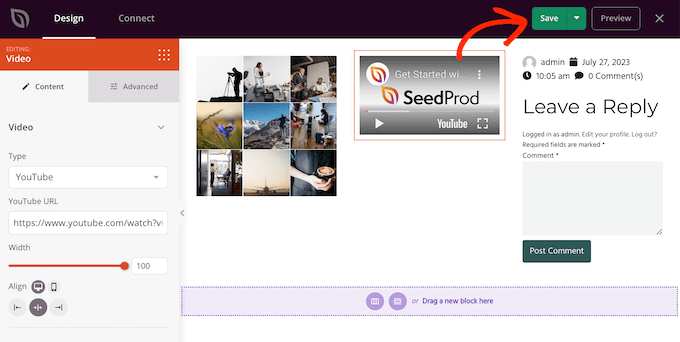
これで、WordPressテーマの残りの部分の編集を続けることができます。詳しくは、初心者のためのカスタマイザーWordPressテーマの作り方完全ガイドをご覧ください。
テンプレートの設定に満足したら、いよいよキットを本番にします。
WordPressのダッシュボードで、SeedProd ” Theme Builderに行き、「SeedProdテーマを有効化」のトグルをクリックして、「はい」と表示されるようにします。

WordPressブログやサイトにアクセスして、新しいカスタムテーマを実際にご覧いただけます。
方法4:フルサイトエディターを使う(ブロックベースのテーマのみ)
ブロック対応のWordPressテーマを使用している場合、フルサイトエディターを使ってサイトのどのエリアにもカラムを追加できます。
WordPress標準のコンテンツエディターでは変更できないエリアも編集できます。例えば、サイトの404ページテンプレートにウィジェットやカラムを追加することができます。
始めるには、WordPressダッシュボードの外観 ” エディターへ向かいます。
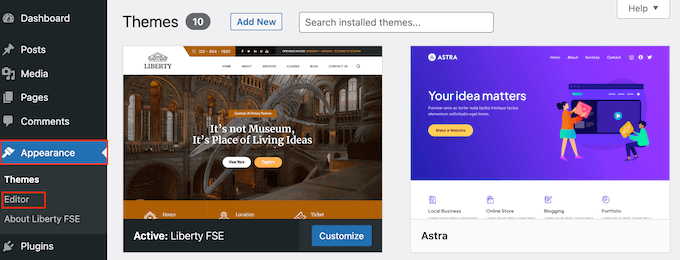
初期設定では、フルサイトエディターにはテーマのホームテンプレートが表示されますが、どのエリアにもカラムやウィジェットを追加することができます。
利用可能なすべてのオプションを表示するには、「テンプレート」または「テンプレートパーツ」のいずれかを選択するだけです。
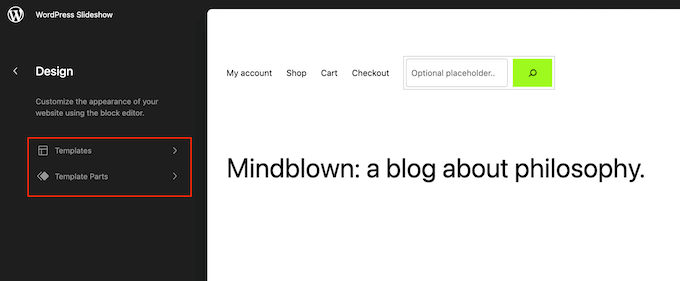
編集したいテンプレートまたはテンプレート部分をクリックします。
WordPressにデザインのプレビューが表示されます。このテンプレートを編集するには、小さな鉛筆のアイコンをクリックしてください。
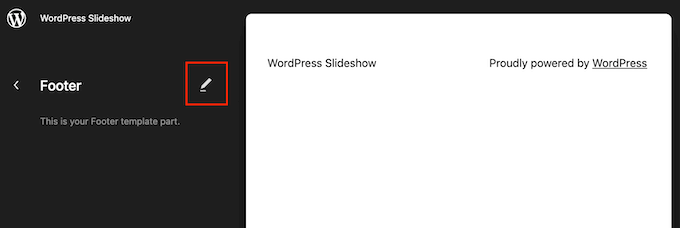
それが終わったら、青い「+」アイコンをクリックし、「カラム」と入力する。
適切なブロックが表示されたら、ページデザインにドラッグ&ドロップします。

使用するレイアウトを選択することができます。
例えば、私たちの画像では、33/33/33レイアウトを使用しています。これは、それぞれ利用可能な幅の33%を占める3つのカラムを作成します。
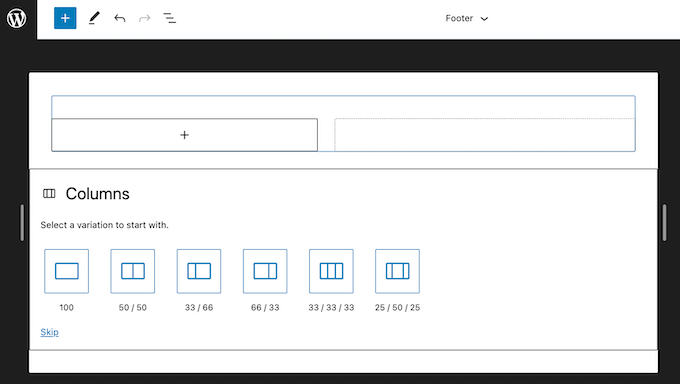
それが終わったら、青い「+」アイコンをクリックして、使いたい最初のウィジェットを見つけます。
このウィジェットを表示したいカラムにドラッグ&ドロップするだけです。
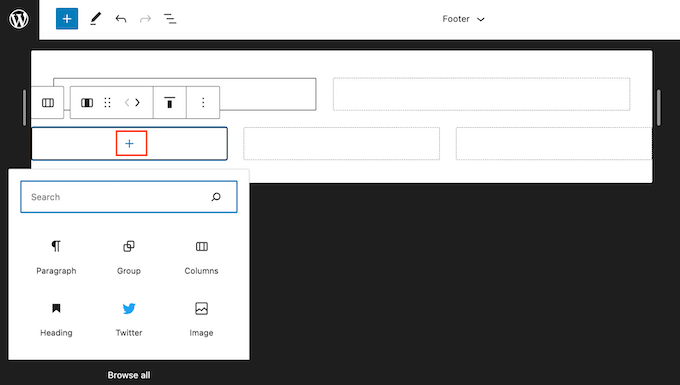
必要であれば、右側のメニューにある設定で各ブロックを微調整できる。
カラムにさらにウィジェットを追加するには、これらの手順を繰り返すだけです。
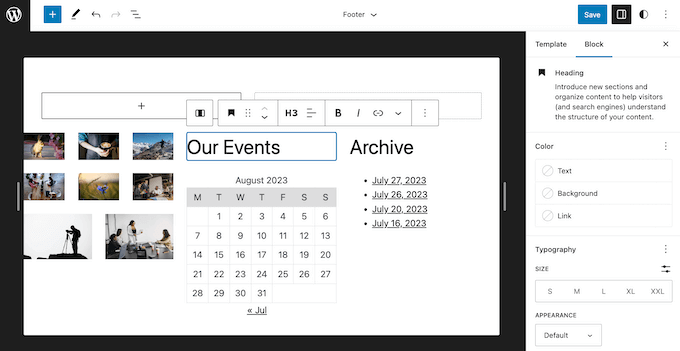
変更が完了したら、「保存」をクリックしてください。これで、WordPressサイトにアクセスすると、新しいウィジェットとカラムが表示されます。
ボーナス:カラムにWordPressの写真を表示する
写真サイトを持っているのであれば、すべての写真を整然とカラムや行に表示することもできる。
これを行うには、市場で最高のWordPressギャラリープラグインであるEnvira Galleryを使用することができます。このプラグインを使用すると、すべての画像が行とカラムに整理され、視覚的に魅力的に見える魅力的なギャラリーを作成することができます。
さらに、ライトボックスポップアップ、透かし、alt画像テキストなどの機能もある。
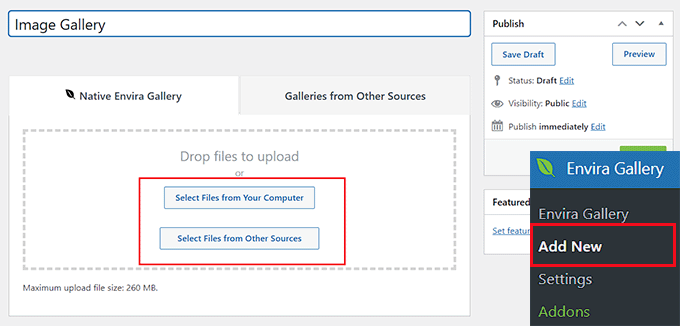
プラグインを有効化したら、Envira Gallery ” 新規追加ページにアクセスし、’他のソースからファイルを選択’ボタンをクリックするだけで、メディアライブラリからすべての画像をアップロードすることができます。
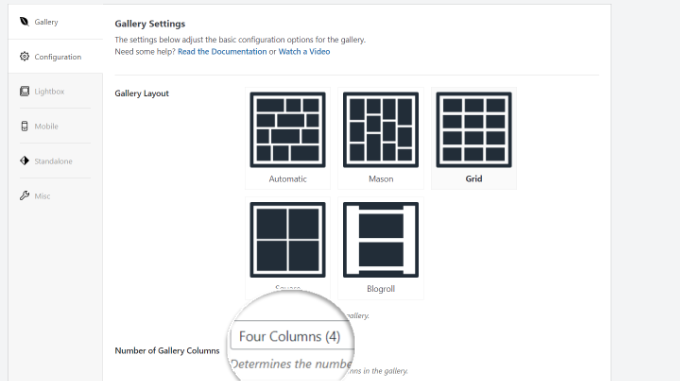
そうしたら、”Currently in your Gallery “セクションまでスクロールダウンし、”Configuration “タブに切り替えます。
ここでは、お好みに応じてギャラリー画像のレイアウトやカラム数を選択することができます。
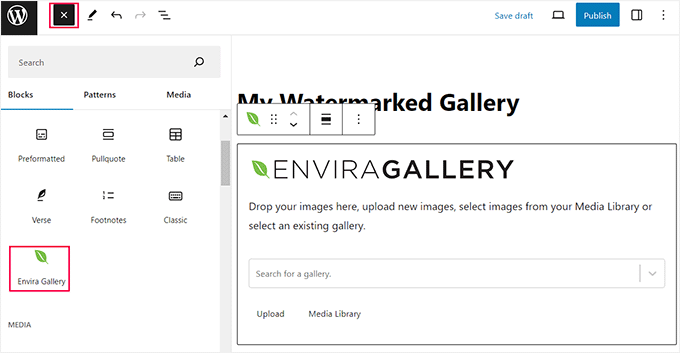
設定が完了したら、上部にある「公開する」ボタンをクリックして、設定を保存します。次の投稿では、行と列に画像を追加したい投稿を開き、「ブロックを追加」(+)ボタンをクリックします。
これでブロックメニューが開きます。Envira Galleryブロックをドラッグ&ドロップし、ブロック内のドロップダウンメニューから作成したイメージギャラリーを選択します。
最後に、「更新」または「公開」ボタンをクリックして、設定を保存します。これで、WordPressサイトにアクセスして、画像を行と列で表示できるようになります。
詳しくは、WordPressの写真をカラムと行で表示する方法のチュートリアルをご覧ください。
WordPressのウィジェットをカラムに表示する方法について、この投稿がお役に立てれば幸いです。WordPressのサイドバーにトップコメンターを表示する方法や、WordPressのエキスパートが選ぶGutenbergフレンドリーなテーマもご覧ください。
If you liked this article, then please subscribe to our YouTube Channel for WordPress video tutorials. You can also find us on Twitter and Facebook.


Atiqullah Sadeqi
Hi,
I need a widget to be able accept other widgets inside it self. Like creating a row and inside of the row we should put other widgets. it can be done?
WPBeginner Support
It would depend on your specific widgets but it sounds like you want to use a text widget.
Admin
Nauman Khan
The recommended plugin has not been updated in 5 years, any good alternative?
WPBeginner Support
Not at the moment, we will certainly keep a look out for alternatives.
Admin
andrew
wordpress now warns the following: “This plugin hasn’t been updated in over 2 years. It may no longer be maintained or supported and may have compatibility issues when used with more recent versions of WordPress.”
any alternatives?
Raymond
Hi… This plugin is really awesome. However…I wonder if there’s a way to make this plugin responsive because if I shrink my browser to Iphone size, the columns wont rearrange to fit the small screen
WPBeginner Staff
That’s up to you and how you feel that it would work for your site’s layout.
Robert Andrews
So can they be placed at the bottom of a post column, or do they have to stay in a sidebar?