
イベントタイムラインを追加することで、イベントやマイルストーンを視覚的に紹介することができ、視聴者をより惹きつけることができます。
イベントの重要な瞬間のハイライトであれ、会社の歴史の紹介であれ、タイムラインはすべてをフォローしやすくします。
とはいえ、WordPressサイトでタイムラインを作成したり表示したりするのは少し分かりにくいかもしれません。多くのサイトオーナーは、機能的でビジュアル的に魅力的なタイムラインをデザインする方法に苦戦しています。
広範囲に渡る調査の結果、Cool TimelineプラグインがWordPressで美しいイベントタイムラインを作成する最も簡単な方法の一つである事が分かりました。この投稿では、WordPressサイトに美しいイベントタイムラインを追加する方法を説明します。

WordPressで美しいイベントタイムラインを追加する理由
イベントのタイムラインは、重要なマイルストーンを明確な時系列構造でハイライトします。これを使うことで、コンテンツのストーリー性を高めることができます。
マイルストーンだけでなく、タイムラインでは、進捗状況、フェーズ、イベントの相互関係を視覚的に表現することができます。コンテンツをより魅力的なものにすることができます。
使用例に関して言えば、多くのWordPressサイトでは、関連するイベントを整理して視覚的にアピールするためにタイムラインを使用しています。
企業や組織も、その歴史を示すためにタイムラインを使うことが多い。

オンライン写真ポートフォリオのようなポートフォリオサイトがあれば、世界中を旅した写真を縦長のタイムラインで見せることができる。
これは、履歴を書いてプレーン・テキストのページとしてサイトに追加するよりも、より魅力的なものになる。
WordPressでイベントタイムラインを追加する方法
WordPressでイベントタイムラインを追加する一番簡単な方法はCool Timelineプラグインを使う事です。この無料でユーザーフレンドリーなプラグインを使えば、素晴らしいタイムラインを素早く簡単に作成する事が出来ます。
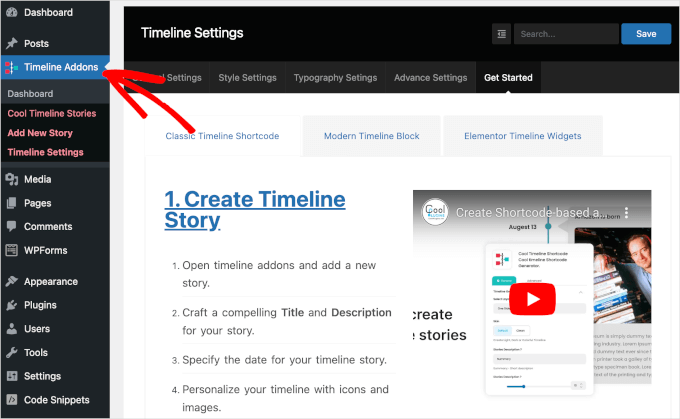
有効化すると、WordPressダッシュボードに新しいTimeline Addonsエリアが表示されます。
このプラグインを使うと、2つの方法でイベントタイムラインを作成することができます。
1つ目は、タイムラインアドオンダッシュボードから’新規ストーリーを追加’ボタンをクリックします。
エディターが開き、タイトルや説明を入力したり、アイキャッチ画像を設定したり、その他の重要な情報を追加することができます。
イベントを追加し終わると、Cool Timelineはこれらのイベントストーリーをすべて同じTimeline上に表示します。Timelineをページや投稿に追加する事が出来ます。
この方法はサイト上で同じTimelineを複数回表示するのに最適です。ただし、個別Timelineしか作成できません。
もう一つのオプションは、WordPressブロックエディター内でビジュアルタイムラインを構築するクールタイムラインブロックを使用することです。
サイトに複数のCool Timelineブロックを追加する事で、サイトの異なる部分に異なるタイムラインを表示する事が出来ます。
しかし、この方法では、自分でブロックパターンとして保存しない限り、サイト全体で同じタイムラインを再利用することはできません。
このガイドでは両方の方法を説明します。どの方法でTimelineを作るにしても、Cool Timelineプラグインをインストールして有効化する必要があります。詳しくはWordPressプラグインのインストール方法をご覧ください。
Timelineアドオンメニューかブロックエディターを使ってTimelineを作成する準備が出来ました。もし、特定の方法に直接飛びたいのであれば、下記のリンクを使ってください:
準備はいいかい?始めよう
方法1.タイムラインアドオンメニューを使って再利用可能なイベントタイムラインを作成する方法
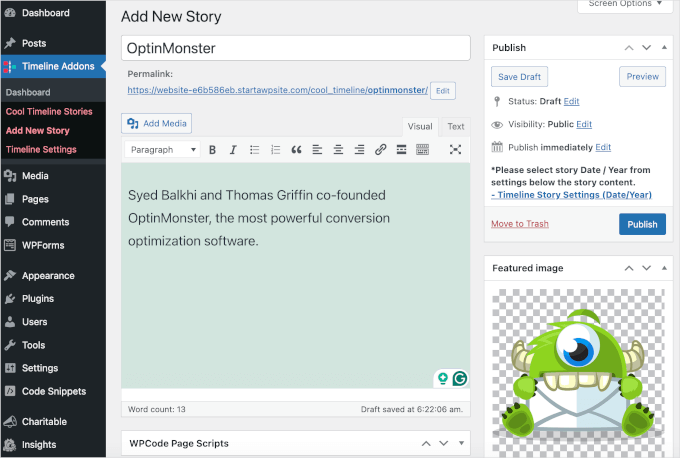
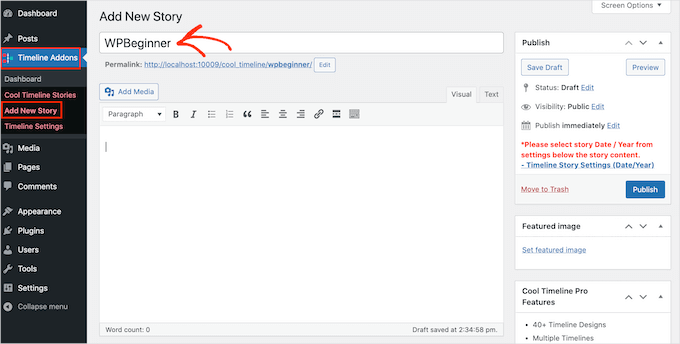
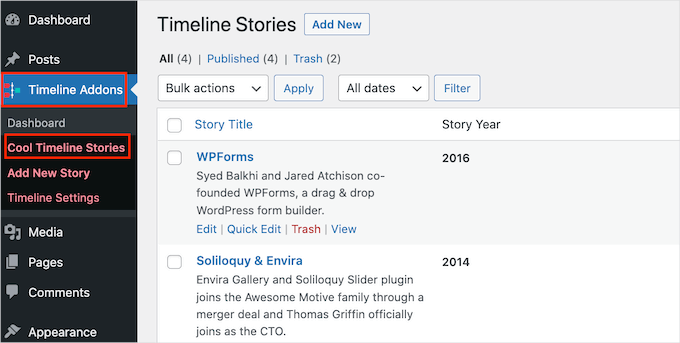
最初のイベントを作成するには、WordPressダッシュボードからTimeline Addons ” Add New Storyにアクセスしてください。
タイトルを追加」フィールドに入力して、イベントにタイトルを付けることができます。
メインエディターで、Timelineに表示したいテキストをすべて入力してください。これは通常イベントの説明になります。
それができたら、次は「アイキャッチ画像を設定」リンクをクリックします。
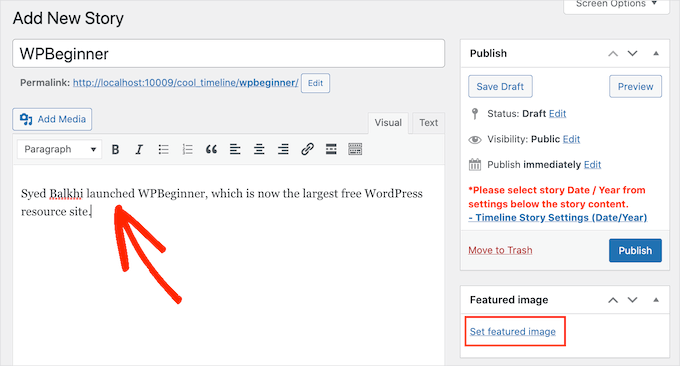
Timeline上でイベントを表す画像を選ぶことができます。クリックしてWordPressメディアライブラリから画像を選ぶか、コンピューターから新しい画像ファイルをアップロードしてください。
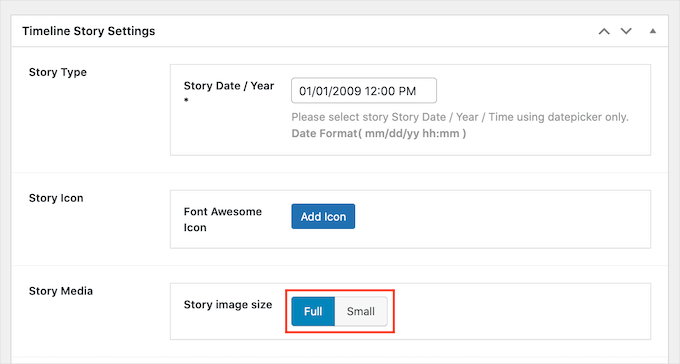
次に、’Timeline Story Settings’セクションまでスクロールダウンしてください。ここで、’Story Date / Year’フィールドをクリックし、カレンダーポップアップを使ってイベントが起こった日時を選択することができます。
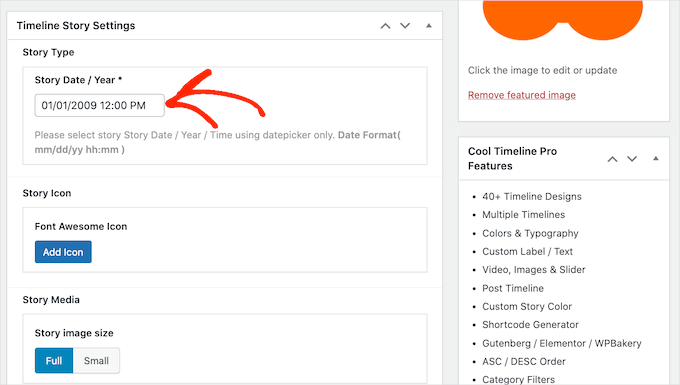
また、イベントの画像は「フル」または「スモール」からお選びいただけます。
次の画像は「フル」画像の例である。
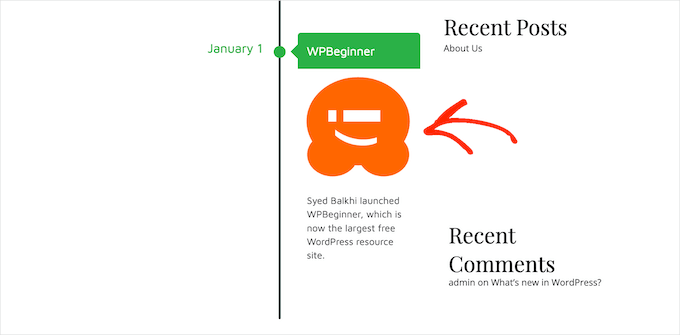
より大きな画像は、タイムライン上の最も重要なイベントの方に訪問者の注意を引きます。しかし、’フル’画像はより多くのスペースを取ります。
次の画像は同じイベントを示しているが、今回は代わりに’Small’画像を使用している。
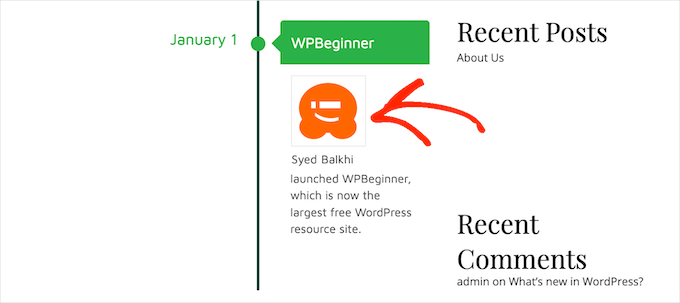
Timelineにたくさんのイベントを追加したい場合は、’Small’設定を使うと良いでしょう。
こうすることで、タイムラインが乱雑に見えるのを防ぐことができる。
これらの変更を行った後、ページを一番上までスクロールし、「公開する」ボタンをクリックしてください。
これで完了です!このステップを繰り返して、さらに多くのイベントを作成することができます。
これまでに作成したイベントをすべて見たいですか?タイムラインアドオン ” Cool Timeline Storiesにアクセスしてください。
すべてのイベントを作成したら、次のステップはサイト上でのTimelineの見え方のカスタマイズです。
これを行うには、Timeline Addons ” Timeline Settings ” General Settingsに行ってください。
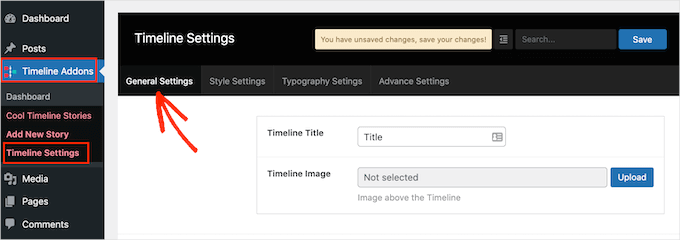
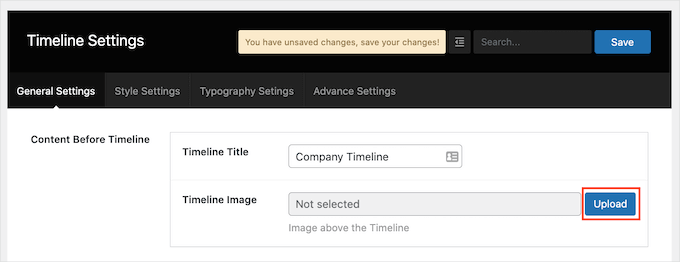
Timeline Title’セクションでは、あなたのタイムラインの上に表示されるタイトルを入力することができます。
Cool TimelineはTimelineの上にあなたの会社のロゴのような画像を表示する事も出来ます。これはあなたのブランディングを強化し、訪問者にTimelineが何を表示しているかを知らせるのに役立ちます。
このオプション画像を追加するには、「アップロード」ボタンをクリックします。
WordPressのメディアライブラリから画像を選択するか、コンピューターから新しいファイルをアップロードすることができます。
タイムラインにたくさんのテキストを追加すると、ごちゃごちゃして不快に見えることがあります。
この事を念頭に置いて、タイムラインに表示される最大単語数を設定すると良いでしょう。単語数の上限を設定するには、’コンテンツの長さ’フィールドに数字を入力するだけです。

もし制限を設定するなら、タイムラインに’続きを読む’リンクを追加するのが良いでしょう。Cool Timelineはあなたの制限文字数以上の説明文にこのリンクを追加します。
このリンクを追加するには、「続きを表示しますか」セクションを見つけ、「はい」ボタンをクリックします。

続きを読む」リンクをクリックすると、テキストの続きが同じタブに表示されるか、新しいブラウザータブに表示されるかを決めることができます。同じタブ」または「新規タブ」のラジオボタンをクリックしてください。
初期設定では、Timelineは各イベントが起こった年を表示します。しかし、常にこの情報を表示する必要はないかもしれません。例えば、すべてのイベントが同じ年に起こった場合。
年号ラベルを非表示にするには、「年号ラベル」のスライダーをクリックして「表示」から「非表示」にするだけでよい。
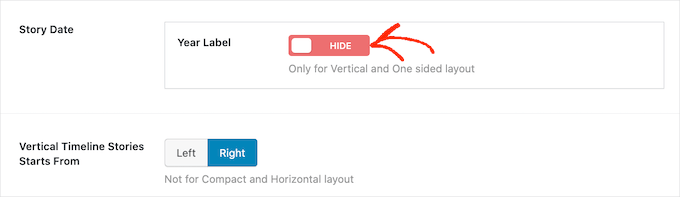
初期設定では、Timelineの最初のイベントはTimelineの縦線の右側に表示されます。
このイベントをタイムラインの左側に表示したいですか?その場合は、’Vertical Timeline Stories Starts From’の隣にある’Left’ボタンをクリックするだけです。

変更が完了したら、「保存」ボタンをクリックして保存します。
次に「スタイル設定」タブに移ります。
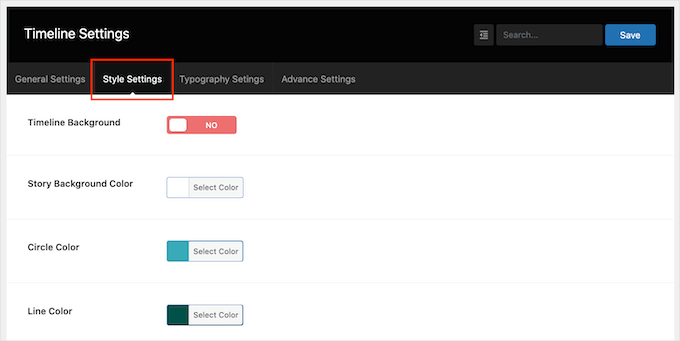
初期設定では、タイムラインには背景がありません。
もし必要であれば、’タイムラインの背景’スライダーをクリックし、’いいえ’から’はい’にすることで、タイムラインに色のついた背景を追加することができます。
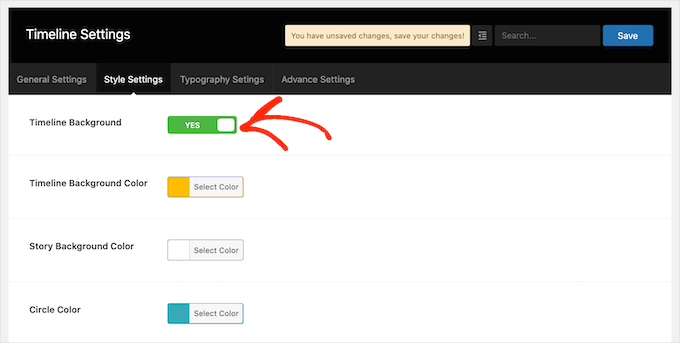
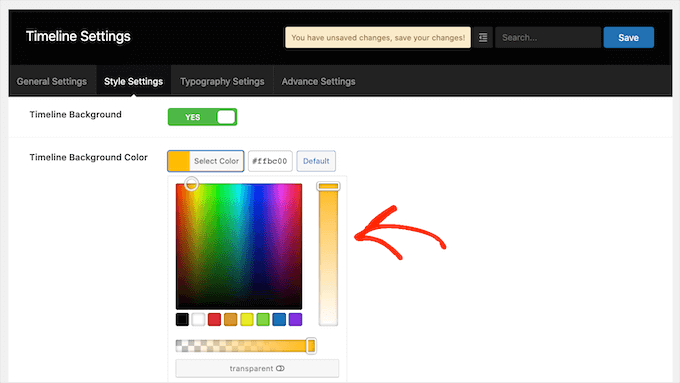
次に、「ストーリーの背景色」の隣にあるボタンをクリックしてください。
カラーピッカーの設定を使って背景色を選択できるはずです。
この画面では、縦線とイベントタイトルを含む、Timelineの異なる部分すべてに同じようなカラー設定が出来ます。これらの初期設定を変更するには、セクションのボタンをクリックし、外観のカラーピッカーを使うだけです。
変更内容に満足したら、忘れずに「保存」ボタンをクリックしてください。
次に、’タイポグラフィ設定’タブに行ってみましょう。ここでは、Timelineタイトルやストーリータイトルなど、Timeline内の様々なコンテンツのフォントを変更 したり、サイズを調整したりする事が出来ます。
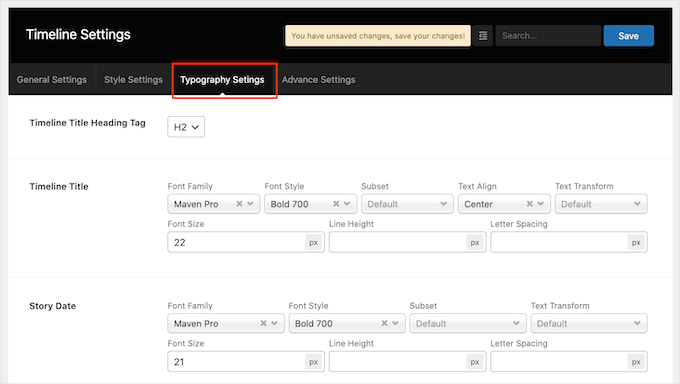
初期設定の組版設定を変更した場合は、「保存」ボタンをクリックして変更を保存することを忘れないでください。
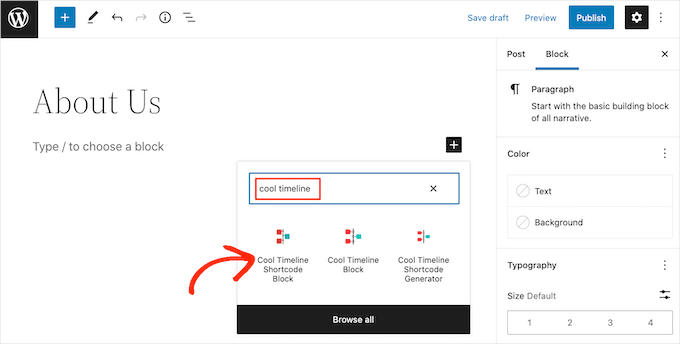
Timelineのカスタマイザーが終わったら、あなたのサイトにTimelineを追加しましょう。表示させたいページや投稿を開き、’+’ボタンをクリックするだけです。
検索バーに’Cool Timeline’と入力してください。このプラグインにはいくつかのブロックがあるので、’Cool Timeline Shortcode Block’をクリックしてください。
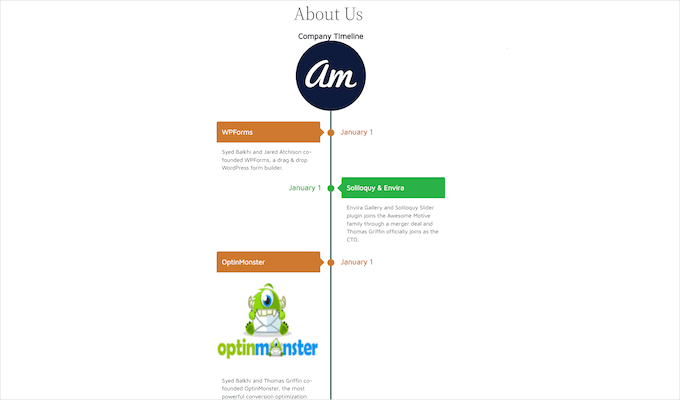
これで通常通りページを更新または公開することができます。
あなたのサイトにアクセスすると、ライブタイムラインが表示されます。
方法2.WordPressでタイムラインブロックを使って複数のイベントタイムラインを作成する方法
ブロックエディターと’Cool Timeline Block’を使って、WordPressで美しいイベントタイムラインを作ることもできます。
このブロックには沢山のプレースホルダーコンテンツがあります。Timelineを作るには、それぞれのプレースホルダーをあなたのテキストとイメージに置き換えるだけです。これにより、より視覚的にTimelineを構築する事が出来ます。
まず、Timelineを追加したいページや投稿を開きます。
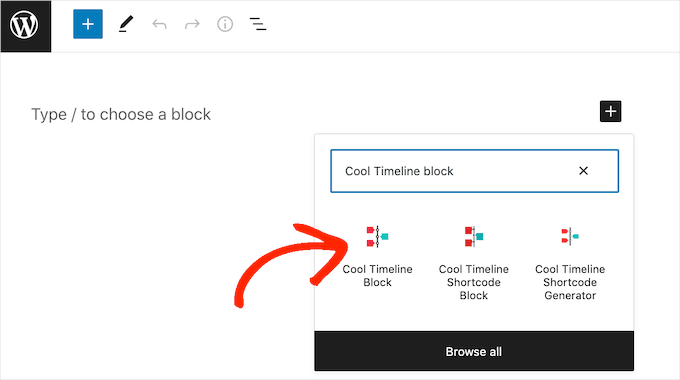
次に「+」アイコンをクリックし、「Cool Timeline Block」とタイプします。このブロックが表示されたら、クリックしてページや投稿に追加します。
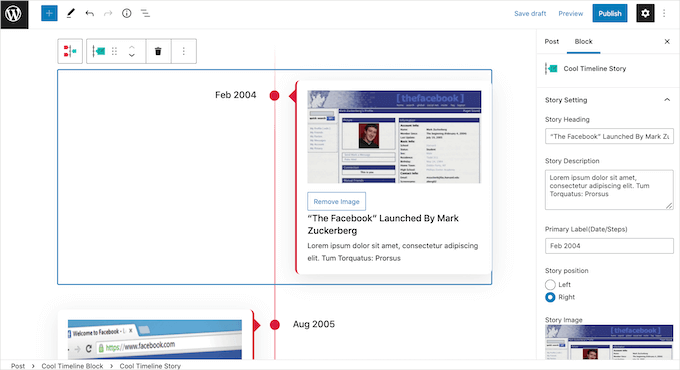
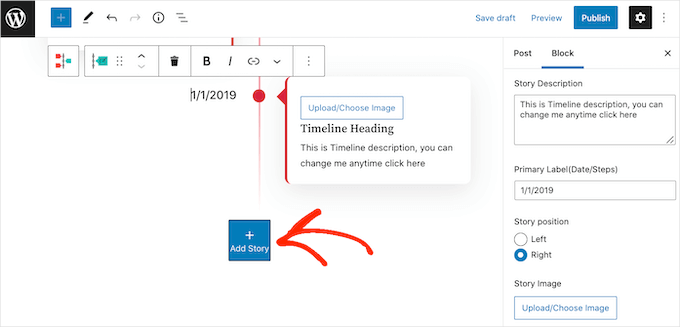
クールタイムラインブロックには4つのプレースホルダーイベントがあります。タイムラインの最初のイベントをクリックすることで、1つずつ編集を始めることができます。
右側のメニューで、’Story Heading’のプレースホルダーを、このイベントで使用したい見出しに置き換えるだけです。
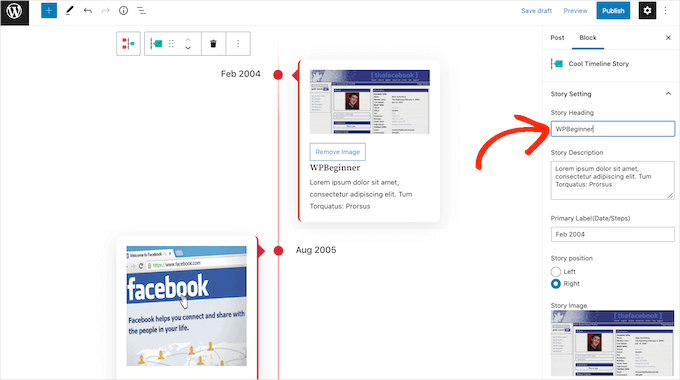
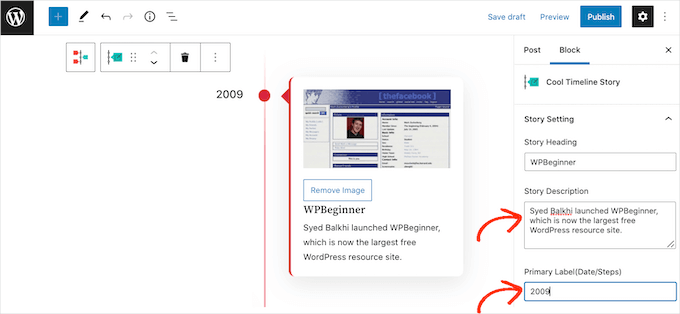
次に、「ストーリーの説明」フィールドに説明を追加することができます。
その後、「プライマリ・ラベル(日付/ステップ)」フィールドを探します。ここに、このイベントが起こった日付を入力してください。
初期設定では、クールタイムラインブロックはタイムラインの右側に最初のイベントを表示します。
縦線の左側にイベントを表示したい場合は、「左」ラジオボタンをクリックしてください。

今、Cool Timelineブロックには各イベントのプレースホルダー画像があります。このプレースホルダーをあなたの画像に置き換えるには、「削除」ボタンをクリックしてください。
アップロードが完了したら、’Upload/Choose Image’ボタンをクリックしてください。
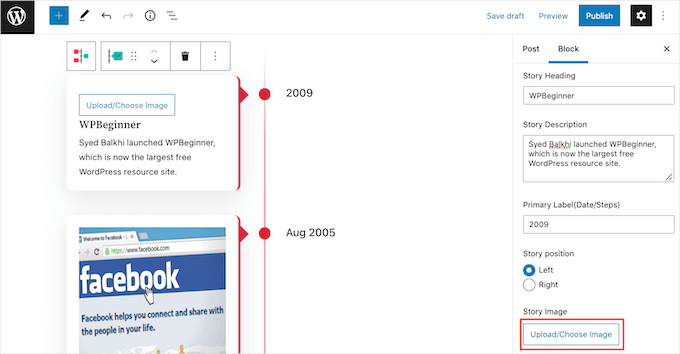
WordPressのメディアライブラリから画像を選択するか、コンピューターから新しいファイルをアップロードします。
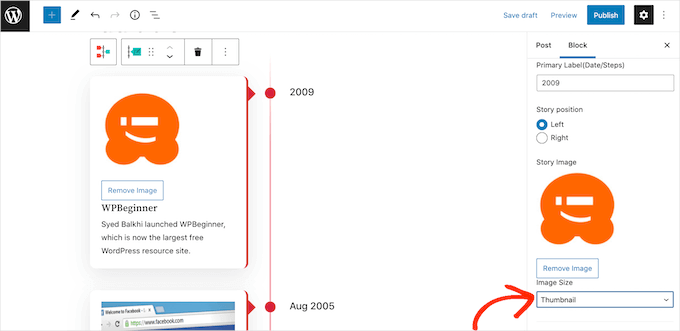
Cool Timelineブロックはそれぞれの画像をフルサイズで表示します。代わりに小さい画像を表示するには、’Image Size’ドロップダウンを開き、’Medium’または’Thumbnail’のいずれかを選択してください。
異なる画像サイズのいずれかをクリックすると、ブロックが更新され、新しい画像が表示されます。これにより、さまざまなサイズを試して、サイトに最適なサイズを確認することができます。
初期設定では、Timelineは垂直線上の各イベントをドットでマークします。このプレーンなドットをカスタムアイコンに置き換える事も出来ます。
例えば、イベントの種類によって違うアイコンを使うかもしれません。カスタム(Font Awesomeアイコン)’ラジオボタンをクリックする事で、Timelineに使えるカスタムアイコンを探す事が出来ます。
そうすると、矢印アイコンのドロップダウンが外観表示されます。矢印のアイコンがついたドロップダウンが表示されたら、それをクリックして、すべてのアイコンをスクロールしてください。
イベントに最適なアイコンを見つけたら、クリックしてください。
残りのプレースホルダー・イベントは、上記と同じプロセスでカスタマイズできます。
Timelineにイベントを追加したい場合は、’Add Story’アイコンをクリックするだけです。これでカスタマイズ可能なプレースホルダーイベントが追加されます。
Timelineの見た目に満足したら、通常通りページを更新または公開しましょう。Timelineが完成したら、あなたのWordPressサイトにTimelineが公開されます。
専門家のアドバイスオンラインで印象的な印象を作りたいですか?私たちのプロフェッショナルなウェブデザインチームがお手伝いします。お客様のブランドを反映し、読者とのつながりを深める視覚的に美しいレスポンシブなサイトを制作いたします。WordPressサイトデザインサービスを今すぐご利用ください!
この投稿があなたのWordPressサイトに美しいイベントタイムラインを追加する方法のお役に立てれば幸いです。WordPressでシンプルなイベントカレンダーを作成する方法とカウントダウンタイマーウィジェットを追加する方法もご覧ください。
If you liked this article, then please subscribe to our YouTube Channel for WordPress video tutorials. You can also find us on Twitter and Facebook.


")

Gunjan
Can you use create different timelines. For example, I want one to show my paid job and another with my Volunteering positions.
WPBeginner Support
The pro version of the plugin allows multiple timelines.
Admin
NICHOLAS AMOL GOMES
Thank you for given me best plugins
WPBeginner Support
Glad our recommendations are helpful
Admin
Sunday Adeniran
I got it like A B C. I was looking for cool timeline by searching for it in wpbeginners when I saw the express timeline.
Many thanks wpbeginners.
WPBeginner Support
Glad our recommendation could help
Admin
Thomas
I’m not sure if my first question has got lost, so i try again.
Any chance to include, to put older, already existing postings in the timeline?
I’ve got several postings that belong to historical information back to the beginning of 1900 and i want to connect it so that customers use the timeline functions to see what happend here 100 years ago.
WPBeginner Support
Hi Thomas,
You can create announcements with matching dates and then add the text you want to show in the timeline.
Admin
Syed
Hi . is it possible to change “Readmore” to have some other name like “Open to know more”
Jocelyn Edwards
Hi, just wondering if there is a way to change the settings on this plugin so that the dates can be displayed according to year (i.e. 2007) rather than a specific date of the year (July 17, 2007) Thanks.
Jan
Is there a similar plugin that can provide a sites member activity information as a timeline? I mean, to the member themselves, in their personal dashboard for example?
bob
I cannot download it. I went through all of the steps, but I cant find the add plugin section. So I need a different version of wordpress?
WPBeginner Support
Hi Bob,
You are probably using WordPress.com. Please see our guide on the difference between self hosted WordPress.org vs free WordPress.com blog.
Admin
Mariana Cubillos
Having trouble with the icons because every time I add a new post they don’t correspond to the post and go the opposite way. Is there anyway to make icons change respectively to the post? For example, if on one post there is an arrow to the right, as soon as I publish a new post the post moves to the left but the corresponding arrow stays to the right. How do I fix that?
Adam
Sorry doesnt work
a) cant put a date further back than 2007 – it’s a timeline !
b) dropdown for icon annoucement doesnt drop down
Waste of time
Ron
Sucks! Wasted time installing. Instructions are poor. Announcements? How about posts?
Sidhesh Halarnkar
Sir
I want to Create a website for an Research Department and its layout is as follow :
1)They are having main slider which goes across the home page.
3)After slider they are having about us section
2)after about us they are having two section basically they are News and Events in the Same Row with Scrolling Effects.
Im , finding very hard to create these two section at homepage do you have any suggestion’s for doing so then please tell me sir.
Waiting for your Response
Thanks and Regards,
Sidhesh Halarnkar
Owais Ali
How can I remove the announcement date in my post ?.
Evan Herman
Hi Owais,
You can easily hide the dates using the settings page. Head into ‘Timeline Express > Settings’ and toggle off the date visibility.
If you are still having issues, please see our documentation:
Evan
Lindsey @ Hut Marketing
Have you noticed that the images are not responsive? On my phone they look squished…
I’m about to just load a series of images instead of messing with a timeline lol
John Morken
I have six announcements posted. When you press the read more button, I get the additional text ok but then a big list below that of all the pages and more on my website. Also, the video (and image) from the first announcement migrates to the other announcements that are only videos and replaces them.
Chris
Hi there! The plugin is not working correctly. When you set up the announcements and post them to the page they are not displayed ok if you remove the “read more” option. Event icons are one over another and the text boxes have no space between them. The top one end just over the heading of the next one.
When you turn on the read more option the whole mess is fixed but not everyone wants to have the read more button
WPBeginner Support
Please try the plugin with a default theme and see if it still misbehaves. If it does not, then this means that your theme’s CSS is conflicting with the plugin’s CSS.
Admin
Andrew Hansen
This is awesome. I’m working on a novel and this will be great once I start blogging about my fiction writing. I’ll be able to use this to lay out my plot after my novel is published (hopefully lol), so peopl can review the order of events in any easily understandable format.