WordPressで管理カラムを追加・カスタマイズする方法をお探しですか?
初期設定のWordPressダッシュボードには、投稿、ページ、コメント、ユーザーなどのカラムがあります。しかし、独自のカスタマイザー・カラムを作成することで、より速く作業でき、編集フローを改善できるかもしれません。
この投稿では、WordPressで管理カラムを追加・カスタマイズする方法を紹介する。
なぜWordPressに管理カラムを追加するのか?
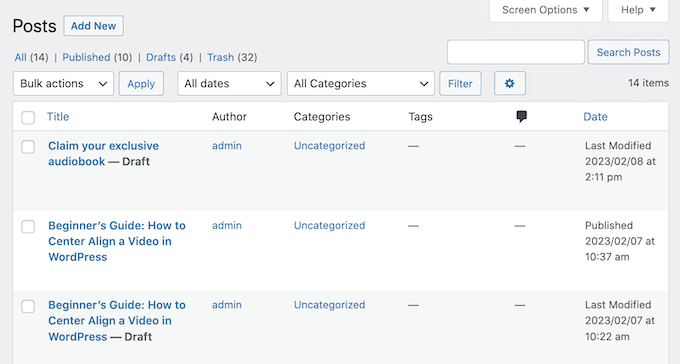
初期設定では、WordPressダッシュボードはエリアごとに異なるカラムを表示しています。
例えば、投稿者 “ すべての投稿にアクセスすると、各投稿のタイトル、著者、カテゴリー、タグ、コメント数、投稿の公開日などのカラムが表示されます。
マルチオーサーのWordPressブログを運営していたり、コンテンツがたくさんある場合、WordPressダッシュボードでコンテンツを管理するのは難しいかもしれません。
そこでカスタム管理カラムの出番だ。
管理エリアにカラムを追加することで、エディターや管理者、その他のユーザーが仕事を成功させるために必要な情報をすべて表示することができます。これにより、編集ワークフローが改善され、より多くの仕事をこなすことができます。
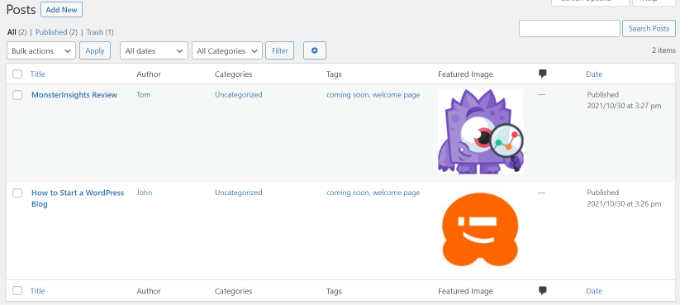
さらに、コンテンツを整理するために使用できる属性もあります。例えば、「アイキャッチ画像」のカラムを追加すれば、どの投稿を開かなくても、画像がない投稿を即座に確認することができます。また、コメント数や記事のワード数など、ブログ投稿の側面を素早く評価することもできる。
最終的には、管理カラムを追加することで、すべてを明確に把握することができ、より効率的にサイトを管理することができる。
それでは、WordPressサイトに管理カラムを追加してカスタマイズする方法を見ていきましょう。
動画チュートリアル
文章での説明がお望みなら、このまま読み進めてほしい。
WordPressの管理カラムの追加とカスタマイズ
管理エリアにカラムを追加する最も簡単な方法は、Admin Columnsを使うことだ。このプラグインを使えば、カスタマイザーのカラムを追加したり、ビルトインのカラムを編集することもできます。
まず、Admin Columnsプラグインをサイトにインストールし、有効化する必要があります。詳しくはWordPressプラグインのインストール方法をご覧ください。
有効化したら、設定 ” 管理カラムでプラグインを設定します。
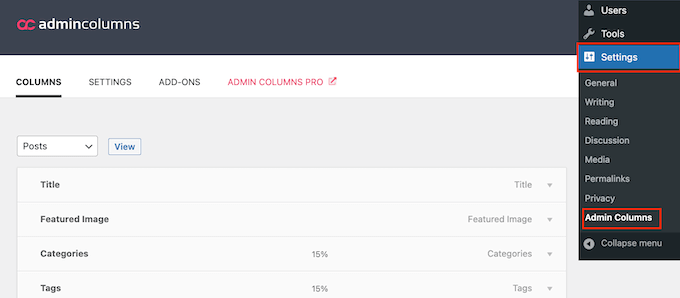
アドミンカラムでは、ページ、投稿日、コメント、パターン、メディア、ユーザー画面のカラムをカスタマイズすることができます。
画面の一番上にあるドロップダウンメニューを開き、カスタマイザーしたいページを選びます。そして、「表示」をクリックします。
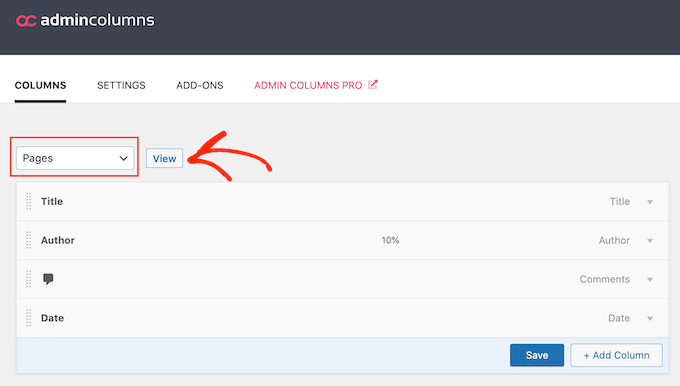
これで、ドラッグ&ドロップでビルトイン管理カラムの順番を変更できる。
カラムにマウスオーバーし、”Edit “リンクが表示されたらクリックすることで、カスタマイズすることもできる。

その後、「Label」フィールドに入力してカラムのラベルを変更できる。
カラムの幅を変更して、すべての情報が画面に快適に収まるようにすることもできます。
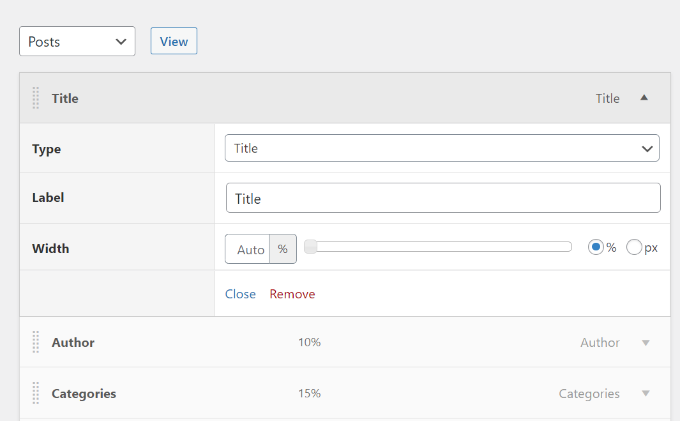
最後に、「タイプ」を管理者欄に表示される情報に変更することができる。
ビルトイン・カラムの設定に満足したら、カスタム・カラムを追加したくなるかもしれない。
例えば、投稿日 “ すべての投稿画面に「おすすめ画像」カラムを追加して、管理者がWordPressサイトのすべてのアイキャッチ画像を確認できるようにすることができます。
まずは、「+カラム追加」ボタンをクリックしてください。これで、カスタマイズ可能な空の’Actions’カラムが追加されます。
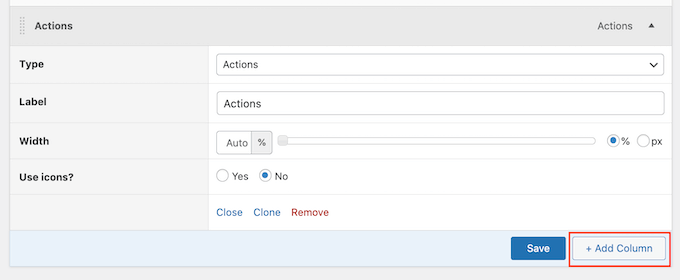
様々なドロップダウンメニューと設定を使ってラベルを追加し、幅を設定するだけです。その後、’タイプ’ドロップダウンメニューを使って、投稿フォーマット、パーマリンク、あるいはカスタムフィールドなど、表示したい情報を選択することができます。
選択した内容によっては、追加設定にアクセスできる場合があります。例えば、’Type’ ドロップダウンから ‘Featured Image’ を選択した場合、WordPress の画像サイズを選択することができます。
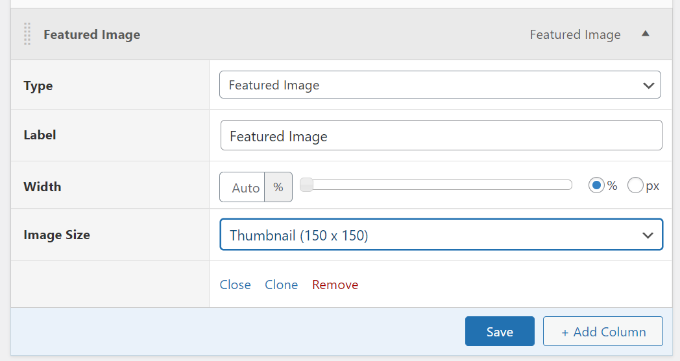
変更内容に満足したら、忘れずに「保存」ボタンをクリックしてください。
WordPressダッシュボードの他のエリアもカスタマイズできます。ページの一番上までスクロールし、ドロップダウンメニューを使ってサイトの新しいセクションを選択するだけです。
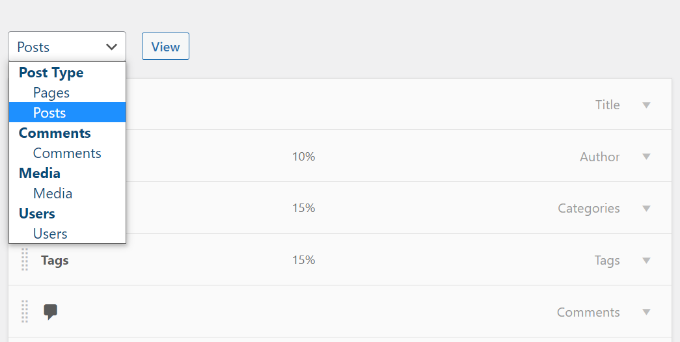
例えば、’Media’を選択した場合、画像の寸法、EXIFデータ、画像のaltテキスト、キャプションのカラムを追加することができる。
WordPressで他の管理カラムをカスタマイズする
WordPressの人気プラグインの中には、管理エリアにカラムを自動的に追加するものがある。
例えば、All In One SEO for WordPressには、SEOタイトルや メタ情報などを一括編集できるカラムが追加されている。
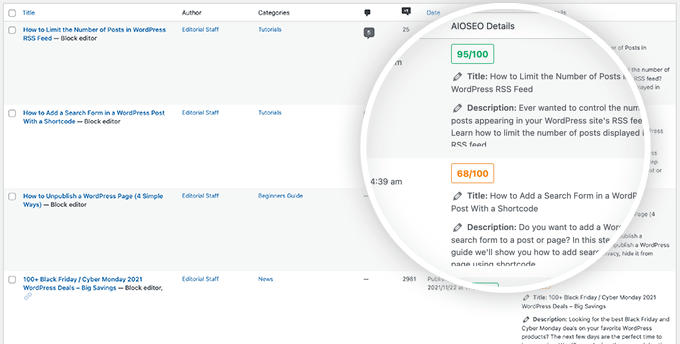
管理画面からプラグイン固有のカラムを削除するには、右上の表示オプションメニューをクリックしてください。
表示されたパネルで、削除したい各カラムの横にあるボックスのチェックを外すだけです。

この投稿がWordPressのカスタマイズや管理カラムの追加に役立てば幸いです。また、メールマガジンの作成方法や、WordPressのエキスパートが選んだビジネスサイトに必須のWordPressプラグインもご覧ください。
If you liked this article, then please subscribe to our YouTube Channel for WordPress video tutorials. You can also find us on Twitter and Facebook.


Goms
I want know if it is possible to reorganize a widget in post publisher admin wordpress by default for all users ?
Thomas Mosterd
Thanks for the guide, really helped me out at the start of my wordpress website.
Now though i use the plugin admin columns, it allows to add and sort a range of different columns which is really helpful.
Jatin Gupta
Hi Friends,
I am facing two problem in WordPress admin
1. Load custom CSS for wp-admin on user-role base (editor)
2. Remove some columns as per user-role in Woo-Commerce on products page
please reply if you can understood my problem…
Bongo
Looks cool, can’t wait to try it