WordPressの投稿やページにウェブサイトのスクリーンショットを頻繁に追加する場合は、プロセスを自動化することで、手動でスクリーンショットをキャプチャする時間を節約できます。
WPBeginnerでは、読者を効果的に誘導するために、定期的にスクリーンショットを作成し、記事に掲載しています。スクリーンショットの作成、編集、自動化に16年以上携わってきた経験から、分かりやすい画像を作成するためのベストプラクティスを熟知しています。
この経験から、読者の理解度を高め、コンテンツへの関心を高めるには、よく練られたスクリーンショットがいかに重要であるかを学びました。
この投稿では、WordPressでウェブサイトのスクリーンショットを簡単に自動作成する方法をご紹介します。
WordPressでウェブサイトのスクリーンショットを自動作成する理由
ワードプレスのウェブサイトをお持ちなら、潜在的な読者にコンテンツの内容を素早く見てもらうために、自動化されたサイトのスクリーンショットを作成し、投稿に追加するとよいでしょう。
検索エンジンは通常、画像やスクリーンショットを使ってコンテンツを理解し、インデックスするため、これはエンゲージメントを高め、サイトのSEOにも役立ちます。
同様に、自動化されたサイトのスクリーンショットを使用して、テーマの更新やその他の変更を行う前に、サイトの視覚的なバックアップを作成することができます。これにより、サイトの新旧スタイルの違いを比較して確認することができます。
自動スクリーンショットは、異なるサービスやサイトを比較したり、ステップバイステップのチュートリアルで読者を誘導したり、時間の経過とともにサイトの進捗状況を追跡したりすることもできます。
ということで、WordPressで簡単に自動サイトのスクリーンショットを作成する方法を見てみましょう:
方法1:プラグインを使ってWordPressで自動サイトスクリーンショットを作成する
この方法は簡単なので、初心者やコードを扱いたくないユーザーにお勧めだ。
まず、Browser Screenshotsプラグインをインストールして有効化する必要があります。詳しくは、WordPressプラグインのインストール方法のステップバイステップガイドをご覧ください。
有効化したプラグインはすぐに動作し、設定する必要はありません。
WordPressの管理サイドバーから、自動でウェブサイトのスクリーンショットを追加したいページや投稿にアクセスするだけです。
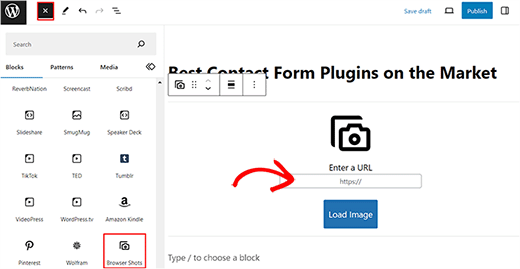
ここで、画面左上の「ブロックを追加」(+)ボタンをクリックし、ブロックメニューを開きます。次にエディターで「ブラウザーショット」ブロックを追加します。
自動スクリーンショットを取得したいサイトのURLを追加し、「Load Image」ボタンをクリックします。
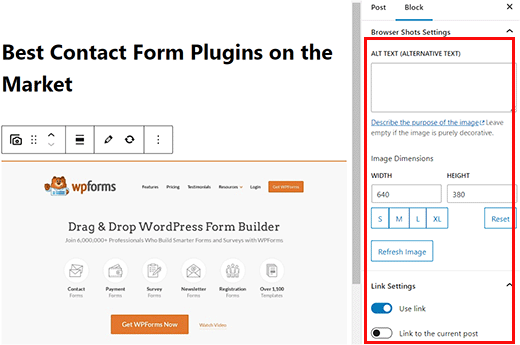
プラグインが自動的に選択したサイトのスクリーンショットを追加します。画像のaltテキストを追加し、右側のブロックパネルから幅と高さを変更できます。
パネルの「Use link」スイッチを切り替えると、スクリーンショットにサイトへのリンクを追加できます。
スクリーンショットに投稿リンクを追加したい場合は、「現在の投稿へのリンク」スイッチを切り替えることもできます。
最後に、「更新」または「公開」ボタンをクリックして、設定を保存します。
これでWordPressサイトにアクセスして自動スクリーンショットを表示できる。
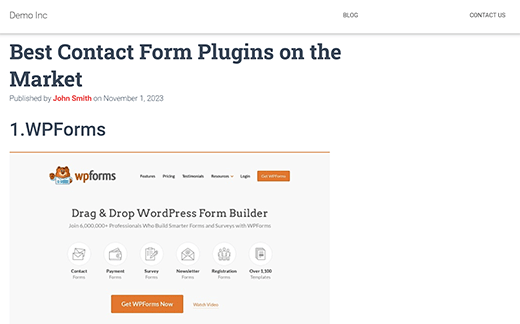
注: ブラウザーショットプラグインは、WordPress.comのmshots APIを使用して、その場でスクリーンショットを生成します。これらの画像はWordPressのメディアライブラリには保存されません。WordPress.comサーバーから直接提供されます。WordPress.com と WordPress.org の違いについては、こちらのガイドをご覧ください。
方法2:WordPressにコードを追加して自動スクリーンショットを作成する
この方法では、WordPressファイルにコードを追加する必要があります。自動スクリーンショットを作成するには、テーマのfunctions.phpファイルにカスタムコードを追加する必要があります。
しかし、コードのわずかなエラーがサイトを壊し、アクセス不能にする可能性があることを忘れないでください。
そのため、WPCodeの使用をお勧めします。WPCodeは、カスタマイザーコードを超安全かつ簡単に追加できる、市場で最高のWordPressコードスニペットプラグインです。
まず、WPCodeプラグインをインストールし、有効化する必要があります。詳しい手順は、WordPressプラグインのインストール方法のステップバイステップガイドをご覧ください。
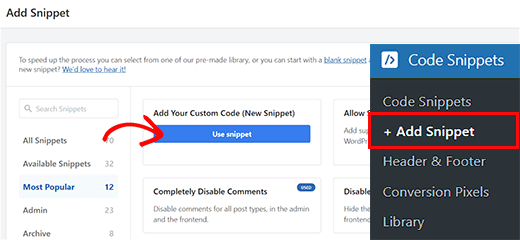
有効化したら、WordPressダッシュボードからCode Snippets ” + Add Snippetページにアクセスします。
カスタムコードを追加する(新規スニペット)」設定の下にある「スニペットを使用する(Use Snippet)」ボタンをクリックします。
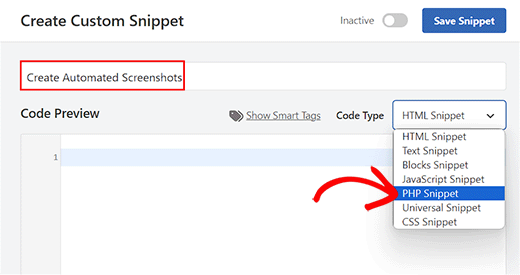
カスタムスニペットの作成」ページが表示されますので、まずはスニペットの名前を入力してください。名前はコードを識別できるものであれば何でもかまいません。
次に、右側のドロップダウンメニューからコードタイプとして「PHP Snippet」を選択します。
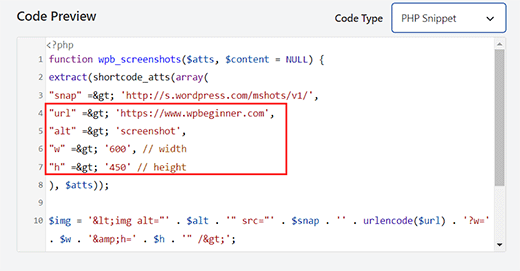
その後、以下のコードをコピー&ペーストして「コード・プレビュー」ボックスに入れてください:
1 2 3 4 5 6 7 8 9 10 11 12 13 14 | function wpb_screenshots($atts, $content = NULL) {extract(shortcode_atts(array("snap" => 'http://s.wordpress.com/mshots/v1/',"url" => 'https://www.wpbeginner.com',"alt" => 'screenshot',"w" => '600', // width"h" => '450' // height), $atts)); $img = '<img alt="' . $alt . '" src="' . $snap . '' . urlencode($url) . '?w=' . $w . '&h=' . $h . '" />'; return $img;}add_shortcode("screen", "wpb_screenshots"); |
先に紹介したプラグインと同様に、このコードもWordPress.com Mshots APIを使用して、その場でスクリーンショットを生成する。
次に、自動スクリーンショットを撮りたいサイトのURLを、コードの"url" =$gt;行の横に追加します。
また、コード内の "w"=>と"h"=>行の横に、スクリーンショットの幅と高さを追加することもできます。
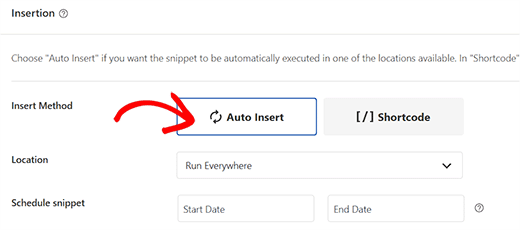
次に、「インサーター」セクションまでスクロールダウンし、「自動挿入」モードを選択する。
有効化したコードは自動的に実行されます。
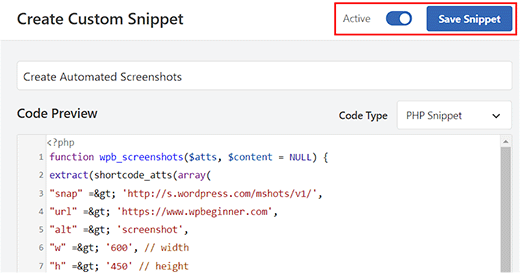
最後に、ページの一番上までスクロールして戻り、「Inactive」スイッチを「Active」に切り替える。
次に、「Save Snippet」ボタンをクリックして設定を保存し、スニペットを有効化します。
さて、WordPressの投稿やページにサイトのスクリーンショットを表示するには、このようにショートコードを入力する必要があります:
1 | [screen url="http://wpbeginner.com" alt="WPBeginner"] |
URLとAltフィールドは、独自の値で置き換えることができます。
まず、WordPressのダッシュボードからブロックエディターでページ/投稿を開き、「ブロックを追加」(+)ボタンをクリックします。
ここから、ページ/投稿に「ショートコード」ブロックを追加する。そして、上記のショートコードを追加し、あなた自身の値で置き換えてください。
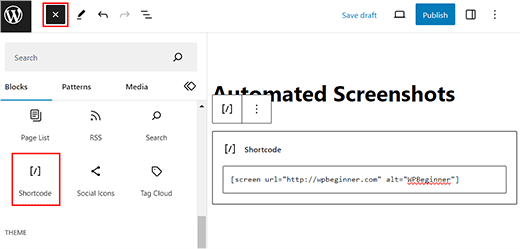
最後に、「更新」または「公開」ボタンをクリックして、設定を保存します。
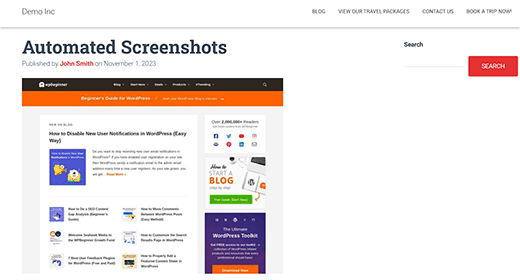
では、WordPressサイトにアクセスして、自動化されたスクリーンショットを表示してみましょう。
ボーナス:サイトのスクリーンショットを手動で撮る
自動スクリーンショットを使いたくない場合は、Droplrのようなツールを使って手動でスクリーンショットを撮ることができます。
自動化されたスクリーンショットに比べ、特定のエリアを自由に選択することができます。さらに、Adobe Photoshopで画像を編集し、矢印や赤枠などの要素を追加することもできます。
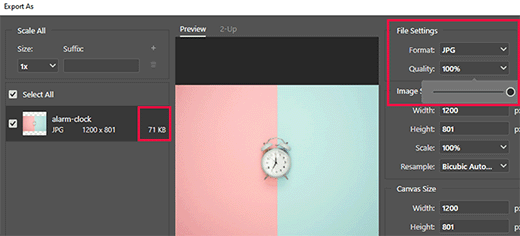
この機能は、プラグインやコードが自動的に画像を取得する自動スクリーンショットには使用できません。
Droplrでスクリーンショットを撮るには、まずコンピュータにアプリをインストールする必要があります。インストールしたら、WindowsまたはMacのタスクバーにあるDroplrアイコンをクリックし、「スクリーンショット」オプションを選択します。
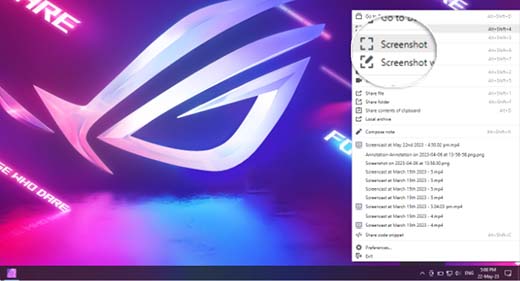
次に、スクリーンショットを撮るエリアを選択します。
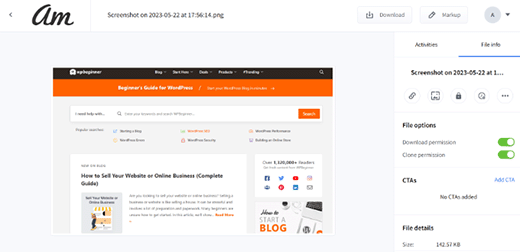
Droplrはその画像をブラウザーで開き、ダウンロードしたり、他の人とリンクを共有したりすることができます。詳しくは、WordPressでスクリーンショットを撮る方法のチュートリアルをご覧ください。
WordPressでウェブサイトのスクリーンショットを自動作成する方法について、この記事がお役に立てれば幸いです。また、画像SEOの初心者向けガイドや、ブログ記事により良い画像を作成するためのベストツールのエキスパートセレクションもご覧ください。
If you liked this article, then please subscribe to our YouTube Channel for WordPress video tutorials. You can also find us on Twitter and Facebook.


Samuel Kaffy
Pls, how can I make the screenshots downloadable as an image file?
WPBeginner Support
You would need to reach out to the plugin’s support for adding that functionality
Admin
Nigel Billam
I’ve used this plugin but it stops on the third use of the short code and reports ‘too many requests’ – i was hoping to display 45 URLs. Do you have any suggestions to avoid this?
WPBeginner Support
You would want to reach out to the plugin’s support if you haven’t already for what options they have available for avoiding that issue.
Admin
Cory Goodwin
Does this browser shot plugin check for updates to the site, or do you have to manually redo to get the latest look of the target website? Thanks:)
WPBeginner Support
You would want to reach out to the plugin’s support for the current refresh rate
Admin
Karin
Your code is just what I was looking for. The only thing is that I want the url not prefilled in the code but generated from a custom field ‘wpcf_websitelink’.
How can I add the code to get the content from the field.
So this line
“url” => ‘https://www.wpbeginner.com’,
should have something to get the content of the field wpcf_websitelink in stead of the wpbeginner.com link
WPBeginner Support
If you are using a plugin to create that custom field then you would want to reach out to the support for that plugin for how to access that information and replace the url value with what they tell you.
Admin
Tien Le
Thank you so much <3
Now i can make more image from capture screen image
Steve Renow
This is a wonderfully simple plugin to use. Great job! Is there any way to crop the images? Some sites show with the cookie warning t the top or bottom and it would be good to be able to crop that off.
Daniel
Where do the screenshot get saved too?
WPBeginner Support
These images are not stored in your WordPress media library. They are served directly from WordPress.com servers.
Admin
Bernd
Is it possible to get screenshots with https ?
Dumitru Brinzan
Helpful tutorial and information, but it feels a little incomplete.
If it contained info on how to save the images to the library then it would be perfect
Annapurna
Did you get how to do this?
Damith
It is possible to save screenshot in media library and make that as featured image. Thanks.
Obeng blankson
Great info. I will surely test the plugin on my website to actually have a feel of it.
Ankit Agarwal
With any of these methods, what will be the side effect on the speed of the website? As a plugin, there will be some addition to load time. If the images are not stored on the media library, there will again be some addition to website load times.
So from the methods given, which one is recommended considering website load speed?