WordPressサイトが競合サイトの下に埋もれてしまわないようにしましょう。リッチスニペットは検索結果ページの上位に表示され、コンテンツへのトラフィックを増やします。
リッチスニペットとは、標準的なタイトル、URL、説明文以外の追加情報を表示する検索結果のことです。この追加情報は、サイトの構造化データから取得され、検索リストを強化し、ユーザーにとってより視覚的に魅力的で有益なものにします。
私たちは、このような特別な検索リストが実に目立ち、読者の注目を集めることで、サイトの認知度が向上し、サイトへのトラフィックが増えることを実感しています。リッチスニペットは、レビュー、レシピ、イベントなどの特別なコンテンツに利用できます。
このガイドでは、WordPressサイトにリッチスニペットを追加するために必要なすべてのことを説明します。

なぜWordPressサイトでリッチスニペットを使うのか?
リッチスニペットは、スキーママークアップと呼ばれるものを使用して、コンテンツに関する追加情報を検索エンジンに提供します。
検索エンジンのボットはこのデータを使って、あなたの投稿やページに関する追加情報を検索結果に表示します。

これにより、投稿やページが検索結果でより目立つようになり、オーガニッククリック率が向上し、ブログのトラフィックを増やすことができます。
Googleの検索統計がこれを証明しており、リッチ結果は100回の検索で58回クリックされ、通常の検索結果を上回っていると報告している。
また、あなたのサイトが検索で見やすくなるため、ニッチな分野での投稿者の構築にも役立ちます。
リッチスニペットはレビューサイトや レシピのためだけのものではありません。イベント、商品、人物、ハウツー、動画、音楽、アプリ、記事、ブログ投稿など、様々なものにリッチスニペットを利用できます。
注:サイトにスキーママークアップを追加しても、Googleがそれを表示することを保証するものではないことを知っておくことが重要です。Googleは、検索によっては表示しないことを選択するかもしれない。しかし、スキーママークアップを追加することで、Googleはあなたのコンテンツを理解しやすくなり、リッチスニペットを表示する可能性が高くなります。
それでは、WordPressにリッチスニペットを追加する方法を紹介しよう。以下のクイックリンクから、お好きな方法にジャンプしてください。
方法1.WordPressプラグインを使ってリッチスニペットを追加する。
WordPressにリッチスニペットを追加する最も簡単な方法は、AIOSEOプラグインを使用することです。これは、300万以上のサイトで使用されている、市場で最高のWordPress SEOプラグインです。

SEOの専門家を雇うことなく、簡単にサイトを検索エンジンに最適化することができます。さらに、数回のクリックでサイトにリッチスニペットを設定できます。
注: AIOSEOにはスキーママークアップ機能やXMLサイトマップ、リダイレクトマネージャーなどの機能が含まれているため、Proバージョンが必要です。無料版のプラグインもあります。
まず最初にAIOSEOプラグインをインストールして有効化します。詳しくはWordPressプラグインのインストール方法をご覧ください。
有効化すると、すぐにAIOSEOのセットアップウィザードが表示されます。Let’s Get Started」ボタンをクリックしてください。
セットアップウィザードがすぐに表示されない場合は、All In One SEO ” ダッシュボードに移動するだけです。
ここから「セットアップウィザードを起動」ボタンをクリックします。あなたのサイトにプラグインをセットアップする手順を説明します。

セットアップウィザードに進むと、「Advanced Rich Snippets + Schema Markups」アドオンを有効化する必要があります。
ボックスが青くなるようにチェックし、「Save and Continue(保存して続行)」ボタンをクリックするだけです。

最後の画面でライセンスキーを入力し、「接続」ボタンをクリックします。
この情報は、AIOSEOサイトのアカウントページに記載されています。

詳しくは、AIOSEO for WordPressの正しい設定方法をご覧ください。
その後、WordPress管理画面のAIOSEO ” 検索外観から、「コンテンツタイプ」タブをクリックします。

次に、投稿とページのスキーママークアップタイプを設定します。
スキーママークアップ」メニューオプションをクリックし、ドロップダウンからスキーマタイプを選択します。
プラグインで作成できるさまざまなコンテンツを見ることができます。リストには以下が含まれます:
- コース
- 製品
- レシピ
- ソフトウェア/アプリ
- よくあるご質問
- ウェブページ
- プロフィール
- 投稿
コンテンツタイプをクリックすると、利用可能なフィールドが表示されます。

これらの設定は、新しいブログ投稿を追加する際の初期設定となります。しかし、投稿日ごとに変更することもできます。
投稿スキーママークアップの下には、ページの初期スキーマ設定もコントロールできる。
ドロップダウンから「スキーマ・タイプ」を選択するだけです。すると、選択したスキーマ・タイプのオプションが追加されます。

変更を終えたら、ページを離れる前に「変更を保存」ボタンをクリックしてください。
投稿とページにリッチスニペット情報を追加する
これで、個々の投稿やページにスキーマ情報を追加し、検索結果に独自のリッチスニペットを表示させることができる。
これを行うには、単にブログ投稿を開き、投稿エディターの下にスクロールダウンします。ここに「AIOSEO設定」というメタ情報があります。
スキーマ」タブをクリックし、「スキーマジェネレータ」ボタンをクリックします。

スキーマ・カタログが開きます。追加したいスキーマの種類の横にある「Add Schema」ボタンをクリックします。
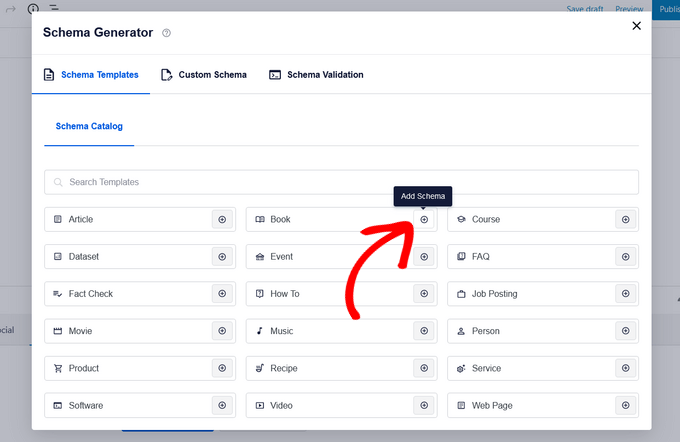
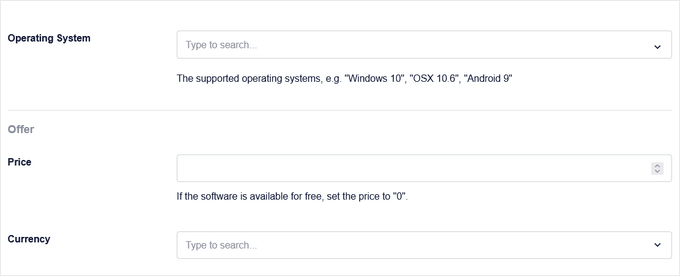
ここで、選択したオプションに応じて、記入できるフィールドが異なります。例えば、「ソフトウェア」スキーマタイプには、名前、オペレーティングシステム、価格、説明、レビューなどのフィールドがあります。
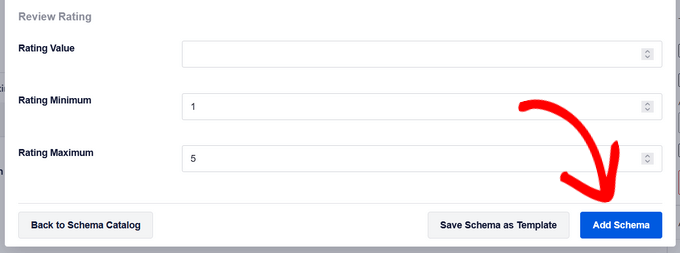
完了したら、「Add Schema」ボタンをクリックします。投稿日:’更新’または’公開’をクリックして変更を保存することもお忘れなく。
個々のWordPressページにスキーママークアップを追加するのも同様だ。編集したいページを開き、ページエディターの下にある「AIOSEO設定」メタ情報ボックスまでスクロールダウンする必要がある。
次に、’スキーマ’メニューオプションをクリックし、’スキーマジェネレータ’ボタンをクリックし、スキーマカタログからページスキーマタイプを選択します。

選択したスキーマの種類によって、異なるオプションが設定される。
上記と同じように、作業が終わったら「Add Schema」ボタンをクリックし、ページ上で「更新」または「公開」をクリックして変更を反映させる必要がある。
リッチスニペット情報を追加しても、WordPressブログのフロントエンドに変化はありません。しかし、検索エンジンのボットに、検索結果で投稿やページと一緒に表示される追加データを与えることになります。
方法2.WordPressにコードを追加してリッチスニペットを追加する。
WordPressにリッチスニペットを追加するもう一つの方法は、WordPressにコードを追加することです。WordPressにコードをコピー&ペーストする方法をご覧ください。
リッチスニペットまたは構造化データマークアップは、3つの異なるボキャブラリーに記述することができます。これらのボキャブラリーは、microdata、RDFa、JSON-LDです。あなたのサイトではどれでも使うことができます。しかし、ほとんどの初心者は、RDFaの方が初心者に優しいと感じるでしょう。
WordPressのユーザー紹介ページの例です。通常、ページのテキストはこのようになります:
1 2 3 4 5 6 7 8 9 10 | John Smith<img src="johnsmith.jpg" alt="Photo of John Smith"/>Support Technician342 Acme Inc.101 Washington AvenueEagleton IN 98052(425) 123-4567<a href="mailto:johnsmith@example.com">johnsmith@example.com</a>Website:<a href="http://www.example.com">example.com</a> |
これはリッチスニペットで簡単に変えることができる。
もしあなたがHTMLに詳しいなら、次の例を簡単に理解できるだろう:
1 2 3 4 5 6 7 8 9 10 11 12 13 14 15 16 17 18 | <div vocab="http://schema.org/" typeof="Person"> <span property="name">John Smith</span> <img src="johnsmith.jpg" property="image" alt="Photo of John Smith"/> <span property="jobTitle">Support Technician</span> <div property="address" typeof="PostalAddress"> <span property="streetAddress"> 342 Acme Inc. 101 Washington Avenue </span> <span property="addressLocality">Eagleton</span>, <span property="addressRegion">IN</span> <span property="postalCode">46818</span> </div> <span property="telephone">(425) 123-4567</span> <a href="mailto:johnsmith@example.com" property="email">johnsmith@example.com</a>Website <a href="http://example.com" property="url">example.com</a></div> |
各コンテンツ・タイプには、定義する必要のある特別なプロパティがいくつかある。
Schema.orgは、さまざまなコンテンツタイプの標準の維持を支援する組織である。Schema.orgのサイトでは、各コンテンツタイプの例を含む広範なドキュメンテーションを見ることができる。
リッチスニペットを使ったレシピの例をもう一つ紹介しよう。
1 2 3 4 5 6 7 8 9 10 11 12 13 14 15 16 17 18 19 20 21 22 | <div vocab="http://schema.org/" typeof="Recipe"> <span property="name">Mom's World Famous Banana Bread</span> By <span property="author">John Smith</span>, <img property="image" src="bananabread.jpg" alt="Banana bread on a plate" /> <span property="description">This classic banana bread recipe comes from my mom -- the walnuts add a nice texture and flavor to the banana bread.</span> Prep Time: <meta property="prepTime" content="PT15M">15 minutes Cook time: <meta property="cookTime" content="PT1H">1 hour Yield: <span property="recipeYield">1 loaf</span> Ingredients: - <span property="recipeIngredient">3 or 4 ripe bananas, smashed</span> - <span property="recipeIngredient">1 egg</span> - <span property="recipeIngredient">3/4 cup of sugar</span> ... Instructions: <span property="recipeInstructions"> Preheat the oven to 350 degrees. Mix in the ingredients in a bowl. Add the flour last. Pour the mixture into a loaf pan and bake for one hour. </span></div> |
WordPressの投稿に手動でリッチスニペットを追加する場合は、WordPressに手動でHTMLを追加する必要があります。詳しくは、WordPressコードエディターでHTMLを編集する方法についての初心者ガイドをご覧ください。
また、Googleの構造化データに関する開発者向けリソースを参照し、各コンテンツタイプにどのプロパティが必須かを理解する必要があるかもしれない。
リッチスニペットとスキーママークアップのテスト
リッチスニペットを手動で追加する場合は、WordPressサイトに構造化データが適切に追加されていることを確認したい。
リッチスニペットをチェックするには、Google構造化データテストツールにアクセスするだけです。そして、構造化データをテストするために実行できる2つの異なるテストがあります。
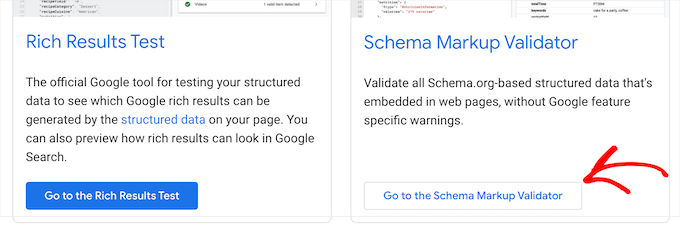
まず、「リッチリザルトテストへ」ボタンをクリックします。これで、あなたのページにどのようなリッチリザルトを生成できるかがわかります。

次に、あなたのページまたは投稿のURLをボックスに入力します。
次に、「Test URL」ボタンをクリックする。

これにより、そのページや投稿が検索結果に表示されたときに、どのリッチリザルト機能が表示されるかを確認するためのレポートが自動的に生成されます。
エラーや警告が表示されるので、構造化データを改善することができます。警告の横にあるドロップダウンの矢印をクリックすると、修正方法の詳細が表示されます。

次に、Google構造化データテストツールのページに戻って、スキーママークアップをテストすることができる。
そして、「Go to the Schema Markup Validator」ボタンをクリックする。
次に、URLまたはコードスニペットを「構造化データのテスト」ポップアップに入力する。
そして、’Run Test’ボタンをクリックする。

このツールは自動的にコードを解析し、エラーがないかどうかを確認する。
ページの右側にエラーが0であることを確認したい。

この投稿がWordPressサイトでリッチスニペットを使用する方法を学ぶのにお役に立てば幸いです。また、WordPressでよくある質問(FAQ)セクションを追加する方法についてのガイドと、WordPressのための最高のスキーママークアッププラグインの専門家のピックもご覧ください。
If you liked this article, then please subscribe to our YouTube Channel for WordPress video tutorials. You can also find us on Twitter and Facebook.


Jiří Vaněk
I discovered markup schema or rich snippets thanks to wpbeginner and thanks to AIO SEO. I can confirm that my SEO and rankings have improved significantly since then. You will really improve your positions if you use them.
Moinuddin Waheed
Thanks for the post I have seen rich snippets many times and have thought of how to add but was not aware of the steps of adding it.
Adding Snippets is a good way to add more information for search bots and increase seo.
As we can add code to the WordPress for rich snippets, I think it would be simpler and better if we would be able to add through wpcode and then use inside posts and pages through some logic.
is there a way we can add rich Snippets using wpcode and how?
WPBeginner Support
We do not have a beginner friendly way we would recommend using WPCode at the moment.
Admin
Jiří Vaněk
It makes no sense at all because every article is different. I personally create snippets exactly according to the article thanks to the AIO SEO plugin. I will add everything I need. How To, Video, FAQ and I mix it up. It takes a little time, but the result is perfect and you can see it in the results.
Blair
Thanks for posting I was interested how to add Rich Snippets into posts or page now I can understand how to do it right.
WPBeginner Support
Glad to hear our article was helpful!
Admin
Anu
Thanks for sharing this article, this is really helpful for me.
WPBeginner Support
You’re welcome, glad our guide was helpful
Admin
Mike Jagger
this is a great share, thanks.
WPBeginner Support
You’re welcome, glad you like our tutorial
Admin
mike
been looking for something like this. thought would have hire a developer initially
thanks.
WPBeginner Support
You’re welcome, glad our content could be helpful
Admin
Stine Mari
So many great tips, I have a few things to improve on now.
Purnendu Mukherjee
Hi, is this plugin can be used with Yoast SEO Plugin or it is also a substitute of Yoast?
charles finni
Hey I am trying to do google’s sitelink in my website can you please help with that
Prajakta Patil
Hi,
I added rich snippet plugin into my website
It is a recipe website. I have installed the plugin and activated. I filled all the boxes. When i tested it in google, i got warning to fill ratings. I looked upon the rating option and didn’t find anything for recipe
What should i do in this case?
Thanks in advance.
WPBeginner Support
Hi Prajakta,
You can try WordPress post ratings plugin or you can try reaching out to plugin author and see if they have a solution.
Admin
Harman
Hello,
Is this plugin compatible with SEO Yoast Premium and Newspaper Theme?
Thanks
Antje
I programmed it without plugin. After acualisation and switching between visuell and text(Code) view my code was gone.
Do you have any suggestions?
Rahul
How i get Google rating in Google Search?
Matus
Why aren’t you using this on your website? Is it not recommended anymore?
Ringo
I see that Google add highligher in Google search console, are they the same thing?
Sergey
Tell me please, is it necessary first to clean the old structured data, which are available on my website, and then install the plugin All In One Schema.org Rich Snippets?
Or can I install the plugin All In One Schema.org Rich Snippets on top of structured data, which are now on my website?
Sergey
Hello! I have the plugin All In One Seo Pack on my site. Please tell me, could this be the conflict All In One Seo Pack with All In One Schema.org Rich Snippets? Could it be that both plugins are used on the website?
Thank you.
WPBeginner Support
Both plugins should work well together.
Admin
Sergey
Thank you!
John C
Is there anyway to get rid of the box it creates on the page?
kiran
There is way to remove the box but it will harm your google ranking.
You should rather use your child theme style.css to make it look good on your page.
or use chile theme functions.php to place it in correct place.
Pravin Nath.K
can i add rich snippets using yoast seo plugin?
Ambily
As others above are complaining, I don’t want anyone to see this box
Raj
How to add rich snippets without this plugin??? I used this plugin but it leaves that box below the content which is visible for the traffic and I don’t want anyone to see this box… I’m really looking forward for your answer
Adriano
I don’t want that box neither, did you find a solution?
Brian
One problem. The recommended plug in has not been updated for a year. Just an FYI.
Brian
WPBeginner Support
It is now updated and compatible with the latest WordPress version.
Admin
shamsher khan
Informative Article i m going to install this plugin on my domain
Marcelo
And… will it work well “teaming” with any other SEO plugins like Yoast’s? I can recall Yoast plugins add plenty of mata tags but still don’t add Rich Snippets.