
WordPressの最新作を「公開する」ボタンを押しました。今度は、コンテンツを共有するためにプラットフォームからプラットフォームへと手動で移動するお馴染みのダンスがやってきます。疲れるでしょ?
WPBeginnerでは、ClickSocialを使用して、すべてのサイトでソーシャルメディアの共有を自動化しています。しかし、ビジネスにはそれぞれ異なるニーズや予算があることを私たちは知っています。そのため、私たちは始めたばかりの読者にもBufferをよく勧めています。
Bufferは、1つのダッシュボードから複数のプラットフォームにわたるソーシャルメディア投稿をスケジュールし、管理できる人気のフリーミアムツールです。WordPressと統合すると、新しい投稿を自動的にソーシャルアカウントで共有することができます。
このガイドでは、これらのツールのいずれかを使用してソーシャルメディア用にWordPressの投稿をスケジュールする方法を紹介します。Bufferの方が広く使われているため、Bufferから始め、その後、私たちのサイトでClickSocialを使用する方法を紹介します。

なぜWordPressでソーシャルメディアへの投稿をスケジュールするのか?
ソーシャルメディアは、WPBeginnerを含む多くのサイトにとって重要なトラフィック源です。
訪問者にコンテンツの共有を促す簡単な方法は、WordPressにソーシャル共有ボタンを追加することです。
しかし、ソーシャルメディア・プラットフォームは、あなたが有効化することを必須とします。そのためのひとつの方法は、ソーシャルメディアのアカウントに定期的に更新を投稿することだ。
1日に何度も投稿し、各ソーシャル・プラットフォームに時間を費やすのは時間がかかる。
そのような作業の一部を自動化してスケジューリングし、ビジネスの成長に集中できたらいいと思いませんか?
それがBufferだ。ソーシャルメディアへの投稿をスケジュールしたり、WordPressからソーシャルメディアに共有するブログ投稿を自動的にスケジュールすることもできる。
Bufferとは?
Bufferはウェブベースのアプリで、さまざまなソーシャルネットワークに投稿できる。
彼らの言葉を借りれば、Bufferはよりスマートな共有方法だ。Facebook、X/Twitter、LinkedInを1つのBufferアカウントに統合することができる。

個別ダッシュボードを使えば、すべてのサイトで共有することができる。また、アナリティクス、簡単な投稿スケジュール、URL短縮機能もある。
チームメンバーを追加することもできるので、ソーシャルメディア活動を区切るのに最適です。
ということで、Bufferを使ってWordPressの投稿をスケジュールし、ソーシャルメディアプロフィールに自動投稿する方法を見てみよう。チュートリアルのナビゲーションは、以下のクイッククリックをご利用ください:
BufferでWordPressの投稿をソーシャルメディア用にスケジュールする方法
ステップ1:Bufferアカウントを開設する
まず、Bufferのホームページにアクセスし、右上にある「今すぐ始める」ボタンをクリックする。
次に、Bufferのオンボーディングウィザードに従ってください。Grow your audienceセクションの’Connect Channels’をクリックして始めましょう。

完了すると、Bufferに接続できるソーシャルメディアチャネルのオプションがいくつか表示されます。
この例ではFacebookを使う。

ここで、Bufferに接続するFacebookアカウントの種類を選択します。ここではデモのためにFacebookページを設定します。
完了したら、『接続開始』をクリックするだけだ。

次のステップは、BufferがあなたのFacebookアカウントにアクセスできるようにすることです。
そのまま「Continue as …」をクリックして進みます。

完了すると、Bufferのダッシュボードが表示されます。
ここで、先ほどBufferに接続したFacebookページを以下のように選択するだけです。

次に確認したいのは、Bufferのダッシュボードでソーシャルアカウントに投稿する特定の時間を設定していることだ。
設定」タブに切り替え、「投稿スケジュール」をクリックするだけです。ここから投稿時間を設定できます。お好きなだけ追加できます。
それが完了したら、『投稿時間を追加』をクリックするだけです。

ステップ2:WP to BufferでWordPressをBufferに接続する
Bufferアカウントを作成したら、次はWordPressサイトに接続します。
そのためには、サイトにWP to Bufferプラグインをインストールして有効化する必要があります。詳しくはWordPressプラグインのインストール方法をご覧ください。
プラグインを有効化した後、WP to Buffer ” Settingsに移動し、’Authorize Plugin’ボタンをクリックします。

以下の画面が表示されるはずです。
アクセスを許可」ボタンをクリックすると、WordPressサイトがBufferアカウントに接続されます。

BufferアカウントがWordPress管理エリアに接続されると、WP to Bufferプラグインオプションが表示されます。
プラグインのページはこんな感じです:

ステップ3:投稿スケジュールをテストするためにブログ記事を公開する
WordPressの投稿が公開されたときに自動的にBufferに共有するには、WP to Buffer ” Settingsに移動し、Postsタブに移動する必要があります。
次に、Bufferに追加したソーシャルメディア・チャンネルのタブに切り替える。この場合、先ほど追加したFacebookページがそれにあたる。

その後、「アカウント有効化」にチェックを入れる。
そして、『保存』をクリックする。

これで、WordPressブログで新しい投稿を公開するたびに、Bufferが選択したスケジュールに基づいて自動投稿します。
ローカル版のサイトや ステージングサイトでテストすることができます。こうすれば、テストブログ投稿を誤って本番のWordPressブログに公開することはない。
WordPressの投稿が公開されたら、WPからBufferへ ” ログ記録.将来公開するためにキューに入れられた投稿が表示されるはずです。

動画チュートリアル
文章での説明が苦手な方は、ビデオチュートリアルをご覧ください:
別の方法ClickSocialでWordPressの投稿をソーシャルメディア用にスケジュールする
Bufferの代替ツールをお探しなら、ClickSocialもおすすめです。SeedProdのようなWPBeginnerパートナーサイトで使用している強力なソーシャルメディアスケジューリングツールです。
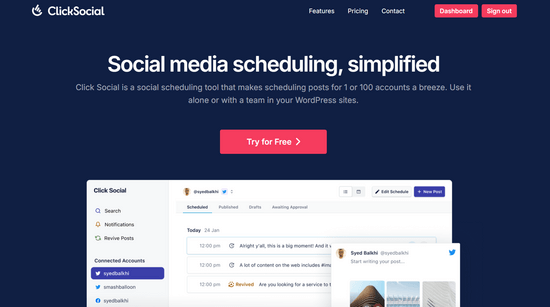
ClickSocialを使えば、WordPressのダッシュボードからInstagram、Facebook、Twitterのソーシャルメディア投稿を作成し、スケジュールすることができます。
また、復活キャンペーンを設定して、ブログ記事を定期的に自動的にシェアすることもできる。
ステップ1:ClickSocialを設定する
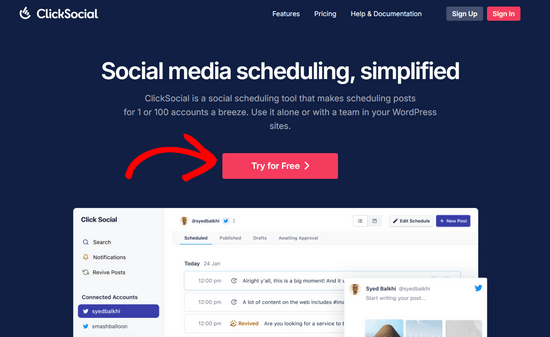
始めるには、ClickSocialのウェブサイトにアクセスし、’Try for Free’ボタンをクリックしてアカウントにサインアップする必要があります。
アカウントにサインアップした後、無料のClickSocialプラグインをインストールして有効化する必要があります。ヘルプが必要な場合は、WordPressプラグインのインストール方法のガイドを参照してください。
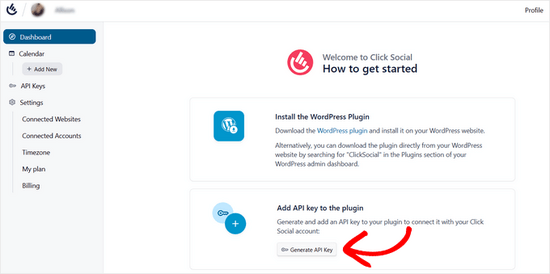
プラグインを有効にしたら、ClickSocialウェブサイトのアカウントに戻ってAPIキーをジェネレータしてください。これにより、ClickSocialとWordPressサイトを接続することができます。
ClickSocialのダッシュボードから、「APIキーをジェネレータ」ボタンをクリックします。
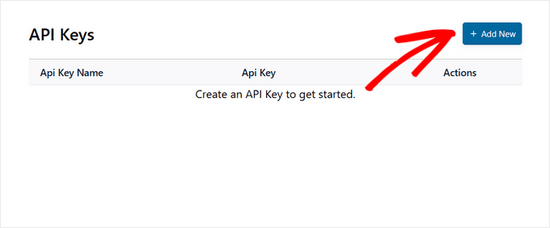
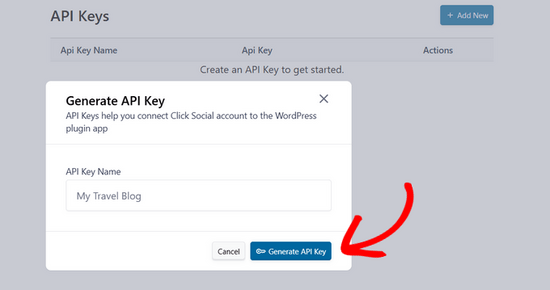
次に、次のページで「新規追加」ボタンをクリックします。
表示されるポップアップで、APIキーの名前を、例えばウェブサイトの名前のように追加することができる。次に、「APIキーをジェネレータする」をクリックする。
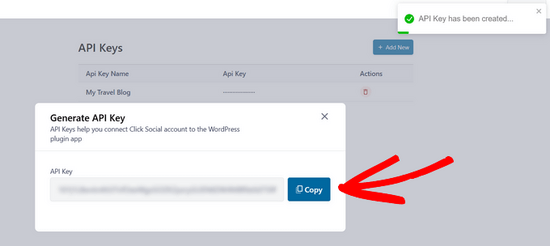
APIキーが生成されます。コピー」ボタンをクリックしてAPIキーをコピーし、WordPressサイトに戻ります。
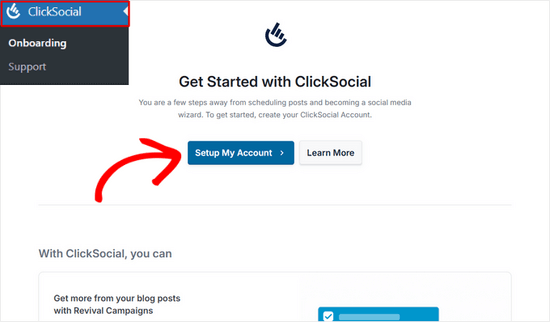
WordPressのダッシュボードから、ClickSocialメニューに移動し、’Setup My Account’ボタンをクリックします。
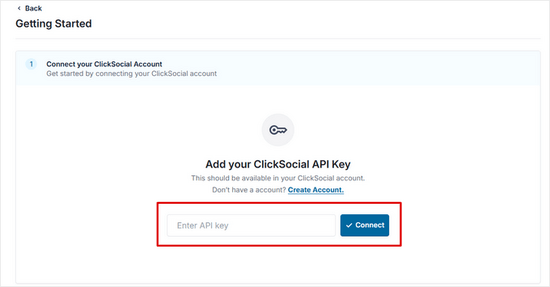
次に、先ほどコピーしたAPIキーをフィールドにペーストし、「Connect」ボタンをクリックする。
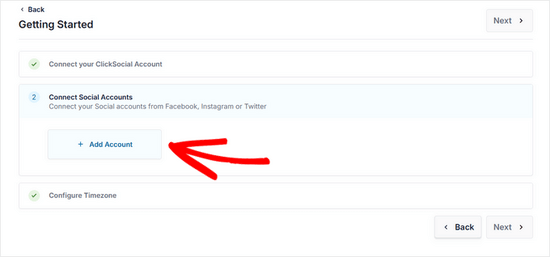
ステップ2:ソーシャルアカウントとの接続
次に、「アカウントを追加」ボタンをクリックして、ソーシャルメディア・アカウントの接続を開始することができます。
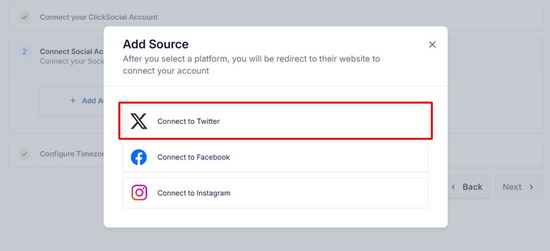
ClickSocialでは、Facebook、Instagram、Twitterに接続することができます。このチュートリアルでは、「Twitterに接続する」オプションを選択します。
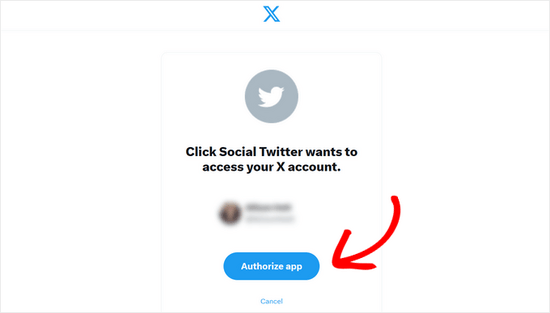
その後、Twitterのウェブサイトにリダイレクトされるので、そこで自分のアカウントにログインし、「Authorize App」ボタンをクリックする必要がある。
その後、ウェブサイトにリダイレクトされます。InstagramとFacebookにも接続したい場合は、もう一度「Add Account」をクリックし、画面の指示に従ってください。
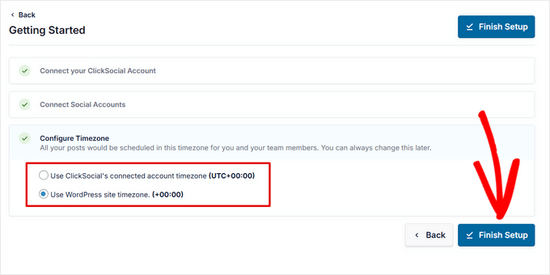
ソーシャルメディアアカウントの接続が完了したら、投稿をスケジュールするタイムゾーンを選択することができます。このチュートリアルでは、WordPressサイトのタイムゾーンを使用します。
そして、「セットアップを終了する」ボタンをクリックします。
ステップ3: ClickSocialでリバイバルキャンペーンを作成する
ClickSocialを設定し、ソーシャルメディアのアカウントと接続したら、WordPressの投稿を自動的に共有するための復活キャンペーンを作成することができます。
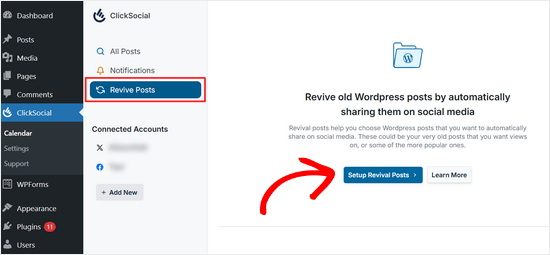
そのためには、WordPressの管理ダッシュボードからClickSocial ” Calendarにアクセスしてください。
そこから「Revive Posts」タブに移動し、「Setup Revival Posts」ボタンをクリックする。
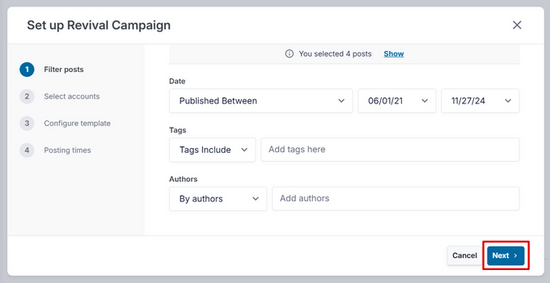
そして、どのWordPressの投稿をソーシャルメディアで自動的にシェアするかを決めるフィルターを設定することができる。
投稿を公開日、タグ、著者でフィルターすることができます。フィルターを設定したら、「次へ」ボタンをクリックしてください。
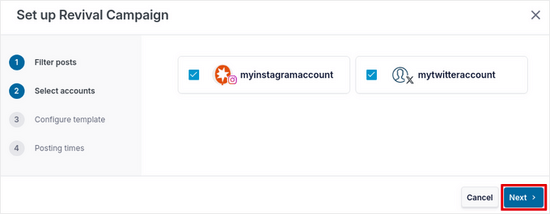
その後、投稿を共有したいソーシャルメディアのアカウントを選択し、「次へ」をクリックして続ける。
このステップでは、ソーシャルメディアの投稿テンプレートを作成することができます。
投稿がシェアされたときに表示させたいテキストを手動で入力したり、投稿タイトル、抜粋、短い投稿リンク、カテゴリーをハッシュタグとして追加するなどの動的コンテンツを追加することができる。
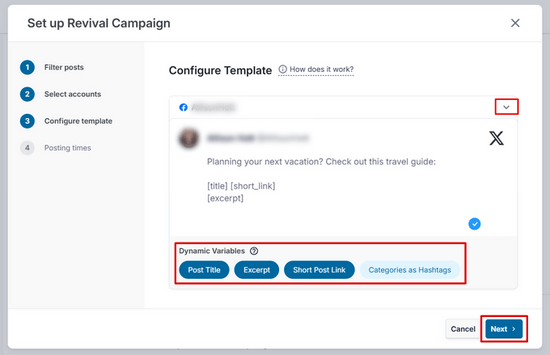
注:投稿先として複数のアカウントを選択した場合は、アカウント名の横にある下向き矢印をクリックして、各プラットフォーム用に個別のテンプレートを作成する必要があります。
最後に、ソーシャルメディアの投稿が共有されるタイミングをスケジュールすることができます。投稿の曜日と時間を選択できます。また、「+」アイコンをクリックして、1日に複数の投稿時間を追加することもできます。
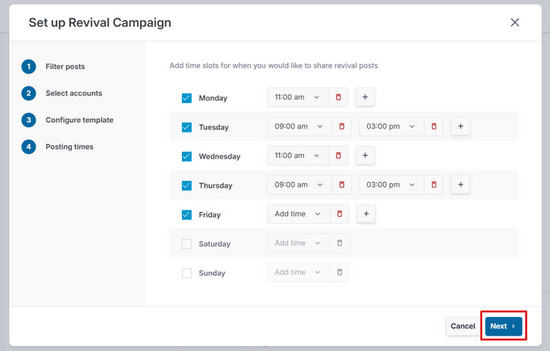
投稿スケジュールでよろしければ、「次へ」ボタンをクリックしてください。
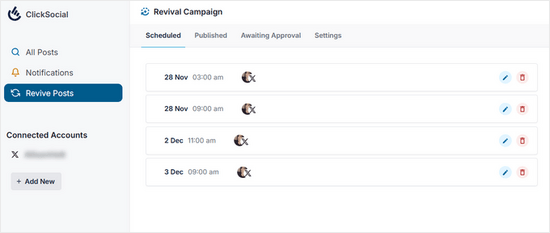
これで完了です!Scheduled」タブで、WordPressの投稿が選択した日に自動的にシェアされることが確認できます。
WordPressソーシャルメディア戦略を自動化するその他の方法
WordPress投稿の自動公開やスケジューリング以外にも、WordPressソーシャルメディア自動化を次のレベルに引き上げる方法はたくさんあります。まずは、これらのスマートなソーシャルメディアガイドをご覧ください:
- WordPressブログの古い投稿を自動的にシェアする方法(ステップバイステップ)– 過去の投稿をソーシャルメディアで自動的に再シェアすることで、常緑のコンテンツを流通させ続けましょう。
- WordPressからInstagramに自動的に公開する方法– WordPressのコンテンツを自動的に共有することで、Instagram戦略を効率化する方法をご紹介します。
- WordPressからFacebookに自動投稿する方法– 手作業なしでWordPressの最新投稿をFacebookページで有効化する方法をご紹介します。
- WordPressで新規投稿を自動ツイートする方法– 新規投稿の自動ツイートを設定することで、Twitterのフォロワーに常に最新のコンテンツを見せることができます。
- WordPressにInstagramの新規写真を自動投稿する方法– WordPressサイトにInstagramのコンテンツを自動投稿し、一貫性のあるオンラインプレゼンスを作りましょう。
- YouTube動画からWordPress投稿を自動作成する方法– YouTube動画をWordPress投稿に自動変換することで、コンテンツ作成プロセスを効率化しましょう。
この投稿が、Bufferを使ってWordPressの投稿をソーシャルメディア用にスケジュールする方法を学ぶのにお役に立てば幸いです。また、WordPressでカスタムInstagramフォトフィードを作成する方法や、WordPressに最適なソーシャルメディアプラグインのエキスパートピックもご覧ください。
If you liked this article, then please subscribe to our YouTube Channel for WordPress video tutorials. You can also find us on Twitter and Facebook.

 in 2024")
")

Yadian
Can I change this ?: “Published by Buffer”
for this: “Published by site_name”
WPBeginner Support
Sadly not at the moment, that is a limitation set by the social media platform rather than buffer itself.
Admin
Tayo
Can buffer auto publish articles from blogspot blogs?
WPBeginner Support
Hi Tayo,
We are not sure it can do that. You can try using it with IFTTT that may work.
Admin
Dave
For Some reason the Buffer plugin, brings my Google Chrome to a standstill whenever I try to load a post or page in the admin, anyone else had this?
Davide Corizzo
Hey guys, thanks for writing this interesting article!
It’s been a while I wanted to automatize publishing my blog articles as the way you made it and was successful.
Just an issue with WP to Buffer plugin… I’d like to get the same result when I copy & paste manually the URL of the article using Facebook Open Graph and Twitter Cards features.
At the moment, the plugin just publish a very basic {title} {url} #{category} plus the image of the article. How could I fix it and get your same result?
Thanks for your attention.
Cheers,
Davide
Sach
If I schedule a post within WordPress, will it still be scheduled to go to Buffer when it was scheduled to be posted within WordPress? Thanks.
WPBeginner Support
Yes.
Admin
Mike
Hi guys, I’m wondering if we can have our Buffer posts or IFTTT or Pocket post updates directly to our WordPress blog page (not home page)? So not WP -> Buffer but reverse and have things auto posted to my blog page on my WP site through Buffer or IFTTT or Pocket.
This would be extremely useful for posting important articles from the web to my website and then my Get Response feed that is already set up.
Any help is much appreciated!
Thanks
Mike
Cristian O. Balan
Work also for Facebook page (and not the profile page)?
David Pappas
What’s the use case? If I can schedule posts within WordPress and publish directly to different social media sites, under what circumstance is this a useful service?
Editorial Staff
Buffer allows you to space your tweets out. If the only thing you do is tweet links for your site, then you don’t need buffer. It is also great for sharing in general aside from WordPress.
Admin
François
Thanks for your tuto, I followed all the steps to successfully set my buffer account.
It’s a pitty that google+ is not supported by buffer, do you know a solutions to deal with it please ?
Thanks for your answer !
Editorial Staff
Google+ doesn’t have the API to allow for that, so we don’t know of any solutions just yet.
Admin
Abdul Rahim
Very nice post, WordPress have already schedule post option, but BufferApp provide more option for publishing post and share on social network automatically.
I like this app
Gurjit Singh Khehra
Nice Service for WordPress Users. Do you know something similar for Blogger Users? That would be much helpful.
Thanks and Regards.
Editorial Staff
Buffer is a third party service and it works for blogger as well. You have to jump through an extra hoop by using IFTTT with combination of Buffer.
Admin