Dopo anni di costruzione di siti web WordPress, abbiamo imparato quanto sia importante avere una configurazione locale di WordPress sul proprio computer.
Avere WordPress sul vostro computer personale vi permette di sperimentare nuove funzionalità senza rischiare il vostro sito live, di immergervi in profondità nello sviluppo di WordPress e persino di costruire interi siti web prima che diventino operativi. È come avere una sandbox privata per tutti i vostri progetti WordPress.
Se siete utenti Windows, esistono numerosi modi per configurare WordPress in locale. Ma abbiamo ristretto il campo ai due metodi più semplici. In questa guida vi mostreremo come installare facilmente WordPress su un computer Windows, indipendentemente dalla versione in uso.
Perché installare WordPress su Windows?
Se siete utenti di Windows, l’installazione di WordPress in locale sul vostro computer offre diversi vantaggi.
Un’installazione locale di WordPress crea un ambiente di prova che non influisce sul vostro sito web reale. Questa configurazione, spesso chiamata server locale o localhost, è il vostro parco giochi personale per WordPress.
Gli sviluppatori di WordPress utilizzano regolarmente installazioni locali per il loro lavoro. Ad esempio, possono usarle per sperimentare nuovi plugin o temi o per testare il sito prima di aggiornare l’editor di blocchi Gutenberg.
Ma non è solo per i professionisti. Se siete alle prime armi con WordPress, una configurazione locale è perfetta per imparare. Potete esplorare le funzionalità, testare temi e plugin e sperimentare liberamente senza preoccuparvi di rompere un sito live.
È importante notare che quando installate WordPress in locale su Windows, solo voi potete vedere il sito. Se volete creare un sito web pubblico, avrete bisogno di un nome di dominio e di un hosting web.
Ora, tecnicamente, è possibile installare WordPress su Windows utilizzando XAMPP, e abbiamo già scritto un tutorial al riguardo.
Detto questo, abbiamo trovato due metodi ancora più semplici di XAMPP per configurare un ambiente WordPress locale, ideali per i principianti o per gli utenti che hanno bisogno di creare rapidamente un sito locale. Potete fare clic sul link qui sotto per passare al metodo che vi interessa:
Metodo 1: Installare WordPress su Windows utilizzando Studio (semplice e veloce)
Per il primo metodo, utilizzeremo Studio. Si tratta di un software locale per WordPress realizzato da Automattic, la società che gestisce e amministra WordPress.com, che è un costruttore di siti web basato sul software WordPress.
Parleremo prima di questo metodo perché è molto più rapido e semplice da seguire, perfetto per i principianti.
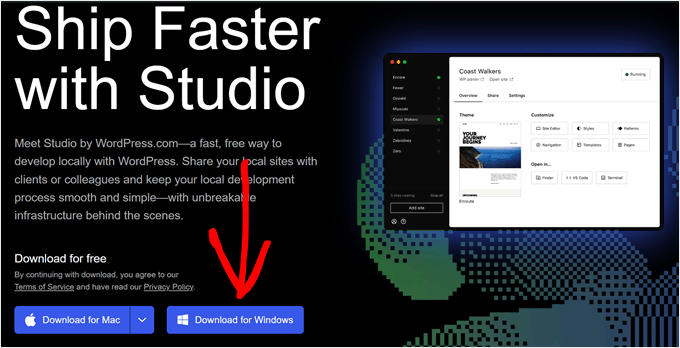
Innanzitutto, è necessario aprire il sito web di Studio by WordPress.com. Quindi, fate clic sul pulsante “Download per Windows”.
Una volta fatto ciò, basta aprire il file scaricato per avviare l’installazione.
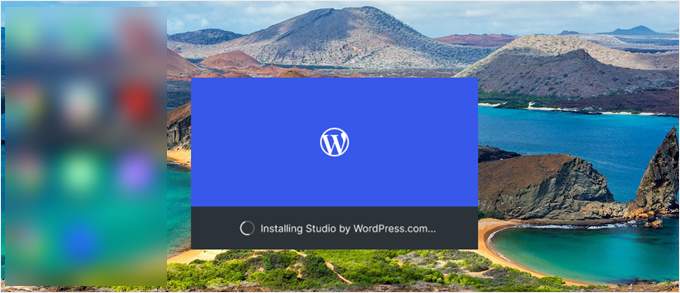
A questo punto apparirà una finestra popup che indica che l’applicazione è in fase di installazione.
Fatto questo, si può aggiungere il primo sito.
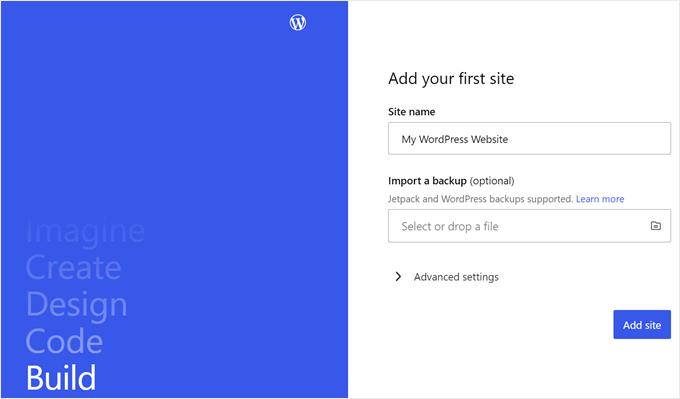
Per farlo, basta inserire il nome del nuovo sito WordPress locale e fare clic su “Aggiungi sito”. Potete dare al sito il nome che preferite, purché vi aiuti a identificarlo facilmente.
Ora dovreste vedere la dashboard del vostro sito WordPress locale.
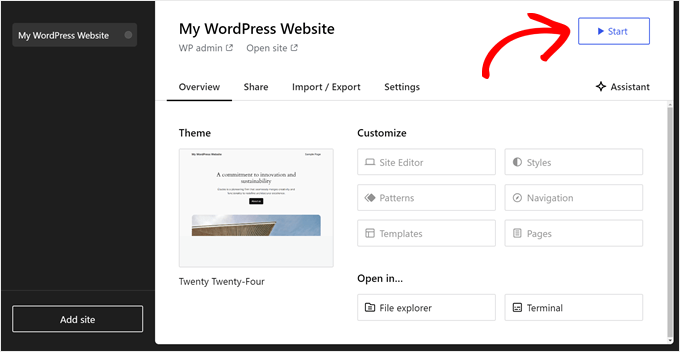
Per accedere alla dashboard di WordPress e modificare il sito web, è sufficiente fare clic sul pulsante “Start” nell’angolo in alto a destra. In questo modo il vostro sito web locale sarà accessibile sul vostro computer.
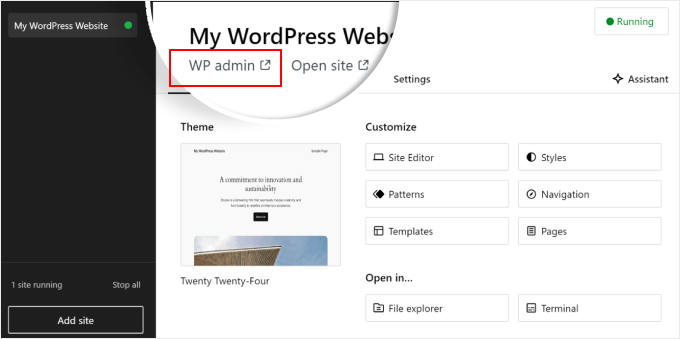
Una volta modificato il pulsante “Avvio” in “In esecuzione”, si può fare clic sul link “WP Admin” in alto a sinistra della pagina.
In questo modo si accede alla pagina di amministrazione locale di WordPress.
E questo è praticamente tutto per la configurazione. Esaminiamo le altre impostazioni che possono essere necessarie per la creazione del vostro sito web locale.
Come si può vedere nella scheda “Panoramica”, è possibile accedere immediatamente al menu dell’editor completo di WordPress direttamente dalla dashboard di Studio. Potete anche fare clic su “Esplora file” per aprire le cartelle e i file del vostro sito WordPress e fare clic su “Terminale” per gestire il vostro sito web utilizzando WP-CLI.
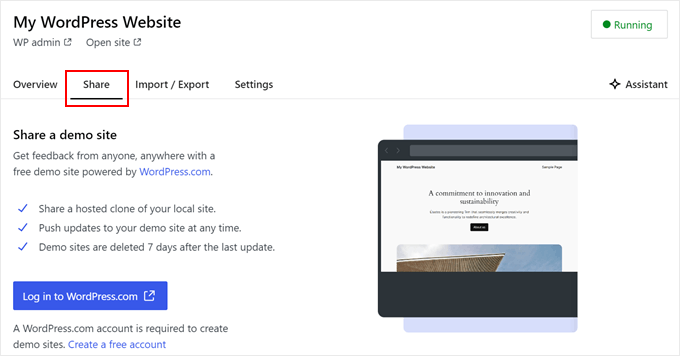
Se passate alla scheda “Condividi”, potete accedere al vostro account WordPress.com, clonare il vostro sito web locale e caricarlo sui server di WordPress.com. In questo modo il sito clonato sarà temporaneamente online, il che è utile per condividere siti demo con i vostri clienti o membri del team.
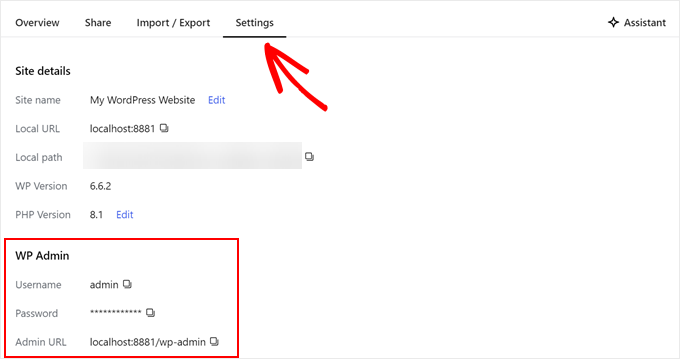
A volte si può desiderare di accedere al proprio sito web locale direttamente tramite il browser, invece di utilizzare Studio. In questo caso, è necessario conoscere le credenziali di wp-admin.
Per trovarli, potete passare alla scheda “Impostazioni” e trovare il nome utente, la password e l’URL di accesso dell’amministratore di WordPress.
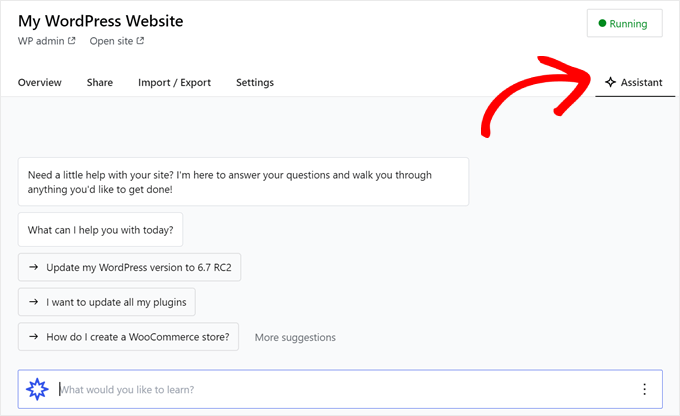
Un’altra caratteristica interessante di Studio è il chatbot AI integrato, con il quale è possibile comunicare facendo clic sul pulsante “Assistente”.
Qui è possibile chiedere aiuto a Studio per compiti come l’aggiornamento di tutti i plugin in una sola volta, l’aggiornamento della versione principale di WordPress o la creazione di codice per un blocco personalizzato.
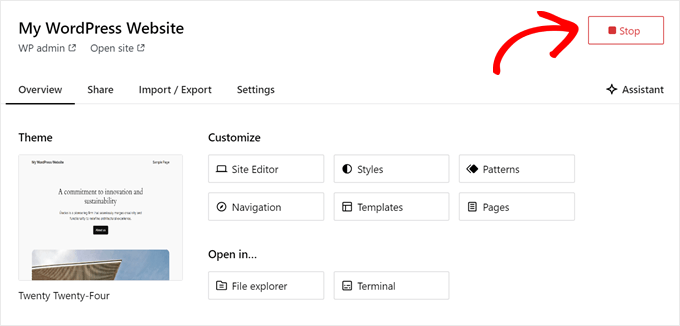
Quando avete finito di lavorare sul vostro sito locale, passate sopra il pulsante “In esecuzione” nell’angolo in alto a destra fino a quando non appare la scritta “Stop”.
Quindi, fare clic sul pulsante per interrompere il sito web.
Un aspetto negativo di Studio è che non è possibile configurare l’ambiente WordPress a proprio piacimento. Ciò significa che dovete utilizzare la versione di PHP, il server web e il database che sono stati preselezionati per voi.
Questo può essere uno svantaggio se avete bisogno di testare il vostro sito web o plugin con configurazioni specifiche del server.
Se avete bisogno di un maggiore controllo sull’ambiente WordPress locale o di far coincidere la vostra configurazione locale con una specifica configurazione del server live, potete verificare il metodo successivo che prevede l’uso di WP locale.
Metodo 2: Installare WordPress su Windows utilizzando WP locale (più personalizzabile)
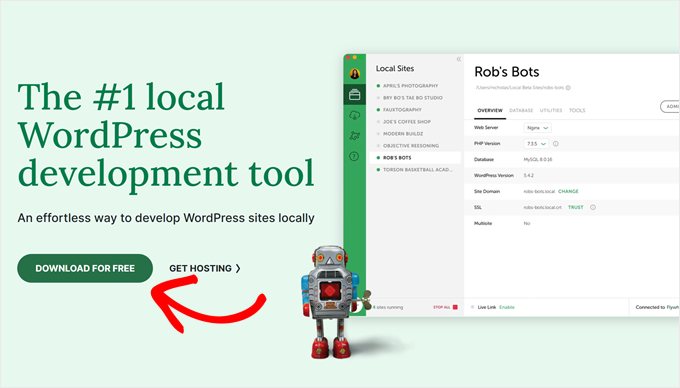
Innanzitutto, è necessario scaricare e installare il software Local WP sul proprio computer Windows. Basta andare sul sito web di Local WP e fare clic sul pulsante “Download for Free”.
Successivamente, apparirà una finestra popup in cui dovrete selezionare la vostra piattaforma. Scegliete “Windows” dal menu a discesa.
Successivamente, è possibile inserire i propri dati, come nome e cognome, indirizzo e-mail di lavoro e numero di telefono, per scaricare il software.
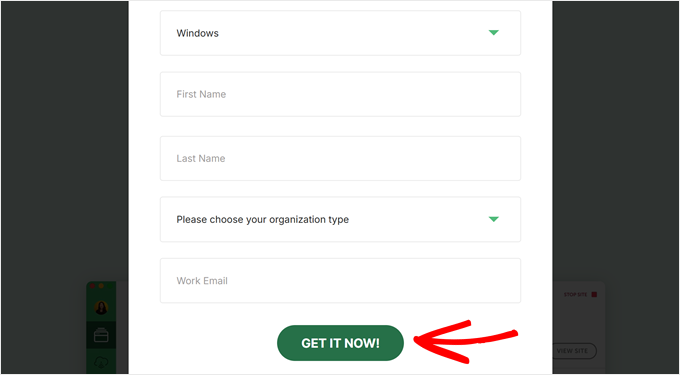
Dopo aver inserito i dati, è sufficiente fare clic sul pulsante “Ottieni ora”.
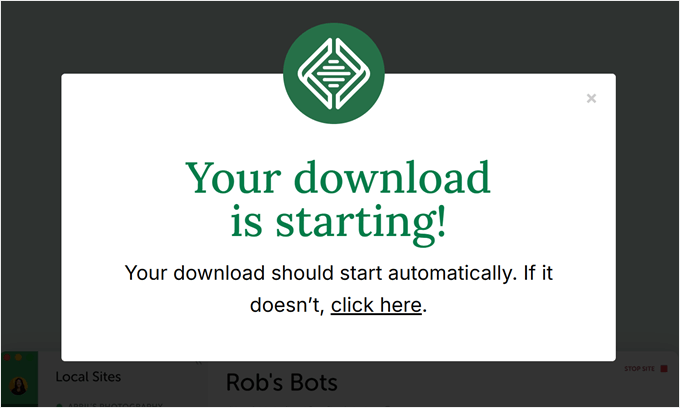
Successivamente, il software verrà scaricato automaticamente nel computer. Altrimenti, è possibile fare clic sul link “clicca qui” per avviare il download.
Una volta scaricato il file, avviate la procedura guidata di installazione.
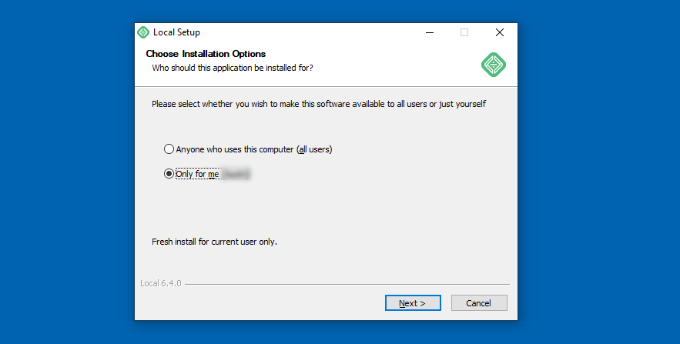
A questo punto, dovrete selezionare se volete installare il software per tutti gli utenti o solo per voi.
Una volta selezionata un’opzione, fare clic sul pulsante “Avanti”.
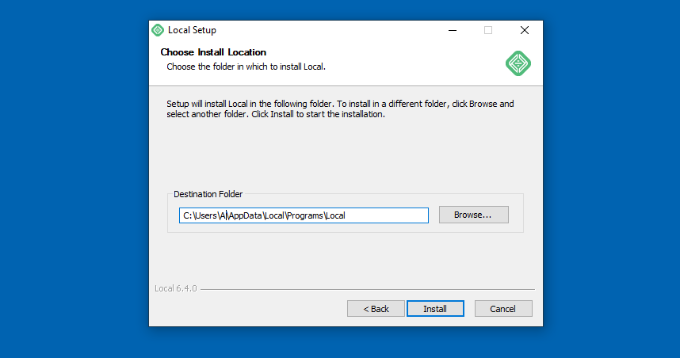
Nel passaggio successivo, è possibile selezionare la “cartella di destinazione” in cui verrà installato il software.
È sufficiente fare clic sul pulsante “Sfoglia” per impostare il percorso e quindi fare clic sul pulsante “Installa”.
Il software Local WP viene ora installato sul computer Windows.
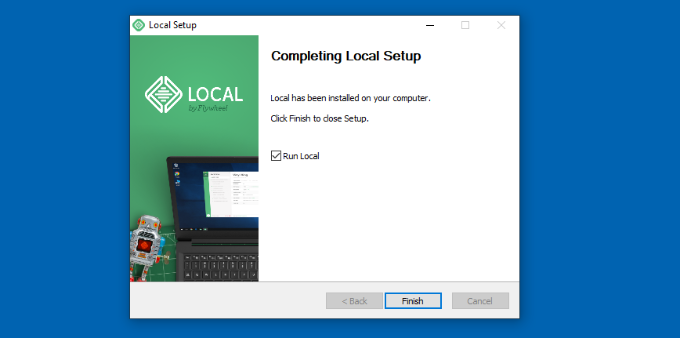
Una volta terminato, è possibile selezionare la casella di controllo “Esegui in locale” e fare clic sul pulsante “Fine” nella procedura guidata di installazione.
A questo punto il software si avvia sul dispositivo Windows.
Il passo successivo consiste nell’aggiungere un nuovo sito web locale. Per farlo, è sufficiente fare clic sul pulsante “+” in basso.
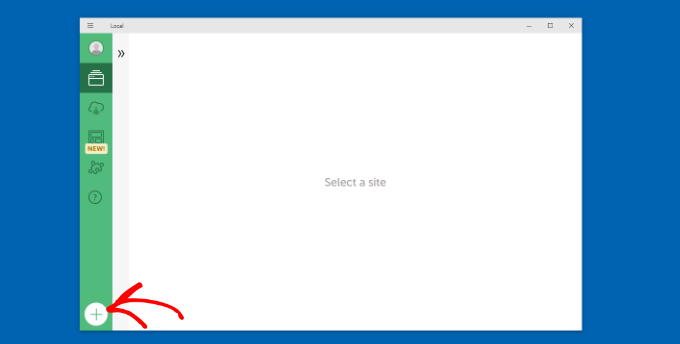
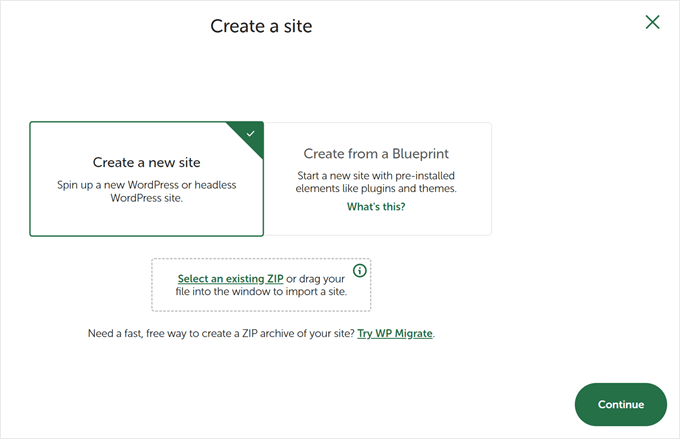
Successivamente, è possibile creare un sito nel software Local.
Selezionare l’opzione “Crea un nuovo sito” e fare clic sul pulsante “Continua”. È possibile creare il sito partendo da un blueprint o da un file di sito esistente, ma a scopo dimostrativo sceglieremo la prima opzione.
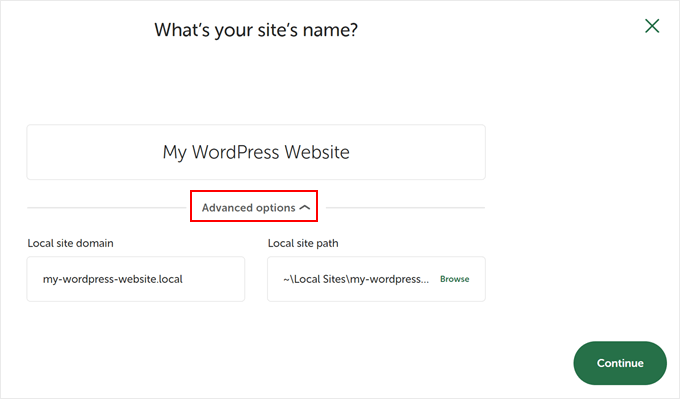
Successivamente, è possibile inserire un nome per il sito web locale, ad esempio “Il mio sito WordPress”.
Sono disponibili anche opzioni avanzate in cui è possibile inserire il dominio del sito locale e il percorso del sito locale. Per impostazione predefinita, il dominio utilizzerà il titolo del sito web, ma separato da trattini.
Una volta terminato, è sufficiente fare clic sul pulsante “Continua”.
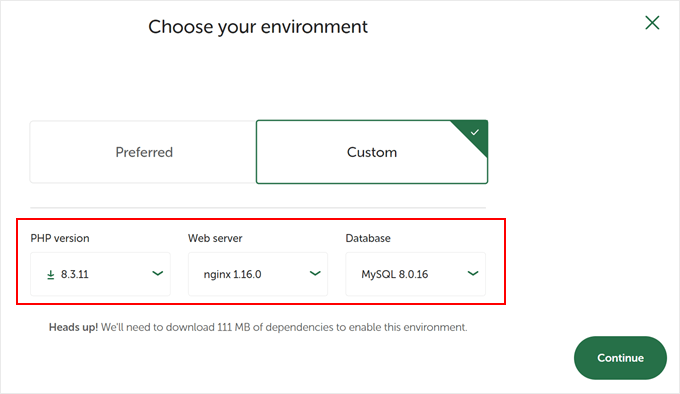
Successivamente, è necessario scegliere un ambiente per il sito web locale.
È possibile utilizzare l’ambiente “Preferito”, in cui il software selezionerà automaticamente la versione di PHP, il server web e la versione di MySQL. D’altra parte, si può anche selezionare “Personalizzato” e inserire i dettagli dell’ambiente.
Local WP offre le ultime versioni di PHP. Per quanto riguarda il server web, è possibile scegliere tra Nginx e Apache. È inoltre possibile scegliere tra MySQL o MariaDB per i database.
Si noti che alcune versioni di PHP, server web e database richiedono il download di alcune dipendenze per funzionare correttamente.
Successivamente, è possibile inserire un nome utente e una password di WordPress per il sito web locale. Inoltre, è possibile scegliere un indirizzo e-mail di WordPress per ricevere tutte le notifiche via e-mail.
Oltre a questo, c’è un’opzione avanzata in cui il software vi chiederà se avete una rete WordPress multisito. In caso contrario, basta fare clic su “No”.
Dopo aver inserito questi dati, è sufficiente fare clic sul pulsante “Aggiungi sito”.
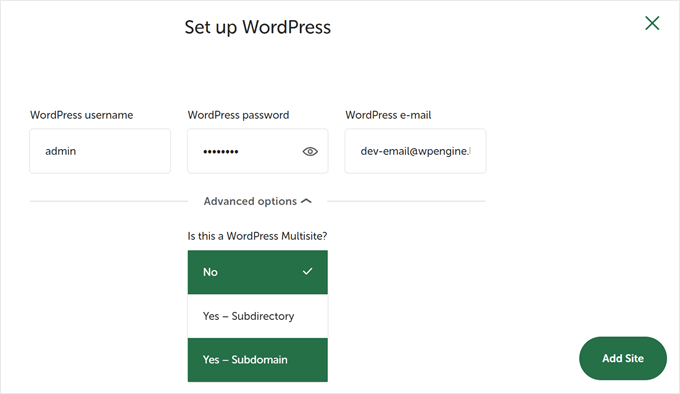
Il software installerà ora WordPress e configurerà il vostro sito web.
Per avviare il sito web locale, fare clic sul pulsante “Avvia sito” nell’angolo in alto a destra.
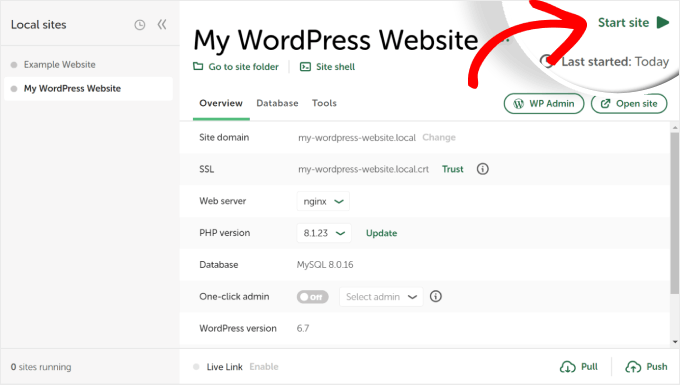
Quindi, fate clic sul pulsante “WP Admin” e vedrete la pagina di accesso all’amministrazione di WordPress.
È sufficiente inserire il nome utente e la password immessi in precedenza durante la configurazione del sito web locale, quindi fare clic sul pulsante “Accedi”.
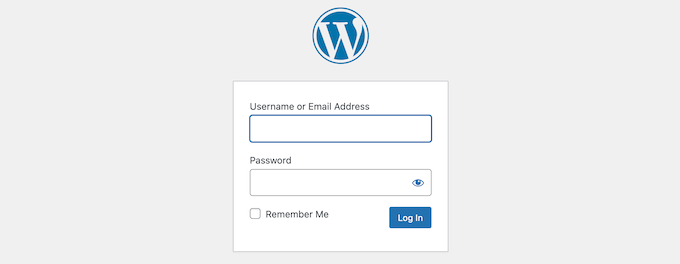
Ora è possibile modificare il sito web locale sul computer Windows.
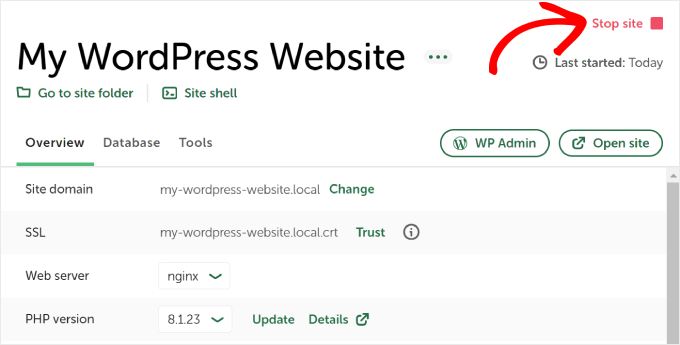
Una volta terminato, non dimenticate di fermare il sito web dal software Local WP facendo clic sul pulsante “Stop site”.
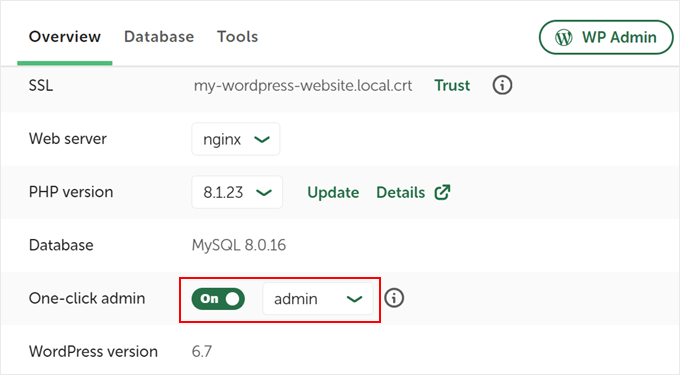
Suggerimento: se si desidera saltare il processo di login, è possibile abilitare il login dell’amministratore con un solo clic in Local WP.
Per farlo, basta tornare alla dashboard di WP locale e attivare il pulsante “Amministratore con un solo clic” fino a quando non appare la dicitura “On”. Quindi, nel menu a discesa, selezionare l’utente amministratore che può utilizzare questa funzione di accesso con un solo clic.
Alternativa: Usare WordPress Playground per testare temi, plugin e altro ancora
WordPress Playground è uno strumento innovativo che consente di sperimentare WordPress direttamente nel browser web. Si tratta di una sandbox virtuale in cui è possibile provare nuovi temi, plugin e funzionalità di WordPress senza influire su alcun sito web reale.
WordPress Playground si differenzia da un ambiente WordPress locale per diversi aspetti fondamentali.
Innanzitutto, non richiede l’installazione sul computer e si ripristina dopo ogni utilizzo, a differenza delle installazioni locali permanenti. È possibile accedervi da qualsiasi dispositivo dotato di browser, mentre le installazioni locali sono legate a un solo computer.
Mentre WordPress Playground è ideale per test e apprendimento rapidi, un ambiente WordPress locale sul vostro computer Windows offre maggiore flessibilità per progetti di sviluppo a lungo termine.
Per una guida dettagliata, consultate la nostra guida su come utilizzare WordPress Playground nel browser.
Ho installato WordPress sul mio computer Windows, e ora?
Ora che avete WordPress sul vostro computer, ecco alcune cose che potete fare:
- Imparate i suggerimenti e i trucchi di base di WordPress per utilizzare meglio il vostro sito.
- Provate diversi temi di WordPress per vedere come può apparire il vostro sito.
- Installate e testate i plugin WordPress indispensabili per aggiungere nuove funzionalità al vostro sito.
- Imparate a risolvere gli errori più comuni di WordPress da soli.
- Provate diversi page builder drag-and-drop per dare al vostro sito un aspetto gradevole.
- Imparate a reimpostare la password di amministrazione di WordPress su localhost per recuperare l’accesso al vostro sito.
- Impostate flussi di lavoro automatizzati per semplificare la gestione del sito.
- Imparate a conoscere la sicurezza di WordPress per mantenere il vostro sito al sicuro dagli hacker.
- Spostate il vostro sito WordPress locale su un server live quando siete pronti a condividerlo con tutti.
Speriamo che questo articolo vi abbia aiutato a capire come installare WordPress in locale su un computer Windows. Potreste anche consultare il nostro articolo su come installare WordPress in locale su un computer Mac e la nostra guida definitiva alla creazione di un sito di staging per WordPress.
Se questo articolo vi è piaciuto, iscrivetevi al nostro canale YouTube per le esercitazioni video su WordPress. Potete trovarci anche su Twitter e Facebook.


muya chris
thank you for this article
young baykay
i thought this was to install WordPress as an app on windows not knowing its just another way of creating a WordPress site. buh i have to say that its really interesting and i learn’t something new and the whole process went well..(thumbs up)
WPBeginner Support
Glad you found it helpful, don’t forget to join us on Twitter for more WordPress tips and tutorials.
Admin
Miha
This has made my day. Thank you!
Hena
Oh!! you are awesome!! thank you very much
Abhishek sharma
Thanku very much it was very helpful.
Diego Marrs-Segura
What if you already have a WordPress account and site but you’re still required to fill in the installation form?
Jean Tildesley
Very helpful article, but when I got to setting up a database for WordPress and clicked on phpmyadmin as instructed, it opened up a localhost page with no content. Can you help please?
Regards,
Judy H
Everything installed correctly and I set up a practice web page. After working on it for awhile I left it for several days. When I attempted to log in to the WP admin site for the test web page, it wouldn’t recognize my password. Any ideas on why this happened or how to recover/reset the password?
Thanks!
Perfect ttorial
thank you very much for this perfect tutorial….all installin done…..now will try the creation
Sarah Alyea
Everything worked fantastic. Until I tried to upload the Divy theme and DivyBuilder plugin.
Received this message for both: The uploaded file exceeds the upload_max_filesize directive in php.ini.
What to do? Any advice?
tommyt
awesome post,
worked like clockwork,
thanks so much for this great post.
Tom
Zaeem Shah
your tutorial was amazing before this tutorial i didnt know about even how to download wordpress on local host after that i am able to download and the main thing is that i am able and got expert in designing a professional website by wordpress thanksss aloot u r doing good job God bless you
Shana
Followed directions and I am getting a
“No webpage was found for the web address:
http://localhost/phpmyadmin/Search Google for localhost phpmyadmin
HTTP ERROR 404
error.”
any ideas?
Shana
This problem is fixed.
Had to change the port listeners in Apache httpd.conf to port 8080.
There are 3 listeners to change.
Also must change the port preference in >Tools>Use a port other than 80.
Once clicked, it will automatically change it to 8080, or whatever port you have changed to. I suggest using 8080.
Hope this helps!
vasudevan
thanks! that helped me. you coul have also mentioned that the tools is accessed by right clicking the icon!
Bala
easy to follow the instruction, my test site on my desktop was up and running in 15 min. Thanks
WPBeginner Support
Hi Bala,
Glad to hear that Don’t forget to follow us on Facebook for more WordPress tips and tutorials.
Admin
Philip Venable
After Wamp installed I attempted to open phpMyAdmin and received this message in Chrome: This localhost page can’t be found
No webpage was found for the web address:
http://localhost/phpmyadminHTTP ERROR 404
Shana
try changing the port in Apache.
Claire
I am having this same error, any solutions yet please
Megha D R
It was very helpfull… The steps and links mentioned in the article are perfect….
Thank you
EIRINI TZIMA
Hello guys, great job!
I followed your advice step by step up to this point: Now open your web browser and go to http://localhost/mysite/
The WordPress database setup will start automatically.
Although the http://localhost/mysite/ seems ok and shows that
ndex of /mysite
[ICO] Name Last modified Size Description
[PARENTDIR] Parent Directory –
[DIR] __MACOSX/ 2017-03-11 22:45 –
[DIR] betheme-premium-word..> 2017-03-11 22:45 –
Apache/2.4.23 (Win32) PHP/5.6.25 Server at localhost Port 80
WordPress itself doesn’t start automatically so now i am stuck here.
Any suggestions?
Thank you so much in advance!
BR,
Eirini
Shana
I am having the same issue.
Any ideas?
Marc De Bodt
I’m also getting the same issue…
Hanif Fadilah
Really useful tutorial, exactly what i was looking for, thank you very much
Cliff
Fantastic tutorial and so easy to follow.
Now to create my test website!!
Thanks
Reg
Can I lift a WordPress site I already have, along with its theme, widgets etc, and put that onto my local computer and then process that WordPress website into another theme. My main reason for having an interest in this is that when I tried to migrate my WordPress site to a new theme it went wrong. Thankfully I had backed it up and so I could just do a restore. But I would like to move the content into a different theme.
WPBeginner Support
Hi Reg,
Yes, you can. This is one of the main reasons people install WordPress on their computers to work on their themes before it goes live. Please see our guide on how to move a live WordPress site to local server
Admin
Sirmee
Thank you so much for the good work. it was easy and straight to the point. More grease to your elbow
Stewart
Fantastic guide. Simple and easy to follow. I now have a test WP site. Many thanks
Olman
I solved my problems!
Note that my first problem was that when copying wordpress into wamp, I only copied wp-admin and not the entire wordpress folder.
The second problem (“Error establishing connection”) was the the form had auto-filled a password (“Password”) and so was actually not blank.
Olman
I am receiving the following error message:
“Error establishing a database connection”
Any advice on correcting this?
Gary
I am trying to upload a new theme from a zip file and keep getting this error “The uploaded file exceeds the upload_max_filesize directive in php.ini.” I opened the php.ini from within Wampserver php tools and changed it to 25MB but still same error. Please help
Ed
Thank you for this article. Very helpful and informational!
We want to build a WordPress-based Intranet. Is this the process for installing WordPress on a local server first, then using the All-In-One Intranet plugin after?
omar
I don’t have WAMP or anything like that, but I have apache, php and mysql installed and it worked for development like that for a while already and it works fine, but when I am trying to install WordPress 4.7.2 on step 2 i get the HTTP 500 status.
The 127.0.0.1 page isn’t working
127.0.0.1 is currently unable to handle this request.
HTTP ERROR 500
I have PHP 7.0.8.
Any thoughts?
Collins
This was helpful. But i have a problem. Anytime i tried access my dashboard (wp-admin). There is always a note. It says “Sorry you are not allowed to access this page”. I need your help to ratify the situation. Please
WPBeginner Support
Hi Collins,
First, make sure you are accessing /wp-admin/ and not a page inside wp-admin like /wp-admin/some-page.php. If the problem persists, then follow our WordPress troubleshooting guide to figure out whats causing the issue and how to fix it.
Admin
Kevin
Great Tutorial, but i have a quick question.
How would i set up a local copy of a wordpress site from a backup? ive offered to help with someones site and i want to install a copy locally which will include a ‘full’ site, webpages and database, to help make the development alot quicker than just uploading stuff to the online test server every time.
Nev Lime
This was a great help
Thank you
Pedro
When I click on phpMyAdmin, it asks for a username and password. Where do I get this information from?
Thank you.
Pedro
WPBeginner Support
Hi Pedro,
You can get this information your hosting account’s cPanel dashboard.
Admin
Lyle Peterson
Where does the installation program look for VCRUNTIME140.dll? I have it on my computer but the program won’t start because that .dll is not installed.
Alpheus
hello guys, i find it hard to download the wordpress any one with a clue pls.
sean burns
I’m stuck here-
Installing WordPress on Windows with WAMP
Download a copy of WordPress from WordPress.org. Extract the zip file and copy the wordpress folder. Go to C:\wamp\www (when I paste this to a browser nothing happens) and paste wordpress folder there. You can rename the wordpress folder to anything you want for example mysite, wpbeginner, etc.
Alexander Stevenson
I hope you solved you problem by now, but in case anyone else has an issue here’s what happened.
I highly recommend against using a browser to access that. That is specifically storage space on your computer. If you go to My Computer you should see Local Disk (C:). This is what the C:\ means. When you open the disk (by double-clicking on it) you should see a list of folders such as Program Files, Windows, and wamp. Open the wamp folder and look for a folder named www. Open that folder, and then paste the wordpress folder in it.
Martina
thanks a lottttttttt. Now I can make my web. I Love you guys.
I don’t know why people can’t help, it does not matter I’m glad I found you.
WPBeginner Support
Hi Martina,
You are welcome we are glad you find WPBeginner helpful. Don’t forget to join us on Twitter for more WordPress tips and tutorials.
Admin
Seth Solanki
HI, I’ve installed WAMP64 and WordPress. I can add pages in WordPress but cannot edit them. I can create new pages and change themes but cannot add or edit any page content. Is this possible?
Carrie
I have a stupid question. I took a beginners wordpress class which totally sucked!
Anyway, they had me use Microsoft webmatrix instead of WAMP. The webmatrix does not work correctly. Could I install WAMP or must I now use MS webmatrix? If I do this, will I use the project I was working on for the class?
I totally lost….
Thanks
Younes Ouahrani
when i click phpmyadmin its shows that im not connected on the browser , any help guys ?
Poonam Paul
My WAMP install went smoothly and created two databases correctly. There are 2 databases and 2 config.php files in my wordpress website. The path for both databases are example.com/httpdocs/wp-config.php and example.com/httpdocs/wordpress/wp-config.php. Both databases have different DB_NAME, DB_USER, DB_PASSWORD, butDB_HOST (IP address) is same.I install httpdocs folder into the www folder properly. I enter db_host in both databases are localhost.
Now when i view the site and open localhost/wordpress/wp-admin, the error is…
This site can’t be reached…localhost refused to connect…ERR_CONNECTION_REFUSED
Gobind Singh
Thanks Sir!! You made it very clear and simple.. I have been trying to do this from a long time. But today I found this article and did it in a flash. I’m really grateful. Thanks.
WPBeginner Support
Glad you found it helpful Don’t forget to follow us on Facebook for more WordPress tips and tutorials.
Admin
Divine
You guys are the best..though I had issues installing my WAMPserver but I managed to fix it. Sincerely this article helped me as i was told by a friend to pay thousands of Nigeria naira before he can help me. More of these guys!!!
WPBeginner Support
Glad you found it helpful. Don’t forget to join us on Twitter for more WordPress tips and tutorials.
Admin
Anatole
You made it very clear and simple to follow. Worked a treat and I didn’t even need to watch a video online. Many thanks.
Alexander
Thanks for the effort you put into this tutorial. Finally my first wordpress test blog is running on wamp.
Geoffrey
My WAMP instal went smoothly (updated the Visial C++ packages) ..created a database called wordpress
My wordpress instal into the www folder went smoothly
When I open localhost/wordpress/wp=admin I see that the Twenty Fifteen theme is active.
But wen I view the site or sample page….I don’t see any evidence that the css of the theme has been invoked…just a very plain looking page
Yes, this is all new to me….I’ve missed something obvious I hope…what did I miss doing>
harish negi
how to test vaultpress backup in the local wordpress?
steph
hi, may i know how could actually installl phpMyAdmin? Where to get username and password to login in. Thanks
Sthe
Can I create a wp website while offline?
WPBeginner Support
Yes you can. However, you may need an internet connection to get help or check out tutorials.
Admin
Jose Luis
Hello, just thought i’d let you know that in order to access the localhost you can use root as user and leave the password field in blank.
Thanx for this article
mikmoken
Thanks for this instructions and tutorials on how to install wordpress using wamp. It helps a lot for us beginners.
WPBeginner Support
Hey mikmoken,
Glad you found it useful You may also want to subscribe to our YouTube Channel for WordPress video tutorials.
Admin
MelR
Thanks guys at long last and 70 years of age I’ve achieved it! Thanks to you guys cheers!!
WPBeginner Support
Hey @MeIR,
We are glad you found it useful You may also want to subscribe to our YouTube Channel for WordPress video tutorials.
Admin