Vi abbiamo mostrato come installare WordPress su Windows e Mac. Tuttavia, recentemente uno dei nostri utenti ci ha chiesto se fosse possibile utilizzare la stessa installazione locale di WordPress sia al lavoro che a casa. In questo articolo vi mostreremo come installare WordPress su una chiavetta USB utilizzando XAMPP, in modo da poter utilizzare l’installazione locale di WordPress su qualsiasi computer.
XAMPP è un pacchetto software contenente il server web Apache, PHP, MySQL e phpMyAdmin. È possibile installarlo sui sistemi operativi Windows, Linux o Mac. Vi mostreremo come installarlo su un’unità USB collegata a un PC Windows, ma il metodo di installazione è praticamente lo stesso indipendentemente dal luogo in cui lo installate.
La prima cosa da fare è scaricare XAMPP lite. Andate alla pagina di download di XAMPP e poi cliccate su Altri download.
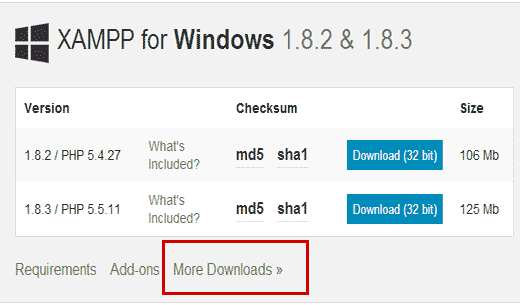
Sarete reindirizzati al sito web di sourceforge dove dovrete prima cliccare su XAMPP per Windows e poi sull’ultima versione.
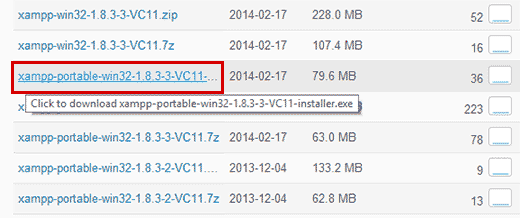
Nella schermata successiva, verrà visualizzato un elenco di file disponibili per quella versione. Scorrere verso il basso e trovare la versione portatile in formato .exe. Fare clic sul nome del file per avviare il download.
Una volta scaricato il file portatile di XAMPP, è necessario fare doppio clic sul file per avviare l’installazione. Durante l’installazione verrà chiesto di selezionare la posizione in cui si desidera installare XAMPP. È necessario fare clic sull’icona della cartella e selezionare l’unità USB.
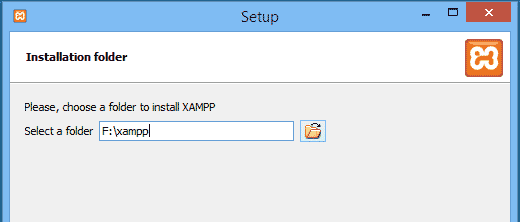
Fare clic su Avanti per continuare l’installazione. Il programma di installazione installerà XAMPP sulla chiavetta USB. Dopo l’installazione, è necessario andare sulla chiavetta USB e aprire la cartella XAMPP.
Per lanciare XAMPP, è necessario eseguire xampp-control.exe dalla chiavetta USB. In questo modo si aprirà il Centro di controllo di XAMPP, che avrà l’aspetto seguente:
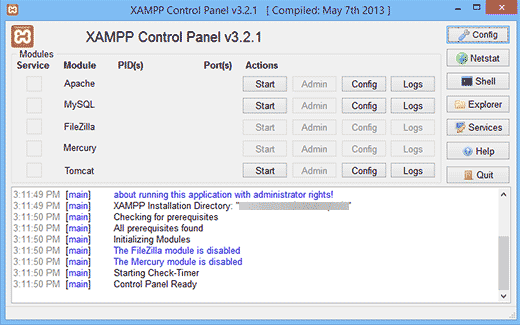
È necessario avviare il server Web Apache e MySQL facendo clic sul pulsante di avvio accanto ad essi. Verrà richiesto da Windows Firewall di consentire l’accesso a entrambe le applicazioni.
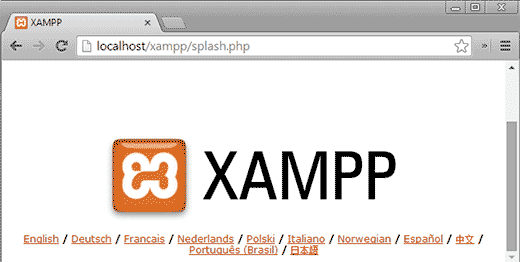
Ora aprite un browser web e digitate http://localhost/ nella barra degli indirizzi. Verrà visualizzata la schermata iniziale di XAMPP. Questo significa che XAMPP è stato installato con successo sulla chiavetta USB.
Installazione di WordPress su chiavetta USB
Finora avete installato con successo il server web Apache con MySQL e PHP sulla vostra chiavetta USB. Il passo successivo è l’installazione di WordPress. L’installazione di WordPress su una chiavetta USB non è molto diversa da quella su un computer Windows o Mac.
Per prima cosa è necessario aprire la chiavetta USB e andare alla cartella htdocs nella directory di installazione di XAMPP. Creare una nuova cartella in htdocs. Questa cartella sarà il vostro sito WordPress locale. Potete darle il nome che preferite. Per il bene di questo tutorial, chiamiamola site1.
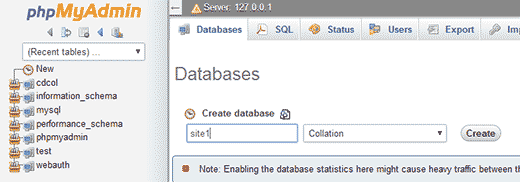
WordPress ha bisogno di un database MySQL per funzionare, quindi è necessario creare un database prima dell’installazione. Per crearlo, è necessario aprire il browser web e digitare http://localhost/phpmyadmin nella barra degli indirizzi. Si aprirà phpMyAdmin, un software di gestione di database basato sul web. Fare clic su Database nella barra dei menu in alto e indicare un nome per il database prima di premere il pulsante Crea.
Ora abbiamo bisogno di WordPress. Visitate semplicemente WordPress.org e scaricate una copia fresca di WordPress sul vostro computer. Estrarre il file .zip scaricato sul desktop e aprirlo.
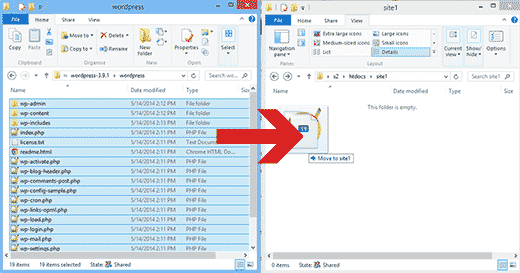
Ora è necessario copiare il contenuto della cartella wordpress e incollarlo nella cartella /htdocs/site1 dell’unità USB.
Una volta copiati i file di WordPress, potete eseguire l’installazione di WordPress accedendo al vostro sito all’indirizzo http://localhost/site1 in un browser web.
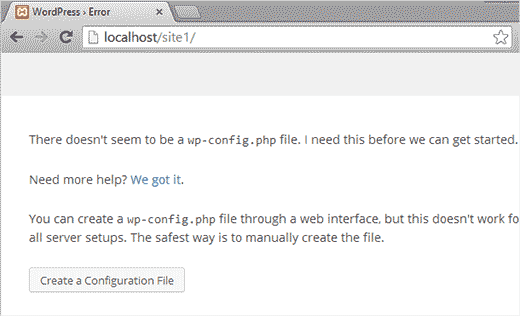
WordPress vi informerà che non ha trovato il file di configurazione di WordPress, quindi dovete crearne uno facendo clic sul pulsante Crea un file di configurazione.
Nella schermata successiva, indicare il nome del database creato in precedenza. Nel campo del nome utente si deve inserire root e lasciare vuoto il campo della password. Premete il pulsante di invio per procedere.
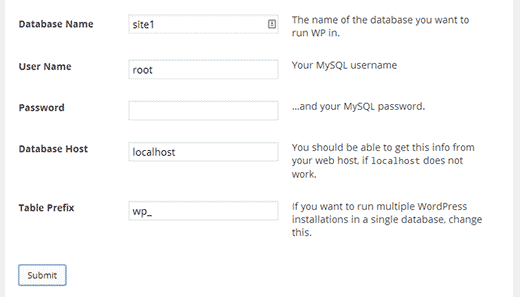
WordPress tenterà ora di connettersi al database. In caso di successo, verrà visualizzato un messaggio di successo. Fate clic sul pulsante Esegui installazione per procedere.
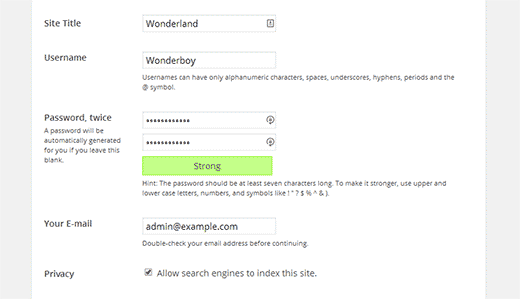
Vi verrà chiesto di fornire le informazioni sul vostro sito e di creare un nome utente e una password di amministrazione. Questo nome utente e questa password saranno utilizzati per accedere all’area di amministrazione di WordPress. Dovrete anche fornire un indirizzo e-mail. Nella sezione privacy è possibile deselezionare la casella che indica Consenti ai motori di ricerca di indicizzare questo sito. Una volta terminato, premere il pulsante Installa in basso.
Questo è tutto, avete installato WordPress con successo. Ora potete accedere al vostro sito e fare quello che volete. Per creare un altro sito WordPress sulla stessa USB, basta creare un’altra cartella nella directory htdocs e ripetere la procedura.
Speriamo che questo articolo vi abbia aiutato a installare WordPress su una chiavetta USB. Ora potete portare con voi questa chiavetta USB. Si noti che la chiavetta USB funzionerà solo con i computer Windows. Potreste anche consultare la nostra guida su come utilizzare WordPress nel browser con WordPress Playground o la nostra selezione di esperti dei migliori page builder drag and drop per WordPress.
Se questo articolo vi è piaciuto, iscrivetevi al nostro canale YouTube per le esercitazioni video su WordPress. Potete trovarci anche su Twitter e Facebook.


martine
Hi,
Installed all in good order. When trying to login into wordpress I get the following error : One or more database tables are unavailable. The database may need to be repaired.
Clicking on the link for repair I get the below and I have to delete the last line referring to the repair. If I do this I get another pop up saying I need to add it again and try again. It is a continious circle with no end.
How to solve this?
The wp_users table is okay.
The wp_usermeta table is okay.
The wp_posts table is okay.
The wp_comments table is okay.
The wp_links table is okay.
The wp_options table is okay.
The wp_postmeta table is okay.
The wp_terms table is okay.
The wp_term_taxonomy table is okay.
The wp_term_relationships table is okay.
The wp_termmeta table is okay.
The wp_commentmeta table is okay.
Repairs complete. Please remove the following line from wp-config.php to prevent this page from being used by unauthorized users.
define(‘WP_ALLOW_REPAIR’, true);
WPBeginner Support
Hi Martine,
If this is a fresh WordPress install and you don’t have any content, then you may want to resinatll WordPress. If it does have content, then you may need to repair tables from PhpMyAdmin.
Admin
rajendra upadhyaya
sir
is there any way to install wordpress on usb with WAMP and how much memory it uses
Miran Potocnik
Hello,
We use WP on server. If I install Apache web server with MySQL and PHP on my USB stick and copy the contents of wordpress folder from server and paste it in the /htdocs/site1 folder on my USB drive. Does it mean that the web pages will be the same? How I can synchronize them?for example: If I change something WP on server side that will be changed on local side, when network be up.
Armando
I used (Microsoft) DISKPART in order to change my USB stick into a bootable disk (FAT32) to be used with XAMPP. Before, it would not install.
You may want to add this tip to the tutorials.
Thanks for your tutorial and best regards!
Jay
I’m not sure these steps still work – I have done the process before (year or so ago) and it worked. Now doing it again on a new drive, and with all updated components, step two of the wordpress installation is always (almost) blank. So something is going wrong. I have tried twice and same thing.
Any tips, based on updated components?
Joshua Harman
Is there any way you’d e willing to do this tutorial for Mac? I’ve been wracking my brain for hours trying to get it to work but don’t have a ton of experience
brainfreeze
hi joshua. i am wondering if you have found a way for Mac? if yes, please share. thanks.
Mahendra
can we run php file in another computer which does not have xampp using usb sticks
Amonza
I am not quite exactly sure what you are asking, but if you have xampp installed on a usb stick as described you should be able to take that stick to any computer and run the apache server and be able to serve php pages from the htdocs folder on the pen drive.
If you are running an IDE that needs the path to php.exe you could point it to the php folder on the pen drive.
Lisa
For those who have done this, what size USB drive do you suggest?
Ahmad Fahrurroji
Good idea, I’ve never used this option installing xampp on usb stick but It’s good to try. Thanks.
WPBeginner Staff
you can transfer your site using BackupBuddy (here is a tutorial) or using Duplicator.
Ian Delemare
I like the idea of having a portable version of WordPress and being able to develop a site in many locations. But what is the procedure to transfer a developed site (including images, posts plugins etc) from a USB stick to the web?
Bill Gibson
I had put a multisite version of WP on a USB stick a couple of years ago. I added a portable version of Firefox, and included the Mobile Barcoder plugin. The multiple sites could be used for classes, projects or presentations, and it was a nice organizational tool. Add text, links & images, and embed for videos or larger files. As long as you put your USB stick in an Internet connected device, you had a great presentation tool. The “Mobile Barcoder” app created QR codes, on the fly, so I could pull up a site from the Flash drive, and then generate a QR code to share links with the audience.
WPBeginner Staff
Yes there is, but we are not sure whether it works as a portable app or not
Zeeshan Asif
What about Mac ???
WPBeginner Staff
Unfortunately MAMP the mac alternative to XAMPP can not be run from an external drive. There is an alternative called AMPPS but we have not tried it.
DigitizedSociety
XAMPP has a mac version.
James B.
Great post. I’ve been using “Instant WP” for my local and USB stick installs of WordPress…but I may try XAMPP out! Thanks for the great work.