If you want to get more sales in your WordPress eCommerce store, then you’ll need to enable at least a few different payment processors. Although Stripe and PayPal are the most popular options, you could increase conversions by also setting up alternative methods like Cash App.
Cash App is a popular mobile payment platform that lets users send, receive, and manage money directly from their smartphones. Its simplicity and speed make it an excellent choice for online stores, service providers, and nonprofits.
Unlike traditional payment processors, Cash App doesn’t require users to enter lengthy card details or banking information, making transactions faster and more convenient. This can help your online store attract younger customers who rely on mobile payments for everyday purchases.
Over the years, we have built many eCommerce stores on WordPress. This has given us a deep understanding of payment methods, what users prefer, and how to create smooth payment experiences that drive conversions.
And in this article, we will show you how to easily collect Cash App payments in WordPress, step by step.
Why Collect Cash App Payments in WordPress?
If you have an online store or sell your services online, then we recommend collecting Cash App payments on your website.
Due to its ease of use, Cash App is especially appealing to younger audiences who prefer fast, mobile-friendly payment options and want to avoid sharing card or banking details during transactions.
With the $Cashtag feature, users can send payments using unique identifiers, keeping their banking information private. On the other hand, you can accept QR code payments, allowing customers to pay in seconds by simply scanning a code with their phone.
These features create a seamless checkout experience, reduce friction, and help minimize cart abandonment.
Additionally, Cash App is known for its low platform fees compared to traditional payment processors, which means you can keep more of your earnings. Overall, it is an affordable and user-friendly payment option that can help you get more sales.
Having said that, let’s take a look at how to easily collect Cash App payments in WordPress. We will discuss 2 methods in this tutorial. You can use the links below to jump to the method of your choice.
Method 1: Collect Cash App Payments in WordPress With WP Simple Pay (Recommended)
This method will show you how to add a Cash App payment form to your website. We recommend it for nonprofits, membership sites, service providers, or anyone without a full-blown online store who wants to collect Cash App payments easily.
For this, you will need WP Simple Pay. It is the best WordPress Stripe plugin on the market and lets you easily accept online payments without setting up a shopping cart.
Plus, it has a user-friendly form builder, secure payment processing, a recurring payment feature, and the built-in ability to accept Cash App payments.
First, you need to install and activate the WP Simple Pay plugin. For details, see our tutorial on how to install a WordPress plugin.
Note: WP Simple Pay has a free plan, but you will need the pro version to unlock the Cash App payment option.
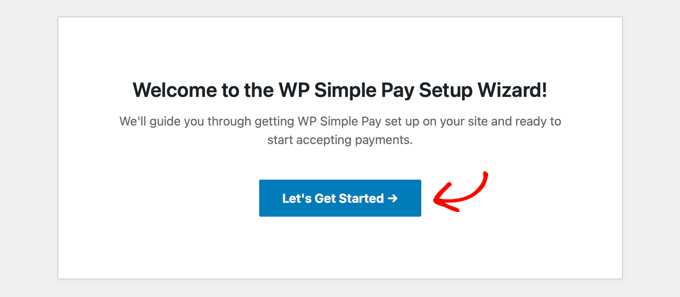
Upon activation, you will see a setup wizard on your screen. Here, just click the ‘Let’s Get Started’ button.
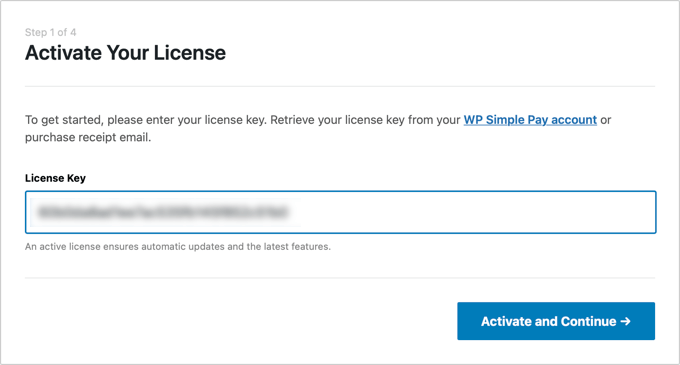
This will direct you to the next step, where you will need to add your plugin’s license key.
You can get this information in your account on the WP Simple Pay website. After that, click the ‘Activate and Continue’ button.
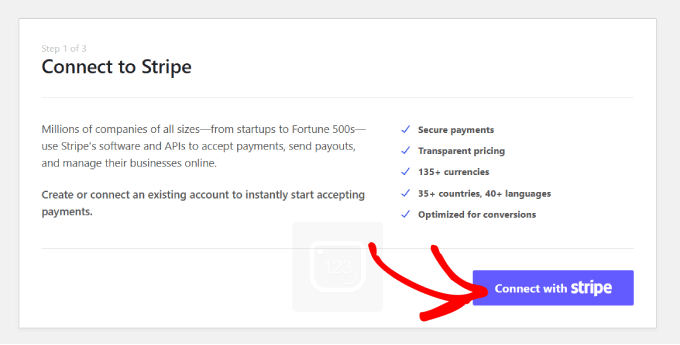
Now, you will be asked to connect your Stripe account with WP Simple Pay. Stripe is a popular payment gateway that allows you to accept online payments.
Please note that the plugin will not work unless you connect it with a new or existing Stripe account. To do this, click the ‘Connect with Stripe’ button to continue.
Then, you must log in to your Stripe account to connect it to WP Simple Pay. For more details, see our tutorial on how to accept Stripe payments in WordPress.
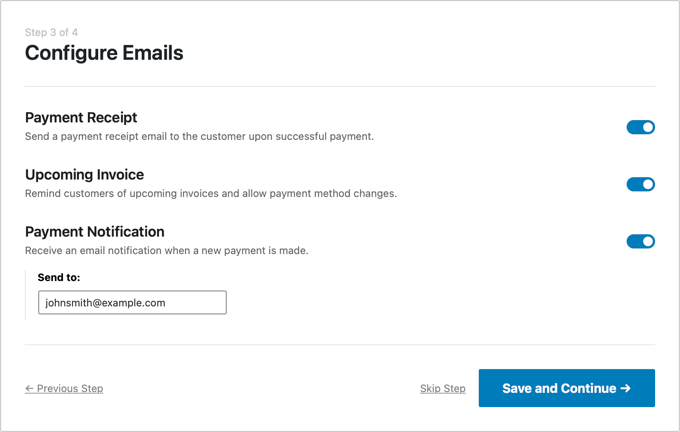
Upon a successful connection with Stripe, the setup wizard will ask you to configure your emails.
You can now enable options to receive email notifications for payment receipts, upcoming invoices, and payment notifications. You will also need to enter the email address you want to send them to.
Once you are done, just click the ‘Save and Continue’ button. You can then complete the other steps and exit the setup wizard.
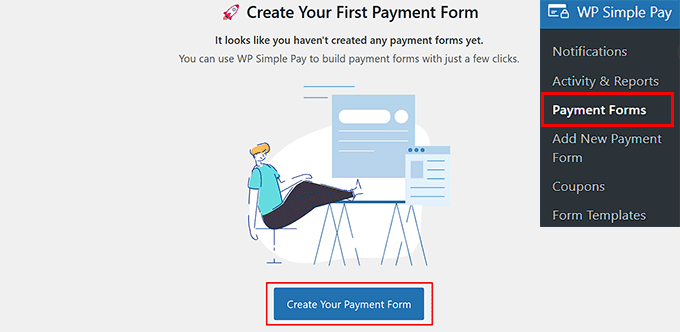
Next, head over to the WP Simple Pay » Payment Forms page from the WordPress dashboard.
Here, click the ‘Create Your Payment Form’ button.
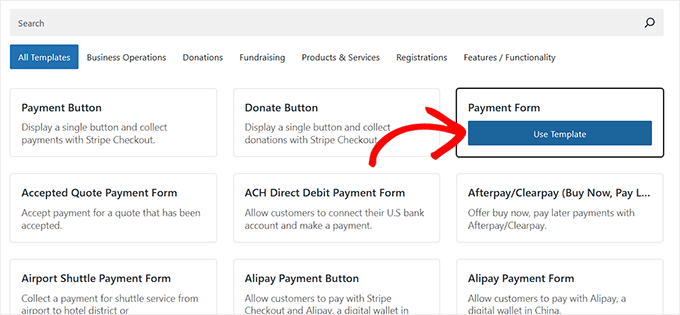
This will take you to the ‘Select a template’ screen, where you will notice a list of premade templates offered by the plugin.
From here, you can choose a suitable template by clicking the ‘Use Template’ button under it. For this tutorial, we will use the simple Payment Form template.
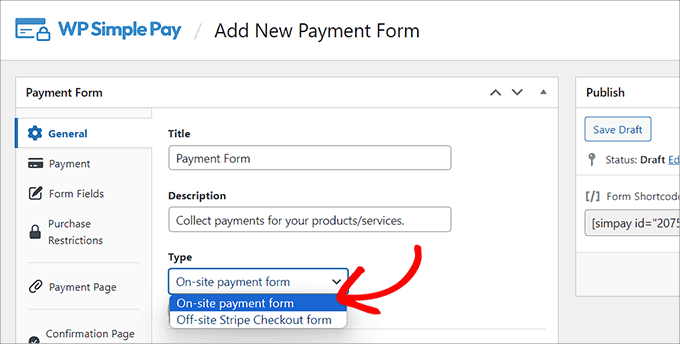
You will now be directed to the ‘Add New Payment Form’ page, where you can add a title and description for your form.
After that, you can select your form type as ‘On-site payment form.’
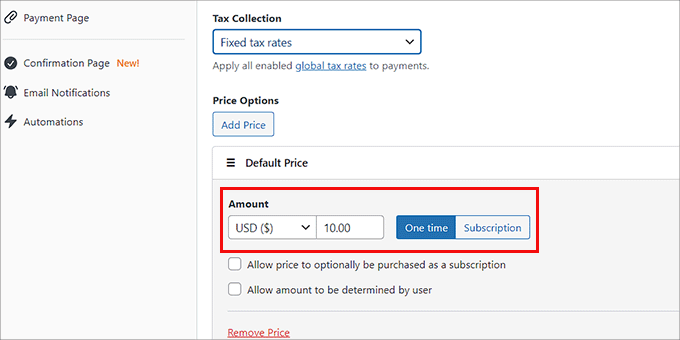
Then, switch to the ‘Payment’ tab from the left column and choose your preferred tax collection rates from the dropdown menu under the ‘Tax Collection’ option.
Next, add the price for the service or product that you plan to sell using the form. If you have a subscription service, then you can select the ‘Subscription’ option.
Next, add subscription tiers by clicking the ‘Add Price’ button.
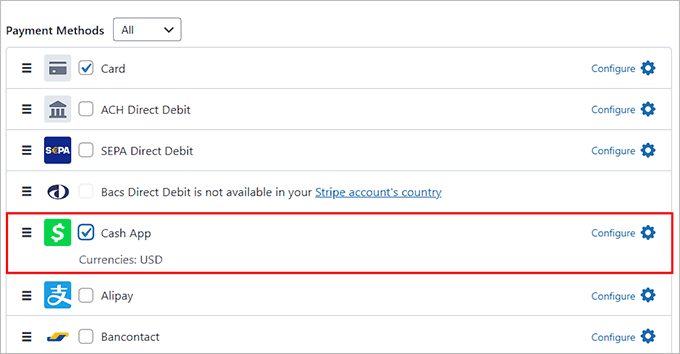
Once that is done, you have to scroll down to the ‘Payment Methods’ section and select the ‘All’ option from the dropdown menu.
Now, locate the ‘Cash App’ option and check the box next to it.
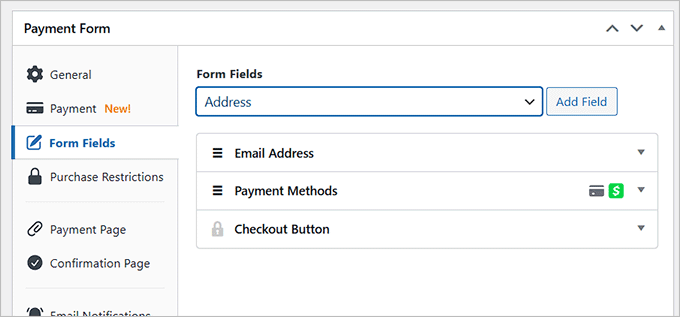
After that, just switch to the ‘Form Fields’ tab. From here, you can add a form field from the dropdown menu and configure its settings by expanding the tab.
You can also rearrange the existing fields by dragging and dropping them.
For instance, you can add and customize an address field on your form if you plan to sell a physical product or provide in-home sessions. That way, customers will need to give their home address when they make a purchase.
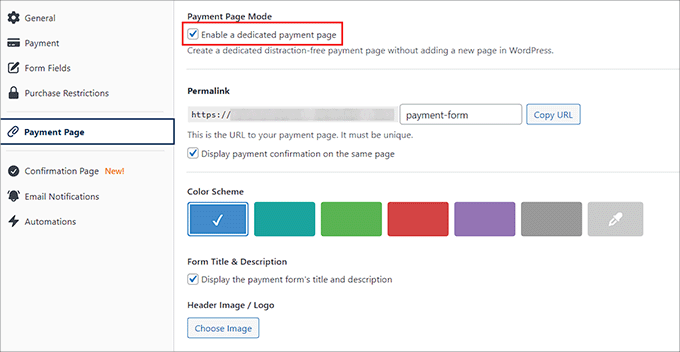
Next, head to the ‘Payment Page’ tab and check the ‘Enable a dedicated payment page’ box.
The plugin will now let you build a custom page for your payment form without creating a new page on your blog or website.
You can add a permalink, color scheme, image, and footer text to customize the form.
Finally, click the ‘Publish’ button to store your settings.
You can now visit the WordPress site to view the Cash App payments form in action.
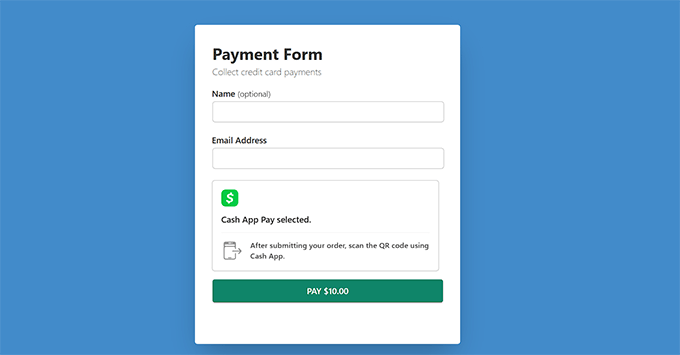
Alternatively, you can also add the Cash App payment form to an existing page by clicking the ‘Publish’ button after adding form fields.
Then, visit a page/post in the WordPress dashboard and click the ‘Add Block’ (+) button in the top left corner to open the block menu.
From here, find and add the WP Simple Pay block to the page, and select the payment form you created from the dropdown menu within the block.
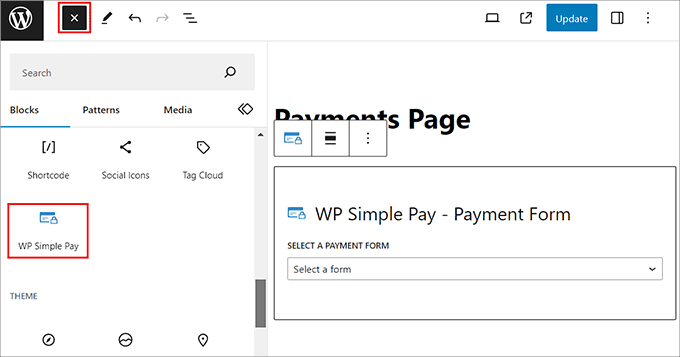
Next, click the ‘Update’ or ‘Publish’ button to save your changes.
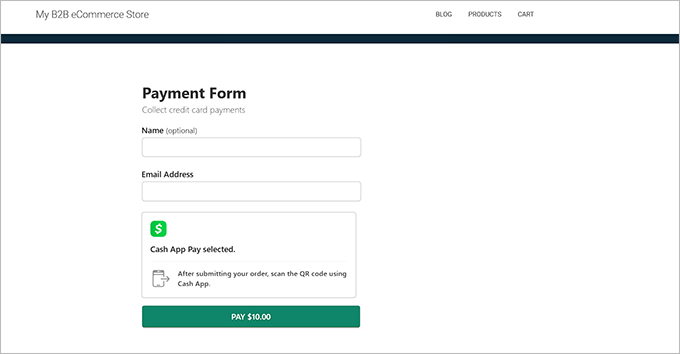
After that, simply visit your WordPress site to view the Cash App payment form.
Method 2: Collect Cash App Payments in WooCommerce With Checkout with Cash App
If you want to accept Cash App payments in your WooCommerce store, then this method is for you.
First, you need to install and activate the Checkout with Cash App on WooCommerce plugin. For details, see our guide on how to install a WordPress plugin.
Upon activation, you need to visit the Cash App Link page from the WordPress admin sidebar. This will open the WooCommerce payments page on your screen.
Here, just check the ‘Enable CASHAPP’ option to add Cash App as a payment method.
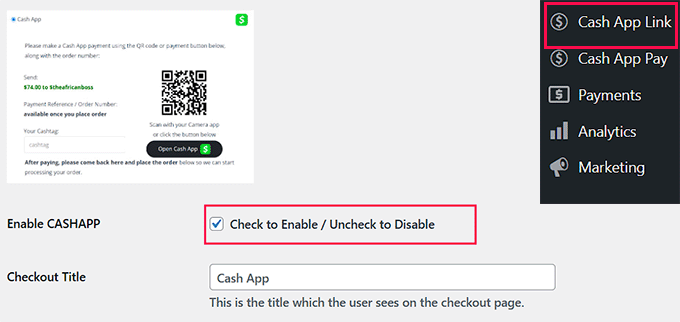
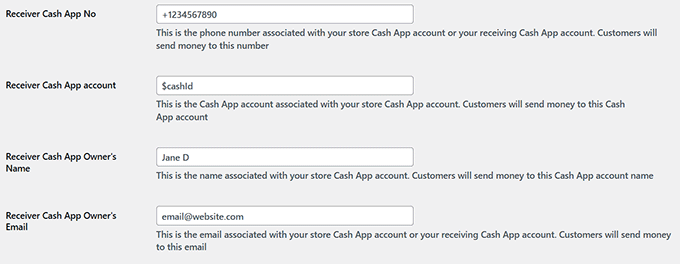
Then, you need to add your Cash App account details and the phone number associated with it. You can also add the email address and name that you have used on your Cash App account.
Once you are done, just click the ‘Save Changes’ button to store your settings.
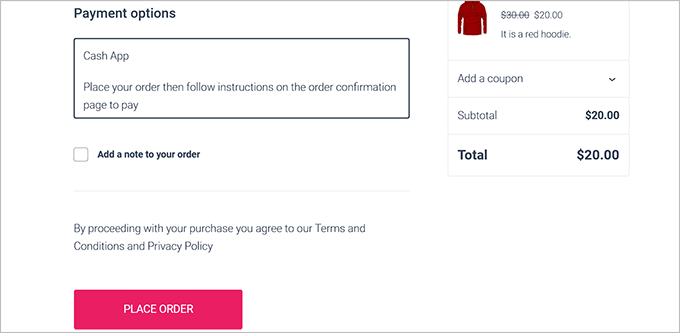
You can now visit the checkout page on your WordPress site.
Here, you will notice the Cash App payment option that users can select and click the ‘Place Order’ button.
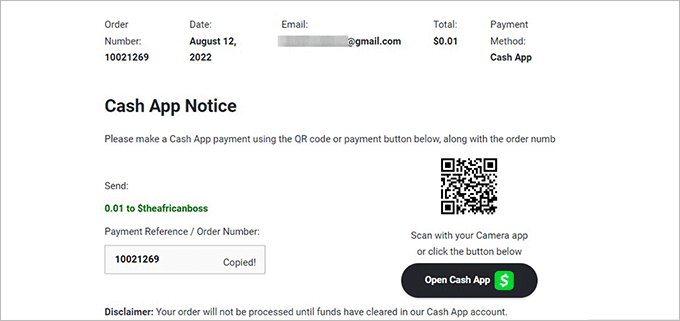
Once that happens, users will be taken to a new screen.
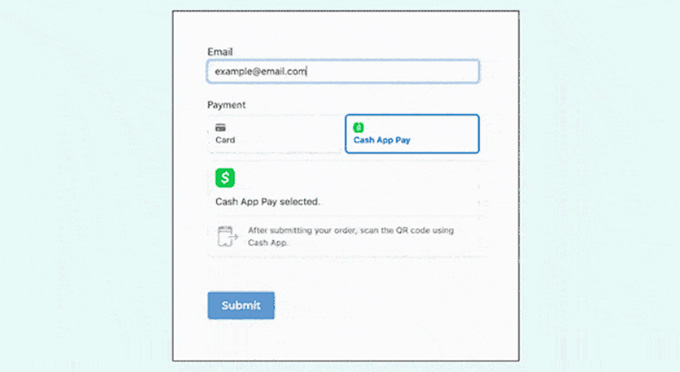
Here, they will see a confirmation message for their order and a QR code they can scan to send the payment.
Bonus: Collect Cash App Payments With Formidable Forms
If the methods above don’t fit your needs, then you can also collect Cash App payments with Formidable Forms. It is an advanced WordPress form builder that allows you to create complex forms, directories, listings, and calculators.
The plugin has a drag-and-drop builder and premade payment templates, making it super easy to add a form to your website with just a few clicks.

Plus, Formidable Forms comes with the Stripe Payments for WordPress addon that lets you accept Cash App payments easily.
Upon activation, just visit the Formidable » Add-Ons page from your dashboard and install the Stripe addon.
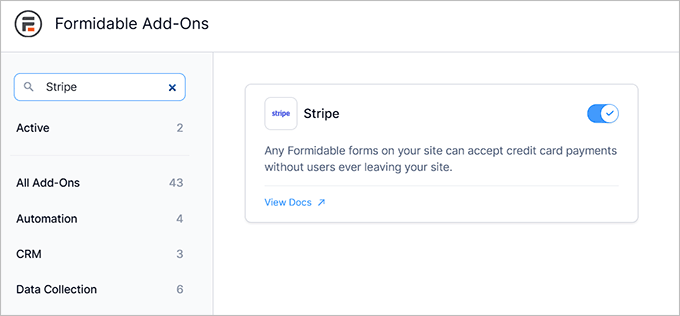
Then, head to the Formidable » Global Settings page and switch to the ‘Stripe’ tab.
From here, you can connect the plugin to your Stripe account. After that, simply choose ‘Cash App’ from the list of payment methods on the page.

Now it’s time to visit the Formidable » Forms page from the WordPress dashboard and click the ‘+ Add New’ button.
This will take you to the next screen, where you can select any of the premade templates you like.
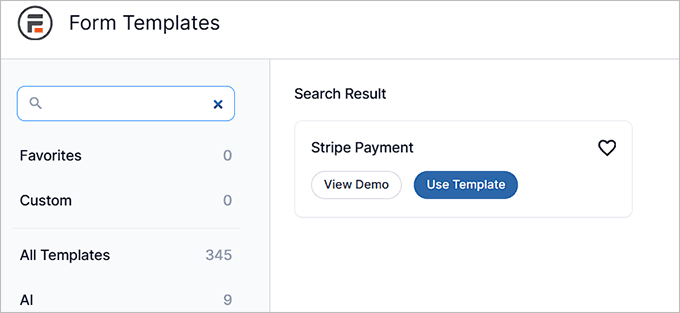
Once you do that, the drag-and-drop builder will open on your screen, with a form preview on the right and form fields in the left column.
From here, you can edit, rearrange, or delete fields according to your liking. You can also add a Calculator field. To learn more, see our tutorial on how to add a mortgage calculator form in WordPress.
Remember that you will need to add the ‘Payment Field’ to your form to collect Cash App payments.
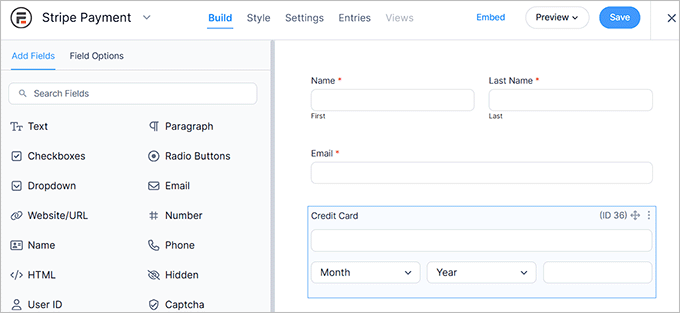
Once you are done, just click the ‘Save’ button to store your changes. You can now embed your form on any page you like.
Finally, visit your website to see the payment form in action.
We hope this article helped you learn how to easily collect Cash App payments in WordPress. You may also like to see our tutorial on how to accept Affirm payments in WordPress and our top picks for the best WordPress PayPal plugins to process payments safely.
Se questo articolo vi è piaciuto, iscrivetevi al nostro canale YouTube per le esercitazioni video su WordPress. Potete trovarci anche su Twitter e Facebook.


Have a question or suggestion? Please leave a comment to start the discussion.