
Incoraggiare le persone a condividere i vostri contenuti sui media è un ottimo modo per far crescere il vostro pubblico e far appassionare chi è interessato alla vostra attività.
Ma la realtà è che le persone condivideranno i vostri contenuti solo se glielo renderete facile.
Sul blog di WPBeginner utilizziamo i pulsanti di condivisione sociale in modo che i nostri lettori possano condividere i nostri contenuti con un semplice clic, quindi sappiamo di cosa stiamo parlando. 🤓
Secondo la nostra esperienza, Pinterest è una piattaforma fantastica per portare traffico al vostro sito WordPress, soprattutto se pubblicate contenuti visivi come foto, infografiche e opere d’arte digitali.
L’aggiunta di un pulsante “Pin It” al vostro sito WordPress consente ai vostri visitatori di condividere rapidamente immagini o altri contenuti visivi sulle loro bacheche Pinterest. Inoltre, può avere molti vantaggi! Pensate: più visitatori, più commenti e più vendite. 💥
In questo articolo vi mostreremo come aggiungere il pulsante “Pin It” di Pinterest a WordPress.
Perché aggiungere il pulsante “Pin It” di Pinterest in WordPress?
Pinterest è una popolare piattaforma di social media che permette agli utenti di raccogliere link a siti web e altri contenuti visivi creando delle bacheche.
Quando gli utenti aggiungono i vostri contenuti alla loro bacheca Pinterest, aiutano altre persone a scoprire il vostro sito web. Pinterest è una fonte di traffico particolarmente importante se gestite un sito web di fotografia, un blog di moda o qualsiasi altro tipo di blog con molte immagini e video.
Condividendo un pulsante “Pin It” sul vostro sito web potete incoraggiare i visitatori a condividere i vostri contenuti su Pinterest.
Nota: Pinterest ha modificato ufficialmente il nome del pulsante “Pin It” in “Salva” nel 2016. Tuttavia, molte guide e plugin di WordPress utilizzano ancora “Pin It”, motivo per cui in questa guida utilizziamo il nome originale. Inoltre, ha un suono più accattivante!
Detto questo, vediamo come aggiungere un pulsante “Pin It” di Pinterest in WordPress. Utilizzate i link rapidi qui sotto per passare direttamente al metodo che desiderate utilizzare:
Metodo 1: Aggiungere il pulsante “Pin It” di Pinterest alle pubblicazioni (modo semplice)
Il modo più semplice per aggiungere un pulsante Pinterest al vostro sito WordPress è utilizzare Novashare. A nostro avviso, è uno dei migliori plugin per WordPress dedicati ai media.
Permette di aggiungere facilmente un pulsante per Pinterest al vostro sito, oltre a pulsanti per tutti gli altri principali social network. Abbiamo testato Novashare per molti casi d’uso diversi e ci piace molto la sua facilità d’uso. Per maggiori informazioni su chi siamo, consultate la nostra recensione completa di Novashare.
Per iniziare, è necessario visitare il sito web di Novashare e scegliere un piano. Successivamente, dovrete installare e attivare il plugin. Se avete bisogno di aiuto, consultate la nostra guida su come installare un plugin per WordPress.

Dopo l’attivazione, si deve andare alla pagina Impostazioni ” Novashare nella propria dashboard di WordPress per attivare la licenza.
È sufficiente fare clic sulla scheda “Licenza”, incollare la chiave di licenza fornita al momento dell’acquisto del plugin e fare clic sul pulsante “Salva licenza”.

Una volta attivata la licenza, è possibile aggiungere un’icona di Pinterest al proprio sito web e qualsiasi altra icona di condivisione sociale. Potete aggiungere queste icone in linea con i vostri contenuti o come barra fluttuante.
In questo caso utilizzeremo la prima opzione (ma continuate a leggere per maggiori informazioni sulle barre fluttuanti).
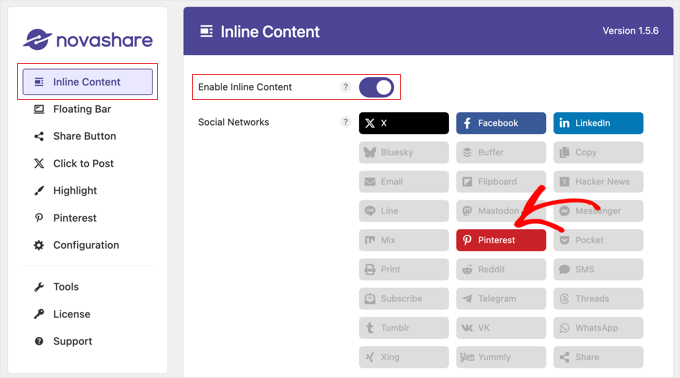
Basta navigare nella scheda “Contenuto in linea” di Novashare e attivare l’opzione “Attiva/disattiva contenuto in linea”. Quindi, fare clic sul pulsante Pinterest in modo che diventi rosso.
A questo punto, è possibile abilitare altre reti sociali che si desidera aggiungere alla barra dei pulsanti di condivisione sociale.
A questo punto, è possibile scorrere verso il basso e utilizzare le opzioni disponibili per configurare la barra dei pulsanti.
Esistono impostazioni per visualizzare la barra dei pulsanti su pubblicazioni, pagine e altro. È inoltre possibile personalizzare il colore e il design dei pulsanti.
È anche possibile aggiungere etichette ai pulsanti e mostrare un conteggio di quante volte il post corrente è stato condiviso sui media.
Copriamo tutte queste opzioni e le barre fluttuanti in dettaglio nella nostra guida su come add-on i pulsanti di condivisione sociale in WordPress.
Una volta personalizzato il pulsante “Pin It”, scorrere fino alla fine della pagina. Qui, cliccate sul pulsante ‘Salva modifiche’ per memorizzare le nuove impostazioni.
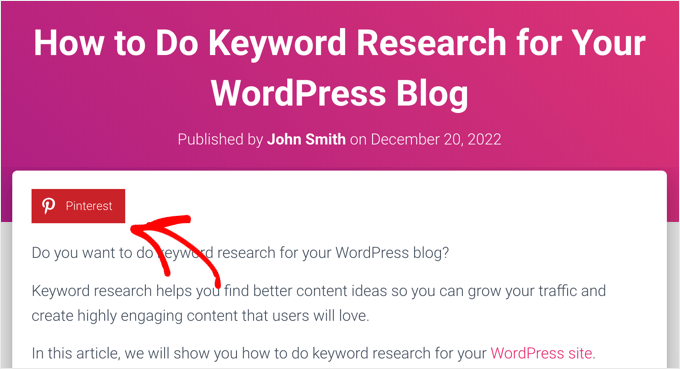
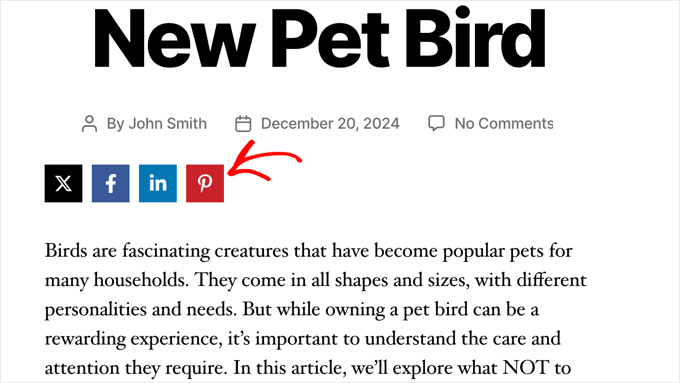
Ora potete visitare il vostro sito web WordPress per vedere il pulsante Pinterest in azione.
Metodo 2: Aggiungere il pulsante “Pin It” di Pinterest alle immagini (in modo semplice)
Gestite un blog di moda, fotografia o cibo? Allora potreste aggiungere un pulsante Pinterest sopra queste immagini. In questo modo i visitatori potranno condividere i vostri contenuti semplicemente al passaggio del mouse sull’immagine che desiderano appuntare.
Il plugin Novashare utilizzato nel Metodo 1 può anche aggiungere un pulsante “Pin” di Pinterest al passaggio del mouse su qualsiasi immagine del sito.
Una volta acquistata la licenza e installato il plugin, come abbiamo spiegato nel precedente Metodo 1, dirigetevi verso Impostazioni ” Novashare e cliccate sulla scheda ‘Pinterest’.
A questo punto, attivate/disattivate l’opzione “Abilita i pulsanti immagine” e selezionate i “Post Type” in cui volete visualizzare il pulsante.

Successivamente, è possibile personalizzare la posizione, la forma e il colore del pulsante. Le altre impostazioni predefinite andranno bene per la maggior parte dei siti web.
Se si preferisce, è possibile visualizzare il pulsante Pinterest sulle immagini in ogni momento, non solo al passaggio del mouse su un’immagine. A tale scopo, è necessario abilitare l’opzione “Mostra sempre”.

Alcuni proprietari di siti web hanno alcune immagini che non vogliono siano condivise. In questo caso, è possibile digitare i nomi dei file nel campo “Immagini escluse”.
Quando siete soddisfatti delle impostazioni, fate clic sul pulsante “Salva modifiche”. Novashare inizierà quindi a visualizzare il pulsante Pin sulle immagini.

Metodo 3: Aggiungere il pulsante “Pin It” di Pinterest utilizzando uno shortcode personalizzato
A volte è possibile controllare esattamente l’aspetto del pulsante “Pin It” sul sito. Ad esempio, potreste voler mostrare il pulsante Pinterest su una specifica landing page pubblicitaria o all’interno del contenuto della pubblicazione.
In questo caso, un’opzione è quella di creare il pulsante usando il codice e poi posizionarlo su ogni pagina o pubblica usando uno shortcode personalizzato. In questo modo si ha la libertà di mostrare il pulsante “Pin It” in posizioni diverse, ma è necessario aggiungerlo manualmente a ogni pagina o pubblica.
Il modo più semplice per aggiungere codice personalizzato a WordPress è utilizzare WPCode. Permette di aggiungere PHP personalizzato, CSS, JavaScript e altro ancora al vostro sito web.
Molti dei nostri brand partner usano questo plugin per gestire gli snippet di codice nei loro siti e tutti ci hanno riferito di quanto lo amino. Per maggiori informazioni, consultate la nostra recensione completa di WPCode.
WPCode può essere utilizzato anche per creare shortcode personalizzati, quindi è perfetto per aggiungere un pulsante “Pin It” al sito web.
Per prima cosa, è necessario installare e attivare il plugin gratuito WPCode. Per ulteriori informazioni, consultate la nostra guida passo-passo su come installare un plugin di WordPress.
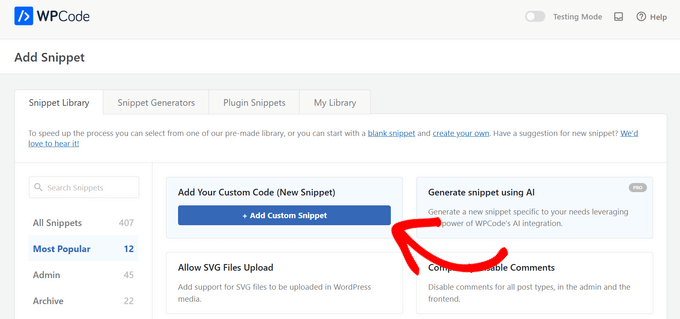
Una volta attivato il plugin, andare su Code Snippets ” Add Snippet.

Qui, potrete vedere tutti gli snippet preconfezionati che WPCode può aggiungere al vostro sito. Questi includono snippet che consentono di aggiungere pulsanti di condivisione sociale a WordPress e di visualizzare le icone sociali in una barra laterale.
A questo punto, occorre passare il mouse sull’opzione “Aggiungi codice personalizzato (nuovo snippet)” e cliccare sul pulsante “+ Aggiungi snippet personalizzato” quando appare.
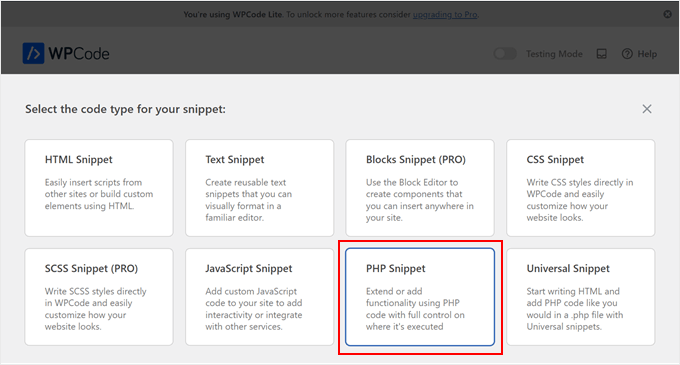
Poi, si aggiungerà il PHP a WordPress, quindi è necessario selezionare “PHP Snippet” come tipo di codice.
Nella schermata successiva, digitate un titolo per lo snippet di codice.
Questo è solo un referer, quindi potete usare qualsiasi cosa vogliate. Per questa esercitazione, digiteremo ‘Pinterest Pin It Button’.
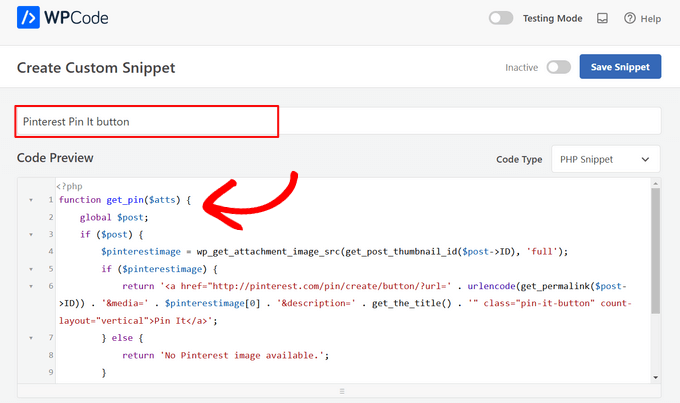
A questo punto, è sufficiente incollare quanto segue nell’editor di codice:
1 2 3 4 5 6 7 8 9 10 11 12 13 14 | function get_pin($atts) { global $post; if ($post) { $pinterestimage = wp_get_attachment_image_src(get_post_thumbnail_id($post->ID), 'full'); if ($pinterestimage) { return '<a href="http://pinterest.com/pin/create/button/?url=' . urlencode(get_permalink($post->ID)) . '&media=' . $pinterestimage[0] . '&description=' . get_the_title() . '" class="pin-it-button" count-layout="vertical">Pin It</a>'; } else { return 'No Pinterest image available.'; } } else { return 'No post found.'; }}add_shortcode('pin', 'get_pin'); |
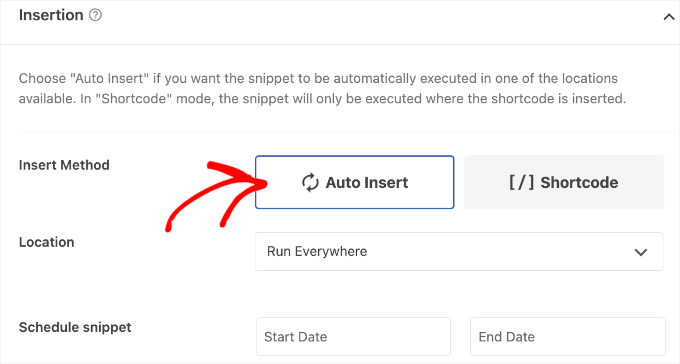
Quindi, scorrere la pagina fino alla sezione “Inserimento”. Qui si può mantenere il metodo predefinito ‘Auto Insert’ per assicurarsi che il codice venga eseguito ovunque.
Se non è già selezionato, selezionare “Esegui ovunque”.
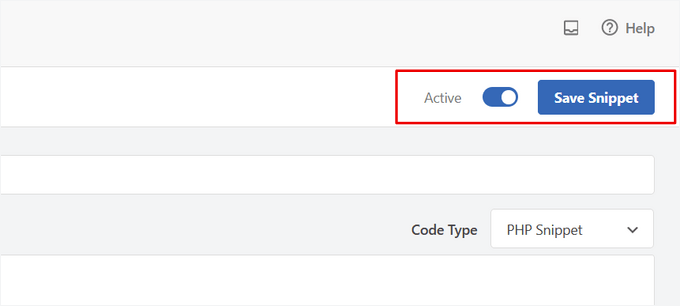
Infine, scorrere fino alla parte superiore dello schermo e fare clic sul cursore “Inattivo” in modo che sia visualizzato “Attivo”.
Quindi, basta fare clic sul pulsante “Salva snippet” o “Aggiorna” per rendere attivo lo snippet di codice.
Ora è possibile aggiungere un pulsante “Pin It” a qualsiasi pagina, post o area widget di WordPress utilizzando lo shortcode [pin].
Per istruzioni passo passo su come inserire lo shortcode, consultare la nostra guida su come aggiungere uno shortcode in WordPress.
![use the [pin] shortcode in your WordPress posts](https://www.wpbeginner.com/wp-content/uploads/2019/06/pinterest-add-shortcode.png)
Dopo aver aggiunto questo codice, i visitatori vedranno un pulsante “Pin It” su qualsiasi pagina o pubblicazione che abbia un’immagine in evidenza.
Se la pagina non ha un’immagine in evidenza, viene visualizzato il messaggio di errore “Nessuna immagine Pinterest disponibile”.
Come aggiungere il pulsante “Pin It” di Pinterest usando l’editor del sito completo
Se utilizzate uno dei temi più recenti abilitati ai blocchi, potete aggiungere un pulsante “Pin It” in qualsiasi punto del vostro tema WordPress utilizzando uno shortcode personalizzato.
Questo è un modo semplice per aggiungere il pulsante a ogni pagina e post. È anche possibile aggiungere il pulsante “Pin It” ad aree che non si possono modificare con l’editor di contenuti standard di WordPress, come il modello della pagina 404 del sito.
Per iniziare, basta andare su Temi “ Editor nella dashboard di WordPress.
")
Per impostazione predefinita, l’editor completo del sito mostra il modello di home del tema.
Per aggiungere un pulsante “Pin It” a un’altra pagina, basta selezionare “Modello” o “Parti del modello” dal menu di sinistra.

A questo punto è possibile selezionare il modello che si desidera modificare.
In questo esempio, vi mostreremo come aggiungere un pulsante “Pin It” al modello di pagina singola del vostro sito. Tuttavia, i passaggi saranno simili indipendentemente dal modello scelto.

WordPress mostrerà ora un’anteprima del modello o della parte di modello.
Per modificare questo modello, fare clic sull’icona della matita.

A questo punto, fare clic sull’icona blu “+” nell’angolo in alto a sinistra.
Nella barra di ricerca visualizzata, digitate “Shortcode”.

Quando appare il blocco giusto, trascinarlo sul layout del modello.
Ora è possibile digitare il codice breve Pin nel blocco.

Dopodiché, basta cliccare su “Salva” per rendere attivo il nuovo shortcode.
Ora, se visitate il vostro sito web WordPress, vedrete il pulsante “Pin it” in azione.
Metodo 4: Aggiungere il pulsante “Pin It” di Pinterest utilizzando il codice e l’FTP
Un altro modo per aggiungere un pulsante Pinterest al sito web senza plugin è quello di aggiungere del codice direttamente nei file del tema. Tuttavia, questo metodo è adatto solo agli utenti tecnici.
La modifica diretta dei file del tema può causare molti errori comuni di WordPress e si perderà tutto il codice personalizzato quando si aggiorna il tema di WordPress. Per questo motivo, consigliamo sempre di utilizzare WPCode.
Tuttavia, se utilizzate questo metodo, dovrete iniziare facendo un backup completo del sito WordPress. Questo vi aiuterà a ripristinare il sito nel caso in cui qualcosa si rompa accidentalmente.
Fatto ciò, collegatevi al vostro host WordPress utilizzando un client FTP e andate nella cartella /wp-content/themes/.
Da qui, è necessario aprire la cartella del tema corrente e individuare il file footer.php.
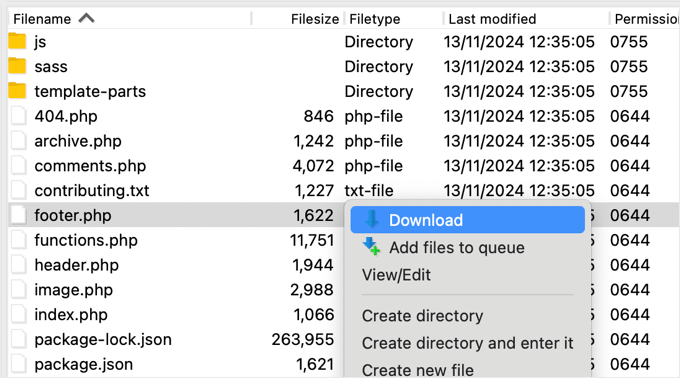
Quindi, è sufficiente fare clic con il tasto destro del mouse sul file e selezionare “Download” dal menu. In questo modo il file footer.php verrà scaricato sul computer.
Ora è necessario aprire il file footer.php con un editor di testo come Notepad e incollare il seguente script proprio prima del tag </body>.
1 2 3 4 5 6 7 8 9 10 11 12 13 14 15 16 17 18 19 | <script type="text/javascript">(function() { window.PinIt = window.PinIt || { loaded:false }; if (window.PinIt.loaded) return; window.PinIt.loaded = true; function async_load(){ var s = document.createElement("script"); s.type = "text/javascript"; s.async = true; s.src = "https://assets.pinterest.com/js/pinit.js"; var x = document.getElementsByTagName("script")[0]; x.parentNode.insertBefore(s, x); } if (window.attachEvent) window.attachEvent("onload", async_load); else window.addEventListener("load", async_load, false);})();</script> |
Una volta fatto ciò, è necessario salvare il file e poi caricarlo nuovamente nella cartella del tema corrente.
Quindi, individuare il template file del tema in cui si desidera aggiungere il pulsante. Di solito si tratta del file single.php, ma può variare a seconda del tema di WordPress. Se non siete sicuri, potete consultare la nostra guida per principianti sulla gerarchia dei template di WordPress.
Per modificare il file del modello, è sufficiente scaricarlo dalla cartella del tema e aprirlo per modificarlo.
È necessario scegliere la posizione in cui mostrare il pulsante “Pin It”. Molti siti web mostrano i pulsanti di condivisione sociale direttamente sotto il titolo del post, ma potete utilizzare qualsiasi posizione desideriate.
Dopo aver scelto una posizione, è sufficiente aggiungere il seguente codice:
1 2 | <?php $pinterestimage = wp_get_attachment_image_src( get_post_thumbnail_id( $post->ID ), 'full' ); ?><a href="http://pinterest.com/pin/create/button/?url=<?php echo urlencode(get_permalink($post->ID)); ?>&media=<?php echo $pinterestimage[0]; ?>&description=<?php the_title(); ?>" class="pin-it-button" count-layout="vertical">Pin It</a> |
Lo snippet di codice sopra riportato aggiunge l’immagine in evidenza, il titolo, la descrizione e l’URL della pubblicazione nel parametro URL di condivisione.
Questo frammento di codice aggiungerà anche un pulsante di condivisione verticale a tutte le pubblicazioni. Se invece si desidera visualizzare un pulsante di condivisione orizzontale, è sufficiente modificare la sezione count-layout="vertical"> in count-layout="horizontal">.
Quando si è pronti, salvare il file e caricarlo direttamente sul tema utilizzando l’FTP.
Bonus: Guide aggiuntive su WordPress e i social media
Volete saperne di più su come utilizzare WordPress con i media? Selezionate queste guide per principianti:
- Pinterest è morto? Come potenziare il traffico Pinterest verso il vostro blog
- Come verificare il vostro sito WordPress su Pinterest (passo dopo passo)
- Come pubblicare automaticamente da WordPress a Instagram
- I migliori plugin WordPress per Facebook per far crescere il vostro blog
- Statistiche sui media (elenco definitivo per i blogger)
Se questo articolo vi è piaciuto, iscrivetevi al nostro canale YouTube per le esercitazioni video su WordPress. Potete trovarci anche su Twitter e Facebook.


Jiří Vaněk
Thanks for the php snippet. I tried it on one of the sites and it works like a charm. You have saved me some space between plugins. Good job.
Alison
Hi. I just added shared counts and the Pinterest add-on plugins recently. They seem to work fine, but I notice they haven’t been updated in several years nor have they been tested with my version of WordPress. Should I be looking for a new plugin or are they still ok to use?
WPBeginner Support
The shared count plugin was updated 2 months ago and it should still be working well, for the warnings we would recommend taking a look at our article below for why you shouldn’t be very concerned
https://www.wpbeginner.com/opinion/should-you-install-plugins-not-tested-with-your-wordpress-version/
Admin
Julie
I’m looking to add an individual graphic pin that I’ve custom designed to the travel blog post it belongs to (like the best things to do in Jaipur). Is that what this article is covering or is it just the literal Pinterst “Button” that looks like the Pinterst logo? Sorry to be co fixed with this technicality, but an image or two would make this much clearer what specifically the “button” you are referring to is….thank you in advance…
WPBeginner Support
This is for the Pinterest pin it button, the second screenshot in the article should be what you are looking for as an example.
Admin
Ellen
It works!! thankyou
WPBeginner Support
Glad our guide could help
Admin
Kara
After I installed the plugin, it never showed up in the settings.
WPBeginner Support
You would want to ensure you activate the plugin as well.
Admin
Jais
Thanks. It works.
WPBeginner Support
You’re welcome, glad it worked for you
Admin
laira
hi wpbeginner, I follow your codes, may i know if i will still pin the images on my pinterest boards? or it will automatically pin there? Im still a beginner in this platform. thank you
WPBeginner Support
The button when used would add it to your board.
Admin
Lorraine Reguly
Thanks for the code. I just added it to my author site. (I have no idea how the Pinterest button shows up on my images on my business site, but it does.)
Now my author site is all set up!
Thanks, Syed.
P.S. I just followed you on Pinterest.
WPBeginner Support
Hey Lorraine,
Thanks for following us on Pinterest. You can also find us on Twitter and Facebook.
Admin
RB
this is work !! thanks
and
I wonder…
how can I change icon? Icon is still same when change code
Thales
I did the last option, adding the short code to my theme’s functions.php file. It worked, but I couldn’t save my posts as draft anymore. Then I removed the code and it is not working. My site is still online, but I cannot log in into my site anymore. The following message appear:
Warning: Cannot modify header information – headers already sent by (output started at /home/peque107/public_html/wp-content/themes/himmelen/functions.php:2) in /home/peque107/public_html/wp-includes/pluggable.php on line 1224
Please help!
Emma steave
Thanks. Its great
Carissa
Does this only apply for wordpress.org blogs? I have a wordpress.com blog and I am not sure if I can add this plugin to it?
Thank you!
WPBeginner Support
Yes it is for WordPress.org. Please see our guide on the difference between self hosted WordPress.org vs free WordPress.com blog.
Admin
Ruth
I have a problem. I followed the instructions and came up with this error:
Parse error: syntax error, unexpected ‘<' in /home/cmomb/butfirstwehavecoffee.com/wp-content/themes/notepad/functions.php on line 18
Now I cannot get rid of it. Could someone advise. My site is now down.
WPBeginner Support
Open the functions.php file in a text editor like notepad. Go to line 18. You probably have <?php tag there that you don’t need. Delete it and also delete the ?> closing tag
Admin
Ian Harris
Thanks for this firstly
I am struggling to position the element. It is seeming to always sit in the top left of the div.
Is it possible to position it and also change the bg image to own custom one.
Thanks
Paradise Found Around
Great tutorial, as usual. I was wondering though if there was a way to modify it to use a custom button in place of the starboard one that automatically comes up.
Thanks,
Mark
mark taylor
Good tutorial, i have put it on my site without any problems, i then tested it and it worked, but it still says 0 after i pinned.
Mark
vrinda
I tried so many plugins… they don’t work with infinite scroll and nextgen gallery…. but with some changes this script solved my issue.. thanks
Michael
Hello,
I just want to ask if I could change the size of the “pin it” button? Because it seems that it was a little bit small.
Regards,
Michael
Editorial Staff
You could use the pin count layout vertical or horizontal. Other than that, no you cannot change the size.
Admin
Jenny
This code just recently stopped working. I had it on my site and it was working great and recently images appear to be working but then when you go view the pinboard there is no image set. Other times when trying to pin it 502 error that comes from the Pinterest site. Any ideas?
Editorial Staff
Probably server errors on Pinterest’s end. We have this code running on our other sites.
Admin
Ido Schacham
There’s a bug in the code. The generated href for the pin it button should include ‘url=’, currently it’s missing the equals sign.
Editorial Staff
Fixed the shortcode code for that. Thanks for reporting it
Admin
jess
For wordpress users..adding the pin it or any other social media is easy! Under dashboard, go to setting, click on sharing and they all appear- click on what you want to add!
Editorial Staff
You are referring to WP.com sites. This tutorial is for self-hosted WordPress sites. Two different things.
Admin
Jen M
THANK YOU! I have been searching for how to do this for 2 days & downloaded something & that didn’t work, I was about to give up & then THANKFULLY read your comment. I appreciate someone making it as EASY as it really is, how come wordpress can’t do that?
Jenn K
Ooh, thanks for the tip! Exactly what I was looking for
Nick
Is there a way to customize this so you can select a custom image for the pin-it button ?
Editorial Staff
If you mean a custom image for your article, then yes you can. Look at the &media tag in the second code.
Admin
Husein Yuseinov
Hi,
I need to implement this code but in header file, but postthumbnail returns error?!
wpbeginner
@Husein Yuseinov You have to call the thumbnail code within your post loop. In order to call it in your header.php file, you must utilize the global variable.
https://www.wpbeginner.com/wp-themes/how-to-display-custom-fields-outside-the-loop-in-wordpress/
Husein Yuseinov
@wpbeginner Thanks for the fast respond, but I’m not a coder, and it’s hard for me to understand you.
wpbeginner
@Husein Yuseinov Ok… so here is what you do. Add the following line above $pinterestimage line inside the PHP tags:
global $wp_query;
$postid = $wp_query->post->ID;
Then replace $post->ID with $postid and it will work. Also after the code, you may want to end wp_reset_query();
This is the best we can do. What you are asking for requires coding. If you are unable to do this, then shoot us an email. We can help you out for a small fee.
robthecomputerguy
What in the world is going on with the “animhut blog” button on thee next 3 comments?
wpbeginner
@robthecomputerguy I think they just liked our comments, and livefyre is showing their profile.
robthecomputerguy
@wpbeginner Oh that’s fascinating – that didn’t even occur to me – thanks for the follow up!
FuturePocket
I tried adding this… it worked but when you click on “Pin it” and it opens the window in a new browser and you actually submit the pin, it just reloads the newly opened window and the pin isn’t submitted. Decided not to implement it until they’ve fixed their bugs.
Phil Derksen
If you don’t want to mess with adding code, I created a Pin It button plugin you can try out.
http://wordpress.org/extend/plugins/pinterest-pin-it-button/
(or just search for “pinterest pin it” under plugins)
Jean Oram
I used the ‘follow me’ code on the Pinterest Goodies page and pasted it into the ‘text’ widget on my WordPress blog. The button now appears right after my mini bio. It works quite well.
Editorial Staff
For any advanced theme framework like Thesis, Genesis, Headway etc, you have to add these codes via functions.php file using the framework appropriate hooks. We cannot possibly cover all the theme frameworks out there. Most theme framework blogs have instructions on how to do customize the themes.
Admin
wpbeginner
Your method seems a bit tedious because you would have to do it for each image.
Ruby
@wpbeginner It’s not ideal, but it’s really not much more than you have to do to post the image anyway. I’m still looking for a great option (plugin ideally) that a) works on my theme and b) is easy. Luckily, due to the popularity of Pinterest, I’m confident someone will have one up and running soon!
wpbeginner
Make sure you set $pinterestimage[0] otherwise it will return an array. Other than that not sure why you are getting the error.
merrittsgret
@wpbeginner It’s working now, thanks to the shortcode code you gave us. Thank you so much!
Now to get it to align with everything else via CSS… (http://ylcf.org/2012/01/tomorrow-2/) Ah, the joys.
wpbeginner
@merrittsgret Yeah, you might have to utilize the !important tag in some cases.
dave2
Any idea on how to change it from featured image to first image?
wpbeginner
@dave2 Use a variation of this snippet:https://www.wpbeginner.com/wp-themes/how-to-set-a-default-fallback-image-for-wordpress-post-thumbnails/
animhut blog
@wpbeginner @dave2 Thank you for the tutorial ! i need that for my another photography site
Gretchen
It works, but it shows the text “array” before the Pin It button. I’m calling it via my functions.php, like so “echo $pinterestimag…..<?php;" Could that be why?
Heidi at CrockPotLadies
I cannot seem to get it to work. I put the first code in my footer.php before the closing body tag and then added the other code into my single php after my other sharing buttons provided by po.st. Yet when I look at a post on my site (http://crockpotladies.com/recipe-categories/entrees/crockpot-chicken-enchiladas/) I do not see a Pin It Button. Any suggestions?
wpbeginner
@Heidi at CrockPotLadies We can see the button in the next line after the Subscribe to feed etc links.
wmwebdes
Only just started to hear about Pinterest – looks as though it is really taking off.
Thanks for the tut.
Ruby
Thanks for this. I recently tried a similar method but it doesn’t seem to work with my WordPress.org theme, so I came up with my own work-around and posted it here: http://www.tomaytotomaaahto.com/tools-and-tutorials/how-to-turn-your-images-into-pinterest-pin-it-buttons-wordpress
YeahThatsKosher
How do you get this to integrate with an existing WP plugin like Digg Digg or Sociable?
wpbeginner
@YeahThatsKosher You would have to ask the developers to do so for you.