Se aggiungete spesso schermate di siti web ai vostri post o pagine di WordPress, automatizzare il processo vi farà risparmiare il tempo speso per catturare manualmente le schermate.
Noi di WPBeginner creiamo e includiamo regolarmente screenshot nei nostri articoli per guidare efficacemente i nostri lettori. Con oltre 16 anni di esperienza nella creazione, modifica e automazione di schermate, abbiamo sviluppato una forte comprensione delle migliori pratiche per creare immagini chiare.
Questa esperienza ci ha insegnato quanto siano importanti le schermate ben realizzate per migliorare la comprensione e l’engagement del lettore con i nostri contenuti.
In questo articolo vi mostreremo come creare facilmente screenshot automatici di siti web in WordPress.
Perché creare schermate automatiche di un sito web in WordPress?
Se avete un sito web WordPress, potreste creare e aggiungere schermate automatiche del sito ai vostri post per dare ai potenziali lettori un modo rapido per vedere di cosa tratta il vostro contenuto.
Questo può aumentare il coinvolgimento e persino contribuire a migliorare la SEO del sito web, poiché i motori di ricerca di solito utilizzano immagini e screenshot per comprendere e indicizzare i contenuti.
Allo stesso modo, è possibile utilizzare screenshot automatici del sito web per creare un backup visivo del sito prima di aggiornare un tema o di apportare qualsiasi altra modifica. In questo modo è possibile confrontare e vedere la differenza tra il nuovo e il vecchio stile del sito web.
Le schermate automatiche possono anche confrontare diversi servizi o siti web, guidare il lettore attraverso un tutorial passo-passo e monitorare i progressi del sito web nel tempo.
Detto questo, vediamo come creare facilmente screenshot automatici di siti web in WordPress:
Metodo 1: Creare screenshot automatici del sito web in WordPress utilizzando un plugin
Questo metodo è più semplice e quindi consigliato ai principianti e agli utenti che non vogliono avere a che fare con il codice.
Per prima cosa, è necessario installare e attivare il plugin Browser Screenshots. Per maggiori dettagli, consultate la nostra guida passo passo su come installare un plugin di WordPress.
Dopo l’attivazione, il plugin funziona subito e non ci sono impostazioni da configurare.
Ora, è sufficiente visitare una pagina o un articolo in cui si desidera aggiungere uno screenshot automatico del sito web dalla barra laterale dell’amministrazione di WordPress.
Qui, fare clic sul pulsante “Aggiungi blocco” (+) nell’angolo superiore sinistro dello schermo per aprire il menu dei blocchi. Quindi, aggiungere il blocco “Scatti del browser” nell’editor.
Una volta fatto ciò, aggiungete l’URL del sito web per il quale volete acquisire uno screenshot automatico e fate clic sul pulsante “Carica immagine”.
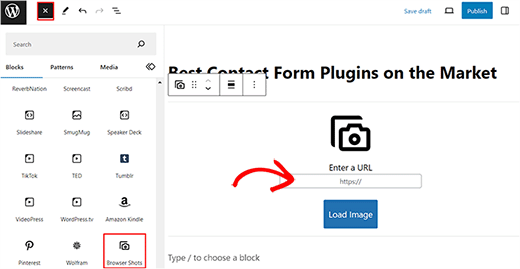
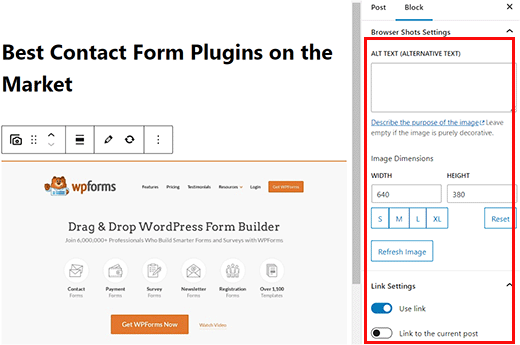
Il plugin aggiungerà automaticamente una schermata per il sito web scelto. È ora possibile aggiungere un testo alt per l’immagine e modificarne la larghezza e l’altezza dal pannello di blocco sulla destra.
Attivando l’interruttore ‘Usa link’ nel pannello, è possibile aggiungere un collega allo screenshot che rimanda al sito web.
È anche possibile attivare l’interruttore “Link al post corrente” se si desidera aggiungere il link del post allo screenshot.
Infine, fare clic sul pulsante “Aggiorna” o “Pubblica” per memorizzare le impostazioni.
Ora è possibile visitare il sito WordPress per visualizzare la schermata automatica.
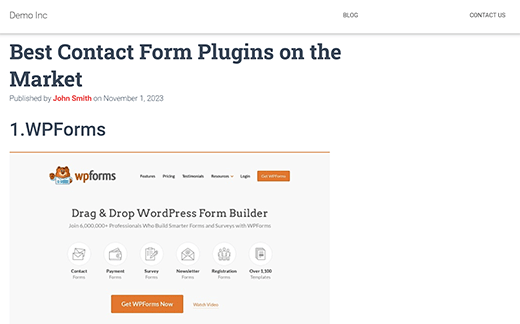
Nota: il plugin Browser Shots utilizza l’API mshots di WordPress.com per generare screenshot al volo. Queste immagini non sono memorizzate nella libreria multimediale di WordPress. Vengono servite direttamente dai server di WordPress.com. Consultate la nostra guida sulla differenza tra WordPress.com e WordPress.org.
Metodo 2: Creare screenshot automatici aggiungendo codice a WordPress
Questo metodo richiede l’aggiunta di codice ai file di WordPress. Per creare screenshot automatici, è necessario aggiungere del codice personalizzato al file functions.php del vostro tema.
Tuttavia, ricordate che il più piccolo errore nel codice può rompere il vostro sito e renderlo inaccessibile.
Ecco perché vi consigliamo di utilizzare WPCode. È il miglior plugin per gli snippet di codice di WordPress sul mercato che rende super sicura e facile l’aggiunta di codice personalizzato.
Per prima cosa, è necessario installare e attivare il plugin WPCode. Per istruzioni dettagliate, consultare la nostra guida passo passo su come installare un plugin di WordPress.
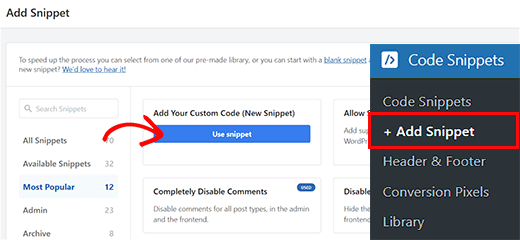
Dopo l’attivazione, visitare la pagina Code Snippets ” + Add Snippet dalla dashboard di WordPress.
Una volta lì, fare clic sul pulsante “Usa snippet” sotto l’opzione “Aggiungi il tuo codice personalizzato (nuovo snippet)”.
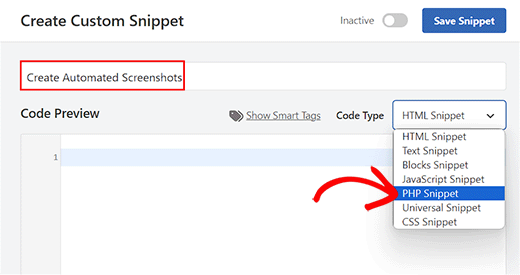
Si aprirà la pagina “Crea snippet personalizzato”, dove si potrà iniziare a digitare un nome per il proprio snippet. Il nome può essere qualsiasi cosa che aiuti a identificare il codice.
Quindi, selezionare “Snippet PHP” come tipo di codice dal menu a discesa sulla destra.
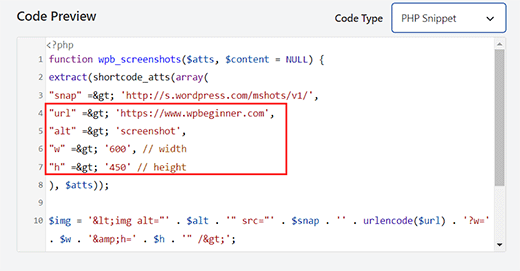
A questo punto, è sufficiente copiare e incollare il seguente codice nella casella “Anteprima codice”:
1 2 3 4 5 6 7 8 9 10 11 12 13 14 | function wpb_screenshots($atts, $content = NULL) {extract(shortcode_atts(array("snap" => 'http://s.wordpress.com/mshots/v1/',"url" => 'https://www.wpbeginner.com',"alt" => 'screenshot',"w" => '600', // width"h" => '450' // height), $atts)); $img = '<img alt="' . $alt . '" src="' . $snap . '' . urlencode($url) . '?w=' . $w . '&h=' . $h . '" />'; return $img;}add_shortcode("screen", "wpb_screenshots"); |
Simile al plugin citato in precedenza, anche questo codice utilizza l’API Mshots di WordPress.com per generare screenshot al volo.
A questo punto, è possibile aggiungere l’URL del sito web di cui si vogliono scattare le schermate automatiche accanto alla riga "url" =$gt; del codice.
È inoltre possibile aggiungere la larghezza e l’altezza preferite per le schermate accanto alle linee "w"=> e "h"=> del codice.
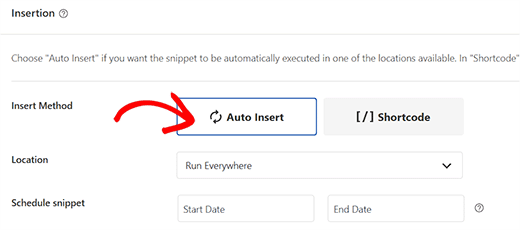
Quindi, scorrere fino alla sezione “Inserimento” e scegliere la modalità “Inserimento automatico”.
Il codice verrà ora eseguito automaticamente all’attivazione.
Infine, scorrere indietro fino alla parte superiore della pagina e spostare l’interruttore “Inattivo” su “Attivo”.
Quindi, fare clic sul pulsante “Salva snippet” per memorizzare le impostazioni e attivare lo snippet.
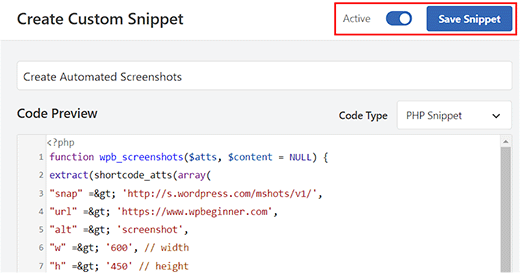
Ora, per visualizzare uno screenshot del sito web nei vostri articoli e pagine di WordPress, dovrete inserire lo shortcode in questo modo:
1 | [screen url="http://wpbeginner.com" alt="WPBeginner"] |
È possibile sostituire i campi URL e Alt con valori personalizzati.
Per prima cosa, aprire la pagina/post nell’editor di blocchi dalla dashboard di WordPress e fare clic sul pulsante “Aggiungi blocco” (+).
Da qui, aggiungere il blocco ‘Shortcode’ alla pagina/post. Quindi, aggiungere lo shortcode di cui sopra e sostituirlo con i propri valori.
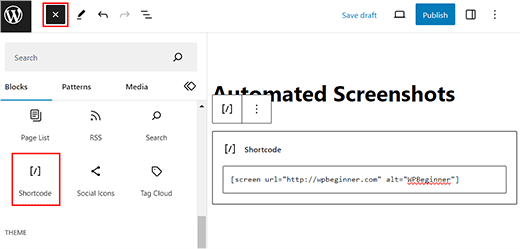
Infine, fare clic sul pulsante “Aggiorna” o “Pubblica” per memorizzare le impostazioni.
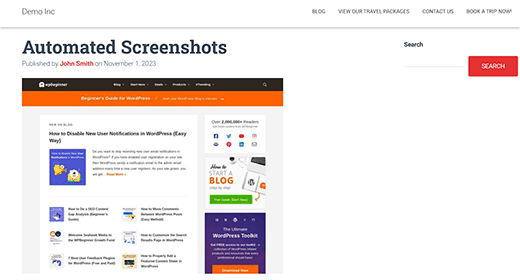
Ora, visitate il vostro sito WordPress per visualizzare lo screenshot automatico in azione.
Bonus: Scattare screenshot manualmente per il vostro sito web
Se non volete usare screenshot automatici, potete fare screenshot manualmente con diversi strumenti come Droplr.
In questo modo si ha maggiore libertà di scegliere un’area specifica per un’immagine rispetto agli screenshot automatici. Inoltre, è possibile modificare queste immagini in Adobe Photoshop e aggiungere altri elementi come frecce o box rossi.
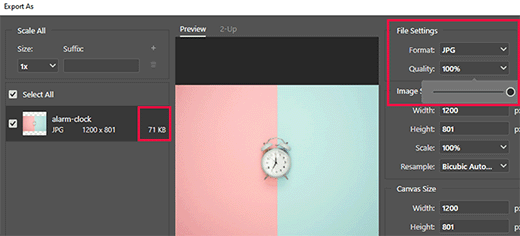
Questa caratteristica non è disponibile per gli screenshot automatizzati, per i quali i plugin o il codice recuperano automaticamente l’immagine.
Per fare uno screenshot con Droplr, dovete prima installare l’applicazione sul vostro computer. Una volta fatto ciò, fate clic sull’icona di Droplr nella barra delle applicazioni di Windows o Mac e selezionate l’opzione “Screenshot”.
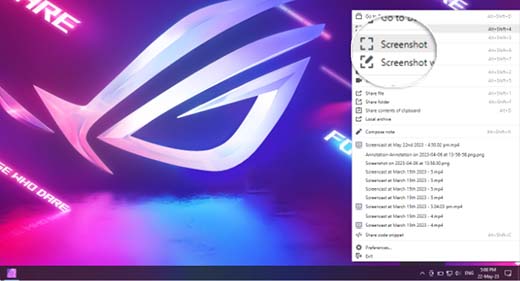
Successivamente, è possibile selezionare l’area in cui si desidera effettuare lo screenshot.
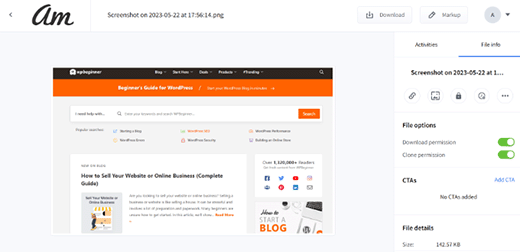
Droplr aprirà quindi l’immagine in un browser dove potrete scaricarla o condividere il collega con altri. Per ulteriori informazioni, consultate il nostro tutorial su come fare uno screenshot in WordPress.
Speriamo che questo articolo vi abbia aiutato a imparare come creare schermate automatiche di siti web in WordPress. Potreste anche consultare la nostra guida per principianti alla SEO delle immagini e le nostre scelte degli esperti sui migliori strumenti per creare immagini migliori per i vostri post.
Se questo articolo vi è piaciuto, iscrivetevi al nostro canale YouTube per le esercitazioni video su WordPress. Potete trovarci anche su Twitter e Facebook.


Samuel Kaffy
Pls, how can I make the screenshots downloadable as an image file?
WPBeginner Support
You would need to reach out to the plugin’s support for adding that functionality
Admin
Nigel Billam
I’ve used this plugin but it stops on the third use of the short code and reports ‘too many requests’ – i was hoping to display 45 URLs. Do you have any suggestions to avoid this?
WPBeginner Support
You would want to reach out to the plugin’s support if you haven’t already for what options they have available for avoiding that issue.
Admin
Cory Goodwin
Does this browser shot plugin check for updates to the site, or do you have to manually redo to get the latest look of the target website? Thanks:)
WPBeginner Support
You would want to reach out to the plugin’s support for the current refresh rate
Admin
Karin
Your code is just what I was looking for. The only thing is that I want the url not prefilled in the code but generated from a custom field ‘wpcf_websitelink’.
How can I add the code to get the content from the field.
So this line
“url” => ‘https://www.wpbeginner.com’,
should have something to get the content of the field wpcf_websitelink in stead of the wpbeginner.com link
WPBeginner Support
If you are using a plugin to create that custom field then you would want to reach out to the support for that plugin for how to access that information and replace the url value with what they tell you.
Admin
Tien Le
Thank you so much <3
Now i can make more image from capture screen image
Steve Renow
This is a wonderfully simple plugin to use. Great job! Is there any way to crop the images? Some sites show with the cookie warning t the top or bottom and it would be good to be able to crop that off.
Daniel
Where do the screenshot get saved too?
WPBeginner Support
These images are not stored in your WordPress media library. They are served directly from WordPress.com servers.
Admin
Bernd
Is it possible to get screenshots with https ?
Dumitru Brinzan
Helpful tutorial and information, but it feels a little incomplete.
If it contained info on how to save the images to the library then it would be perfect
Annapurna
Did you get how to do this?
Damith
It is possible to save screenshot in media library and make that as featured image. Thanks.
Obeng blankson
Great info. I will surely test the plugin on my website to actually have a feel of it.
Ankit Agarwal
With any of these methods, what will be the side effect on the speed of the website? As a plugin, there will be some addition to load time. If the images are not stored on the media library, there will again be some addition to website load times.
So from the methods given, which one is recommended considering website load speed?