A canonical URL is the main version of a webpage that you want Google and other search engines to index. It can be used to prevent duplicate content issues when your website has different versions of pages with the same content.
For instance, users might search for your website address with www (www.mysite.com) or without www (mysite.com).
While both the URLs are for the same webpage, search engines will see them as 2 separate pages. You will need to set a canonical tag (rel=”canonical”) to specify which version you’d like Google to index.

Why Are Canonical URLs Important for SEO?
The main reason for using canonical URLs is to prevent duplicate content on your website. Having duplicate content can be bad for WordPress SEO.
If search engines find two or more pages with the same content, then they won’t know which one to show in the search results. Because of this, all of these pages end up ranking lower.
Another issue caused by duplicate content is keyword cannibalization. This happens when multiple pages on the same website start competing for the same keyword, which can harm their rankings.
If a canonical URL isn’t set for duplicate pages, then Google will use its best judgment to choose a main page. The issue with this is that it may not be the page that you want search engines to index.
That’s why it’s important to set canonical URLs and tell search engines your preference. This way, Google will know which page to index and show in the search results.
How to Set Up Canonical URLs in WordPress
To set a canonical URL, you will need to enter canonical tags into the HTML of your page.
This usually requires adding the rel=”canonical” tag to the <head> section of any duplicate page. The URL should look like this:
<link rel="canonical” href=“https://mywebsite.com/canonical-page/" />
That said, messing around with your website code and HTML can be tricky, as any mistake can break your site’s design and functionality. An easier way to add canonical tags is by using an SEO WordPress plugin.
For instance, you can use the All in One SEO (AIOSEO) plugin, which helps you optimize your site for search engines without any technical knowledge.
AIOSEO offers settings in the WordPress content editor where you can define the main page you want search engines to index.
First, you will need to install and activate the AIOSEO plugin. If you need help then please see our guide on how to install a WordPress plugin.
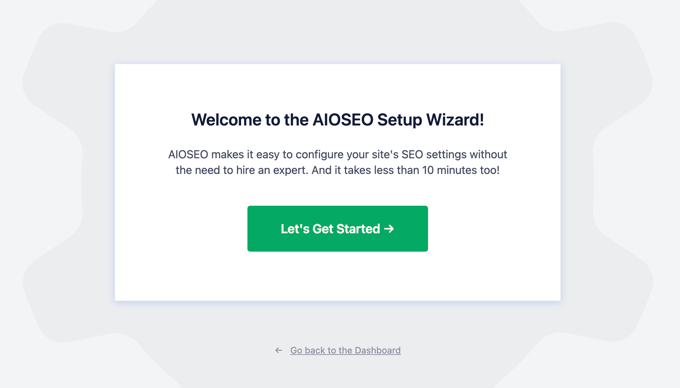
Upon activation, you will see the setup wizard. Simply follow the onscreen instructions to set up the plugin. For more details, please see our guide on how to set up All in One SEO for WordPress.

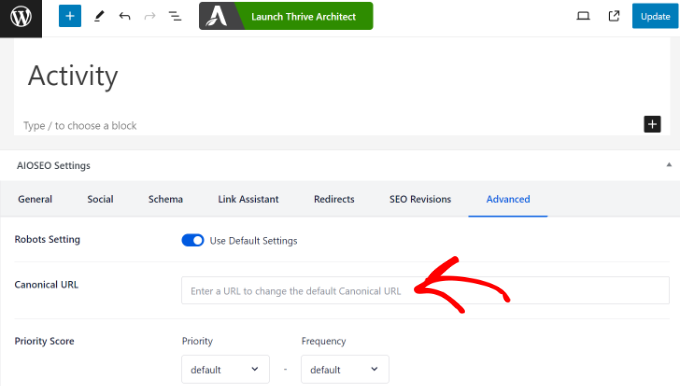
After that, simply edit any duplicate blog post or page and scroll down to the ‘AIOSEO Settings’ meta box.
From here, switch to the ‘Advanced’ tab and then enter the primary link in the ‘Canonical URL’ field.

Once that’s done, go ahead and update the page or post.
You can now repeat this step and add canonical tags to any other duplicate or near-duplicate pages in WordPress.
Canonical URL Best Practices for SEO
It is important to properly configure canonical tags on your site, or you might confuse Google and other search engines.
To help you out, here are some best practices for using canonical tags and improving your site’s SEO.
1. Use Only 1 Canonical URL per Page
When specifying a canonical URL, it is best to use only one link per page. Otherwise, search engines will get confused and will not know which page version to index.
Another common mistake to avoid is adding two canonical tags within the same page’s HTML code. This usually happens if you manually add the canonical tag and accidently also use a WordPress plugin to add canonical URLs.
2. Specify Trailing Slashes in the Canonical URL
You’ll need to decide if you want to use a trailing slash symbol (/) at the end of your canonical URL or not.
- Trailing slash: https://mywebsite.com/
- Without trailing slash: https://mywebsite.com
Google and other search engines will see URLs with and without a trailing slash as two separate URLs. So, when setting a canonical URL, make sure that you pick either a trailing slash or a non-trailing slash link, but not both.
3. Set WWW vs Non-WWW Canonical URLs
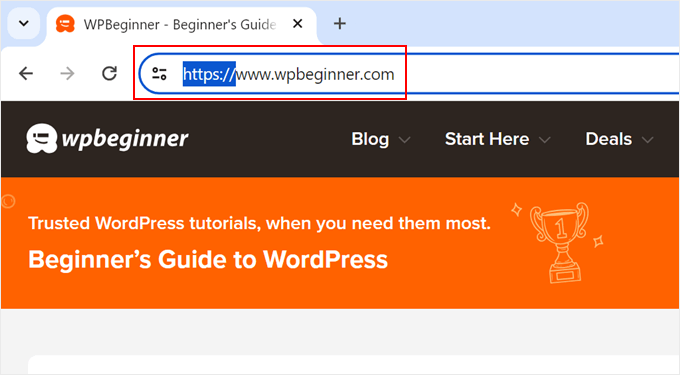
Just like trailing slashes, using WWW or non-WWW in URLs can also signal duplication to search engines.
For instance, your website links could look like this:
- WWW: https://www.mywebsite.com/
- Non-WWW: https://mywebsite.com/
It is best to choose one version of your URL and keep it consistent across your website.
4. Using the Correct Protocol in Canonical URLs
Similarly, you will also need to use the correct domain protocol when defining a canonical URL.
For example, if your site uses the HTTPS protocol, then make sure to use that in the canonical URL.

To learn more, please see our guide on how to move WordPress sites from HTTP to HTTPS.
We hope this article helped you learn more about canonical URLs in WordPress. You may also want to see our Additional Reading list below for related articles on useful WordPress tips, tricks, and ideas.
If you liked this article, then please subscribe to our YouTube Channel for WordPress video tutorials. You can also find us on Twitter and Facebook.


