Tras años construyendo sitios web con WordPress, hemos aprendido lo importante que es tener una configuración local de WordPress en tu ordenador.
Tener WordPress en tu máquina personal te permite experimentar con nuevas funciones sin poner en riesgo tu sitio web, profundizar en el desarrollo de WordPress e incluso crear sitios web completos antes de que salgan a la luz. Es como tener una caja de arena privada para todos tus proyectos de WordPress.
Si eres usuario de Windows, existen numerosas formas de configurar WordPress localmente. Pero lo hemos reducido a los dos métodos más sencillos. En esta guía, te mostraremos cómo instalar WordPress fácilmente en un ordenador con Windows, independientemente de la versión que estés utilizando.
¿Por qué debería instalar WordPress en Windows?
Si eres usuario de Windows, instalar WordPress localmente en tu ordenador te ofrece varias ventajas.
Una instalación local de WordPress crea un entorno de pruebas que no afecta a su sitio web. Esta configuración, a menudo llamada servidor local o localhost, es tu patio de recreo personal para WordPress.
Los desarrolladores de WordPress utilizan habitualmente instalaciones locales para su trabajo. Por ejemplo, pueden utilizarla para experimentar con nuevos plugins o temas o probar el sitio antes de actualizarlo al editor de bloques Gutenberg.
Pero no es sólo para los profesionales. Si eres nuevo en WordPress, una configuración local es perfecta para aprender. Puedes explorar funciones, probar temas y plugins, y experimentar libremente sin preocuparte de romper un sitio activo.
Es importante tener en cuenta que cuando instalas WordPress localmente en Windows, sólo tú puedes ver el sitio. Si quieres crear un sitio web público, necesitarás un nombre de dominio y alojamiento web.
Ahora, técnicamente, puedes instalar WordPress en Windows usando XAMPP, y hemos escrito un tutorial sobre ello antes.
Dicho esto, hemos encontrado 2 formas aún más sencillas que XAMPP para configurar un entorno local de WordPress, por lo que son ideales para principiantes o usuarios que necesitan crear un sitio local rápidamente. Puedes hacer clic en el enlace de abajo para saltar al método que te interese:
Método 1: Instalar WordPress en Windows con Studio (rápido y sencillo)
Para el primer método, utilizaremos Studio. Es un software local de WordPress hecho por Automattic, la empresa que gestiona y dirige WordPress.com, que es un constructor de sitios web basado en el software de WordPress.
Hablaremos primero de este método porque es mucho más rápido y sencillo de seguir, lo que lo hace perfecto para los principiantes.
En primer lugar, tienes que abrir el sitio web Studio by WordPress.com. A continuación, haz clic en el botón “Descargar para Windows”.
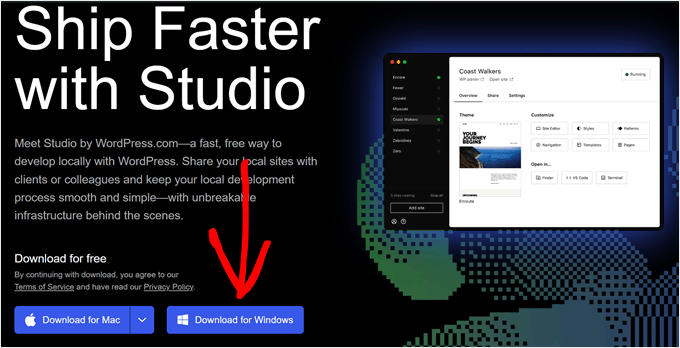
Una vez hecho esto, sólo tienes que abrir el archivo descargado para iniciar la instalación.
Aparecerá una ventana emergente que le indicará que se está instalando la aplicación.
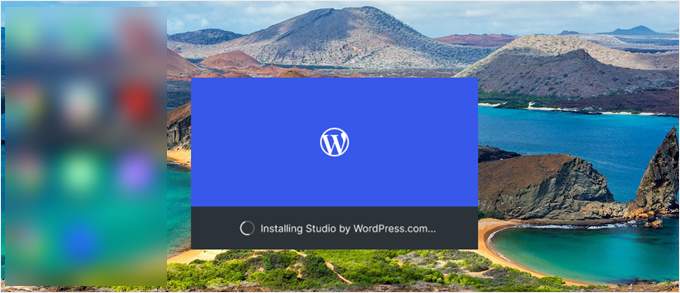
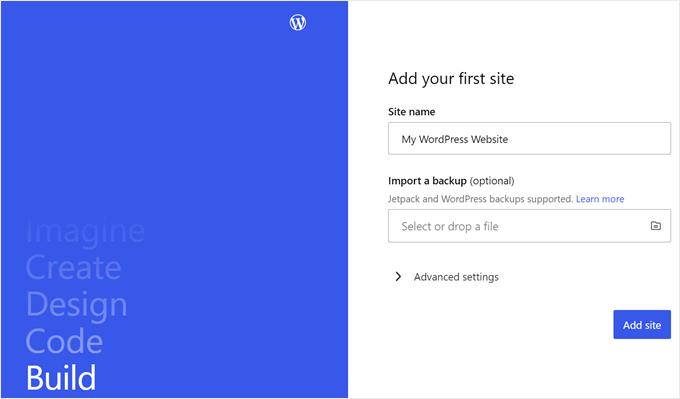
Una vez hecho esto, puede añadir su primer sitio.
Para ello, introduce el nombre de tu nuevo sitio local de WordPress y haz clic en “Añadir sitio”. Puedes nombrar el sitio como quieras siempre que te ayude a identificarlo fácilmente.
Ahora debería ver el escritorio de WordPress local.
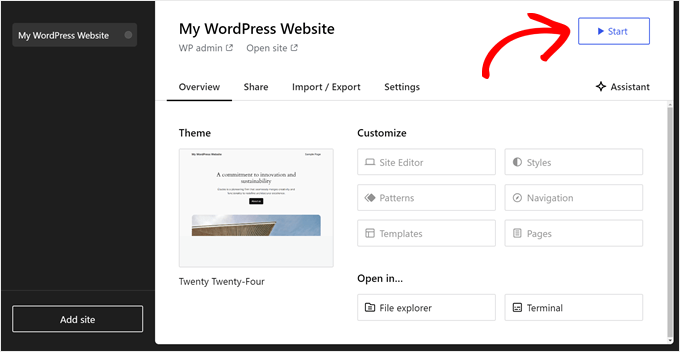
Para acceder a tu escritorio de WordPress y editar tu sitio web, sólo tienes que hacer clic en el botón “Inicio” situado en la esquina superior derecha. De este modo, podrá acceder a su sitio web local desde su ordenador.
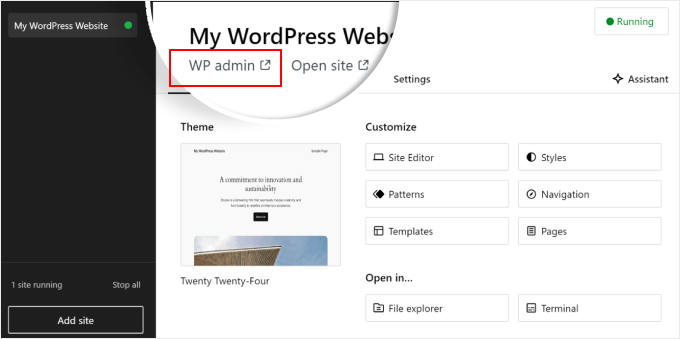
Una vez que el botón “Iniciar” cambie a “Ejecutando”, puede hacer clic en el enlace “WP Admin” en la parte superior izquierda de la página.
Esto le llevará a su página local de administración de WordPress.
Y eso es más o menos todo para la configuración. Vamos a explorar los otros ajustes que pueden ser necesarios a medida que construye su sitio web local.
Como puedes ver en la pestaña ‘Visión general’, puedes acceder inmediatamente al menú completo del editor de WordPress directamente desde el escritorio de Studio. También puedes hacer clic en “Explorador de archivos” para abrir las carpetas y archivos de tu sitio web de WordPress y hacer clic en “Terminal” para administrar tu sitio web mediante WP-CLI.
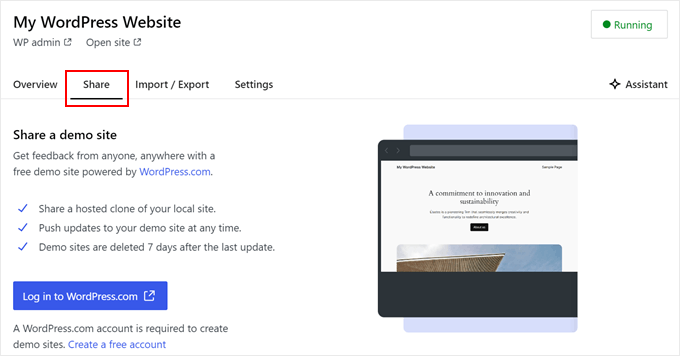
Si cambias a la pestaña “Compartir”, puedes acceder a tu cuenta de WordPress.com, clonar tu sitio web local y subirlo a los servidores de WordPress.com. Esto hará que el sitio clonado esté online temporalmente, lo que resulta útil para compartir sitios de demostración con tus clientes o miembros del equipo.
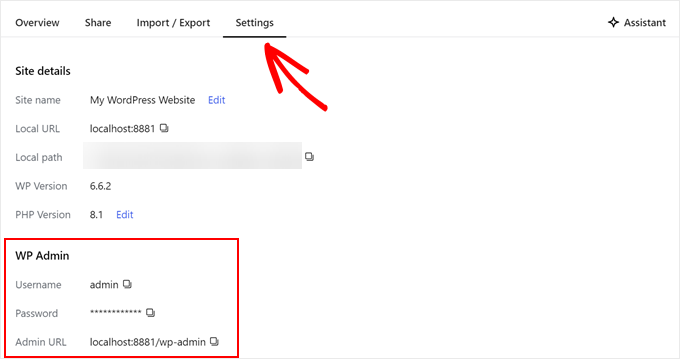
A veces, es posible que desee iniciar sesión en su sitio web local directamente a través de su navegador en lugar de utilizar Studio. En ese caso, necesita conocer sus credenciales de wp-admin.
Para encontrarlos, puede cambiar a la pestaña “Configuración” y encontrar allí su nombre de usuario, contraseña y URL de inicio de sesión de administrador de WordPress.
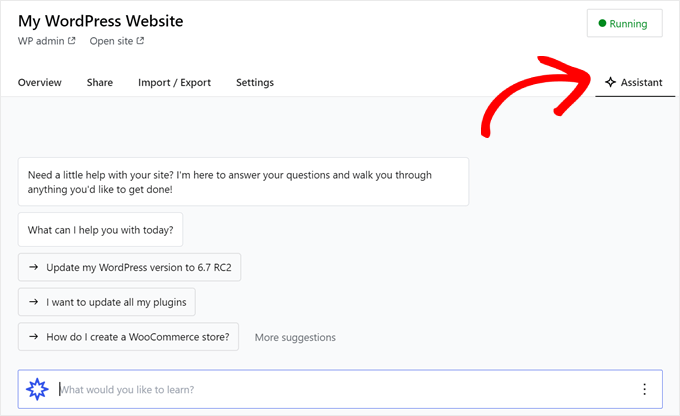
Otra característica interesante de Studio es su chatbot de inteligencia artificial integrado, con el que puedes comunicarte pulsando el botón “Asistente”.
Aquí puedes pedir ayuda a Studio para tareas como actualizar todos tus plugins a la vez, actualizar la versión principal de WordPress o crear código para un bloque personalizado.
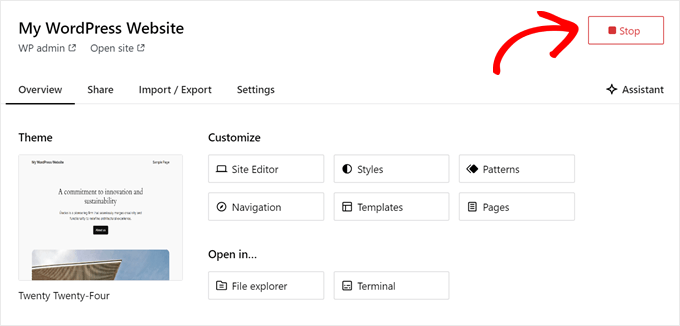
Cuando hayas terminado de trabajar en tu sitio local, sólo tienes que pasar el ratón por encima del botón “En ejecución” de la esquina superior derecha hasta que ponga “Detener”.
A continuación, haga clic en el botón para detener el sitio web.
Una desventaja de Studio es que no puedes configurar el entorno de WordPress a tu gusto. Esto significa que tienes que utilizar la versión de PHP, el servidor web y la base de datos que se han preseleccionado para ti.
Esto puede ser un inconveniente si necesitas probar tu sitio web o plugin con configuraciones de servidor específicas.
Si necesita un mayor control sobre su entorno local de WordPress o necesita que su configuración local coincida con una configuración específica del servidor en vivo, entonces puede consultar el siguiente método usando WP Local.
Método 2: Instalar WordPress en Windows Usando WP Local (Más Personalizable)
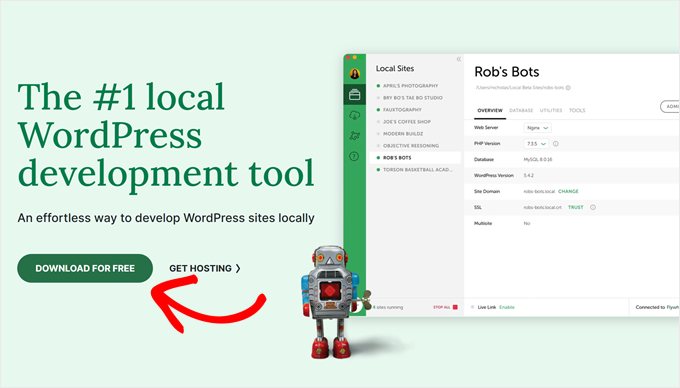
En primer lugar, debe descargar e instalar el software Local WP en su ordenador Windows. Simplemente vaya al sitio web de Local WP y haga clic en el botón “Descargar gratis”.
A continuación, aparecerá una ventana emergente en la que tendrás que seleccionar tu plataforma. Elige “Windows” en el menú desplegable.
A continuación, puedes introducir tus datos, como nombre y apellidos, dirección de correo electrónico laboral y número de teléfono, para descargar el software.
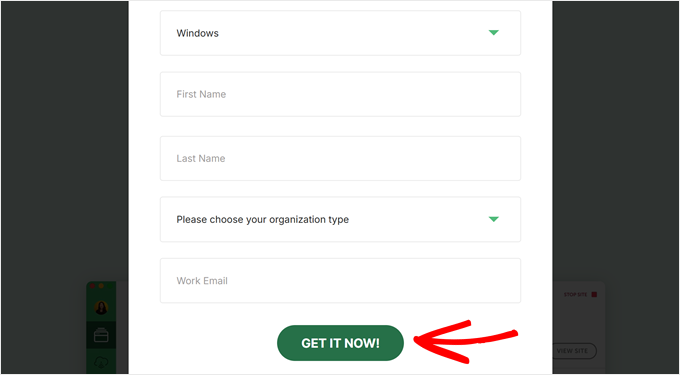
Una vez introducidos los datos, basta con hacer clic en el botón “Consíguelo ahora”.
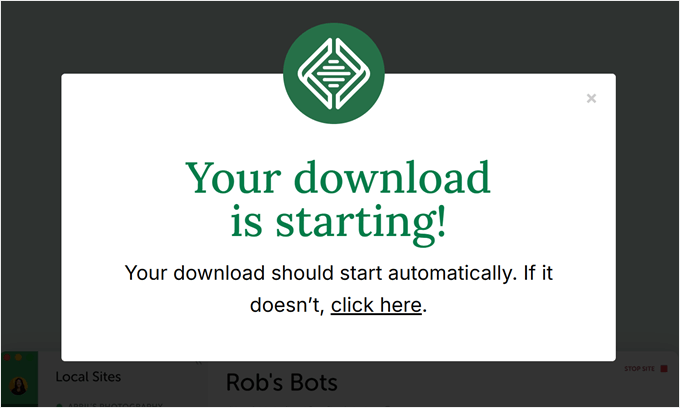
A continuación, el software se descargará automáticamente en tu ordenador. De lo contrario, puede hacer clic en el enlace “haga clic aquí” para iniciar la descarga.
Una vez descargado el archivo, inicie el asistente de instalación.
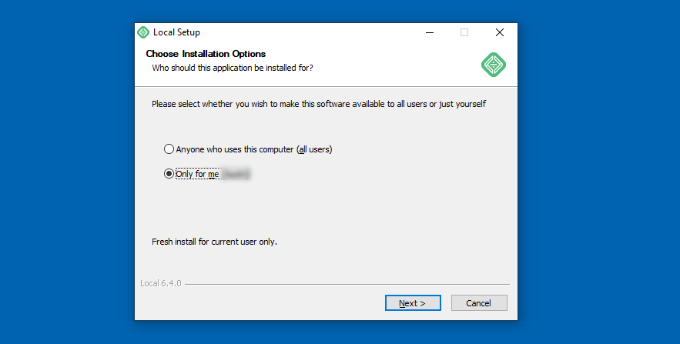
Ahora, tendrás que seleccionar si quieres instalar el software para todos los usuarios o sólo para ti.
Una vez seleccionada una opción, pulse el botón “Siguiente”.
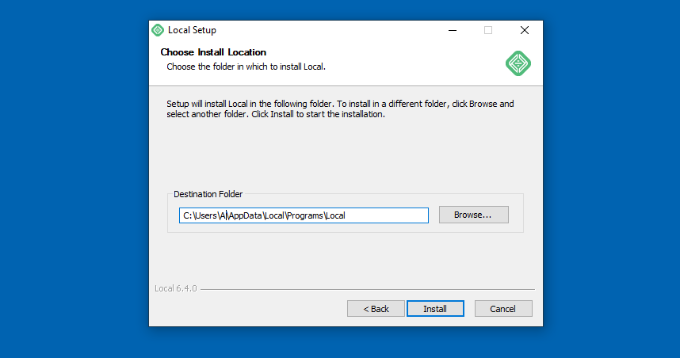
En el siguiente paso, puede seleccionar la “Carpeta de destino” donde se instalará el software.
Basta con hacer clic en el botón “Examinar” para establecer la ruta y, a continuación, hacer clic en el botón “Instalar”.
El software Local WP se instalará en tu ordenador Windows.
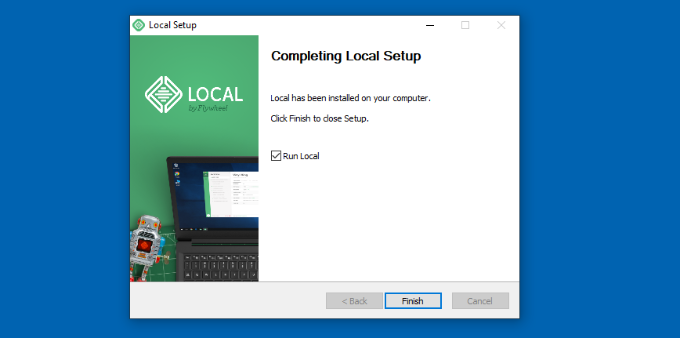
Una vez hecho esto, puede marcar / comprobar la casilla de verificación “Ejecutar localmente” y hacer clic en el botón “Finalizar” del asistente de configuración.
El software se iniciará ahora en su dispositivo Windows.
El siguiente paso es añadir un nuevo sitio web local. Para ello, basta con hacer clic en el botón “+” de la parte inferior.
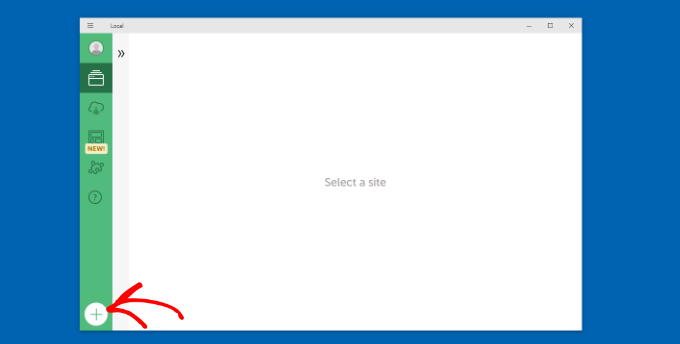
Después, puede crear un sitio en el software Local.
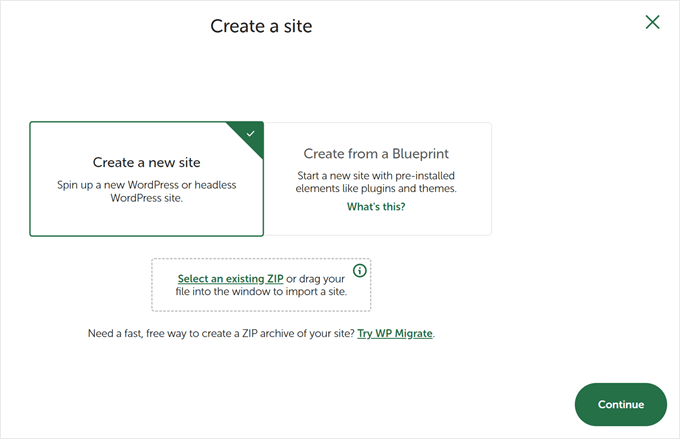
Seleccione la opción “Crear un nuevo sitio” y haga clic en el botón “Continuar”. También hay opciones para crear el sitio desde un plano o un archivo de sitio web existente, pero vamos a ir con la primera opción en aras de la demostración.
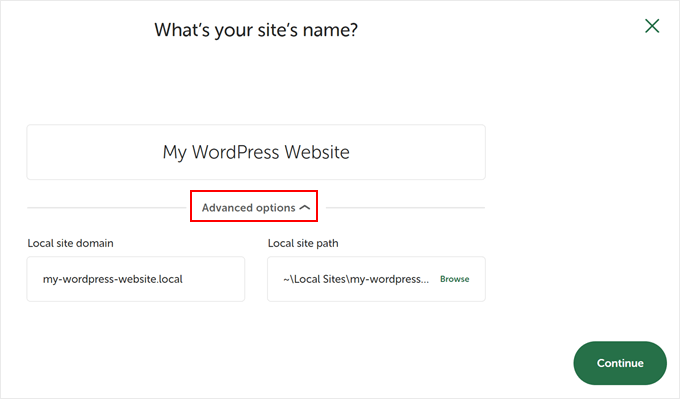
A continuación, puede introducir un nombre para su sitio web local, como “Mi sitio web WordPress”.
También hay opciones avanzadas en las que puede introducir el dominio del sitio local y la ruta del sitio local. Por defecto, el dominio utilizará el título de su sitio web, pero separado por guiones.
Una vez que haya terminado, simplemente haga clic en el botón “Continuar”.
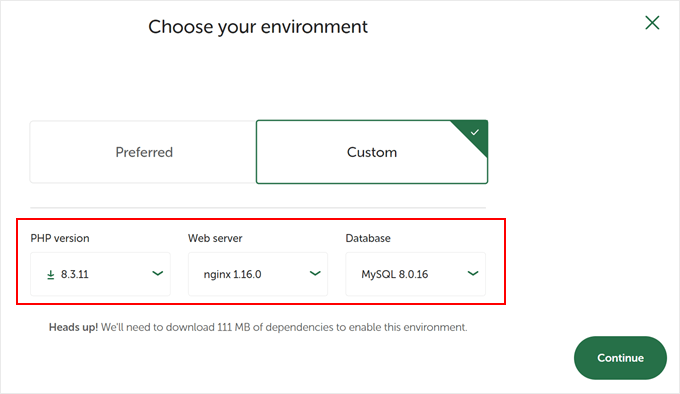
Después, tendrá que elegir un entorno para su sitio web local.
Puede utilizar el entorno ‘Preferido’, en el que el software seleccionará automáticamente la versión de PHP, el servidor web y la versión de MySQL. Por otro lado, también puedes seleccionar ‘Personalizado’ e introducir los detalles del entorno.
Local WP ofrece las últimas versiones de PHP. En cuanto al servidor web, puedes elegir entre Nginx o Apache. También puedes seleccionar entre MySQL o MariaDB para las bases de datos.
Tenga en cuenta que algunas versiones de PHP, servidores web y bases de datos requieren la descarga de algunas dependencias para que funcionen correctamente.
A continuación, puedes introducir un nombre de usuario y una contraseña de WordPress para tu sitio web local. Además, también tienes la opción de elegir una dirección de correo electrónico de WordPress en la que recibirás todas las notificaciones por correo electrónico.
Aparte de eso, hay una opción avanzada en la que el programa te preguntará si tienes una red multisitio de WordPress. Si no es así, haz clic en “No”.
Tras introducir estos datos, basta con hacer clic en el botón “Añadir sitio”.
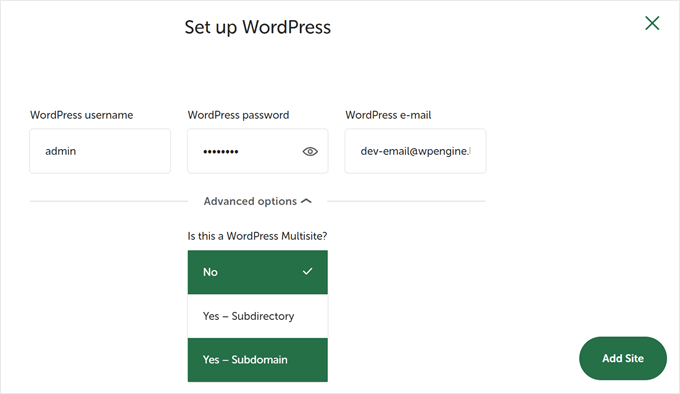
El programa instalará WordPress y establecerá su sitio web.
Para iniciar el sitio web local, haz clic en el botón “Iniciar sitio” situado en la esquina superior derecha.
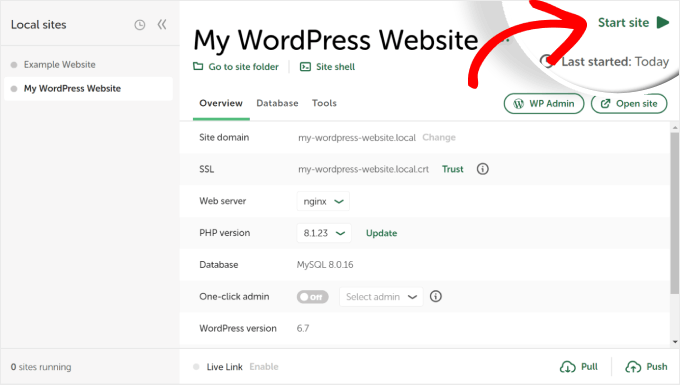
A continuación, haz clic en el botón “WP Admin” y verás la página de inicio de sesión del administrador de WordPress.
Sólo tiene que introducir el nombre de usuario y la contraseña que introdujo anteriormente al configurar el sitio web local y, a continuación, hacer clic en el botón “Iniciar sesión”.
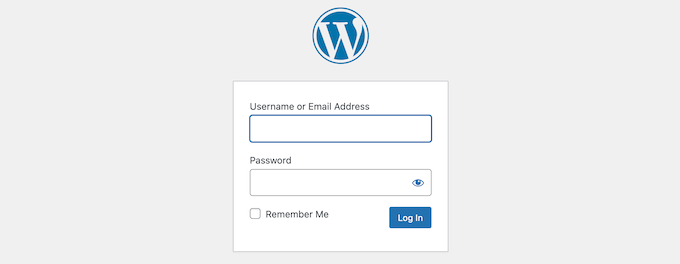
Ahora puede editar su sitio web local en su ordenador Windows.
Cuando haya terminado, no olvide detener el sitio web desde el software WP local al hacer clic en el botón “Detener sitio”.
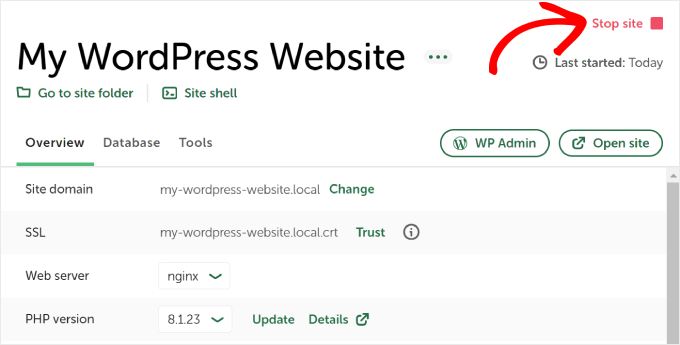
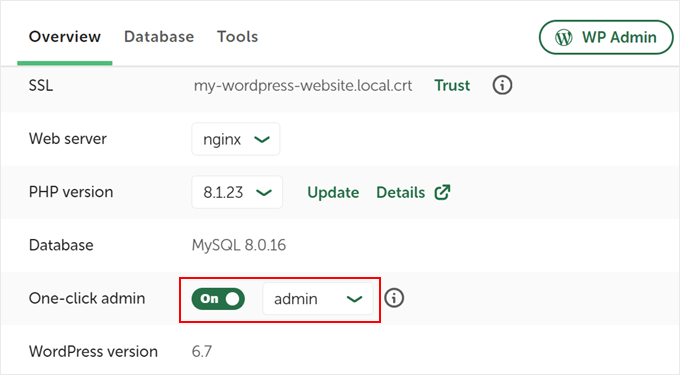
Consejo profesional: Si desea omitir el proceso de inicio de sesión, puede habilitar un inicio de sesión de administrador con un solo clic en Local WP.
Para ello, vuelve al panel de control de Local WP y activa el botón “One-click admin” hasta que aparezca “On”. A continuación, en el menú desplegable, seleccione el usuario administrador que puede utilizar esta función de inicio de sesión con un solo clic.
Alternativa: Utiliza WordPress Playground para probar temas, plugins y mucho más
WordPress Playground es una herramienta innovadora que te permite experimentar con WordPress directamente en tu navegador web. Es una caja de arena virtual donde puedes probar nuevos temas, plugins y funciones de WordPress sin afectar a ningún sitio web real.
WordPress Playground difiere de un entorno local de WordPress en varios aspectos clave.
En primer lugar, no requiere instalación en tu ordenador y se reinicia después de cada uso, a diferencia de las instalaciones locales permanentes. Puedes acceder a ella desde cualquier dispositivo con un navegador, mientras que las instalaciones locales están atadas a un ordenador.
Mientras que WordPress Playground es ideal para pruebas rápidas y aprendizaje, un entorno local de WordPress en su ordenador Windows ofrece más flexibilidad para proyectos de desarrollo a largo plazo.
Para obtener información detallada, consulte nuestra guía sobre cómo utilizar WordPress Playground en su navegador.
He instalado WordPress en mi ordenador Windows, ¿y ahora qué?
Ahora que ya tienes WordPress en tu ordenador, aquí tienes algunas cosas que puedes hacer:
- Aprenda trucos y consejos básicos de WordPress para utilizar mejor su sitio.
- Pruebe diferentes temas de WordPress para ver cómo puede quedar su sitio.
- Instale y pruebe los plugins imprescindibles de WordPress para añadir nuevas funciones a su sitio.
- Aprenda a solucionar errores comunes de WordPress por su cuenta.
- Pruebe diferentes creadores de páginas de arrastrar y soltar para que su sitio tenga un aspecto atractivo.
- Aprenda a restablecer la contraseña de administrador de WordPress en localhost para recuperar el acceso a su sitio.
- Establezca flujos de trabajo automatizados para facilitar la gestión de su sitio.
- Infórmese sobre la seguridad de WordPress para mantener su sitio a salvo de los piratas informáticos.
- Traslade su sitio local de WordPress a un servidor activo cuando esté listo para compartirlo con todo el mundo.
Esperamos que este artículo te haya ayudado a aprender cómo instalar WordPress localmente en un ordenador con Windows. Puede que también quieras ver nuestro artículo sobre cómo instalar WordPress localmente en un ordenador Mac y nuestra guía definitiva para crear un sitio de prueba de WordPress.
If you liked this article, then please subscribe to our YouTube Channel for WordPress video tutorials. You can also find us on Twitter and Facebook.


Mituka
Awesome Stuff. Worked like a charm.
WPBeginner Support
Glad our guide could help
Admin
Noreen Naz
Great.. but i want to make another data base what should i do?? should i register again?? reply as soon as possible please
WPBeginner Support
For making another database for your local install, rather than visiting localhost/yoursite you would go to localhost which should have a link in the bottom left to get you to phpMyadmin
Admin
Asadullah
Great Tutorials:
My eyes have been opened.
That was all,which I was looking for.
Best….
WPBeginner Support
Glad our article could help
Admin
pawan
nice article
WPBeginner Support
Glad you like our article
Admin
Jan
Great tutorial. Worked straightaway – thanks!
Steve
Hey guys.
Thought you should know that your tutorials are being used by a scammer on YouTube to gain affiliate commissions from Bluehost.
Did you upload this video onto this channel? –
WPBeginner Support
Hi Steve,
No, we did not. They just downloaded and reuploaded it on their channel. Thank you for notifying us.
Admin
Bharat Suneja
Why not use IIS instead of Apache? It’s a native web server on Windows and offers much better functionality and manageability, particularly for Windows users/admins who’s used to managing Windows via the GUI tools, commands and/or PowerShell.
WPBeginner Support
Hi Bharat,
Most users would move their websites to a live server, or create a development environment for a site. Most likely those hosting providers will be running Apache.
Admin
Bob
How much load does running this take on my machine? Could I put on a spare machine on my local network and access it via my LAN?
WPBeginner Support
Hi Bob,
Depends on how fast your machine is. Yes, you can do that but that would require some extra steps to configure your network and server.
Admin
Noz
WaMp is bulky, full of problems and never know when it will break and you lose your databases… never use it.
Sharon Y
This site can’t be reached localhost refused to connect.
Search Google for localhost mysite
ERR_CONNECTION_REFUSED
Please help!
WPBeginner Support
Hi Sharon,
This means that WAMP is not running Apache. You need to restart it and then retry.
Admin
Sharon Y
I can’t login to localhost/mysite/
Forbidden
You don’t have permission to access /mysite/ on this server.
Apache/2.4.35 (Win64) PHP/7.2.10 Server at localhost Port 80
Please help!
SULAIMAN OLUWO
while installing i received warning message which was not part of the expected actions stated in the WAMP instruction steps above,. It went thus: do you want this programme (WAMP) to make changes to your pc….
Julio
Hi
I followed every step the tutorial said, but when i enter the db info before installing wordpress, i get an “error estabilishing connection to the database”.
WAMP is running ok, apache green, MySQL green, i created the database by accessing PhpMyAdmin, all the info is exactly like written in the tutorial… i searched all over the web and found absolutely nothing related to this error.
Can someone help me out?
WPBeginner Support
Hi Julio,
The only reason you will get this error is when WordPress is unable to connect to your database. You need to check your database settings to make sure they are correct.
Admin
Tracy
I’m trying to upload a theme but when I click to upload the zip file from my computer I get a message saying “the link you followed has expired” please try again.
WPBeginner Support
Hi Tracy,
Most likely, your theme file size is too big and it gets killed during the upload. Please try the steps in our tutorial on increasing file upload size limit in WordPress.
Admin
Hazel Andrews
I’m getting that error as well… brill thanks for the link to follow!
Tanja
Hi, how to start my word press today. I installed it yesterday, using your instruction, but today I cannot find any icon or anything that will help me to start with it
WPBeginner Support
Hi Tanja,
You will first need to start WAMP and after that you will be able to open your site in the browser.
Admin
Henry
Awesome. This worked perfectly. Thanks for sharing
Mike
I want to install WordPress on my W7 computer for experimental purposes.
But I want to use WordPress 4.9.1, instead of the latest version.
This is because I have an excellent tutorial that’s based on 4.9.1.
Is this possible?
WPBeginner Support
Hi Mike,
Yes it is possible. You can download the older versions of WordPress from official website and install it following the instructions above.
Admin
Nina
Every time I try to open up Wamp, it keeps giving me this message: “Error: This program can only be installed on versions of Windows designed for the following processor architectures: x64”
My computer is a Windows 7 32-bit operating system and I’ve downloaded both the 62-bit and 32-bit wamp version yet it gives me the same message. It’s so frustrating because I’ve installed Wamp on my computer last year, then uninstalled it this year. Now, I’m trying to install it again and it gives me the same message over and over again. Does anyone know how to fix this? It’s literally driving me nuts. I’ve got a link below of the message if you want to see it:
Aasim Unia
Thank you for sharing ! it worked in first try.
Jim Zapapas
Installed successfully 1st try.
Thank you!
Jordens Cadet
Thanks so much, much better than silent videos on youtube.
Jazz
Thanks a ton for sharing your knowledge with all of us here!
WordPress is installed successfully for me
But, now my skype has stopped…it says MSVCP140.dll missing. How can I fix this without causing any trouble to WordPress and Wamp functioning?
Aniket Thanage
Perfect tutorial…thanks a lot
Lucky
Thanks for this. but do i need to install wordpress again each time I put on my laptop to edit my site or create a new site? pls reply asap. thanks
henry paul
The WampServer site has two versions of the software – 32 BITS or 64 BITS. Click on the version you prefer to download.
Click on “download directly,” and you’ll be taken to the website. The download will automatically start in 5 seconds.
Tristan
Got it working without a hitch! Thank you so much for this. But I have another question:
As a web developer I will be creating multipule websites. If I use local WP to create 1 site, do I have to create a separate DP for each new website? And if I eventually wish to attatch it to a domain/host, is there another tutorial that I can follow that will teach me to do just that? Thank you!!
Chandan
i changed wordpress name to mysite but it shows below error
Further, I tried pasting http;//localhost/wamp64 in my browser, it gives the error 404. Also, I want to build my website locally before I go live. Please assist me.
Chandan
Further, I tried pasting http;//localhost/wamp/mysite but shows error. in my browser, it gives the error 404 with below mentioned
The requested URL /mysite/ was not found on this server.
Apache/2.4.23 (Win32) PHP/5.6.25 Server at localhost Port 80
Rudy
Wow! without any problems Wamp on my pc and after that my website local!
Thank you very much for your time and effort to write this tutorial!
Alhaji ZiC
your guideline perfectly worked for me while installing wampserver and wordpress though it was not easy but i combined persistence and trial and error till i see the end.
A million pounds applause there.
but, please, i have no knowledge on web designing, so, what step can i take to design a good looking and professional website?
kind regard
sahil
Not able to download wampserver from the link.
It says file has been removed.
Please provide the new link.
WPBeginner Support
Hi Sahil,
The link is working. May be it was a temporary error. Please try again.
Admin
kym
Hi, If i want say try out with a Thrive theme and their page builder would it be possible with WAMP?
WPBeginner Support
Hi kym,
Yes you can try it on your local server using WAMP.
Admin
Lyson
Im getting password is wrong.
I need your help guys.
Steve Baer
Thanks for this guide, it was smooth sailing…..everything installed perfectly.
Elliot McClintock
Thank for the tutorial. Everything went smooth in the first attempt.
I have a secondary question: If I want to create a second test website (e.g. mysite2), can I do it within same WAMP64\www folder or would I have to repeat the whole process from start on a separate root folder?
Thanks again.
Muhammad Bilal
there are two methods one is you can use single wordpress for your second website and the second is repeate the same process but the wordpress folder name should be different and database also…
Vegard Svingen
Hoping this will be my breakthrough
Gimel
Thanks a lot for this tutorial, it was extremely helpful. I do however have on issue that is causing me a lot of frustration right now. My wordpress installation is moving extremely slow. it takes about 8 – 10 seconds to perform any action in wordpress. I tried everything i found online, I disabled the cgi_module, I changed localhost to 127.0.0.1 in the wp-config file. I also tried anther solution I found online concerning adding additional code to the wp-config file, nothing works. it’s taking me forever to get anything done. I would deeply appreciate any help I can get on this matter.
Aditya Choudhary
Thank you for this tutorial, this is very helpful for me. Thank you.
Samuel
Thanks for this tutorial, the installation process went smoothly but after installation i tried installing some themes and i activate the themes but they wont take effect please does any body know what i can do about this?
Aika
Hi!, Wondering what to do with this error.
The program can’t start becauseMSVCR110.dll is missing from your computer. Try reinstalling the program to fix this problem.
been reinstalling several times. Thanks in advance!
Robert Wheeler
You need to
1) Uninstall WAMP
2) Install a number of Microsoft C++ Redistributables – do a Google search for this. This will install a number of .DLL files which are needed for WAMP to run.
3) Reinstall WAMP.
I’m not sure why this information is not included with the instructions on how to install WAMP, it is a regular error.
Margie
FANTASTIC! Went off without a hitch! Had trouble with XAMPP install, so decided to try WAMP instead, and your instructions had me up and running in no time…thanks sooo much!
Eddie
Hi,
I pasted the wordpress folder into the C:\wamp64\www folder
and renamed the wordpress folder to mysite. I opened the web browser and typed the url on my browser, http://localhost/mysite/.
The browser shows a blank page so I can’t start the wordpress install. I have changed the local host to 8080 via the Wamp tool menu. I can’t seem to go further, can someone advise me. Thanks
Trevor
If you changed the WAMP (apache) port, you’ll have to include the port number in the URL. ex: localhost:8080/mysite/
Eddie
Hi Trevor,
Thanks it worked.
Regards
Eddie
Eddie
Hi Trevor, Thanks it worked.
Regards
Eddie
Gaz Davies
Can I ask why you would change the port on a local host?
thanks
M.
my local wordpress is settings are for http, while my current online version is set at https. if i use duplicator, will i end up having http and have to force http to https redirect?
Sunday Adeniran
WAMP could not fully function on my 2010 hp laptop. It complained of missing file MSVCR120.dll. Only one service in running. Can somebody help me?
Sunday Adeniran
I was able to solve this problem by installing a lower version of WAMP server (2.5). It then worked well. Many thanks.
Victor Escobar
Great tutorial, but when I installed WamServer 3.1.0, I get a slightly different tools menu, without phpMyAdmin being listed. The following is what’s on the Tools menu, under the Tools section:
– Restart DNS
– Check httpd.conf syntax
– Check state of services
– Check DNS search order
– Check Compiler VC, compatibility and ini files
– Show VirtualHost examined by Apache
– Show Apache loaded modules
– Delete unused versions
The other sections have to do with assigning port numbers and purging logs.
Jeremiah
To access phpMyAdmin, left-click on the WampServer icon in windows taskbar, and you will find it on the list that will appear, but if you right-click on the icon instead, you will get the list you mentioned earlier.
Sheraz Ali
One of the best guide. it works smoothly.
justine
Many thanks – Very easy to follow and worked like a dream
Sunday
Finally, guys. I got it done. Simple but stylish. Many thanks to our friends in WPbeginner.
joran
sir there was an error ..MSVR.dll what is the solution of this error sir? tnx
Sunday Adeniran
It was the same error I got. So what is the solution?
Nanya
whoa! It was a success. Well detailed. I love this, I had no problem at all, it’s very comprehensive. Thanks a lot.