Tras años construyendo sitios web con WordPress, hemos aprendido lo importante que es tener una configuración local de WordPress en tu ordenador.
Tener WordPress en tu máquina personal te permite experimentar con nuevas funciones sin poner en riesgo tu sitio web, profundizar en el desarrollo de WordPress e incluso crear sitios web completos antes de que salgan a la luz. Es como tener una caja de arena privada para todos tus proyectos de WordPress.
Si eres usuario de Windows, existen numerosas formas de configurar WordPress localmente. Pero lo hemos reducido a los dos métodos más sencillos. En esta guía, te mostraremos cómo instalar WordPress fácilmente en un ordenador con Windows, independientemente de la versión que estés utilizando.
¿Por qué debería instalar WordPress en Windows?
Si eres usuario de Windows, instalar WordPress localmente en tu ordenador te ofrece varias ventajas.
Una instalación local de WordPress crea un entorno de pruebas que no afecta a su sitio web. Esta configuración, a menudo llamada servidor local o localhost, es tu patio de recreo personal para WordPress.
Los desarrolladores de WordPress utilizan habitualmente instalaciones locales para su trabajo. Por ejemplo, pueden utilizarla para experimentar con nuevos plugins o temas o probar el sitio antes de actualizarlo al editor de bloques Gutenberg.
Pero no es sólo para los profesionales. Si eres nuevo en WordPress, una configuración local es perfecta para aprender. Puedes explorar funciones, probar temas y plugins, y experimentar libremente sin preocuparte de romper un sitio activo.
Es importante tener en cuenta que cuando instalas WordPress localmente en Windows, sólo tú puedes ver el sitio. Si quieres crear un sitio web público, necesitarás un nombre de dominio y alojamiento web.
Ahora, técnicamente, puedes instalar WordPress en Windows usando XAMPP, y hemos escrito un tutorial sobre ello antes.
Dicho esto, hemos encontrado 2 formas aún más sencillas que XAMPP para configurar un entorno local de WordPress, por lo que son ideales para principiantes o usuarios que necesitan crear un sitio local rápidamente. Puedes hacer clic en el enlace de abajo para saltar al método que te interese:
Método 1: Instalar WordPress en Windows con Studio (rápido y sencillo)
Para el primer método, utilizaremos Studio. Es un software local de WordPress hecho por Automattic, la empresa que gestiona y dirige WordPress.com, que es un constructor de sitios web basado en el software de WordPress.
Hablaremos primero de este método porque es mucho más rápido y sencillo de seguir, lo que lo hace perfecto para los principiantes.
En primer lugar, tienes que abrir el sitio web Studio by WordPress.com. A continuación, haz clic en el botón “Descargar para Windows”.
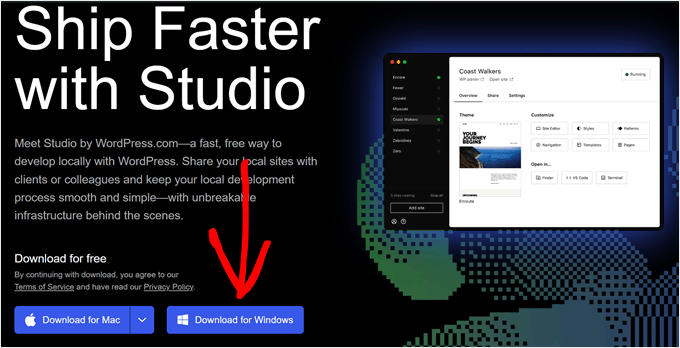
Una vez hecho esto, sólo tienes que abrir el archivo descargado para iniciar la instalación.
Aparecerá una ventana emergente que le indicará que se está instalando la aplicación.
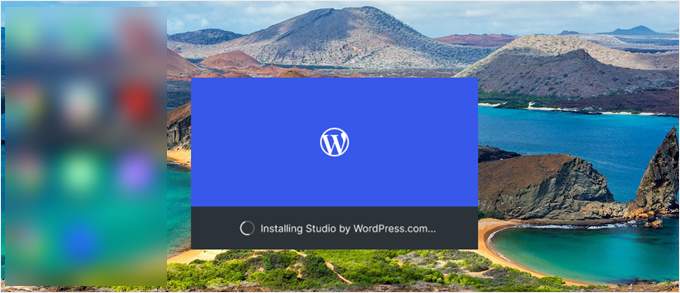
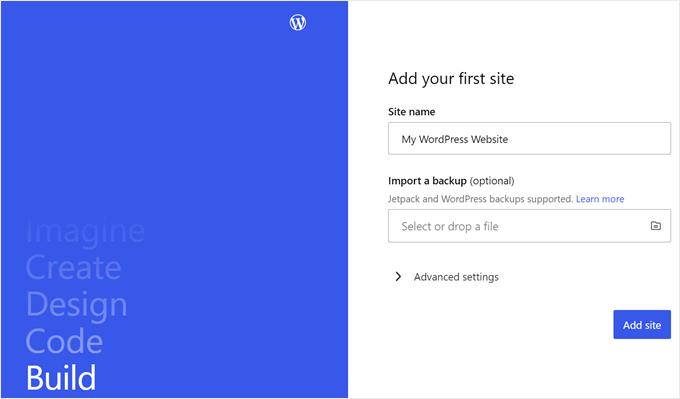
Una vez hecho esto, puede añadir su primer sitio.
Para ello, introduce el nombre de tu nuevo sitio local de WordPress y haz clic en “Añadir sitio”. Puedes nombrar el sitio como quieras siempre que te ayude a identificarlo fácilmente.
Ahora debería ver el escritorio de WordPress local.
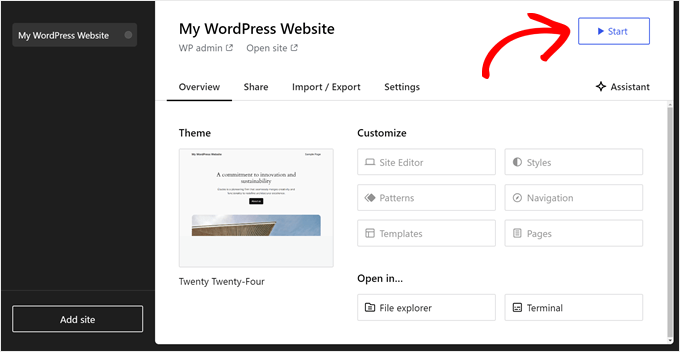
Para acceder a tu escritorio de WordPress y editar tu sitio web, sólo tienes que hacer clic en el botón “Inicio” situado en la esquina superior derecha. De este modo, podrá acceder a su sitio web local desde su ordenador.
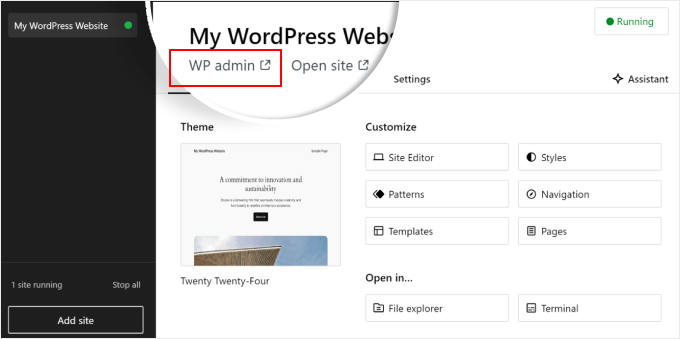
Una vez que el botón “Iniciar” cambie a “Ejecutando”, puede hacer clic en el enlace “WP Admin” en la parte superior izquierda de la página.
Esto le llevará a su página local de administración de WordPress.
Y eso es más o menos todo para la configuración. Vamos a explorar los otros ajustes que pueden ser necesarios a medida que construye su sitio web local.
Como puedes ver en la pestaña ‘Visión general’, puedes acceder inmediatamente al menú completo del editor de WordPress directamente desde el escritorio de Studio. También puedes hacer clic en “Explorador de archivos” para abrir las carpetas y archivos de tu sitio web de WordPress y hacer clic en “Terminal” para administrar tu sitio web mediante WP-CLI.
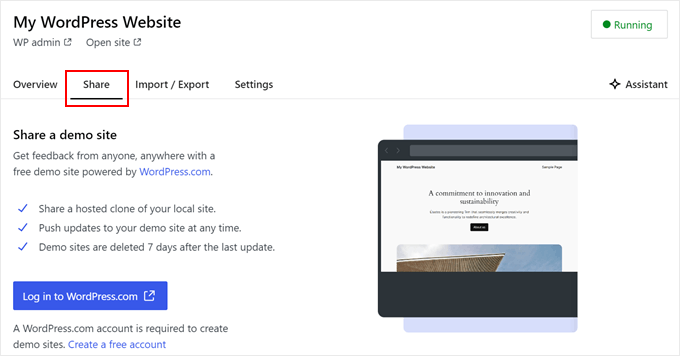
Si cambias a la pestaña “Compartir”, puedes acceder a tu cuenta de WordPress.com, clonar tu sitio web local y subirlo a los servidores de WordPress.com. Esto hará que el sitio clonado esté online temporalmente, lo que resulta útil para compartir sitios de demostración con tus clientes o miembros del equipo.
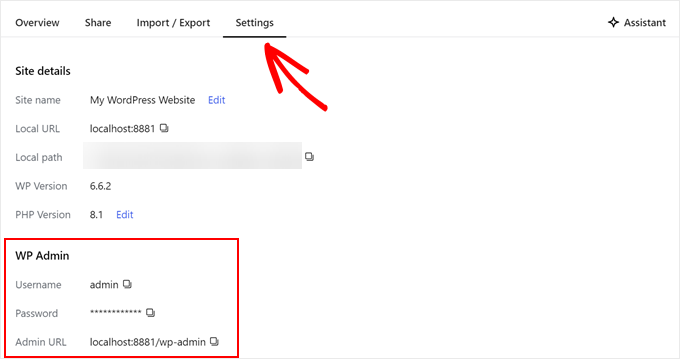
A veces, es posible que desee iniciar sesión en su sitio web local directamente a través de su navegador en lugar de utilizar Studio. En ese caso, necesita conocer sus credenciales de wp-admin.
Para encontrarlos, puede cambiar a la pestaña “Configuración” y encontrar allí su nombre de usuario, contraseña y URL de inicio de sesión de administrador de WordPress.
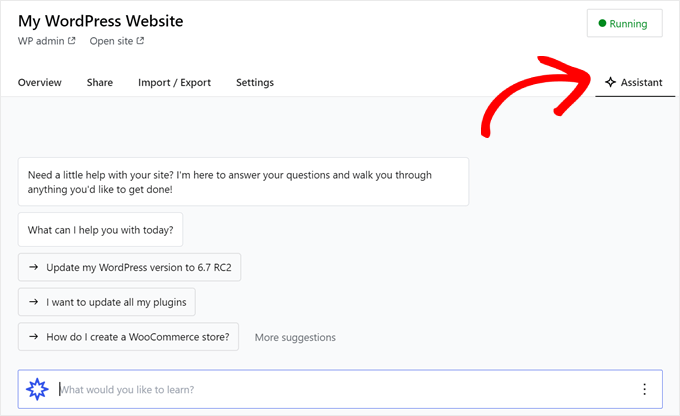
Otra característica interesante de Studio es su chatbot de inteligencia artificial integrado, con el que puedes comunicarte pulsando el botón “Asistente”.
Aquí puedes pedir ayuda a Studio para tareas como actualizar todos tus plugins a la vez, actualizar la versión principal de WordPress o crear código para un bloque personalizado.
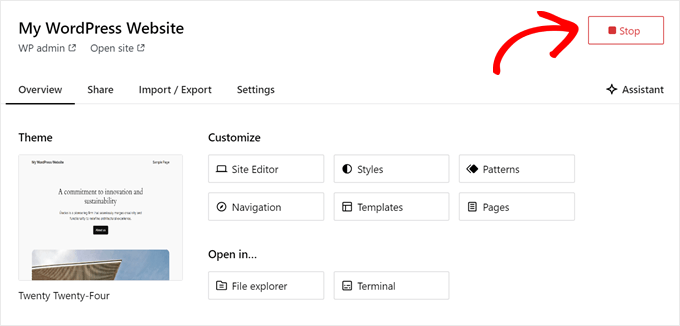
Cuando hayas terminado de trabajar en tu sitio local, sólo tienes que pasar el ratón por encima del botón “En ejecución” de la esquina superior derecha hasta que ponga “Detener”.
A continuación, haga clic en el botón para detener el sitio web.
Una desventaja de Studio es que no puedes configurar el entorno de WordPress a tu gusto. Esto significa que tienes que utilizar la versión de PHP, el servidor web y la base de datos que se han preseleccionado para ti.
Esto puede ser un inconveniente si necesitas probar tu sitio web o plugin con configuraciones de servidor específicas.
Si necesita un mayor control sobre su entorno local de WordPress o necesita que su configuración local coincida con una configuración específica del servidor en vivo, entonces puede consultar el siguiente método usando WP Local.
Método 2: Instalar WordPress en Windows Usando WP Local (Más Personalizable)
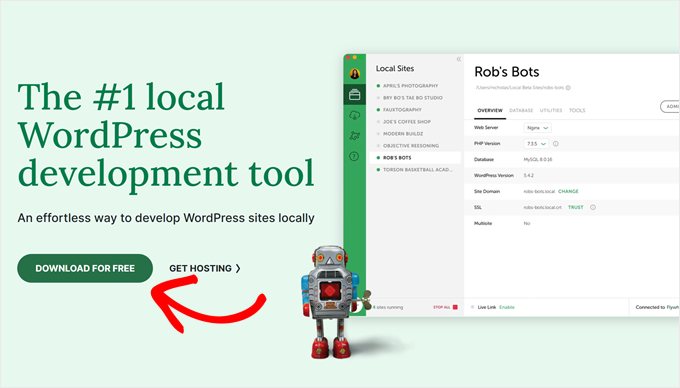
En primer lugar, debe descargar e instalar el software Local WP en su ordenador Windows. Simplemente vaya al sitio web de Local WP y haga clic en el botón “Descargar gratis”.
A continuación, aparecerá una ventana emergente en la que tendrás que seleccionar tu plataforma. Elige “Windows” en el menú desplegable.
A continuación, puedes introducir tus datos, como nombre y apellidos, dirección de correo electrónico laboral y número de teléfono, para descargar el software.
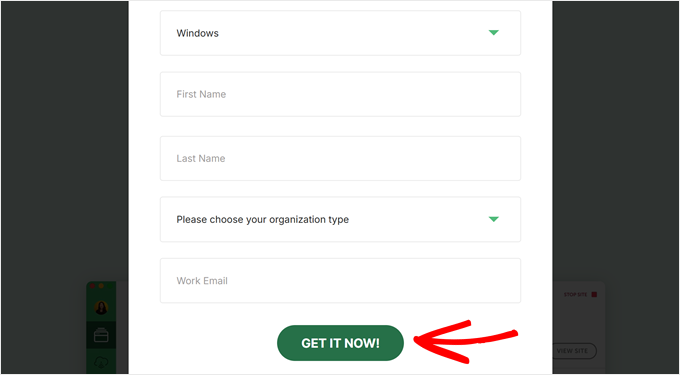
Una vez introducidos los datos, basta con hacer clic en el botón “Consíguelo ahora”.
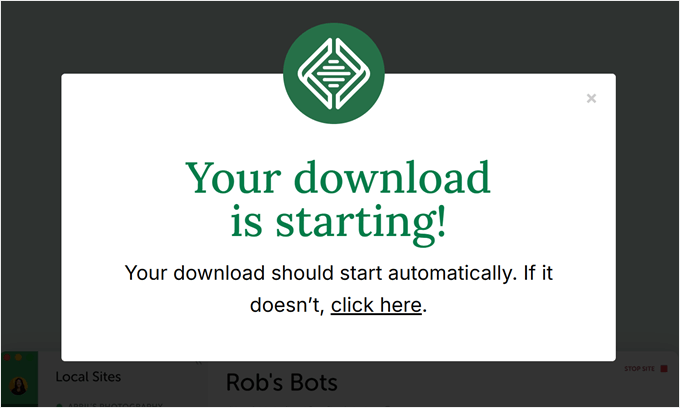
A continuación, el software se descargará automáticamente en tu ordenador. De lo contrario, puede hacer clic en el enlace “haga clic aquí” para iniciar la descarga.
Una vez descargado el archivo, inicie el asistente de instalación.
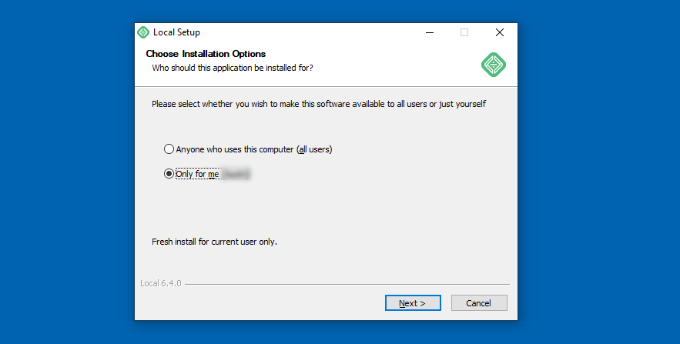
Ahora, tendrás que seleccionar si quieres instalar el software para todos los usuarios o sólo para ti.
Una vez seleccionada una opción, pulse el botón “Siguiente”.
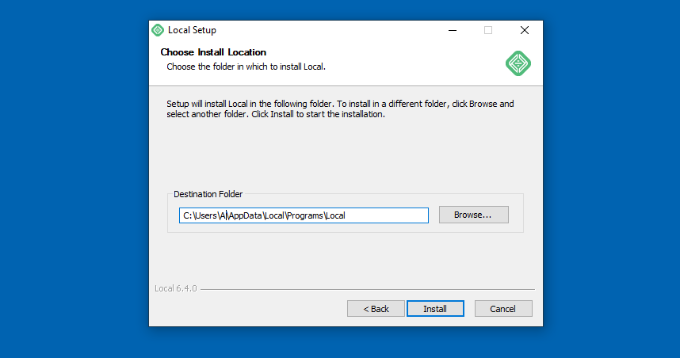
En el siguiente paso, puede seleccionar la “Carpeta de destino” donde se instalará el software.
Basta con hacer clic en el botón “Examinar” para establecer la ruta y, a continuación, hacer clic en el botón “Instalar”.
El software Local WP se instalará en tu ordenador Windows.
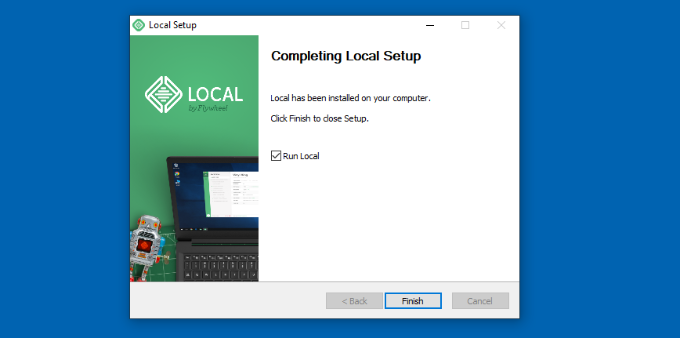
Una vez hecho esto, puede marcar / comprobar la casilla de verificación “Ejecutar localmente” y hacer clic en el botón “Finalizar” del asistente de configuración.
El software se iniciará ahora en su dispositivo Windows.
El siguiente paso es añadir un nuevo sitio web local. Para ello, basta con hacer clic en el botón “+” de la parte inferior.
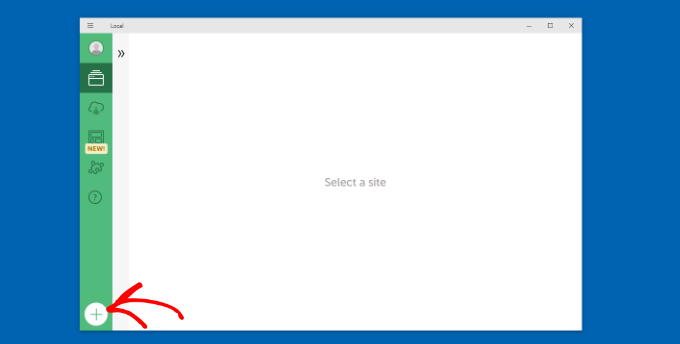
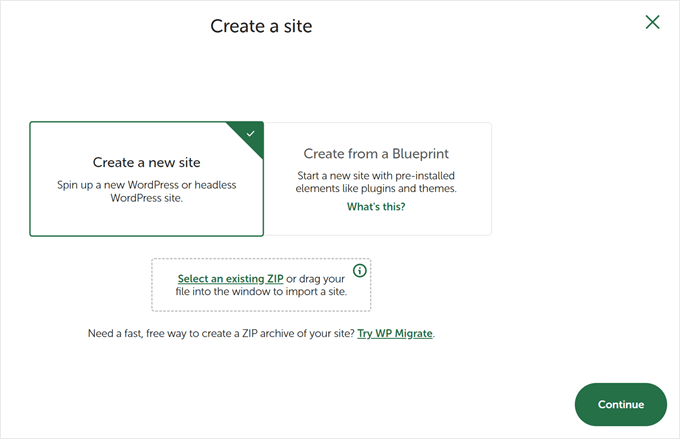
Después, puede crear un sitio en el software Local.
Seleccione la opción “Crear un nuevo sitio” y haga clic en el botón “Continuar”. También hay opciones para crear el sitio desde un plano o un archivo de sitio web existente, pero vamos a ir con la primera opción en aras de la demostración.
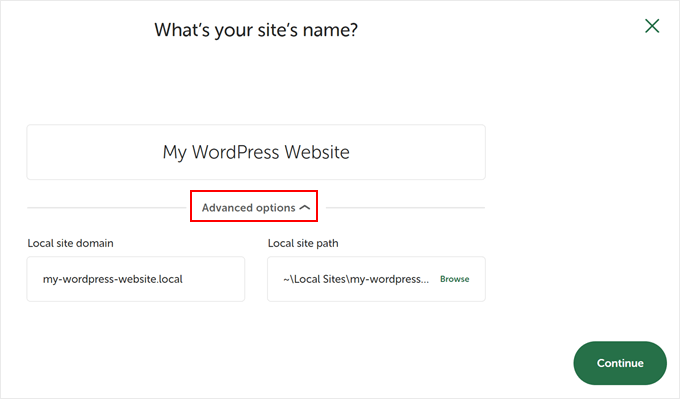
A continuación, puede introducir un nombre para su sitio web local, como “Mi sitio web WordPress”.
También hay opciones avanzadas en las que puede introducir el dominio del sitio local y la ruta del sitio local. Por defecto, el dominio utilizará el título de su sitio web, pero separado por guiones.
Una vez que haya terminado, simplemente haga clic en el botón “Continuar”.
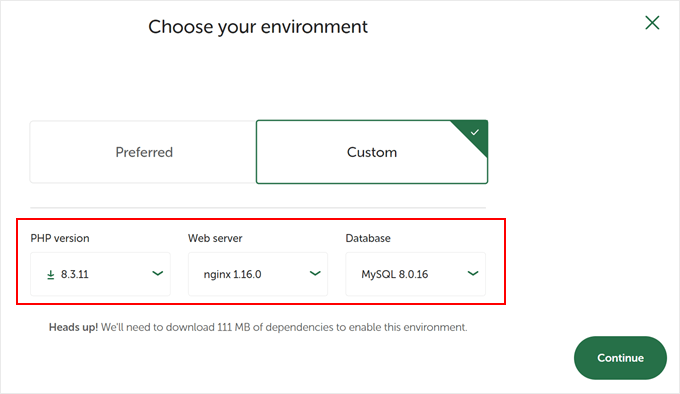
Después, tendrá que elegir un entorno para su sitio web local.
Puede utilizar el entorno ‘Preferido’, en el que el software seleccionará automáticamente la versión de PHP, el servidor web y la versión de MySQL. Por otro lado, también puedes seleccionar ‘Personalizado’ e introducir los detalles del entorno.
Local WP ofrece las últimas versiones de PHP. En cuanto al servidor web, puedes elegir entre Nginx o Apache. También puedes seleccionar entre MySQL o MariaDB para las bases de datos.
Tenga en cuenta que algunas versiones de PHP, servidores web y bases de datos requieren la descarga de algunas dependencias para que funcionen correctamente.
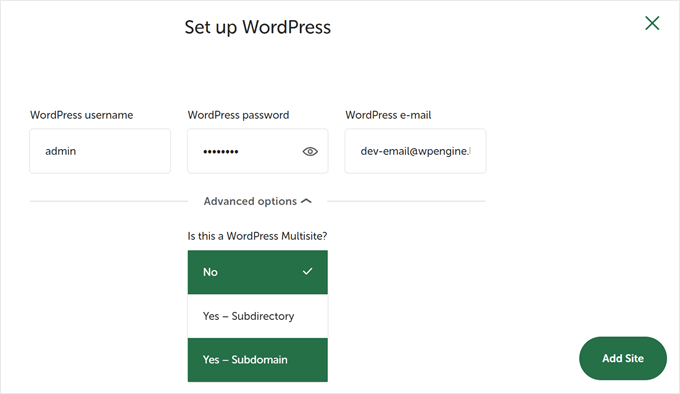
A continuación, puedes introducir un nombre de usuario y una contraseña de WordPress para tu sitio web local. Además, también tienes la opción de elegir una dirección de correo electrónico de WordPress en la que recibirás todas las notificaciones por correo electrónico.
Aparte de eso, hay una opción avanzada en la que el programa te preguntará si tienes una red multisitio de WordPress. Si no es así, haz clic en “No”.
Tras introducir estos datos, basta con hacer clic en el botón “Añadir sitio”.
El programa instalará WordPress y establecerá su sitio web.
Para iniciar el sitio web local, haz clic en el botón “Iniciar sitio” situado en la esquina superior derecha.
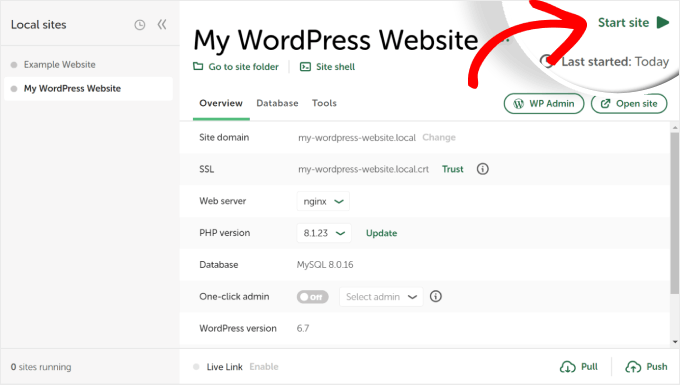
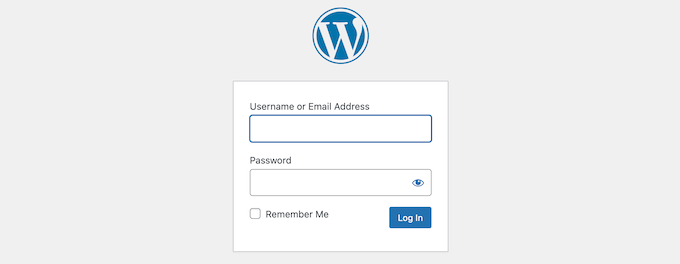
A continuación, haz clic en el botón “WP Admin” y verás la página de inicio de sesión del administrador de WordPress.
Sólo tiene que introducir el nombre de usuario y la contraseña que introdujo anteriormente al configurar el sitio web local y, a continuación, hacer clic en el botón “Iniciar sesión”.
Ahora puede editar su sitio web local en su ordenador Windows.
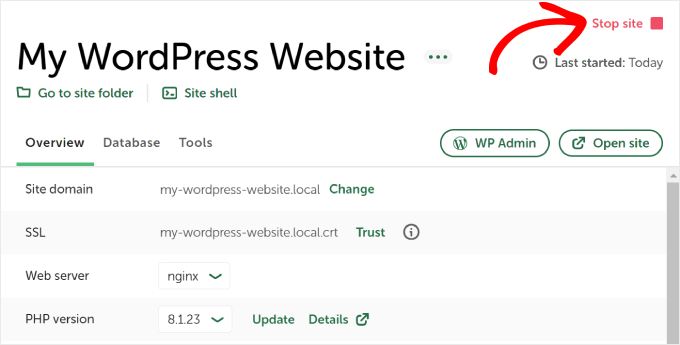
Cuando haya terminado, no olvide detener el sitio web desde el software WP local al hacer clic en el botón “Detener sitio”.
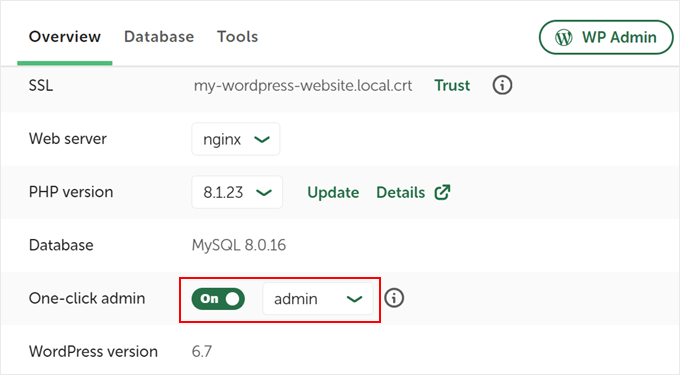
Consejo profesional: Si desea omitir el proceso de inicio de sesión, puede habilitar un inicio de sesión de administrador con un solo clic en Local WP.
Para ello, vuelve al panel de control de Local WP y activa el botón “One-click admin” hasta que aparezca “On”. A continuación, en el menú desplegable, seleccione el usuario administrador que puede utilizar esta función de inicio de sesión con un solo clic.
Alternativa: Utiliza WordPress Playground para probar temas, plugins y mucho más
WordPress Playground es una herramienta innovadora que te permite experimentar con WordPress directamente en tu navegador web. Es una caja de arena virtual donde puedes probar nuevos temas, plugins y funciones de WordPress sin afectar a ningún sitio web real.
WordPress Playground difiere de un entorno local de WordPress en varios aspectos clave.
En primer lugar, no requiere instalación en tu ordenador y se reinicia después de cada uso, a diferencia de las instalaciones locales permanentes. Puedes acceder a ella desde cualquier dispositivo con un navegador, mientras que las instalaciones locales están atadas a un ordenador.
Mientras que WordPress Playground es ideal para pruebas rápidas y aprendizaje, un entorno local de WordPress en su ordenador Windows ofrece más flexibilidad para proyectos de desarrollo a largo plazo.
Para obtener información detallada, consulte nuestra guía sobre cómo utilizar WordPress Playground en su navegador.
He instalado WordPress en mi ordenador Windows, ¿y ahora qué?
Ahora que ya tienes WordPress en tu ordenador, aquí tienes algunas cosas que puedes hacer:
- Aprenda trucos y consejos básicos de WordPress para utilizar mejor su sitio.
- Pruebe diferentes temas de WordPress para ver cómo puede quedar su sitio.
- Instale y pruebe los plugins imprescindibles de WordPress para añadir nuevas funciones a su sitio.
- Aprenda a solucionar errores comunes de WordPress por su cuenta.
- Pruebe diferentes creadores de páginas de arrastrar y soltar para que su sitio tenga un aspecto atractivo.
- Aprenda a restablecer la contraseña de administrador de WordPress en localhost para recuperar el acceso a su sitio.
- Establezca flujos de trabajo automatizados para facilitar la gestión de su sitio.
- Infórmese sobre la seguridad de WordPress para mantener su sitio a salvo de los piratas informáticos.
- Traslade su sitio local de WordPress a un servidor activo cuando esté listo para compartirlo con todo el mundo.
Esperamos que este artículo te haya ayudado a aprender cómo instalar WordPress localmente en un ordenador con Windows. Puede que también quieras ver nuestro artículo sobre cómo instalar WordPress localmente en un ordenador Mac y nuestra guía definitiva para crear un sitio de prueba de WordPress.
If you liked this article, then please subscribe to our YouTube Channel for WordPress video tutorials. You can also find us on Twitter and Facebook.


Pulkit
Thank you so much for this tutorial, it will surely help me a lot
Dubba Ramesh
Very nice tutorial.
its very use full to me..
thank you very much…..
Pradeep
Thank you very much. I was facing trouble earlier doing it and here detailed yet simple steps lead me to finish it. Great work keep doing it.
alex
hi
i do it like u.
but when i fiill everu thing and wana to go to next page to finish set uo the page is wite and dosnt show any thing !!!
i can see the admin page : 127.0.0.1/wp-login.php but the username and password dosnt work !!
what do i do ??
thx
Yvonne
Need help please….
I’ve downloaded wamp and did some set up (followed other instructions on youtube), it is now “online” but when I tried to access phpMyAdmin, it says “#1045 – access denied for user ‘root’@’localhost’, can anyone give me some advice, please?
Thank you so much!!!
sarvesh maurya
I have install wamp server and my wordpress also works very well,
But,
When i going to install any theme or plugin to my wordpress it doesn’t install properly and showing error message in table form which is not understandable for me…………
solve this problem please…….
it is very important……
REPLY FAST PLEASE….
WPBeginner Support
What error message do you see?
Admin
Skippy McGregor
If you’re having issues with this, run WAMP as an administrator (right click from start menu > run as administrator). The icon in the notification area needs to be green.
John
Thank you, I am using Sitegorund servers, but it was very nice to learn how to work offline!
Marcia
Three years ago, I spent days of my life trying to get WordPress running on my computer. I managed to make it work, but the process was very, very painful.
This time around, I followed your concise, clear and excellent instructions. The result: quick and pain-free success. Thank you !!!
WPBeginner Support
Thanks for the feedback. Glad you found this helpful.
Admin
Wayne
Hi there, Worked great. I did find that I was getting a 404 when trying to view the site localhost/mysite/ but when I tried in Chrome Incognito it worked fine. Also, it appears that the configuration file is now created automatically while using WordPress 4.4.1.
Thanks for the tutorial.
Andrew
I’ve installed wordpress into the www folder, Apache is running but when I try with localhost/worpress/ we get a 404 error, how can we fix this?
Tunde
Thank you very much for this tutorial. It works perfectly.
René Rijlart
Helpfulllllll
Chris
I hate this open source garbage. I can never get it to work. I follow the freaking examples perfectly, and I get all kinds of errors and stuff doesn’t work… WordPress and WAMP is freaking CRAP!!!
Peter
Funny comment … Just followed the instructions, downloaded WordPress, and reached the Dashboard. Everything worked smoothly and quickly — five minutes at most. And I am 80 years old — by rights I should be the one to have been lost …
samar
thanks
it’s helpful
Ryan
Sorry, I need a wp-config-sample.php file to work from. Please re-upload this file to your WordPress installation.
How can I resolve this. I have edited and renamed the wp-config.php file but things cant just work for me. Its been two days now. I cant make progress
WPBeginner Support
Download a fresh copy of WordPress to your computer. Unzip the file and then go to WordPress folder. Inside the folder you will find wp-config-sample.php file. You can now upload this file to your website using an FTP client.
Admin
Chris
Hi guys, I also had an issue with the getting a 404 error and permission error. I misinterpreted the text so in case anyone else has done the same let me paraphrase the following paragraph:
“Download a copy of WordPress from WordPress.org. Extract the zip file and copy the wordpress folder. Go to C:\wamp\www and paste wordpress folder there. You can rename the wordpress folder to anything you want for example mysite, wpbeginner, etc”
1) After installing WAMP, in the windows GUI navigate to ‘C:/wamp/www’
2) The drop the extracted WordPress folder (not just the loose files).
I was doing it wrong; I was dropping the loose files from inside WordPress into the www folder and changing the name. It seems this is incorrect.
Enjoy!!
Chris
I installed WAMPServer, clicked on phpMyAdmin, then in the browser I got:
Server Error in ‘/’ Application.
Access is denied.
Description: An error occurred while accessing the resources required to serve this request. The server may not be configured for access to the requested URL.
Error message 401.2.: Unauthorized: Logon failed due to server configuration. Verify that you have permission to view this directory or page based on the credentials you supplied and the authentication methods enabled on the Web server. Contact the Web server’s administrator for additional assistance.
Version Information: Microsoft .NET Framework Version:4.0.30319; ASP.NET Version:4.0.30319.34274
tomi
Hello
When I run http://localhost/mysite/ I get a 404 error. I have no idea how to fix it and could use some help:)
Screenshoted issue: http://prntscr.com/9ft5z6
Thanks in advance!
WPBeginner Support
Make sure apache is running on your computer. If you are using Wamp or Xamp then you can see apache status in your taskbar.
Admin
Sohail Nawaz
thankyou very much.
Soph Desharnais
Great tutorial. No issues and was set up in less than 10 minutes. Thank you.
Tasneem
Hi
Thank you sooo much for this awesome tut, I also have the followup one bookmarked for moving localhost site to live. I am now all set up with my test site on my local server. No more building websites with a maintenance plugin needed!
My question is, do I have to create a new database and new wordpress site for every new site I build, or can I just clean out and reuse this same test_db and localhost/testsite that I created if I don’t need it anymore? what do you guys do?
WPBeginner Support
It is better to create a new test site for any new project.
Admin
Nadia
Hello, thank you for that great tutorial! It works almost perfectly for me. The only problem I have is that I am not allowed to upload images by grad and drop in the media library. I’ve got javascript error “Uncaught TypeError: Cannot read property ‘appendChild’ of null – load-scripts.php:22”
That said it’s not a problem of the upload itself because I am able to upload images via “Media” > “Add New”.
Is it only my problem? I’ll be really grateful for any assistance with it. Thanks!
WPBeginner Support
Please try deactivating all plugins and then adding an image using drag and drop. If this resolves your issue, then one of the plugins installed on your site is conflicting with WordPress core.
Admin
Nadia
Thank you for the prompt reply! NO plugins at all, fresh wp 4.3.1 installation
Nadia
I resolved this by installing XAMPP instead of Wampserver. I had issues with XAMPP as well, and learned to run it as administrator in my Windows 8. It fixed the issues and maybe there was the similar one with the Wampserver.
Anwar Manha
Hi
I tried the exact step but thrown by the below error, could you please advise
( ! ) Warning: require(C:\wamp\www\test1/wp-includes/load.php): failed to open stream: No such file or directory in C:\wamp\www\test\wp-settings.php on line 21
Call Stack
Daniel
Hi, i have made a website using the WAMP-server.
When try to acess the website from my phone to check the responsivness, all i get is the the text from the website. No styling or pictures are shown.
Is there any type of settings that i have to enable?
John van Rems
Maybe I’m stupid but after installing the Wampserver I try to open phpMyAdmin to setup a database but instate of getting a page like the example the browserpage is empty… Logic I guess because Apage doesn’t run so I can’t see php pages on a local machine.
I try to run it on Windows 10 Can you tell me what’s wrong?
John
John van Rems
Problem solved by correcting te Windows 10 Internetport to 8080
Now to find out how to connect the php db to my wordpress
tsega
hi
Nice post. I find it helpful but i wonder how can i use my own them. Can you give as your expertise on that ?
Keith in Winchester
A full day of headbanging and I was just about to give up when I found this invaluable site. Could not have been made easier. Follow the well laid out instructions and you will find it a breeze. Great work and Many Thanks.
Medha
Thank you so much, this really helped!
John
Hi,
I followed all the instructions up to the point where i go through my web browser to localhost/mysite. I get the error “wp-seetings.php is missing” however the link you provided to create a configuration file is empty. How do i create “wp-settings.php”?
Thanks
Ahsan
Thanks guys, it was surely a great help!
sandeep
thank you so much. very good tutorial.
Mike
This is a real beauty! Thanks so much. I know HTML, CSS, JavaScript, PHP, a very little MySQL — no genius at some of it, but I know what I’m doing. But an organization I’m involved with may wind up using WordPress and I’ve never liked these WYSIWYGs. Since I do want to learn the stuff, though, I wanted to give it a swing on localhost rather than messing up my own GoDaddy- and Netfirms-hosted domains.
Just follow your directions and this installs beautifully. One question, though. Is there any particular book you’d recommend? I was particularly looking at the Dummies All-in-One and the Missing Manuals books. Is one better than the other? Or do you recommend a third alternative? I don’t want to buy a whole library full of this stuff for a technology I may never use that much except for helping this organization with upkeep.
WPBeginner Support
Check out WordPress Books section on our website.
Admin
Liana
after I click on the phpadmin all I get is a blank page with nothing on it :/
raydy
Hi There, Thanks for the tutorial
however, i encounter with this problem for localhost/mysite/
Not Found
The requested URL /mysite/ was not found on this server.
Apache/2.4.9 (Win32) PHP/5.5.12 Server at localhost Port 80
Alok
Hi,
I am also facing the same problem…Did you get the solution? Can you please help.
Regards,
Alok
Mike
Thumbs up mate,
Great guide…it was very helpful!
Julian
Please help. This is what I get:
“Not Found
The requested URL /mysite/ was not found on this server.
Apache/2.4.9 (Win64) PHP/5.5.12 Server at localhost Port 80”
I took my wordpress folder and dropped it in the wamp folder, C:\wamp\www. I renamed my wordpress folder to: “mysite”. I then went to Chrome and searched: “localhost/mysite/”. And I get:
“Not Found
The requested URL /mysite/ was not found on this server.
Apache/2.4.9 (Win64) PHP/5.5.12 Server at localhost Port 80.”
Kyle
Burnt out. Seriously. Help.
No manner of step by step instruction is working and I’m pulling out my hair. What am I missing?
“Download a copy of WordPress from WordPress.org. Extract the zip file and copy the wordpress folder. Go to C:\wamp\www and paste wordpress folder there. You can rename the wordpress folder to anything you want for example mysite, wpbeginner, etc. For the sake of this tutorial, we renamed our wordpress directory to mysite. Now open a web browser and go to:
http://localhost/mysite/”
C:\wamp\www ???
First off, there is no folder titled “www,” so maybe you’re implying the website name take that place? I don’t really know.
Still, I tested all methods. I tried creating a folder called ‘www,’ I tried simply C:\mamp\sitename, But when I type in the “localhost/sitename” absolutely nothing happens.
I have experience doing website redesigns and all I want to do is clone this site to my local host and I am baffled at how I’ve spent 2 whole days just trying to get WordPress isn’t even installed on my local host.
Thank you in advance.
Composed under duress.
Captain
Hello Kyle, sorry for your sad experience.
You said you don’t see a folder called “www” on C:\wamp.
Can you check to confirm that you have wampserver installed on your computer?
Also, it could be it’s installed but not on the C drive.
Do get back when you confirm; cos the tutorial was quite straight and worked really well for me.
aman
After installing WAMP server and clicking on phpmyadmin there is an error that says Access Denied and no other option is displayed. Please Help me
DutchLuck
Great tutorial, sweet and simple!!! Thanks!!!
Karthikeyan
Good Example.Its working fine for me.
Thank you all..
Janvi
hi
i m not getting create configuration file option
WPBeginner Support
Your WordPress folder may already have a wp-config.php file. This file may not have correct information for your WordPress database settings. Please see our guide on editing wp-config.php file in WordPress.
Admin
Samantha T
Sooooooooooooooooooooo… I uninstalled everything and reinstalled. Now I have an orange light on the Wamp, and when I open phpMyAdmin, I get “Access denied”: MySQL said: Documentation
#1045 – Access denied for user ‘root’@’localhost’ (using password: NO)
phpMyAdmin tried to connect to the MySQL server, and the server rejected the connection. You should check the host, username and password in your configuration and make sure that they correspond to the information given by the administrator of the MySQL server.
*sigh*
Joe
OK, how do you do that?
odion
After installation of wordpress in my computer, I did not receive a success message but a blank white page and am not able to login into the wp-admin.
odion ikhidero
Pls I got. The following errors after installation
Sansun
I already have MySQL server running in my local 3306 port, how do I install WAMP in my case?
Aamir
Thanks for the help.
I have been taking help from your immensely helpful site. It is a great service that you guys are providing.
Jim14409
Hi, )
)
Thanks for your site and all the help you offer. I installed WAMP and everything went perfectly until I reached the part where you said:
“WordPress will inform you that it can not find a wp-config.php file.”
Well WP never said that :0 but sent me directly to a Directory of “JimSite” with links there to Parent Directory and a link to WordPress. Finally clicked the WordPress link and now it seems we are heading to the config-php setup. (I’ll holler back if the trail dead-ends
Thought you might want to amend your guide with a note about this possibility for some users so as to save them the confusion and frustration I’ve had the past half hour. Might have something to do with my using Vista64, I’m not sure.
Thanks again and for your nice email when I signed up.
Jim
Markus
Thanks for this nice tutorial. Its really helpful, and works like a charme to set up.
The skype addition about the port issue with wamp helped me also – sometimes wamp just wouldn’t work and I didn’t know why. (I’m using skype just once in a while..)
I’ve got another question though: How to move a live website to localhost for development.
I’m not really sure how to go about it. Copy everything (including db) and change the settings in the config file of wordpress. or install wordpress and then migrate the database somehow, and add the other special content…
WPBeginner Support
See how to move a live WordPress site to local server.
Admin
Samuel
Thanks
But I have an issue. After installation, I got a prompt “The program can’t start because MSVCR110.dll is missing from your computer, Try reinstalling the program to fix the problem”
What do I do?
Dev Enthusiast
Hi Samuel,
The error that you received can be fixed by downloading and installing the following from Microsoft:
Visual C++ Redistributable
Give that a try!