Tras años construyendo sitios web con WordPress, hemos aprendido lo importante que es tener una configuración local de WordPress en tu ordenador.
Tener WordPress en tu máquina personal te permite experimentar con nuevas funciones sin poner en riesgo tu sitio web, profundizar en el desarrollo de WordPress e incluso crear sitios web completos antes de que salgan a la luz. Es como tener una caja de arena privada para todos tus proyectos de WordPress.
Si eres usuario de Windows, existen numerosas formas de configurar WordPress localmente. Pero lo hemos reducido a los dos métodos más sencillos. En esta guía, te mostraremos cómo instalar WordPress fácilmente en un ordenador con Windows, independientemente de la versión que estés utilizando.
¿Por qué debería instalar WordPress en Windows?
Si eres usuario de Windows, instalar WordPress localmente en tu ordenador te ofrece varias ventajas.
Una instalación local de WordPress crea un entorno de pruebas que no afecta a su sitio web. Esta configuración, a menudo llamada servidor local o localhost, es tu patio de recreo personal para WordPress.
Los desarrolladores de WordPress utilizan habitualmente instalaciones locales para su trabajo. Por ejemplo, pueden utilizarla para experimentar con nuevos plugins o temas o probar el sitio antes de actualizarlo al editor de bloques Gutenberg.
Pero no es sólo para los profesionales. Si eres nuevo en WordPress, una configuración local es perfecta para aprender. Puedes explorar funciones, probar temas y plugins, y experimentar libremente sin preocuparte de romper un sitio activo.
Es importante tener en cuenta que cuando instalas WordPress localmente en Windows, sólo tú puedes ver el sitio. Si quieres crear un sitio web público, necesitarás un nombre de dominio y alojamiento web.
Ahora, técnicamente, puedes instalar WordPress en Windows usando XAMPP, y hemos escrito un tutorial sobre ello antes.
Dicho esto, hemos encontrado 2 formas aún más sencillas que XAMPP para configurar un entorno local de WordPress, por lo que son ideales para principiantes o usuarios que necesitan crear un sitio local rápidamente. Puedes hacer clic en el enlace de abajo para saltar al método que te interese:
Método 1: Instalar WordPress en Windows con Studio (rápido y sencillo)
Para el primer método, utilizaremos Studio. Es un software local de WordPress hecho por Automattic, la empresa que gestiona y dirige WordPress.com, que es un constructor de sitios web basado en el software de WordPress.
Hablaremos primero de este método porque es mucho más rápido y sencillo de seguir, lo que lo hace perfecto para los principiantes.
En primer lugar, tienes que abrir el sitio web Studio by WordPress.com. A continuación, haz clic en el botón “Descargar para Windows”.
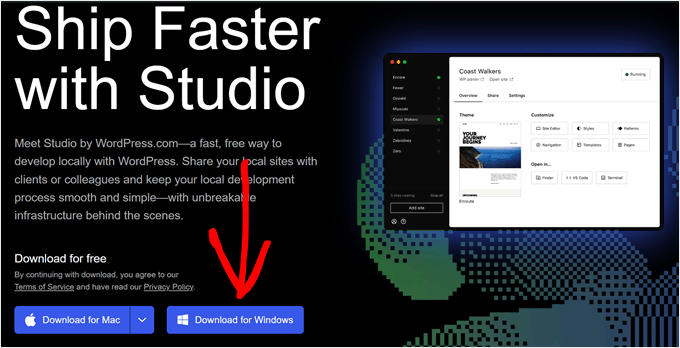
Una vez hecho esto, sólo tienes que abrir el archivo descargado para iniciar la instalación.
Aparecerá una ventana emergente que le indicará que se está instalando la aplicación.
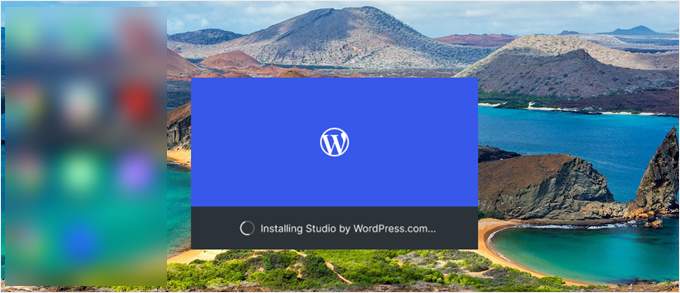
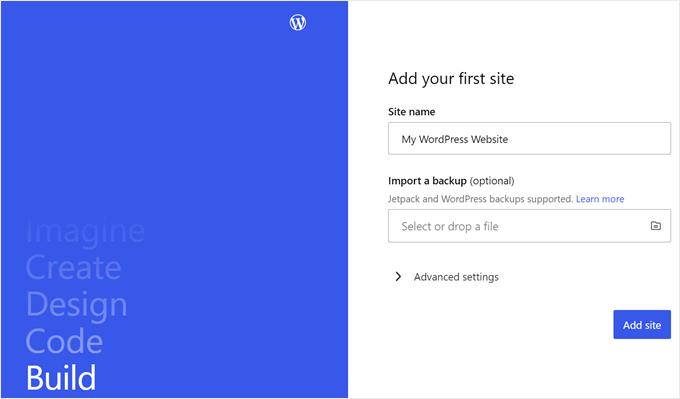
Una vez hecho esto, puede añadir su primer sitio.
Para ello, introduce el nombre de tu nuevo sitio local de WordPress y haz clic en “Añadir sitio”. Puedes nombrar el sitio como quieras siempre que te ayude a identificarlo fácilmente.
Ahora debería ver el escritorio de WordPress local.
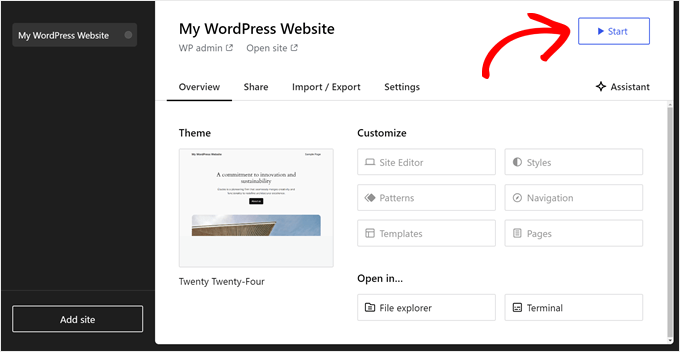
Para acceder a tu escritorio de WordPress y editar tu sitio web, sólo tienes que hacer clic en el botón “Inicio” situado en la esquina superior derecha. De este modo, podrá acceder a su sitio web local desde su ordenador.
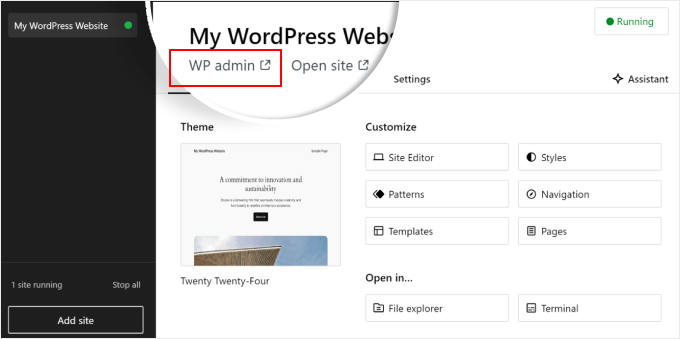
Una vez que el botón “Iniciar” cambie a “Ejecutando”, puede hacer clic en el enlace “WP Admin” en la parte superior izquierda de la página.
Esto le llevará a su página local de administración de WordPress.
Y eso es más o menos todo para la configuración. Vamos a explorar los otros ajustes que pueden ser necesarios a medida que construye su sitio web local.
Como puedes ver en la pestaña ‘Visión general’, puedes acceder inmediatamente al menú completo del editor de WordPress directamente desde el escritorio de Studio. También puedes hacer clic en “Explorador de archivos” para abrir las carpetas y archivos de tu sitio web de WordPress y hacer clic en “Terminal” para administrar tu sitio web mediante WP-CLI.
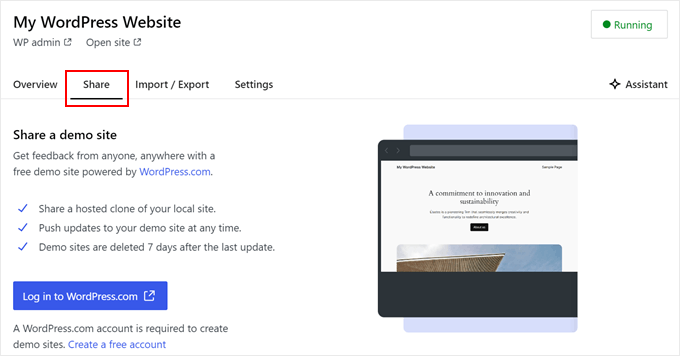
Si cambias a la pestaña “Compartir”, puedes acceder a tu cuenta de WordPress.com, clonar tu sitio web local y subirlo a los servidores de WordPress.com. Esto hará que el sitio clonado esté online temporalmente, lo que resulta útil para compartir sitios de demostración con tus clientes o miembros del equipo.
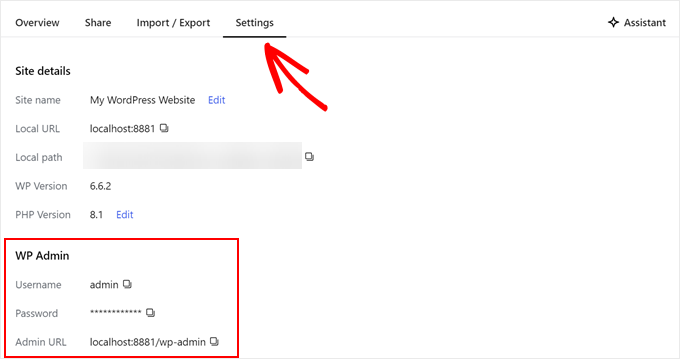
A veces, es posible que desee iniciar sesión en su sitio web local directamente a través de su navegador en lugar de utilizar Studio. En ese caso, necesita conocer sus credenciales de wp-admin.
Para encontrarlos, puede cambiar a la pestaña “Configuración” y encontrar allí su nombre de usuario, contraseña y URL de inicio de sesión de administrador de WordPress.
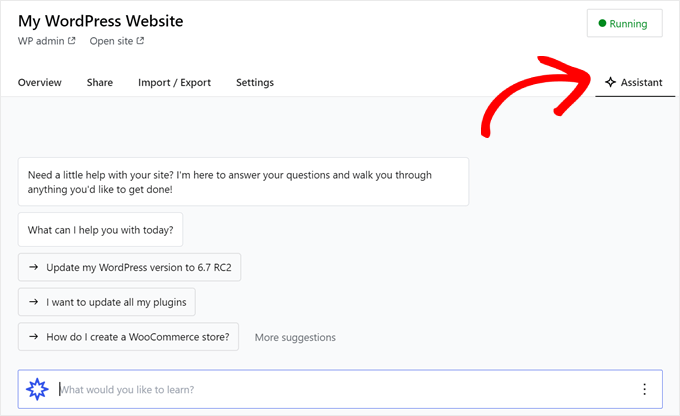
Otra característica interesante de Studio es su chatbot de inteligencia artificial integrado, con el que puedes comunicarte pulsando el botón “Asistente”.
Aquí puedes pedir ayuda a Studio para tareas como actualizar todos tus plugins a la vez, actualizar la versión principal de WordPress o crear código para un bloque personalizado.
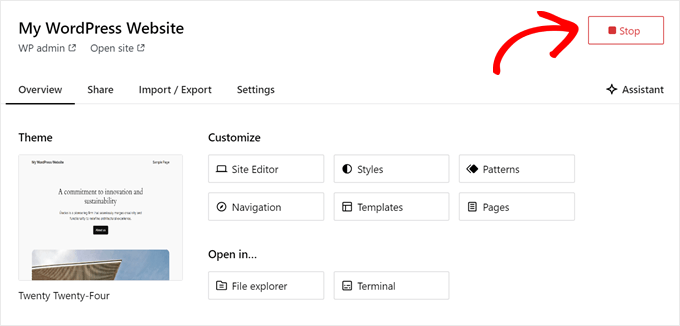
Cuando hayas terminado de trabajar en tu sitio local, sólo tienes que pasar el ratón por encima del botón “En ejecución” de la esquina superior derecha hasta que ponga “Detener”.
A continuación, haga clic en el botón para detener el sitio web.
Una desventaja de Studio es que no puedes configurar el entorno de WordPress a tu gusto. Esto significa que tienes que utilizar la versión de PHP, el servidor web y la base de datos que se han preseleccionado para ti.
Esto puede ser un inconveniente si necesitas probar tu sitio web o plugin con configuraciones de servidor específicas.
Si necesita un mayor control sobre su entorno local de WordPress o necesita que su configuración local coincida con una configuración específica del servidor en vivo, entonces puede consultar el siguiente método usando WP Local.
Método 2: Instalar WordPress en Windows Usando WP Local (Más Personalizable)
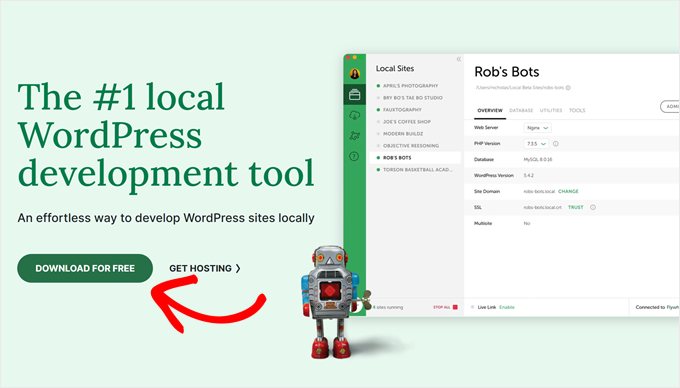
En primer lugar, debe descargar e instalar el software Local WP en su ordenador Windows. Simplemente vaya al sitio web de Local WP y haga clic en el botón “Descargar gratis”.
A continuación, aparecerá una ventana emergente en la que tendrás que seleccionar tu plataforma. Elige “Windows” en el menú desplegable.
A continuación, puedes introducir tus datos, como nombre y apellidos, dirección de correo electrónico laboral y número de teléfono, para descargar el software.
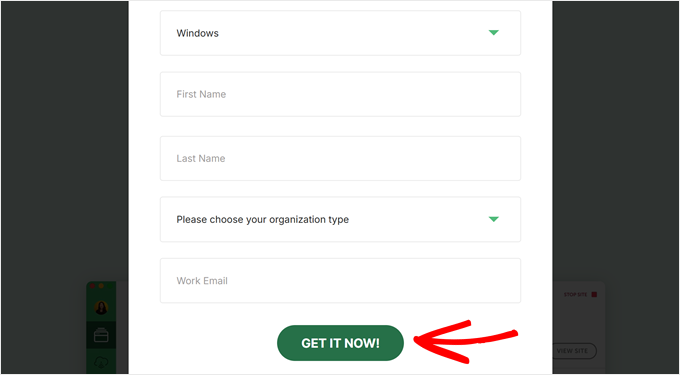
Una vez introducidos los datos, basta con hacer clic en el botón “Consíguelo ahora”.
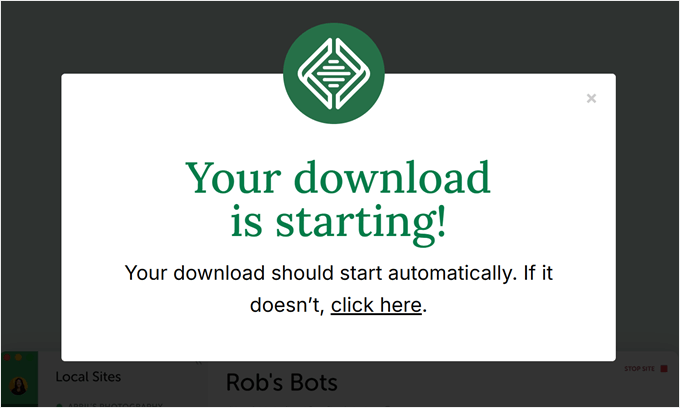
A continuación, el software se descargará automáticamente en tu ordenador. De lo contrario, puede hacer clic en el enlace “haga clic aquí” para iniciar la descarga.
Una vez descargado el archivo, inicie el asistente de instalación.
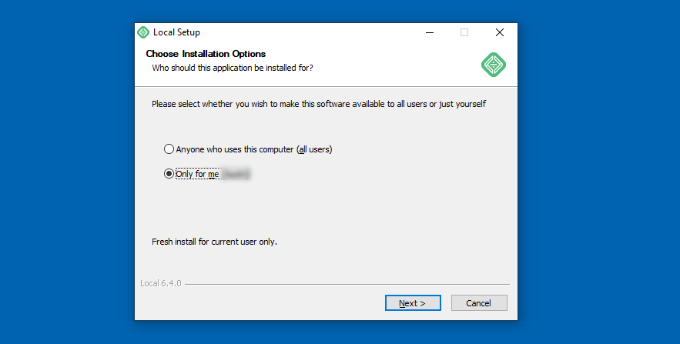
Ahora, tendrás que seleccionar si quieres instalar el software para todos los usuarios o sólo para ti.
Una vez seleccionada una opción, pulse el botón “Siguiente”.
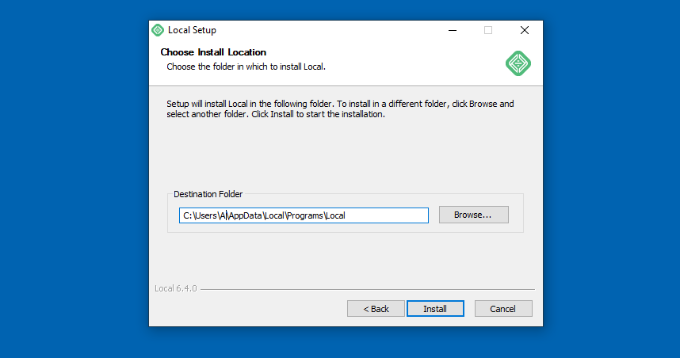
En el siguiente paso, puede seleccionar la “Carpeta de destino” donde se instalará el software.
Basta con hacer clic en el botón “Examinar” para establecer la ruta y, a continuación, hacer clic en el botón “Instalar”.
El software Local WP se instalará en tu ordenador Windows.
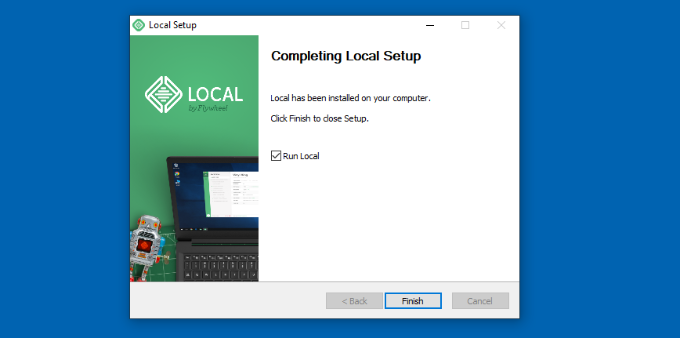
Una vez hecho esto, puede marcar / comprobar la casilla de verificación “Ejecutar localmente” y hacer clic en el botón “Finalizar” del asistente de configuración.
El software se iniciará ahora en su dispositivo Windows.
El siguiente paso es añadir un nuevo sitio web local. Para ello, basta con hacer clic en el botón “+” de la parte inferior.
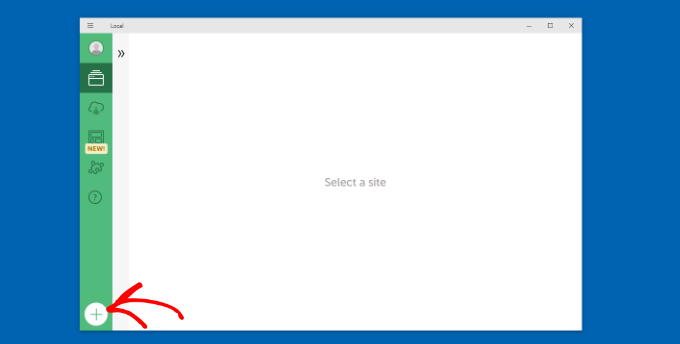
Después, puede crear un sitio en el software Local.
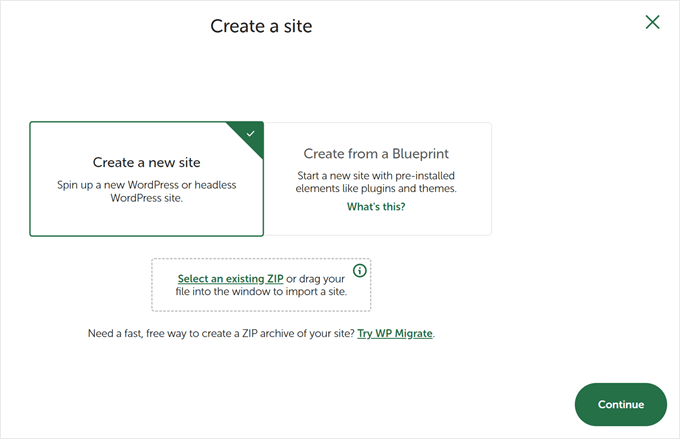
Seleccione la opción “Crear un nuevo sitio” y haga clic en el botón “Continuar”. También hay opciones para crear el sitio desde un plano o un archivo de sitio web existente, pero vamos a ir con la primera opción en aras de la demostración.
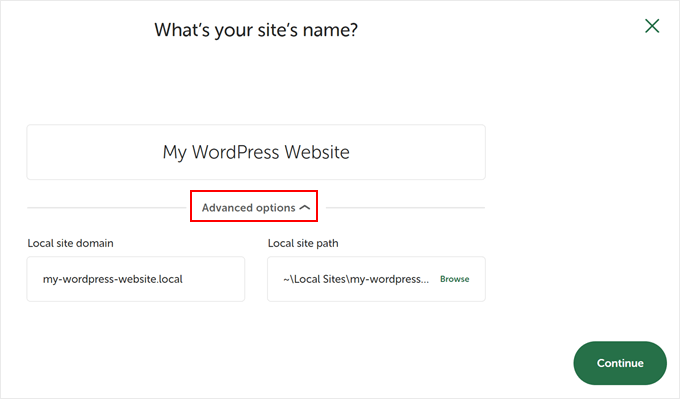
A continuación, puede introducir un nombre para su sitio web local, como “Mi sitio web WordPress”.
También hay opciones avanzadas en las que puede introducir el dominio del sitio local y la ruta del sitio local. Por defecto, el dominio utilizará el título de su sitio web, pero separado por guiones.
Una vez que haya terminado, simplemente haga clic en el botón “Continuar”.
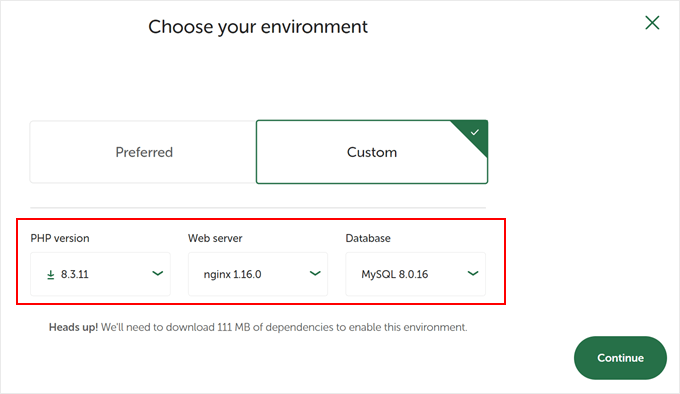
Después, tendrá que elegir un entorno para su sitio web local.
Puede utilizar el entorno ‘Preferido’, en el que el software seleccionará automáticamente la versión de PHP, el servidor web y la versión de MySQL. Por otro lado, también puedes seleccionar ‘Personalizado’ e introducir los detalles del entorno.
Local WP ofrece las últimas versiones de PHP. En cuanto al servidor web, puedes elegir entre Nginx o Apache. También puedes seleccionar entre MySQL o MariaDB para las bases de datos.
Tenga en cuenta que algunas versiones de PHP, servidores web y bases de datos requieren la descarga de algunas dependencias para que funcionen correctamente.
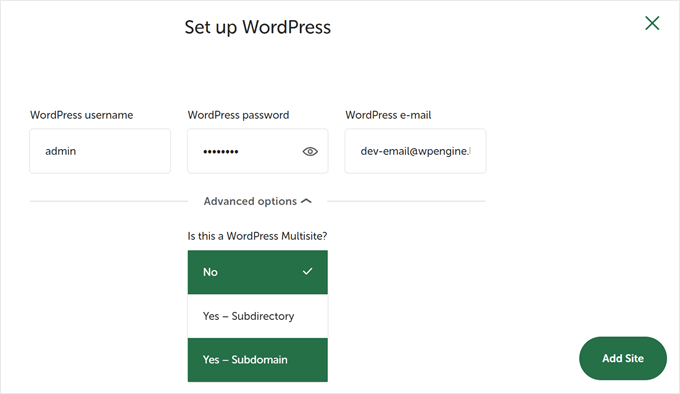
A continuación, puedes introducir un nombre de usuario y una contraseña de WordPress para tu sitio web local. Además, también tienes la opción de elegir una dirección de correo electrónico de WordPress en la que recibirás todas las notificaciones por correo electrónico.
Aparte de eso, hay una opción avanzada en la que el programa te preguntará si tienes una red multisitio de WordPress. Si no es así, haz clic en “No”.
Tras introducir estos datos, basta con hacer clic en el botón “Añadir sitio”.
El programa instalará WordPress y establecerá su sitio web.
Para iniciar el sitio web local, haz clic en el botón “Iniciar sitio” situado en la esquina superior derecha.
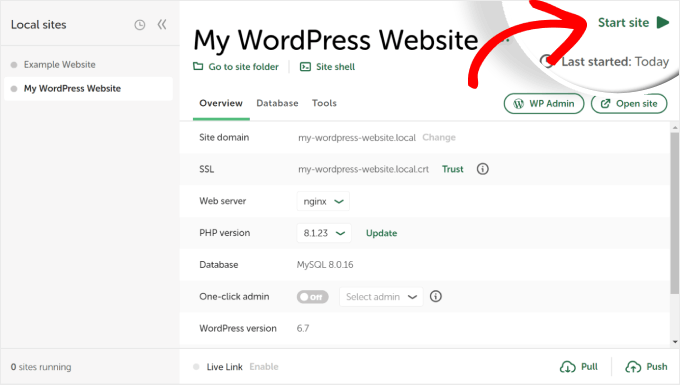
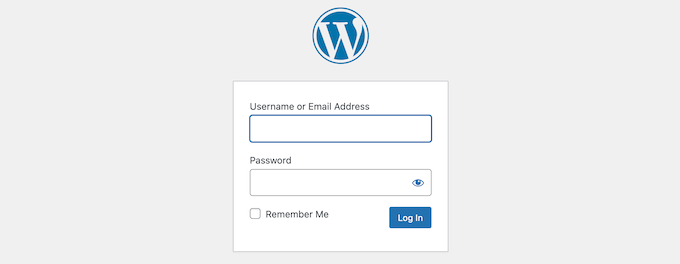
A continuación, haz clic en el botón “WP Admin” y verás la página de inicio de sesión del administrador de WordPress.
Sólo tiene que introducir el nombre de usuario y la contraseña que introdujo anteriormente al configurar el sitio web local y, a continuación, hacer clic en el botón “Iniciar sesión”.
Ahora puede editar su sitio web local en su ordenador Windows.
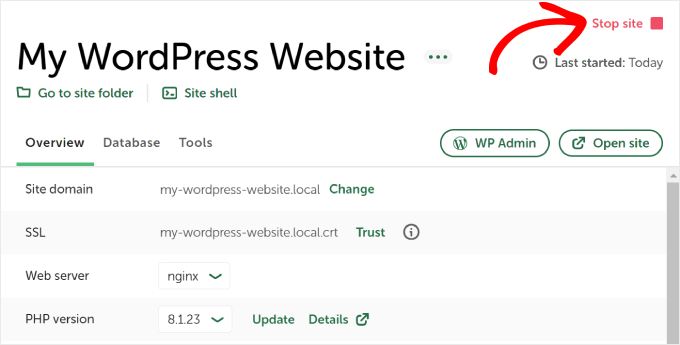
Cuando haya terminado, no olvide detener el sitio web desde el software WP local al hacer clic en el botón “Detener sitio”.
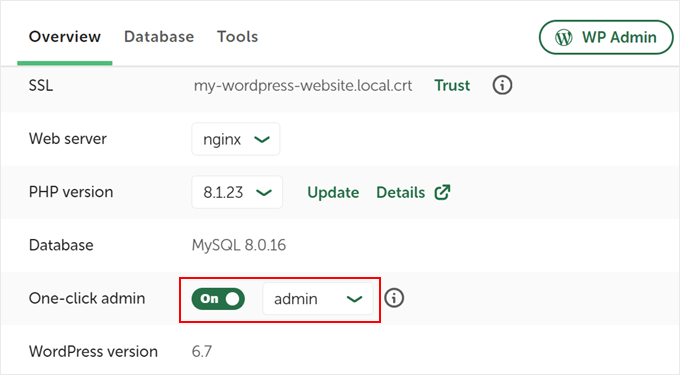
Consejo profesional: Si desea omitir el proceso de inicio de sesión, puede habilitar un inicio de sesión de administrador con un solo clic en Local WP.
Para ello, vuelve al panel de control de Local WP y activa el botón “One-click admin” hasta que aparezca “On”. A continuación, en el menú desplegable, seleccione el usuario administrador que puede utilizar esta función de inicio de sesión con un solo clic.
Alternativa: Utiliza WordPress Playground para probar temas, plugins y mucho más
WordPress Playground es una herramienta innovadora que te permite experimentar con WordPress directamente en tu navegador web. Es una caja de arena virtual donde puedes probar nuevos temas, plugins y funciones de WordPress sin afectar a ningún sitio web real.
WordPress Playground difiere de un entorno local de WordPress en varios aspectos clave.
En primer lugar, no requiere instalación en tu ordenador y se reinicia después de cada uso, a diferencia de las instalaciones locales permanentes. Puedes acceder a ella desde cualquier dispositivo con un navegador, mientras que las instalaciones locales están atadas a un ordenador.
Mientras que WordPress Playground es ideal para pruebas rápidas y aprendizaje, un entorno local de WordPress en su ordenador Windows ofrece más flexibilidad para proyectos de desarrollo a largo plazo.
Para obtener información detallada, consulte nuestra guía sobre cómo utilizar WordPress Playground en su navegador.
He instalado WordPress en mi ordenador Windows, ¿y ahora qué?
Ahora que ya tienes WordPress en tu ordenador, aquí tienes algunas cosas que puedes hacer:
- Aprenda trucos y consejos básicos de WordPress para utilizar mejor su sitio.
- Pruebe diferentes temas de WordPress para ver cómo puede quedar su sitio.
- Instale y pruebe los plugins imprescindibles de WordPress para añadir nuevas funciones a su sitio.
- Aprenda a solucionar errores comunes de WordPress por su cuenta.
- Pruebe diferentes creadores de páginas de arrastrar y soltar para que su sitio tenga un aspecto atractivo.
- Aprenda a restablecer la contraseña de administrador de WordPress en localhost para recuperar el acceso a su sitio.
- Establezca flujos de trabajo automatizados para facilitar la gestión de su sitio.
- Infórmese sobre la seguridad de WordPress para mantener su sitio a salvo de los piratas informáticos.
- Traslade su sitio local de WordPress a un servidor activo cuando esté listo para compartirlo con todo el mundo.
Esperamos que este artículo te haya ayudado a aprender cómo instalar WordPress localmente en un ordenador con Windows. Puede que también quieras ver nuestro artículo sobre cómo instalar WordPress localmente en un ordenador Mac y nuestra guía definitiva para crear un sitio de prueba de WordPress.
If you liked this article, then please subscribe to our YouTube Channel for WordPress video tutorials. You can also find us on Twitter and Facebook.


mike
installed wamp Apache/2.4.9 (Win32) PHP/5.5.12, downloaded wordpress, configured wp-config nothing, absolutely nothing happens.
Any thoughts?
Villi
Hey. So everything worked great and i have been playing around practicing. Now i am going to make another website but keep the practice website also, but i need them to be completely independent from each other since i dont want my “messing around” to affect the new one Should i install wordpress again and follow the same instructions (extract the wordpress folder to C:\wamp\www etc.) and make another database ?
In short, should i follow exactly the same process as before, except i would not need to download wamp again obviously.
Thank you
WPBeginner Support
Yes, you need to follow the same instructions.
Admin
Wayne
Great article. I have managed to get everything up and running. But have not got stuck when I try to upload a Theme I have purchased. I have a personal live site using WordPress. But wanted to build one offline for my workplace, hence I am using phpAdmin. Any ideas please how I can work on purchased themes on a localhost?
WPBeginner Support
Installing a purchased theme is no different on a localhost site than on a live site. Simply go to Appearance > Themes on your localhost site. Click on the Add New button and then click on the Upload button. Click on the choose file button to locate the Theme Zip file from your computer and then upload it.
Admin
Manoj
Hi
I had installed everything as per the guide here and my site was working fine. Today, however, i tried to loginto localhost and it gives an error. It says this webpage is not available. ERR_CONNECTION_REFUSED
Kindly help
naveenraj
hi sir,
The icon says in orange colour and i getting blank pages when i go for localhost/phpmyadmin/ page, Please help t resolve this.
WPBeginner Support
Please see WAMP documentation and support forums.
Admin
bella
“Go to C:\wamp\www and paste wordpress folder there.”
I can’t seem to find anywhere that accepts my wordpress folder. Does anybody have more detailed description to do this step for me? Thank you very much for all you sharing people
Ayesha
Hi,
Once you go to wordpress.org and install wp, you will have a wordpress zip folder, extract its contents and it would create a wordpress folder, open this folder and copy the folder named wordpress. Now goto your wampserver folder and then open www folder that lies insides wampserver folder, paste the folder wordpress over there i.e. inside www folder.
You just have to copy your wordpress folder and paste it in the www folder of wampserver.
Hope that helps!
Kush Singh
Really it’s very helpful site for installing wordpress.
Nice work guys keep it up…
Satish Shihani
Superb….. I really like this
On my first attempt only, i done all installation without any error
Thank you so much for this tutorial
Amir
Smooth and fun, worked like a charm. I had only one problem which was resolved by shutting down a certain Microsoft product…
Thank you.
Paul
Great tutorial glad I found it as I am just learning how to use wamp and my local server to build wordpress sites. I would also like to copy a live wordpress site to my local server so I could modify a theme, then reload it to the remote server and was wondering if there was a tutorial on how to do that? I have found and read the tutorial on uploading a site from my local server to the remote one but nothing on copying a live site to the local server and getting it to work. Is this possible and if so, do you have a tutorial on how to achieve it successfully? Thanks in advance.
Kvaibahv01
Hey there,
I had created a WordPress blog earlier this month and my WAMP server was uninstalled due to some reasons….I reinstalled it>did all the same steps> named the ‘wordpress’ folder to ‘site’> opened localhost/site/wp-admin which says :
Welcome to WordPress. Before getting started,………………………….before proceeding.
Database name
Database username
Database password
Database host
Table prefix (if you want to run more than one WordPress in a single database)
We’re going…………We got it.
In all …………… all ready…
I clicked ‘Let’s go’ button which opened ‘Setup config.File’ entered my DB name ‘site’> ‘username’ and ‘password’ I edited on ‘wp-config-sample.php’ and changed username to blank and same with password too> Click next and now it shows me an error “Can’t select database”:
We ………………. database.
Are you sure it exists?
Does the user have permission to use the site database?
On some systems the name of your database is prefixed with your username, so it would be like username_site. Could that be the problem?
If you don’t know how to set up a database you should contact your host. If all else fails you may find help at the WordPress Support Forums.
Please help!
WPBeginner Support
Visit localhost/phpmyadmin to confirm that the database name you entered is correct.
Admin
Geraldine
Hello. I hope you can help me with this. After I created the test site, how can I share this to my friend via online?
Rhian Williams
thank you so much for this I have been battling with localhost software all day and this worked first time for me
moneytechnicals
Ive installed WAMP in windows 7 32 bit. And want to use wordpress. But its not showing to create configuration file. Its showing an error like this-
Warning:
require(C:wampwwwwordpress-trunk/wp-blog-header.php): failed to open
stream: No such file or directory in
C:wampwwwwordpress-trunkindex.php on line 18
Please help me to get out of this. Thank you in advance.
Campbell Sinclair
Hello and to anyone who googles this error and is stuck like I was on this,
You likely downloaded the zip installer and extracted them, maybe cancelled it some point because the extraction / transfer of the folder inside was slow. I’m not sure what happened, not the point either.
This error occurs when not all the files are present. Try and hunt down wp-blog-header in your WordPress folder directory with a simple search. The index page (one that is first loaded by a browser when it opens a directory) is only asking for this file but it simply won’t be there with it in the directory. Index.php is asking for wp-blog-header and everyone else said I’m not the file you’re looking for.
I downloaded the version prior and it was complete because I had the installation page as expected. This is the quickest and certain fix. If you do this, you will should be able to upgrade to the latest once you have installed as well.
WPBeginner Staff
Yes you can.
ArtaGene
Since I didn’t see any specs listed, not sure my old computer will have enough memory…can I install on a portable drive (connects with USB) and use that way ?
WPBeginner Staff
Seems like WAMP didn’t install correctly on your computer. Try installing again or try XAMP.
jerry
I get this error right at the end of the installation.
httpd.exe – system error
The program can’t start because MSVCR110.dll is missing from your computer. Try reinstalling the program to fix this
problem
nikhil
i have install wamp server but when i am going to phpMyAdmin it is showing error like this:-
Forbidden
You don’t have permission to access /phpmyadmin/ on this server.
Roshan Bagdiya
error
#1045 – Access denied for user ‘root’@’localhost’ (using password: NO)
while accesing phpmyadmin
how to resolve it
WPBeginner Staff
Please make sure that the Wamp server icon in your taskbar turns Green before you click on phpMyAdmin. You can also try manually accessing phpMyAdmin by typing this URL in your browser’s address bar http://localhost/phpmyadmin/
Diviya
Followed your procedure step wise. Now when I try to setup database for WordPress, when I click on phpMyadmin I get error ‘HTTP Error 404. The requested resource is not found’
Syed Balkhi
Done – thanks for the suggestion.
Carrie
FYI, the “Skype” error also happens with a similar program called Team Viewer. A similar simple fix, going in to the program and changing the checkbox regarding ports 80 and 443. I agree with others, if nothing else you should put a link to the troubleshooting info in the article right after the WAMP installation. I got frustrated that I kept getting an error, and decided to look through the comments until I found a solution.
Anand Upadhyay
Suggested edit. Please replace
C:wampwww
with
C:wampwww
Aditya Pranav
Done all thing , but when I click on phpMyadmin the an error page will open in browser and that is :-
HTTP Error 404.0 – Not Found
The resource you are looking for has been removed, had its name changed, or is temporarily unavailable.
Derick
Howe about adding a tutorial that continues from this one on how to add multiple websites to be worked on offline like the above one.
Vijay
Thanks so much for this. It worked for me.
My only complaint is that the skype error should have been right after the WAMP installation part. I spent a lot of time figuring out how to get the WAMP icon to go green instead of orange. Ultimately found out that IIS 8.5 was using port 80 and that I had to stop WWW publishing services from Services.msc and restart the Apache on WAMP to get it to work.
M♥ηyαηє Ramołło™
Great tutorial
Jim
Great tutorial. Big thanks. Only you should post the info on Skype port before in the beginning, as I did everything by myself and changed the port number in wamp folder. Then here I found out that there was easier way doing it on Skype
lobsterhands
Great tutorials. Thank you for being so clear and concise.
Lis
Fab article! I’m all installed and working. However, any additional pages I am creating over and above the home page don’t work. I am creating the page in WordPress, but when following the ‘View’ link, I get a 404. Any idea?
pramod
Downloaded everything. when i write on web http://localhost/mysite/ but display error
The requested URL /mysite/ was not found on this server.
Monica
Very helpful thanks.
St. Buzo of C.O.B. ®
Bingo..!! this was so helpful.!! Phase one done i have installed..!!
anbu
dear sir,
this blog is very usefull to me..as per your instruction i create a website locally. but when i try to open the same site from different machine in tha same lan i can’t.please guide me.
i tried via this following method in another computer
1.http://192.168.1.88/(sitename).
2.http://localhost/(sitename)
the site is not opening
anbu
dear sir,
this blog is very usefull to me..as per your instruction i create a website locally. but when i try to open the same site from different machine in tha same lan i can’t.please guide me.
i tried via this following method in another computer
1.http://192.168.1.88/(sitename).
2.http://localhost/(sitename)
Lyle Denman
http://forum.wampserver.com/read.php?2,121118
This should answer many of your questions. Know that you will also have to update your database’s options (from localhost/phpmyadmin/). wp_options > siteurl and wp_options > home should be changed from http://localhost/database_name to http://your_local_ip_address/database_name (for example http://192.168.0.11/coolsite/).
Make sure you open c:/wamp/bin/apache/apache2.4.9/conf/httpd.conf
In that file, after the line reading: # onlineoffline tag – don’t remove, add the following 2 lines:
Require all granted
Require ip 192.168.0 (or whatever the first 3 groupings of your local ipv4 address is)
Then, in the same file, find the line reading: #Include conf/extra/httpd-vhosts.conf and remove the # from the beginning of that line.
Then, open the file c:/wamp/bin/apache/apache2.4.9/conf/extra/httpd-vhosts.conf and comment out the code that is there (just to keep defaults around) and past the following:
ServerName localhost
DocumentRoot c:/wamp/www
AllowOverride All
Save those files, restart all WAMP services and enjoy your LAN development.
Lina
This post was VERY helpful!! Thank you very much!
WPBeginner Staff
First you need to uninstall wampserver completely from your computer. Then download a fresh copy and try to reinstall. If this does not work out, then we will recommend you to use XAMPP which is an alternate software with nearly the same software (Apache, php, mysql).
Jokerman
I tried EasyPhP too but that didn’t work either. Have just installed Xampp and that appears to be working. Thanks very much for the advice.
Jokerman
I have downloaded and attempted an install. It didn’t work as I was missing a dll file. Have downloaded the necessary software from MS and this time the install appeared to have gone well…no error messages and the Wampserver icon has appeared on my desktop as requested. However when I click on the Wampserver icon it asks: Do you want to the following program from an unknown publisher to make changes to your computer? (Program name: wampmanager.exe) Clicking on Yes causes that window to close then nothing happens. Do you have any clues as to what to try next please? Thank you
cmills
The latest version of wamp uses PHP 5.5.12 which isn’t compatible with WordPress!
WPBeginner Staff
That’r probably because your site is served at 127.0.01 which is a local loop address while the other ip address is your lan address. They are two different things.
To enable sharing you need to add this line to your httpd.conf file Listen 192.168.1.4:80 make sure your computer is using static ip and it is set to use the ip address you enter in apache configuration file.
You will also need to make sure that WordPress saves your IP address as your sites URL not localhost. To achieve this you would need to install wordpress from 192.168.1.4/mysite instead of localhost/mysite
Naresh
Thank you very much.
archetypechris
Hello, and thank you for the amazing guide! I have a small
problem. Everything worked find when I followed the guide and my site loads up
fine, but when I try to connect to it from another computer in my house with
address: 192.168.1.4/mysite, it says I don’t have permission to view the page.
Does anyone know how to fix this? Thank
you!
WPBeginner Staff
You can use the Duplicator plugin or BackupBuddy for site transfers.
Anji
It is my first time creating a website in WP and his post was easy and it worked like a charm! Thank you so much!
WPBeginner Staff
George,
The WordPress you install on your local computer is only available on that computer.
There are specialized software that allow you to install Wampserver on a USB stick which you can then carry with you to work.
George
Thanks for the speedy reply,
Today I installed Wamp on my work laptop and using phpadmin exported my sql database from my home computer and imported it to my work laptop.
I tried mirroring the process above on my work laptop and named the database the same thing. I was able to get into my site on my work laptop but is seems my plugins and theme haven’t transferred. Am I missing a step? Must I transfer another folder?
I was planning on working on a local server doing this transfer sequence between work and home and was wondering if it can even be done (I heard about url linking problems) A short check list or play by play of what I must do would be very helpful.
Thank you,
-George
rustomQ
excellent guide!!!!!! got everything up and running the first time!!! thank you oh so much!!!!
George
This Work wonderfully! I’ve been word pressing for a couple of days and have made some progress over the weekend.
One Problem:
How can I take what I have on my home computer and work on it on my work computer in the office? Can I upload this to wordpress and work on it from anywhere? (I am fine with having a http://www.website.wordpress.com url while I am developing) What are my options to working and showing my development work after following the process above.
I am a complete newbie but willing to learn, a quick tutorial on that process and options would be greatly appreciated. Great work so far and thank you for all the resources you guys provide.
Thomas
*facepalm* There is a link just above to resolve the problem. Sorry about that! Thanks again for this great tutorial!