Ya te hemos enseñado a instalar WordPress en Windows y Mac. Sin embargo, recientemente uno de nuestros usuarios preguntó si era posible usar la misma instalación local de WordPress tanto en el trabajo como en casa. En este artículo, te mostraremos cómo instalar WordPress en una memoria USB usando XAMPP, para que puedas usar tu instalación local de WordPress en cualquier ordenador que desees.
XAMPP es un paquete de software que contiene el servidor web Apache, PHP, MySQL y phpMyAdmin. Puedes instalarlo en tus sistemas operativos Windows, Linux o Mac. Te mostraremos cómo instalarlo en una unidad USB conectada a un PC con Windows, pero el método de instalación es prácticamente el mismo independientemente de dónde lo instales.
Lo primero que tienes que hacer es descargar XAMPP lite. Ve a la página de descargas de X AMPP, y luego haz clic en Más descargas.
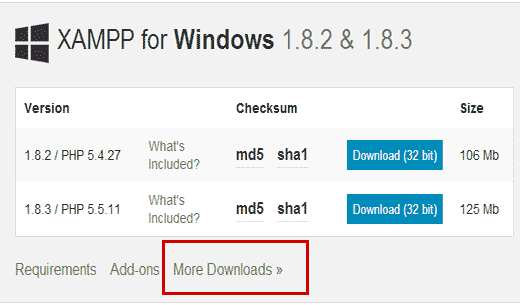
Serás redirigido al sitio web de sourceforge donde tendrás que hacer clic primero en XAMPP para Windows, y luego en la última versión.
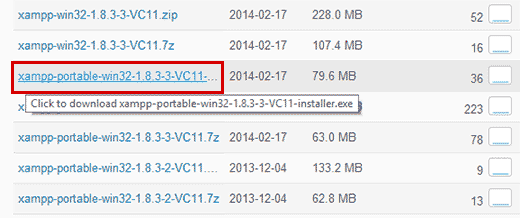
En la pantalla siguiente, aparecerá un anuncio / catálogo / ficha de los archivos disponibles para esa versión. Desplácese hacia abajo y busque la versión portátil en formato .exe. Haga clic en el nombre del archivo para iniciar la descarga.
Una vez que hayas descargado el archivo portable de XAMPP, tienes que hacer doble clic en el archivo para ejecutar la instalación. Durante la instalación se te pedirá que selecciones la ubicación donde quieres instalar XAMPP. Tienes que hacer clic en el icono de la carpeta, y luego seleccionar tu unidad USB.
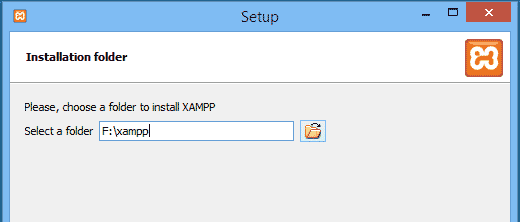
Haz clic en siguiente para continuar la instalación. El instalador instalará XAMPP en tu unidad USB. Después de la instalación, tienes que ir a la unidad USB y abrir la carpeta XAMPP.
Para lanzar XAMPP, necesitas ejecutar xampp-control.exe desde tu unidad USB. Esto mostrará el Centro de Control de XAMPP que se parece a esto:
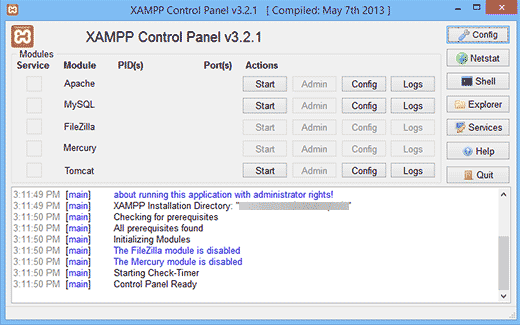
Tienes que iniciar el servidor web Apache y MySQL al hacer clic en el botón de inicio al lado de ellos. El cortafuegos de Windows le indicará que debe permitir el acceso a ambas aplicaciones.
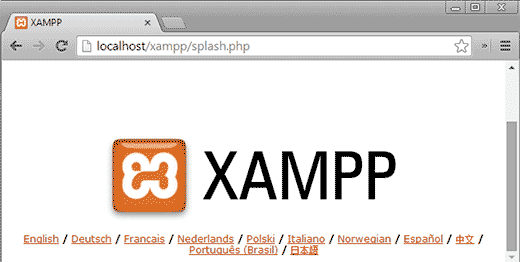
Ahora abre un navegador / explorador web y escribe http://localhost/ en la barra de direcciones. Te aparecerá la pantalla de inicio de XAMPP. Esto significa que has instalado correctamente XAMPP en tu unidad USB.
Instalar WordPress en una memoria USB
Hasta ahora, has instalado correctamente el servidor web Apache con MySQL y PHP en tu memoria USB. El siguiente paso es instalar WordPress. La instalación de WordPress en una memoria USB no difiere mucho de la instalación en un ordenador Windows o Mac.
Primero tienes que abrir tu unidad USB e ir a la carpeta htdocs en tu directorio de instalación de XAMPP. Crea una nueva carpeta en htdocs. Esta carpeta será tu sitio local de WordPress. Puedes ponerle el nombre que quieras. Por el bien de este tutorial vamos a llamarlo site1.
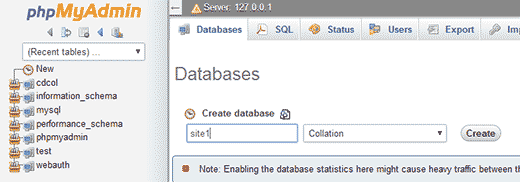
WordPress necesita una base de datos MySQL para funcionar, por lo que es necesario crear una base de datos antes de la instalación. Para crear una, debe abrir el navegador / explorador web e introducir http://localhost/phpmyadmin en la barra de direcciones. Esto abrirá phpMyAdmin que es un software de gestión de bases de datos basado en web. Haga clic en Bases de datos en la barra de menú superior y escriba un nombre para la base de datos antes de pulsar el botón Crear.
Ahora necesitamos WordPress. Visita WordPress.org y descarga una copia nueva de WordPress en tu ordenador. Extrae el archivo .zip descargado a tu escritorio y ábrelo.
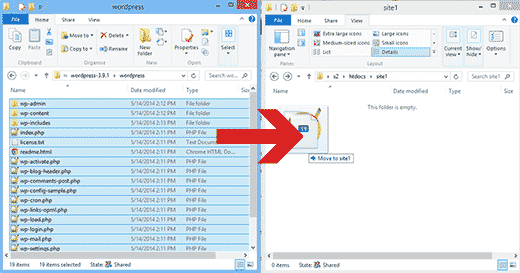
Ahora debe copiar el contenido de la carpeta wordpress y pegarlo en la carpeta /htdocs/site1 de su unidad USB.
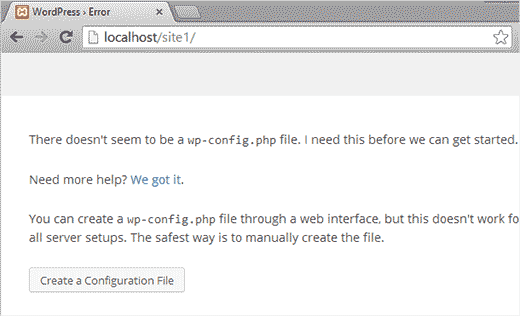
Una vez que haya copiado los archivos de WordPress, puede ejecutar la instalación de WordPress accediendo a su sitio en http://localhost/site1 en un navegador / explorador web.
WordPress le informará de que no ha encontrado el archivo de configuración de WordPress, por lo que deberá crear uno al hacer clic en el botón Crear un archivo de configuración.
En la siguiente pantalla, introduzca el nombre de la base de datos que creó anteriormente. En el campo de nombre de usuario debes introducir root y dejar en blanco el campo de contraseña. Pulsa el botón Enviar para continuar.
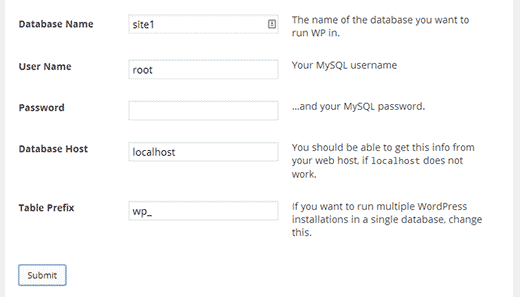
WordPress intentará conectarse a su base de datos. Si es correcto, le mostrará un mensaje de correcto. Haga clic en el botón Ejecutar instalación para continuar.
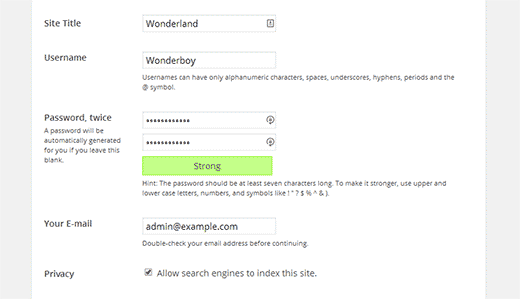
Se le pedirá que proporcione la información de su sitio y que cree un nombre de usuario y una contraseña de administrador. Este nombre de usuario y contraseña de administrador se utilizarán para acceder / acceder al área de administrador de WordPress. También tendrá que proporcionar una dirección de correo electrónico. En la sección de privacidad puede desmarcar la casilla Permitir que los motores de búsqueda indexen este sitio. Una vez que haya terminado, pulse el botón Instalar en la parte inferior.
Eso es todo, has instalado correctamente WordPress. Ahora puedes proceder a acceder / acceder a tu sitio y hacer lo que quieras. Para crear otro sitio de WordPress en el mismo USB, simplemente cree otra carpeta en el directorio htdocs y repita el proceso.
Esperamos que este artículo te haya ayudado a instalar WordPress en una memoria USB. Ahora puedes llevarte esta memoria USB contigo. Ten en cuenta que tu memoria USB solo funcionará con ordenadores Windows. Puede que también quieras ver nuestra guía práctica sobre cómo usar WordPress en tu navegador con WordPress Playground o nuestra selección de los mejores editores de arrastrar y soltar para páginas de WordPress.
If you liked this article, then please subscribe to our YouTube Channel for WordPress video tutorials. You can also find us on Twitter and Facebook.


martine
Hi,
Installed all in good order. When trying to login into wordpress I get the following error : One or more database tables are unavailable. The database may need to be repaired.
Clicking on the link for repair I get the below and I have to delete the last line referring to the repair. If I do this I get another pop up saying I need to add it again and try again. It is a continious circle with no end.
How to solve this?
The wp_users table is okay.
The wp_usermeta table is okay.
The wp_posts table is okay.
The wp_comments table is okay.
The wp_links table is okay.
The wp_options table is okay.
The wp_postmeta table is okay.
The wp_terms table is okay.
The wp_term_taxonomy table is okay.
The wp_term_relationships table is okay.
The wp_termmeta table is okay.
The wp_commentmeta table is okay.
Repairs complete. Please remove the following line from wp-config.php to prevent this page from being used by unauthorized users.
define(‘WP_ALLOW_REPAIR’, true);
WPBeginner Support
Hi Martine,
If this is a fresh WordPress install and you don’t have any content, then you may want to resinatll WordPress. If it does have content, then you may need to repair tables from PhpMyAdmin.
Admin
rajendra upadhyaya
sir
is there any way to install wordpress on usb with WAMP and how much memory it uses
Miran Potocnik
Hello,
We use WP on server. If I install Apache web server with MySQL and PHP on my USB stick and copy the contents of wordpress folder from server and paste it in the /htdocs/site1 folder on my USB drive. Does it mean that the web pages will be the same? How I can synchronize them?for example: If I change something WP on server side that will be changed on local side, when network be up.
Armando
I used (Microsoft) DISKPART in order to change my USB stick into a bootable disk (FAT32) to be used with XAMPP. Before, it would not install.
You may want to add this tip to the tutorials.
Thanks for your tutorial and best regards!
Jay
I’m not sure these steps still work – I have done the process before (year or so ago) and it worked. Now doing it again on a new drive, and with all updated components, step two of the wordpress installation is always (almost) blank. So something is going wrong. I have tried twice and same thing.
Any tips, based on updated components?
Joshua Harman
Is there any way you’d e willing to do this tutorial for Mac? I’ve been wracking my brain for hours trying to get it to work but don’t have a ton of experience
brainfreeze
hi joshua. i am wondering if you have found a way for Mac? if yes, please share. thanks.
Mahendra
can we run php file in another computer which does not have xampp using usb sticks
Amonza
I am not quite exactly sure what you are asking, but if you have xampp installed on a usb stick as described you should be able to take that stick to any computer and run the apache server and be able to serve php pages from the htdocs folder on the pen drive.
If you are running an IDE that needs the path to php.exe you could point it to the php folder on the pen drive.
Lisa
For those who have done this, what size USB drive do you suggest?
Ahmad Fahrurroji
Good idea, I’ve never used this option installing xampp on usb stick but It’s good to try. Thanks.
WPBeginner Staff
you can transfer your site using BackupBuddy (here is a tutorial) or using Duplicator.
Ian Delemare
I like the idea of having a portable version of WordPress and being able to develop a site in many locations. But what is the procedure to transfer a developed site (including images, posts plugins etc) from a USB stick to the web?
Bill Gibson
I had put a multisite version of WP on a USB stick a couple of years ago. I added a portable version of Firefox, and included the Mobile Barcoder plugin. The multiple sites could be used for classes, projects or presentations, and it was a nice organizational tool. Add text, links & images, and embed for videos or larger files. As long as you put your USB stick in an Internet connected device, you had a great presentation tool. The “Mobile Barcoder” app created QR codes, on the fly, so I could pull up a site from the Flash drive, and then generate a QR code to share links with the audience.
WPBeginner Staff
Yes there is, but we are not sure whether it works as a portable app or not
Zeeshan Asif
What about Mac ???
WPBeginner Staff
Unfortunately MAMP the mac alternative to XAMPP can not be run from an external drive. There is an alternative called AMPPS but we have not tried it.
DigitizedSociety
XAMPP has a mac version.
James B.
Great post. I’ve been using “Instant WP” for my local and USB stick installs of WordPress…but I may try XAMPP out! Thanks for the great work.