Nachdem wir jahrelang WordPress-Websites erstellt haben, haben wir gelernt, wie wichtig es ist, eine lokale WordPress-Einrichtung auf Ihrem Computer zu haben.
Mit WordPress auf Ihrem persönlichen Rechner können Sie mit neuen Funktionen experimentieren, ohne Ihre Live-Site zu gefährden, tief in die WordPress-Entwicklung eintauchen und sogar ganze Websites erstellen, bevor sie live gehen. Es ist wie eine private Sandbox für alle Ihre WordPress-Projekte.
Als Windows-Benutzer gibt es zahlreiche Möglichkeiten, WordPress lokal einzurichten. Wir haben uns jedoch auf die zwei einfachsten Methoden beschränkt. In dieser Anleitung zeigen wir Ihnen, wie Sie WordPress ganz einfach auf einem Windows-Computer installieren können, unabhängig davon, welche Version Sie verwenden.
Warum sollten Sie WordPress unter Windows installieren?
Wenn Sie ein Windows-Benutzer sind, dann bietet die lokale Installation von WordPress auf Ihrem Computer mehrere Vorteile.
Eine lokale WordPress-Installation schafft eine Testumgebung, die sich nicht auf Ihre Live-Website auswirkt. Diese Einrichtung, die oft als lokaler Server oder localhost bezeichnet wird, ist Ihr persönlicher Spielplatz für WordPress.
WordPress-Entwickler verwenden regelmäßig lokale Installationen für ihre Arbeit. Zum Beispiel können sie damit mit neuen Plugins oder Themes experimentieren oder die Website vor dem Update auf den Gutenberg-Blockeditor testen.
Aber das ist nicht nur etwas für Profis. Wenn Sie WordPress noch nicht kennen, ist eine lokale Installation perfekt zum Lernen. Sie können Funktionen erkunden, Themes und Plugins testen und frei experimentieren, ohne sich Sorgen machen zu müssen, dass eine Live-Site kaputt geht.
Es ist wichtig zu wissen, dass bei einer lokalen Installation von WordPress unter Windows nur Sie die Website sehen können. Wenn Sie eine öffentliche Website erstellen möchten, benötigen Sie einen Domainnamen und Webhosting.
Technisch gesehen können Sie WordPress unter Windows mit XAMPP installieren, und wir haben bereits eine Anleitung dazu geschrieben.
Wir haben jedoch 2 noch einfachere Methoden als XAMPP gefunden, um eine lokale WordPress-Umgebung einzurichten. Sie eignen sich hervorragend für Anfänger oder Benutzer, die schnell eine lokale Website erstellen müssen. Sie können auf den unten stehenden Link klicken, um zu der jeweiligen Methode zu springen, die Sie interessiert:
Methode 1: WordPress unter Windows mit Studio installieren (schnell und einfach)
Für die erste Methode werden wir Studio verwenden. Dabei handelt es sich um eine lokale WordPress-Software von Automattic, dem Unternehmen, das WordPress.com verwaltet und betreibt, einen Website-Builder, der auf der WordPress-Software basiert.
Wir werden zuerst über diese Methode sprechen, weil sie viel schneller und einfacher zu befolgen ist, was sie perfekt für absolute Anfänger macht.
Zunächst müssen Sie die Website Studio by WordPress.com öffnen. Klicken Sie dann auf die Schaltfläche “Download für Windows”.
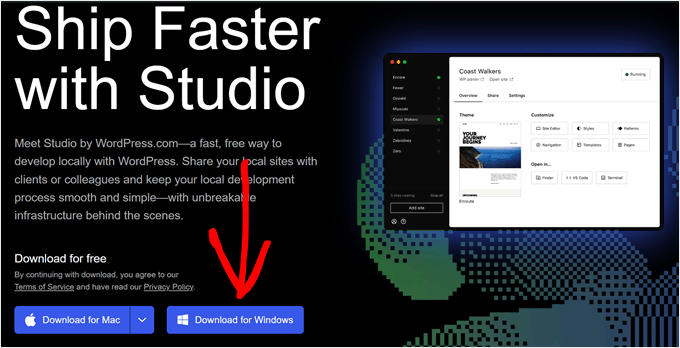
Öffnen Sie dann einfach die heruntergeladene Datei, um die Installation zu starten.
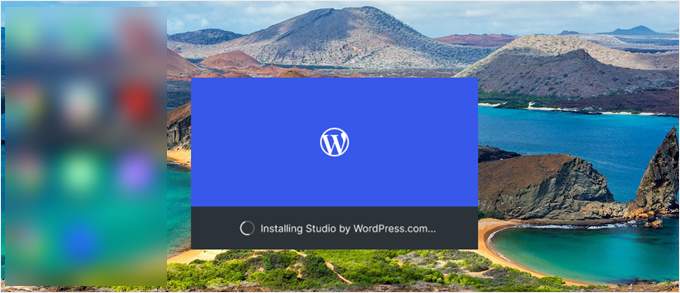
Es erscheint nun ein Popup-Fenster, das Ihnen anzeigt, dass die Anwendung installiert wird.
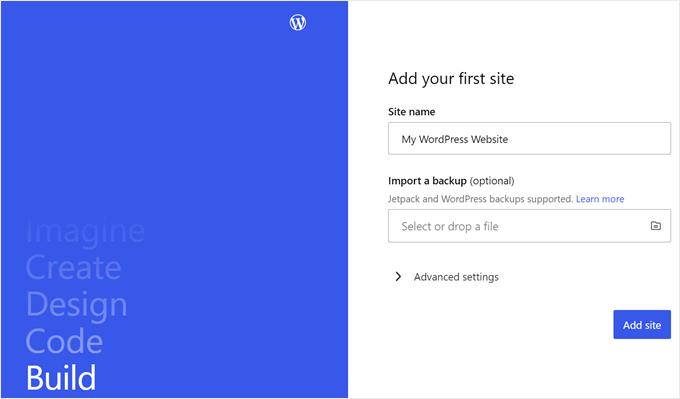
Danach können Sie Ihre erste Website hinzufügen.
Geben Sie dazu einfach den Namen Ihrer neuen lokalen WordPress-Site ein und klicken Sie auf “Site hinzufügen”. Sie können die Website benennen, wie Sie wollen, solange Sie sie leicht identifizieren können.
Sie sollten nun das Dashboard Ihrer lokalen WordPress-Website sehen.
Um auf Ihr WordPress-Dashboard zuzugreifen und Ihre Website zu bearbeiten, klicken Sie einfach auf die Schaltfläche “Start” in der oberen rechten Ecke. Dadurch wird Ihre lokale Website für Sie auf Ihrem Computer zugänglich.
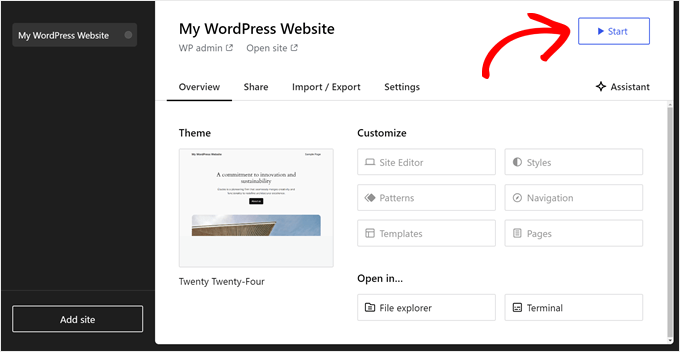
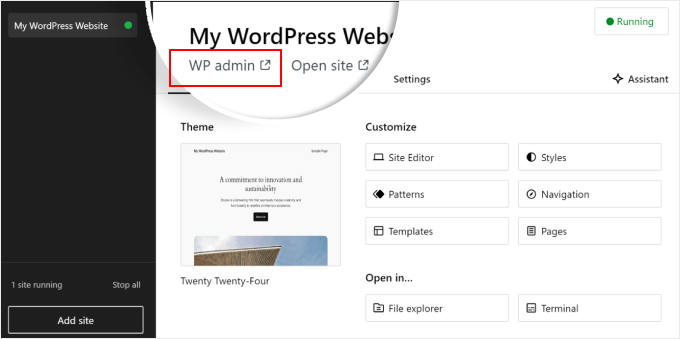
Sobald die Schaltfläche “Start” auf “Läuft” wechselt, können Sie auf den Link “WP Admin” oben links auf der Seite klicken.
Dies bringt Sie zu Ihrer lokalen WordPress-Verwaltungsseite.
Und das war’s dann auch schon mit der Einrichtung. Sehen wir uns nun die anderen Einstellungen an, die beim Aufbau Ihrer lokalen Website erforderlich sein können.
Wie Sie auf der Registerkarte “Übersicht” sehen können, haben Sie direkt vom Studio-Dashboard aus Zugriff auf das Menü des WordPress-Vollseiteneditors. Sie können auch auf “Datei-Explorer” klicken, um die Ordner und Dateien Ihrer WordPress-Website zu öffnen, und auf “Terminal” klicken, um Ihre Website mit WP-CLI zu verwalten.
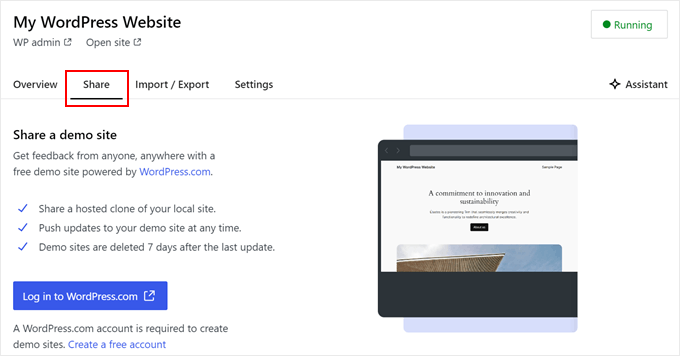
Wenn Sie zur Registerkarte “Freigeben” wechseln, können Sie sich bei Ihrem WordPress.com-Konto anmelden, Ihre lokale Website klonen und sie auf die Server von WordPress.com hochladen. Dadurch wird die geklonte Website vorübergehend online gestellt, was für die gemeinsame Nutzung von Demoseiten mit Ihren Kunden oder Teammitgliedern nützlich ist.
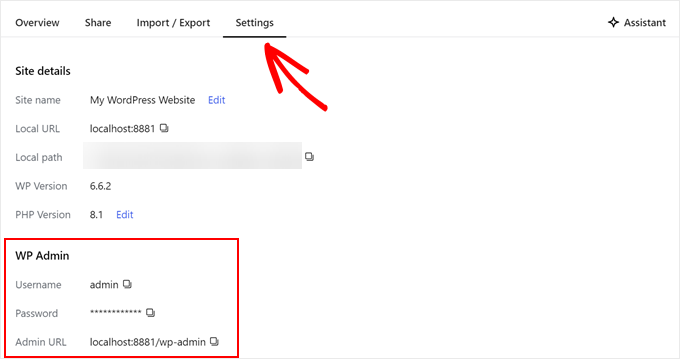
Es kann vorkommen, dass Sie sich direkt über Ihren Browser bei Ihrer lokalen Website anmelden möchten, anstatt Studio zu verwenden. In diesem Fall müssen Sie Ihre wp-admin-Anmeldedaten kennen.
Um sie zu finden, können Sie zur Registerkarte “Einstellungen” wechseln und dort Ihren WordPress-Administrator-Benutzernamen, Ihr Passwort und Ihre Anmelde-URL finden.
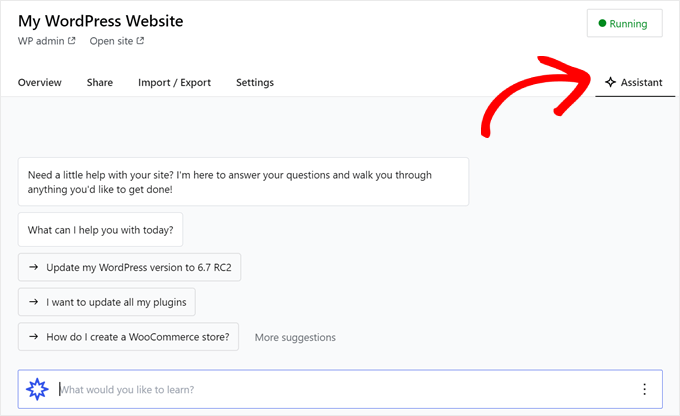
Eine weitere nützliche Funktion von Studio ist der integrierte KI-Chatbot, mit dem Sie kommunizieren können, indem Sie auf die Schaltfläche “Assistent” klicken.
Hier können Sie Studio um Hilfe bei Aufgaben wie der gleichzeitigen Aktualisierung aller Ihrer Plugins, der Aktualisierung Ihrer WordPress-Kernversion oder der Erstellung von Code für einen benutzerdefinierten Block bitten.
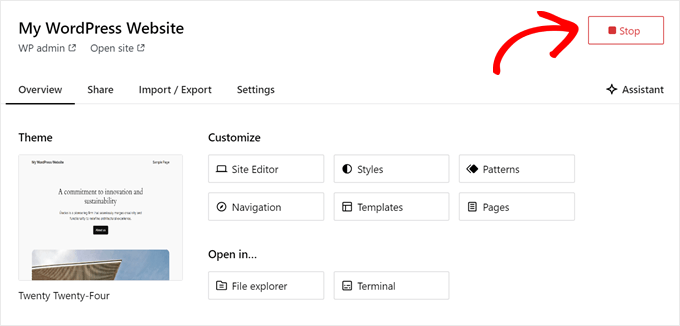
Wenn Sie mit der Arbeit an Ihrer lokalen Website fertig sind, bewegen Sie den Mauszeiger einfach über die Schaltfläche “Laufend” in der oberen rechten Ecke, bis dort “Stopp” steht.
Klicken Sie dann auf die Schaltfläche, um die Website zu beenden.
Ein Nachteil von Studio ist, dass Sie die WordPress-Umgebung nicht nach Ihren Wünschen konfigurieren können. Das bedeutet, dass Sie die PHP-Version, den Webserver und die Datenbank verwenden müssen, die für Sie vorausgewählt wurden.
Dies kann ein Nachteil sein, wenn Sie Ihre Website oder Ihr Plugin mit bestimmten Serverkonfigurationen testen müssen.
Wenn Sie mehr Kontrolle über Ihre lokale WordPress-Umgebung benötigen oder Ihr lokales Setup an eine bestimmte Live-Server-Konfiguration anpassen müssen, können Sie die nächste Methode mit Local WP ausprobieren.
Methode 2: WordPress unter Windows mit lokalem WP installieren (besser anpassbar)
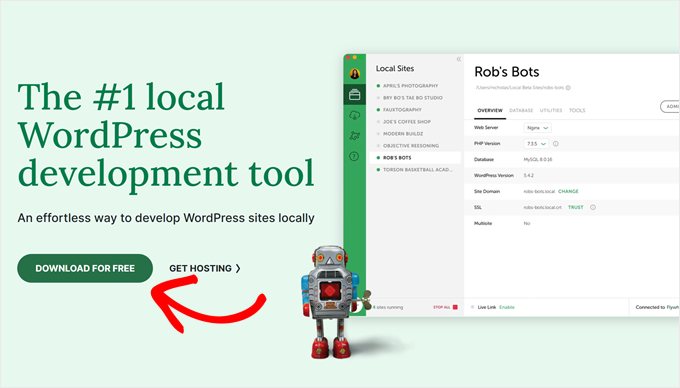
Zunächst müssen Sie die Local WP-Software herunterladen und auf Ihrem Windows-Computer installieren. Gehen Sie einfach auf die Local WP-Website und klicken Sie auf die Schaltfläche “Download for Free”.
Daraufhin erscheint ein Popup-Fenster, in dem Sie Ihre Plattform auswählen müssen. Wählen Sie “Windows” aus dem Dropdown-Menü.
Als Nächstes können Sie Ihre Daten wie Vor- und Nachname, Arbeits-E-Mail-Adresse und Telefonnummer eingeben, um die Software herunterzuladen.
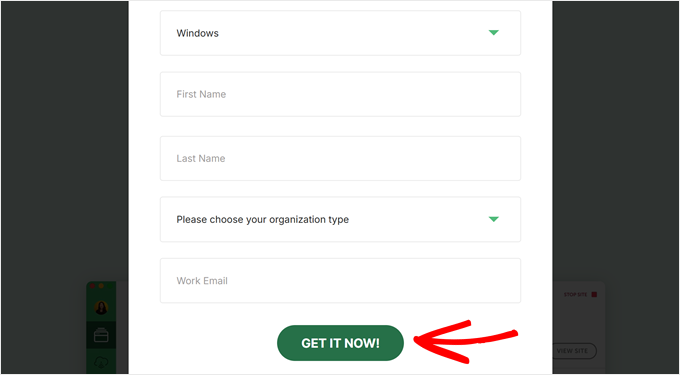
Nach Eingabe der Daten klicken Sie einfach auf die Schaltfläche “Jetzt anfordern”.
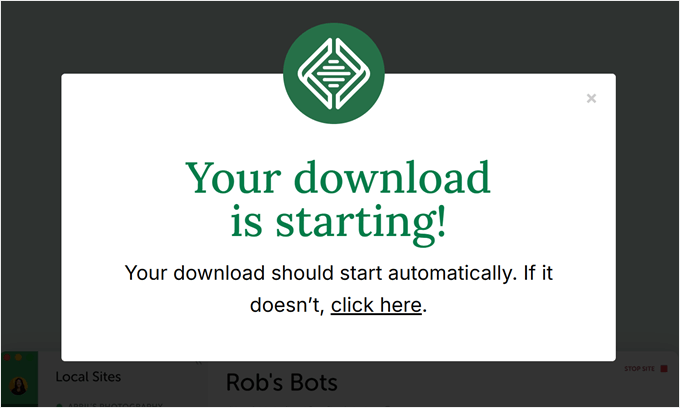
Danach wird die Software automatisch auf Ihren Computer heruntergeladen. Andernfalls können Sie auf den Link “Hier klicken” klicken, um den Download zu starten.
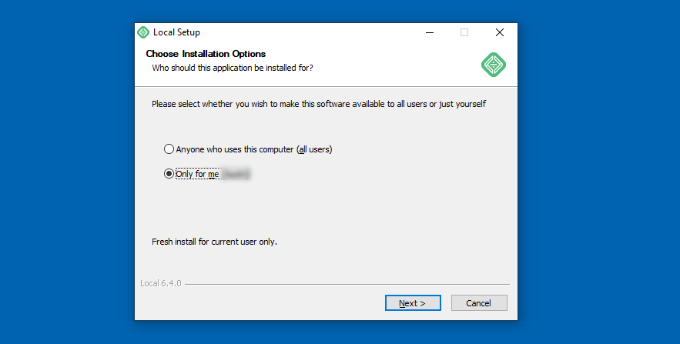
Sobald die Datei heruntergeladen ist, starten Sie den Einrichtungsassistenten.
Nun müssen Sie auswählen, ob Sie die Software für alle Benutzer oder nur für sich selbst installieren möchten.
Sobald Sie eine Option ausgewählt haben, klicken Sie auf die Schaltfläche “Weiter”.
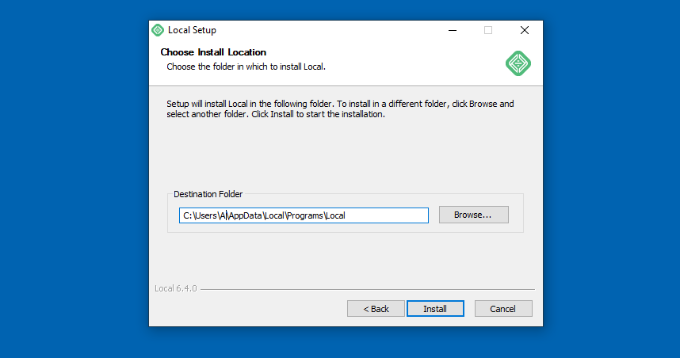
Im nächsten Schritt können Sie den “Zielordner” auswählen, in dem die Software installiert werden soll.
Klicken Sie einfach auf die Schaltfläche “Durchsuchen”, um den Pfad festzulegen, und klicken Sie dann auf die Schaltfläche “Installieren”.
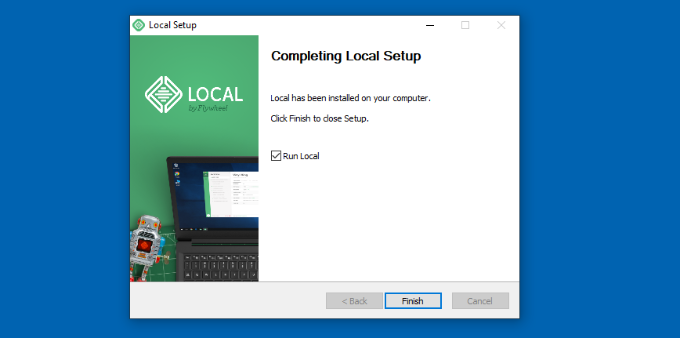
Die Local WP-Software wird nun auf Ihrem Windows-Computer installiert.
Anschließend können Sie das Kontrollkästchen “Lokal ausführen” aktivieren und im Einrichtungsassistenten auf die Schaltfläche “Fertig stellen” klicken.
Die Software wird nun auf Ihrem Windows-Gerät gestartet.
Der nächste Schritt besteht darin, eine neue lokale Website hinzuzufügen. Klicken Sie dazu einfach auf das Pluszeichen “+” am unteren Rand.
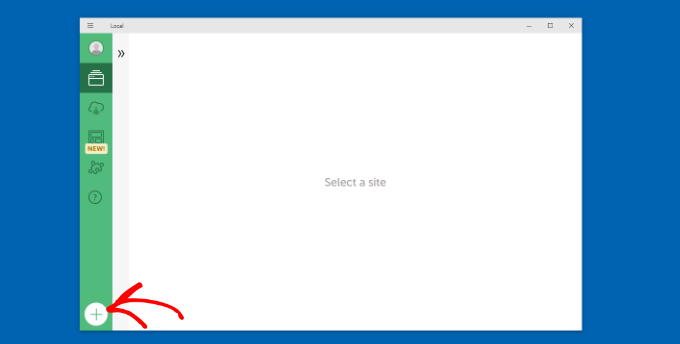
Danach können Sie eine Website in der lokalen Software erstellen.
Wählen Sie die Option “Neue Website erstellen” und klicken Sie auf die Schaltfläche “Weiter”. Es gibt auch die Möglichkeit, die Website aus einer Blaupause oder einer bestehenden Website-Datei zu erstellen, aber zur Veranschaulichung entscheiden wir uns für die erste Option.
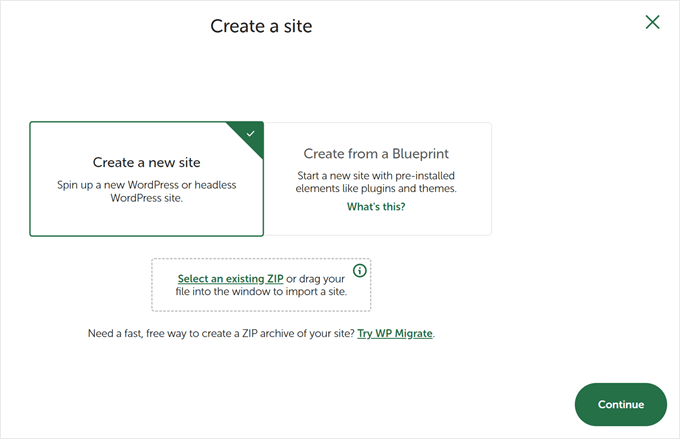
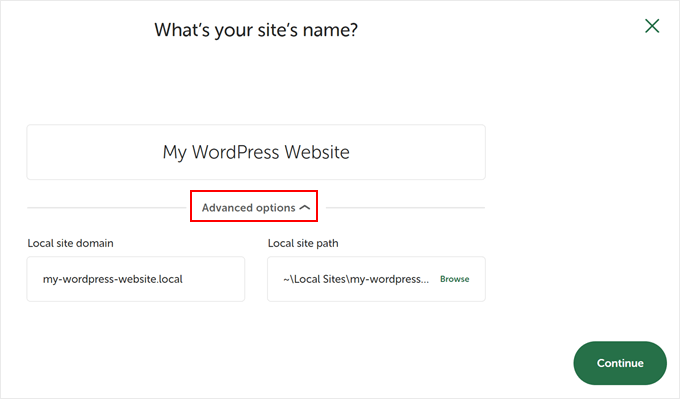
Als nächstes können Sie einen Namen für Ihre lokale Website eingeben, z. B. “Meine WordPress-Website”.
Es gibt auch erweiterte Optionen, bei denen Sie die lokale Website-Domäne und den lokalen Website-Pfad eingeben können. Standardmäßig wird für die Domain der Titel Ihrer Website verwendet, jedoch mit Bindestrichen getrennt.
Wenn Sie fertig sind, klicken Sie einfach auf die Schaltfläche “Weiter”.
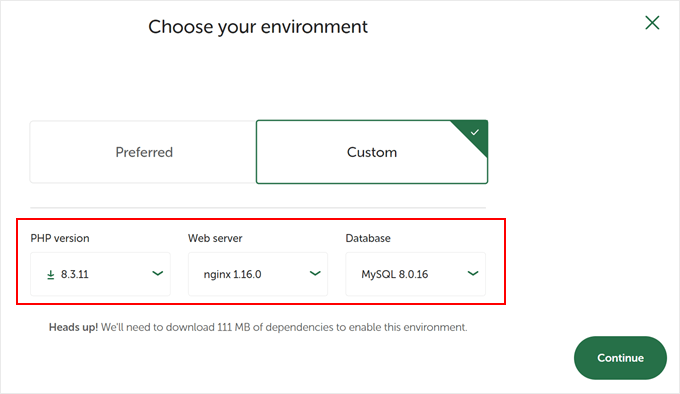
Danach müssen Sie eine Umgebung für Ihre lokale Website auswählen.
Sie können die “bevorzugte” Umgebung verwenden, in der die Software automatisch die PHP-Version, den Webserver und die MySQL-Version auswählt. Andererseits können Sie auch “Benutzerdefiniert” wählen und die Umgebungsdetails eingeben.
Local WP bietet die neuesten PHP-Versionen. Als Webserver können Sie zwischen Nginx und Apache wählen. Auch bei den Datenbanken können Sie zwischen MySQL und MariaDB wählen.
Beachten Sie, dass einige PHP-, Webserver- und Datenbankversionen das Herunterladen bestimmter Abhängigkeiten erfordern, damit sie ordnungsgemäß funktionieren.
Als nächstes können Sie einen WordPress-Benutzernamen und ein Passwort für Ihre lokale Website eingeben. Außerdem haben Sie die Möglichkeit, eine WordPress-E-Mail-Adresse auszuwählen, an die Sie alle E-Mail-Benachrichtigungen erhalten werden.
Darüber hinaus gibt es eine erweiterte Option, bei der die Software fragt, ob Sie ein WordPress-Multisite-Netzwerk haben. Wenn nicht, klicken Sie einfach auf “Nein”.
Nachdem Sie diese Angaben eingegeben haben, klicken Sie einfach auf die Schaltfläche “Website hinzufügen”.
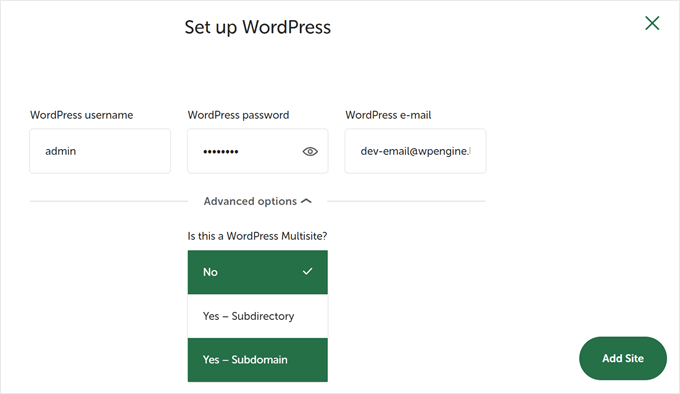
Die Software wird nun WordPress installieren und Ihre Website einrichten.
Um die lokale Website zu starten, klicken Sie auf die Schaltfläche “Website starten” in der oberen rechten Ecke.
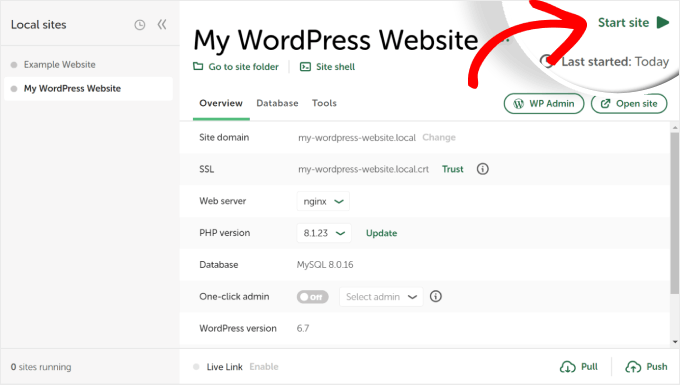
Klicken Sie als Nächstes auf die Schaltfläche “WP Admin”, um die Anmeldeseite für den WordPress-Admin anzuzeigen.
Geben Sie einfach den Benutzernamen und das Kennwort ein, die Sie zuvor bei der Einrichtung der lokalen Website eingegeben haben, und klicken Sie dann auf die Schaltfläche “Anmelden”.
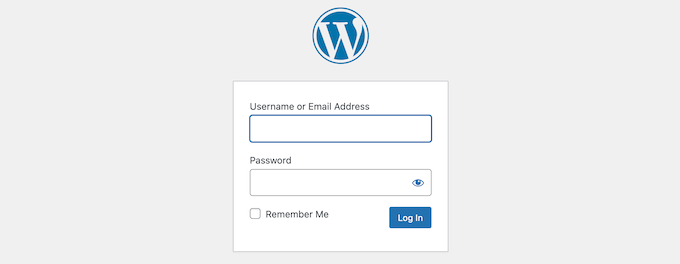
Sie können nun Ihre lokale Website auf Ihrem Windows-Computer bearbeiten.
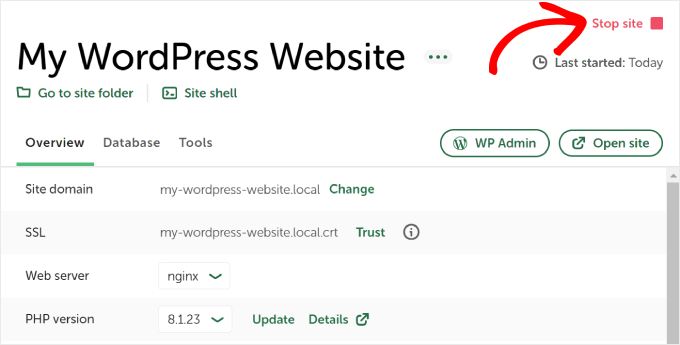
Wenn Sie fertig sind, vergessen Sie nicht, die Website von der Local WP Software zu stoppen, indem Sie auf die Schaltfläche “Stop site” klicken.
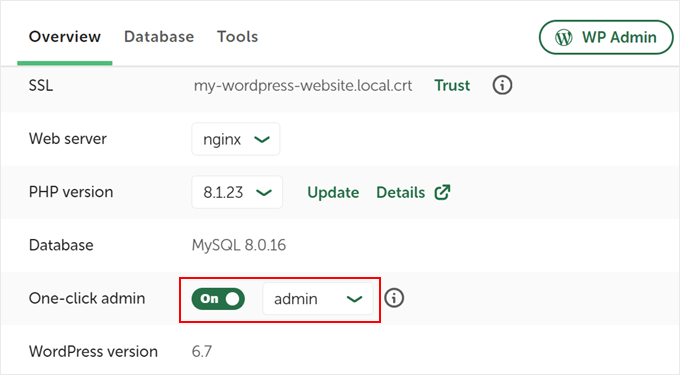
Pro-Tipp: Wenn Sie den Anmeldevorgang überspringen möchten, können Sie in Local WP einen Ein-Klick-Admin-Login aktivieren.
Gehen Sie dazu einfach zurück zum Local WP Dashboard und schalten Sie die Schaltfläche “One-click admin” auf “On”. Wählen Sie dann im Dropdown-Menü den Admin-Benutzer aus, der diese Ein-Klick-Login-Funktion nutzen kann.
Alternative: Verwenden Sie WordPress Playground, um Themes, Plugins und mehr zu testen
WordPress Playground ist ein innovatives Tool, mit dem Sie direkt in Ihrem Webbrowser mit WordPress experimentieren können. Es ist ein virtueller Sandkasten, in dem Sie neue WordPress-Themes, Plugins und Funktionen ausprobieren können, ohne eine reale Website zu beeinträchtigen.
WordPress Playground unterscheidet sich von einer lokalen WordPress-Umgebung in mehreren wichtigen Punkten.
Erstens muss es nicht auf Ihrem Computer installiert werden und wird im Gegensatz zu dauerhaften lokalen Installationen nach jeder Verwendung zurückgesetzt. Sie können von jedem Gerät mit einem Browser darauf zugreifen, während lokale Installationen an einen Computer gebunden sind.
Während WordPress Playground ideal für schnelle Tests und zum Lernen ist, bietet eine lokale WordPress-Umgebung auf Ihrem Windows-Computer mehr Flexibilität für langfristige Entwicklungsprojekte.
Eine ausführliche Anleitung finden Sie in unserem Leitfaden zur Verwendung von WordPress Playground in Ihrem Browser.
Ich habe WordPress auf meinem Windows-Computer installiert, was nun?
Jetzt, wo Sie WordPress auf Ihrem Computer haben, können Sie einige Dinge tun:
- Lernen Sie grundlegende WordPress-Tipps und -Tricks, um Ihre Website besser zu nutzen.
- Probieren Sie verschiedene WordPress-Themes aus, um zu sehen, wie Ihre Website aussehen kann.
- Installieren und testen Sie unverzichtbare WordPress-Plugins, um Ihrer Website neue Funktionen hinzuzufügen.
- Erfahren Sie, wie Sie häufige WordPress-Fehler selbst beheben können.
- Probieren Sie verschiedene Drag-and-Drop-Seitenerstellungsprogramme aus, um Ihre Website ansprechend zu gestalten.
- Erfahren Sie, wie Sie das WordPress-Administrator-Passwort auf localhost zurücksetzen, um den Zugang zu Ihrer Website wiederherzustellen.
- Richten Sie automatisierte Arbeitsabläufe ein, um die Verwaltung Ihrer Website zu erleichtern.
- Erfahren Sie mehr über die Sicherheit von WordPress, um Ihre Website vor Hackern zu schützen.
- Verschieben Sie Ihre lokale WordPress-Website auf einen Live-Server, wenn Sie sie für alle freigeben möchten.
Wir hoffen, dass dieser Artikel Ihnen geholfen hat, zu lernen, wie man WordPress lokal auf einem Windows-Computer installiert. Vielleicht interessieren Sie sich auch für unseren Artikel über die lokale Installation von WordPress auf einem Mac-Computer und unsere ultimative Anleitung zur Erstellung einer WordPress-Staging-Site.
Wenn Ihnen dieser Artikel gefallen hat, dann abonnieren Sie bitte unseren YouTube-Kanal für WordPress-Videotutorials. Sie können uns auch auf Twitter und Facebook finden.


Mituka
Awesome Stuff. Worked like a charm.
WPBeginner Support
Glad our guide could help
Admin
Noreen Naz
Great.. but i want to make another data base what should i do?? should i register again?? reply as soon as possible please
WPBeginner Support
For making another database for your local install, rather than visiting localhost/yoursite you would go to localhost which should have a link in the bottom left to get you to phpMyadmin
Admin
Asadullah
Great Tutorials:
My eyes have been opened.
That was all,which I was looking for.
Best….
WPBeginner Support
Glad our article could help
Admin
pawan
nice article
WPBeginner Support
Glad you like our article
Admin
Jan
Great tutorial. Worked straightaway – thanks!
Steve
Hey guys.
Thought you should know that your tutorials are being used by a scammer on YouTube to gain affiliate commissions from Bluehost.
Did you upload this video onto this channel? –
WPBeginner Support
Hi Steve,
No, we did not. They just downloaded and reuploaded it on their channel. Thank you for notifying us.
Admin
Bharat Suneja
Why not use IIS instead of Apache? It’s a native web server on Windows and offers much better functionality and manageability, particularly for Windows users/admins who’s used to managing Windows via the GUI tools, commands and/or PowerShell.
WPBeginner Support
Hi Bharat,
Most users would move their websites to a live server, or create a development environment for a site. Most likely those hosting providers will be running Apache.
Admin
Bob
How much load does running this take on my machine? Could I put on a spare machine on my local network and access it via my LAN?
WPBeginner Support
Hi Bob,
Depends on how fast your machine is. Yes, you can do that but that would require some extra steps to configure your network and server.
Admin
Noz
WaMp is bulky, full of problems and never know when it will break and you lose your databases… never use it.
Sharon Y
This site can’t be reached localhost refused to connect.
Search Google for localhost mysite
ERR_CONNECTION_REFUSED
Please help!
WPBeginner Support
Hi Sharon,
This means that WAMP is not running Apache. You need to restart it and then retry.
Admin
Sharon Y
I can’t login to localhost/mysite/
Forbidden
You don’t have permission to access /mysite/ on this server.
Apache/2.4.35 (Win64) PHP/7.2.10 Server at localhost Port 80
Please help!
SULAIMAN OLUWO
while installing i received warning message which was not part of the expected actions stated in the WAMP instruction steps above,. It went thus: do you want this programme (WAMP) to make changes to your pc….
Julio
Hi
I followed every step the tutorial said, but when i enter the db info before installing wordpress, i get an “error estabilishing connection to the database”.
WAMP is running ok, apache green, MySQL green, i created the database by accessing PhpMyAdmin, all the info is exactly like written in the tutorial… i searched all over the web and found absolutely nothing related to this error.
Can someone help me out?
WPBeginner Support
Hi Julio,
The only reason you will get this error is when WordPress is unable to connect to your database. You need to check your database settings to make sure they are correct.
Admin
Tracy
I’m trying to upload a theme but when I click to upload the zip file from my computer I get a message saying “the link you followed has expired” please try again.
WPBeginner Support
Hi Tracy,
Most likely, your theme file size is too big and it gets killed during the upload. Please try the steps in our tutorial on increasing file upload size limit in WordPress.
Admin
Hazel Andrews
I’m getting that error as well… brill thanks for the link to follow!
Tanja
Hi, how to start my word press today. I installed it yesterday, using your instruction, but today I cannot find any icon or anything that will help me to start with it
WPBeginner Support
Hi Tanja,
You will first need to start WAMP and after that you will be able to open your site in the browser.
Admin
Henry
Awesome. This worked perfectly. Thanks for sharing
Mike
I want to install WordPress on my W7 computer for experimental purposes.
But I want to use WordPress 4.9.1, instead of the latest version.
This is because I have an excellent tutorial that’s based on 4.9.1.
Is this possible?
WPBeginner Support
Hi Mike,
Yes it is possible. You can download the older versions of WordPress from official website and install it following the instructions above.
Admin
Nina
Every time I try to open up Wamp, it keeps giving me this message: “Error: This program can only be installed on versions of Windows designed for the following processor architectures: x64”
My computer is a Windows 7 32-bit operating system and I’ve downloaded both the 62-bit and 32-bit wamp version yet it gives me the same message. It’s so frustrating because I’ve installed Wamp on my computer last year, then uninstalled it this year. Now, I’m trying to install it again and it gives me the same message over and over again. Does anyone know how to fix this? It’s literally driving me nuts. I’ve got a link below of the message if you want to see it:
Aasim Unia
Thank you for sharing ! it worked in first try.
Jim Zapapas
Installed successfully 1st try.
Thank you!
Jordens Cadet
Thanks so much, much better than silent videos on youtube.
Jazz
Thanks a ton for sharing your knowledge with all of us here!
WordPress is installed successfully for me
But, now my skype has stopped…it says MSVCP140.dll missing. How can I fix this without causing any trouble to WordPress and Wamp functioning?
Aniket Thanage
Perfect tutorial…thanks a lot
Lucky
Thanks for this. but do i need to install wordpress again each time I put on my laptop to edit my site or create a new site? pls reply asap. thanks
henry paul
The WampServer site has two versions of the software – 32 BITS or 64 BITS. Click on the version you prefer to download.
Click on “download directly,” and you’ll be taken to the website. The download will automatically start in 5 seconds.
Tristan
Got it working without a hitch! Thank you so much for this. But I have another question:
As a web developer I will be creating multipule websites. If I use local WP to create 1 site, do I have to create a separate DP for each new website? And if I eventually wish to attatch it to a domain/host, is there another tutorial that I can follow that will teach me to do just that? Thank you!!
Chandan
i changed wordpress name to mysite but it shows below error
Further, I tried pasting http;//localhost/wamp64 in my browser, it gives the error 404. Also, I want to build my website locally before I go live. Please assist me.
Chandan
Further, I tried pasting http;//localhost/wamp/mysite but shows error. in my browser, it gives the error 404 with below mentioned
The requested URL /mysite/ was not found on this server.
Apache/2.4.23 (Win32) PHP/5.6.25 Server at localhost Port 80
Rudy
Wow! without any problems Wamp on my pc and after that my website local!
Thank you very much for your time and effort to write this tutorial!
Alhaji ZiC
your guideline perfectly worked for me while installing wampserver and wordpress though it was not easy but i combined persistence and trial and error till i see the end.
A million pounds applause there.
but, please, i have no knowledge on web designing, so, what step can i take to design a good looking and professional website?
kind regard
sahil
Not able to download wampserver from the link.
It says file has been removed.
Please provide the new link.
WPBeginner Support
Hi Sahil,
The link is working. May be it was a temporary error. Please try again.
Admin
kym
Hi, If i want say try out with a Thrive theme and their page builder would it be possible with WAMP?
WPBeginner Support
Hi kym,
Yes you can try it on your local server using WAMP.
Admin
Lyson
Im getting password is wrong.
I need your help guys.
Steve Baer
Thanks for this guide, it was smooth sailing…..everything installed perfectly.
Elliot McClintock
Thank for the tutorial. Everything went smooth in the first attempt.
I have a secondary question: If I want to create a second test website (e.g. mysite2), can I do it within same WAMP64\www folder or would I have to repeat the whole process from start on a separate root folder?
Thanks again.
Muhammad Bilal
there are two methods one is you can use single wordpress for your second website and the second is repeate the same process but the wordpress folder name should be different and database also…
Vegard Svingen
Hoping this will be my breakthrough
Gimel
Thanks a lot for this tutorial, it was extremely helpful. I do however have on issue that is causing me a lot of frustration right now. My wordpress installation is moving extremely slow. it takes about 8 – 10 seconds to perform any action in wordpress. I tried everything i found online, I disabled the cgi_module, I changed localhost to 127.0.0.1 in the wp-config file. I also tried anther solution I found online concerning adding additional code to the wp-config file, nothing works. it’s taking me forever to get anything done. I would deeply appreciate any help I can get on this matter.
Aditya Choudhary
Thank you for this tutorial, this is very helpful for me. Thank you.
Samuel
Thanks for this tutorial, the installation process went smoothly but after installation i tried installing some themes and i activate the themes but they wont take effect please does any body know what i can do about this?
Aika
Hi!, Wondering what to do with this error.
The program can’t start becauseMSVCR110.dll is missing from your computer. Try reinstalling the program to fix this problem.
been reinstalling several times. Thanks in advance!
Robert Wheeler
You need to
1) Uninstall WAMP
2) Install a number of Microsoft C++ Redistributables – do a Google search for this. This will install a number of .DLL files which are needed for WAMP to run.
3) Reinstall WAMP.
I’m not sure why this information is not included with the instructions on how to install WAMP, it is a regular error.
Margie
FANTASTIC! Went off without a hitch! Had trouble with XAMPP install, so decided to try WAMP instead, and your instructions had me up and running in no time…thanks sooo much!
Eddie
Hi,
I pasted the wordpress folder into the C:\wamp64\www folder
and renamed the wordpress folder to mysite. I opened the web browser and typed the url on my browser, http://localhost/mysite/.
The browser shows a blank page so I can’t start the wordpress install. I have changed the local host to 8080 via the Wamp tool menu. I can’t seem to go further, can someone advise me. Thanks
Trevor
If you changed the WAMP (apache) port, you’ll have to include the port number in the URL. ex: localhost:8080/mysite/
Eddie
Hi Trevor,
Thanks it worked.
Regards
Eddie
Eddie
Hi Trevor, Thanks it worked.
Regards
Eddie
Gaz Davies
Can I ask why you would change the port on a local host?
thanks
M.
my local wordpress is settings are for http, while my current online version is set at https. if i use duplicator, will i end up having http and have to force http to https redirect?
Sunday Adeniran
WAMP could not fully function on my 2010 hp laptop. It complained of missing file MSVCR120.dll. Only one service in running. Can somebody help me?
Sunday Adeniran
I was able to solve this problem by installing a lower version of WAMP server (2.5). It then worked well. Many thanks.
Victor Escobar
Great tutorial, but when I installed WamServer 3.1.0, I get a slightly different tools menu, without phpMyAdmin being listed. The following is what’s on the Tools menu, under the Tools section:
– Restart DNS
– Check httpd.conf syntax
– Check state of services
– Check DNS search order
– Check Compiler VC, compatibility and ini files
– Show VirtualHost examined by Apache
– Show Apache loaded modules
– Delete unused versions
The other sections have to do with assigning port numbers and purging logs.
Jeremiah
To access phpMyAdmin, left-click on the WampServer icon in windows taskbar, and you will find it on the list that will appear, but if you right-click on the icon instead, you will get the list you mentioned earlier.
Sheraz Ali
One of the best guide. it works smoothly.
justine
Many thanks – Very easy to follow and worked like a dream
Sunday
Finally, guys. I got it done. Simple but stylish. Many thanks to our friends in WPbeginner.
joran
sir there was an error ..MSVR.dll what is the solution of this error sir? tnx
Sunday Adeniran
It was the same error I got. So what is the solution?
Nanya
whoa! It was a success. Well detailed. I love this, I had no problem at all, it’s very comprehensive. Thanks a lot.