Nachdem wir jahrelang WordPress-Websites erstellt haben, haben wir gelernt, wie wichtig es ist, eine lokale WordPress-Einrichtung auf Ihrem Computer zu haben.
Mit WordPress auf Ihrem persönlichen Rechner können Sie mit neuen Funktionen experimentieren, ohne Ihre Live-Site zu gefährden, tief in die WordPress-Entwicklung eintauchen und sogar ganze Websites erstellen, bevor sie live gehen. Es ist wie eine private Sandbox für alle Ihre WordPress-Projekte.
Als Windows-Benutzer gibt es zahlreiche Möglichkeiten, WordPress lokal einzurichten. Wir haben uns jedoch auf die zwei einfachsten Methoden beschränkt. In dieser Anleitung zeigen wir Ihnen, wie Sie WordPress ganz einfach auf einem Windows-Computer installieren können, unabhängig davon, welche Version Sie verwenden.
Warum sollten Sie WordPress unter Windows installieren?
Wenn Sie ein Windows-Benutzer sind, dann bietet die lokale Installation von WordPress auf Ihrem Computer mehrere Vorteile.
Eine lokale WordPress-Installation schafft eine Testumgebung, die sich nicht auf Ihre Live-Website auswirkt. Diese Einrichtung, die oft als lokaler Server oder localhost bezeichnet wird, ist Ihr persönlicher Spielplatz für WordPress.
WordPress-Entwickler verwenden regelmäßig lokale Installationen für ihre Arbeit. Zum Beispiel können sie damit mit neuen Plugins oder Themes experimentieren oder die Website vor dem Update auf den Gutenberg-Blockeditor testen.
Aber das ist nicht nur etwas für Profis. Wenn Sie WordPress noch nicht kennen, ist eine lokale Installation perfekt zum Lernen. Sie können Funktionen erkunden, Themes und Plugins testen und frei experimentieren, ohne sich Sorgen machen zu müssen, dass eine Live-Site kaputt geht.
Es ist wichtig zu wissen, dass bei einer lokalen Installation von WordPress unter Windows nur Sie die Website sehen können. Wenn Sie eine öffentliche Website erstellen möchten, benötigen Sie einen Domainnamen und Webhosting.
Technisch gesehen können Sie WordPress unter Windows mit XAMPP installieren, und wir haben bereits eine Anleitung dazu geschrieben.
Wir haben jedoch 2 noch einfachere Methoden als XAMPP gefunden, um eine lokale WordPress-Umgebung einzurichten. Sie eignen sich hervorragend für Anfänger oder Benutzer, die schnell eine lokale Website erstellen müssen. Sie können auf den unten stehenden Link klicken, um zu der jeweiligen Methode zu springen, die Sie interessiert:
Methode 1: WordPress unter Windows mit Studio installieren (schnell und einfach)
Für die erste Methode werden wir Studio verwenden. Dabei handelt es sich um eine lokale WordPress-Software von Automattic, dem Unternehmen, das WordPress.com verwaltet und betreibt, einen Website-Builder, der auf der WordPress-Software basiert.
Wir werden zuerst über diese Methode sprechen, weil sie viel schneller und einfacher zu befolgen ist, was sie perfekt für absolute Anfänger macht.
Zunächst müssen Sie die Website Studio by WordPress.com öffnen. Klicken Sie dann auf die Schaltfläche “Download für Windows”.
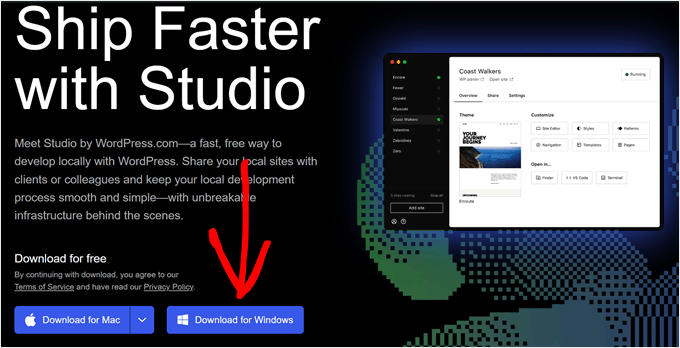
Öffnen Sie dann einfach die heruntergeladene Datei, um die Installation zu starten.
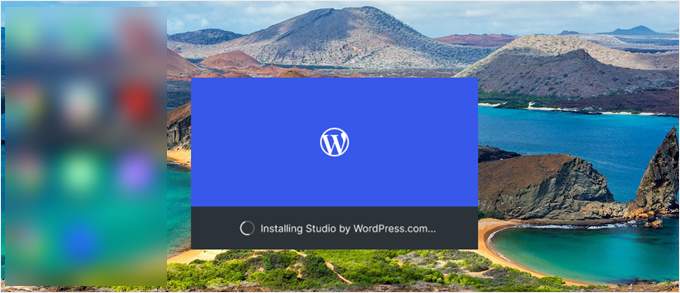
Es erscheint nun ein Popup-Fenster, das Ihnen anzeigt, dass die Anwendung installiert wird.
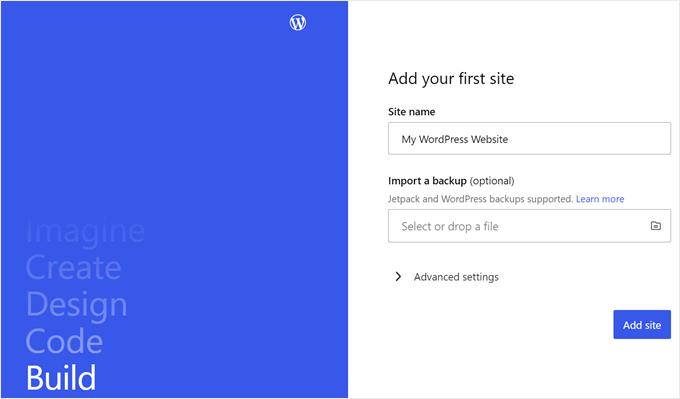
Danach können Sie Ihre erste Website hinzufügen.
Geben Sie dazu einfach den Namen Ihrer neuen lokalen WordPress-Site ein und klicken Sie auf “Site hinzufügen”. Sie können die Website benennen, wie Sie wollen, solange Sie sie leicht identifizieren können.
Sie sollten nun das Dashboard Ihrer lokalen WordPress-Website sehen.
Um auf Ihr WordPress-Dashboard zuzugreifen und Ihre Website zu bearbeiten, klicken Sie einfach auf die Schaltfläche “Start” in der oberen rechten Ecke. Dadurch wird Ihre lokale Website für Sie auf Ihrem Computer zugänglich.
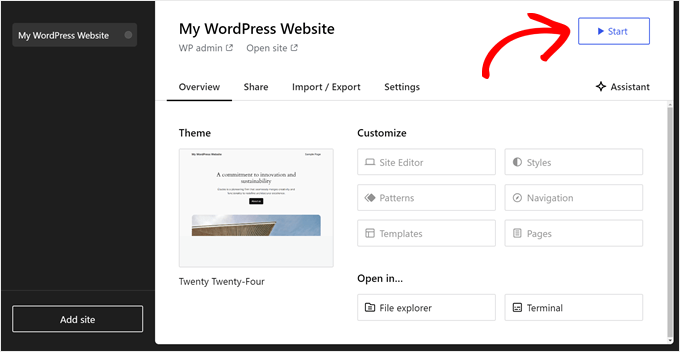
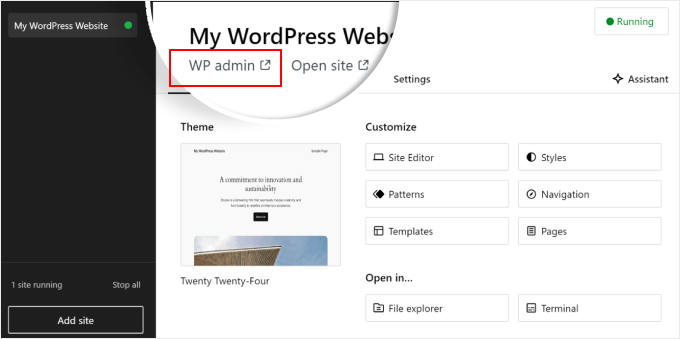
Sobald die Schaltfläche “Start” auf “Läuft” wechselt, können Sie auf den Link “WP Admin” oben links auf der Seite klicken.
Dies bringt Sie zu Ihrer lokalen WordPress-Verwaltungsseite.
Und das war’s dann auch schon mit der Einrichtung. Sehen wir uns nun die anderen Einstellungen an, die beim Aufbau Ihrer lokalen Website erforderlich sein können.
Wie Sie auf der Registerkarte “Übersicht” sehen können, haben Sie direkt vom Studio-Dashboard aus Zugriff auf das Menü des WordPress-Vollseiteneditors. Sie können auch auf “Datei-Explorer” klicken, um die Ordner und Dateien Ihrer WordPress-Website zu öffnen, und auf “Terminal” klicken, um Ihre Website mit WP-CLI zu verwalten.
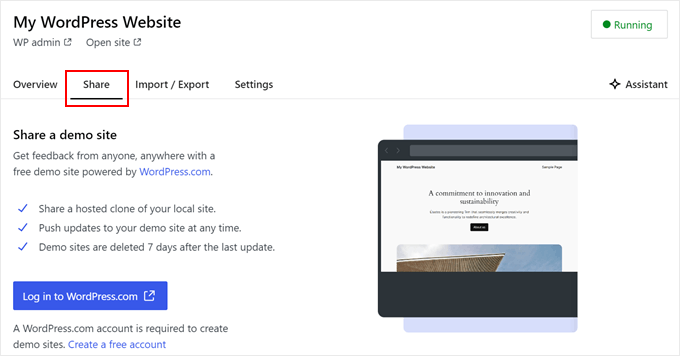
Wenn Sie zur Registerkarte “Freigeben” wechseln, können Sie sich bei Ihrem WordPress.com-Konto anmelden, Ihre lokale Website klonen und sie auf die Server von WordPress.com hochladen. Dadurch wird die geklonte Website vorübergehend online gestellt, was für die gemeinsame Nutzung von Demoseiten mit Ihren Kunden oder Teammitgliedern nützlich ist.
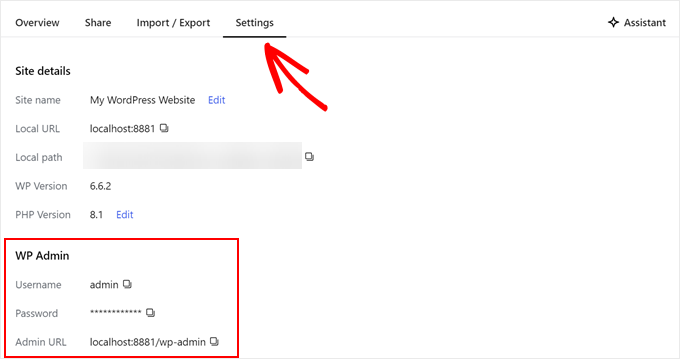
Es kann vorkommen, dass Sie sich direkt über Ihren Browser bei Ihrer lokalen Website anmelden möchten, anstatt Studio zu verwenden. In diesem Fall müssen Sie Ihre wp-admin-Anmeldedaten kennen.
Um sie zu finden, können Sie zur Registerkarte “Einstellungen” wechseln und dort Ihren WordPress-Administrator-Benutzernamen, Ihr Passwort und Ihre Anmelde-URL finden.
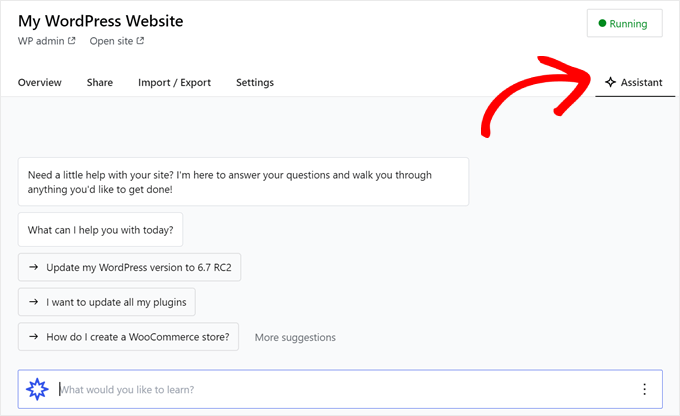
Eine weitere nützliche Funktion von Studio ist der integrierte KI-Chatbot, mit dem Sie kommunizieren können, indem Sie auf die Schaltfläche “Assistent” klicken.
Hier können Sie Studio um Hilfe bei Aufgaben wie der gleichzeitigen Aktualisierung aller Ihrer Plugins, der Aktualisierung Ihrer WordPress-Kernversion oder der Erstellung von Code für einen benutzerdefinierten Block bitten.
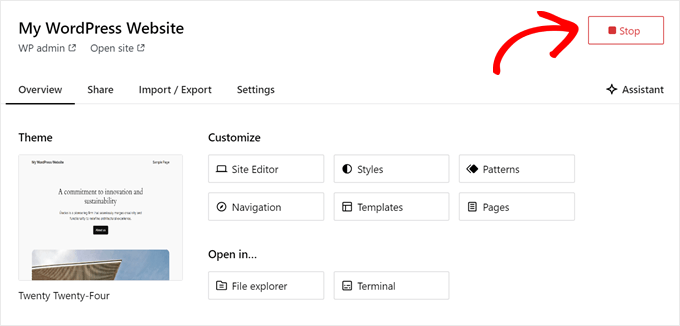
Wenn Sie mit der Arbeit an Ihrer lokalen Website fertig sind, bewegen Sie den Mauszeiger einfach über die Schaltfläche “Laufend” in der oberen rechten Ecke, bis dort “Stopp” steht.
Klicken Sie dann auf die Schaltfläche, um die Website zu beenden.
Ein Nachteil von Studio ist, dass Sie die WordPress-Umgebung nicht nach Ihren Wünschen konfigurieren können. Das bedeutet, dass Sie die PHP-Version, den Webserver und die Datenbank verwenden müssen, die für Sie vorausgewählt wurden.
Dies kann ein Nachteil sein, wenn Sie Ihre Website oder Ihr Plugin mit bestimmten Serverkonfigurationen testen müssen.
Wenn Sie mehr Kontrolle über Ihre lokale WordPress-Umgebung benötigen oder Ihr lokales Setup an eine bestimmte Live-Server-Konfiguration anpassen müssen, können Sie die nächste Methode mit Local WP ausprobieren.
Methode 2: WordPress unter Windows mit lokalem WP installieren (besser anpassbar)
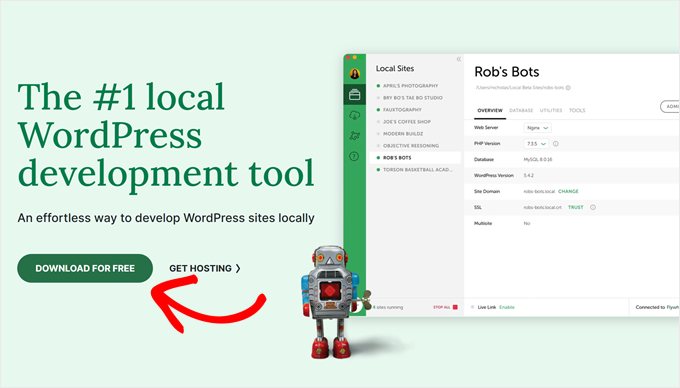
Zunächst müssen Sie die Local WP-Software herunterladen und auf Ihrem Windows-Computer installieren. Gehen Sie einfach auf die Local WP-Website und klicken Sie auf die Schaltfläche “Download for Free”.
Daraufhin erscheint ein Popup-Fenster, in dem Sie Ihre Plattform auswählen müssen. Wählen Sie “Windows” aus dem Dropdown-Menü.
Als Nächstes können Sie Ihre Daten wie Vor- und Nachname, Arbeits-E-Mail-Adresse und Telefonnummer eingeben, um die Software herunterzuladen.
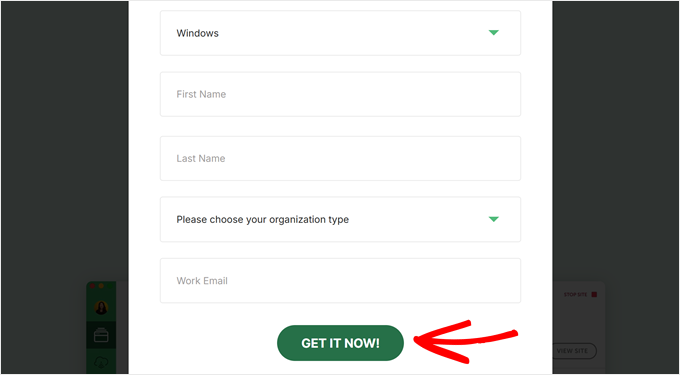
Nach Eingabe der Daten klicken Sie einfach auf die Schaltfläche “Jetzt anfordern”.
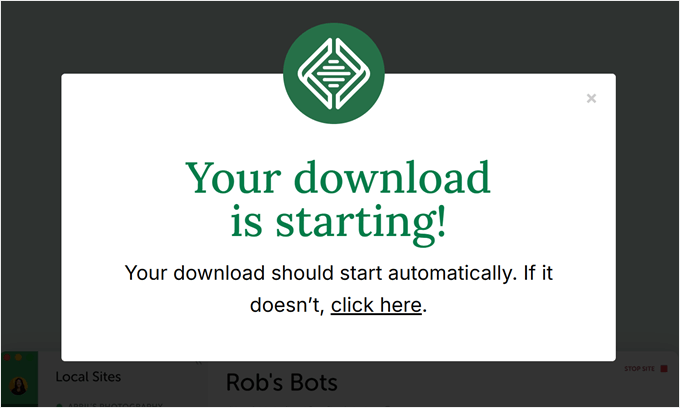
Danach wird die Software automatisch auf Ihren Computer heruntergeladen. Andernfalls können Sie auf den Link “Hier klicken” klicken, um den Download zu starten.
Sobald die Datei heruntergeladen ist, starten Sie den Einrichtungsassistenten.
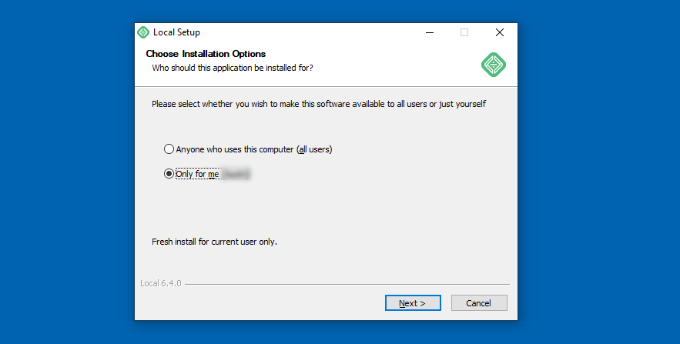
Nun müssen Sie auswählen, ob Sie die Software für alle Benutzer oder nur für sich selbst installieren möchten.
Sobald Sie eine Option ausgewählt haben, klicken Sie auf die Schaltfläche “Weiter”.
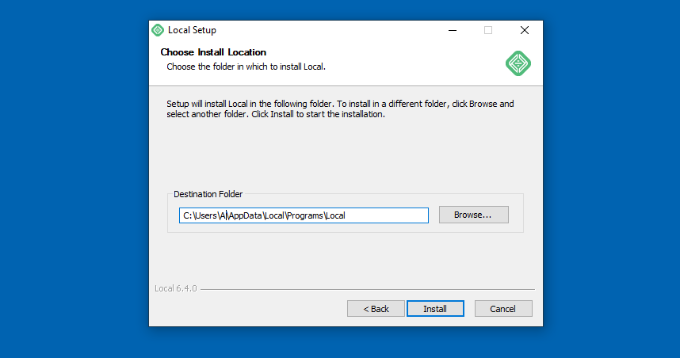
Im nächsten Schritt können Sie den “Zielordner” auswählen, in dem die Software installiert werden soll.
Klicken Sie einfach auf die Schaltfläche “Durchsuchen”, um den Pfad festzulegen, und klicken Sie dann auf die Schaltfläche “Installieren”.
Die Local WP-Software wird nun auf Ihrem Windows-Computer installiert.
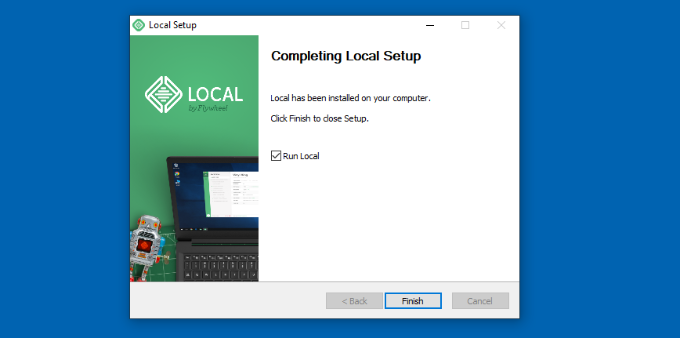
Anschließend können Sie das Kontrollkästchen “Lokal ausführen” aktivieren und im Einrichtungsassistenten auf die Schaltfläche “Fertig stellen” klicken.
Die Software wird nun auf Ihrem Windows-Gerät gestartet.
Der nächste Schritt besteht darin, eine neue lokale Website hinzuzufügen. Klicken Sie dazu einfach auf das Pluszeichen “+” am unteren Rand.
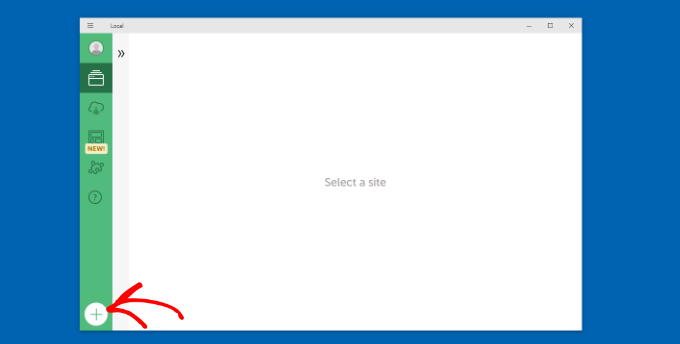
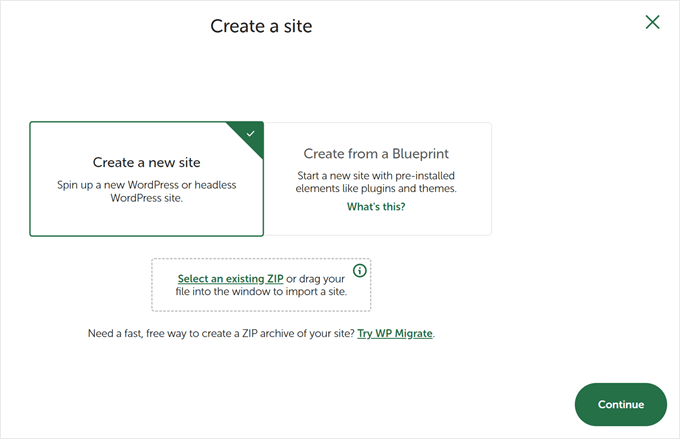
Danach können Sie eine Website in der lokalen Software erstellen.
Wählen Sie die Option “Neue Website erstellen” und klicken Sie auf die Schaltfläche “Weiter”. Es gibt auch die Möglichkeit, die Website aus einer Blaupause oder einer bestehenden Website-Datei zu erstellen, aber zur Veranschaulichung entscheiden wir uns für die erste Option.
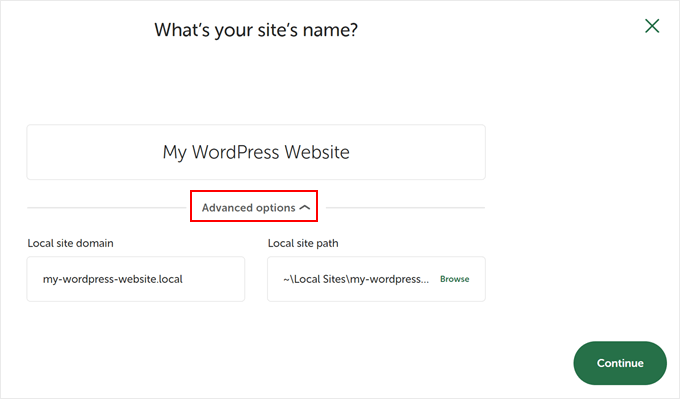
Als nächstes können Sie einen Namen für Ihre lokale Website eingeben, z. B. “Meine WordPress-Website”.
Es gibt auch erweiterte Optionen, bei denen Sie die lokale Website-Domäne und den lokalen Website-Pfad eingeben können. Standardmäßig wird für die Domain der Titel Ihrer Website verwendet, jedoch mit Bindestrichen getrennt.
Wenn Sie fertig sind, klicken Sie einfach auf die Schaltfläche “Weiter”.
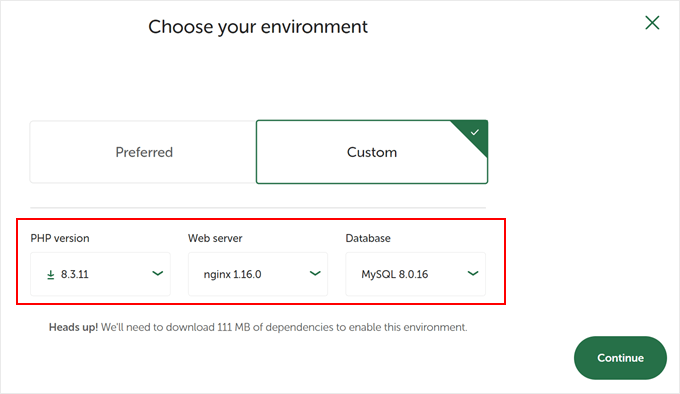
Danach müssen Sie eine Umgebung für Ihre lokale Website auswählen.
Sie können die “bevorzugte” Umgebung verwenden, in der die Software automatisch die PHP-Version, den Webserver und die MySQL-Version auswählt. Andererseits können Sie auch “Benutzerdefiniert” wählen und die Umgebungsdetails eingeben.
Local WP bietet die neuesten PHP-Versionen. Als Webserver können Sie zwischen Nginx und Apache wählen. Auch bei den Datenbanken können Sie zwischen MySQL und MariaDB wählen.
Beachten Sie, dass einige PHP-, Webserver- und Datenbankversionen das Herunterladen bestimmter Abhängigkeiten erfordern, damit sie ordnungsgemäß funktionieren.
Als nächstes können Sie einen WordPress-Benutzernamen und ein Passwort für Ihre lokale Website eingeben. Außerdem haben Sie die Möglichkeit, eine WordPress-E-Mail-Adresse auszuwählen, an die Sie alle E-Mail-Benachrichtigungen erhalten werden.
Darüber hinaus gibt es eine erweiterte Option, bei der die Software fragt, ob Sie ein WordPress-Multisite-Netzwerk haben. Wenn nicht, klicken Sie einfach auf “Nein”.
Nachdem Sie diese Angaben eingegeben haben, klicken Sie einfach auf die Schaltfläche “Website hinzufügen”.
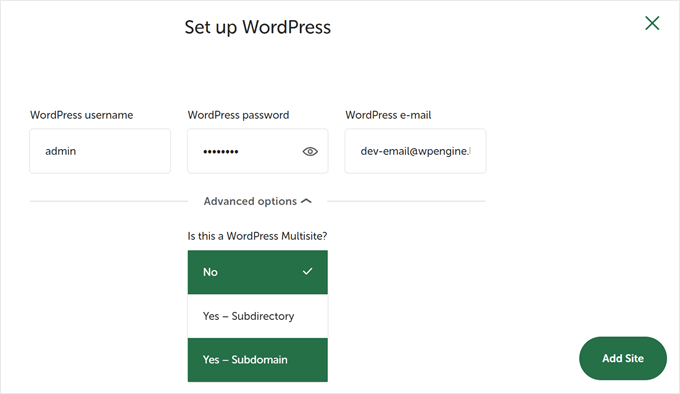
Die Software wird nun WordPress installieren und Ihre Website einrichten.
Um die lokale Website zu starten, klicken Sie auf die Schaltfläche “Website starten” in der oberen rechten Ecke.
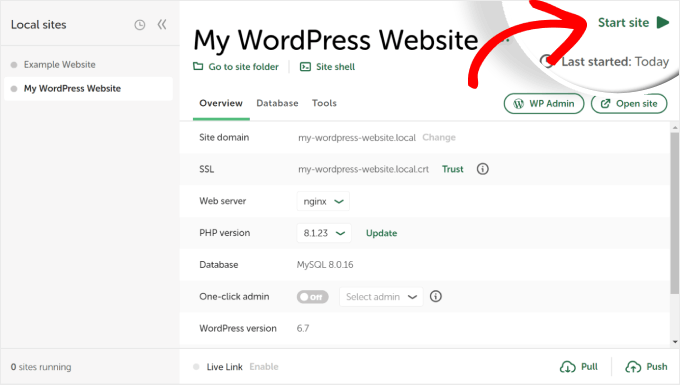
Klicken Sie als Nächstes auf die Schaltfläche “WP Admin”, um die Anmeldeseite für den WordPress-Admin anzuzeigen.
Geben Sie einfach den Benutzernamen und das Kennwort ein, die Sie zuvor bei der Einrichtung der lokalen Website eingegeben haben, und klicken Sie dann auf die Schaltfläche “Anmelden”.
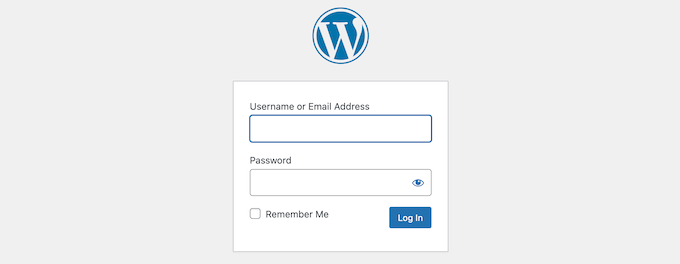
Sie können nun Ihre lokale Website auf Ihrem Windows-Computer bearbeiten.
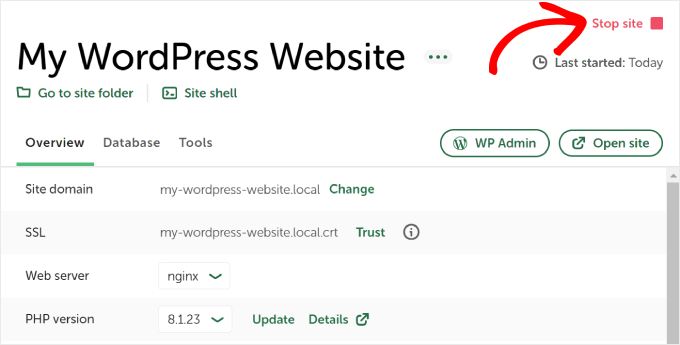
Wenn Sie fertig sind, vergessen Sie nicht, die Website von der Local WP Software zu stoppen, indem Sie auf die Schaltfläche “Stop site” klicken.
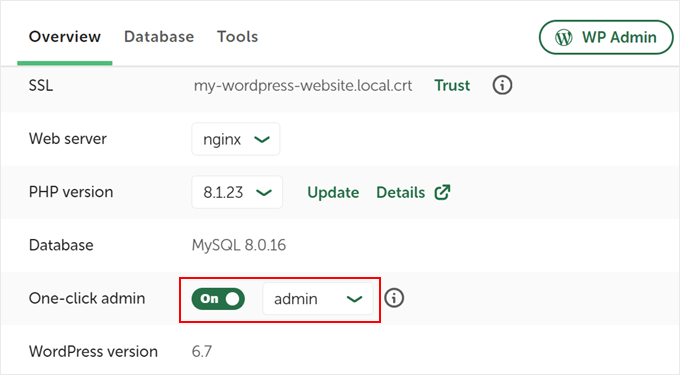
Pro-Tipp: Wenn Sie den Anmeldevorgang überspringen möchten, können Sie in Local WP einen Ein-Klick-Admin-Login aktivieren.
Gehen Sie dazu einfach zurück zum Local WP Dashboard und schalten Sie die Schaltfläche “One-click admin” auf “On”. Wählen Sie dann im Dropdown-Menü den Admin-Benutzer aus, der diese Ein-Klick-Login-Funktion nutzen kann.
Alternative: Verwenden Sie WordPress Playground, um Themes, Plugins und mehr zu testen
WordPress Playground ist ein innovatives Tool, mit dem Sie direkt in Ihrem Webbrowser mit WordPress experimentieren können. Es ist ein virtueller Sandkasten, in dem Sie neue WordPress-Themes, Plugins und Funktionen ausprobieren können, ohne eine reale Website zu beeinträchtigen.
WordPress Playground unterscheidet sich von einer lokalen WordPress-Umgebung in mehreren wichtigen Punkten.
Erstens muss es nicht auf Ihrem Computer installiert werden und wird im Gegensatz zu dauerhaften lokalen Installationen nach jeder Verwendung zurückgesetzt. Sie können von jedem Gerät mit einem Browser darauf zugreifen, während lokale Installationen an einen Computer gebunden sind.
Während WordPress Playground ideal für schnelle Tests und zum Lernen ist, bietet eine lokale WordPress-Umgebung auf Ihrem Windows-Computer mehr Flexibilität für langfristige Entwicklungsprojekte.
Eine ausführliche Anleitung finden Sie in unserem Leitfaden zur Verwendung von WordPress Playground in Ihrem Browser.
Ich habe WordPress auf meinem Windows-Computer installiert, was nun?
Jetzt, wo Sie WordPress auf Ihrem Computer haben, können Sie einige Dinge tun:
- Lernen Sie grundlegende WordPress-Tipps und -Tricks, um Ihre Website besser zu nutzen.
- Probieren Sie verschiedene WordPress-Themes aus, um zu sehen, wie Ihre Website aussehen kann.
- Installieren und testen Sie unverzichtbare WordPress-Plugins, um Ihrer Website neue Funktionen hinzuzufügen.
- Erfahren Sie, wie Sie häufige WordPress-Fehler selbst beheben können.
- Probieren Sie verschiedene Drag-and-Drop-Seitenerstellungsprogramme aus, um Ihre Website ansprechend zu gestalten.
- Erfahren Sie, wie Sie das WordPress-Administrator-Passwort auf localhost zurücksetzen, um den Zugang zu Ihrer Website wiederherzustellen.
- Richten Sie automatisierte Arbeitsabläufe ein, um die Verwaltung Ihrer Website zu erleichtern.
- Erfahren Sie mehr über die Sicherheit von WordPress, um Ihre Website vor Hackern zu schützen.
- Verschieben Sie Ihre lokale WordPress-Website auf einen Live-Server, wenn Sie sie für alle freigeben möchten.
Wir hoffen, dass dieser Artikel Ihnen geholfen hat, zu lernen, wie man WordPress lokal auf einem Windows-Computer installiert. Vielleicht interessieren Sie sich auch für unseren Artikel über die lokale Installation von WordPress auf einem Mac-Computer und unsere ultimative Anleitung zur Erstellung einer WordPress-Staging-Site.
Wenn Ihnen dieser Artikel gefallen hat, dann abonnieren Sie bitte unseren YouTube-Kanal für WordPress-Videotutorials. Sie können uns auch auf Twitter und Facebook finden.


Pulkit
Thank you so much for this tutorial, it will surely help me a lot
Dubba Ramesh
Very nice tutorial.
its very use full to me..
thank you very much…..
Pradeep
Thank you very much. I was facing trouble earlier doing it and here detailed yet simple steps lead me to finish it. Great work keep doing it.
alex
hi
i do it like u.
but when i fiill everu thing and wana to go to next page to finish set uo the page is wite and dosnt show any thing !!!
i can see the admin page : 127.0.0.1/wp-login.php but the username and password dosnt work !!
what do i do ??
thx
Yvonne
Need help please….
I’ve downloaded wamp and did some set up (followed other instructions on youtube), it is now “online” but when I tried to access phpMyAdmin, it says “#1045 – access denied for user ‘root’@’localhost’, can anyone give me some advice, please?
Thank you so much!!!
sarvesh maurya
I have install wamp server and my wordpress also works very well,
But,
When i going to install any theme or plugin to my wordpress it doesn’t install properly and showing error message in table form which is not understandable for me…………
solve this problem please…….
it is very important……
REPLY FAST PLEASE….
WPBeginner Support
What error message do you see?
Admin
Skippy McGregor
If you’re having issues with this, run WAMP as an administrator (right click from start menu > run as administrator). The icon in the notification area needs to be green.
John
Thank you, I am using Sitegorund servers, but it was very nice to learn how to work offline!
Marcia
Three years ago, I spent days of my life trying to get WordPress running on my computer. I managed to make it work, but the process was very, very painful.
This time around, I followed your concise, clear and excellent instructions. The result: quick and pain-free success. Thank you !!!
WPBeginner Support
Thanks for the feedback. Glad you found this helpful.
Admin
Wayne
Hi there, Worked great. I did find that I was getting a 404 when trying to view the site localhost/mysite/ but when I tried in Chrome Incognito it worked fine. Also, it appears that the configuration file is now created automatically while using WordPress 4.4.1.
Thanks for the tutorial.
Andrew
I’ve installed wordpress into the www folder, Apache is running but when I try with localhost/worpress/ we get a 404 error, how can we fix this?
Tunde
Thank you very much for this tutorial. It works perfectly.
René Rijlart
Helpfulllllll
Chris
I hate this open source garbage. I can never get it to work. I follow the freaking examples perfectly, and I get all kinds of errors and stuff doesn’t work… WordPress and WAMP is freaking CRAP!!!
Peter
Funny comment … Just followed the instructions, downloaded WordPress, and reached the Dashboard. Everything worked smoothly and quickly — five minutes at most. And I am 80 years old — by rights I should be the one to have been lost …
samar
thanks
it’s helpful
Ryan
Sorry, I need a wp-config-sample.php file to work from. Please re-upload this file to your WordPress installation.
How can I resolve this. I have edited and renamed the wp-config.php file but things cant just work for me. Its been two days now. I cant make progress
WPBeginner Support
Download a fresh copy of WordPress to your computer. Unzip the file and then go to WordPress folder. Inside the folder you will find wp-config-sample.php file. You can now upload this file to your website using an FTP client.
Admin
Chris
Hi guys, I also had an issue with the getting a 404 error and permission error. I misinterpreted the text so in case anyone else has done the same let me paraphrase the following paragraph:
“Download a copy of WordPress from WordPress.org. Extract the zip file and copy the wordpress folder. Go to C:\wamp\www and paste wordpress folder there. You can rename the wordpress folder to anything you want for example mysite, wpbeginner, etc”
1) After installing WAMP, in the windows GUI navigate to ‘C:/wamp/www’
2) The drop the extracted WordPress folder (not just the loose files).
I was doing it wrong; I was dropping the loose files from inside WordPress into the www folder and changing the name. It seems this is incorrect.
Enjoy!!
Chris
I installed WAMPServer, clicked on phpMyAdmin, then in the browser I got:
Server Error in ‘/’ Application.
Access is denied.
Description: An error occurred while accessing the resources required to serve this request. The server may not be configured for access to the requested URL.
Error message 401.2.: Unauthorized: Logon failed due to server configuration. Verify that you have permission to view this directory or page based on the credentials you supplied and the authentication methods enabled on the Web server. Contact the Web server’s administrator for additional assistance.
Version Information: Microsoft .NET Framework Version:4.0.30319; ASP.NET Version:4.0.30319.34274
tomi
Hello
When I run http://localhost/mysite/ I get a 404 error. I have no idea how to fix it and could use some help:)
Screenshoted issue: http://prntscr.com/9ft5z6
Thanks in advance!
WPBeginner Support
Make sure apache is running on your computer. If you are using Wamp or Xamp then you can see apache status in your taskbar.
Admin
Sohail Nawaz
thankyou very much.
Soph Desharnais
Great tutorial. No issues and was set up in less than 10 minutes. Thank you.
Tasneem
Hi
Thank you sooo much for this awesome tut, I also have the followup one bookmarked for moving localhost site to live. I am now all set up with my test site on my local server. No more building websites with a maintenance plugin needed!
My question is, do I have to create a new database and new wordpress site for every new site I build, or can I just clean out and reuse this same test_db and localhost/testsite that I created if I don’t need it anymore? what do you guys do?
WPBeginner Support
It is better to create a new test site for any new project.
Admin
Nadia
Hello, thank you for that great tutorial! It works almost perfectly for me. The only problem I have is that I am not allowed to upload images by grad and drop in the media library. I’ve got javascript error “Uncaught TypeError: Cannot read property ‘appendChild’ of null – load-scripts.php:22”
That said it’s not a problem of the upload itself because I am able to upload images via “Media” > “Add New”.
Is it only my problem? I’ll be really grateful for any assistance with it. Thanks!
WPBeginner Support
Please try deactivating all plugins and then adding an image using drag and drop. If this resolves your issue, then one of the plugins installed on your site is conflicting with WordPress core.
Admin
Nadia
Thank you for the prompt reply! NO plugins at all, fresh wp 4.3.1 installation
Nadia
I resolved this by installing XAMPP instead of Wampserver. I had issues with XAMPP as well, and learned to run it as administrator in my Windows 8. It fixed the issues and maybe there was the similar one with the Wampserver.
Anwar Manha
Hi
I tried the exact step but thrown by the below error, could you please advise
( ! ) Warning: require(C:\wamp\www\test1/wp-includes/load.php): failed to open stream: No such file or directory in C:\wamp\www\test\wp-settings.php on line 21
Call Stack
Daniel
Hi, i have made a website using the WAMP-server.
When try to acess the website from my phone to check the responsivness, all i get is the the text from the website. No styling or pictures are shown.
Is there any type of settings that i have to enable?
John van Rems
Maybe I’m stupid but after installing the Wampserver I try to open phpMyAdmin to setup a database but instate of getting a page like the example the browserpage is empty… Logic I guess because Apage doesn’t run so I can’t see php pages on a local machine.
I try to run it on Windows 10 Can you tell me what’s wrong?
John
John van Rems
Problem solved by correcting te Windows 10 Internetport to 8080
Now to find out how to connect the php db to my wordpress
tsega
hi
Nice post. I find it helpful but i wonder how can i use my own them. Can you give as your expertise on that ?
Keith in Winchester
A full day of headbanging and I was just about to give up when I found this invaluable site. Could not have been made easier. Follow the well laid out instructions and you will find it a breeze. Great work and Many Thanks.
Medha
Thank you so much, this really helped!
John
Hi,
I followed all the instructions up to the point where i go through my web browser to localhost/mysite. I get the error “wp-seetings.php is missing” however the link you provided to create a configuration file is empty. How do i create “wp-settings.php”?
Thanks
Ahsan
Thanks guys, it was surely a great help!
sandeep
thank you so much. very good tutorial.
Mike
This is a real beauty! Thanks so much. I know HTML, CSS, JavaScript, PHP, a very little MySQL — no genius at some of it, but I know what I’m doing. But an organization I’m involved with may wind up using WordPress and I’ve never liked these WYSIWYGs. Since I do want to learn the stuff, though, I wanted to give it a swing on localhost rather than messing up my own GoDaddy- and Netfirms-hosted domains.
Just follow your directions and this installs beautifully. One question, though. Is there any particular book you’d recommend? I was particularly looking at the Dummies All-in-One and the Missing Manuals books. Is one better than the other? Or do you recommend a third alternative? I don’t want to buy a whole library full of this stuff for a technology I may never use that much except for helping this organization with upkeep.
WPBeginner Support
Check out WordPress Books section on our website.
Admin
Liana
after I click on the phpadmin all I get is a blank page with nothing on it :/
raydy
Hi There, Thanks for the tutorial
however, i encounter with this problem for localhost/mysite/
Not Found
The requested URL /mysite/ was not found on this server.
Apache/2.4.9 (Win32) PHP/5.5.12 Server at localhost Port 80
Alok
Hi,
I am also facing the same problem…Did you get the solution? Can you please help.
Regards,
Alok
Mike
Thumbs up mate,
Great guide…it was very helpful!
Julian
Please help. This is what I get:
“Not Found
The requested URL /mysite/ was not found on this server.
Apache/2.4.9 (Win64) PHP/5.5.12 Server at localhost Port 80”
I took my wordpress folder and dropped it in the wamp folder, C:\wamp\www. I renamed my wordpress folder to: “mysite”. I then went to Chrome and searched: “localhost/mysite/”. And I get:
“Not Found
The requested URL /mysite/ was not found on this server.
Apache/2.4.9 (Win64) PHP/5.5.12 Server at localhost Port 80.”
Kyle
Burnt out. Seriously. Help.
No manner of step by step instruction is working and I’m pulling out my hair. What am I missing?
“Download a copy of WordPress from WordPress.org. Extract the zip file and copy the wordpress folder. Go to C:\wamp\www and paste wordpress folder there. You can rename the wordpress folder to anything you want for example mysite, wpbeginner, etc. For the sake of this tutorial, we renamed our wordpress directory to mysite. Now open a web browser and go to:
http://localhost/mysite/”
C:\wamp\www ???
First off, there is no folder titled “www,” so maybe you’re implying the website name take that place? I don’t really know.
Still, I tested all methods. I tried creating a folder called ‘www,’ I tried simply C:\mamp\sitename, But when I type in the “localhost/sitename” absolutely nothing happens.
I have experience doing website redesigns and all I want to do is clone this site to my local host and I am baffled at how I’ve spent 2 whole days just trying to get WordPress isn’t even installed on my local host.
Thank you in advance.
Composed under duress.
Captain
Hello Kyle, sorry for your sad experience.
You said you don’t see a folder called “www” on C:\wamp.
Can you check to confirm that you have wampserver installed on your computer?
Also, it could be it’s installed but not on the C drive.
Do get back when you confirm; cos the tutorial was quite straight and worked really well for me.
aman
After installing WAMP server and clicking on phpmyadmin there is an error that says Access Denied and no other option is displayed. Please Help me
DutchLuck
Great tutorial, sweet and simple!!! Thanks!!!
Karthikeyan
Good Example.Its working fine for me.
Thank you all..
Janvi
hi
i m not getting create configuration file option
WPBeginner Support
Your WordPress folder may already have a wp-config.php file. This file may not have correct information for your WordPress database settings. Please see our guide on editing wp-config.php file in WordPress.
Admin
Samantha T
Sooooooooooooooooooooo… I uninstalled everything and reinstalled. Now I have an orange light on the Wamp, and when I open phpMyAdmin, I get “Access denied”: MySQL said: Documentation
#1045 – Access denied for user ‘root’@’localhost’ (using password: NO)
phpMyAdmin tried to connect to the MySQL server, and the server rejected the connection. You should check the host, username and password in your configuration and make sure that they correspond to the information given by the administrator of the MySQL server.
*sigh*
Joe
OK, how do you do that?
odion
After installation of wordpress in my computer, I did not receive a success message but a blank white page and am not able to login into the wp-admin.
odion ikhidero
Pls I got. The following errors after installation
Sansun
I already have MySQL server running in my local 3306 port, how do I install WAMP in my case?
Aamir
Thanks for the help.
I have been taking help from your immensely helpful site. It is a great service that you guys are providing.
Jim14409
Hi, )
)
Thanks for your site and all the help you offer. I installed WAMP and everything went perfectly until I reached the part where you said:
“WordPress will inform you that it can not find a wp-config.php file.”
Well WP never said that :0 but sent me directly to a Directory of “JimSite” with links there to Parent Directory and a link to WordPress. Finally clicked the WordPress link and now it seems we are heading to the config-php setup. (I’ll holler back if the trail dead-ends
Thought you might want to amend your guide with a note about this possibility for some users so as to save them the confusion and frustration I’ve had the past half hour. Might have something to do with my using Vista64, I’m not sure.
Thanks again and for your nice email when I signed up.
Jim
Markus
Thanks for this nice tutorial. Its really helpful, and works like a charme to set up.
The skype addition about the port issue with wamp helped me also – sometimes wamp just wouldn’t work and I didn’t know why. (I’m using skype just once in a while..)
I’ve got another question though: How to move a live website to localhost for development.
I’m not really sure how to go about it. Copy everything (including db) and change the settings in the config file of wordpress. or install wordpress and then migrate the database somehow, and add the other special content…
WPBeginner Support
See how to move a live WordPress site to local server.
Admin
Samuel
Thanks
But I have an issue. After installation, I got a prompt “The program can’t start because MSVCR110.dll is missing from your computer, Try reinstalling the program to fix the problem”
What do I do?
Dev Enthusiast
Hi Samuel,
The error that you received can be fixed by downloading and installing the following from Microsoft:
Visual C++ Redistributable
Give that a try!