Nach Jahren des Erstellens von WordPress-Websites haben wir gelernt, wie wichtig es ist, eine lokale WordPress-Einrichtung auf Ihrem Computer zu haben.
WordPress auf Ihrem persönlichen Rechner zu haben, ermöglicht es Ihnen, mit neuen Funktionen zu experimentieren, ohne Ihre Live-Website zu gefährden, tief in die WordPress-Entwicklung einzutauchen und sogar ganze Websites zu erstellen, bevor sie live gehen. Es ist wie eine private Sandbox für all Ihre WordPress-Projekte.
Wenn Sie ein Windows-Benutzer sind, gibt es zahlreiche Möglichkeiten, WordPress lokal einzurichten. Wir haben es jedoch auf die zwei einfachsten Methoden eingegrenzt. In dieser Anleitung zeigen wir Ihnen, wie Sie WordPress einfach auf einem Windows-Computer installieren, unabhängig von der verwendeten Version.
Warum Sie WordPress unter Windows installieren sollten?
Wenn Sie ein Windows-Benutzer sind, bietet die lokale Installation von WordPress auf Ihrem Computer mehrere Vorteile.
Eine lokale WordPress-Installation erstellt eine Testumgebung, die Ihre Live-Website nicht beeinträchtigt. Dieses Setup, oft als lokaler Server oder localhost bezeichnet, ist Ihr persönlicher Spielplatz für WordPress.
WordPress-Entwickler verwenden regelmäßig lokale Installationen für ihre Arbeit. Zum Beispiel können sie diese verwenden, um mit neuen Plugins oder Themes zu experimentieren oder die Website vor dem Update auf den Gutenberg-Block-Editor testen.
Aber es ist nicht nur für Profis. Wenn Sie neu bei WordPress sind, ist eine lokale Einrichtung perfekt zum Lernen. Sie können Funktionen erkunden, Themes und Plugins testen und frei experimentieren, ohne sich Gedanken über das Beschädigen einer Live-Website machen zu müssen.
Es ist wichtig zu beachten, dass nur Sie die Website sehen können, wenn Sie WordPress lokal unter Windows installieren. Wenn Sie eine öffentliche Website erstellen möchten, benötigen Sie einen Domainnamen und Webhosting.
Nun, technisch gesehen können Sie WordPress unter Windows mit XAMPP installieren, und wir haben bereits ein Tutorial dazu geschrieben.
Das gesagt, wir haben 2 noch einfachere Wege als XAMPP gefunden, um eine lokale WordPress-Umgebung einzurichten, was sie großartig für Anfänger oder Benutzer macht, die schnell eine lokale Website erstellen müssen. Sie können auf den Link unten klicken, um zu jeder Methode zu springen, an der Sie interessiert sind:
- Methode 1: WordPress unter Windows mit Studio installieren (schnell und einfach)
- Methode 2: WordPress unter Windows mit Local WP installieren (anpassbarer)
- Alternative: Use WordPress Playground to Test Themes, Plugins, and More
Methode 1: WordPress unter Windows mit Studio installieren (schnell und einfach)
Für die erste Methode verwenden wir Studio. Es ist eine lokale WordPress-Software, die von Automattic entwickelt wurde, dem Unternehmen, das WordPress.com verwaltet und betreibt, einem Website-Builder, der auf der WordPress-Software basiert.
Wir werden diese Methode zuerst besprechen, da sie viel schneller und einfacher zu befolgen ist und sich somit perfekt für absolute Anfänger eignet.
Zuerst müssen Sie die Website Studio by WordPress.com öffnen. Klicken Sie dann auf die Schaltfläche „Download for Windows“.
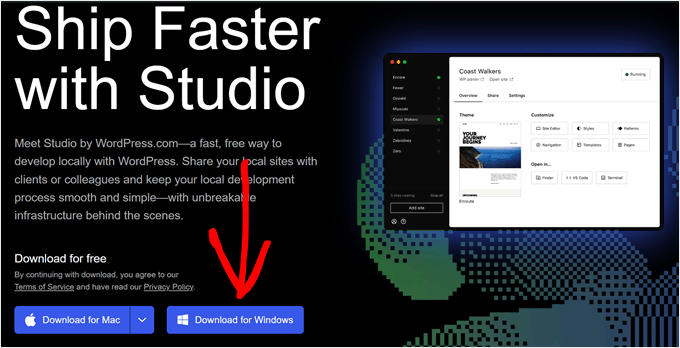
Sobald Sie das getan haben, öffnen Sie einfach die heruntergeladene Datei, um die Installation zu starten.
Ein Popup-Fenster wird nun angezeigt, das Ihnen zeigt, dass die Anwendung installiert wird.
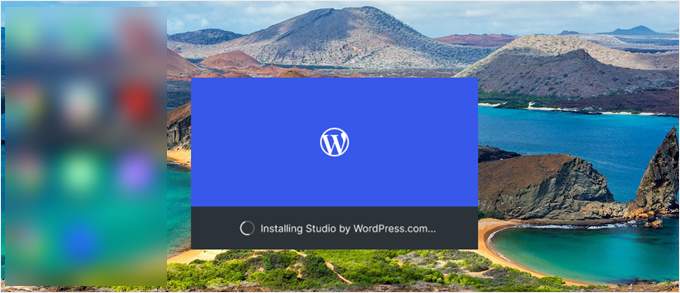
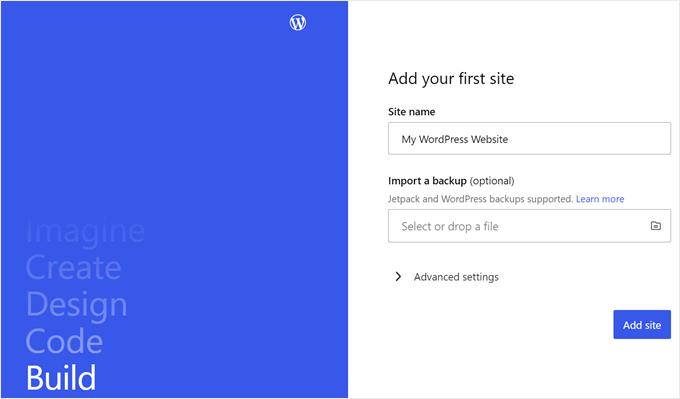
Wenn das erledigt ist, können Sie Ihre erste Website hinzufügen.
Um dies zu tun, geben Sie einfach den Namen Ihrer neuen lokalen WordPress-Website ein und klicken Sie auf „Website hinzufügen“. Sie können die Website beliebig benennen, solange sie Ihnen hilft, sie leicht zu identifizieren.
Sie sollten nun das Dashboard Ihrer lokalen WordPress-Site sehen.
Um auf Ihr WordPress-Dashboard zuzugreifen und Ihre Website zu bearbeiten, klicken Sie einfach auf die Schaltfläche „Start“ in der oberen rechten Ecke. Dadurch wird Ihre lokale Website auf Ihrem Computer für Sie zugänglich.
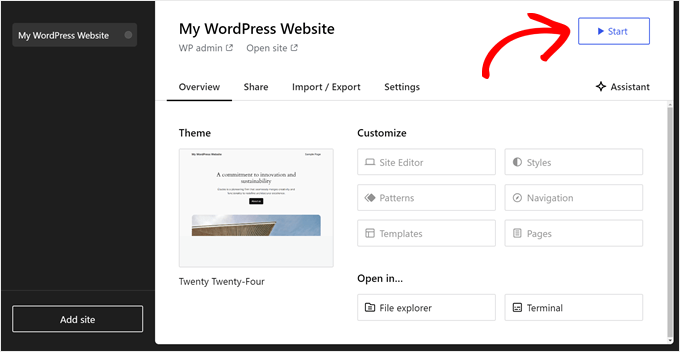
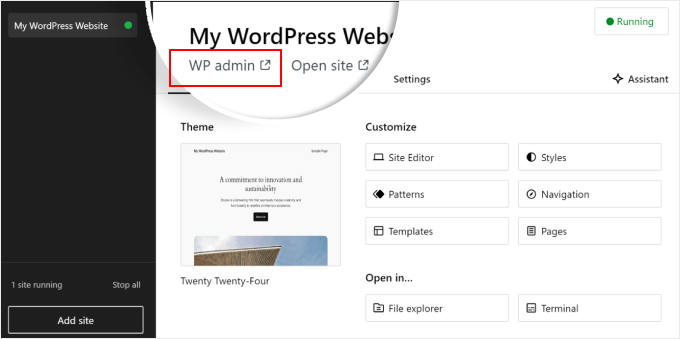
Sobald sich die Schaltfläche „Start“ in „Läuft“ ändert, können Sie oben links auf der Seite auf den Link „WP Admin“ klicken.
Dies bringt Sie zu Ihrer lokalen WordPress-Adminseite.
Und das war's so ziemlich mit der Einrichtung. Lassen Sie uns die anderen Einstellungen erkunden, die möglicherweise erforderlich sind, während Sie Ihre lokale Website erstellen.
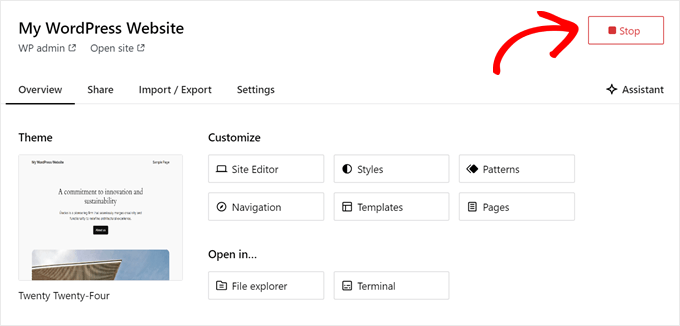
Wie Sie im Tab „Übersicht“ sehen können, können Sie das Menü des WordPress-Website-Editors direkt vom Studio-Dashboard aus aufrufen. Sie können auch auf „Datei-Explorer“ klicken, um die Ordner und Dateien Ihrer WordPress-Website zu öffnen, und auf „Terminal“ klicken, um Ihre Website mit WP-CLI zu verwalten.
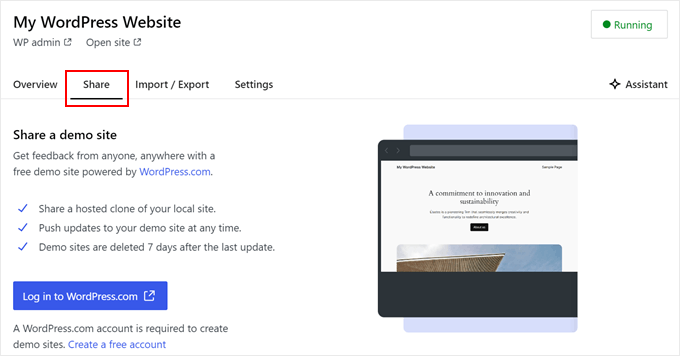
Wenn Sie zum Tab „Teilen“ wechseln, können Sie sich in Ihr WordPress.com-Konto einloggen, Ihre lokale Website klonen und sie auf die Server von WordPress.com hochladen. Dies macht die geklonte Website vorübergehend online, was nützlich ist, um Demo-Websites mit Ihren Kunden oder Teammitgliedern zu teilen.
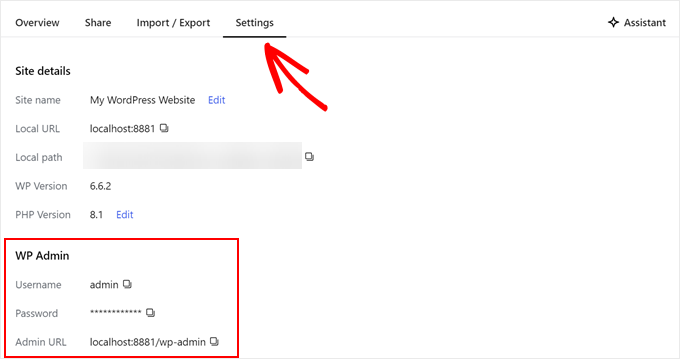
Manchmal möchten Sie sich direkt über Ihren Browser bei Ihrer lokalen Website anmelden, anstatt Studio zu verwenden. In diesem Fall müssen Sie Ihre wp-admin-Zugangsdaten kennen.
Um sie zu finden, können Sie zum Tab 'Einstellungen' wechseln und dort Ihren WordPress-Admin-Benutzernamen, Ihr Passwort und Ihre Login-URL finden.
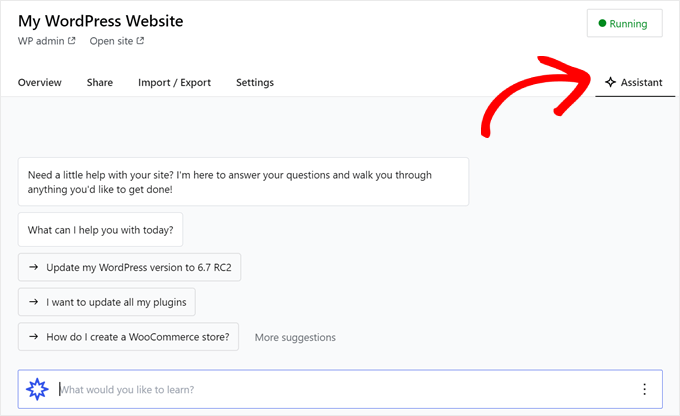
Eine weitere nette Funktion von Studio ist sein integrierter KI-Chatbot, mit dem Sie kommunizieren können, indem Sie auf die Schaltfläche „Assistent“ klicken.
Hier können Sie Studio um Hilfe bei Aufgaben bitten, wie z. B. die gleichzeitige Aktualisierung aller Ihrer Plugins, die Aktualisierung Ihrer Kern-WordPress-Version oder die Erstellung von Code für einen benutzerdefinierten Block.
Wenn Sie mit der Arbeit an Ihrer lokalen Website fertig sind, fahren Sie einfach mit der Maus über die Schaltfläche „Running“ oben rechts, bis sie „Stop“ anzeigt.
Klicken Sie dann auf die Schaltfläche, um die Website zu stoppen.
Ein Nachteil von Studio ist, dass Sie die WordPress-Umgebung nicht nach Ihren Wünschen konfigurieren können. Das bedeutet, dass Sie die PHP-Version, den Webserver und die Datenbank verwenden müssen, die für Sie vorab ausgewählt wurden.
Dies kann ein Nachteil sein, wenn Sie Ihre Website oder Ihr Plugin mit spezifischen Serverkonfigurationen testen müssen.
Wenn Sie mehr Kontrolle über Ihre lokale WordPress-Umgebung benötigen oder Ihr lokales Setup mit einer bestimmten Live-Serverkonfiguration abgleichen müssen, können Sie die nächste Methode mit Local WP ausprobieren.
Methode 2: WordPress unter Windows mit Local WP installieren (anpassbarer)
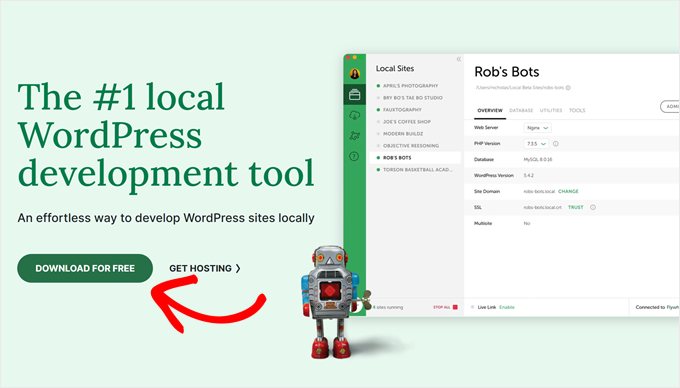
Zuerst müssen Sie die Local WP-Software auf Ihrem Windows-Computer herunterladen und installieren. Gehen Sie einfach auf die Local WP-Website und klicken Sie auf die Schaltfläche „Kostenlos herunterladen“.
Danach erscheint ein Popup-Fenster, in dem Sie Ihre Plattform auswählen müssen. Wählen Sie im Dropdown-Menü 'Windows'.
Als Nächstes können Sie Ihre Daten wie Vor- und Nachname, geschäftliche E-Mail-Adresse und Telefonnummer eingeben, um die Software herunterzuladen.
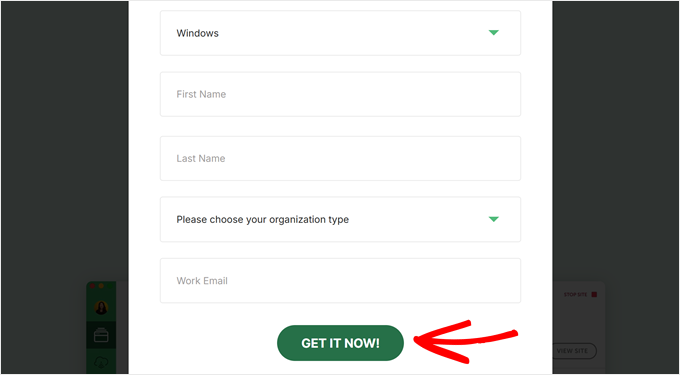
Nach Eingabe der Details klicken Sie einfach auf die Schaltfläche „Jetzt erhalten“.
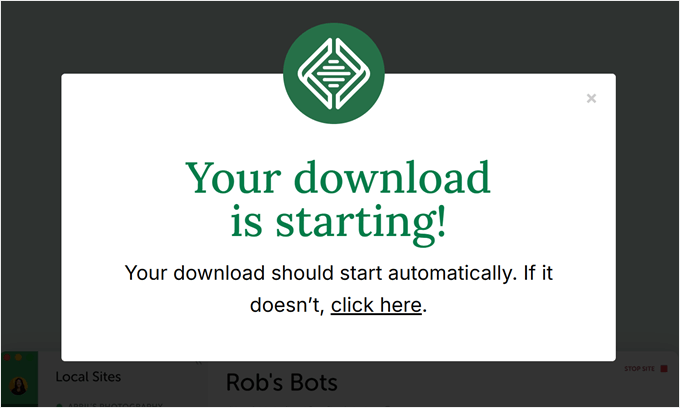
Danach wird die Software automatisch auf Ihren Computer heruntergeladen. Alternativ können Sie auf den Link 'Hier klicken' klicken, um den Download zu starten.
Sobald die Datei heruntergeladen ist, starten Sie den Einrichtungsassistenten.
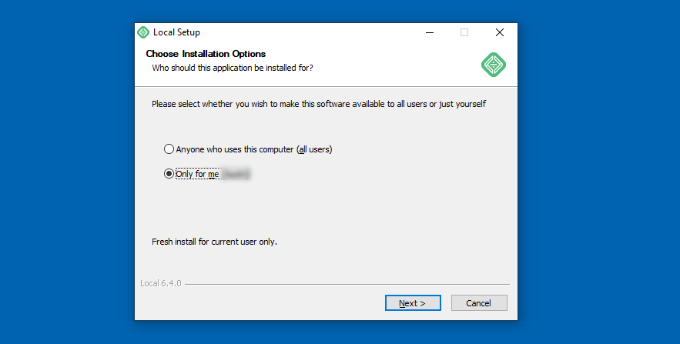
Nun müssen Sie auswählen, ob Sie die Software für alle Benutzer oder nur für sich selbst installieren möchten.
Sobald Sie eine Option ausgewählt haben, klicken Sie auf die Schaltfläche „Weiter“.
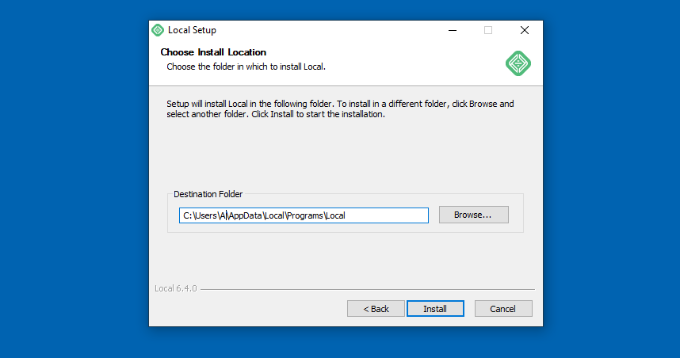
Im nächsten Schritt können Sie den „Zielordner“ auswählen, in dem die Software installiert wird.
Klicken Sie einfach auf die Schaltfläche „Durchsuchen“, um den Pfad festzulegen, und klicken Sie dann auf die Schaltfläche „Installieren“.
Die Local WP-Software wird nun auf Ihrem Windows-Computer installiert.
Sobald dies geschehen ist, können Sie das Kontrollkästchen „Lokal ausführen“ aktivieren und im Einrichtungsassistenten auf die Schaltfläche „Fertig stellen“ klicken.
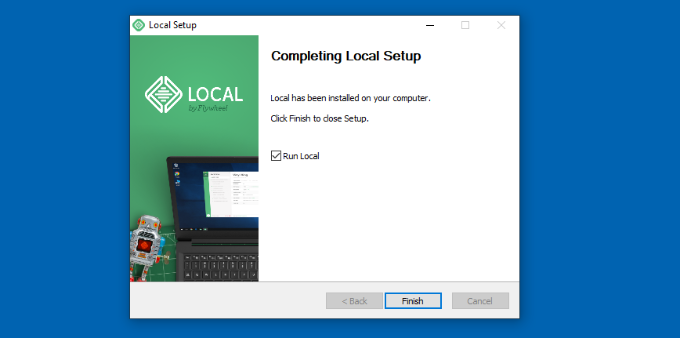
Die Software wird nun auf Ihrem Windows-Gerät gestartet.
Der nächste Schritt ist das Hinzufügen einer neuen lokalen Website. Klicken Sie dazu einfach auf das Pluszeichen '+' unten.
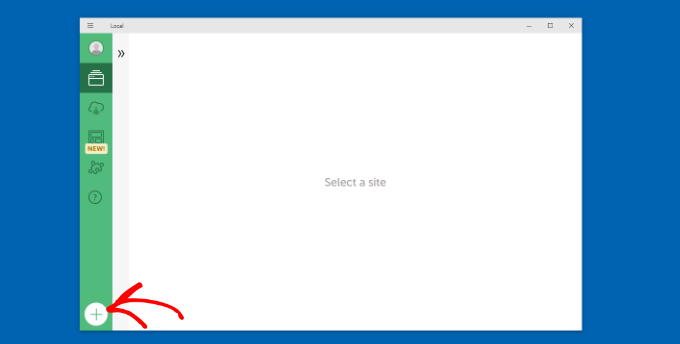
Danach können Sie eine Website in der Local-Software erstellen.
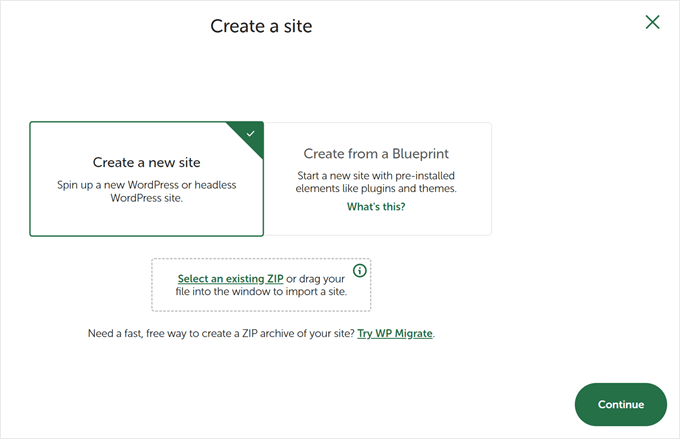
Wählen Sie die Option „Neue Website erstellen“ und klicken Sie auf die Schaltfläche „Weiter“. Es gibt auch Optionen, die Website aus einer Vorlage oder einer vorhandenen Website-Datei zu erstellen, aber wir wählen die erste Option zur Demonstration.
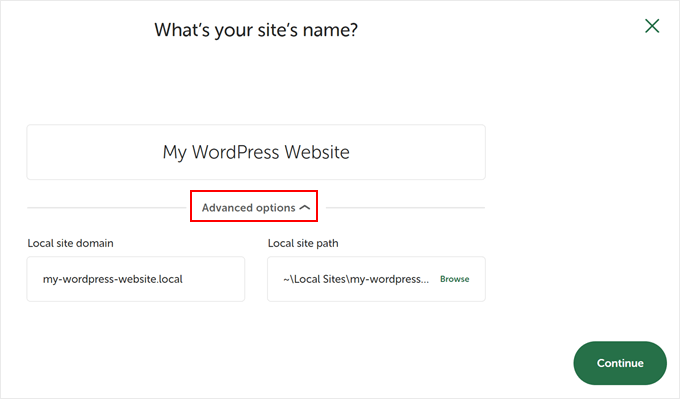
Als Nächstes können Sie einen Namen für Ihre lokale Website eingeben, z. B. 'Meine WordPress-Website'.
Es gibt auch erweiterte Optionen, bei denen Sie die Domain und den Pfad der lokalen Website eingeben können. Standardmäßig verwendet die Domain den Titel Ihrer Website, aber mit Bindestrichen getrennt.
Wenn Sie fertig sind, klicken Sie einfach auf die Schaltfläche „Weiter“.
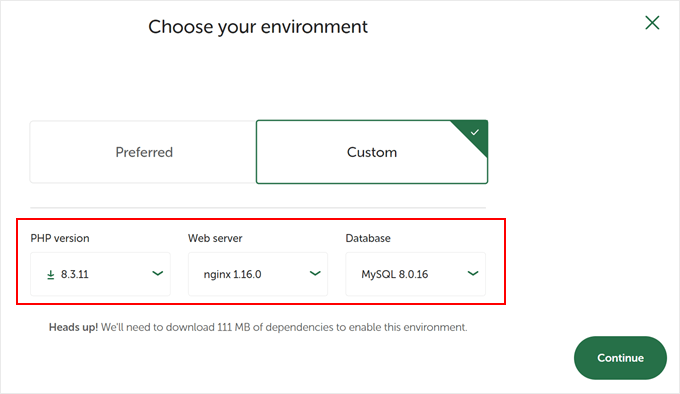
Danach müssen Sie eine Umgebung für Ihre lokale Website auswählen.
Sie können die 'Bevorzugte' Umgebung verwenden, in der die Software automatisch die PHP-Version, den Webserver und die MySQL-Version auswählt. Alternativ können Sie auch 'Benutzerdefiniert' wählen und die Umgebungsdetails eingeben.
Local WP bietet die neuesten PHP-Versionen. Als Webserver können Sie zwischen Nginx oder Apache wählen. Sie können auch zwischen MySQL oder MariaDB für die Datenbanken wählen.
Beachten Sie, dass einige PHP-, Webserver- und Datenbankversionen das Herunterladen einiger Abhängigkeiten erfordern, damit sie ordnungsgemäß funktionieren.
Als Nächstes können Sie einen WordPress-Benutzernamen und ein Passwort für Ihre lokale Website eingeben. Außerdem gibt es eine Option, eine WordPress-E-Mail-Adresse auszuwählen, an die Sie alle E-Mail-Benachrichtigungen erhalten.
Abgesehen davon gibt es eine erweiterte Option, bei der die Software fragt, ob Sie ein WordPress Multisite-Netzwerk haben. Wenn nicht, klicken Sie einfach auf „Nein“.
Nachdem Sie diese Details eingegeben haben, klicken Sie einfach auf die Schaltfläche "Site hinzufügen".
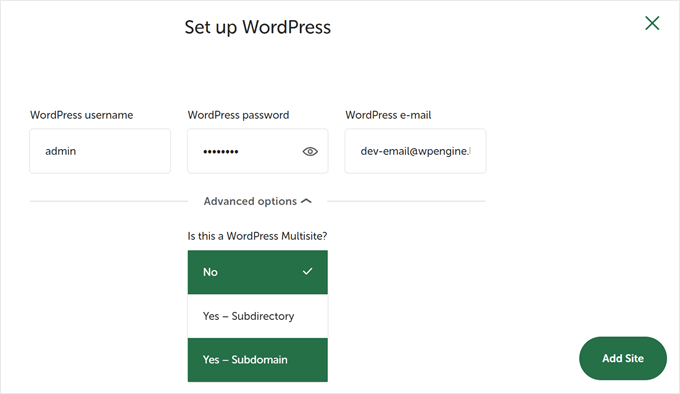
Die Software installiert nun WordPress und richtet Ihre Website ein.
Um die lokale Website zu starten, klicken Sie auf die Schaltfläche 'Site starten' in der oberen rechten Ecke.
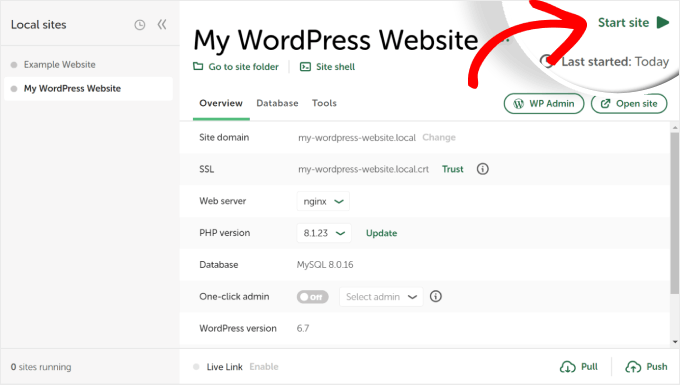
Klicken Sie dann auf die Schaltfläche „WP Admin“, und Sie sehen die WordPress-Admin-Anmeldeseite.
Geben Sie einfach den Benutzernamen und das Passwort ein, die Sie zuvor beim Einrichten der lokalen Website eingegeben haben, und klicken Sie dann auf die Schaltfläche „Anmelden“.
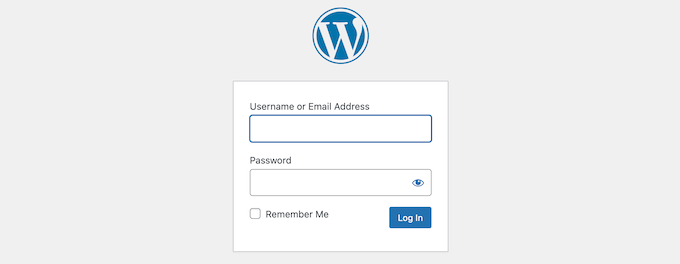
Sie können Ihre lokale Website jetzt auf Ihrem Windows-Computer bearbeiten.
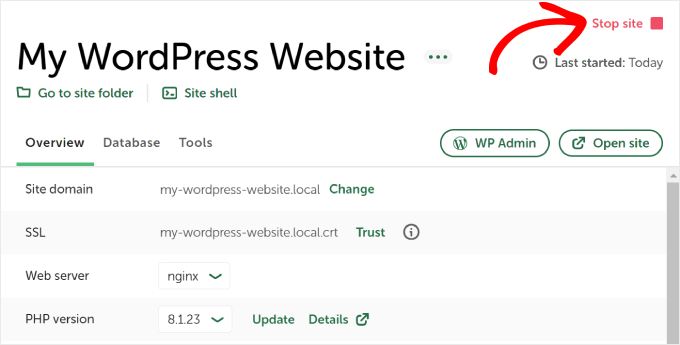
Wenn Sie fertig sind, vergessen Sie nicht, die Website über die Local WP-Software zu stoppen, indem Sie auf die Schaltfläche „Site stoppen“ klicken.
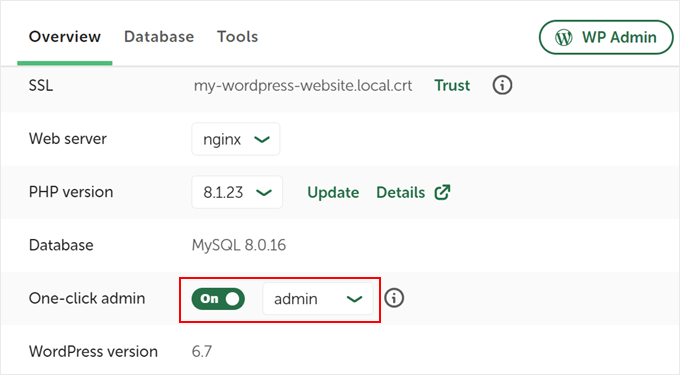
Profi-Tipp: Wenn Sie den Anmeldevorgang überspringen möchten, können Sie in Local WP eine Ein-Klick-Admin-Anmeldung aktivieren.
Um dies zu tun, gehen Sie einfach zurück zum Local WP-Dashboard und schalten Sie den Schalter „One-click admin“ um, bis er „On“ anzeigt. Wählen Sie dann im Dropdown-Menü den Admin-Benutzer aus, der diese Ein-Klick-Anmeldefunktion nutzen kann.
Alternative: WordPress Playground zum Testen von Themes, Plugins und mehr verwenden
WordPress Playground ist ein innovatives Tool, mit dem Sie mit WordPress direkt in Ihrem Webbrowser experimentieren können. Es ist eine virtuelle Sandbox, in der Sie neue WordPress-Themes, Plugins und Funktionen ausprobieren können, ohne eine echte Website zu beeinträchtigen.
WordPress Playground unterscheidet sich in mehreren wichtigen Punkten von einer lokalen WordPress-Umgebung.
Erstens erfordert es keine Installation auf Ihrem Computer und wird nach jeder Verwendung zurückgesetzt, im Gegensatz zu permanenten lokalen Setups. Sie können von jedem Gerät mit einem Browser darauf zugreifen, während lokale Installationen an einen Computer gebunden sind.
Während WordPress Playground ideal für schnelle Tests und zum Lernen ist, bietet eine lokale WordPress-Umgebung auf Ihrem Windows-Computer mehr Flexibilität für langfristige Entwicklungsprojekte.
Für eine detaillierte Anleitung lesen Sie unseren Leitfaden unter wie Sie WordPress Playground in Ihrem Browser verwenden.
Ich habe WordPress auf meinem Windows-Computer installiert, was nun?
Jetzt, da Sie WordPress auf Ihrem Computer haben, können Sie Folgendes tun:
- Lernen Sie grundlegende WordPress-Tipps und Tricks, um Ihre Website besser zu nutzen.
- Probieren Sie verschiedene WordPress-Themes aus, um zu sehen, wie Ihre Website aussehen kann.
- Installieren und testen Sie unverzichtbare WordPress-Plugins, um Ihrer Website neue Funktionen hinzuzufügen.
- Erfahren Sie, wie Sie häufige WordPress-Fehler selbst beheben können.
- Probieren Sie verschiedene Drag-and-Drop-Seitenersteller aus, um Ihre Website gut aussehen zu lassen.
- Erfahren Sie, wie Sie das WordPress-Admin-Passwort auf dem Localhost zurücksetzen, um wieder Zugriff auf Ihre Website zu erhalten.
- Automatisierte Workflows einrichten, um die Verwaltung Ihrer Website zu erleichtern.
- Erfahren Sie mehr über WordPress-Sicherheit, um Ihre Website vor Hackern zu schützen.
- Verschieben Sie Ihre lokale WordPress-Site auf einen Live-Server, wenn Sie bereit sind, sie mit allen zu teilen.
Wir hoffen, dieser Artikel hat Ihnen geholfen zu lernen, wie Sie WordPress lokal auf einem Windows-Computer installieren. Möglicherweise möchten Sie auch unseren Artikel über die Installation von WordPress lokal auf einem Mac-Computer und unseren ultimativen Leitfaden zur Erstellung einer WordPress-Staging-Site sehen.
Wenn Ihnen dieser Artikel gefallen hat, abonnieren Sie bitte unseren YouTube-Kanal für WordPress-Video-Tutorials. Sie finden uns auch auf Twitter und Facebook.


Thomas
Tolles Tutorial! Ich versuche, eine WordPress-Site auf eine lokale Kopie herunterzuladen. Ich habe mich an diesem Tutorial orientiert. Bisher habe ich Folgendes richtig gemacht (glaube ich...):
1- Ich habe alle Dateien von der Live-Website mit FileZilla nach wamp/www/mysite/ heruntergeladen.
2 – Ich habe die Datenbank der Live-Website exportiert, heruntergeladen und gezippt.
3 – Mit WAMP>phpmyadmin habe ich eine neue Datenbank erstellt und die Zip-Datei (von 2) importiert.
4- Die wp-config.php geändert und den Datenbanknamen, Benutzer und Passwort aktualisiert.
An diesem Punkt kann ich die Homepage sehen, wenn ich http::/localhost/mysite eingebe. Das Thema wurde jedoch zurückgesetzt. Auch die Admin-Seite scheint perfekt zu funktionieren.
Das Hauptproblem, das ich habe, ist, dass ich abgesehen von der Homepage 404-Fehler für alle anderen Seiten auf der lokalen Website erhalte.
I’m not sure what I’m doing wrong! Thanks in advance!
George
Vielen Dank. Ich habe alles am Laufen. Sehr hilfreich. Ich hätte das nicht alleine geschafft.
maggie
xampp ist gut für wordpress. Es unterstützt eine maximale Bandbreite an URLs und alles
maggie
danke... Es war hilfreich und einfach
karis
Ich habe dies mit der falschen Annahme aufgeschoben, dass der Prozess mühsam und zeitaufwendig ist. Wow, dank Ihnen bin ich jetzt fertig. So einfach. Nochmals vielen Dank für die gute Arbeit. Möge sie nie unentlohnt bleiben.
Dmitry M
Danke für das Tutorial, sehr einfach zu befolgen.
Naaz
großartig..!! war so einfach wie 1+1 :p
Marty
Ausgezeichnet, hat zu 110% funktioniert. Danke, Kumpel!
Bob S
Das war ein großartiges Tutorial! Danke für die Hilfe
Faisal Masood
Danke für die schönen WordPress-Ressourcen.
Sabine Blackburn
Alles installiert, aber ich kann keine Datenbank in MyphpAdmin erstellen, es wird 'Keine Berechtigungen' angezeigt, wo der Erstellen-Button sein sollte
Irgendwelche Vorschläge?
David
Nachdem ich Ihre Anweisungen befolgt hatte, habe ich alles richtig gemacht, außer als ich mich mit dem Benutzernamen „root“ anmelden wollte. Wenn ich mich anmelde, erhalte ich diese Meldung „ #1045 Kann sich nicht am MySQL-Server anmelden“. Bitte, was soll ich tun?
WPBeginner-Mitarbeiter
Versuchen Sie, sich mit einem leeren Passwort anzumelden. Wenn das nicht funktioniert, müssen Sie das Root-Passwort für Ihren MySQL-Server zurücksetzen.
pran
Wie ändere ich das Root-Passwort
Gabriel Popov
Danke, dieser Artikel war wirklich nützlich.
Omar
Erstaunlich!! Vielen Dank!!
Aaron
Alles heruntergeladen. Ich kann auf WordPress zugreifen, muss aber eine Datenbank für WordPress erstellen. Wenn ich auf phpMyAdmin klicke, werde ich zu einer 403 Forbidden-Fehlermeldung weitergeleitet, die besagt, dass Sie keine Berechtigung haben, auf /phpmyadmin/ auf diesem Server zuzugreifen. Ich kann es nicht herausfinden.
Annie L
Hallo – dein Tutorial ist spitze. Ich schaffe es über die 5-minütige Einrichtung hinaus und lande auf der WordPress-Login-Seite.
Ein Problem: Nach der Eingabe derselben Anmeldedaten, die im 5-Minuten-Setup bereitgestellt wurden (/wordpress/wp-login.php), erhalte ich eine Fehlermeldung „SSL-Verbindungsfehler“. Wenn ich mir die Datei wp-login.php ansehe, erzwingt sie eine Weiterleitung zu SSL.
Wie kann ich das umgehen, ohne SSL lokal zu installieren?
Running Wamp 2.4, Windows 7, Chrome browser.
lubna
Wirklich hilfreiches Tutorial, Bro. Ich kann mich nach erfolgreicher Installation nicht bei Word anmelden. Hilfe.
Miriam
Ich finde Ihre Tutorials klarer als alles andere, was ich für einen Neuling wie mich finde. Danke!
Können Sie Vorschläge für mein Problem bei der Erstellung einer Datenbank machen? Ich habe bereits eine WP-Website unter Bitnami. Ich habe beschlossen, WAMP herunterzuladen, um mehrere WP-Websites mit WAMP zu betreiben. Nach der Installation von WAMP erhalte ich beim Öffnen von phpMyAdmin ein Anmeldefenster. Wenn ich mich mit dem ursprünglich eingerichteten Benutzernamen/Passwort (mit der Bitnami-Installation) anmelde, wird mir mitgeteilt, dass ich keine Berechtigung habe, eine Datenbank zu erstellen. Ich kann mich mit dem Benutzernamen/Passwort von der Bitnami WordPress-Website bei phpMyAdmin anmelden und habe Berechtigungen, aber es gibt mir einen 1044-Fehler, wenn ich versuche, eine neue Datenbank zu erstellen. Ich bin mir nicht sicher, was ich als Nächstes versuchen soll. Vielen Dank im Voraus für jeden Vorschlag, den Sie haben.
Miriam
Ich habe das Problem gelöst und bin nun bei einem anderen Problem. Nachdem ich WAMP installiert und WordPress in c:WAMP/WWW… gelegt habe, öffne ich einen Browser und versuche http://localhost/mysite/, erhalte aber eine 404 Not Found. Könnte das damit zusammenhängen, dass ich bereits Bitnami/localhost habe? Danke!
Win
Sie haben es nicht in den www-Ordner kopiert. Sie können es nicht in die Haupt-WordPress-Datei einfügen – Sie müssen zum www-Ordner navigieren und es neben der index.html-Datei einfügen. Dies sollte Ihr 404-Fehlerproblem beheben
Merom
Hallo,
Ich habe das gleiche Problem. Was genau soll ich in www einfügen?
danke
IBAS
Ich fand dieses Tutorial wirklich sehr hilfreich für mich, danke für die Mühe
Kriss
Wamp Server ist ein veraltetes Programm, das 2013 eingestellt wurde. Wahrscheinlich ist es nicht das Beste für WordPress
Laurent Lafont
Sie geben beim Starten von phpMyAdmin nicht an, wie der Benutzername und das Passwort lauten! Und alle Websuchen liefern ebenfalls nur Dummy-Informationen... Jetzt stecke ich fest... sehr nützliche Anweisungen in der Tat.......
Win
Benutzername: Root
Passwort: Leer
Helen Magner
Danke für die Anleitung. Sie hat gut funktioniert. Ich habe seit einem Jahr eine WordPress-Website am Laufen, aber jetzt möchte ich sie gerne auf meinen lokalen Rechner importieren können, damit ich schreiben und speichern kann, während ich keine Internetverbindung habe, und veröffentlichen kann, wenn ich wieder online bin. Danke für Ihre Hilfe.
ludovic
Einfach perfekt. Merci !!!
Robert
Wenn ich die Schritte Wampserver zu myphpadmin verfolge, erhalte ich die Anmeldeseite, nicht die Seite, auf der ich auf die Datenbankregisterkarte klicken kann, wie in Ihrem sehr gut geschriebenen Tutorial gezeigt. Vorschläge zur Einrichtung der wp-config.php-Datei?
Dave
Ich hatte dasselbe Problem, lassen Sie einfach das Passwort leer, und Sie kommen rein.
Psdfreak.com
Geben Sie auf dieser Anmeldeseite als Benutzernamen "root" ein und drücken Sie auf Anmelden (kein Passwort erforderlich).
Maryam Jamil
thanks alot
your article really helps
Dharmesh Joshi
Danke, Bro… (Y)
Vivi
Hey! Wirklich hilfreicher Artikel, aber… Ich kann mich nicht in WordPress einloggen.. Zuerst wurde ich im Schritt der Installation von WordPress auf eine leere Seite (nur Logo) weitergeleitet, dann habe ich neu geladen und es hieß, es sei bereits installiert, also habe ich mit dem Einloggen fortgefahren, aber es scheint, dass mein Konto nicht gültig ist.. Nichts funktionierte.. nicht einmal die E-Mail, um ein neues Passwort zu erhalten.
Was soll ich tun? Ich habe die Schritte bereits zweimal von Anfang an mit verschiedenen Datenbanken und Daten kopiert.
nel
Dein Tutorial hat PERFEKT funktioniert
ty
Andy
Please help . Thanks
installed WAMServer, as according to your instructions, I chose phpMyadmin, and I encountered this error msg, “HTTP Error 404.0 – Not Found
The resource you are looking for has been removed, had its name changed, or is temporarily unavailable.
Detailed Error Information
Module IIS Web Core
Notification MapRequestHandler
Handler StaticFile
Error Code 0×80070002
Requested URL http://localhost:80/phpmyadmin/
Physical Path C:\inetpub\wwwroot\phpmyadmin\
Logon Method Anonymous
Logon User Anonymous”
I installed and re-installed WAMServer, but encounter the same error, how do I proceed from here?
farah
Hallo, vielen Dank für das tolle Tutorial. Ich habe ein Problem, bitte helfen Sie mir, es zu lösen. Nach erfolgreicher Installation von WAMP, als ich auf PhpMyAdmin geklickt habe, wurde ich nach einem Login gefragt, aber ich weiß nicht, welchen Benutzernamen und welches Passwort ich hier verwenden kann?
Mit freundlichen Grüßen
Farah
WPBeginner Support
Versuchen Sie den Benutzernamen root und lassen Sie das Passwortfeld leer
Admin
Barbara
Ich hatte denselben Fehler und andere Websites hatten sehr komplizierte und, ehrlich gesagt, erfolglose Vorschläge, wie man ihn beheben kann. Vielen Dank für diese klare und einfache Lösung – sie hat funktioniert!
KarSho
Einfach, klar und hilfreich.
Danke, Kumpel...
zubekk
Danke Kumpel………..!
Sara
Hallo! Ich habe WampServer wie gesagt installiert, aber wenn ich auf phpmyadmin klicke, öffnet sich eine leere Chrome-Webseite. Kein Datenbankmenü oder etwas Ähnliches wie auf dem Screenshot, den du gezeigt hast. Es ist einfach leer. Ich habe versucht, es zu deinstallieren und neu zu installieren, aber es bleibt dasselbe. Hilfe!
WPBeginner Support
Wo drücke ich phpMyAdmin? Versuchen Sie, darauf über die URL http://localhost/phpmyadmin/ zuzugreifen.
Admin
Sara
Ich wähle das WampServer-Symbol aus der Taskleiste und wähle phpmyadmin genau wie auf Ihrem Screenshot. Nein, das hat auch nicht funktioniert. Ich weiß nicht, was falsch sein kann!
Sara
Ok, starten Sie das System neu und es öffnete etwas auf phpmyadmin, aber es fragt mich nach Login und Passwort!
Omer
Hallo. Obwohl dieser Artikel hilfreich ist, möchte ich ihn gerne verbessern. Es gibt einige Lücken in diesem Artikel, die die Installation von WordPress erschweren.
1. Nachdem Sie die Installation von Wamp Server 2 erklärt haben, springen Sie sofort zu phpmyadmin, wo Sie eigentlich hätten sagen sollen, dass wir mySQL installieren müssen – Dienst – Dienst installieren und starten. Dann müssen wir Apache installieren – Dienst – Dienst installieren und starten. Dann, nachdem wir sichergestellt haben, dass das Wamp-Symbol grün ist, gehen Sie zu phpmyadmin.
2. Nachdem Sie die localhost-Website geöffnet haben, haben Sie nicht erwähnt, dass der Benutzername für die Datenbankseite „root“ und das Passwort leer war, und sind sofort zum Erstellen von Datenbanken über die Datenbankregisterkarte gesprungen.
Abgesehen davon war es eine großartige Leistung.
hujat ul islam
Können Sie mir bei der Installation von WordPress auf XAMPP helfen?
sumit
Während der Installation des WAMP-Servers wird immer wieder ein Fehler angezeigt. Der Fehler betrifft die Datei MSVC3100.dll. Bitte beheben Sie diesen Fehler.
LIsa
Ich habe WAMP erfolgreich installiert, die Datenbank umbenannt, WordPress installiert, alle Felder eingegeben und dann, als ich auf „WordPress installieren“ klickte, erhielt ich einen seltsamen leeren Bildschirm mit dem WordPress-Logo oben. Als ich auf die „Zurück-Schaltfläche“ klickte, hieß es, WordPress sei bereits installiert, also versuchte ich, den Benutzernamen und das Passwort einzugeben, und es heißt, es sei nicht gefunden worden. Ich habe versucht, die E-Mail-Adresse einzugeben, die ich zur Passwortzurücksetzung eingegeben hatte, und es heißt, sie sei nicht gefunden worden. Ich habe versucht, die obigen Anweisungen zum Ändern des Passworts in phpMyAdmin zu befolgen, habe die Datei Wp-users in meiner Datenbank gefunden und auf das Bleistiftsymbol geklickt, um Benutzer zu bearbeiten, und es heißt „MySQL gab ein leeres Ergebnis zurück“ … Hilfe!
Lisa Tomsio
Egal... Ich habe die WordPress-Installation gelöscht, eine neue Datenbank erstellt und von vorne begonnen, und es hat funktioniert. Ich hatte beim ersten Mal die Option „Suchmaschinen zulassen…“ auf der WordPress-Seite deaktiviert, also habe ich sie beim zweiten Mal aktiviert gelassen und es hat gut funktioniert. Danke für diese Informationen!
Campbell
Ich habe WAMServer gemäß Ihren Anweisungen installiert, phpMyAdmin ausgewählt und diese Fehlermeldung erhalten: „HTTP-Fehler 404.0 – Nicht gefunden
Die gesuchte Ressource wurde entfernt, umbenannt oder ist vorübergehend nicht verfügbar.
Detaillierte Fehlerinformationen
Modul IIS Web Core
Benachrichtigung MapRequestHandler
Handler StaticFile
Fehlercode 0x80070002
Angefragte URL http://localhost:80/phpmyadmin/
Physischer Pfad C:\inetpub\wwwroot\phpmyadmin\
Anmeldemethode Anonym
Angemeldeter Benutzer Anonym”
Ich habe WAMServer installiert und neu installiert, erhalte aber denselben Fehler. Wie gehe ich von hier aus weiter?
yousef mayeli
Hallo
Ich habe viele Male mit verschiedenen Optionen installiert, aber das gleiche Problem, das Symbol erscheint und wenn ich darauf klicke, um fortzufahren, erscheint nichts. Ich weiß nicht, was ich tun soll. Bin nur enttäuscht
yousef mayeli
Ich habe WAMP installiert und sein Symbol erschien auf dem Schreibtisch, aber wenn ich darauf klicke, öffnet es sich nicht. Ich bin sogar zu meinem Skype gegangen und habe es geändert, aber es hat nichts bewirkt. Danke.
. Führe mich
WPBeginner Support
Versuchen Sie, WAMP erneut zu installieren.
Admin
sumit
Während der Installation des WAMP-Servers wird immer wieder ein Fehler angezeigt. Der Fehler betrifft die Datei MSVC3100.dll. Bitte beheben Sie diesen Fehler.
Bitte helft mirrrrr....
Kevin Salt
Guter Artikel… Danke.
Ich möchte nicht kleinlich sein, aber ich glaube, Ihnen fehlt ein Semikolon im Skype-Abschnitt...
„und gehen Sie zu Extras » Optionen. Klicken Sie auf Erweitert und dann auf Verbindungen.“
——————-> »
al b
Ich scheine bei http://localhost/mysite/ festzustecken. Ich erhalte eine 404 Not found-Fehlermeldung.
Al B
Vergessen Sie es. Ich habe vergessen, das WP-Verzeichnis umzubenennen, als ich zu www. verschoben habe. Vielen Dank für dieses Tutorial!
WPBeginner Support
Stellen Sie sicher, dass WordPress dort installiert ist. Stellen Sie sicher, dass Ihr WAMServer läuft.
Admin
Kenia
Ich habe gerade WAMP installiert und hatte dann keine Ahnung, wie ich weitermachen sollte, da es kein Handbuch für WAMP gibt. Dieser und der nächste Artikel über die Live-Schaltung der WordPress-Website sind beide Lebensretter. Ernsthaft. DANKE, dass Sie dies für Anfänger geschrieben haben und nicht davon ausgehen, dass wir Dinge wissen, die wir nicht wissen (das sehe ich oft bei Experten: Sie nehmen ihr Wissen als selbstverständlich hin und vergessen, wie es ist, anzufangen und Dinge nicht zu wissen).
DANKE, DANKE, DANKE!!!
Martin
Hallo Leute, alles erledigt.. egal was ich mache.. der letzte Schritt friert immer ein. Ich sehe nur das WP weiß-blaue Logo und eine weiße, nicht geladene Textbox. Nach der Eingabe meiner Website erhalte ich die Fehlermeldung: „Fehler bei der Datenbankverbindung“. Irgendwelche Ideen? Cheers.
Chris
Vielen Dank dafür! Erfolgreich installiert. Das einzige Problem, auf das ich gestoßen bin, war mit der Datei wp-config.php. Ich musste eine Kopie von wp-config-sample.php öffnen, meine eigenen Änderungen vornehmen und dann speichern. Ansonsten eine einfache Installation.
Amelia
Als ich in phpMyAdmin auf „Datenbank erstellen“ klicken wollte, stand dort „X Keine Berechtigungen“. Was habe ich falsch gemacht?
Amelia
Egal, ich habe das behoben. Jetzt hänge ich nur noch auf der Konfigurationsseite fest, Informationen ausgefüllt und auf Senden geklickt, aber die Installationsseite für WordPress kommt nie!
om gupta
Auf meinem Laptop funktioniert der WAMP-Server nicht im lokalen Benutzerkonto. Er funktioniert nur im Administratorkonto, aber ich möchte den WAMP-Server im lokalen Benutzerkonto ausführen, da ich keine Administratorrechte habe. Bitte helfen Sie mir, wie kann ich den WAMP-Server in meinem lokalen Benutzerkonto ausführen.
WPBeginner Support
Ohne Administratorrechte wäre es schwierig für Sie, WAMP auszuführen.
Admin
Ratan
Hallo,
Ich habe die vollständigen Schritte befolgt, die WP heruntergeladen und mit dem Hochladen des Themes begonnen. Mit meinem ersten Theme allein erhielt ich nach dem Versuch, es zu installieren, die folgende Meldung:
Die hochgeladene Datei überschreitet die Direktive upload_max_filesize in php.ini.
Bitte führen Sie mich.
Regards ,
WPBeginner Support
Bitte schau dir diesen Leitfaden an: So erhöhst du die maximale Upload-Größe in WordPress
Admin
utpal
nach der Installation von Wampserver gehe ich zu phpmyadmin, dort gibt es eine Login-Option
wo bekomme ich Benutzername und Passwort
WPBeginner Support
Versuchen Sie es mit root als Benutzernamen und lassen Sie das Passwort leer.
Admin
Tony Leary
Gleiches Problem – das funktioniert. Danke.
Alan
Hallo nochmal,
Wie in meinem letzten Kommentar erwähnt, glaube ich, dass ich es herausgefunden habe. Entschuldigung für die Umstände.
Alan
Danke für den Bericht! Ich frage mich, ob Sie vielleicht Ideen haben, warum ich keine Datenbank über phpMyAdmin erstellen kann? Nachdem ich auf "Datenbanken" geklickt habe, um eine Datenbank zu erstellen, erhalte ich eine "Laden"-Meldung für eine ganze Weile, dann verschwindet sie & nichts...
Das Gleiche passiert, egal welchen Tab ich im phpMyAdmin-Dashboard auswähle. Ich google schon seit über einer Stunde & konnte keine Lösung finden. Danke nochmals!
WPBeginner Support
Versuche, WAMP Server zu deinstallieren und dann neu zu installieren. Wenn das nicht hilft, kannst du auch XAMPP installieren.
Admin
Maureen
Hallo Leute! Schritt für Schritt wunderbar! WAMP erfolgreich installiert, Datenbank eingerichtet, WP problemlos heruntergeladen. Erfolg! Jetzt anmelden… Benutzername oder Passwort ungültig… hier klicken, um das Passwort per E-Mail senden zu lassen… ich erhalte diese Nachricht: „Die E-Mail konnte nicht gesendet werden.
Möglicher Grund: Ihr Host hat möglicherweise die mail()-Funktion deaktiviert.“ Jede Hilfe wird geschätzt!
WPBeginner Support
Check out our guide on how to reset a WordPress password from phpMyAdmin
Admin